Reliquary Wall Safe
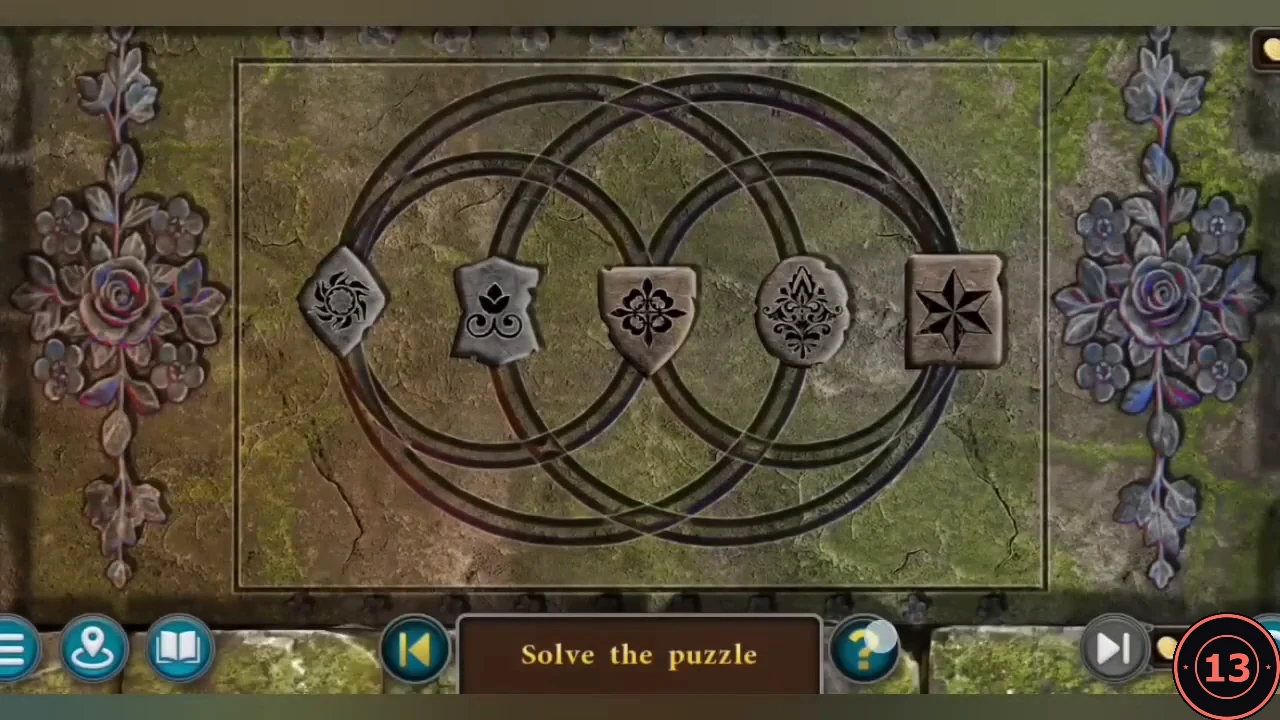
The last weight is locked in the wall safe beside the knight armour. Swap the chips into the right order.
- The clue is the row of red banners across the room. Reading left to right, set the chips to: quatrefoil cross, eight-pointed star, fleur-de-lis, sun swirl, lotus.
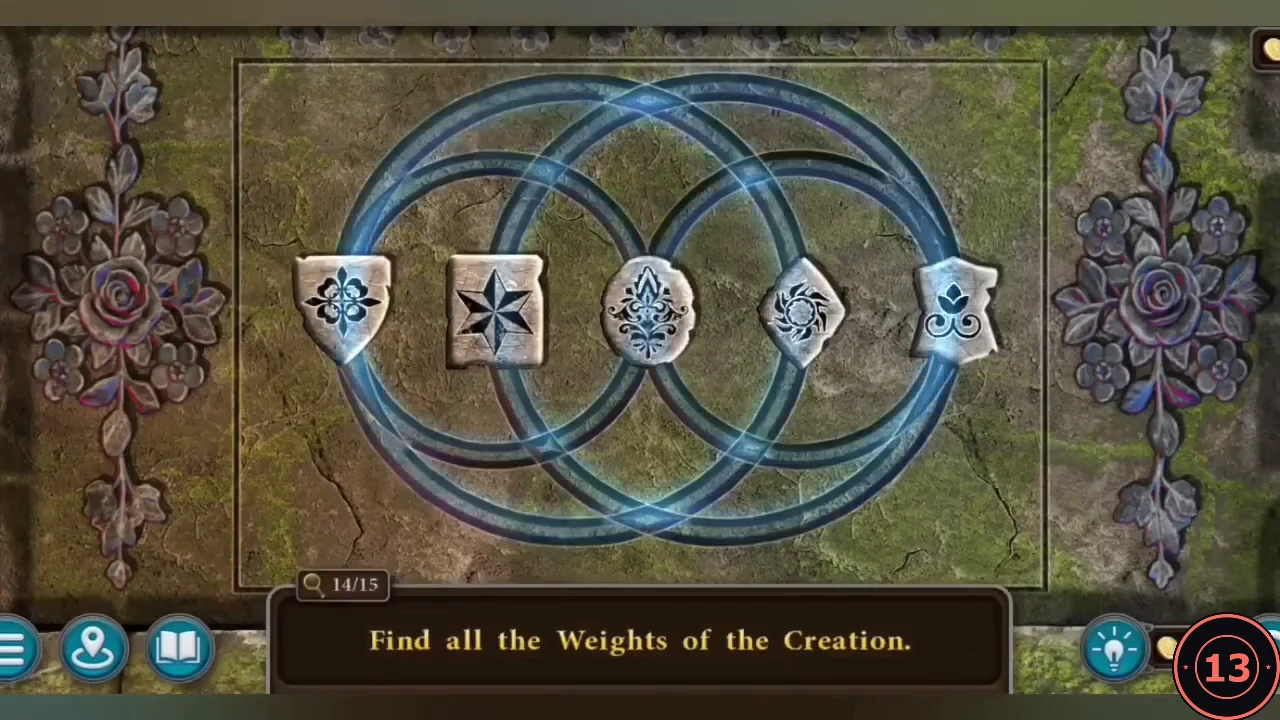
The solved chip order, matching the red banners. - Tap the cart to collect the CART WITH WEIGHTS.
Pillar of Balance: First Weighing
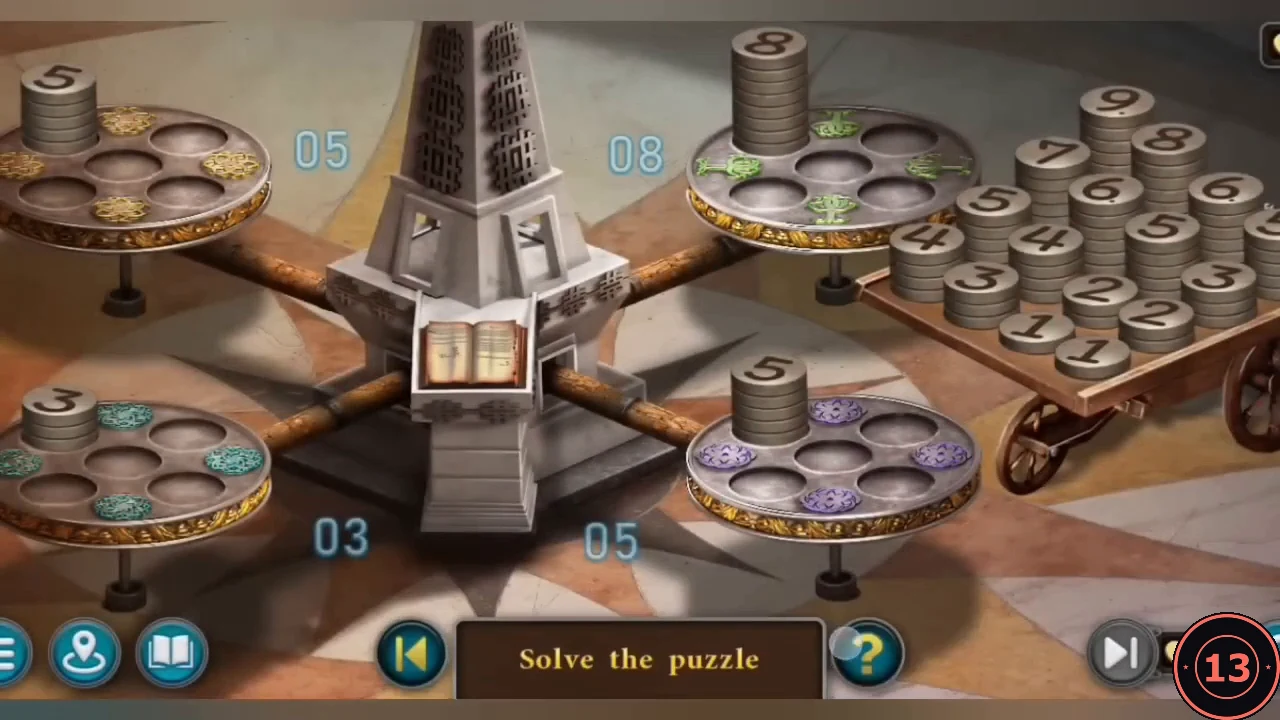
Use the CART WITH WEIGHTS on the pillar in the Chamber of Balance. The rule: the totals on opposite pans (back left with front right, back right with front left) must be equal, and every weight from the cart must end up on a pan. The weights on the cart are not always the same, so check your own numbers.
- Method: add up the weights already on the pans and all the weights on the cart. Each opposite pair must then share the same total. Giving all four pans the same total is one convenient target when the numbers divide evenly, but it is not required: another completed replay finished with back left 22, front right 22, back right 24 and front left 24 and an empty cart. Example from this playthrough: the pans started with 5 (back left), 8 (back right), 3 (front left) and 5 (front right) and all the weights added up to 92, so 23 on every pan worked: back left 5+5+3+9+1, back right 8+5+6+3+1, front left 3+5+7+6+2, front right 5+2+4+8+4. If your weights differ, use the method rather than copying this list.
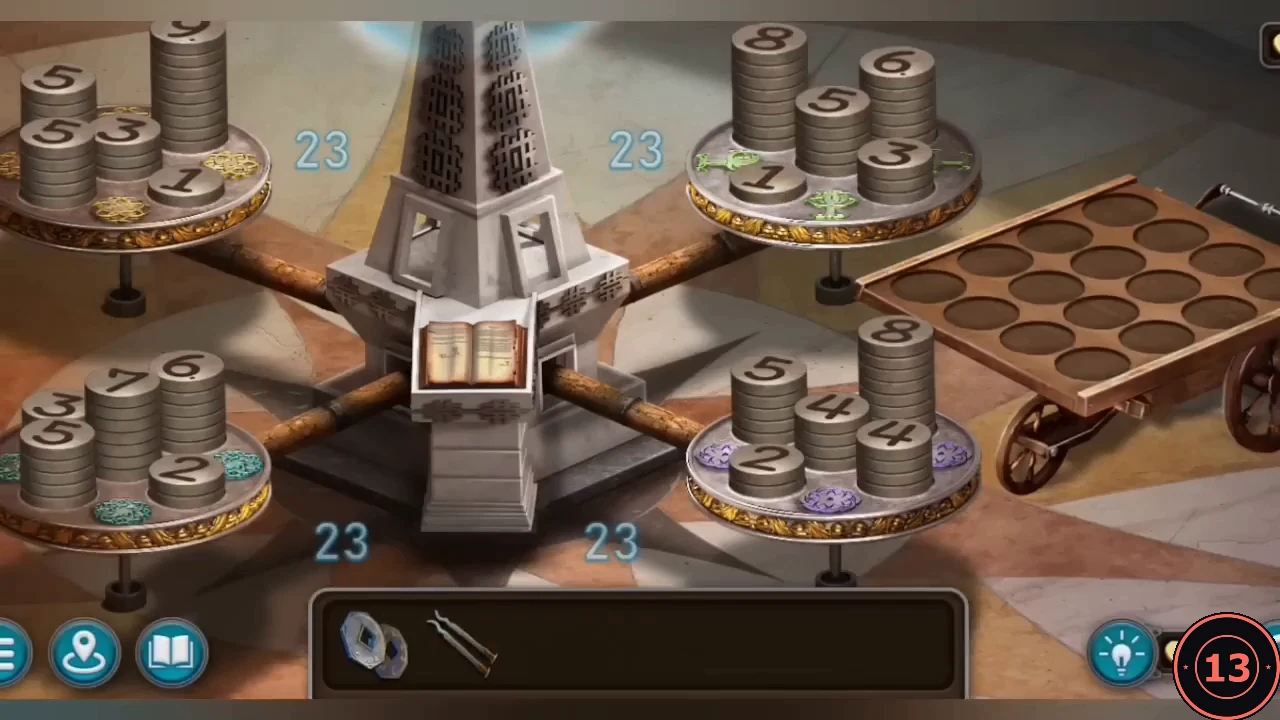
Example finished balance: every pan totals 23. - The pillar radiates and an anomaly pulls Cassandra into an unknown world.
The Streets of Kangai
Cassandra arrives in an oriental city. New task: Red Gates.
- In the alley, collect Morph 5/47 at the bottom right and Handprint 2/8 on the wooden structure.
- Zoom into the muddy footprints and take the KEY. Use it on the cylinder lock of the sliding door.
- Behind the door, take the KNIFE from the crates.
- Use the KNIFE to cut the three ropes on the bamboo gate and enter the market square.
- In the market square, collect Morph 6/47 on the building at the upper left and Footprint 3/7 at the bottom left.
- Visit the tavern on the left. Takayuki is closing, but will help if you bring him a lotus. New task: Soup.
- Go to the temple garden. Collect Handprint 3/8 on the left post and Morph 7/47 by the pond. Open the box on the shrine table for Manuscript 3/12, The Universe Portal. Take the LOTUS from the pond.
Gathering the Soup Ingredients
Takayuki's recipe needs drinking water, rice, kelp, carrot, potato, three shiitake mushrooms, green onion, fish and egg. Soy sauce and spices are found later in the kitchen.
- Give the LOTUS to Takayuki and take the SOUP RECIPE. You will need a fishing rod and bait for the fish. Take the SCOOP from the barrel area and the CAULDRON from the stove.
- In the alley shed, use the SCOOP on the urn to get RICE and take the THREAD from the crate.
- Outside, on the right-hand wall of the shed, cut the GREEN ONION from the planter with the KNIFE.
- Zoom into the chicken coop in the middle of the alley. The chickens sit on the egg, so scatter some RICE to lure them out (the rice stays in your inventory), then take the EGG.
- At the market handcart, take the POTATO and the CARROT.
- In the garden, fill the CAULDRON at the fountain for DRINKING WATER, cut BAMBOO with the KNIFE and pick 3 SHIITAKE MUSHROOMS in the bamboo patch. Take the KELP from the pond.
- At the market wagon with the green cloth, use the leaf on the dead fish to collect MAGGOTS for bait.
Wagon Chest: Fish and Bird Seals
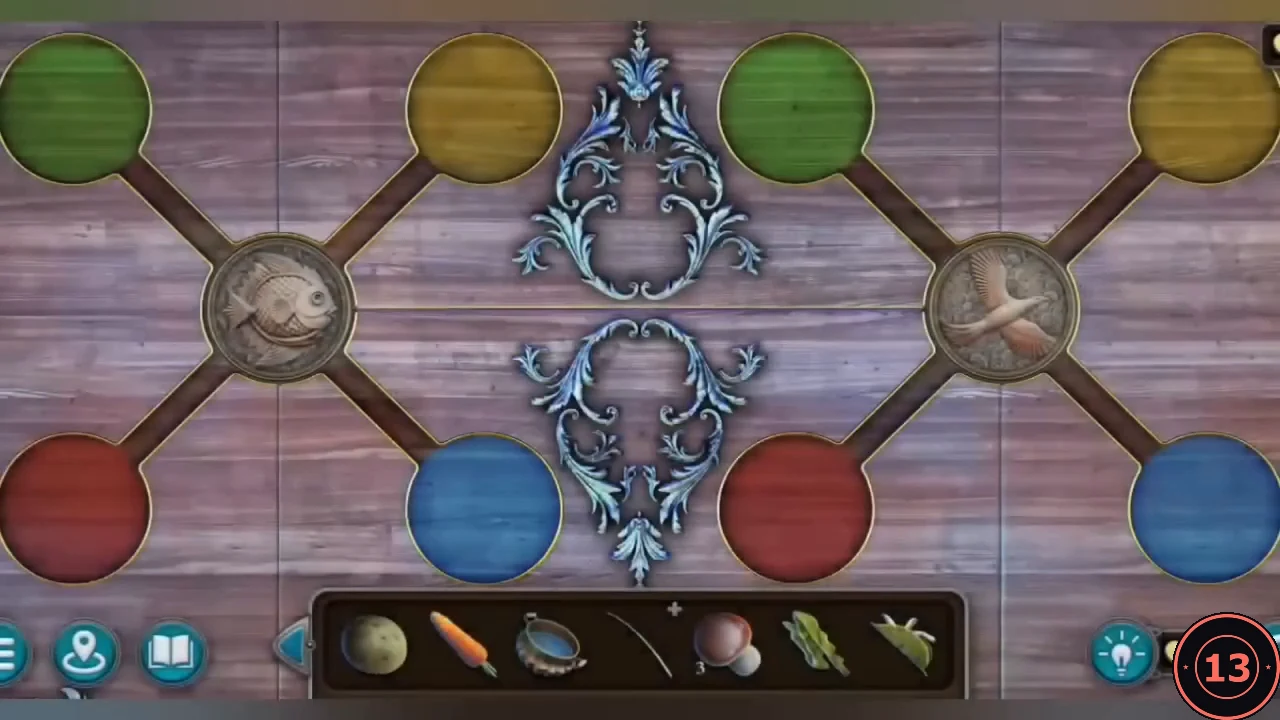
The chest on the market wagon has a fish token and a bird token on crossing tracks.
- The clues are the seals you have seen: the notice on the red gate has the bird seal in a yellow circle, and the soup recipe has the fish seal in blue. Move the fish token onto the blue node and the bird token onto the yellow node.
Wagon Chest: Ring of Chips
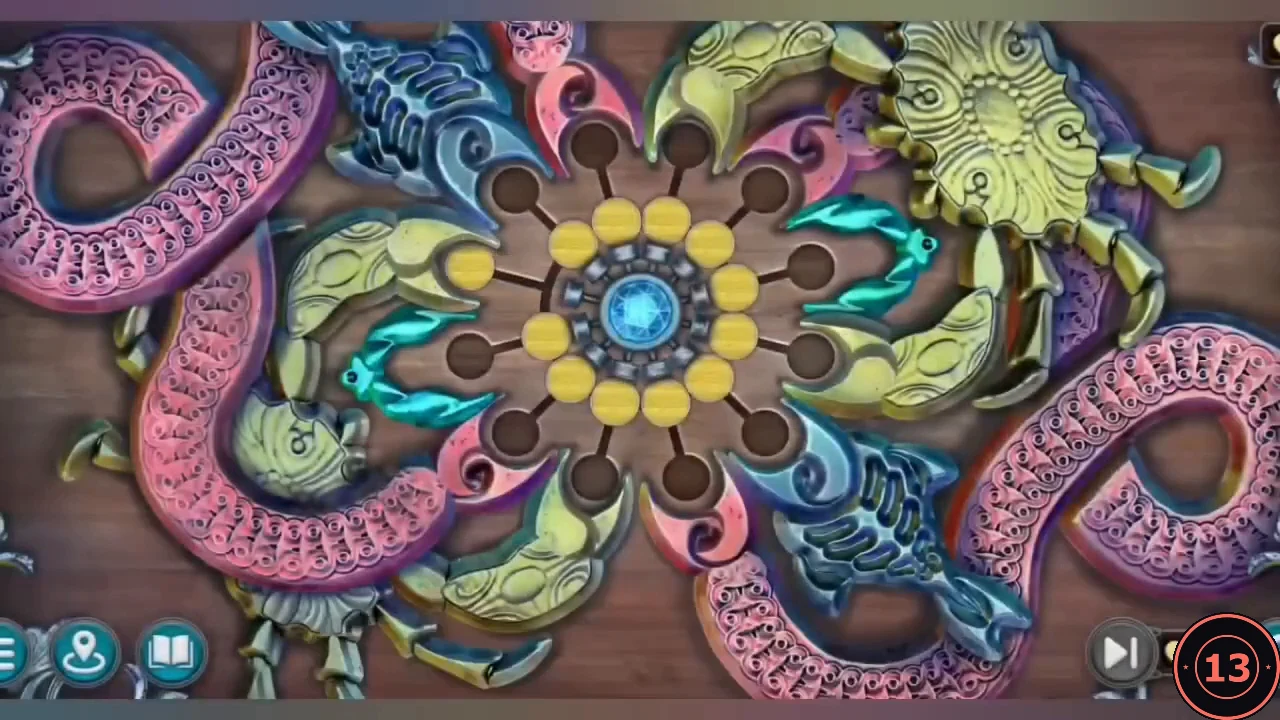
Inside is a radial lock: twelve yellow chips around a blue gem, each in front of a spoke that ends in a sea-creature claw.
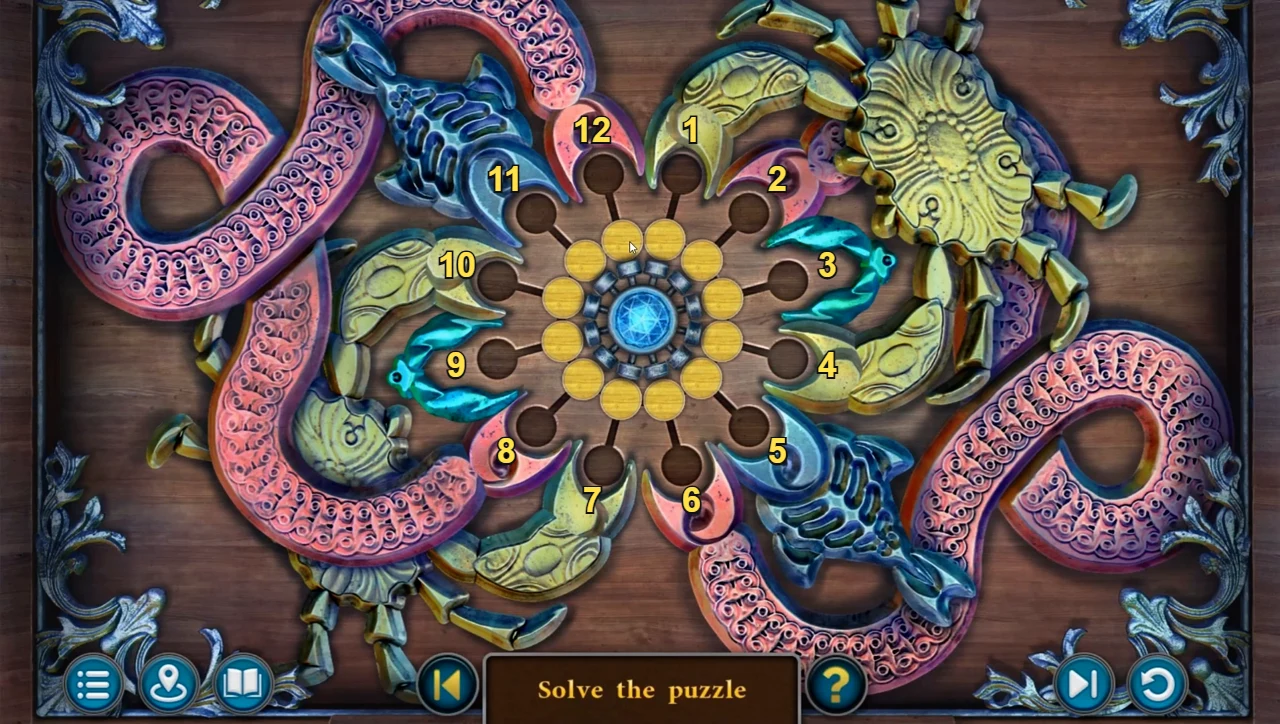
- "Place all the chips in the animals' claws." The twelve yellow chips sit in a ring around the gem, one in front of each spoke. Number the claws 1-12 clockwise: claw 1 is the first claw to the right of the top, claw 12 the first to the left of the top. Tapping a chip in the ring pushes it along its spoke into the empty claw at the end; tapping a filled claw pulls its chip back into the empty ring space in front of it. After every tap, all chips still in the ring shift one place anticlockwise, so always tap the chip that is now in front of the named spoke. Tap: 1. spoke 1, 2. spoke 2, 3. claw 1 (pull it back), 4. spoke 1, 5. spoke 3, 6. spoke 4, 7. spoke 5, 8. spoke 7, 9. spoke 9, 10. spoke 6, 11. claw 3 (pull it back), 12. spoke 11, 13. spoke 8, 14. spoke 12, 15. spoke 10, 16. spoke 3. All twelve chips are now in the claws and the chest opens.CODE1, 2, back 1, 1, 3, 4, 5, 7, 9, 6, back 3, 11, 8, 12, 10, 3
- Take the BOBBER and the HOOK from the boxes in the chest.
Fishing and the Recipe
Build a fishing rod, catch the fish and gather everything on the recipe.
- Combine the BAMBOO, THREAD, BOBBER, HOOK and MAGGOTS into a FISHING ROD.
- Cast the FISHING ROD into the garden pond to catch a FISH.
- Open the SOUP RECIPE and drag each ingredient onto its line: rice, green onion, egg, potato, carrot, drinking water, fish, kelp and the shiitake mushrooms. When all are ticked you receive the INGREDIENTS.
Cooking the Soup
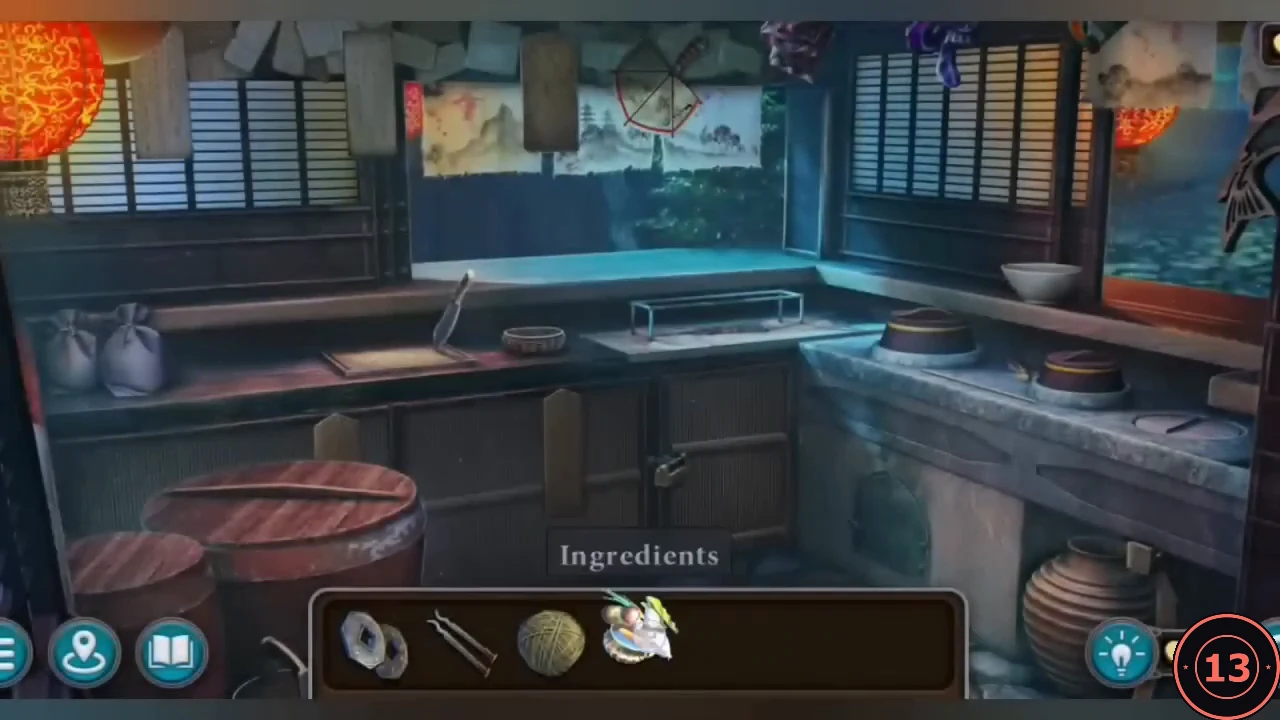
Enter the tavern kitchen. The INGREDIENTS open as a separate tray; follow the recipe precisely.
- Zoom into the barrels at the bottom left of the kitchen; everything found here goes into the separate kitchen tray. Take the kitchen SCOOP from the small barrel, lift the lid of the large barrel and search the straw for a KEY, then take the HAND FAN from the bucket beneath the barrels.
- At the stove, pour drinking water into both pots and put the egg in the small pot. The water is boiling, so lift the egg out with the kitchen SCOOP.
- Use the KEY on the padlock of the lower cabinet and take the SPICES and SOY SAUCE.
- On the chopping board, use the cleaver to chop the green onion, mushrooms, potato and carrot. Add the vegetables, rice, soy sauce and spices to the large pot, then peel and halve the egg into the bowl.
- At the grill, wrap the fish in kelp on a skewer over the coals and use the HAND FAN to raise the heat.
- Take the grilled fish and put it on the stove counter. Use the KNIFE to fillet it, then put the fillet in the bowl with the halved egg. Finally use the kitchen SCOOP to ladle soup from the large pot into the bowl to get the SOUP.
- Give the SOUP to the beggar woman in the alley. Task complete: Soup.
The Red Gates
The red gate has an empty gong bracket and a mallet.
- At the garden shrine table, a gift may only be taken if something is left in return. Put your COINS in the offering bowl: one coin stays in the bowl and the other COIN comes back to your inventory. Now take the GONG.
- Hang the GONG on the red gate and strike it. The guards answer and seize Cassandra.
Stun the Guard
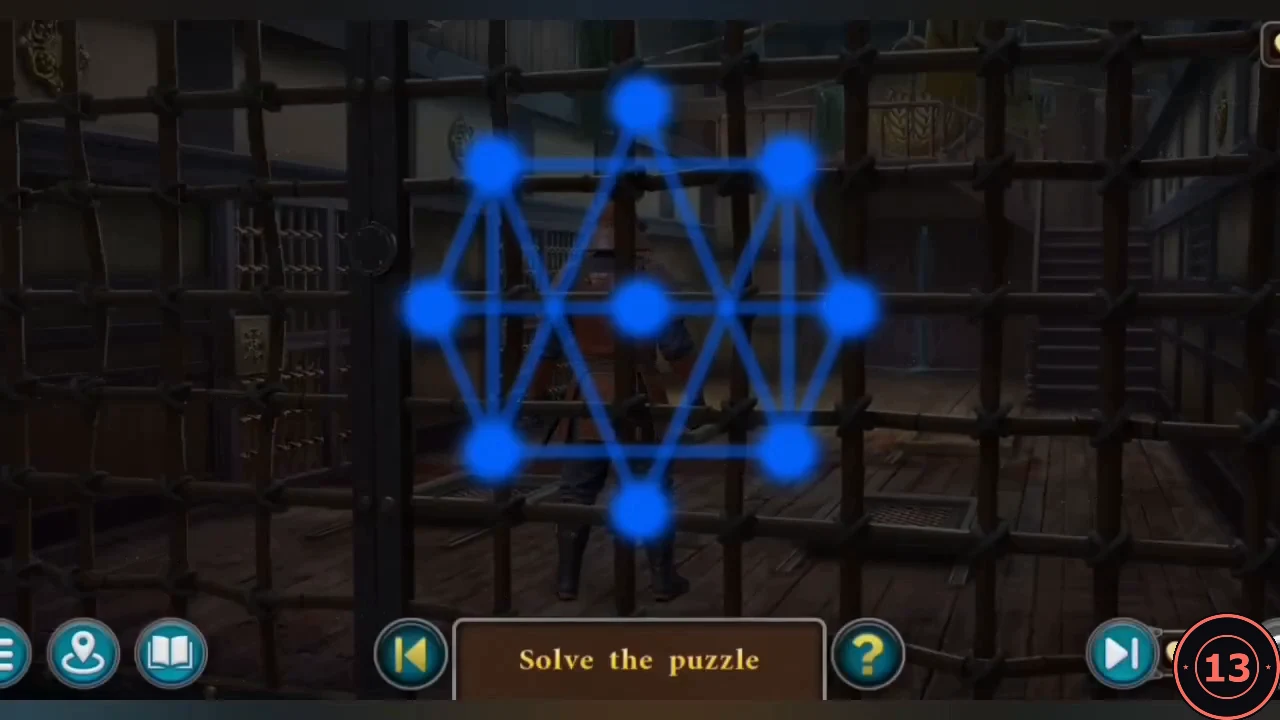
New task: Escape. Cassandra traces a spell figure to stun the guard. The figure has nine nodes and must be drawn in one continuous line.
- Study the preview of the figure. Label the nodes T (top), UL and UR (upper left and right), L, C and R (middle row), LL and LR (lower left and right) and B (bottom). Only L and R have an odd number of lines, so the trace must start at one of them and finish at the other.
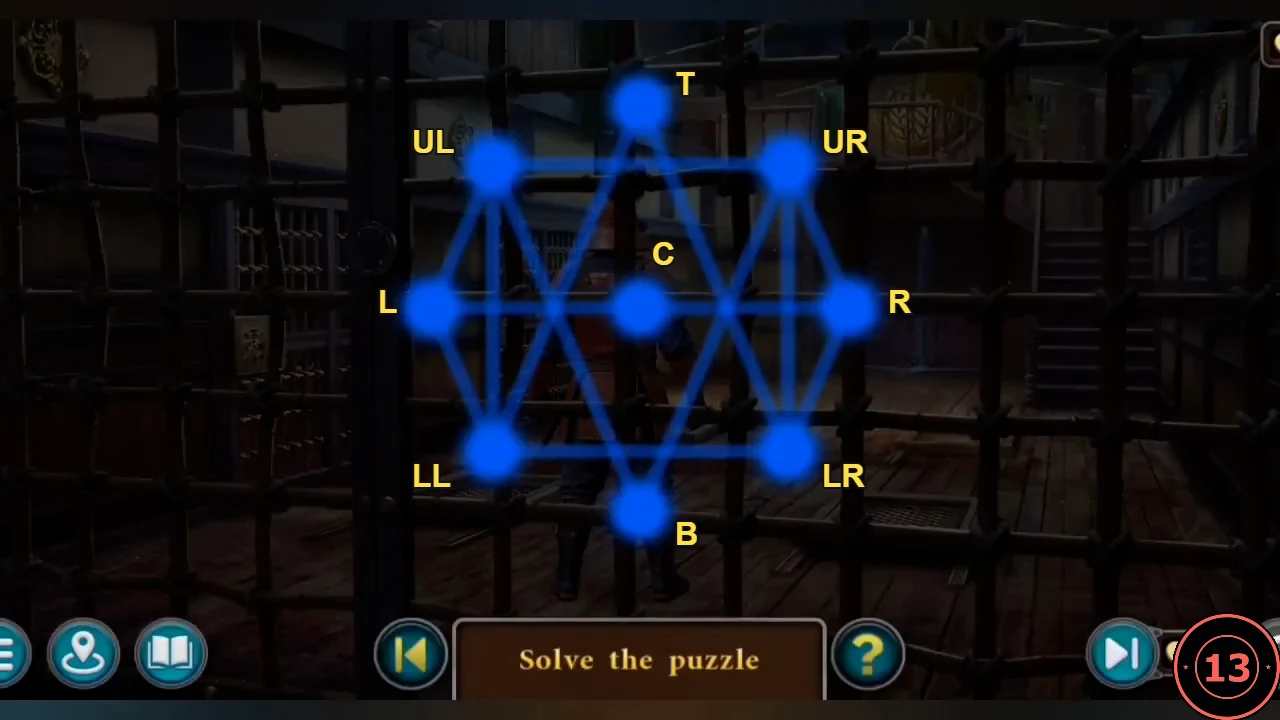
Node names used in the drawing order. Start at R and finish at L. - Draw without lifting: R, C, L, LL, T, LR, UR, B, UL, LL, LR, R, UR, UL, L. The guard collapses.CODER-C-L-LL-T-LR-UR-B-UL-LL-LR-R-UR-UL-L
Picking the Cell Lock
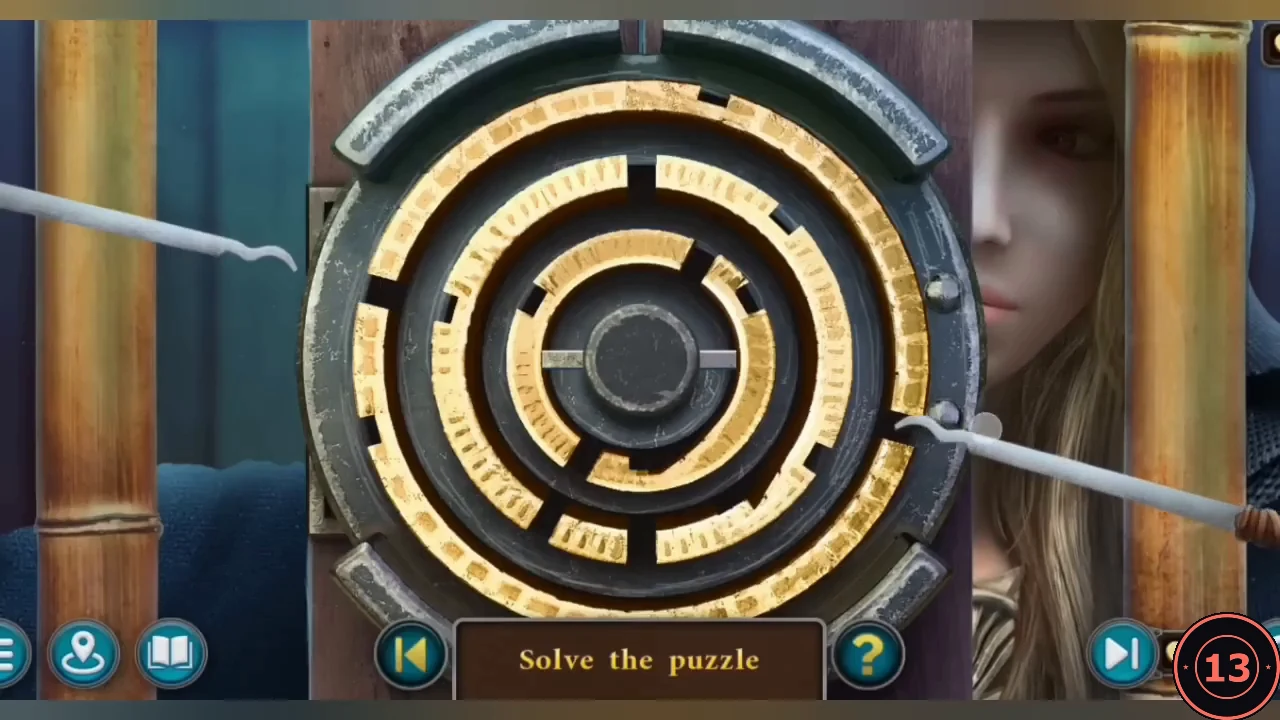
Use the LOCKPICKS on the cell door. The lock is a set of concentric rings; guide both picks to the centre. This is a lengthy maze, so the guide gives the method rather than every move.
- Move the left and right picks inward ring by ring, passing only through the gaps in each ring. When a gap is out of reach, travel around the current ring to find the next opening. Both picks must reach the centre.
- Search the unconscious guard for the KEYRING and the WAKIZASHI.
The Guardhouse
Explore the guardhouse hall without being seen.
- Use the KEYRING on the barred door of the guards' room on the left to lock the guards in. The ornate barred cell on the right has a star-patterned gold dial that the keyring does not fit yet.
- Open the two floor grates with the KEYRING. The front-left pit holds a boot; an injured boy lies in the right pit.
- Peek through the exit doors at the back: a guard trains with a dummy, and Cassandra's magic fails again. Take the RED STAR from the dummy.
- In the weapons storage room, read the diagram on the table (the keyring can be modified) and take the STEP LADDER from the wall.
- In the left pit, take the BLUE GEM by the boot. Place the STEP LADDER in the right pit; the boy hands you the GREEN GEM and a NOTE: "The warrior waits in the shadows, hand gripping the taut bow – the hare holds still".
Scroll Cylinder Lock
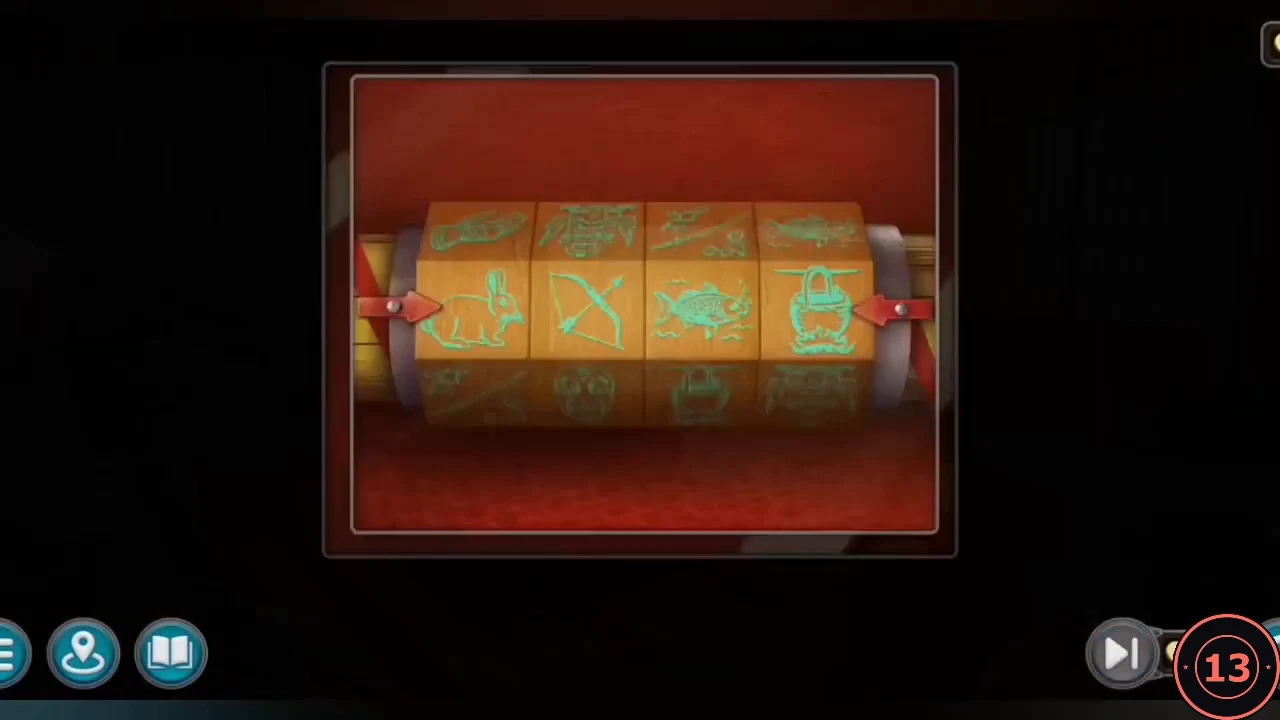
Place the NOTE on the scroll cylinder on the storage-room table. Turn its four rings so that the pictures between the red arrows tell the note's story.
- Set the rings, left to right, to WARRIOR MASK, GAUNTLETED HAND, BOW and HARE between the red arrows.CODEWarrior mask – hand – bow – hare
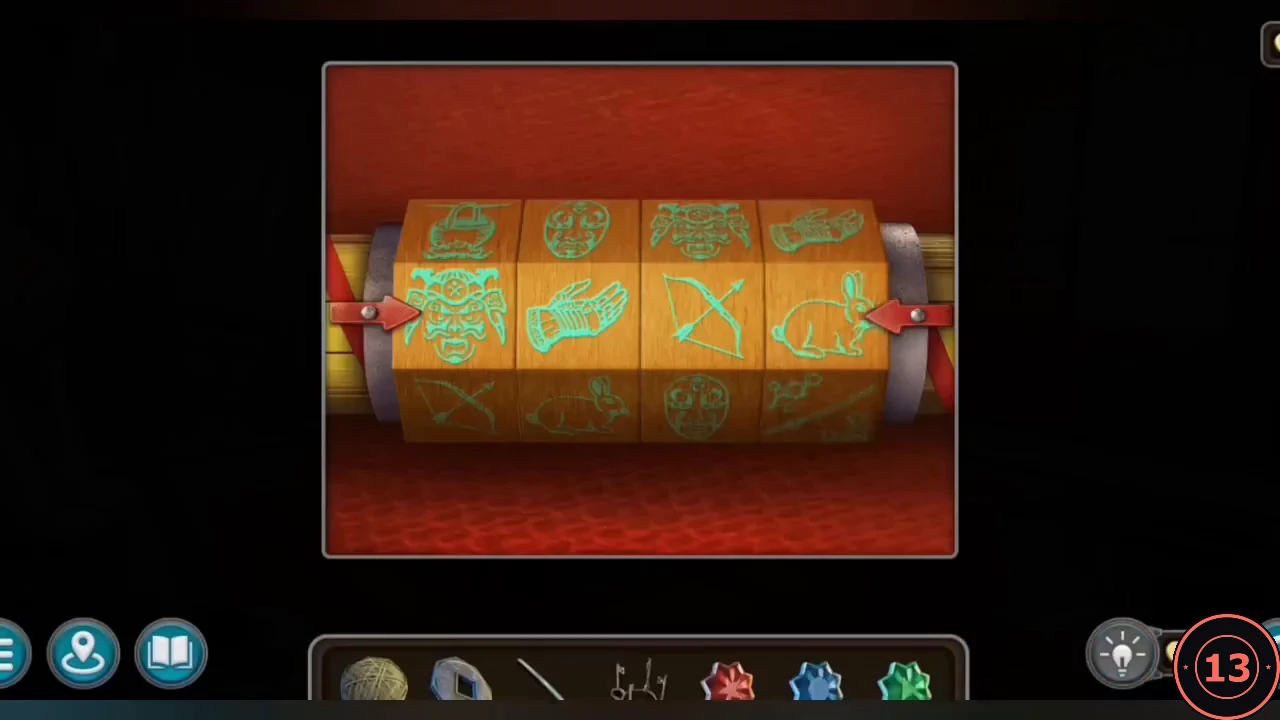
The solved cylinder: warrior mask, hand, bow, hare from left to right. - Take the KEY and the LIQUOR BOTTLE from the cylinder.
- Use the KEY on the padlock of the storage room's sliding doors to reach the balcony. Take the YELLOW GEM by the rope post and the SPEAR from the weapon rack on the left wall.