Spider Statue Legs
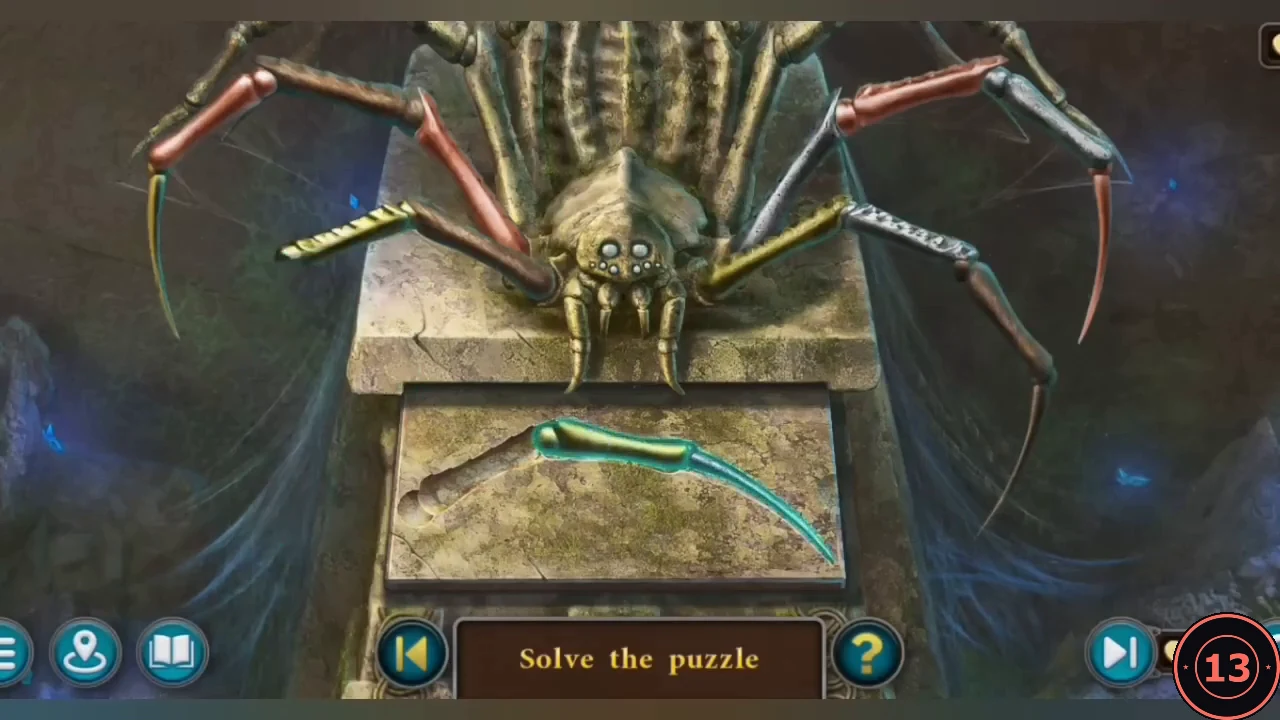
Place the three SPIDER LEGS on the plate in front of the spider statue in the webbed hall.
- Goal: every leg must be a single colour from body to claw – red, silver or gold. Tap a leg section on the statue to swap it with the section lying on the plate. Fix one leg at a time: park a wrong-coloured section on the plate, then swap in a section of the leg's colour. When all legs are uniform, the legs glow and the spider's eyes light up.
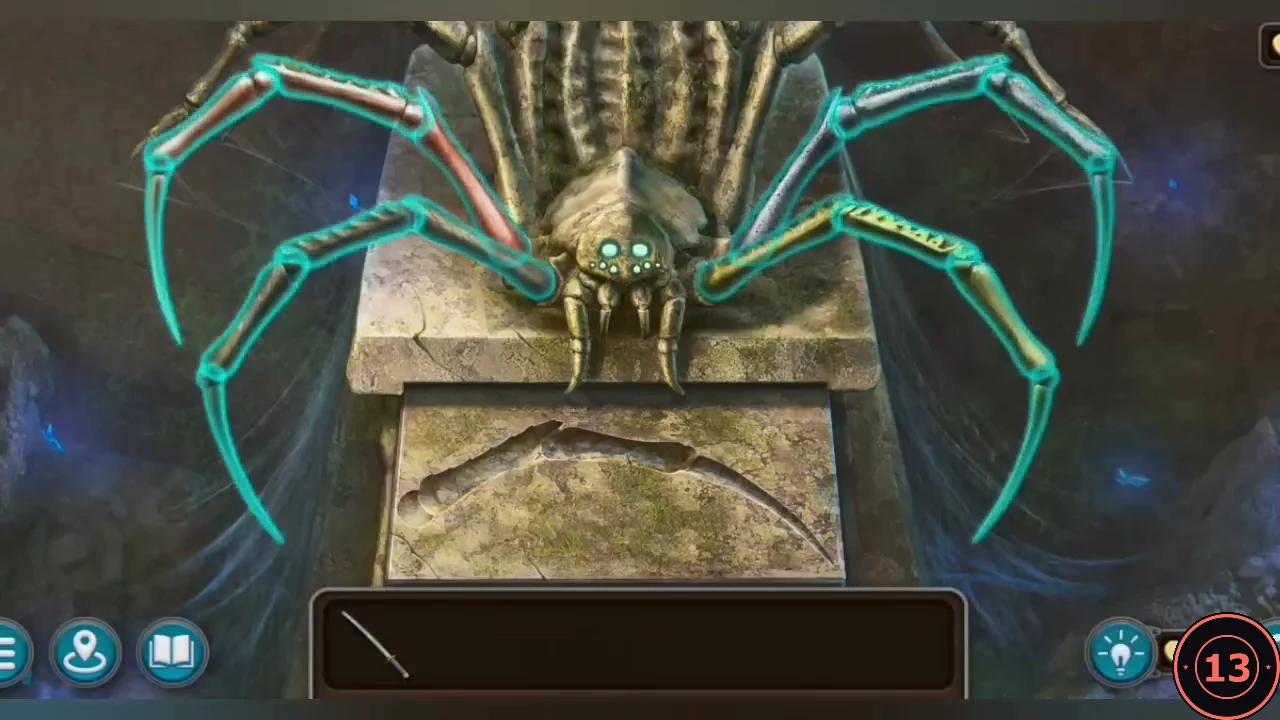
Solved: each leg is one colour and the legs glow. - Open the pedestal drawer and take the GLOWING ORB, then read Manuscript 4/12, Un'Hellar.
- In the dark back chamber, place the GLOWING ORB in the ceiling socket. The far wall shows a relief with 15 animal silhouettes.
Treasury Gem Slider
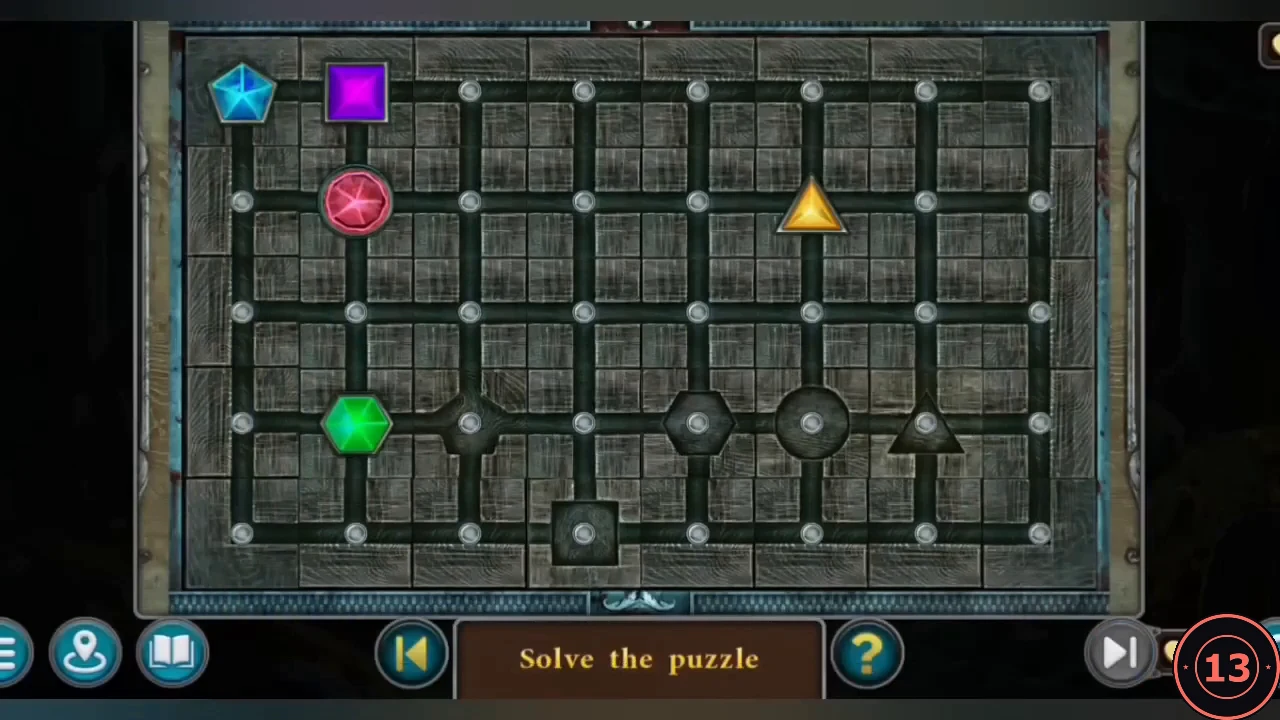
The chest to the left of the animal wall holds five shaped gems on a grid of tracks, with five matching sockets. Drag a gem along the tracks to move it from node to node. Each gem leaves a chain behind it, and chains cannot cross each other or run through another gem, so a careless route can cut off a gem that has not moved yet. Move every gem onto the socket of the same shape.
- The chest is covered in cobwebs at first ("There's something under the web"). Take the FORK beside the knight statue and use it to sweep the web away, then tap the chest to open the gem puzzle.
- Example solution for this playthrough's layout: gems start with the blue pentagon in the top-left corner, the purple square beside it, the red star in the second row on the left, the yellow triangle in the second row on the right and the green hexagon in the fourth row on the left. The square socket is in the bottom row; the pentagon, hexagon, star and triangle sockets are in the fourth row. Drag purple right along the top edge to the corner, down the right edge and left along the bottom row into the square socket. Drag yellow one node right and down into the triangle socket. Drag blue down the left edge, two nodes right along the bottom row (past the green gem’s column to the third column) and up into the pentagon socket. Drag red right along the second row and down into the star socket. Drag green up one row, right above the blue gem and down into the hexagon socket. If your layout differs, send gems with long routes around the outside edges first and keep their chains away from gems that still have to move.
The Animal-Tile Wall
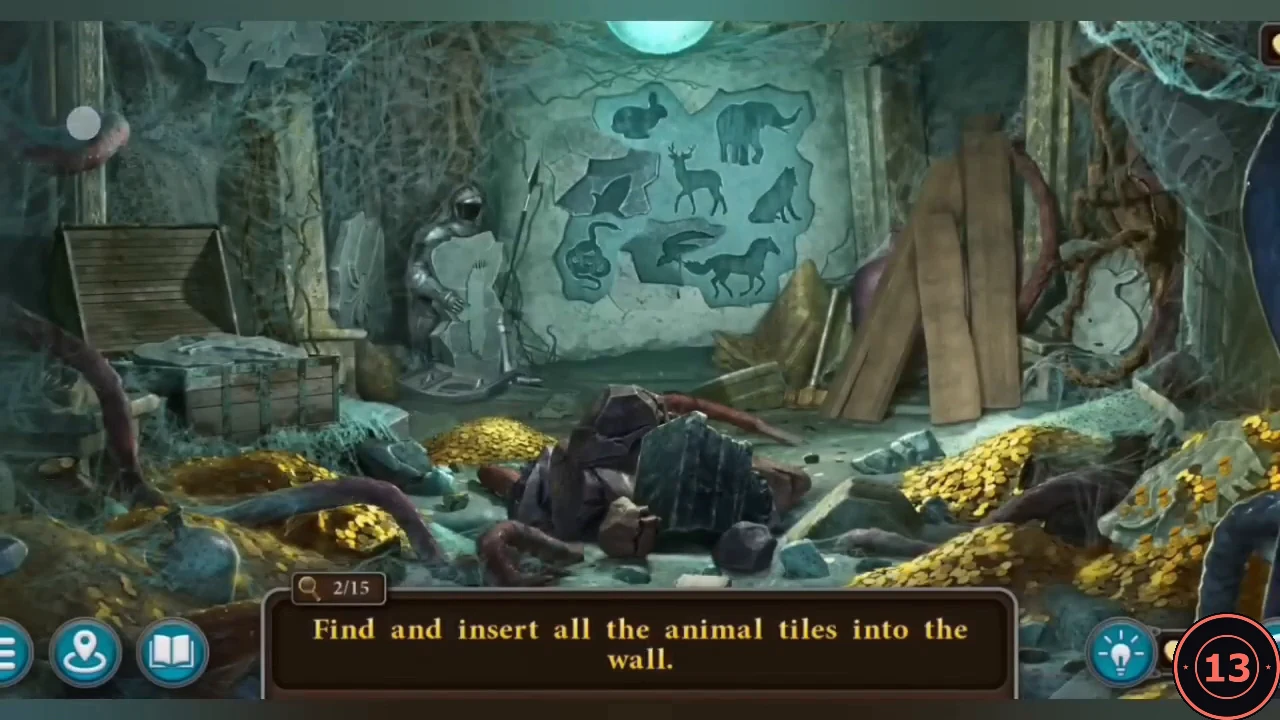
Find all 15 animal tiles and insert them into the matching silhouettes on the treasury wall.
- Search the back chamber for tiles and place each one in its silhouette as you find it; the wall layers rotate as you fill them. Tiles are in the floor debris, in the gem chest, in the web around the ceiling orb and under the cloth. On the right, move the wooden boards aside to uncover two urns, then break the urns with the HAMMER for more tiles. Also take the tile held in the knight statue's hand.
- The last tile, the spider, is on the knight statue's shield. Put it in the centre to complete the wall.
- The treasury opens. Mountgor takes his treasure and gives you the MAGIC STABILIZER.
Pillar of Balance: Recalibration
Return to the Stronghold with the prince.
- On the way back, collect Morph 11/47 at the lower-left edge of the crossroads and Morph 12/47 at the left edge of the Vital Lake scene. In the portal hall, collect Handprint 7/8 at the upper right, beside the top of the staircase.
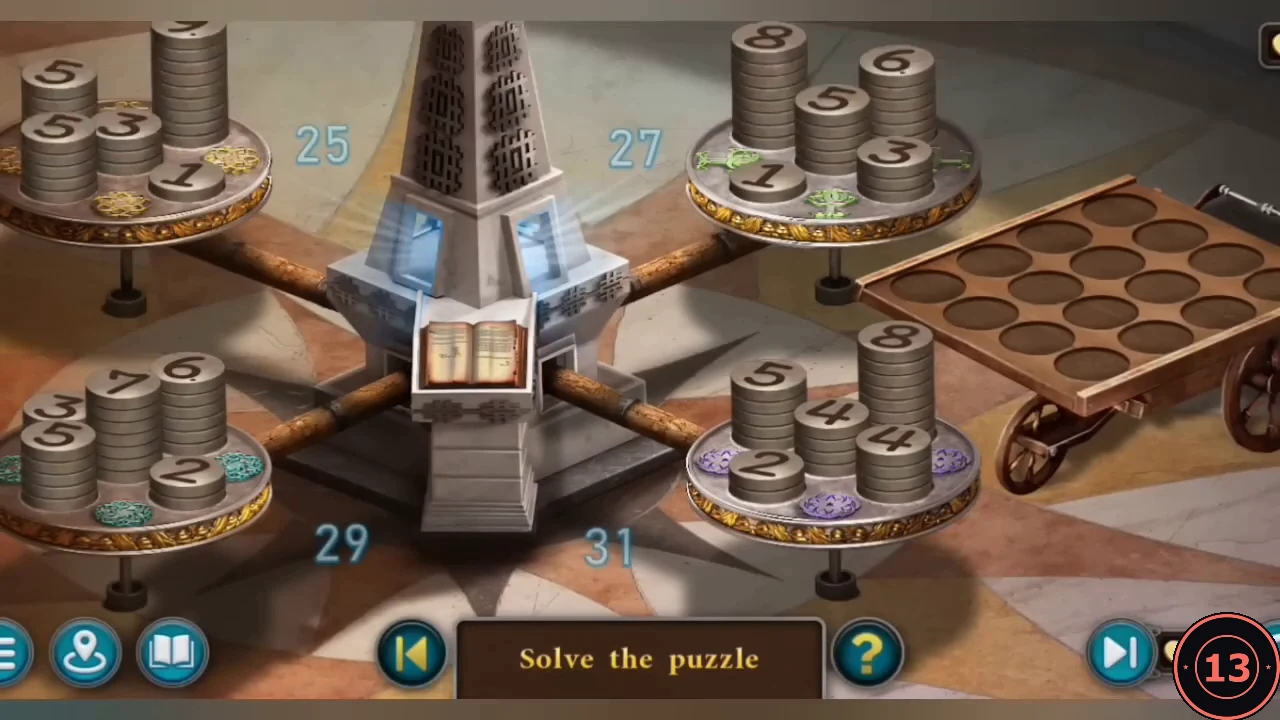
- Place the MAGIC STABILIZER on the pillar. It is still inactive; balance the scales again to calibrate it.
- The same rule applies: opposite pans must show equal totals and the cart must end up empty. Move numbered weights between the pans, using the cart as a parking spot, and watch the number beside each pan. Example from this playthrough: the pans started at 25, 27, 29 and 31 (112 in total) and were balanced by bringing every pan to 28 - take weight off the 31 and 29 pans, add it to the 25 and 27 pans, then fine-tune with the small weights. If your pans start with other numbers, make each opposite pair equal using your own totals instead of copying 28.
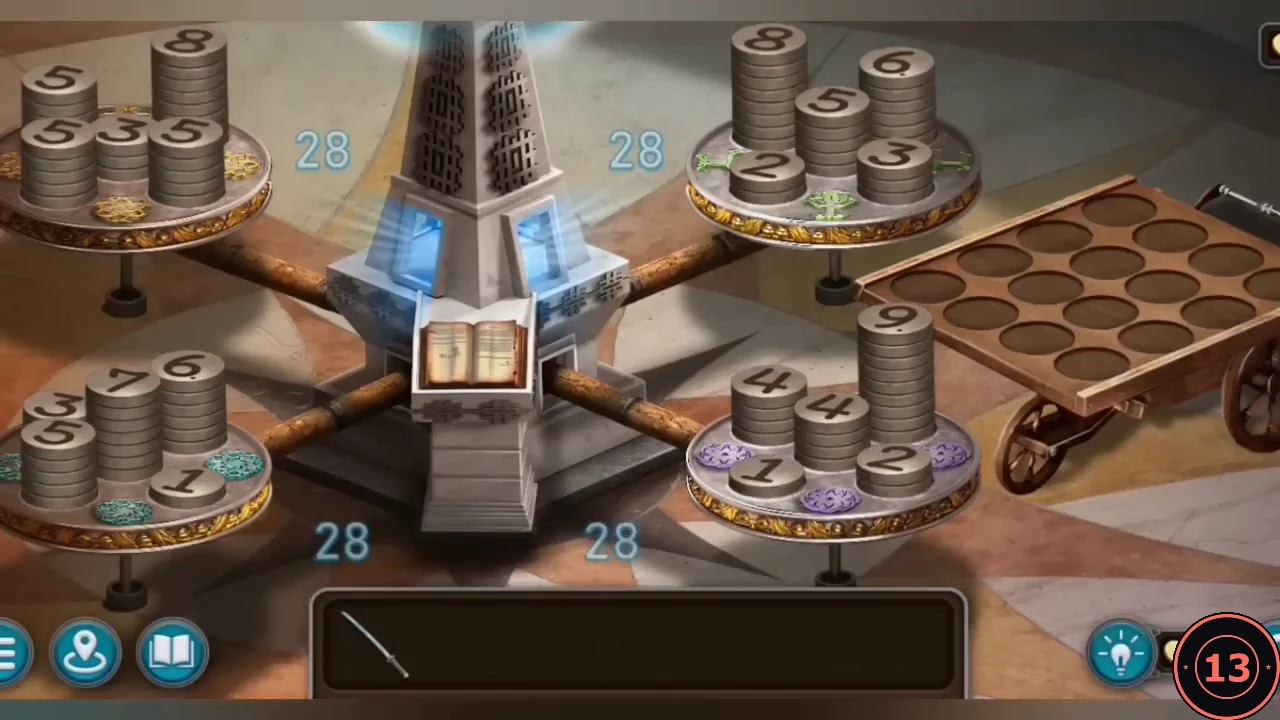
Finished recalibration: every pan reads 28. - Cassandra gives Prince Rikahiro an enchanted amulet and he returns through the portal. Chapter 1 ends.
Chapter 1 Remaining Collectibles
The last Chapter 1 collectibles are in Kangai rooms you have already visited. Use the map to travel back after the story ends, or grab them on your first visit.
- Commander's room: Handprint 8/8 on the left by the statue (Detective achievement) and Morph 13/47 in front of the low red table.
- Guardhouse hall: Footprint 7/7 at the lower right (Investigator achievement) and Morph 14/47 on the right wall. Cell room: Morph 15/47 on the right side. A message confirms that all morphing objects and collectibles in the chapter were found.