The Forest Ravine and the Ruins
Chapter 2 is labelled Bonus on the Chapter Selection screen, but it is a full story chapter. You play as Prince Rikahiro, who arrives through a portal in an unknown autumn forest. New task: What is this world?
- Ravine: tap Morph 16/47 in the bushes on the right. Zoom into the rubble at the foot of the cliff and take the VALVE and the WOODEN STAFF.
- Clear the leaves from the tree stump on the right and take the AXE. Use the AXE on the notched tree left of the chasm; it falls and forms a bridge. Lute 1/8 is at the bottom left.
- A beehive has fallen into the leaves. Zoom into the leaves and take the FRAGMENT OF THE PART. The wild bees will not let you near the hive yet.
- Cross into the ruined courtyard. Flute 1/9 is in the stone ruins on the left and Morph 17/47 is high on the ruined wall at the upper left. Zoom into the lever mechanism on the right and take the BROKEN PART; the mechanism is missing a gear. The telescope platform in the centre is blocked by walls.
- Zoom into the base of the telescope in the centre ("It seems the platform can rotate, but it's not working yet") and fit the VALVE to it. The telescope platform turns, but the walls still block the view.
- Zoom into the winch on the left and use the AXE on its stopper pin; the chandelier crashes down. In the chandelier close-up take the second FRAGMENT OF THE PART and brush the leaf aside to take the TILE SHARD. The axe cannot cut the rope, so use the TILE SHARD on the rope tied to the chandelier and take the ROPE (the shard stays in your inventory).
- Zoom into the broken gear arm of the lever mechanism. Place both FRAGMENTS OF THE PART and the BROKEN PART on the shafts, wind the ROPE around them and cut the excess with the TILE SHARD. Take the REPAIRED PART (the rope stays in your inventory).
- Install the REPAIRED PART in the lever mechanism. It has six levers above numbered plates 1-6, and each lever lowers part of the ruined walls around the telescope ("So, levers control the walls! Got it!"). The wall behind the telescope is painted with a 4. In the reference playthrough, lever 2 was pulled first, then lever 5, and the view cleared after lever 4 was pulled. Pull levers until the walls in front of the telescope are down.
Telescope Lens
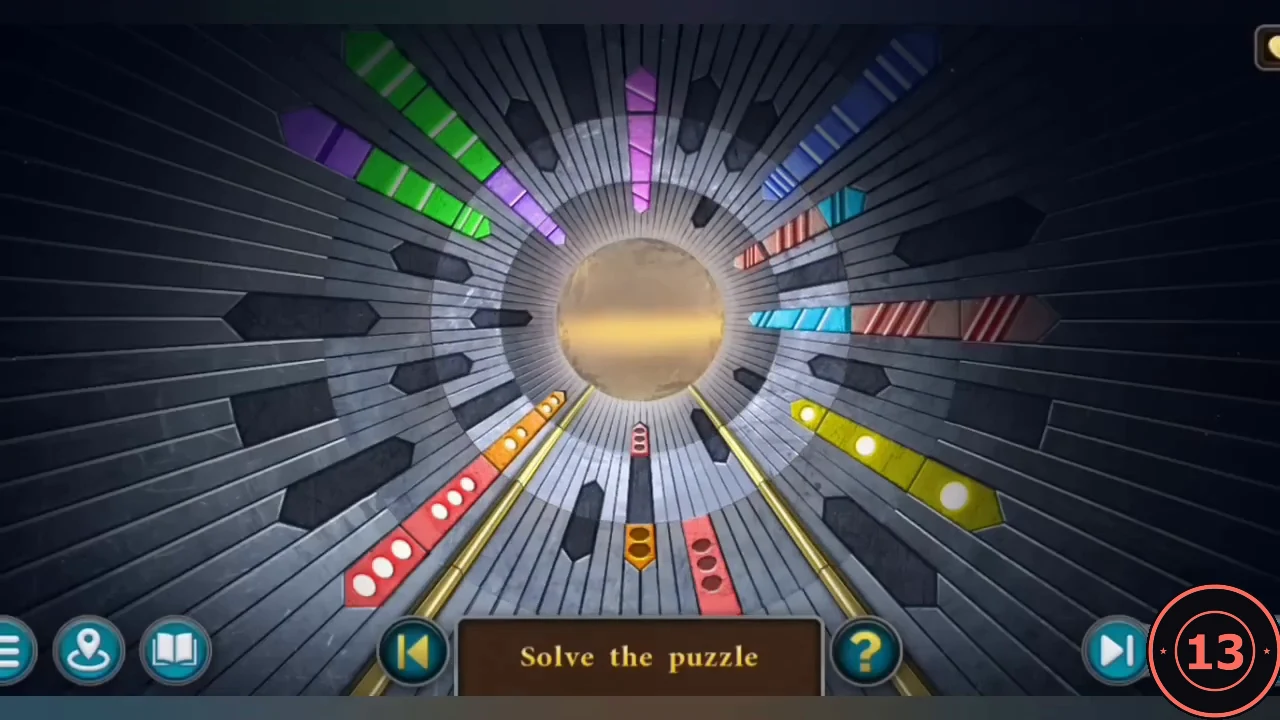
Zoom into the telescope to adjust the lens focus.
- The game's instructions: "Adjust the telescope by connecting blocks with matching symbols in a line. To do this, rotate the segments and move the blocks into empty slots." The lens is made of concentric rings carrying coloured blocks. Use both controls: rotate a ring to turn all its blocks together, and move single blocks into empty slots (including onto a neighbouring ring) when rotating alone cannot line them up. Build each colour into one continuous ray from the centre to the matching fixed stripe on the outer rim. The finished lens shows nine stripes: purple, green, magenta, blue, cyan, striped red, yellow, orange and dotted red. Work outward one ring at a time and compare with the solved image.
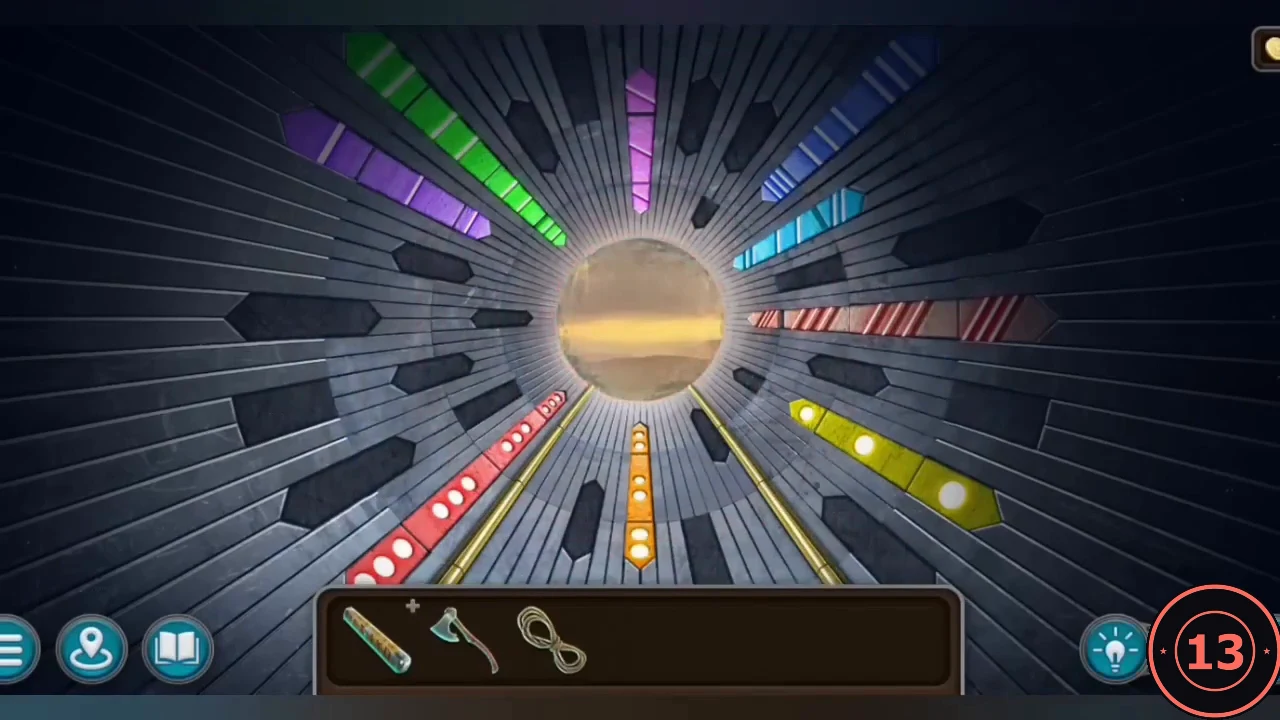
Solved lens: each colour forms one continuous stripe. - Looking through the lens, Rikahiro sees a tower and smoke from a fire below it. New task: Tower in the distance.
The Rangers' Camp
Follow the path down the slope to a rangers' camp. A Minotaur is locked in a cage cart. New task: Minotaur.
- Camp: Morph 18/47 is on the right side of the cage cart. Enter the dark cave: take the BURNT-OUT TORCH on the left and collect Flute 2/9 at the left edge, about a third of the way down. Back at the camp, Lute 2/8 is by the tent and laundry.
- Zoom into the cage cart and take the GAUZE from the crate. Combine the GAUZE with the BURNT-OUT TORCH to get a REPAIRED TORCH. The cage door is locked by two padlocks; you cannot open it yet.
- Zoom into the crates. Rikahiro cannot uncork the jug, and the Minotaur says to smash it, but the rangers would hear. The Minotaur offers to sneeze loudly to cover the noise, so use the AXE on the jug and it breaks during his sneeze. Dip the REPAIRED TORCH in the spilled liquid to get an ALCOHOL-SOAKED TORCH.
Telescope Gear Track
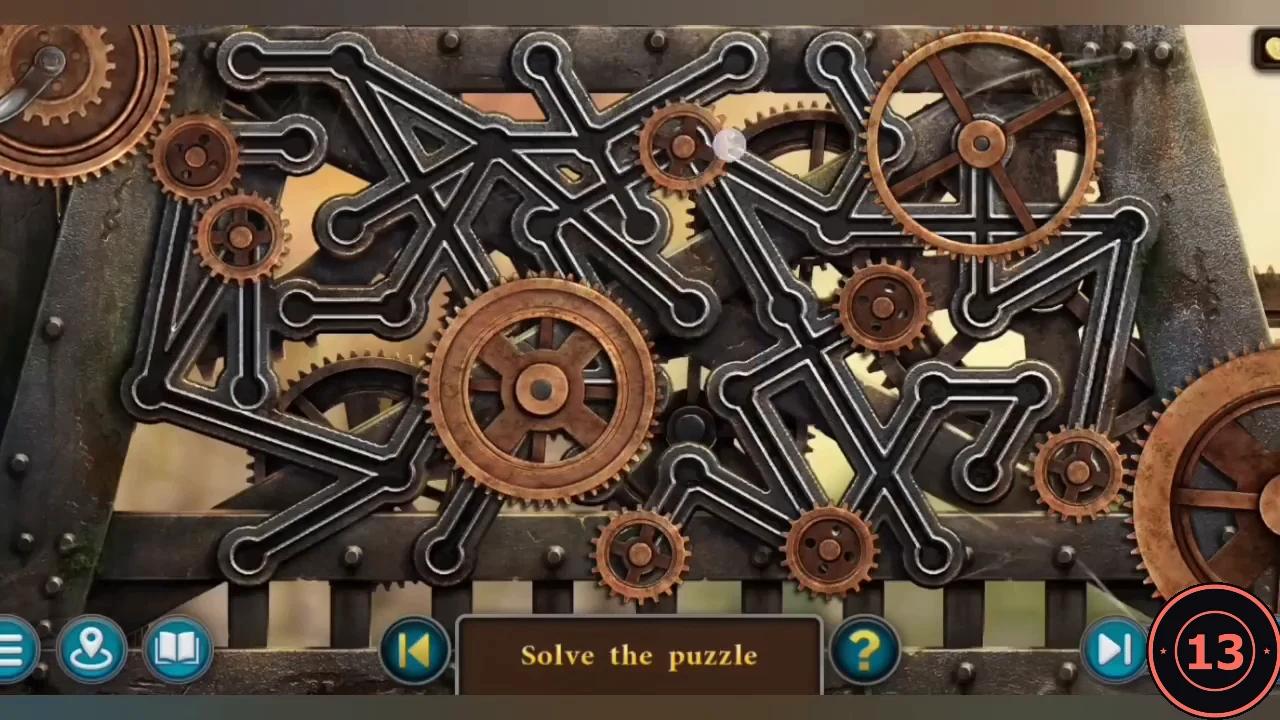
Back in the ruins, use the ALCOHOL-SOAKED TORCH on the telescope. Rikahiro wants to aim it at the sun, but the mechanism is broken.
- Gears slide along grooves in the track. Move them until an unbroken chain of gears links the drive gear on the left edge to the large spoked wheel and the gear on the right edge. The gears glow cyan when the train is complete.
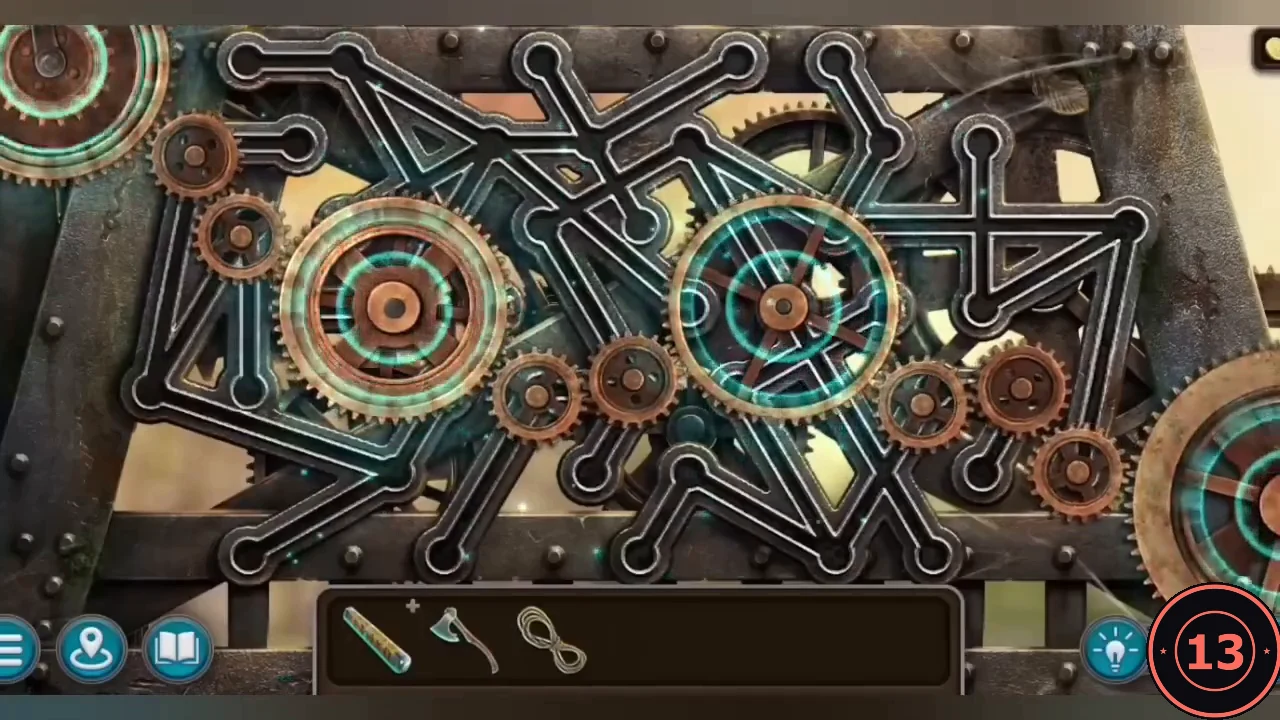
The completed gear train. - The telescope focuses sunlight on the torch. Take the BURNING TORCH.
The Cave and the Sleep Potion Recipe
The cave beside the camp holds a sleeping ranger, caged animals, a locked chest and an alchemy table.
- Place the BURNING TORCH in the sconce on the left cave wall to light the cave.
- Look around: the wooden chest has a hexagon lock that needs a hint, the rangers have caged forest animals, and the keys hang from the sleeping ranger's belt (you do not dare take them yet).
- Zoom into the sleeping ranger and take the note from under him: the SLEEP POTION RECIPE. Put gauze over a bowl; add Motherwort root, Moonbloom berries, Beardig flowers, Melissa leaves and Hypericum seeds; pour alcohol over them; grind and squeeze the juice into the bowl; inject it with a syringe.
- Zoom into the alchemy table and place the SLEEP POTION RECIPE on it, beside the bowls. This turns the table into an item scene: the ingredients and tools you need appear as silhouettes in the inventory bar.
Alchemy Table: Sleep Potion
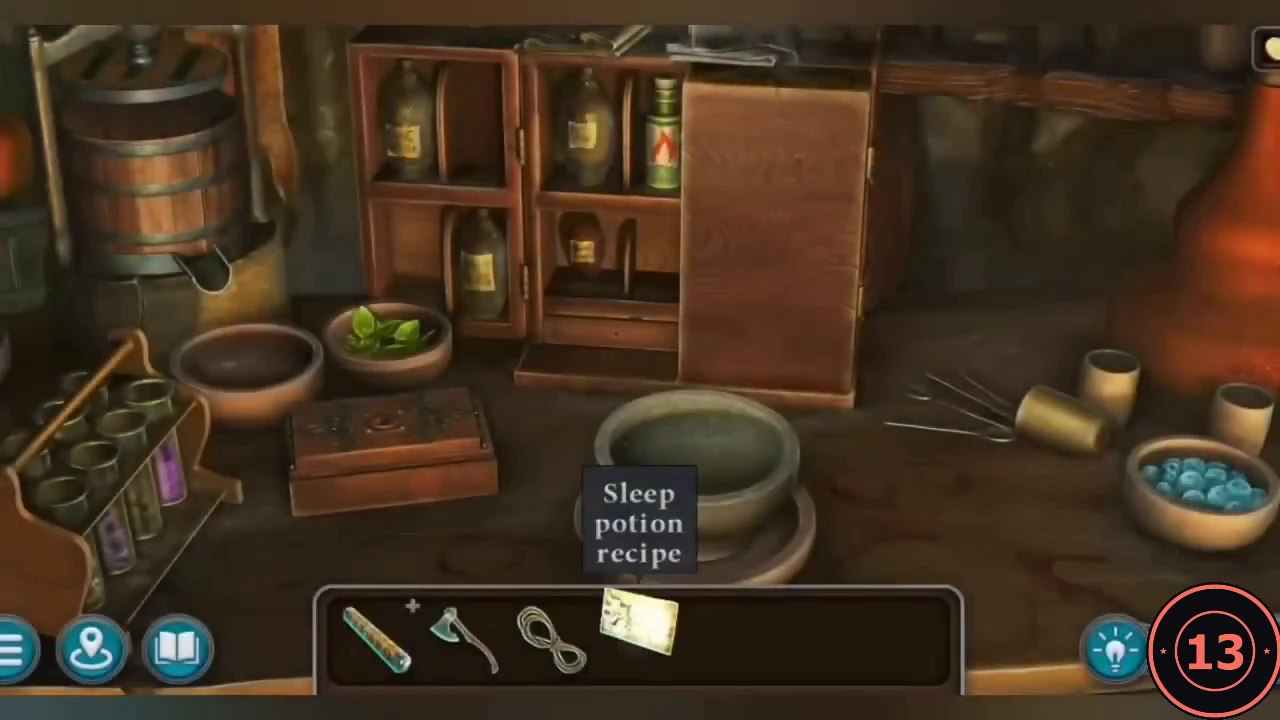
With the recipe placed on the alchemy table, the ingredients appear as silhouettes; the game warns you if you try to use them out of recipe order.
- Open the cabinet door and take the MOTHERWORT ROOT (bottom right), the ALCOHOL (top shelf) and the green PESTLE. The lower drawer is stuck: take the ROD from the table beside the recipe and pry the drawer open to take the white BEARDIG FLOWERS.
- Tap the lacquered box on the table to open the animal token puzzle (next section).
Lacquered Box: Animal Tokens
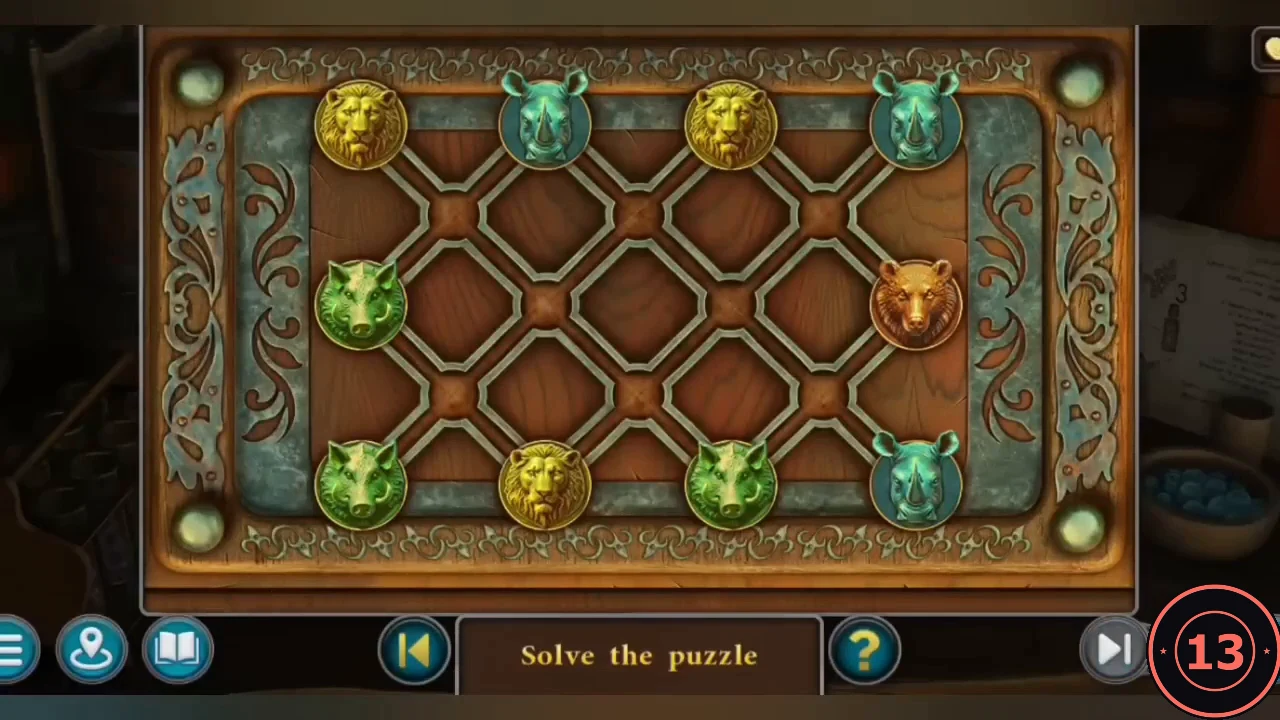
Animal tokens slide along the lines of the lattice on the lid.
- Slide the tokens into the layout that is the starting picture turned upside down. Target: top row rhino, boar, lion, boar; middle row bear on the left and boar on the right; bottom row rhino, lion, rhino, lion. Take the SYRINGE from the opened box.
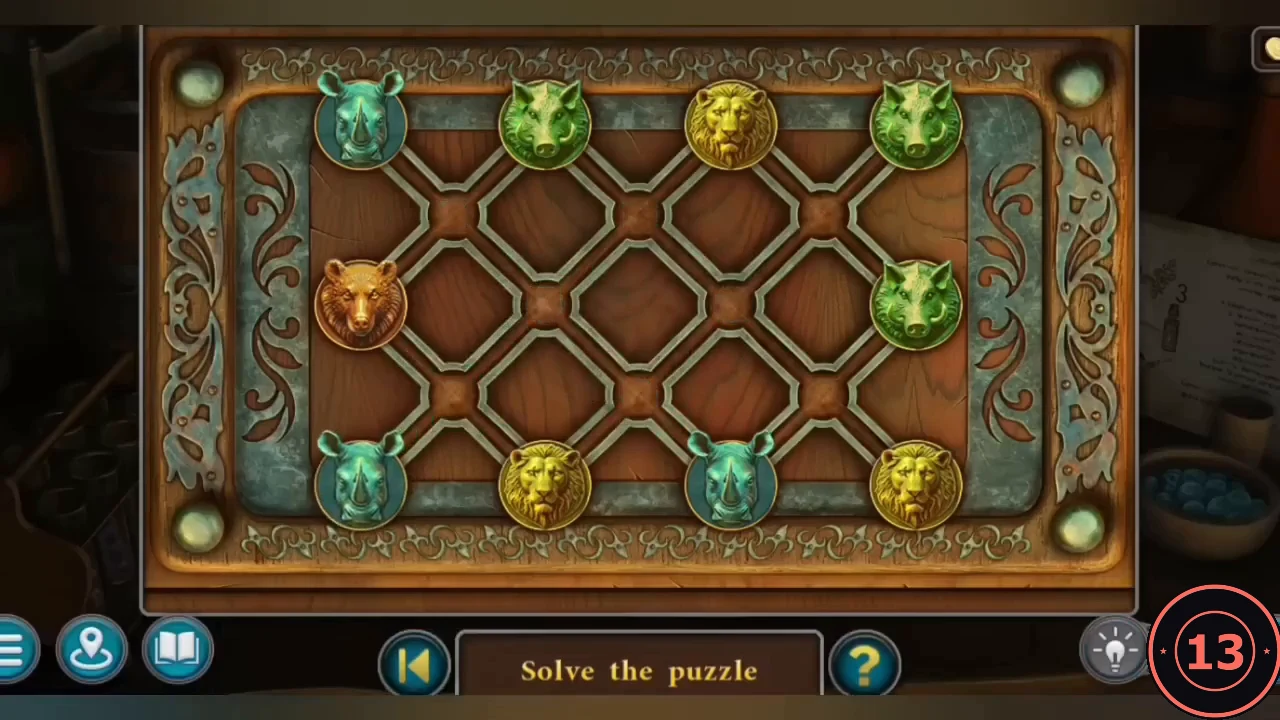
The finished token layout. - Finish collecting: MELISSA LEAVES from the green bowl on the left; tap the right test tube in the rack to spill the yellow HYPERICUM SEEDS and take them; GAUZE from the cabinet drawer; MOONBLOOM BERRIES from the blue bowl on the right.
- Follow the recipe: gauze on the centre bowl, all herbs onto the gauze, pour the alcohol, grind with the pestle, squeeze the gauze, then draw the juice into the syringe. Take the SLEEP POTION.
Ranger's Journal and the Staff Cylinder
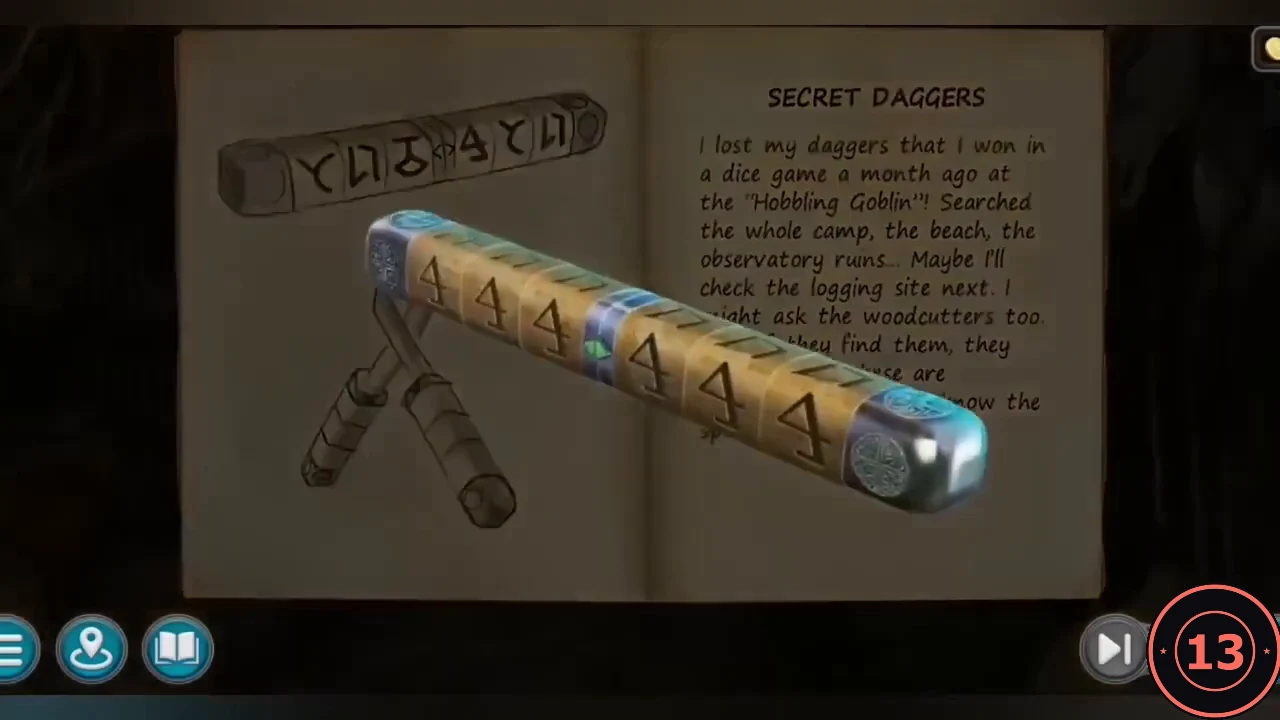
With the ranger drugged, you can search him safely.
- Inject the SLEEP POTION into the sleeping ranger. Read his journal pages about his secret daggers (hidden in a cylinder with a special code) and a broken boat on the riverbank. Take the KEY RING from his belt.
- Examine the WOODEN STAFF with the journal open. Rotate its six rings to match the sketch, left to right: hooked Y, angular n, looped circle with a bar | divider | 4-shaped rune, hooked Y, angular n. The cylinder splits; take the DAGGERS.
Cage Cart Rod Lock
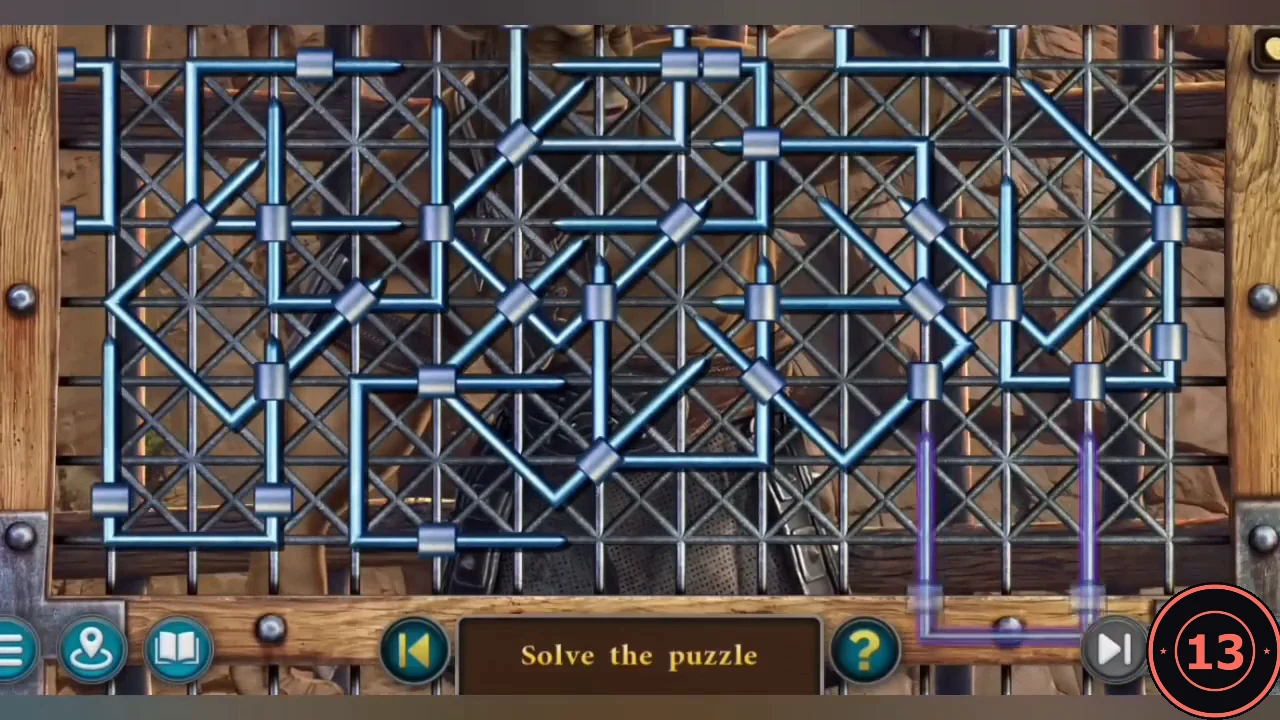
Use the KEY RING on the two padlocks of the Minotaur's cage cart.
- Tap rods to pull them out of the grate. A rod only comes free when no other rod blocks its path, so clear the outer rods first and work inward until the grate is empty.
- The Minotaur asks you to hand him your axe secretly: give him the AXE. He scares off the rangers. Task complete: Minotaur.
Ten Boat Parts
The ranger's boat on the riverbank is a skeleton. Going by river is faster and safer. New task: Boat.
- Cave: use the KEY RING on the animal cage to free the animals, then take the NAILS from the cage floor.
- Riverbank: take BOAT PARTS 1/10 and 2/10 by the boat. Take the PITCHFORK from the haystack on the left. Morph 19/47 is on the rocks at the lower left by the water. Cut the net hanging in the tree on the right with the DAGGERS, then take the SCOOP, SHOVEL and PAINTBRUSH from the shore beneath it.
- Camp: BOAT PARTS 3/10 left of the tent and 4/10 by the crates and tent. At the campfire take the HAMMER from the wooden box and the CAULDRON. You cannot pick up the hot coals with bare hands.
- Cave: BOAT PARTS 5/10 on the bars of the animal cage at the left and 6/10 on the barrel at the far-left edge. Ruins: 7/10 halfway up the ruined pillar on the left and 8/10 high on the ruined wall at the upper right. Ravine: 9/10 left of the fallen-tree bridge and 10/10 in the centre.
Honey and Melted Wax
The hull will need waterproofing. The fallen beehive in the ravine provides wax.
- At the campfire use the SCOOP on the hot coals to get HOT COALS.
- Ravine, fallen beehive: place the HOT COALS beside the hive to calm the bees with smoke, put down the CAULDRON and lift the hive into it with the PITCHFORK. Take the cauldron with the WILD HIVE.
- Cave alchemy table: put the WILD HIVE on the table, tip the comb into the press barrel (the honey drains into the yellow bowl and stays there), and the remaining comb returns to the cauldron as WAX.
- Campfire: hang the WAX cauldron over the fire and dip the PAINTBRUSH in it to get MELTED WAX.
Boat Hull Planks
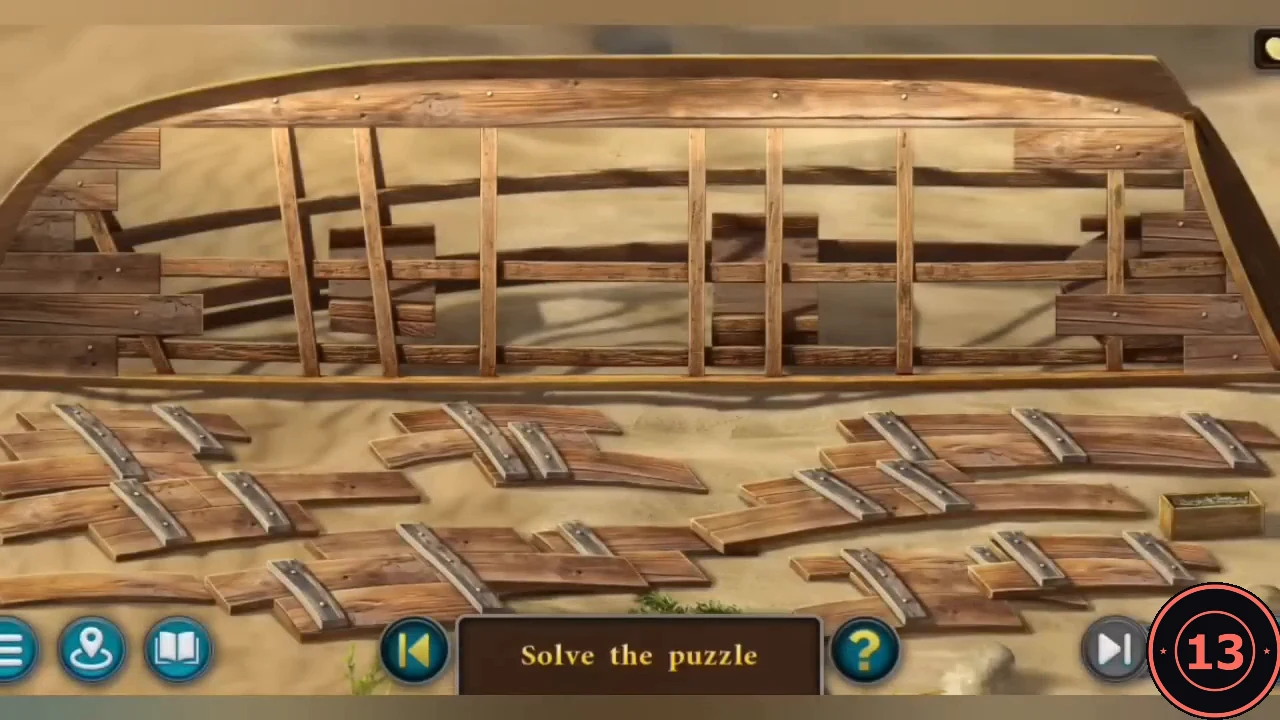
Riverbank: place the BOAT PARTS on the boat, then use the HAMMER and NAILS.
- Drag the plank pieces from the sand into the gaps in the hull. Each piece fits only where its outline and metal brackets line up with the gap. When the hull is fully planked it is nailed automatically.
- Spread the MELTED WAX over the hull in several passes to make it watertight. You cannot flip the boat alone.
River Navigation
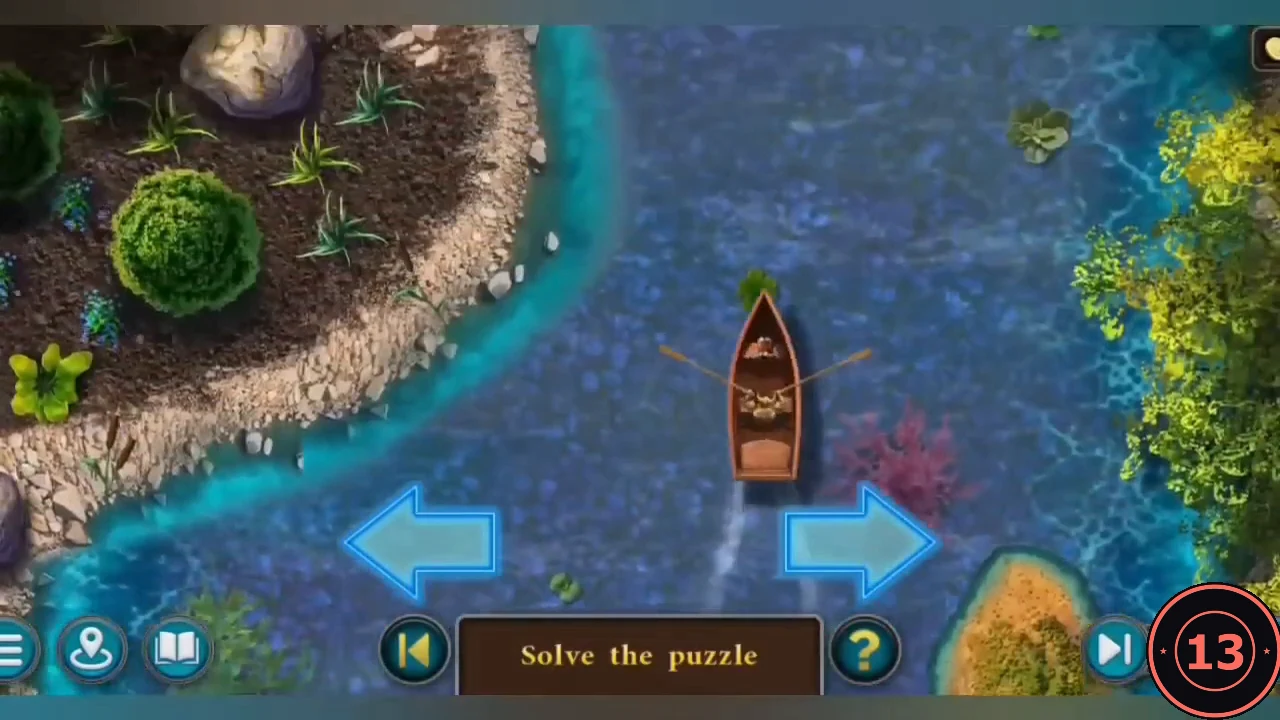
The Minotaur returns and flips the boat into the water, but it cannot be steered without oars. New task: Arena.
- Zoom into the sand where the boat lay and dig with the SHOVEL to find the OARS.
- Place the OARS on the boat. Tap the left and right arrows to steer around rocks, islands and weeds until the boat passes the weir and reaches Greylmar.