Arena Labyrinth: Stone Shards
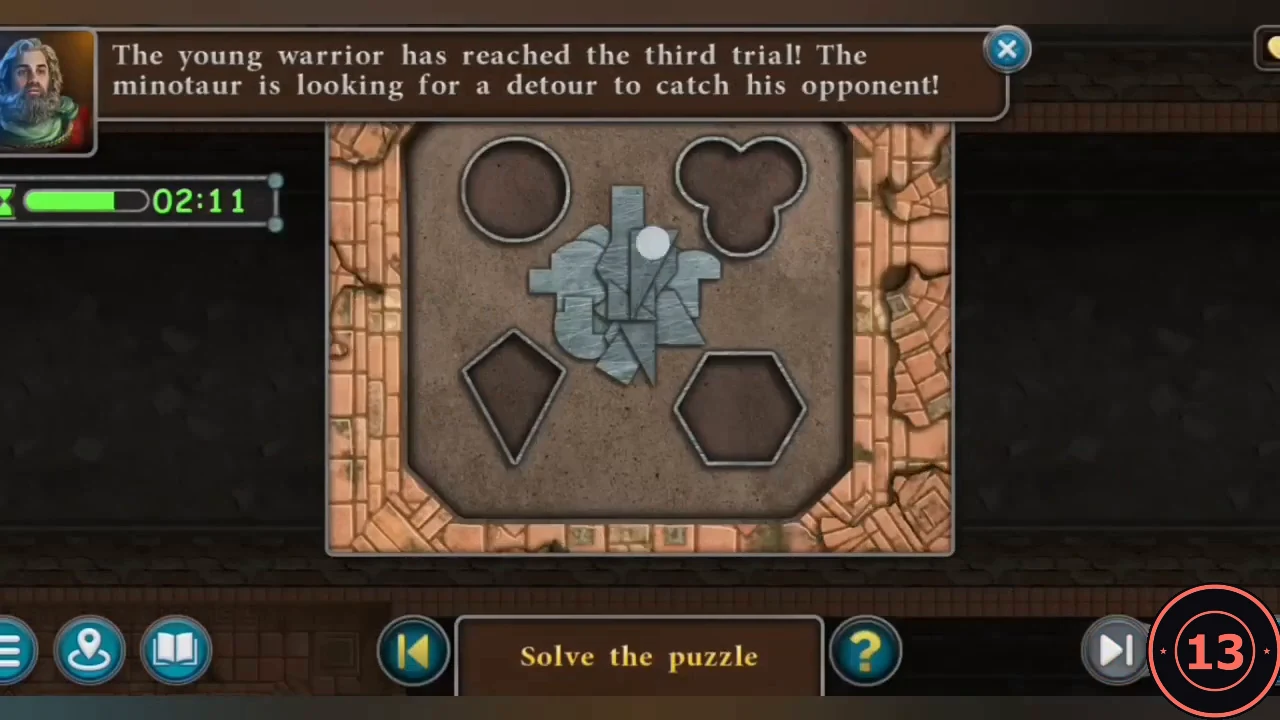
Four outlines need filling: a circle (top left), a trefoil (top right), a kite (bottom left) and a hexagon (bottom right).
- Drag the stone shards from the central pile into the outlines until all four shapes are complete.
- The wall closes on the Minotaur. Go left 4 to the chest between the two braziers.
Arena Prize Chest
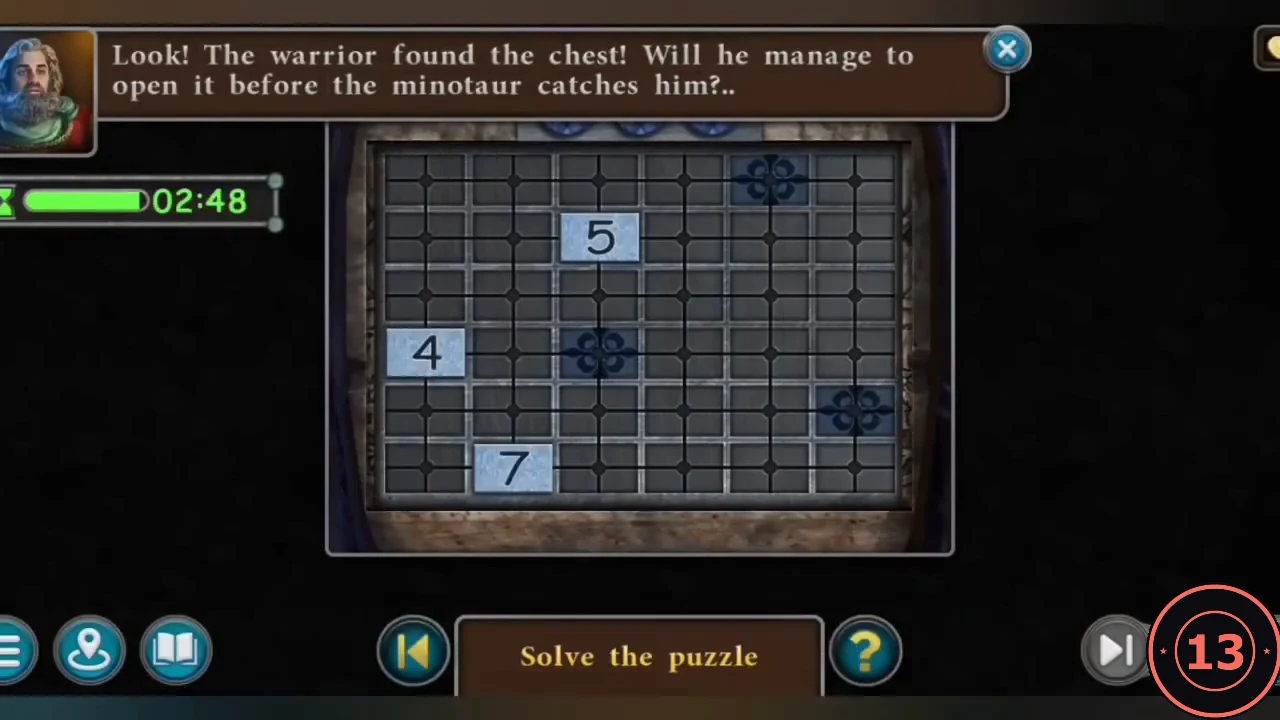
A 6×6 grid in three stages (the three gems at the top show your progress). Rows and columns are counted from the top left.
- Rule: drag a numbered tile one cell at a time. Each cell moved lowers its number by 1, and the tile must land on a fleur marker exactly when it reaches 0. Detour to use up extra steps if needed.
- Stage 1: move the 4 (row 4, col 1) to the marker at row 4, col 3; the 5 (row 2, col 3) to row 1, col 5; the 7 (row 6, col 2) to row 5, col 6.
- Stage 2: tiles 7 (row 1, col 6), 5 (row 4, col 1) and 6 (row 6, col 2); markers at row 2 col 2, row 4 col 4 and row 6 col 6. Move the 5 to row 2, col 2 (3 cells away, so add one step out and back); the 6 to row 4, col 4 (4 cells away, add one step out and back); the 7 straight down to row 6, col 6 (5 cells away, add one step out and back).
- Stage 3: move the 4 (row 1, col 4) to row 1, col 2; the 5 (row 3, col 3) to row 3, col 6; the 6 (row 6, col 1) to row 5, col 4. The goblet is inside.
Chained in the Barn
After the victory Rikahiro is betrayed and wakes up chained by the wrist in a barn. His amulet from Cassandra is gone.
- Zoom into the wrist shackle and take the BIRD FIGURINE.
- Take the SHORT STICK WITH A NAIL from the pile of sticks at the front left. Use it on the floor to drag the long branch within reach, then tap the branch to knock the FISHING ROD off its hooks high on the upper-left wall; the rod drops to the floor. Tap the rod to cast it at the oil lamp hanging from the ceiling. The first cast misses ("Ugh, didn't work! One more try"), so repeat until you catch the OIL LAMP. Use the OIL LAMP on the wrist shackle: the oil lets the hand slip free.
- Collectibles: Morph 22/47 on the floor on the right by the chain post, Manuscript 6/12 Prince Rikahiro on the floor left of centre, Lute 5/8 by the leaning board left of centre.
- Window on the left wall: tap the heavy weight on the sill to smash the cracked pane and take the GLASS SHARD. Push the GLASS SHARD through the slit in the door to cut the fastening; the door opens to the farmyard.
Farmyard Escape
The farmyard gate is locked with a carving of a tree with five bird outlines, so you need five BIRD FIGURINES.
- Take BIRD FIGURINE 2 from the outdoor oven on the left. Open the big wooden chest in the right foreground to recover the DAGGERS, MACE, a BARN LOCK and the blue MYSTERIOUS ARTIFACT.
- The dog in the doghouse would attack if it senses you. Take the HANDCART (wheelbarrow) in front of the oven and BIRD FIGURINE 3 from the workbench on the right.
- Go back into the barn: in the corner with the sacks take BIRD FIGURINE 4, load a sack onto the HANDCART to get a CART WITH A SACK, and take the BLACKSMITH'S TONGS from behind the crate.
- Use the BLACKSMITH'S TONGS on the oven grill to take ROASTED RIBS. Zoom into the doghouse and open the small triangular hatch in its side wall (if you have not opened it yet). Put the ROASTED RIBS in through that hatch: the dog walks into the doghouse through its exit on the right. Block that exit with the CART WITH A SACK.
- Zoom into the house door: take BIRD FIGURINE 5 by the plant pot, then use the BARN LOCK on the hasp of the door to lock the owners inside.
- Place all five BIRD FIGURINES in the bird outlines of the tree carving on the gate (one by one; each outline takes one figurine). The bolt slides and a ring maze lock appears.
Gate Tree-Ring Maze
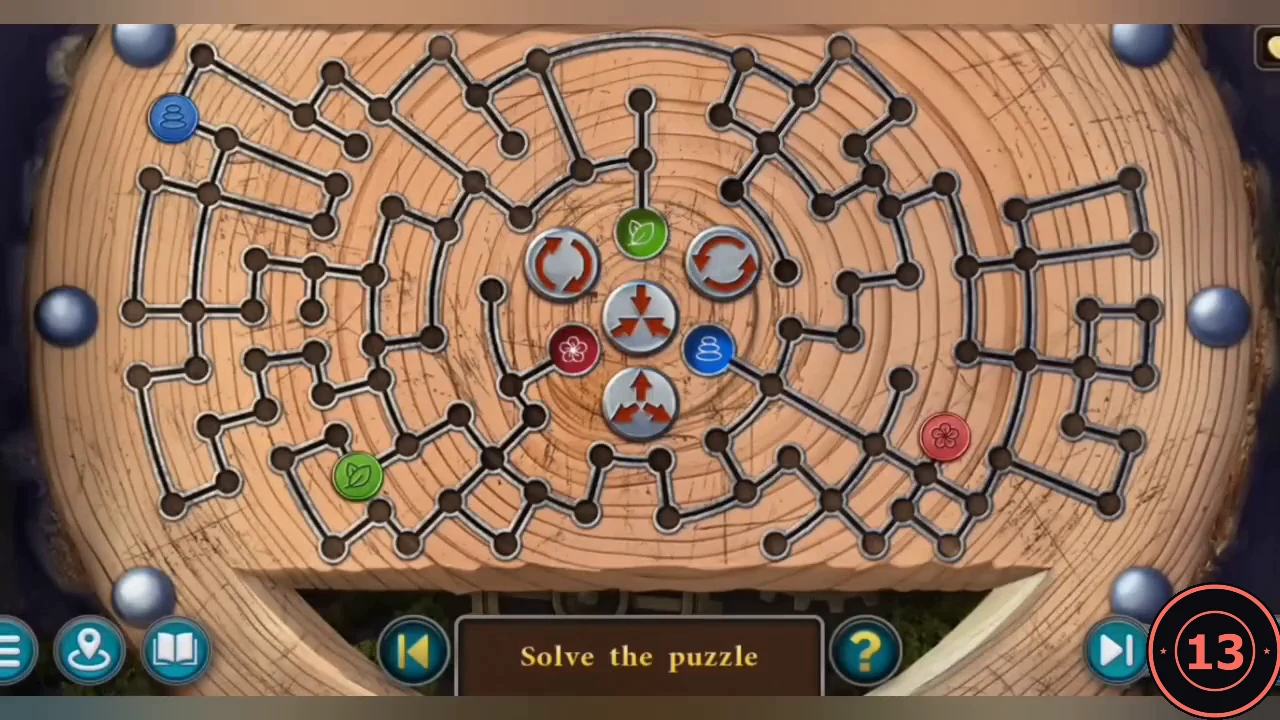
Three coloured tokens start in the outer grooves: blue at the top left, green at the lower left and red on the right.
- Drag each token node by node along the black grooves to the socket of its own colour beside the centre: green at the top, red on the left, blue on the right. The rotating centre discs were not needed in the reference playthrough. The paths glow blue when solved.
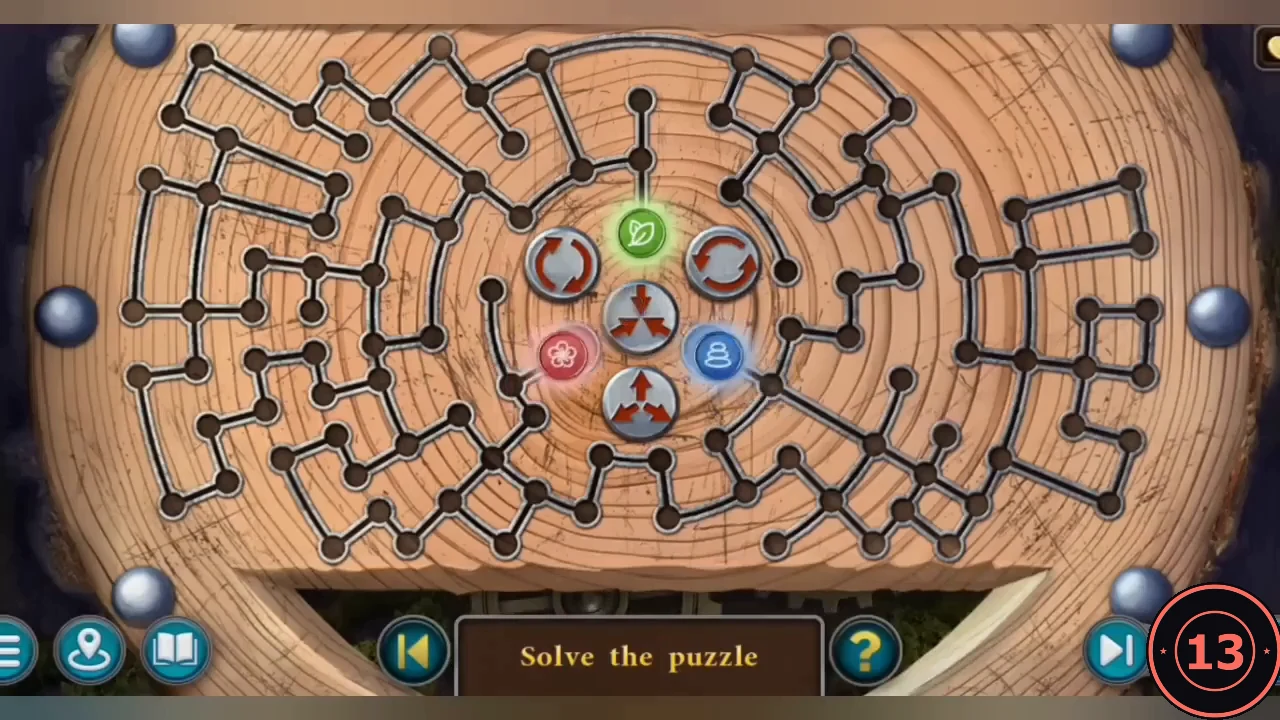
Each token in its own socket by the centre. - The gate opens. Leave down the road to the crossroads: Task complete Escape. Morph 23/47 is at the upper left of the crossroads, by the castle towers.
The Lift and the Stabilizer Room
Rikahiro heads back to the tower with the same lift he used before.
- On the path below the tower zoom into the fallen gargoyle statue and use the pole lying across it as a lever to turn the statue face up. Then zoom into the wooden winch at the foot of the wall in the centre (the base of the lift) and pull its lever to release the brake. Flute 4/9 is in the bottom-right foreground by the path.
- Take the lift up to the hall with the broken glass dome. Cut the ivy on the left wall with the DAGGERS to reveal a stone with a mask-shaped socket. The ornate gate on the left is locked.
- Go back down. Morph 24/47 is on the wooden scaffolding on the right. Smash the cracked statue with the MACE and take the STONE MASK (gargoyle head).
- Ride the lift up again: Flute 5/9 is in the pile of glass and rubble in the centre, Morph 25/47 at the upper right. Zoom into the broken dome to drop into the Stabilizer room below.
- Stabilizer room: the device on the lectern runs on an artifact, and its book pages are blackened with charcoal. New task: Bear gum. Flute 6/9 is on the left side of the room.
Mask Wall Glyphs
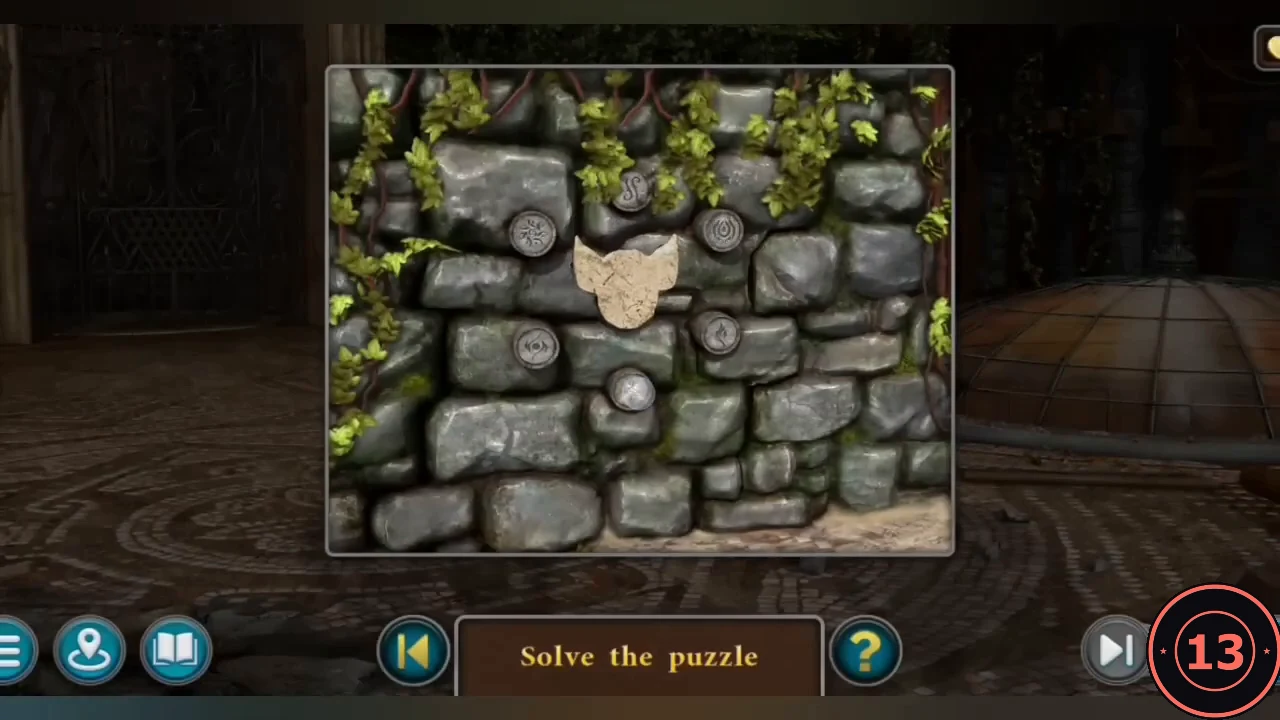
Place the STONE MASK in the socket on the ivy wall of the upper hall. Six glyph stones surround it. The clue is the arrow diagram on the right page of the Stabilizer book, starting at 1 on the upper right.
- Press the glyphs in this order: upper right (drop/ring), bottom (swirl), upper left (sun), top (S-shape), right middle (flame), left middle (eye). The wall slides open.CODEUpper right – Bottom – Upper left – Top – Right middle – Left middle
- Hidden niche: read Grilur's note on the table and take the ANTIDOTE RECIPE. New task: Grilur's underground business. Take the STORAGE KEY from the table.
Storage Door Memory Tiles
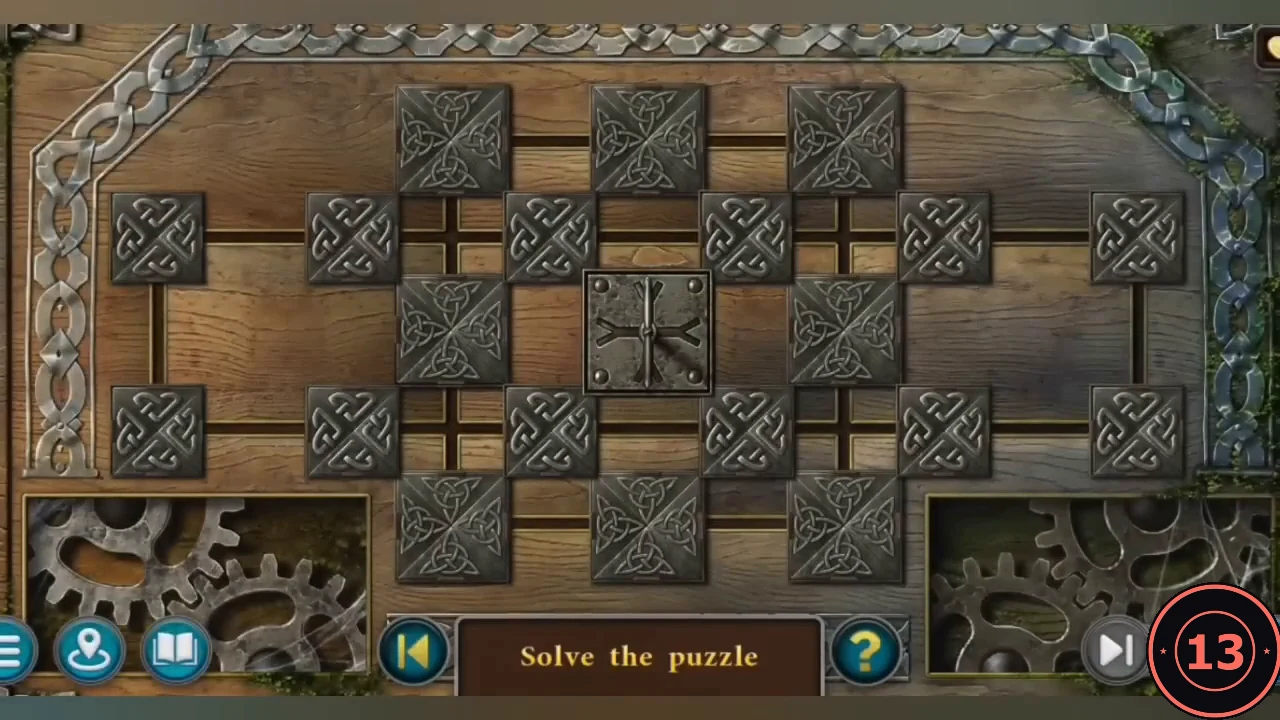
Go back down by the lift and use the STORAGE KEY on the storage door to the right of the lift.
- The board is a cross of tracks around a central star. Tap tiles to flip them and reveal tool symbols (hammers, axes, pickaxes, daggers, maces, shields, sacks, barrels, chests, anvils). Matching pairs stay face up; tiles shift along the tracks between turns. Continue until every tile is face up to earn the achievement Virtuoso.
Storage Room: Antidote Components
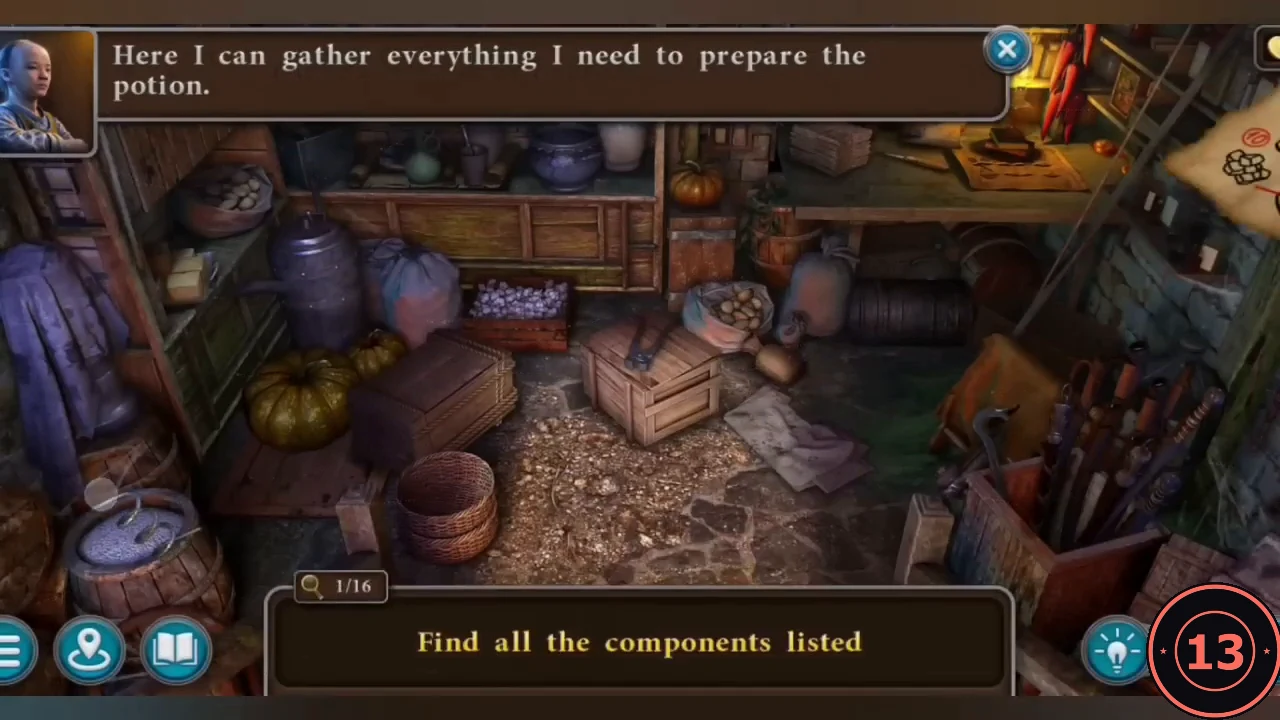
Inside the storage room, first place the ANTIDOTE RECIPE on the holder on the right side of the room ("Here I can gather everything I need to prepare the potion"). Then find all 16 components listed.
- Interactive spots: the cupboard at the upper left is nailed shut ("The cabinet doors are nailed shut"); tap the PINCERS lying on top of the small crate in the centre and they pull the nails, then open the cupboard and move the tin on its shelf to reveal a bottle. Open the garlic crate. The floor hatch at the front left has no handle ("I need something to pry it open"); tap the curved CROWBAR standing in the tool box at the lower right and it pries the hatch open. In the lamp-lit shelf close-up cut a gourd slice with the knife and collect the chilli string, berries and moth frame. The last component lies beside the tool box at the lower right. Collect the ANTIDOTE KIT.
Brewing the Antidote
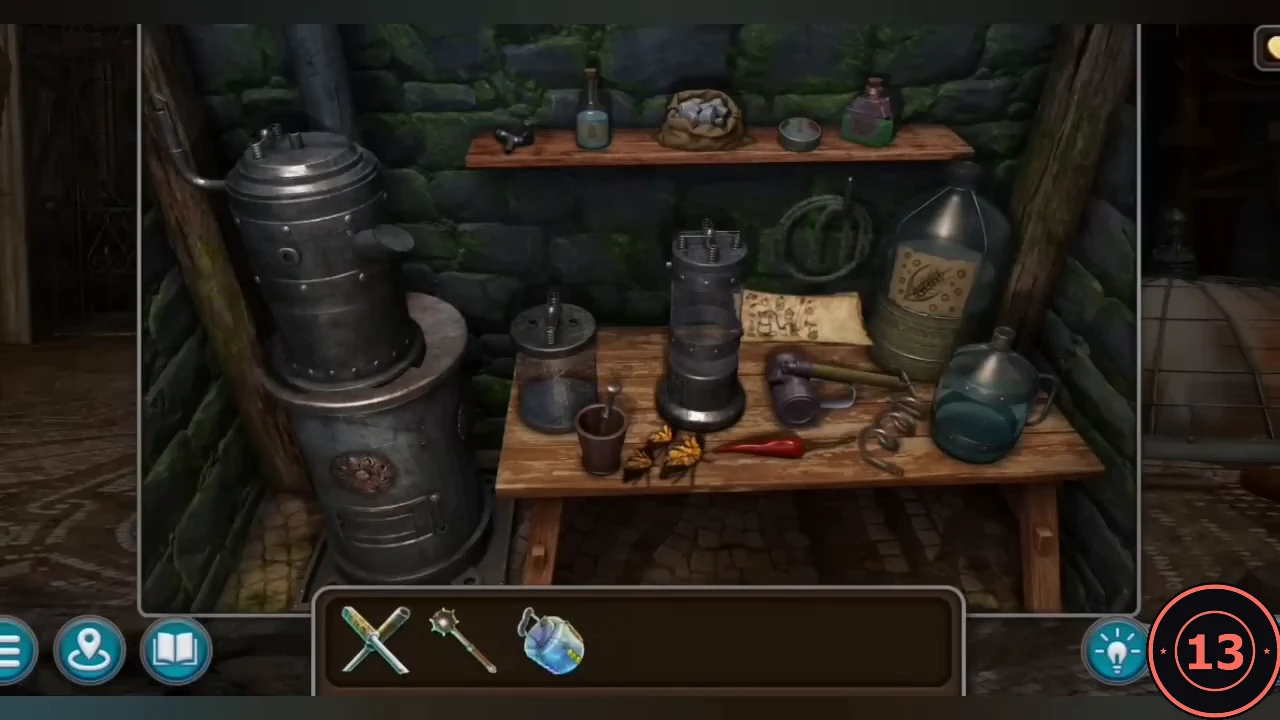
Place the ANTIDOTE KIT on the table in the hidden stove niche. Follow the recipe exactly.
- Pour the fermented mash (wicker demijohn) into the distillation tank on the stove and fit the thermometer from the top shelf onto the tank.
- Chop the red peppers with the DAGGERS. Take the black SPIGOT from the left end of the top shelf and fit it to the side of the tall cooling flask (the glass column on the table). Open the lid of the cooling flask and fill it from the blue water pitcher.
- Put the swamp moths and chopped pepper in the mortar ("I need to grind certain ingredients"), grind them with the pestle and pour the mixture into the funnel on the side of the distillation tank on the stove.
- Open the stove firebox, add the dry alcohol from the bag on the top shelf and pour the reagent bottle on it to light the fire. Connect the tubes from the tank through the steam trap to the cooling flask. Take the SPRAYER from the table and place it under the spigot of the cooling flask, then pour the green toad-slime bottle into the sprayer. Take the ANTIDOTE (the filled sprayer).
- Examining the ANTIDOTE shows that it still lacks one component.
Grilur's Key and the Hunting Lantern
Rikahiro returns to the farmyard, where Grilur is locked in the house.
- Farmyard: Grilur talks through the barred window and gives you GRILUR'S KEY. New task: Antidote.
- Take the FILE from the big wooden chest and give it to Grilur through the barred window. The blue artifact turns out to be a HUNTING LANTERN that can track Mini by his fur. New task: Minotaur's footprints.
- Crossroads well sweep: zoom into the counterweight and use GRILUR'S KEY on its lock. The sweep swings and lowers its rope into the well. Zoom into the well: a crate lies at the bottom; hook it with the rope's hook. Go back to the counterweight and use GRILUR'S KEY on the lock again ("To keep the crane raised, it must be secured with a lock"); the sweep lifts the crate out of the well. Take the BOTTLE WITH STUPEFIER from the crate.
- Examine the ANTIDOTE sprayer in the inventory and add the BOTTLE WITH STUPEFIER to its top port to complete the ANTIDOTE.
- Visit Zair's room in the arena (the hookah tray and cabinet are there), then travel to the camp. Place the HUNTING LANTERN on the floor of the Minotaur's old cage; it collects his fur and a lock puzzle opens.
Hunting Lantern Cylinder
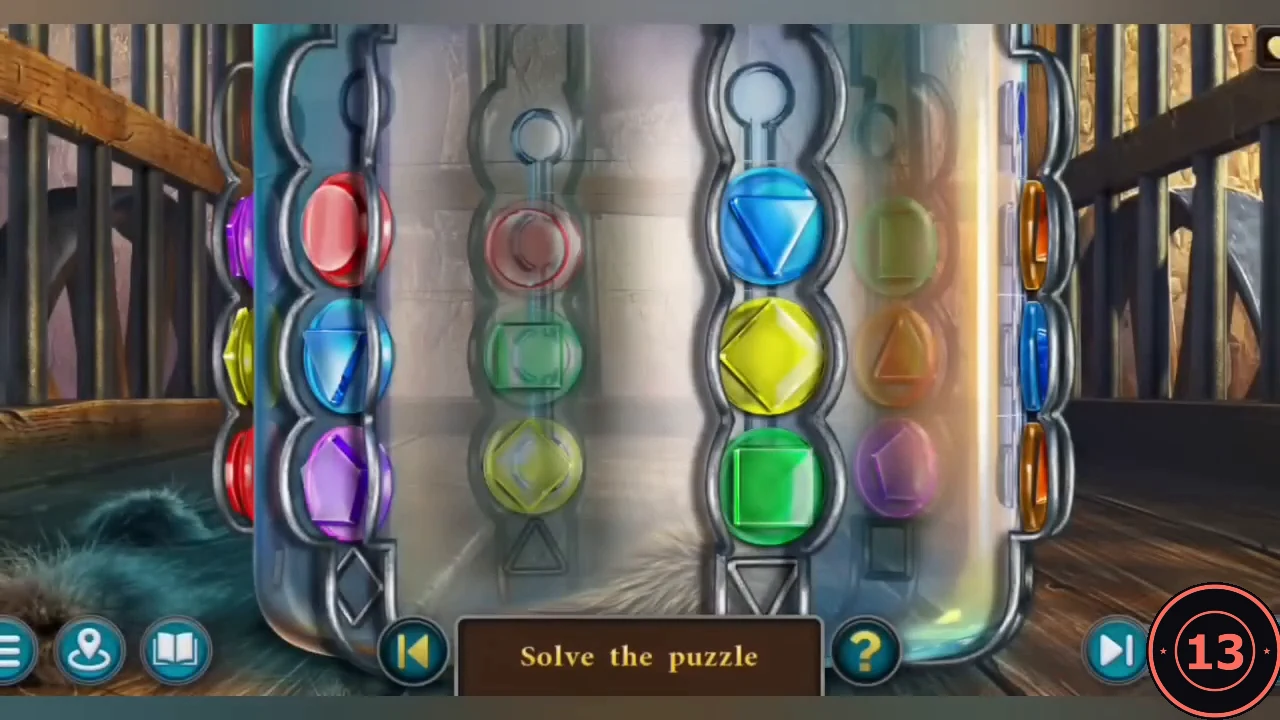
Columns of coloured gem shapes surround a rotating cylinder. Each column has outline sockets for one shape.
- Rotate the cylinder and slide gems along the columns through the open loop at the top until every column holds three gems of its own shape (red circles, teal triangles, yellow diamonds, green squares, purple pentagons, orange triangles). Take the GLOWING LANTERN.