Race Registration
New task: Race preparation.
- Talk to the curator at the registration desk on the left. You receive the DEVICE TOKEN, the RUNE STONES TOKEN, the MAGICAL MARK (the seal that unlocks the tent) and the LIST OF RUNES missing from the distributor.
- Crown 4/8 is at the top of the Registration banner pole on the left; Morph 37/47 is the weathervane on top of the tall wooden cage.
Tent Seal
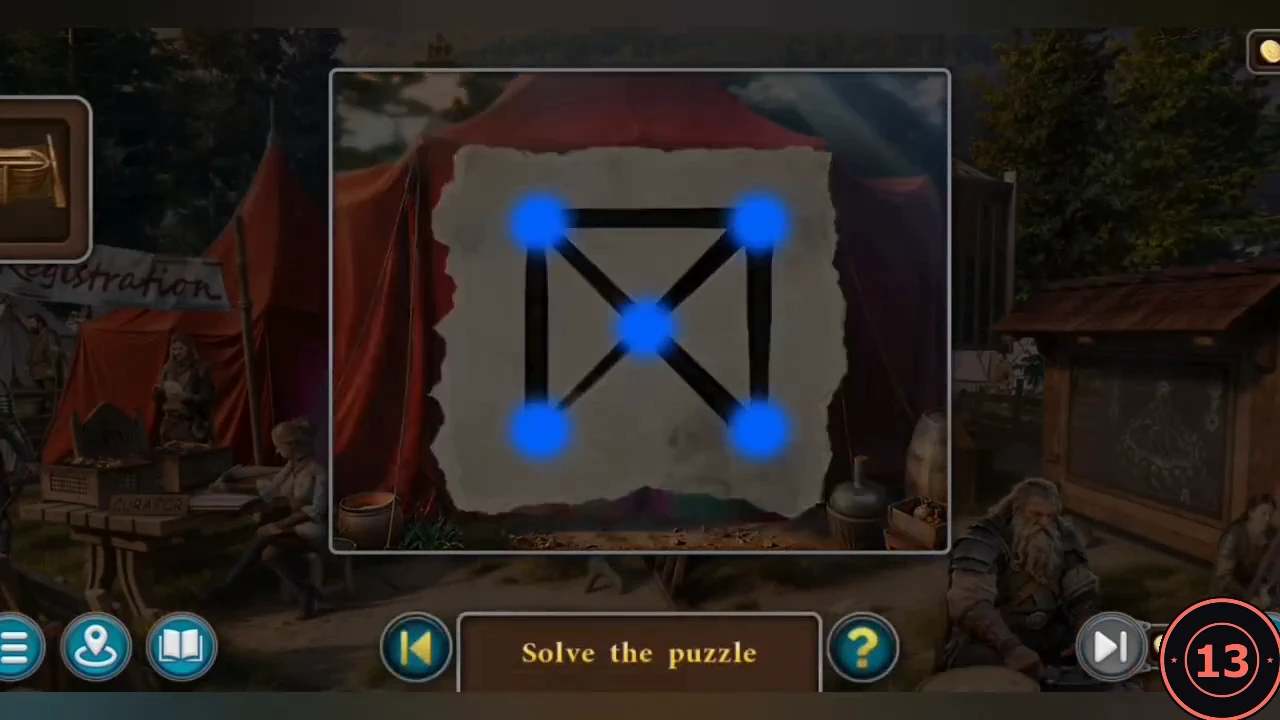
Use the MAGICAL MARK on the curtain of the red Registration tent. The seal is drawn in one stroke.
- The seal has five points: top-left, top-right, centre, bottom-left and bottom-right. Trace without lifting: top-left → bottom-left → centre → bottom-right → top-right → top-left → centre → top-right. The tent opens.
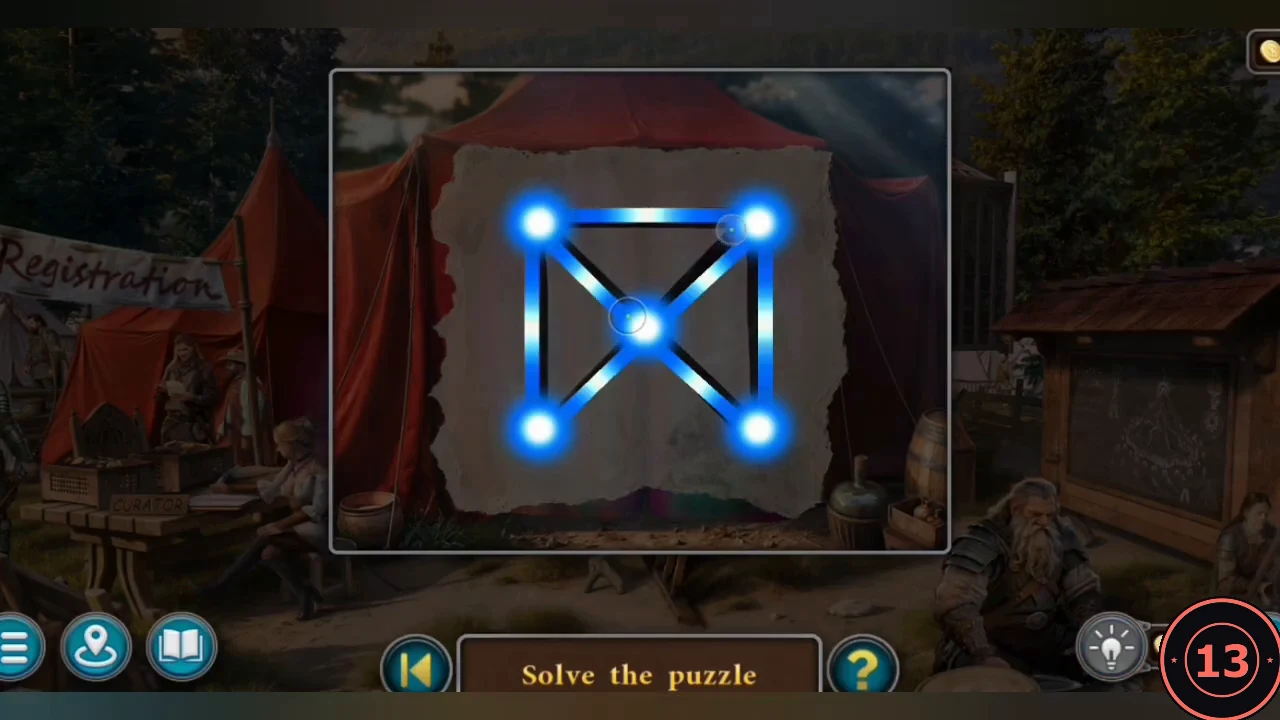
The seal drawn in one stroke.
Tent Storage: Find the Runes
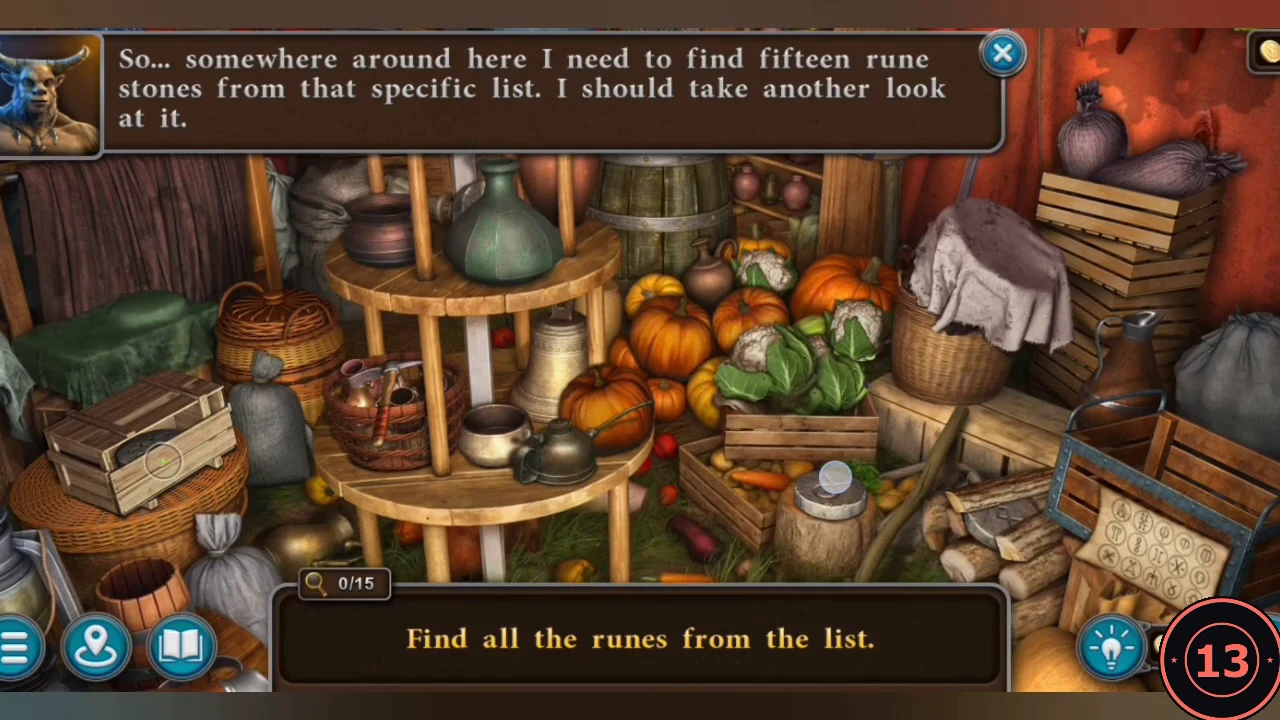
"Find all the runes from the list." Fifteen runes are hidden in the tent storage; several are behind interactive covers.
- First tap the LIST OF RUNES in your inventory to look at it: this starts the search ("Find all the runes from the list", counter 0/15 above the task bar). The scene scrolls sideways. Order in the reference playthrough: 1) on the small wooden crate at the lower left; 2) on the tree stump in the right foreground; 3) move the cabbages in the vegetable crate right of the round stand and take the rune underneath (3/15). 4) Zoom into the cloth-covered basket on the stacked crates at the right, lift the cloth and take the rune on the floor (4/15). 5) In the same close-up move the stacked crates aside and take the rune lying in the straw behind them (5/15). Back in the scene: 6) on top of the pumpkin pile; 7) by the kettle on the lowest shelf of the round stand; 8) open the lid of the crate on the left; 9) lift the green jug on the stand; 10) lift the little basket left of the stand; 11) lift the green cloth on the left crate (11/15). 12) Zoom into the lower-left alcove and open the slatted cabinet door on the left (12/15). The cabinet holds an ornate box with a chain puzzle (next section); the last three runes come after it. If a spot is unclear, the hint button (light bulb, lower right) shows a remaining rune.
Ornate Box: Chain
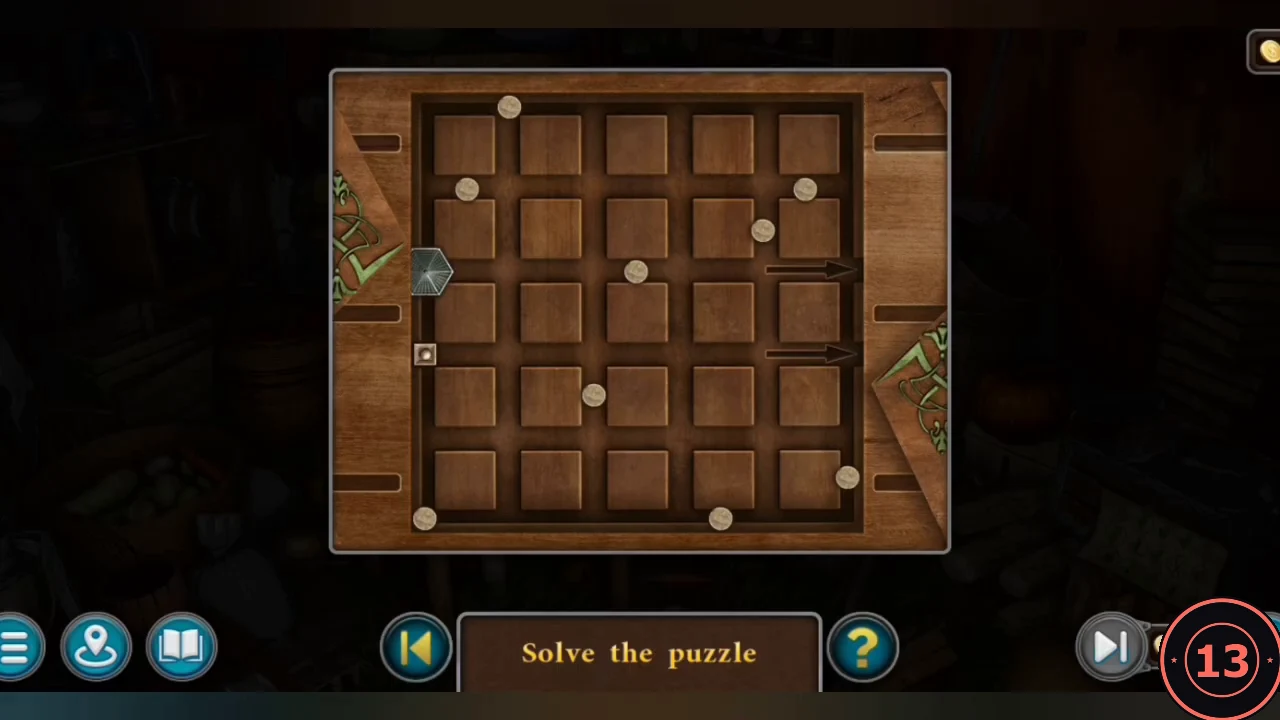
Open the ornate box found in a compartment of the tent storage. "Stretch the chain to the other end of the board, collecting all the circles along the way." Two chains start on the left edge; the lower chain mirrors every move of the upper one.
- Number columns 1-6 from the left and rows 1-6 from the top; the upper chain starts at column 1, row 3. Drag it: right to column 2; up to row 2; left to column 1; up to row 1; right to column 3; down to row 3; right to column 4; up to row 1; right to column 6; down to row 2; left to column 5; down to row 3; right to column 6 and out through the exit. The lower chain mirrors this through rows 4-6 and all nine circles are collected.
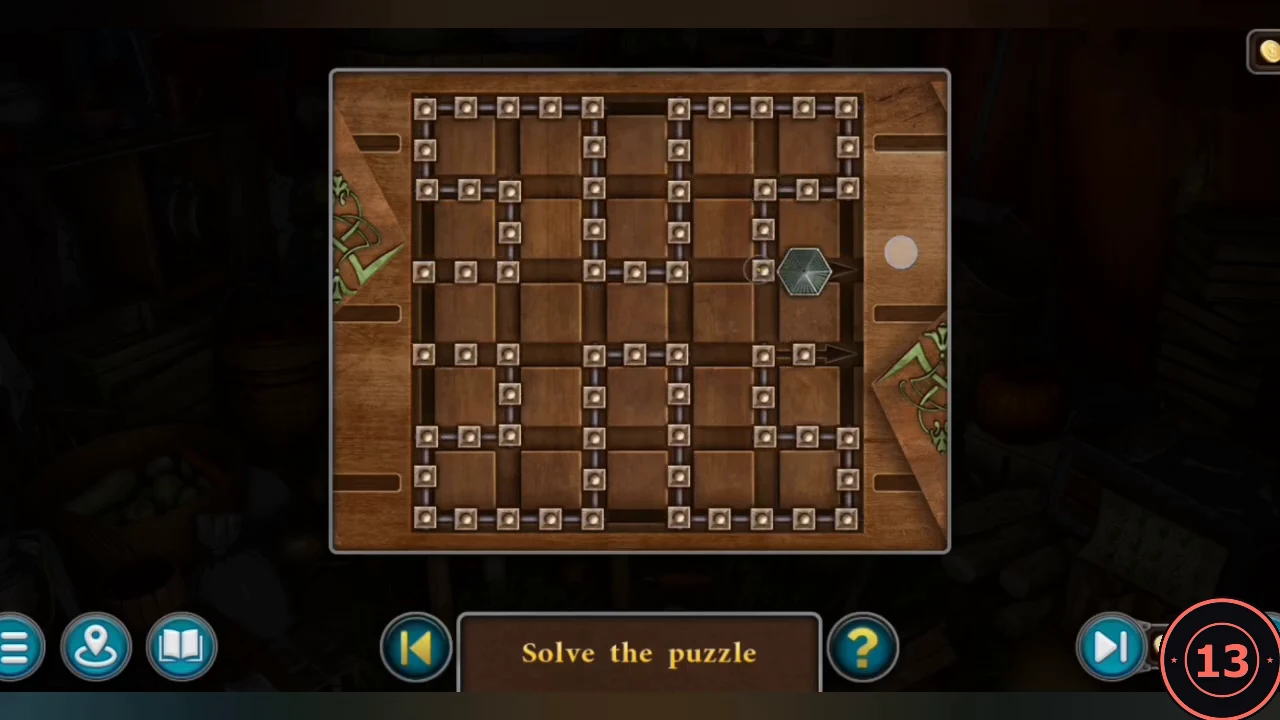
Just before the final move: every circle is collected and the head sits beside the exit. One more move to the right pulls the chain out and the board flashes gold. - After the chain puzzle, take the rune from the box compartment, then open the chest on the shelf by the pots in stages and take the last two runes. You receive the RUNES.
Wheel of Fortune and the Dolmen
With the runes delivered, the race organiser explains the rules at the chalkboard.
- Put the RUNES into the tall wooden distributor cage.
- Wheel booth: insert the RUNE STONES TOKEN and spin to win a RUNESTONE; insert the DEVICE TOKEN and spin to win… a PAINTBRUSH.
- Put the RUNESTONE into the round socket on the right stone of the dolmen. A portal opens. New task: Needle in a haystack.
Needle in a Haystack
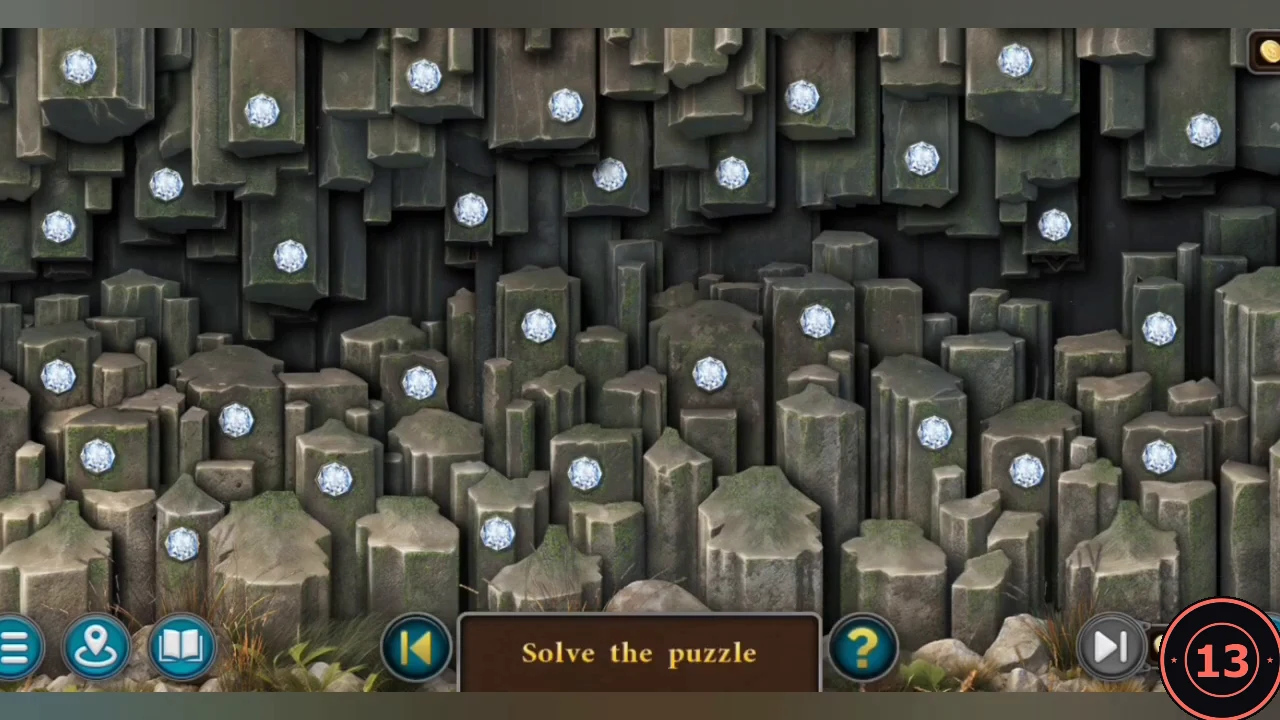
Basalt columns each carry a white gem. No rules are shown.
- This is a memory game. Tap a gem to reveal the rune on its column; when you reveal two identical runes they stay uncovered. Remember each rune's position and match every pair. The columns sink when the pairs are complete (one gem stayed covered in the reference playthrough). The layout may differ in your game.
The Chamber of Eyes
The rock closes behind you. The door reads "The door will open when both eyes see each other". The room is dark; two ceiling spotlights are aimed with valves on the left and right wall mounts (one valve per mount). You can only work in lit areas.
- Take the VALVE from the floor in front of the door. Put it on the right wall mount and turn it: a spotlight swings ("The valve changed the sphere's position! So that's how it works!"). Leave this valve on the right mount. Zoom into the left wall mount and take the RUSTY VALVE stuck there.
- In the lit left alcove take the FLAME BLOCK from the top of the brass block stack under the stone water tank. Zoom into the floor recess in the centre: it has a square slot with a special mark, and a yellow oily puddle lies at its top right ("Smells like some kind of flammable oily substance"). Dip the RUSTY VALVE into the puddle to oil it, then put it on the left wall mount. From now on turn the valve on either mount to aim that mount's spotlight wherever you need light.
- Turn a valve so a spotlight lights the root pillar at the back right. Take the SUN BLOCK from the small panel; the pillar has blockers in the way. Put the SUN BLOCK into the square slot in the floor recess; the floor opens onto a shape recess. Take the WATER BLOCK lying on it.
Shape Recess
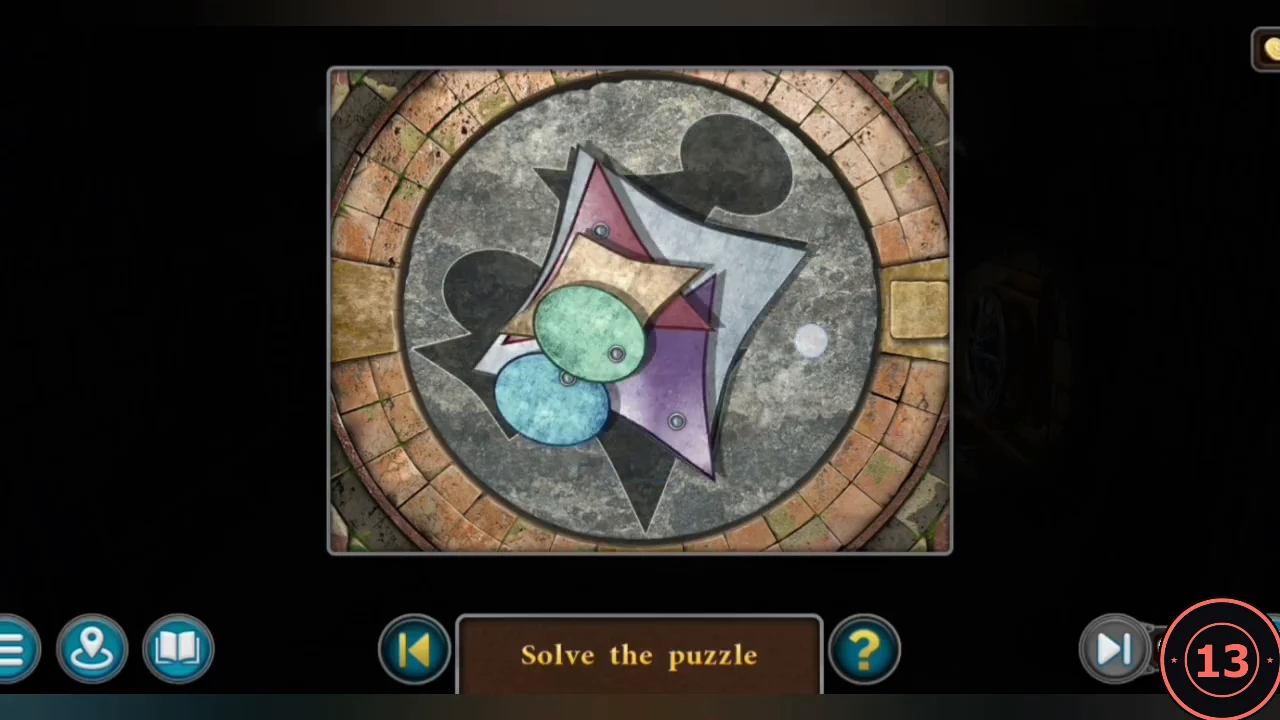
"Rotate the shapes so that they fill the recess."
- Each shape (purple triangle, white square, blue oval, green oval, beige kite, red triangle) turns around its own pin. Rotate them until together they fill the dark cut-out exactly. Compare with the solved image.
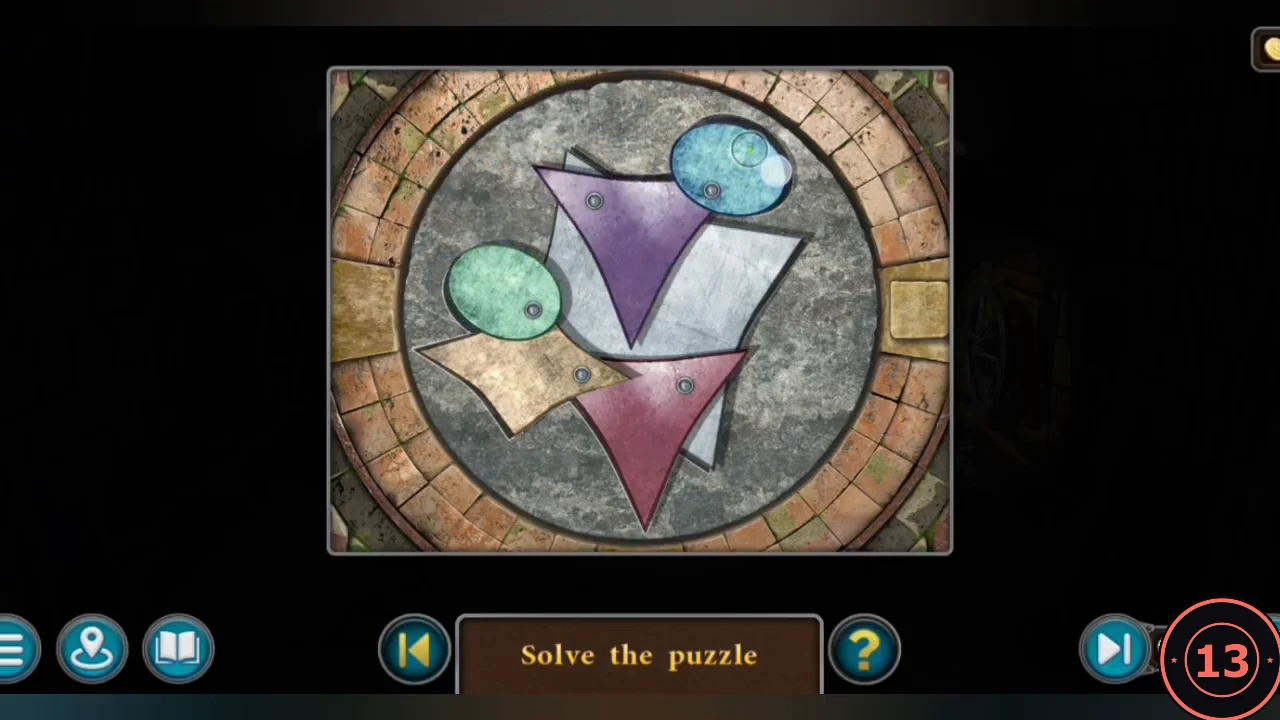
The solved arrangement.
Root Pillar Rings
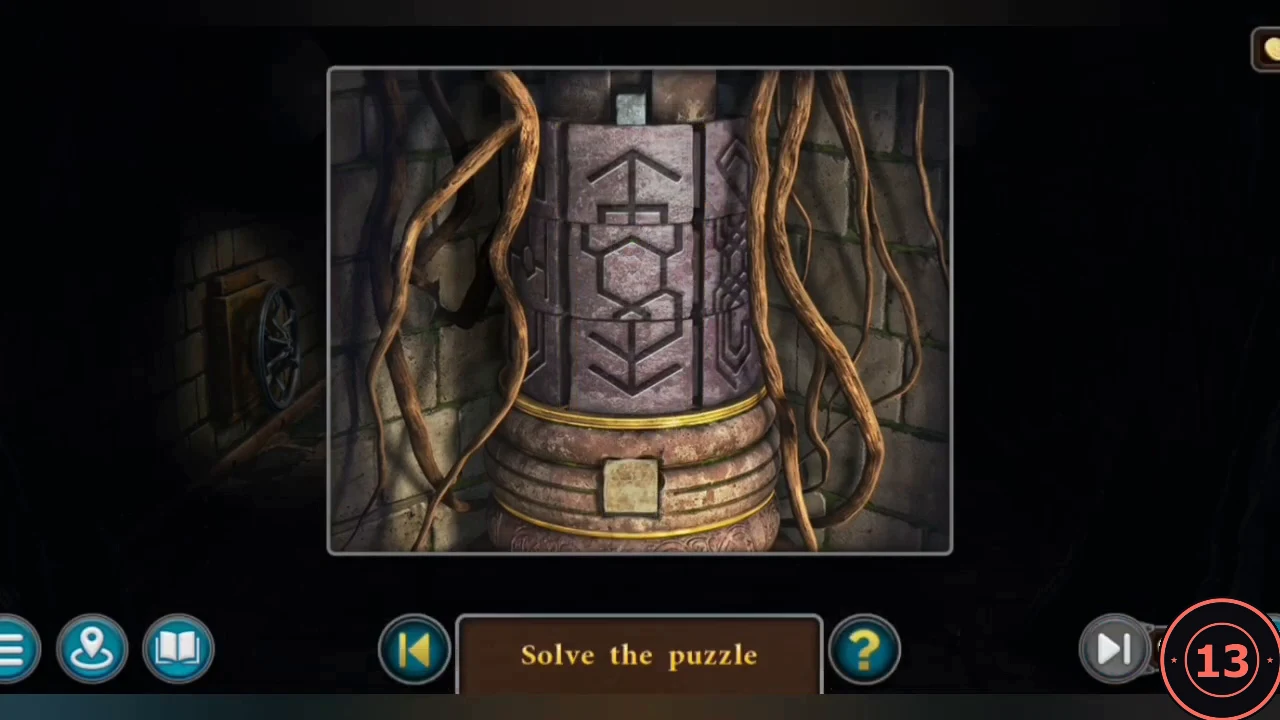
Light the root pillar again and put the FLAME BLOCK into the slot at its base.
- Insert the FLAME BLOCK at the pillar base.
- Rotate the three stacked rings until their front faces form one continuous interlaced knot, the emblem of the Flame block. Rocks fall into the base and something clicks elsewhere.
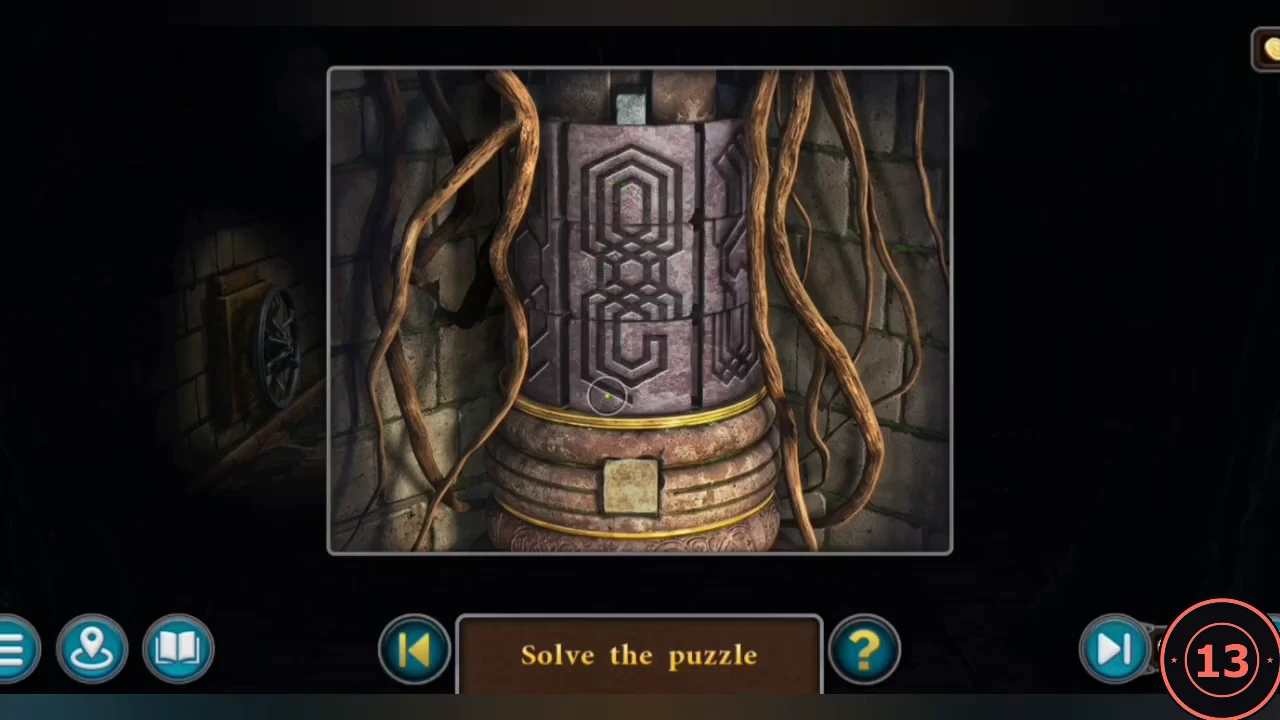
Solved: the knot runs unbroken through all three rings.
Water Tank Picture
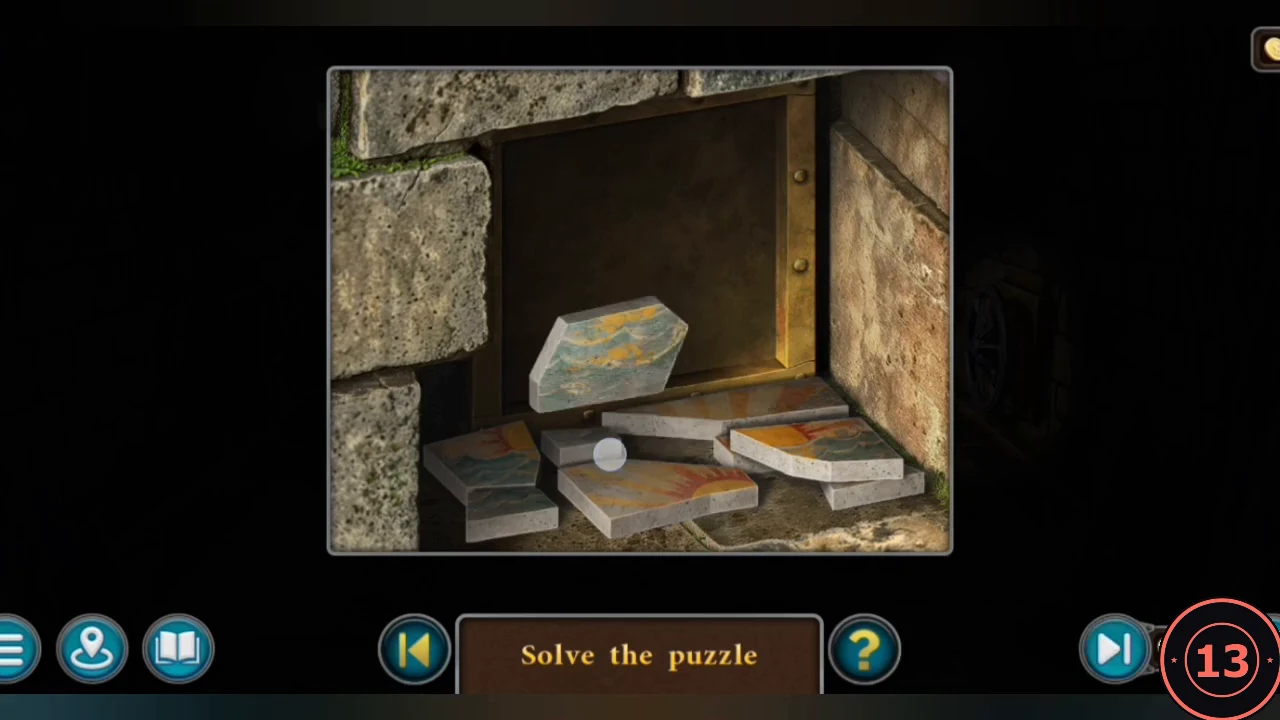
Light the left alcove again.
- Put the WATER BLOCK into the empty slot of the block stack; the locks of the water tank open and a wall slab falls. Take GREEN STONE DISC 1/10.
- In the opened niche, place and rotate the loose painted slabs in the frame until they form a picture of the sun over the sea. Water gushes from the tank and floods the floor recess ("Phew... That's all?"). Now turn the valve on the right mount and then the one on the left mount so that both spotlights point down at the water: their reflections meet and a glowing eye appears ("Looks like it worked! The eyes saw each other through the water's reflection!"). Tap the eye on the door to open its mechanism (next section).
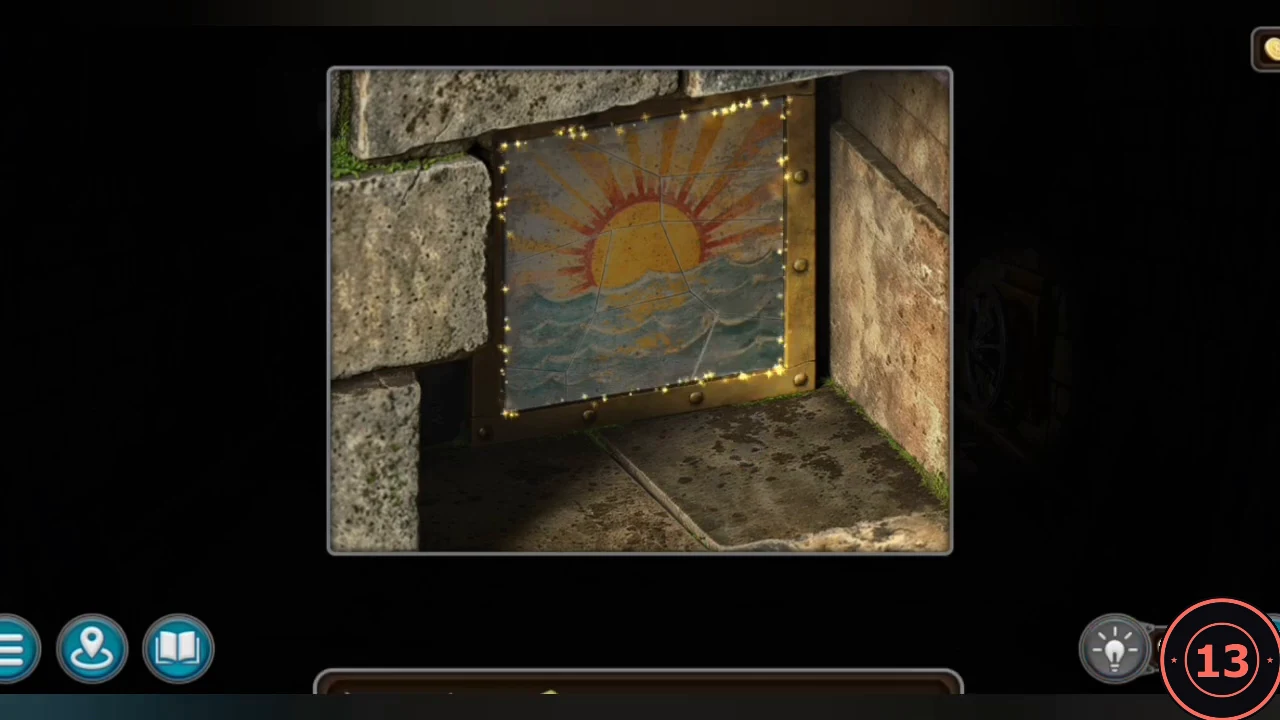
The finished picture: the sun over the sea.
Door Mechanism: Hex Chips
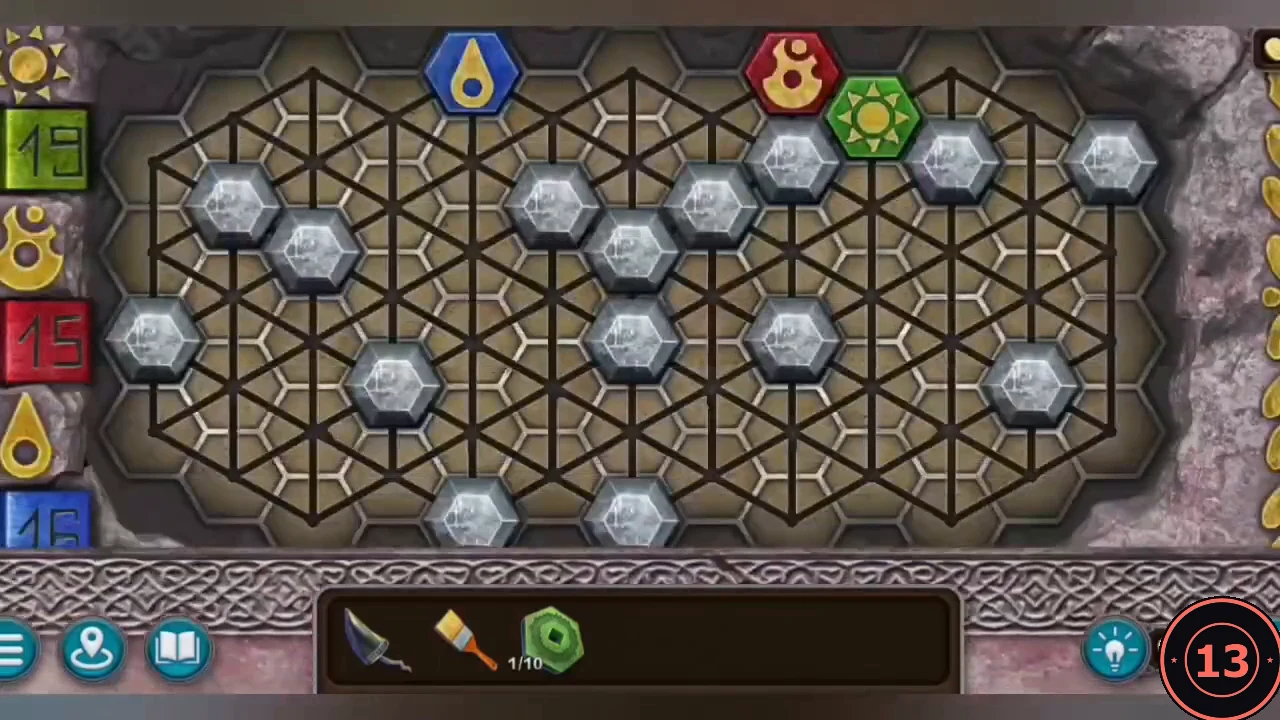
"Fill the entire board by placing the required number of chips of each type. Chips can only move until they hit an obstacle."
- The board starts with three coloured chips on it: BLUE drop (top, left of centre), RED flame (top right) and GREEN sun (just below and right of the red chip); grey stone blocks are obstacles. The counters on the left show how many cells each colour must cover (green 19, red 15, blue 16): these are the cells each chip must still colour, not counting the cell it starts on. Tap a coloured chip, then tap one of the highlighted end cells: the chip slides in a straight line (up, down or one of the four diagonals) until it hits the board edge, a stone or a coloured cell, and leaves its colour on every cell it crosses. The next move starts from where the chip stopped. Directions are as seen on screen. RED: 1. down-left, 2. up, 3. down-left, 4. down, 5. up-right, 6. down-right, 7. down-left, 8. down-right, 9. up. GREEN: 1. up-right, 2. down-right, 3. down, 4. up-right, 5. down, 6. down-left, 7. up-left, 8. up-right, 9. up-left, 10. up-right, 11. up, 12. down-left, 13. up, 14. down-left, 15. down. BLUE: 1. down-left, 2. up, 3. down-left, 4. down, 5. down-right, 6. down-left, 7. down-right, 8. up, 9. down-right, 10. up-right, 11. down-right. Every cell is now coloured and the door opens.
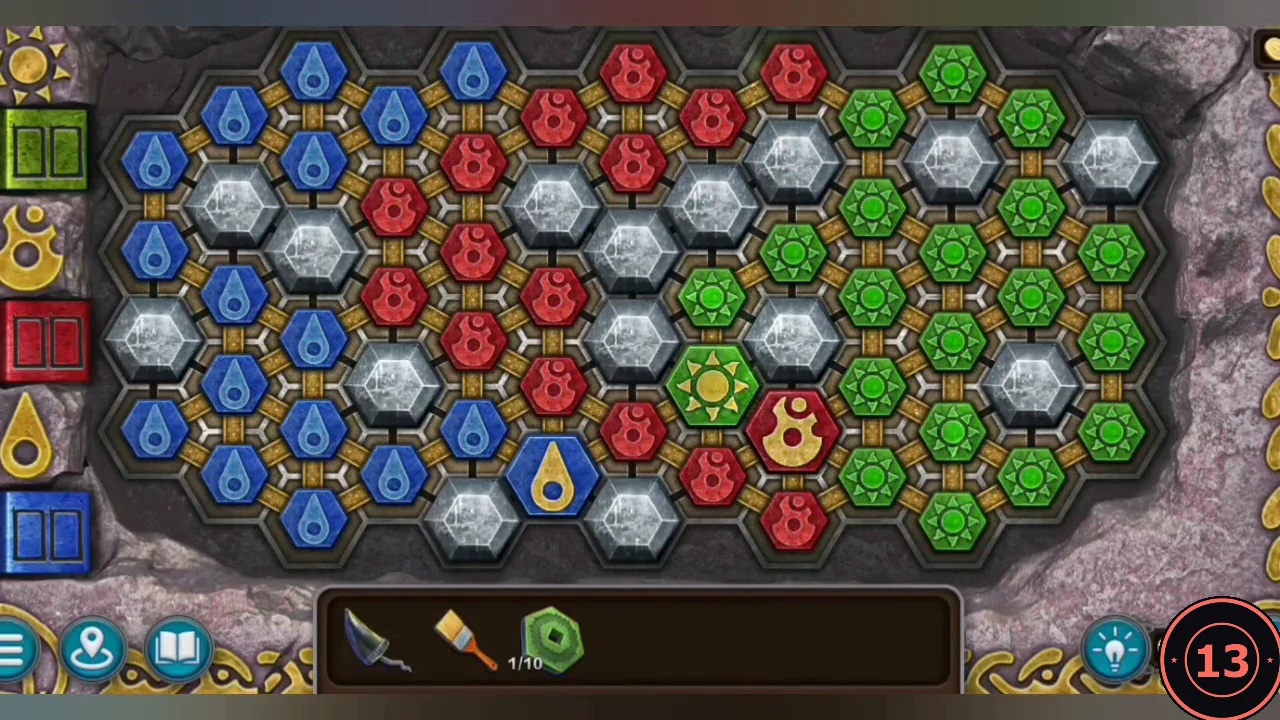
Every cell coloured: the door opens.
The Temple of Three Statues
Three seated statues stand around a floor triangle with a fourth pedestal in the centre: the Warrior (left), the Sage (back right) and the Maiden (front right). A rival rushes past. The tablet on the left reads: "The Maiden has her own but desires another's. The Warrior has another's but desires his own. The Sage has nothing and desires nothing." Their forehead marks: Sage = fire, Warrior = earth, Maiden = water.
- Take the SPEAR from behind the Warrior's shoulder. From the pedestal with the triangle slot (near the Warrior) take the RED STONE DISC and the SOLID BOWL; from the round-hole pedestal (near the Sage) the LEAKY BOWL; from the square-hole pedestal (near the Maiden) the FORGED BOWL. Take GREEN STONE DISC 2/10 from the Maiden's forehead. Morph 38/47 is the book on the left by the tablet steps; Crown 5/8 is at the left edge.
- Return to the chamber of eyes, which has drained. Fill the SOLID BOWL in the floor pool to get a BOWL OF WATER. Morph 39/47 is in the upper-left wall arch. In the rear alcove fill the FORGED BOWL with coals under the roots (BOWL WITH COALS). Ship 2/7 is on the right floor by the valve; GREEN STONE DISC 3/10 lies in front of the arch.
- Temple: hit the cracked top-left corner of the tablet with the SPEAR; sand pours out. A green disc is visible in the cavity but out of reach for now. Scoop the sand with the LEAKY BOWL (BOWL OF SAND).
- Put the BOWL OF WATER on the triangle-slot pedestal and the BOWL OF SAND on the round-hole pedestal; the statues' gaze beams activate. The BOWL WITH COALS will not ignite on the square-hole pedestal, so take it back, dip it in the yellow oily puddle beside the floor pool in the chamber of eyes (BOWL WITH SOAKED COALS) and place it on the square-hole pedestal again. Then tap the lit candle standing beside that pedestal to hold it to the coals: they ignite. All statues are active ("Perfect! All the statues are active!").
Statue Gazes
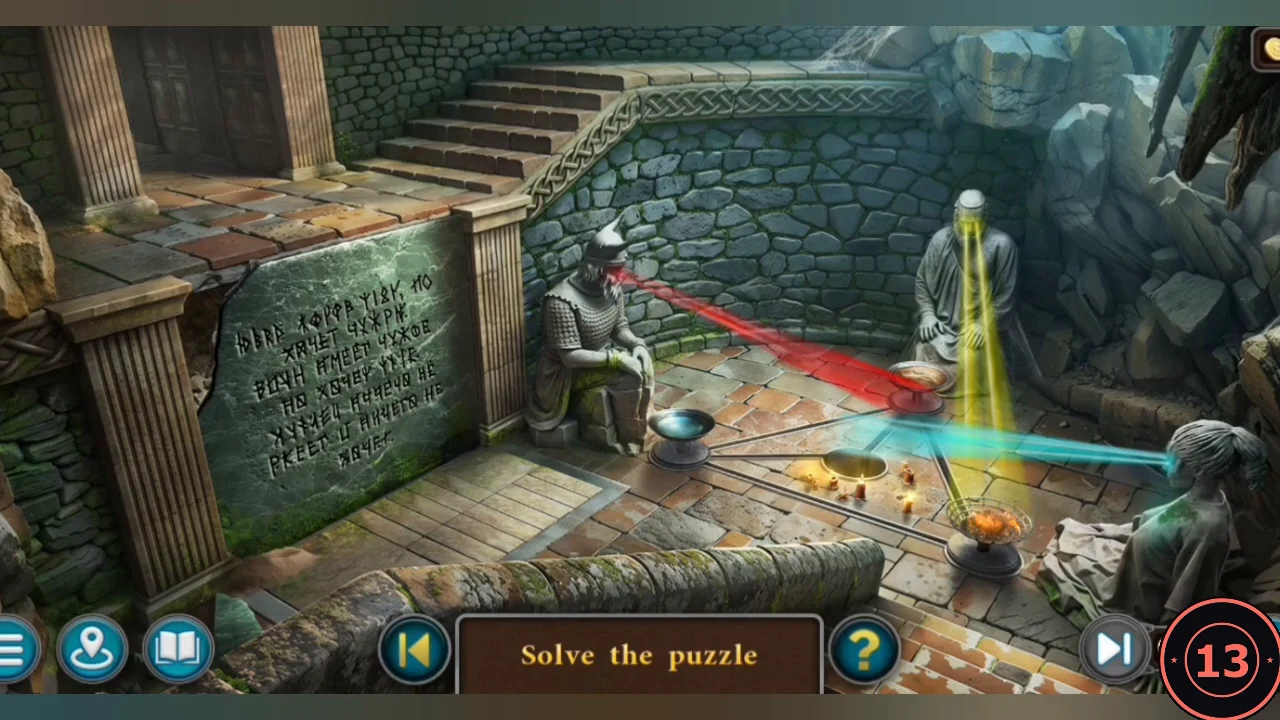
Tap a statue to turn its gaze and move bowls between the four pedestals. Arrange them as the riddle says.
- Final arrangement: the FIRE bowl on the pedestal in front of the Warrior, the WATER bowl on the pedestal in front of the Maiden, the SAND bowl on the centre pedestal and the Sage's pedestal empty. Turn the Maiden's gaze onto the fire bowl, the Warrior's gaze onto the sand bowl in the centre, and the Sage's gaze straight up. (The Maiden has water but desires fire; the Warrior has fire but desires earth; the Sage has nothing and desires nothing.)
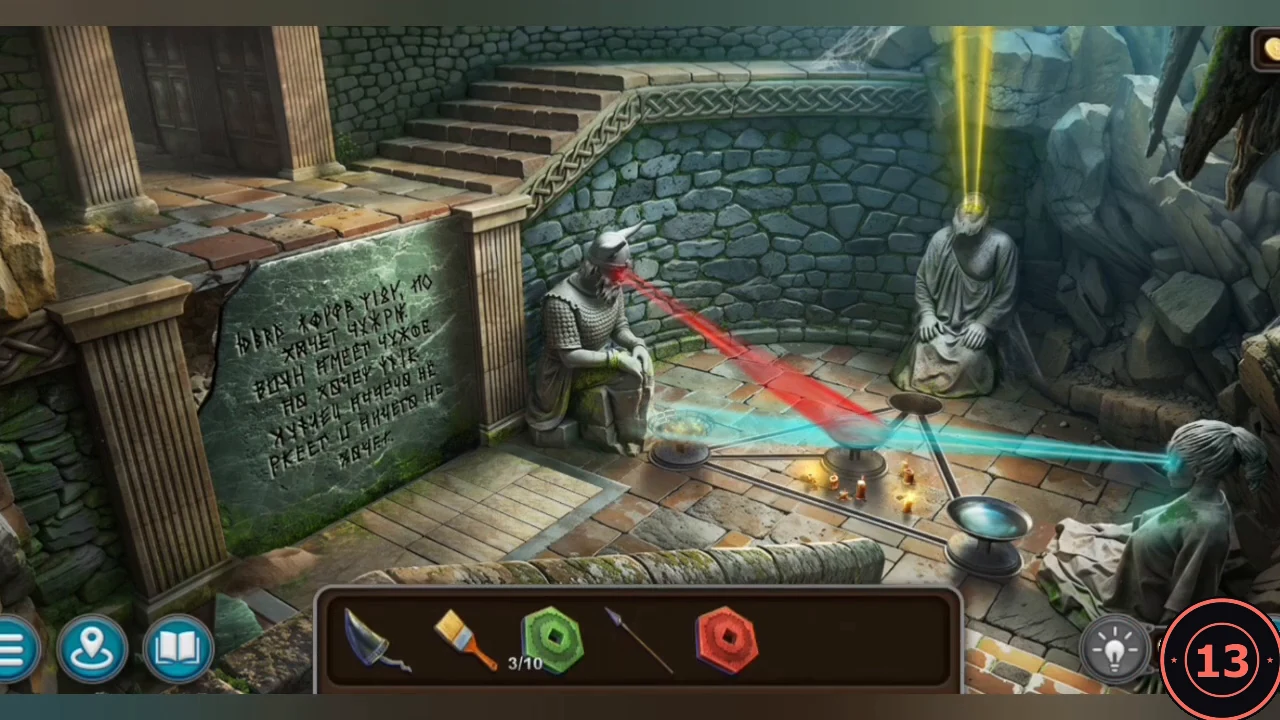
The final arrangement of bowls and gazes.