CHAPTER 3 · PUZZLE
Pirate Skeleton Hexagons
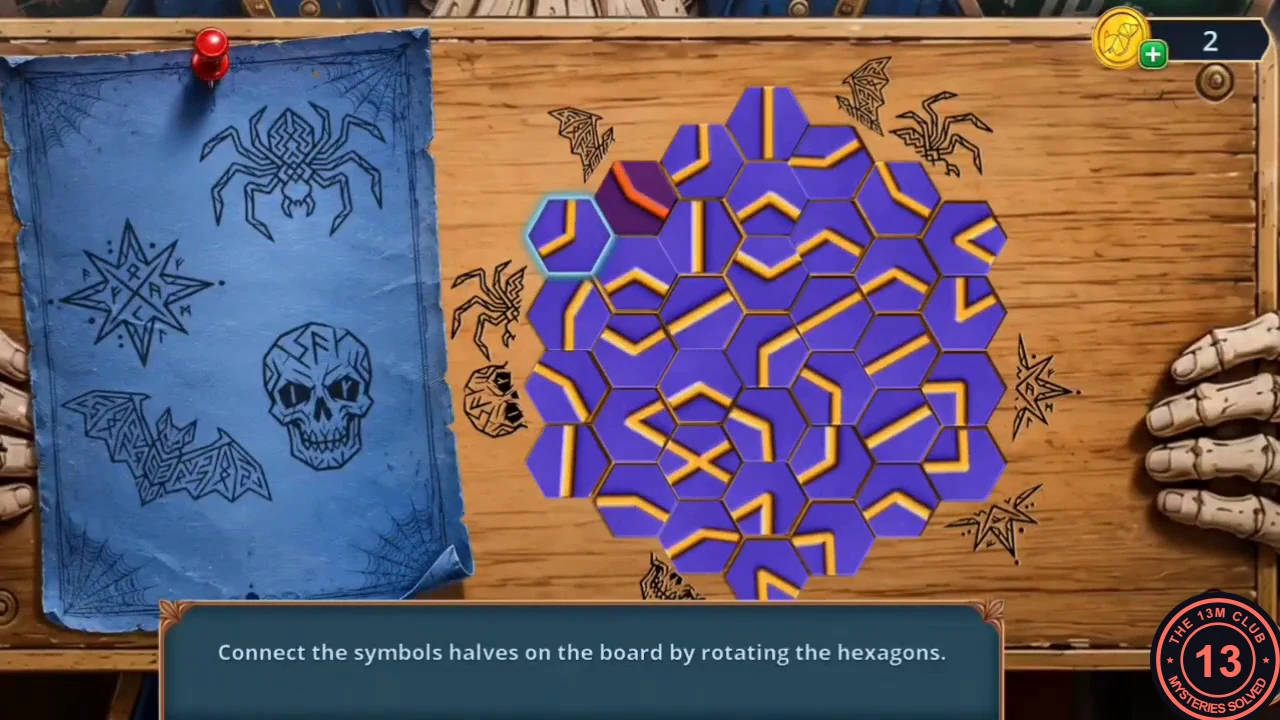
The plush creature and the pirate standee in the dormitory foyer hold the next clues.
- In the foyer, put the Toy Heart into the plush creature's chest and sew it up with the Thread and Needle. Take the Doubloon Coin.
- Put the Doubloon Coin into the pirate skeleton's empty eye socket. The board it holds opens a puzzle: "Connect the symbols halves on the board by rotating the hexagons." Tap a hexagon to rotate it. Half-symbols (spider, bat, skull, star) sit around the edge; a path lights red when it joins two halves of the same symbol. Join every pair.
- Work from the edge symbols inward and avoid turning hexagons that already carry a lit path. It takes some trial, so no fixed tap list is given. When all pairs are joined, take the Bat Amulet.
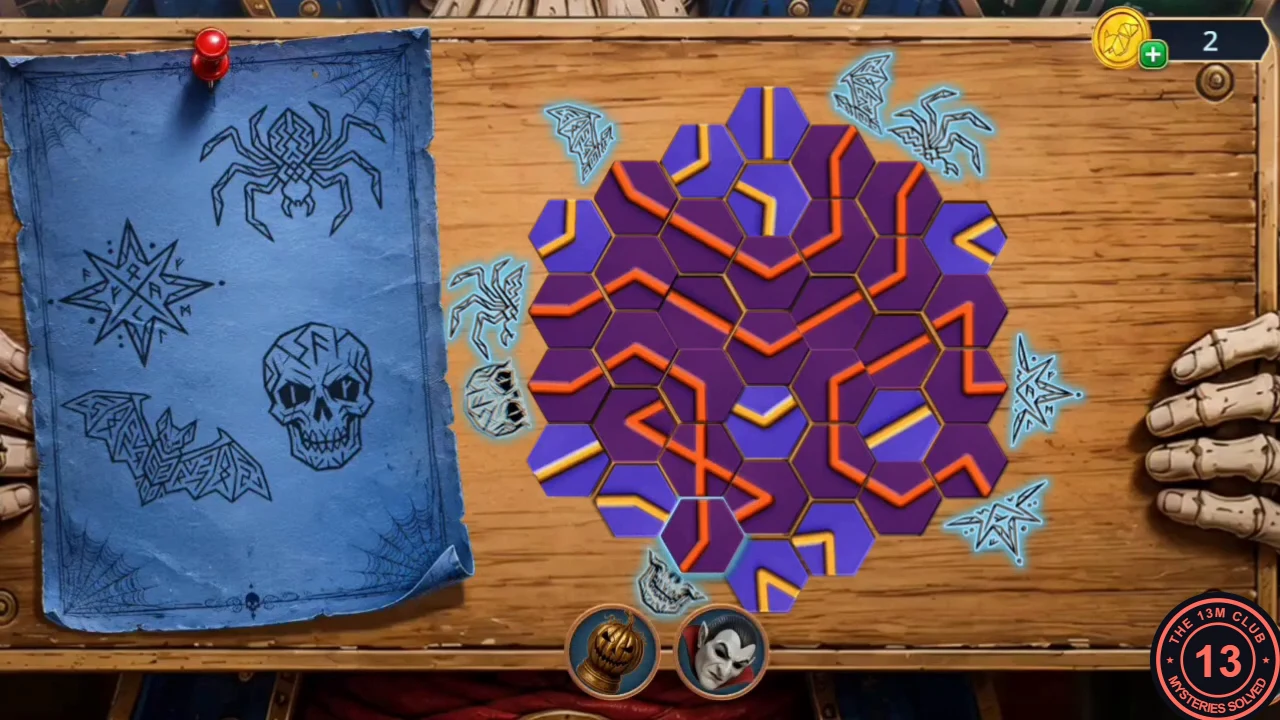
The solved board in the example game: every path is lit red and every symbol pair glows. - In the Dormitory Cafe, note that the cuckoo clock's perch is empty. Put the Bat Amulet in the bat-shaped slot of the coffee machine's lower drawer. Take the Pumpkin Keychain, the Theater Patch and the "Host" Card.
CHAPTER 3 · PUZZLE
Card Square
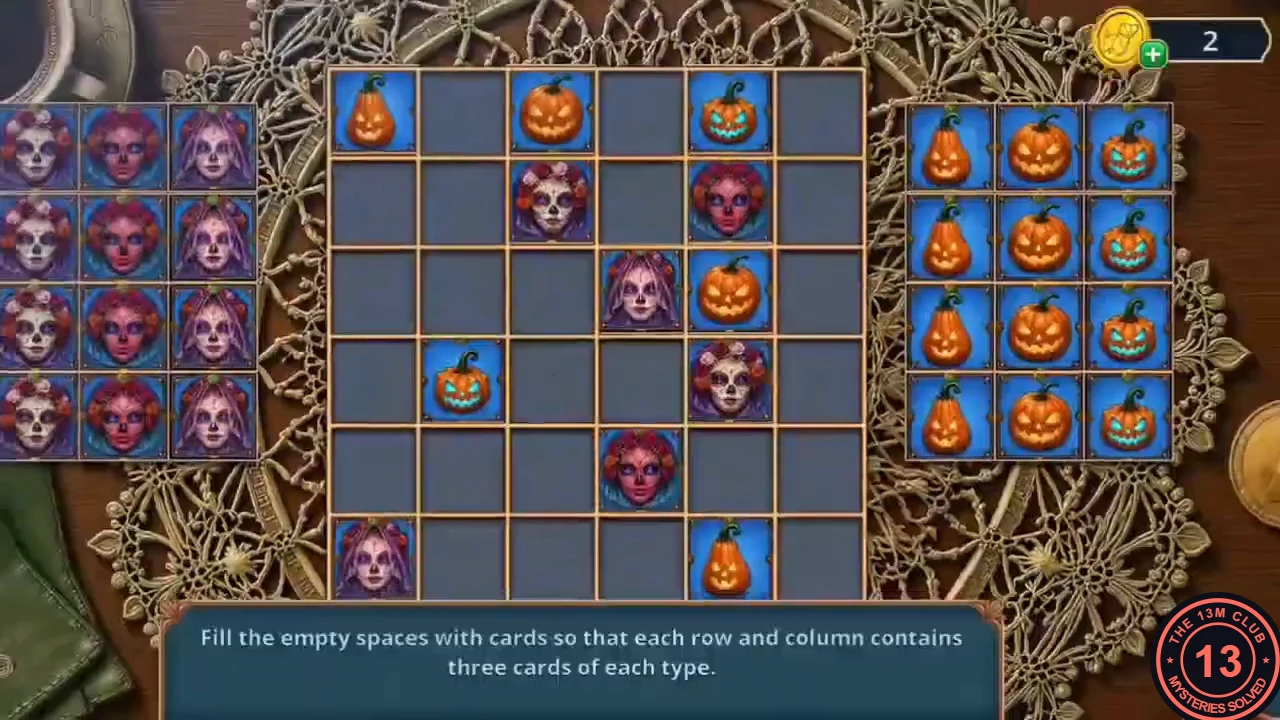
With all three cards, the card deck on the cafe table is full.
- Put the "Witness", "Bride" and "Host" Cards in the card box on the cafe table. Puzzle: "Fill the empty spaces with cards so that each row and column contains three cards of each type." The 6×6 board uses six designs, each appearing once in every row and column. In this guide they are G = tall gourd pumpkin, O = round orange pumpkin, T = pumpkin with a teal face, R = skull lady with red roses, W = white skull lady and V = skull lady with a pink veil.
- Starting board (fixed cards; dots are empty): row 1 G . O . T . / row 2 . . W . R . / row 3 . . . V O . / row 4 . T . . W . / row 5 . . . R . . / row 6 V . . . G . — Solution, rows top to bottom: 1: G R O W T V; 2: T V W O R G; 3: R W G V O T; 4: O T V G W R; 5: W G T R V O; 6: V O R T G W.
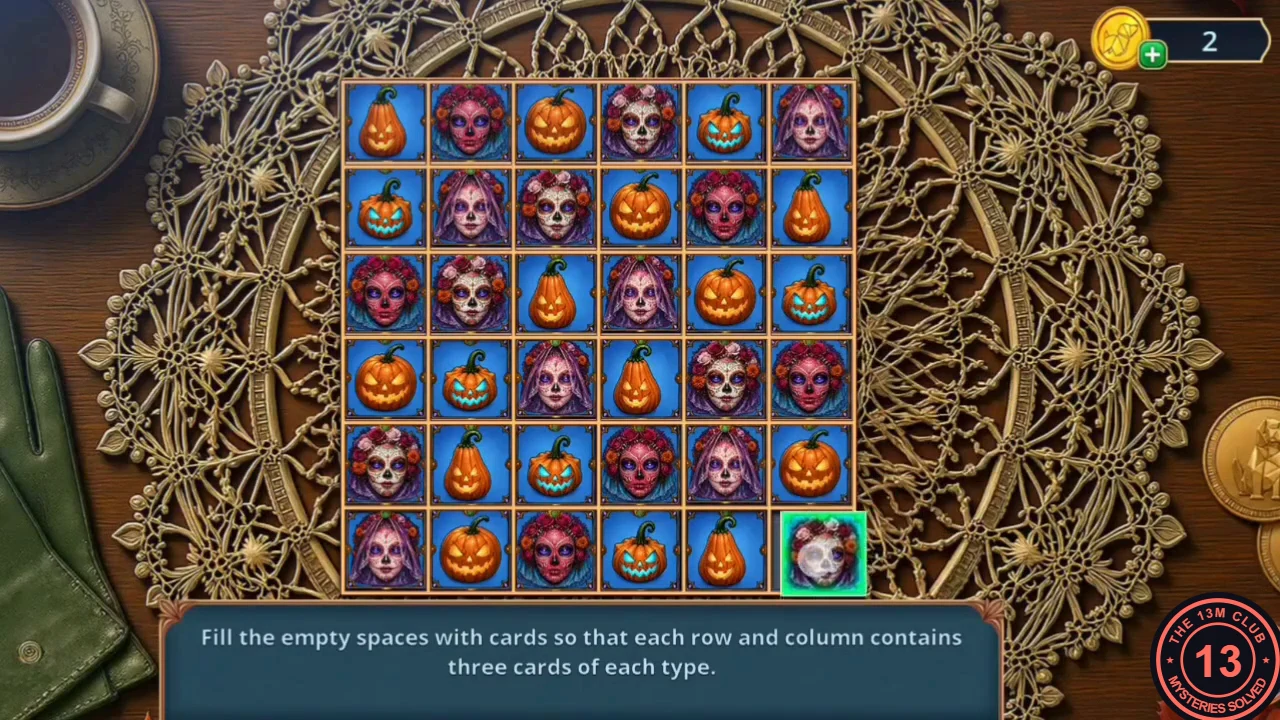
The finished square, matching the solution rows in step 2. - The box opens: take the Pumpkin Tail. In the Mask Warehouse, put the Pumpkin Tail on the lid of the jack-o'-lantern bowl by the pop-up book and take the Awl.
- Set the Awl into the crack in the wall by the HALLOWEEN poster and the mannequin, then hammer it in with the Heavy Statuette. The wall panel breaks; take the Blood (red vial).
CHAPTER 3 · HIDDEN OBJECTS
Mask Cube
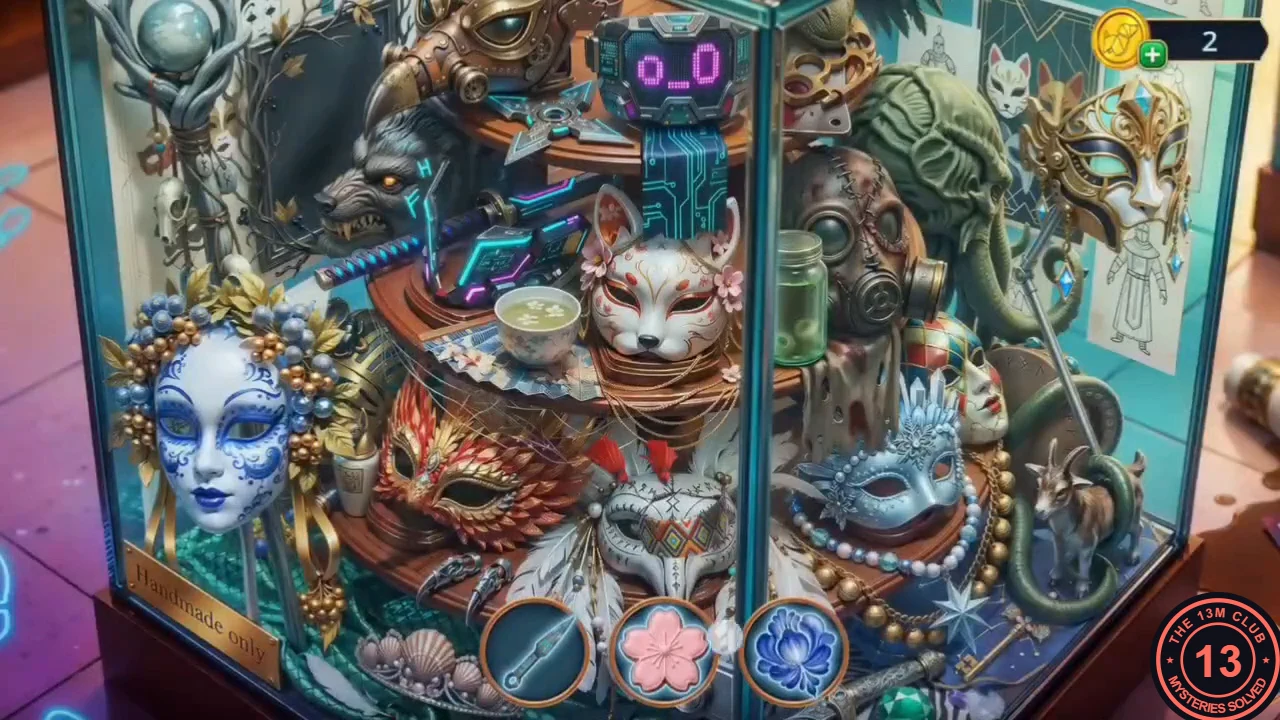
The glass cube full of masks in the shop sparkles.
- In the "Horror Shop" Costume, tap the sparkling glass cube of masks. This scene works the other way round: each icon in the bottom bar is a missing part. Drag it from the bar onto the object it completes. Tapping an incomplete object first only gives "Something is missing here." Three icons show at a time, and new ones replace those you place. The parts and their places: blue flower = forehead of the blue-and-white porcelain mask (left); bell = neck of the small goat figurine (lower right); kunai = centre ring of the throwing star on the shelf beside the robot head (top); dark grilled visor = the neon device beside the wolf's head; cherry blossom = the folded paper fan under the teacup; eyeballs = the empty green jar beside the gas mask; black feather crest = top of the white tribal mask with the red feather (centre, below the fox mask); gold beak = the red feathered mask (left of centre); wolf picture = the empty dark frame at the top left, behind the wolf's head; gold jaw piece = the gold mask at the top right; green curled tentacle = the green octopus-headed mask behind the gas mask. You receive the Friendship Bracelet.
- Tie the teal feathers on the counter flyer together with the Friendship Bracelet. Take the Feather Duster.
- In the Dormitory Cafe, dust out the coffee machine's lower drawer with the Feather Duster. Take the Science Patch.
CHAPTER 3 · HIDDEN OBJECTS
Cupcake Hunt
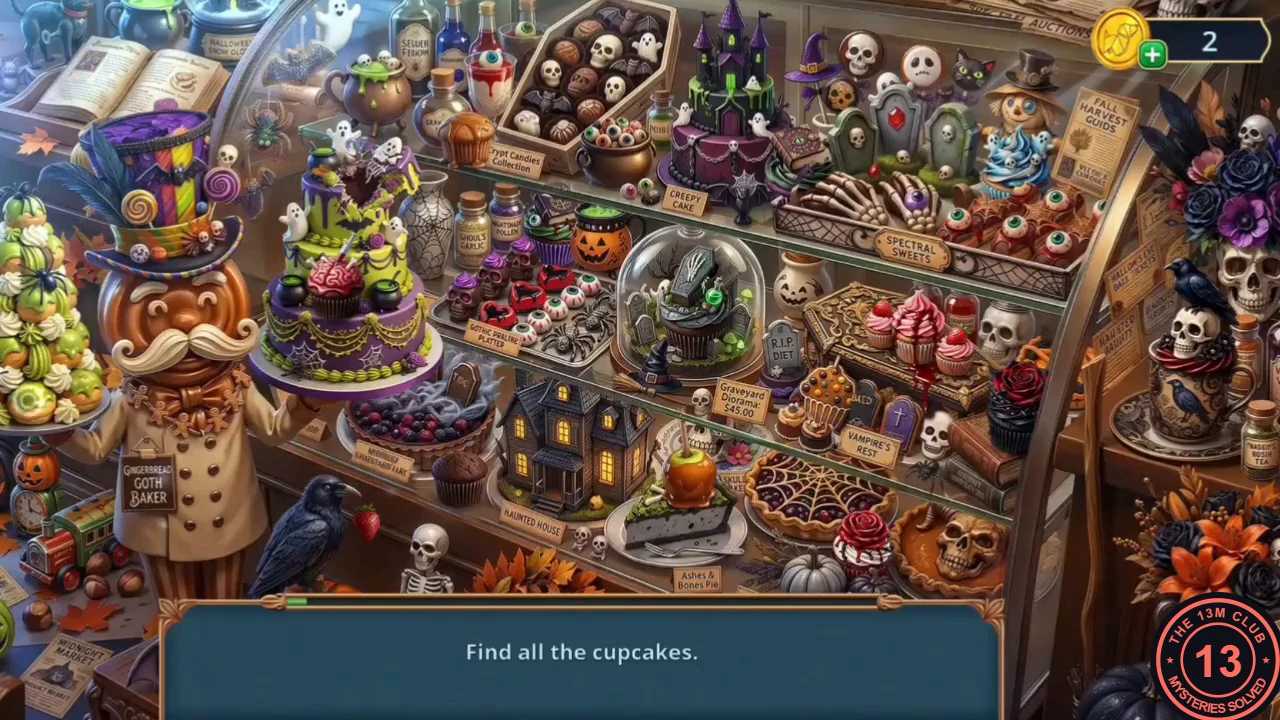
The cafe pastry case sparkles again.
- Tap the sparkling pastry case. Task: "Find all the cupcakes." The scene is wider than the screen, so drag it left and right. Most cupcakes count with a single tap, for example the brain cupcake on the green tiered cake, the cupcake beside the purple castle cake, the blue cupcake by the scarecrow, the red-velvet cupcake with a rose beside the skull pie, the black cupcake with a red rose right of the ornate coffin box and the cupcake under the glass dome. Four need a topping or a move first; while one is unfinished, tapping it only brings a remark from Casey (for example "And something small on top."). Drag the caramel apple from the cake-slice plate right of the haunted house onto the orange muffin on the top shelf, left of the coffin-shaped "Crypt Candies" box. Drag the strawberry held by the crow at the bottom left onto the centre pink cupcake on the ornate coffin tray below the "Spectral Sweets" sign. Drag the skull-and-raven topper from the raven coffee cup at the right onto the plain chocolate cupcake on the lower shelf, left of the haunted house (the caramel apple and the strawberry do not fit it). Finally drag the tall muffin with orange candies from its stand beside the "Graveyard Diorama $45.00" sign onto the front of the gingerbread baker's jacket at the left, then tap it there. Each finished cupcake then counts. You receive the Wind-up Bird.
- Put the Wind-up Bird on the empty perch of the cuckoo clock. The clock door opens: read Noah's note ("Jack said, 'Feed the diary, and it will remember everything.'") and take the Cat Food.
- In Noah's Room, put the Cat Food on the desk next to the black cat. The cat jumps down and runs under the bed; zoom in by the bed and nightstand and tap the monster-faced diary on the floor.
CHAPTER 3 · PUZZLE
The Bride's Journal
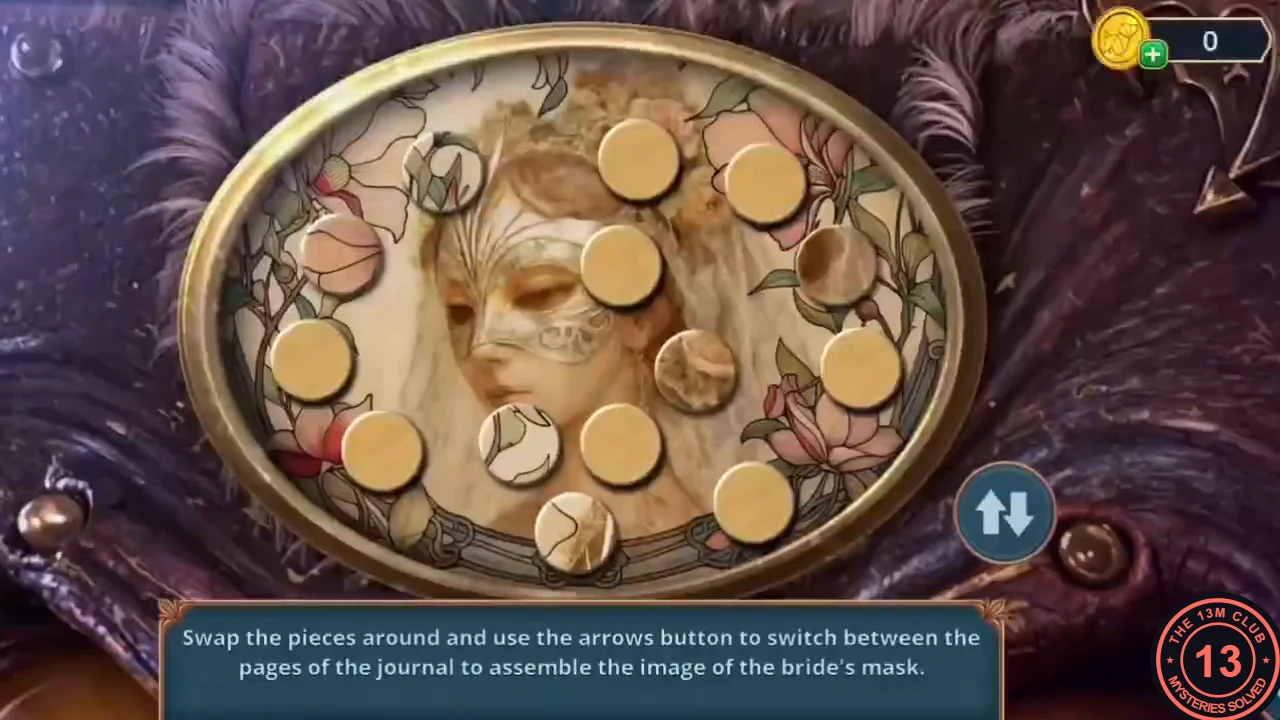
The diary has to be fed before it reveals anything.
- "What should I pour onto it?" Pour the Blood onto the diary. Its eye opens and a puzzle starts: "Swap the pieces around and use the arrows button to switch between the pages of the journal to assemble the image of the bride's mask."
- Round pieces are scattered across two pages; the arrows button at the lower right flips between them. Tap two pieces to swap them, and move pieces from one page to the other the same way. Match each piece to its patch of the portrait (a woman in a lace mask framed by pink flowers): face and mask pieces in the centre, flower and stem pieces around the edge. This takes many swaps, so no fixed sequence is given.
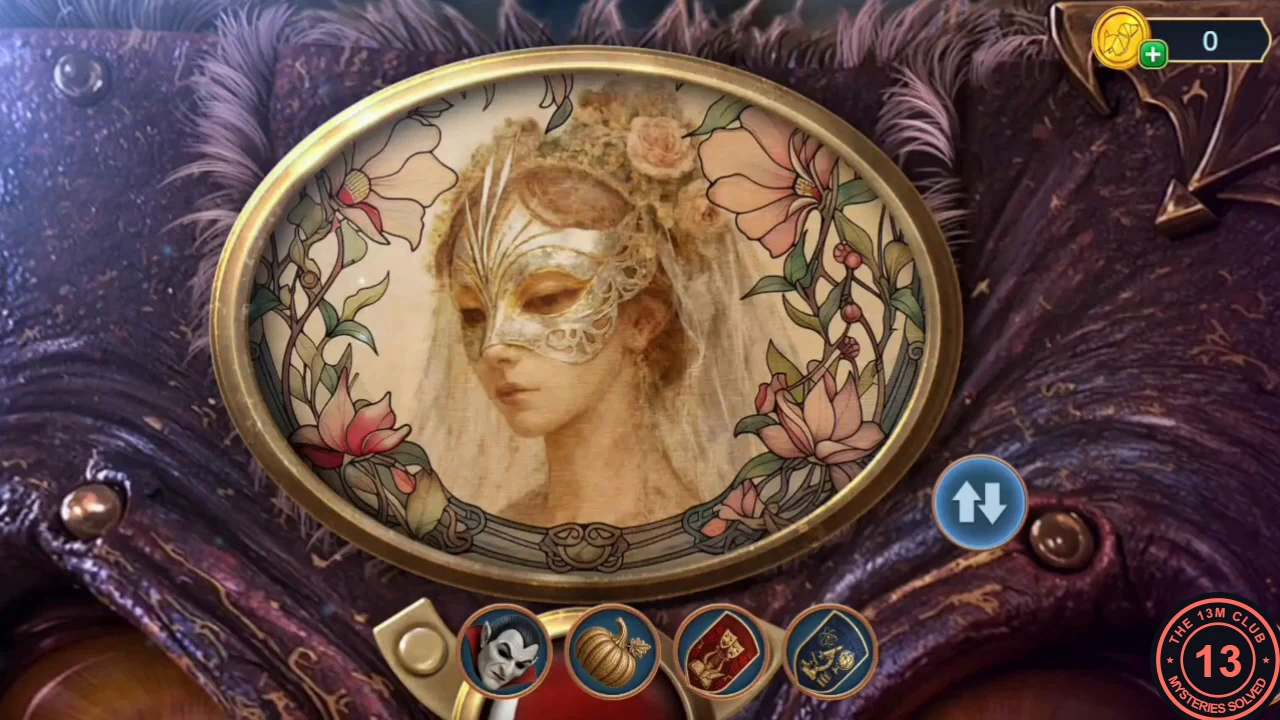
The completed portrait to aim for. - With every Pumpkin Pin so far, the counter now reads 105/140. Chapter 3 ends with its decision summary (0/12 on this route): Ask nothing, Stop Ryan, Freeze in fear and Leave Noah alone gave 0. The unchosen options were Ask Noah (+2), Support Ryan (+2), Ask Ryan for help (+2), Distract the students (+6) and Push Noah (+2). Reward tiers are again 0, 4 and 10 points. A 10-point chapter score adds extra scenes; see High Decision Scores at the end of this guide.