Assembly Hall Throne
The theatre room has a throne, a violin on a stand, a deer head over a portrait and the Actors' Room door.
- In the hall view, tap the purple and orange Pumpkin Pins on the front edge of the open wooden chest (red flowers inside) at the lower left, under the dress mannequin. At the throne, take the Brush (purple) and the Credit Card. Tap the orange Pumpkin Pin on the right edge of the throne's back.
- Place the Violin Pegs on the violin ("Return the violin its missing parts... and some notes"). Also tap the Pumpkin Pins at the lower left of the violin close-up, beside the violin and its case.
- Tap the portrait under the deer head. It swings open to show a keypad and a yellow note. The deer head is also missing its antlers.
- Put the Pattern Pieces on the back of the throne to complete the crest. The seat drawer opens: take the Sheet Music. The armrest holds a blade with no handle.
Tune the Violin
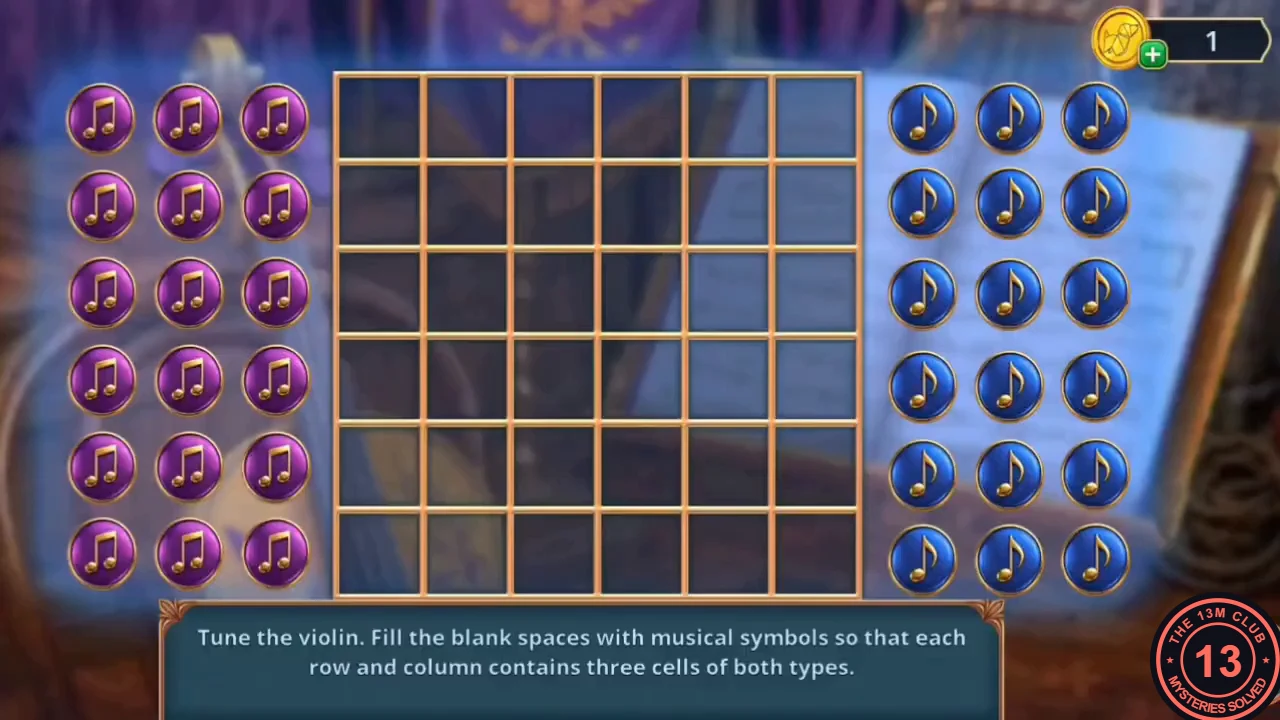
The violin stand takes the Sheet Music.
- Place the Sheet Music on the violin stand. Puzzle: "Tune the violin. Fill the blank spaces with musical symbols so that each row and column contains three cells of both types." The 6×6 board starts empty; drag purple and blue notes onto it.
- A checkerboard is accepted: row 1 purple, blue, purple, blue, purple, blue; row 2 blue, purple, blue, purple, blue, purple; repeat these two rows down the board (rows 3 and 5 like row 1, rows 4 and 6 like row 2).
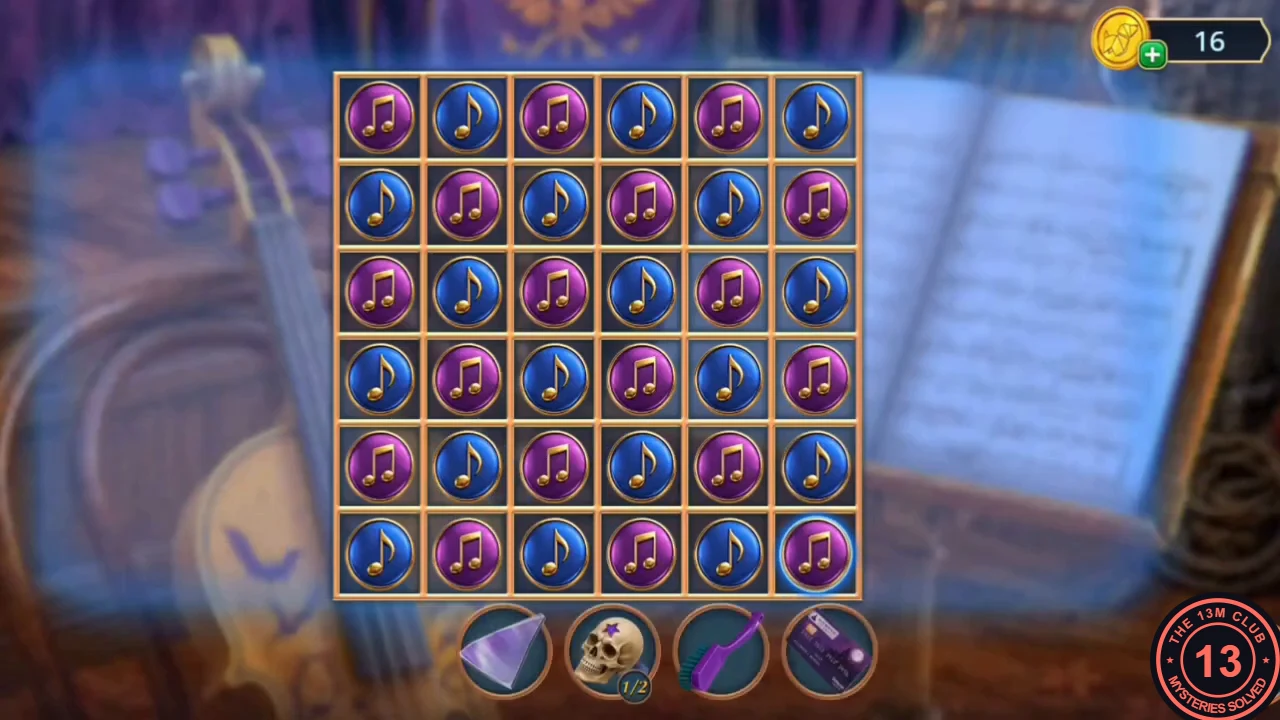
The accepted checkerboard, starting with purple at the top left. - The violin case opens. Tap the Bride mask lying inside to destroy it (the second one), then take the Garland.
Actors' Room Costumes
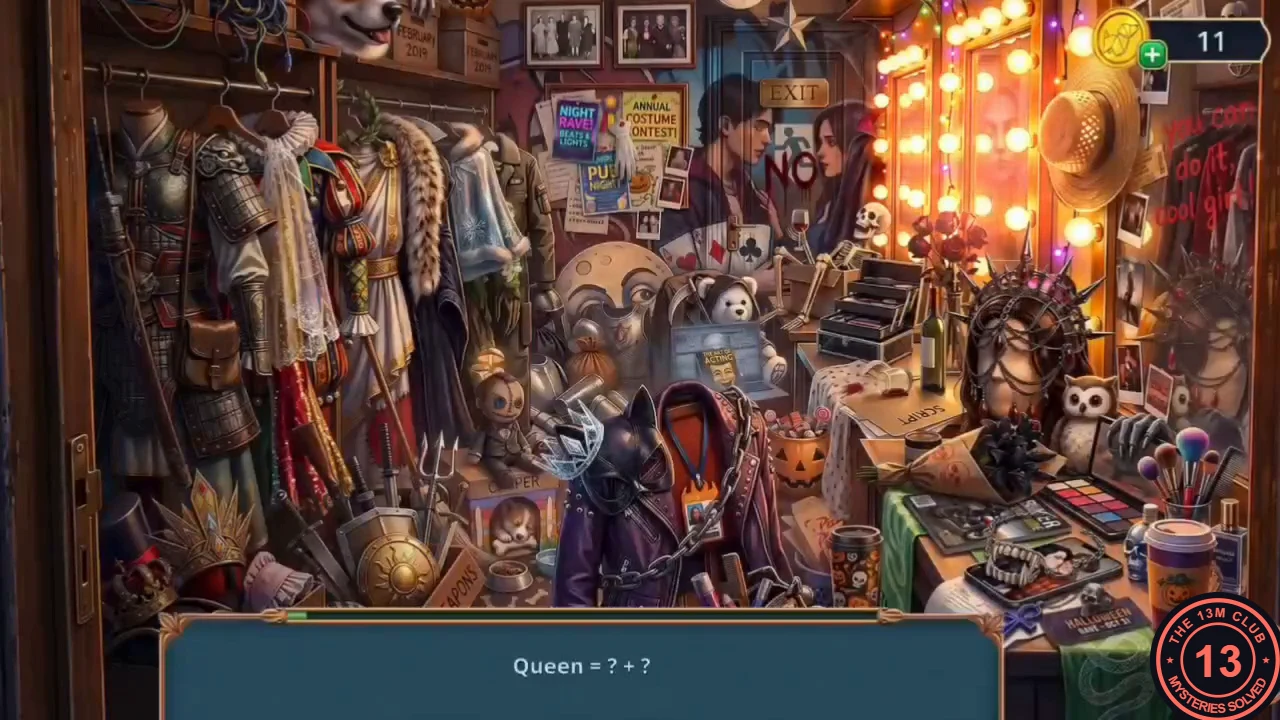
The Actors' Room door on the right of the theatre.
- Hang the Garland on the Actors' Room door to open a combination scene. Each line asks for the two items that make a costume. In order: Queen = Velvet Mantle (the blue velvet cape on the clothes rail, upper left) + Crown (the small silver crown in the centre, beside the black cat costume); Vampire = Black Cloak (hanging at the left edge of the lit mirror) + Fangs (the white fangs on the photo in front of the eye-shadow palette, lower right); Magician = Top Hat (the black top hat in the bottom left corner) + Playing Cards (the fan of cards pinned on the wall below the posters, left of the mirror); Scarecrow = Patch (the patched cloth at the foot of the clothes rail, lower left) + Straw Hat (the straw hat at the top right of the mirror); Actor = Script (the SCRIPT folder on the dressing table beside the spilled wine glass) + Theatrical Mask (the gold mask on "The Art of Acting" book propped in front of the laptop, centre); Bride = White Glove (the small white glove among the posters at the top centre) + Veil (the long white veil hanging on the clothes rail at the left). You receive the Screwdriver.
Disco Ball
The deer panel and the broken disco ball come next.
- Unscrew the lower compartment of the deer panel with the Screwdriver. Take the Folding Cane and the Glue. The keypad needs its prints dusted before you can read the answer.
- In the Masquerade Gym, put the Mirror Triangle in the gap of the disco ball and fix it with the Glue. The lights come on and a socket opens: take the Stapler.
- Tap the sparkles at the buffet table ("Maybe I missed something") to open its second hidden-object scene.
Masquerade Buffet Again
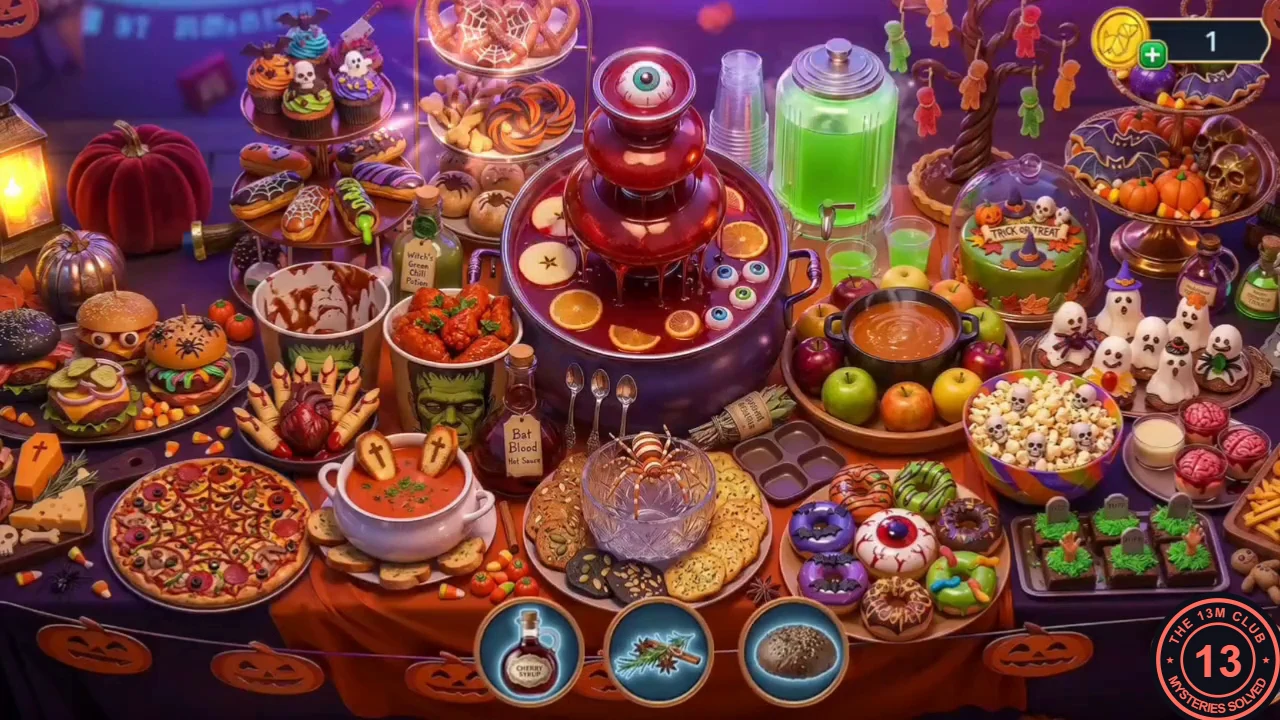
A second scene on the buffet table, which works the other way round.
- Each icon in the bottom bar is a missing part: drag it from the bar onto the dish it completes. Tapping an unfinished dish first only gives "Something is missing here", and a part dropped in the wrong place goes back to the bar. Three parts show at a time, and new ones replace those you place. The parts and their places: cake slice = the green "Trick or Treat" cake under the glass dome, which has a slice missing; bone-shaped cookies = the empty tray at the top left, above the punch fountain; bread roll = the unfinished burger (bottom bun only) at the far left; cherry syrup = the white ghost treats right of the soup pot; brain jelly = the plain white dessert cup beside the pink brain cakes, right of the popcorn; skull crackers = the pizza at the bottom left; black seeds = the crystal bowl under the spider, bottom centre; ribs = the Frankenstein bucket lined with bloody paper, left of the fountain; jars of sprinkles = the empty grey baking tin above the doughnuts, beside the apples; honey jar = the small pumpkin between the red velvet pumpkin and the ribs bucket, which turns into a glowing caramel pumpkin; star anise and cinnamon = the red punch at the base of the fountain; Toxic Liquid = the green drink dispenser. You receive the Axe Handle.
Fingerprint Safe
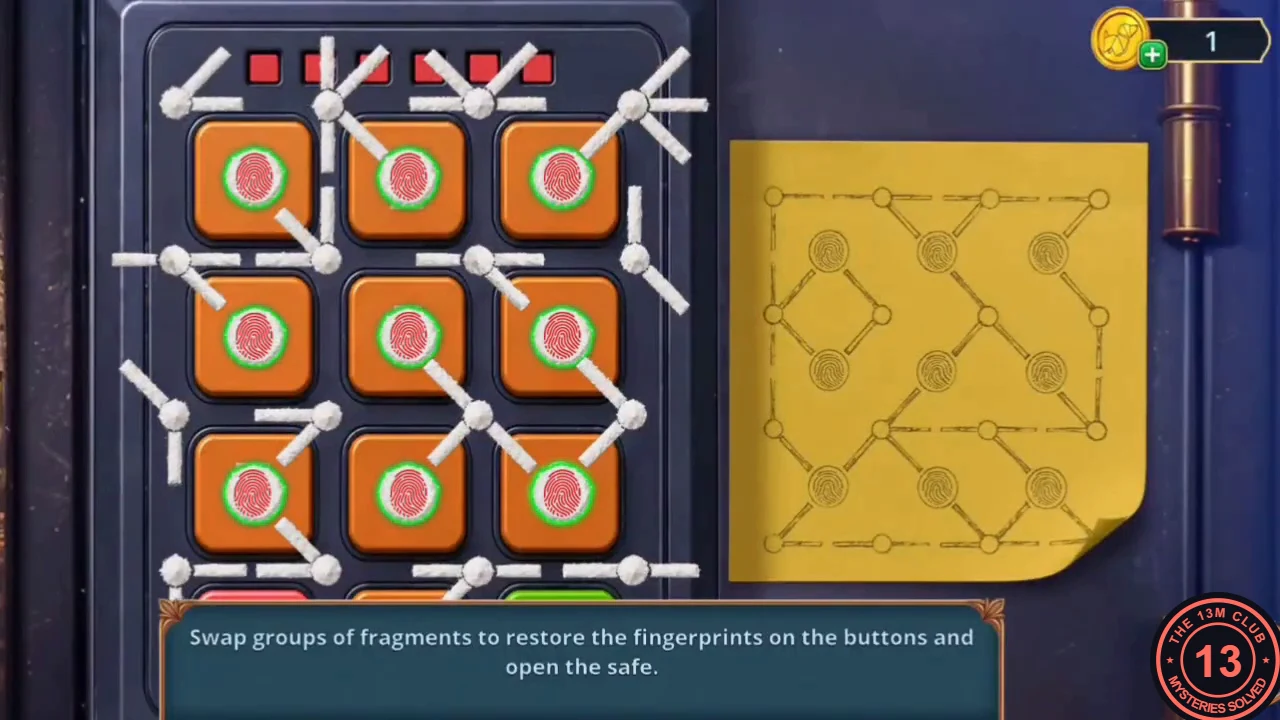
The keypad behind the portrait opens once its fingerprints are restored.
- Fit the Axe Handle to the blade in the throne's armrest to make the Battle Axe. Split the carved pumpkin at the violin stand with it and take the Starch and a Brush (pink makeup brush).
- At the keypad behind the portrait, pour the Starch and dust it with the makeup Brush. Puzzle: "Swap groups of fragments to restore the fingerprints on the buttons and open the safe." The white fragments sit in groups: each white knob at a corner between the 3×3 buttons carries its own set of rods. Tap one knob to select its group (it lights up blue), then tap another knob: the two groups swap places. The yellow note is the target: it shows which rods must meet at every knob position. Every button already has a green ring at the start, so the ring tells you nothing; the fingerprint itself is red and turns green once the rods around that button match the note.
- Expect some trial swaps, so no fixed sequence is given. Work one button at a time: compare the knobs around it with the same spots on the note, swap the right groups in, and check that its print turns green. When all nine prints are green, the safe opens.
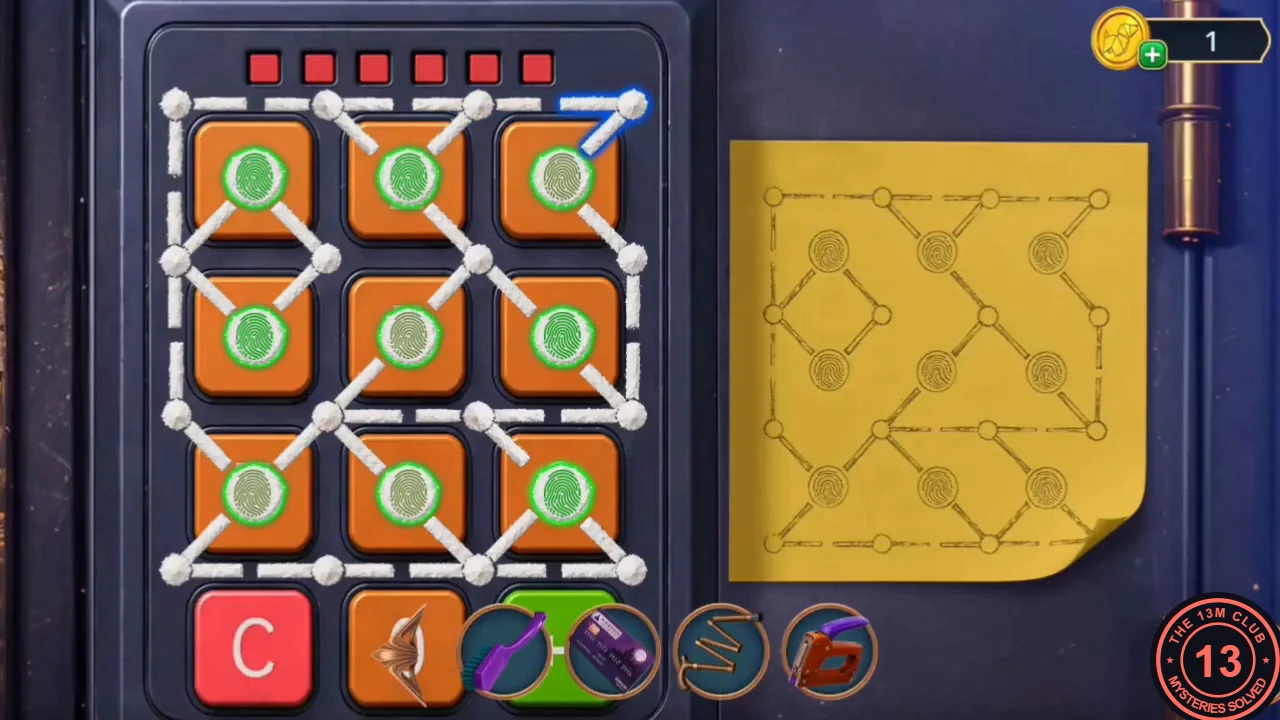
The restored keypad, matching the yellow note. - The safe opens. Destroy the third Bride mask inside and read the note: six copies of the Bride's Mask are the ritual's anchors, and if they are all intact by dawn, Jack gathers his retinue again. The ghost moves aside; take the Smoking Censer.
Skull Wreath
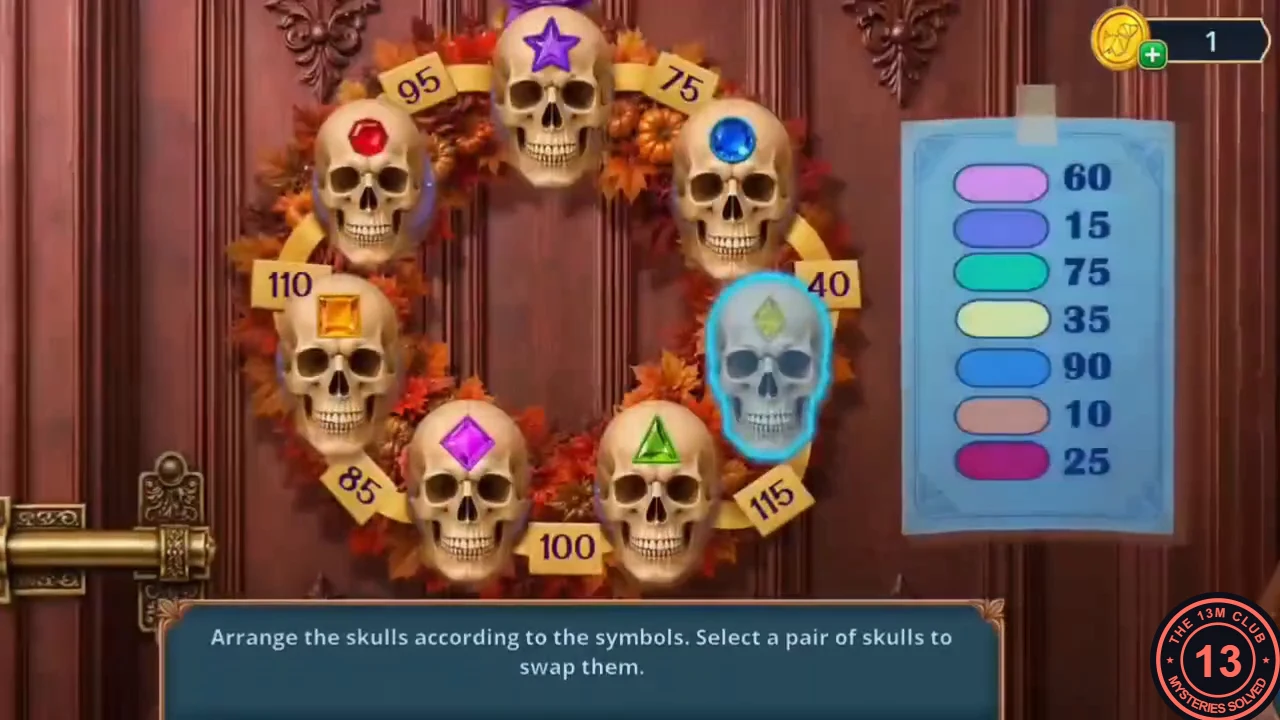
The skull wreath on the corridor door is the way to the cafeteria.
- In the Backstage Corridor, calm the bees in the carved pumpkin with the Smoking Censer. Take the Cup and the Wreath Skulls (2/2).
- Place the Wreath Skulls on the wreath on the corridor door. Puzzle: "Arrange the skulls according to the symbols. Select a pair of skulls to swap them." The note gives each colour a value: lavender 60, periwinkle 15, teal 75, pale yellow 35, blue 90, beige 10, magenta 25. Each number printed on the wreath is the sum of the two skulls beside it.
- Solution, clockwise from the top: pink diamond (60), purple star (15), red hexagon (25), blue circle (90), orange square (10, at the bottom), green triangle (75), yellow diamond (35). The door opens to the University Cafeteria.
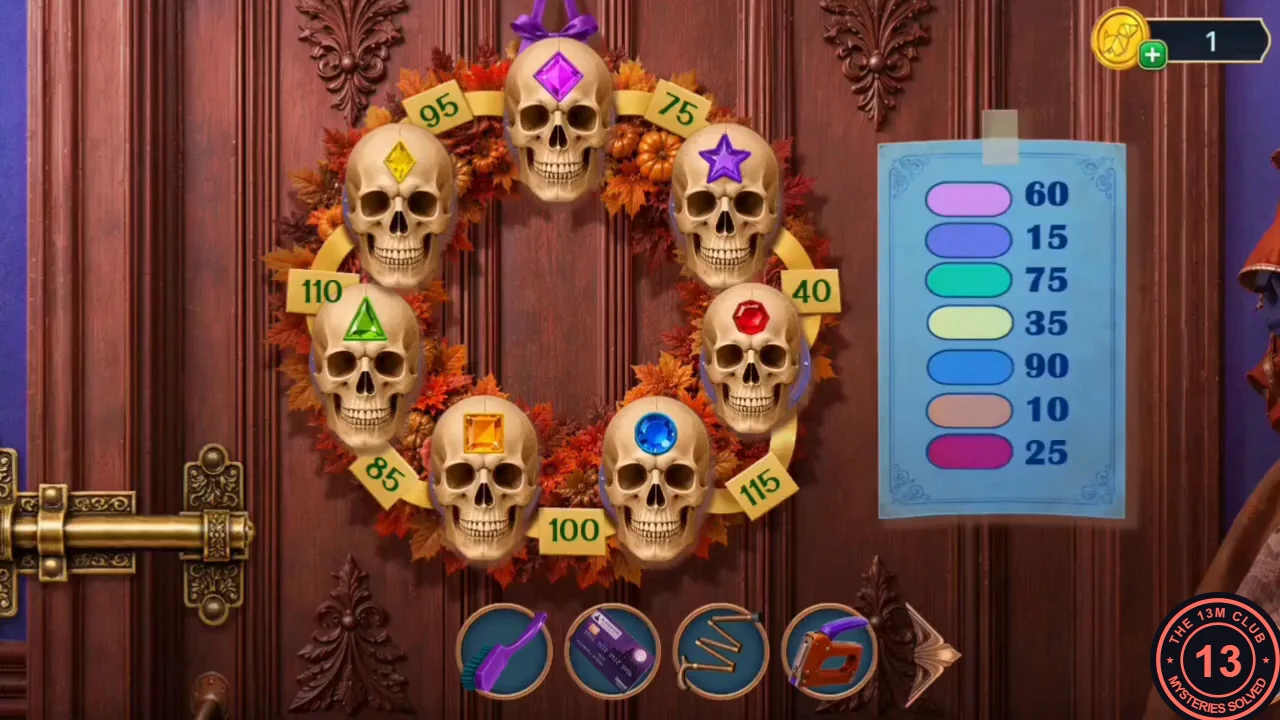
The solved wreath, matching the order in step 3.
University Cafeteria
The cafeteria has a carved counter, a microwave with a red lockbox, a soap dispenser by the vending machine and locked double doors.
- Tap the Pumpkin Pins on the round table among the scattered sweets. Take the Tap Shoe and the Three Metal Chains there. Slide the Credit Card into the gap of the carved counter doors to open them, then take the Batteries from the counter. Also tap the orange Pumpkin Pin at the bottom left of the counter close-up, below the "volunteers only" sign.
- At the microwave, place the purple Brush on top of the red lockbox (its key has broken off in the lock). Tap the Pumpkin Pin with a white skull charm at the lower right of this close-up, by the books. Put the Batteries in the soap dispenser by the vending machine (also tap the Pumpkin Pin with a white skull charm beside the sink tap below the dispenser), then hold the Cup under the spout to get the Cup of Soap.
- Pour the Cup of Soap at the microwave and scrub with the Brush. Take the Fang Pendant.
- In the Inner Courtyard, set the Stapler on the green gift box at the scarecrow. The box handle still needs some fabric.
- Back in the cafeteria, put the Fang Pendant on the loose floor tile by the double doors and stamp it with the Tap Shoe. The tile opens: take the "Pumpkin" Label and the Scarlet Ribbon.
- At the green gift box, put the Scarlet Ribbon in place; the Stapler fixes it as a pull handle. The box opens: take the Towel and the Handle.
Swimming Pool
The moon window in the courtyard leads to the pool.
- Fit the Handle to the moon window in the Inner Courtyard. It opens; go through to the Swimming Pool.
- On arrival, tap the purple and orange Pumpkin Pins lying at the far end of the pool deck, left of the small white side table under the KEEP OUT window, beside a small jack-o'-lantern. On the pool deck, take the Oven Control Knob. Something lies out of reach; hook it with the Folding Cane to open a differences scene.
Poolside Differences
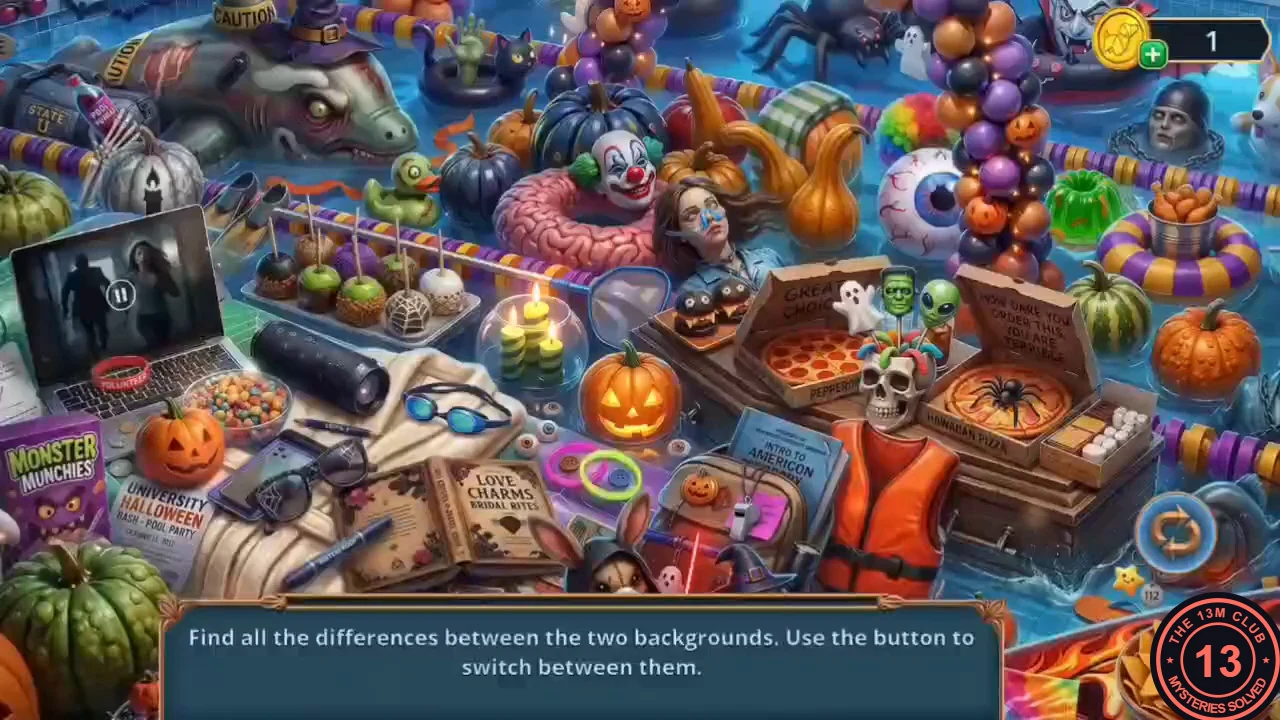
Find all the differences between the two backgrounds.
- "Find all the differences between the two backgrounds. Use the button to switch between them." You receive the File.
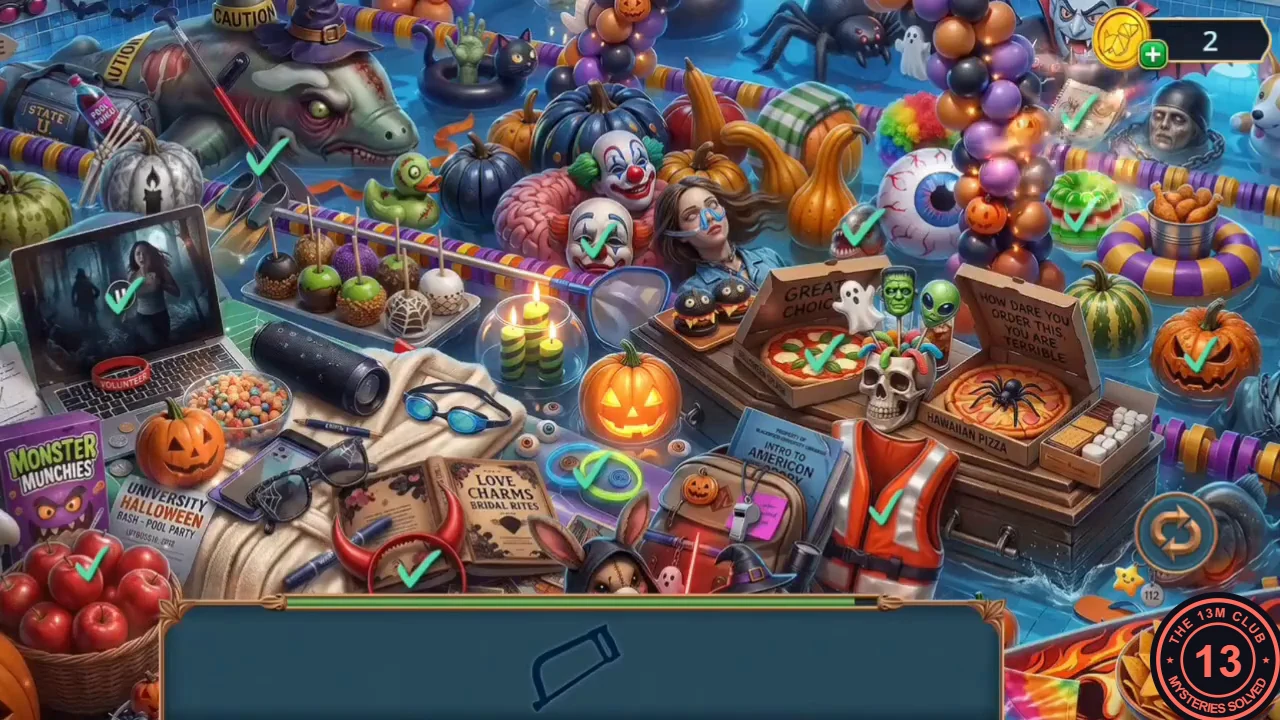
Every difference found in the example game, with the File as the reward. - Destroy the Bride mask on the pool deck. The counter reaches 4/6.
Lifebuoy Beams
The diving tower and the lifebuoy wall hold the next clues.
- Saw through the KEEP OUT boards on the diving tower with the File. A raven sits on the platform; it hates loud noise. Pick up the Bent Fork at the diving board.
- Pry the fish mosaic panel open with the Bent Fork and take the Lifebuoy.
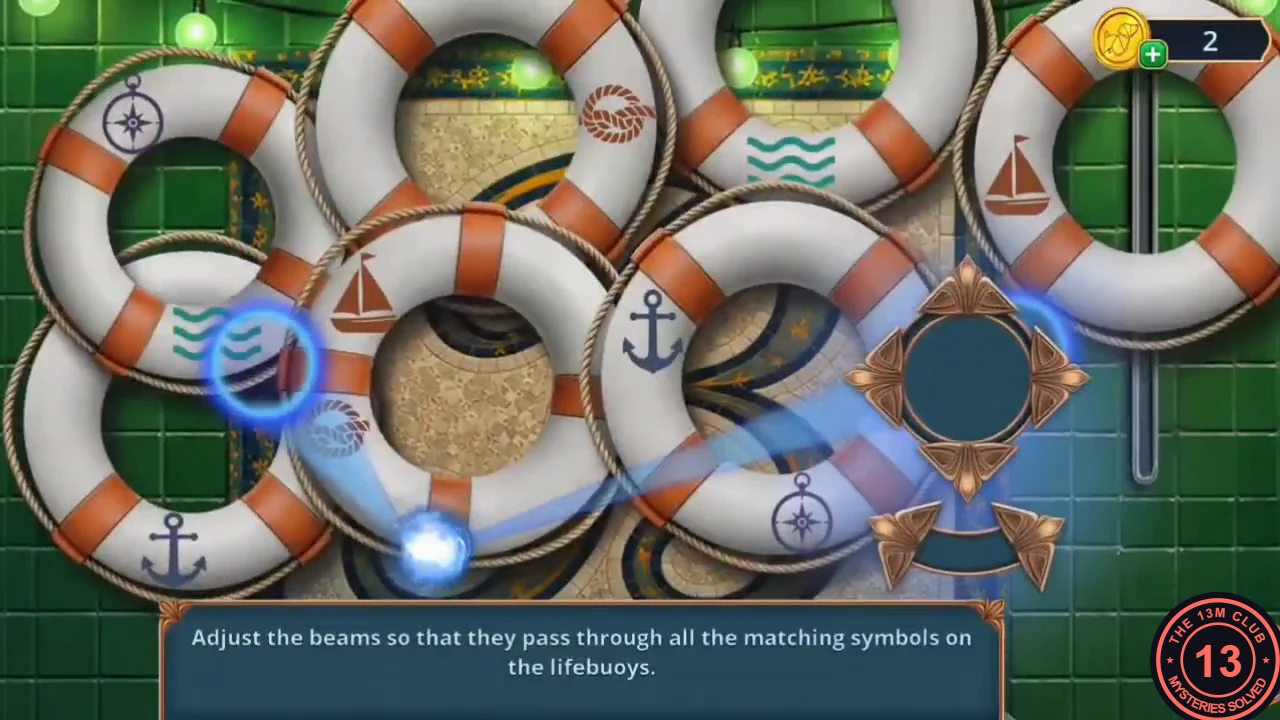
- In the close-up of the wall with the B emblem, tap the Pumpkin Pins at the lower left, by the jack-o'-lanterns, then hang the Lifebuoy on that wall. Puzzle: "Adjust the beams so that they pass through all the matching symbols on the lifebuoys." The symbols are anchors, waves, compasses, sailboats and rope knots, each on two lifebuoys. The glowing light source at the bottom sends out two beams, and a blue ring marks the symbol each beam is hitting at the moment. Steer the beams with the copper arrow buttons at the right: the four arrows around the round copper frame (up, down, left and right) move the beam ends in that direction, and holding one of the two arrows on the bar below swings both beams round the light source. Watch the two rings after every tap. When both rings sit on the two lifebuoys that carry the same symbol, that symbol disappears from both of them. Clear one pair at a time; in the example game the anchors went first, then the waves, then the compasses and rope knots, and the two sailboats last. The beams move a little differently depending on where they start, so no fixed button sequence is given.
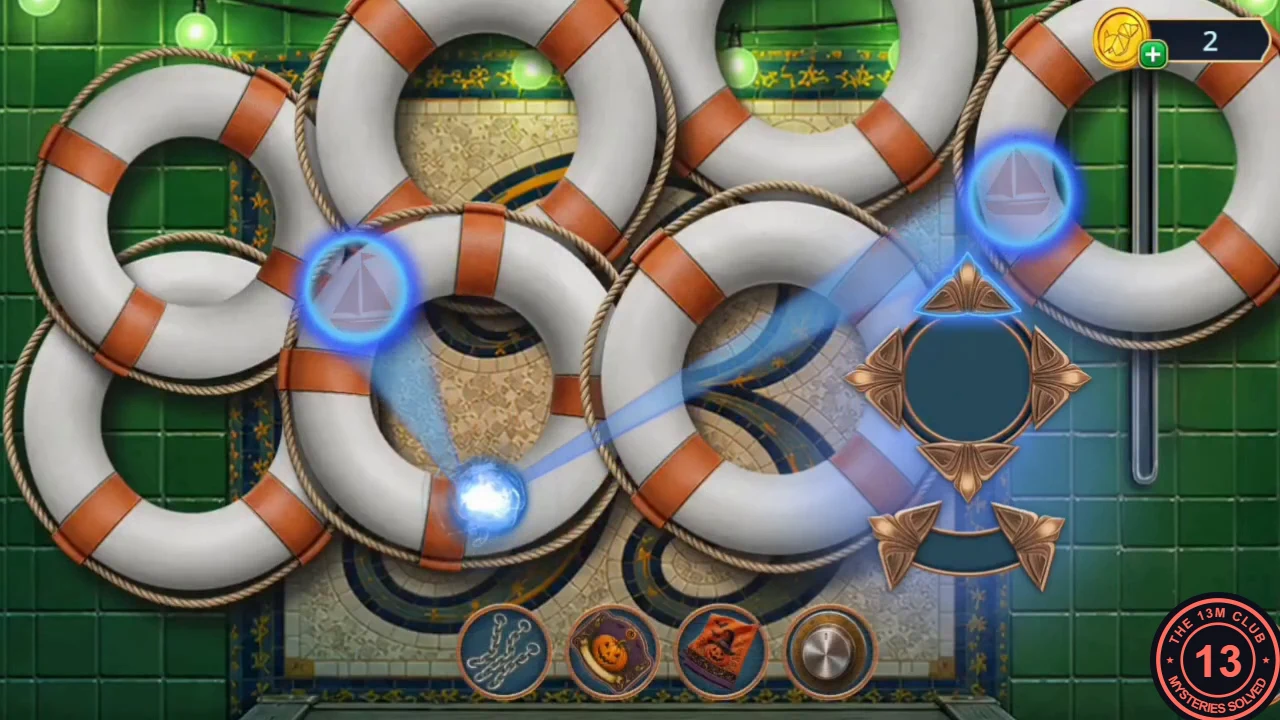
Near the end of the example game. Matched symbols disappear from the lifebuoys, and only the two sailboats are left here. - A niche opens: take the Newspaper and the Paper Bracelet. The teal chest below needs a round handle.
Kitchen Door Pin Lock
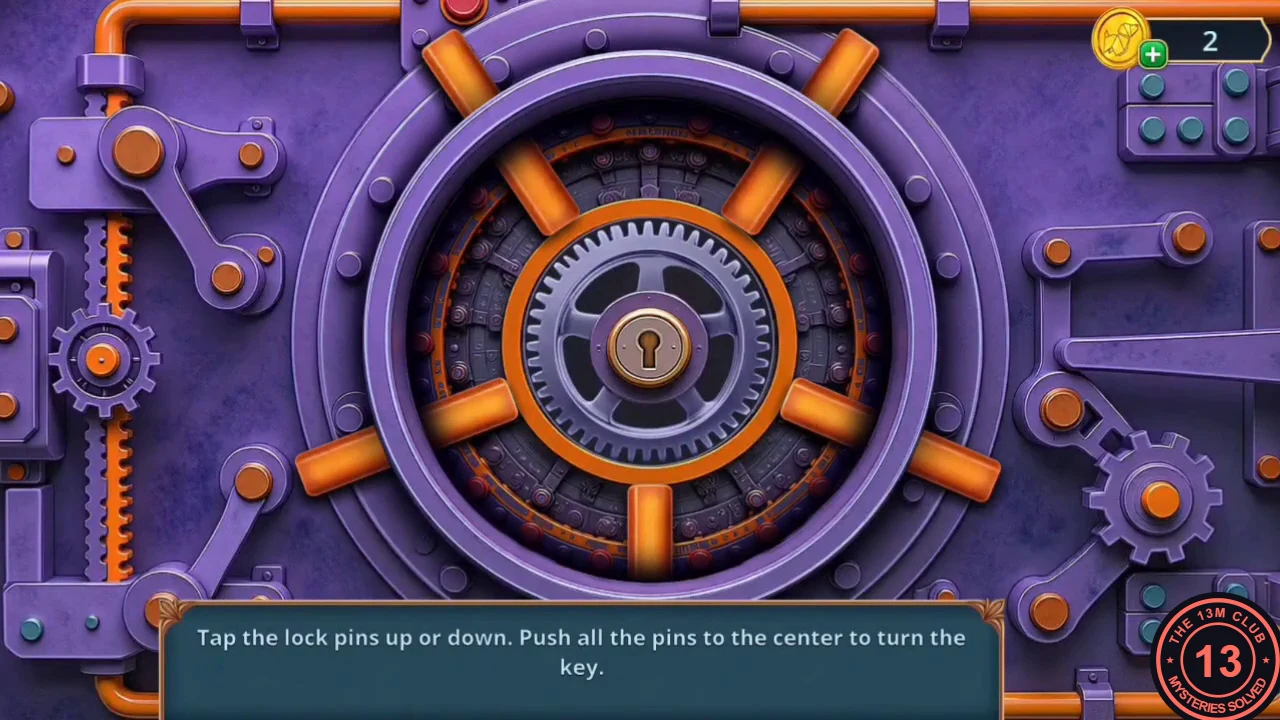
The cafeteria counter and the locked double doors lead to the kitchen.
- In the cafeteria, put the Paper Bracelet on the "volunteers only" sign. The counter flap lifts: take the Frying Pan and the Awl.
- At the double doors, slide the Newspaper under the door, push the key out of the lock with the Awl and pull the Newspaper back with the key on it. Put the key in the lock. Puzzle: "Tap the lock pins up or down. Push all the pins to the center to turn the key." Tap each pin that sits off-centre until every one reaches the middle. In the finished lock, five orange bars meet at the keyhole like the spokes of a wheel.
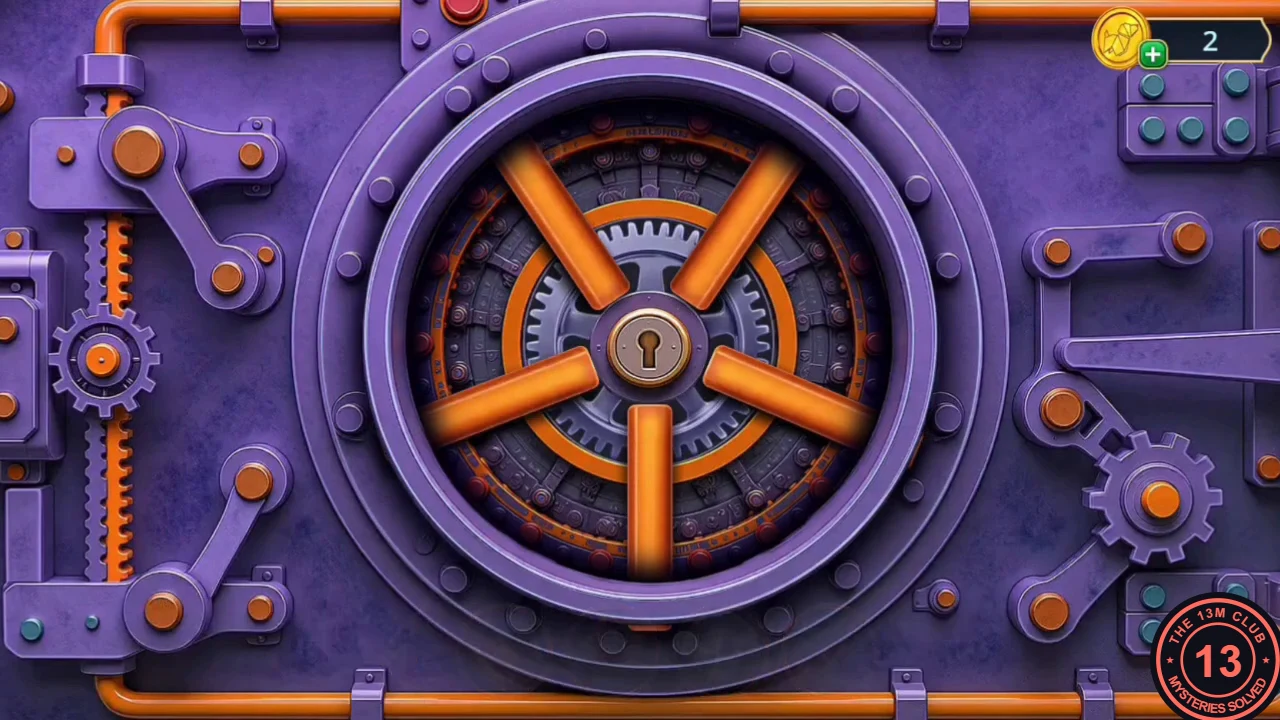
Every pin pushed to the centre. - In the kitchen, the vampire boy says the spare masks are hidden among the food, candles and boxes. Choice: "Let's split it up: you check the equipment, and I'll check the boxes." (60 coins, +2) or the free "Let's just look a little faster. Jack is already gathering the students." This guide takes the free answer.