Back in the Decorated Gym
Chapter 2 starts in the Decorated Gym. The main exit just loops back, so Casey has to find another way out.
- Noah offers to lead the way. Choose "Awesome! Lead the way." (60 coins, +2 decision points) or the free "Yeah, yeah, whatever. Just lead the way." This guide takes the free answer.
- Zoom in on the DJ booth: a white mouse sits on the mixer, and an orange case with 4×3 buttons has a blank paper that needs light. Tap the purple Pumpkin Pin lying on the buffet in front of the punch cauldron, behind the bowl of sweets and left of the carved jack-o'-lantern. Then zoom in on the clown dummy and take Ryan's Pin from beside its leg.
- Use Ryan's Pin on the curled poster on the bleachers. It flattens into the "Student Raven Fright Halloween" poster and opens a hidden-object scene.
Student Raven Fright Poster
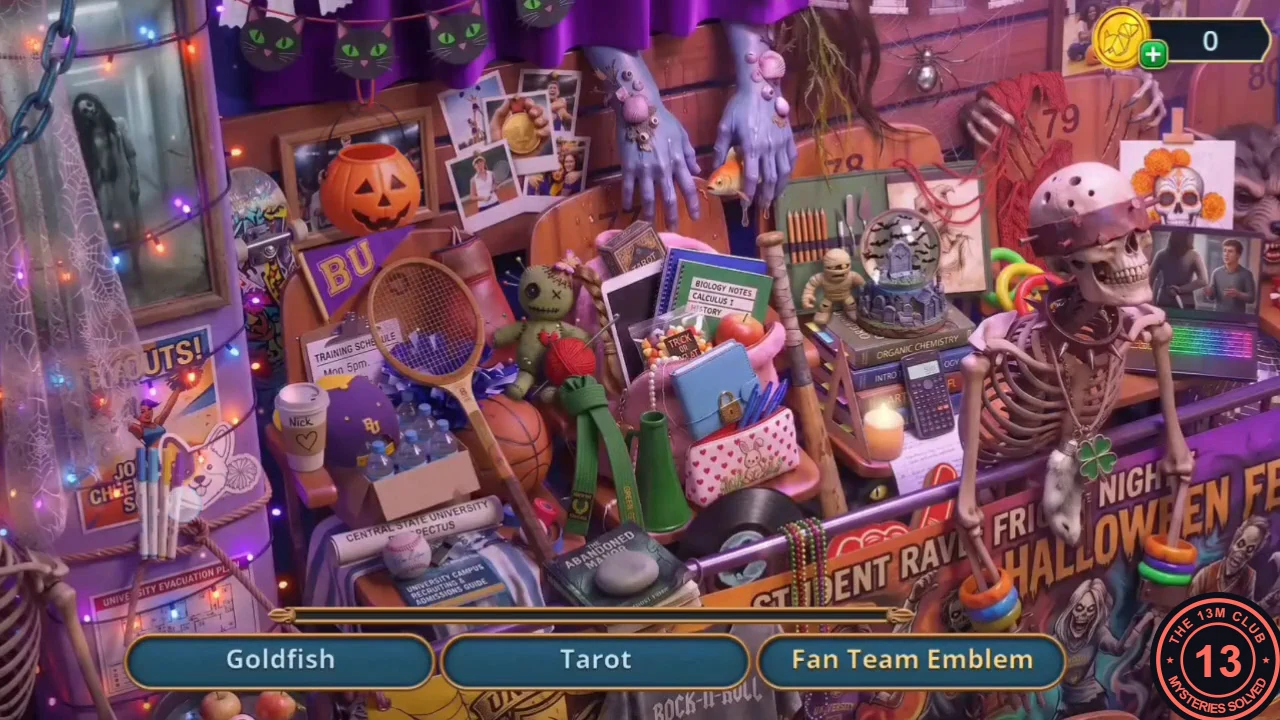
A list hidden-object scene on the bleachers poster.
- Find the listed items: Goldfish, Tarot, Fan Team Emblem, Pumpkin Lantern, Megaphone, First Place, Lucky Charm, Red Scarf, Baseball Cap, Betrayal, Mirror Shard and Mummy. You receive the Foam Arm.
DJ Booth Lighting Case
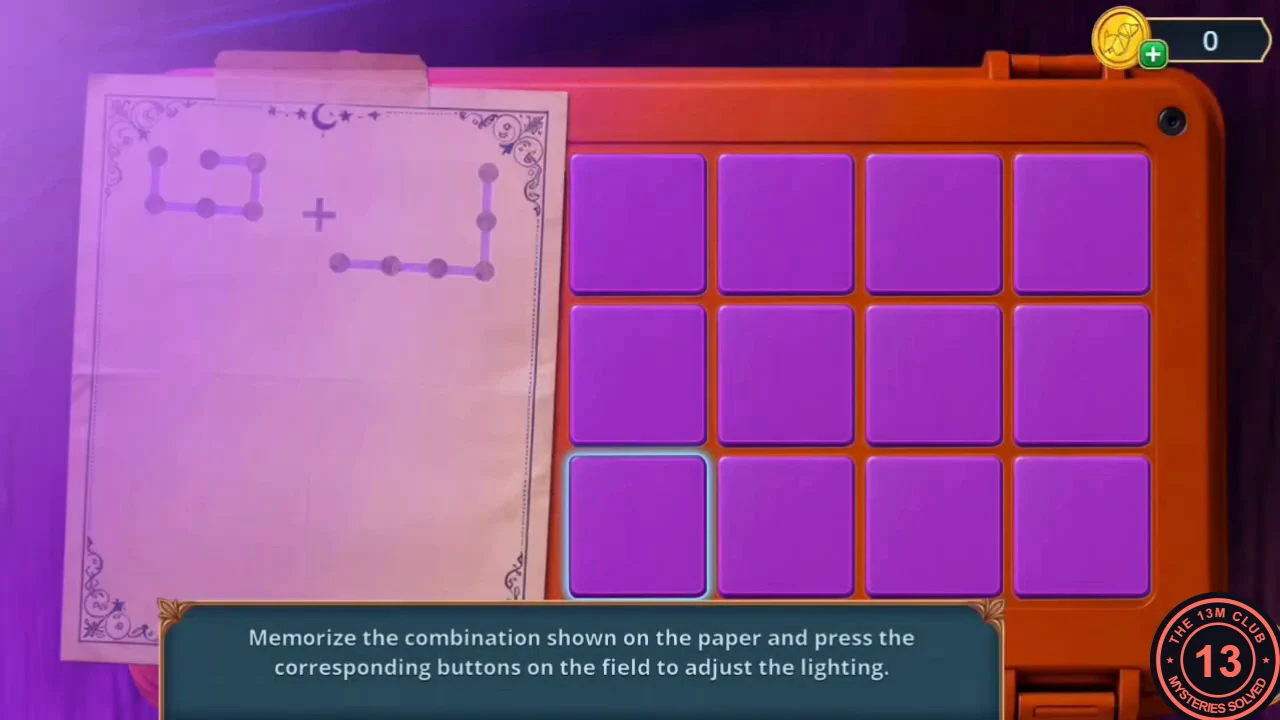
The orange case on the DJ booth hides the short route map.
- The DJ booth item is too far to reach by hand. Use the Foam Arm on it to get the Mini Wire Cutters.
- Use the Mini Wire Cutters on the thorny vines in the clown's pot. Take the UV Lamp Handle.
- Attach the UV Lamp Handle to the DJ booth. The lamp lights the paper and the case puzzle opens: "Memorize the combination shown on the paper and press the corresponding buttons on the field to adjust the lighting."
- Each round, the UV light briefly shows two dot-path shapes on the paper. Together they cover all 12 buttons (4 columns × 3 rows). Trace each shape by pressing its buttons; pressed buttons go dark. There are three rounds. Example shapes from one game (rows counted from the top, columns from the left): round 1 was the 3×2 block in rows 1-2, columns 1-3, plus the L of column 4 and row 3; round 2 was column 1 + row 2 columns 2-3 + row 3 column 2, plus row 1 columns 2-4 + column 4 rows 2-3 + row 3 column 3; round 3 was row 3 + row 2 columns 1-2, plus row 1 + row 2 columns 3-4. If your paper shows different shapes, trace those instead.
- The case opens: take the Short Route Map. Place it on the evacuation plan by the exit door ("Find the short route") and go through to the Sports Equipment Room.
Torn Costume Stitching
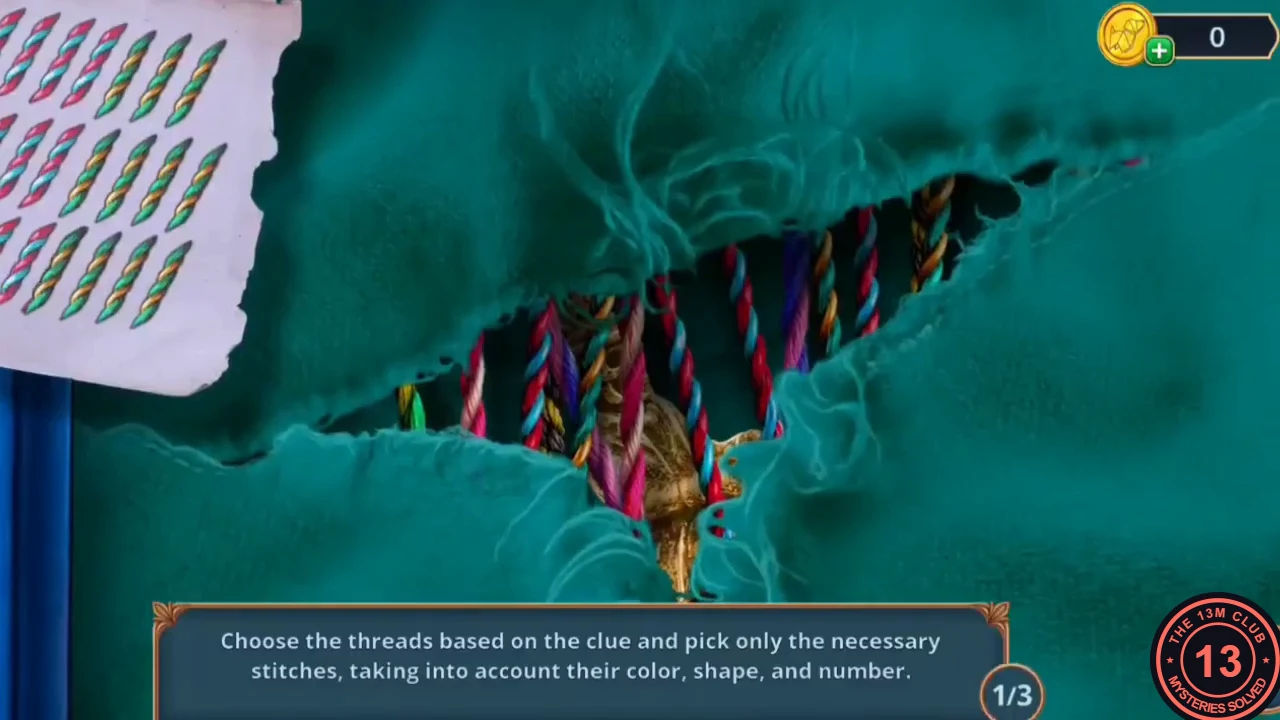
The blue locker in the Sports Equipment Room holds a torn tiger costume.
- In the Sports Equipment Room, tap the purple Pumpkin Pins on the folded shirts on the left-hand shelf, beside the blue Blackwood pillows. Look at the vent grille: its screws need a screwdriver. Take the Toothbrush from the floor in front of it. Tap the Pumpkin Pins on the shelf at the left edge of this close-up, beside the grille.
- Open the blue locker (it has a 3-digit lock for later) and tap the torn green costume. A stitching puzzle opens: "Choose the threads based on the clue and pick only the necessary stitches, taking into account their color, shape, and number."
- The clue card in the top-left corner has three rows of twisted two-colour stitches, one row per round. Round 1: four red-and-cyan stitches and three green-and-yellow stitches. Rounds 2 and 3: five red-and-cyan and four green-and-yellow each. In the tear, tap only twisted threads of those two colour pairs, as many of each as the row shows (the green-and-yellow ones look green and gold under the cloth). Selected threads glow, and they disappear when the round is complete. Leave the decoys alone: pink-and-white, purple-and-pink, black-and-gold and red-and-gold twists, and the straight yellow-green thread.
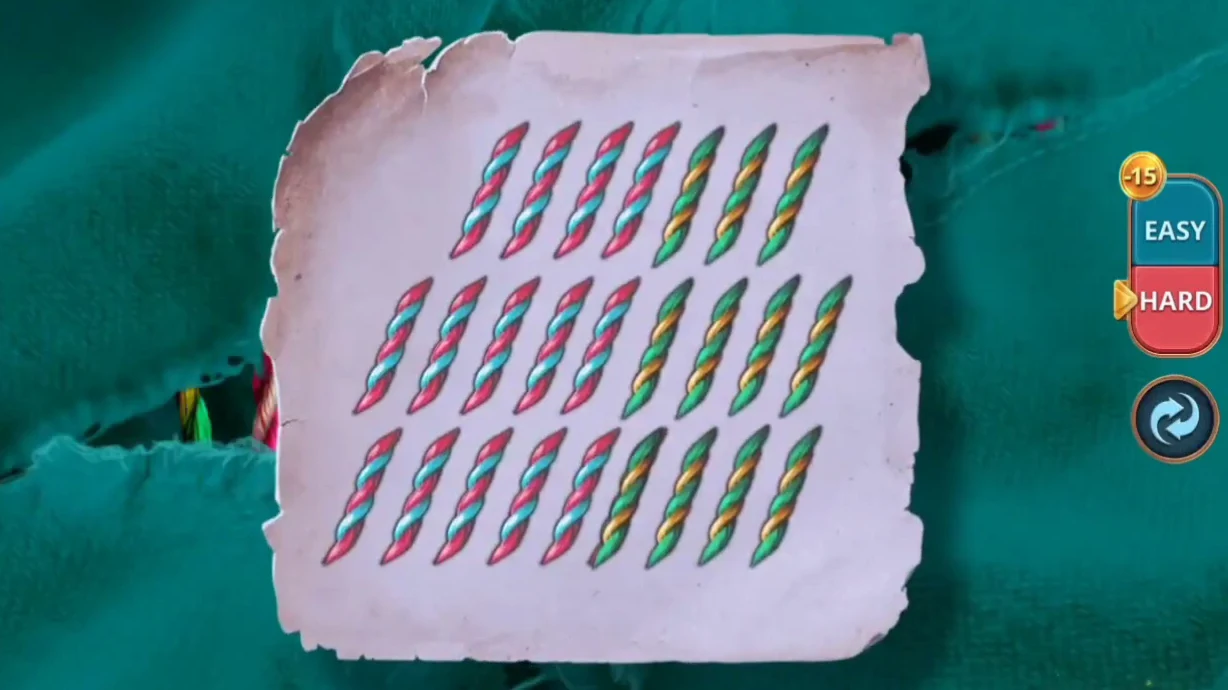
The full clue card. Row 1 is round 1 (four red-and-cyan, three green-and-yellow); rows 2 and 3 each show five and four. - Take the Ghost Coachman Figurine from the repaired costume lining.
Carriage Arrow Path
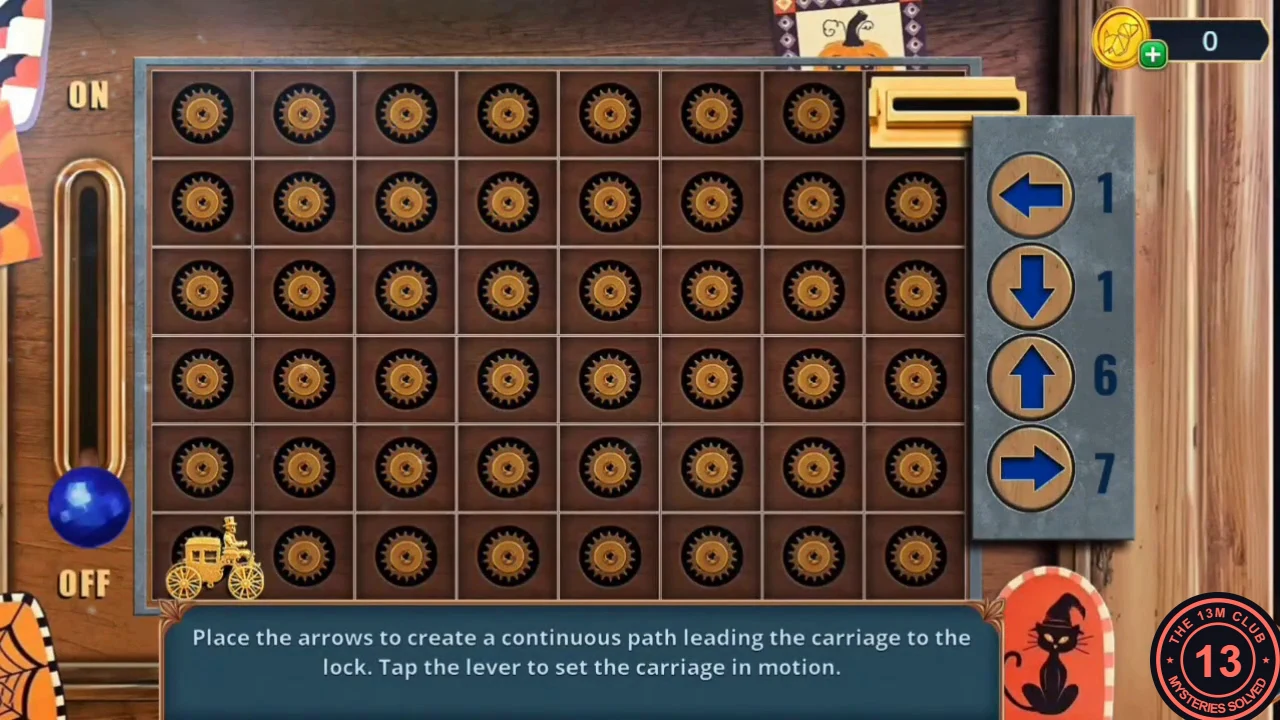
A carriage medallion panel sits under the lit pumpkin on the Sports Equipment Room shelf.
- Place the Ghost Coachman Figurine on the shelf panel. Puzzle: "Place the arrows to create a continuous path leading the carriage to the lock. Tap the lever to set the carriage in motion." The grid is 8 columns × 6 rows; the carriage starts at the bottom-left and the lock is at the top-right. You have 7 right, 6 up, 1 left and 1 down arrows.
- Solution (row 1 is the top, column 1 the left): row 6 col 2 Right; row 6 col 3 Up; row 5 col 3 Up; row 4 col 3 Right; row 4 col 4 Up; row 3 col 4 Left; row 3 col 3 Up; row 2 cols 3, 4, 5 and 6 Right; row 2 col 7 Down; row 3 col 7 Right; row 3 col 8 Up; row 2 col 8 Up. Pull the lever.
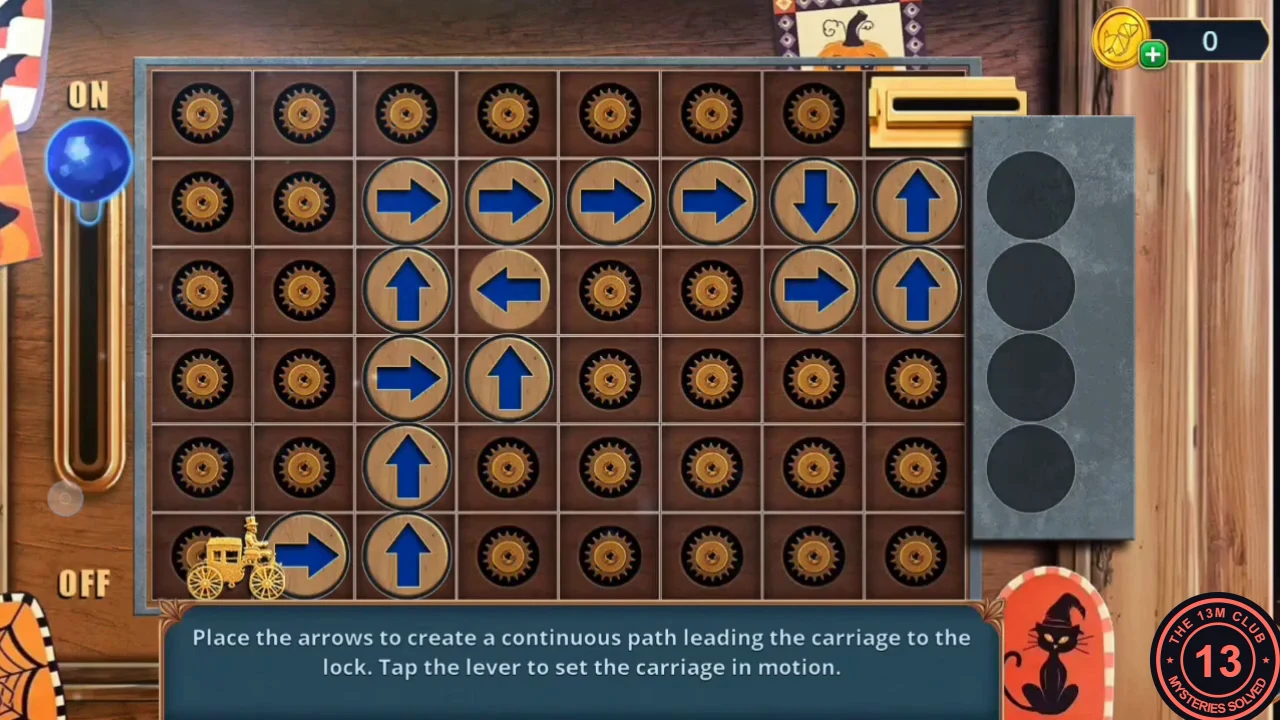
The arrows from step 2 in place, forming one continuous path to the lock. - Take the Fake Fang. Put it into the golden skull lock of the sports cart: the cart opens and you take the Screwdriver; the Fake Fang returns to your inventory. The item in the cart is too slippery to grab yet.
- Use the Screwdriver on the vent grille and take the Potholders.
Sports Cart
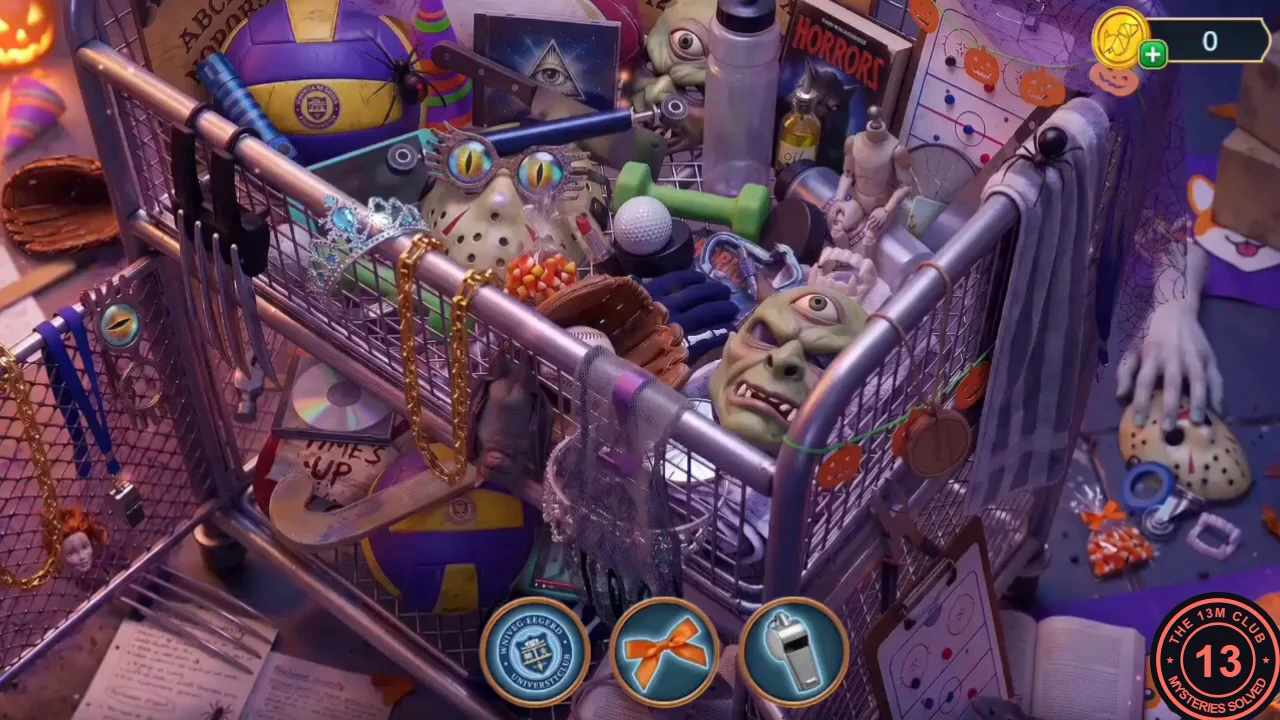
With potholders, Casey can search the sports cart.
- Use the Potholders on the sports cart to open a hidden-object scene. Find the items shown at the bottom of the screen. One item works the other way round: tapping the grey net draped over the front rail of the cart (centre) only says "Something is missing here." Drag the lace trim icon out of the bottom bar onto that net to complete it. Among the last items, the teal video phone lies at the top left beside the goggles, and the whistle lies on the floor at the right, next to the ice-hockey mask and the blue tape. You receive the University's History Poster.
- Pin the University's History Poster beside the blue locker's lock. It shows the founding year 1888, so set the three dials to 8-8-8. The locker opens; after a brief ghost scene you reach the Administrative Building office.
Administrative Building Office
The office has the cafeteria door and a window with two empty sockets.
- In the Administrative Building, tap the purple Pumpkin Pin in the cactus pot on the photocopier. On the bulletin board, take the Levers (1/2) pinning the flyer. The board's staples cannot be removed by hand yet.
- At the desk, tap the purple ink-pad case to reveal a blank card; Casey needs something heavy to make an imprint. Tap the Pumpkin Pins on the desk in front of the model, left of the ink pad. Take the Paint (blue jar) from the Blackwood model.
- In the window alcove, use the Lipstick (from Chapter 1) on the glittery purple zipper case. Take the Pumpkin Magnet. The window's two square sockets need a couple of levers.
- At the cafeteria door, put the Pumpkin Magnet into the metal channel. Take the Iron Stamp.
- Use the Iron Stamp on the ink pad and card at the desk to get the Barcode Imprint.
Cafeteria Door Scanner
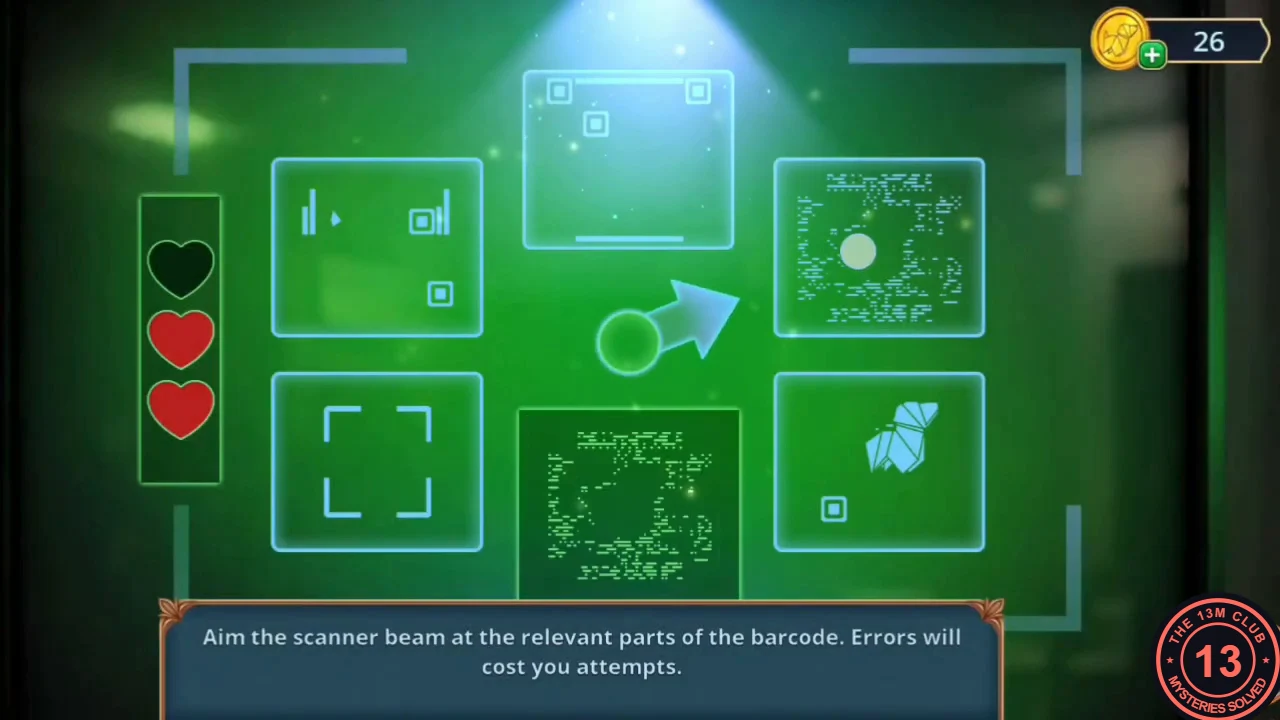
The cafeteria door wants a code scan.
- Use the Barcode Imprint on the door scanner. Mini-game: "Aim the scanner beam at the relevant parts of the barcode. Errors will cost you attempts." You have three hearts. The fragment shown at the bottom centre tells you which part of the barcode to scan: turn the beam to the tile that matches that fragment and confirm. Repeat for each fragment (three fragments in the example game).
- The door unlocks. Enter the Campus Internet Cafe.
Campus Internet Cafe
The cafe has a coffee machine, a gaming desk and a printer desk.
- The red spill on the printer desk has hardened; come back later. In the cafe, tap the purple Pumpkin Pins on the sofa between the jack-o'-lantern and the Blackwood shirt. At the coffee machine, read the note about the Pumpkin Face store and take the Spice Scoop. In the same close-up, tap the orange and purple Pumpkin Pins in the top paper cup right of the machine. The purple ornate box beside the machine has two holes ("require a two-pronged solution") for later.
- At the library door, dig into the candy-filled carved pumpkin with the Spice Scoop. Take the Worm Candy.
- Put the Worm Candy into the coffee machine's side coin slot. A plastic spider pops out: Plastic Spiders (2/2).
Gaming PC Maze
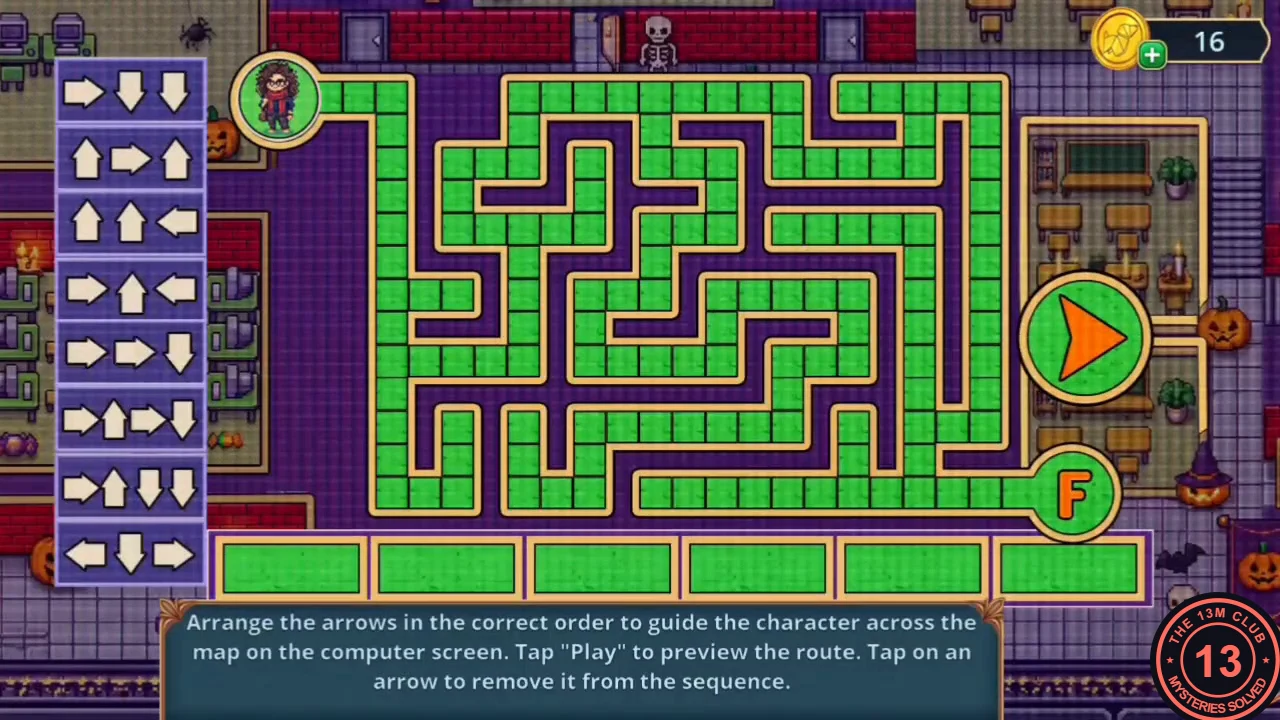
The gaming desk gamepad is missing its joysticks.
- Place the Plastic Spiders on the gamepad as joysticks. Puzzle: "Arrange the arrows in the correct order to guide the character across the map on the computer screen. Tap Play to preview the route. Tap on an arrow to remove it from the sequence."
- Fill the six slots left to right with these arrow cards: [Right, Down, Down], [Right, Up, Left], [Up, Right, Up], [Right, Right, Down], [Right, Up, Right, Down], [Left, Down, Right]. The cards [Up, Up, Left] and [Right, Up, Down, Down] are not used. Tap Play: "Congratulations! Player one, you've won!"
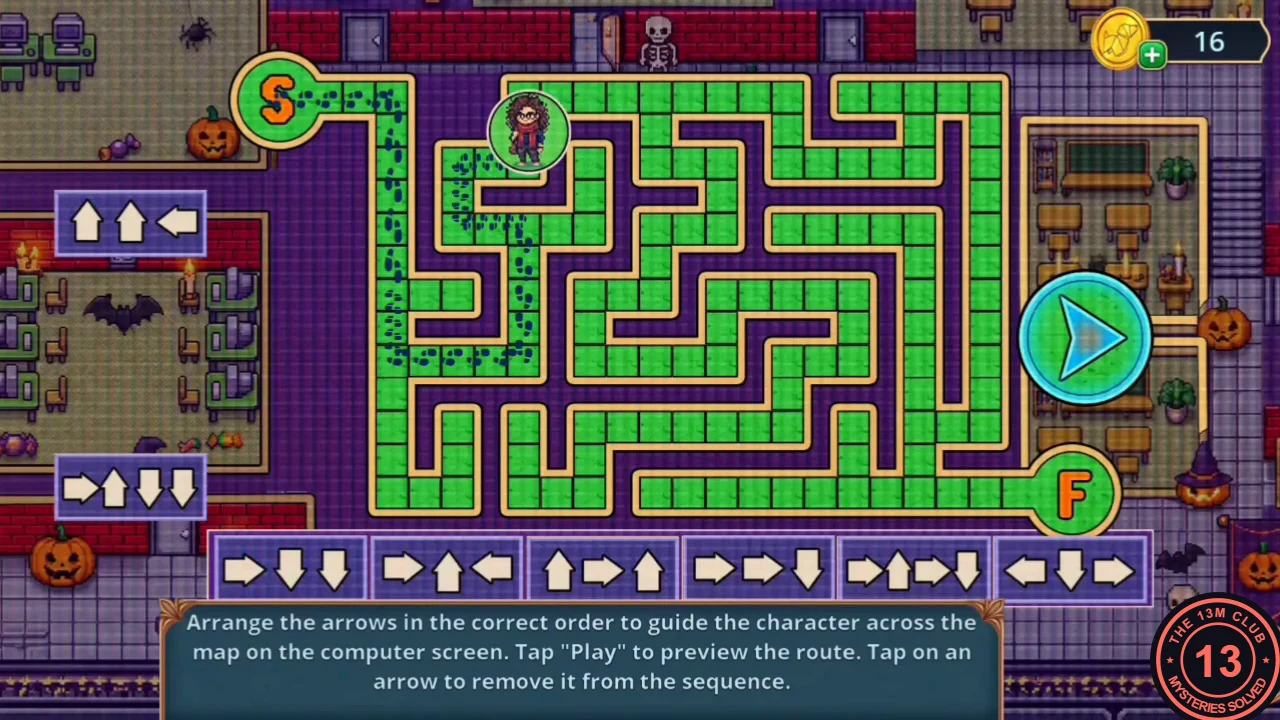
The six cards from step 2 in order, with the two unused cards left over on the side. - Take the Coin. Put it into the coffee machine and take the Glass of Water.
- Pour the Glass of Water over the box covered in hardened pink jam on the printer desk. Take the Selfie Stick. (The frozen block below needs something "scientific" later.)
- Go to the Sports Equipment Room and use the Selfie Stick on the top shelf with the jack-o'-lantern. Take the Staple Remover from the cart.
- In the office, use the Staple Remover on the bulletin board. Remove the green poster and take the purple lever from the niche: Levers (2/2).
Window Lever Panel
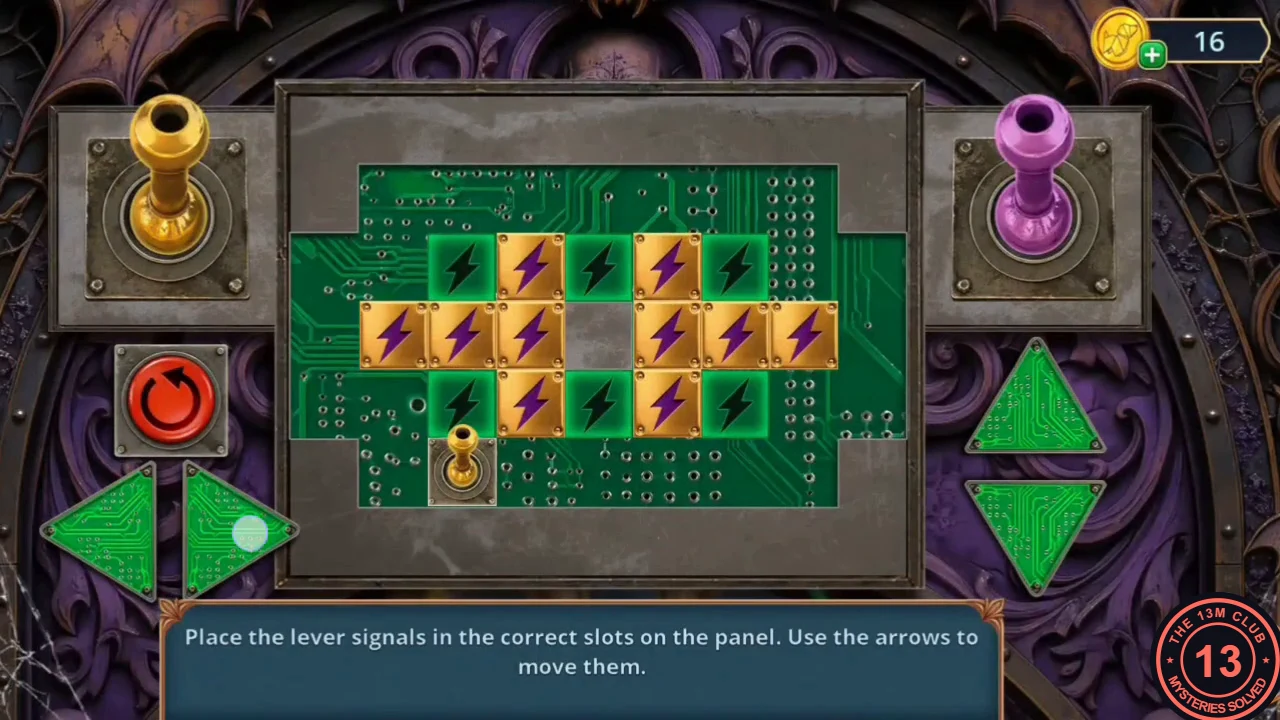
The window in the office alcove opens with a lever-signal panel.
- Insert both Levers into the window sockets. Puzzle: "Place the lever signals in the correct slots on the panel. Use the arrows to move them."
- Move the small lever cursor with the four arrow buttons. Every tile it enters flips between green and gold. The goal is to turn every tile gold (the grey centre stays grey). The red button resets the panel. Work row by row and avoid re-entering finished gold tiles where you can. This puzzle takes many moves, so no fixed move list is given.
- The window opens onto the rehearsal room, where a masked queen stands at a mirror. Choice: "Do nothing" (free), "Ask Ryan to check her" (30 coins, +2) or "Call out to the queen" (60 coins, +6). This guide takes the free Do nothing. Casey learns the queen must be freed from her mask carefully.
Bat Piñata
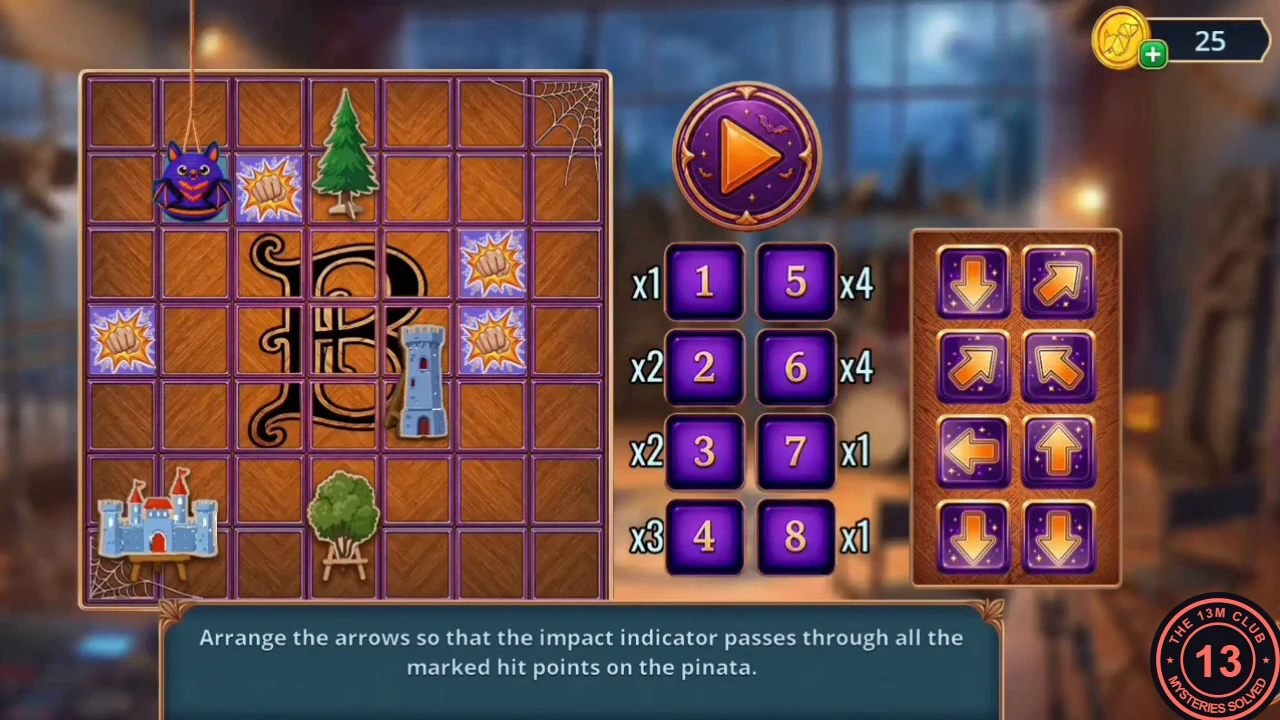
A bat piñata hangs in the Rehearsal Hall.
- Tap the purple and orange Pumpkin Pins on top of the costume rack by the window, in front of the black witch hat. Take the Horrid Pawn by the red bag. The grandfather clock is missing its working parts.
- Tap the bat piñata. Puzzle: "Arrange the arrows so that the impact indicator passes through all the marked hit points on the piñata." The 7×7 grid has eight numbered slots (1-4 on the left, 5-8 on the right), each with a fixed step count. Drag an arrow card into each slot and press Play.
- Round 1 (example; the step counts are printed on the slots): 1 Left, 2 Down, 3 Up-Right, 4 Down, 5 Up-Right, 6 Down, 7 Up-Left, 8 Up.
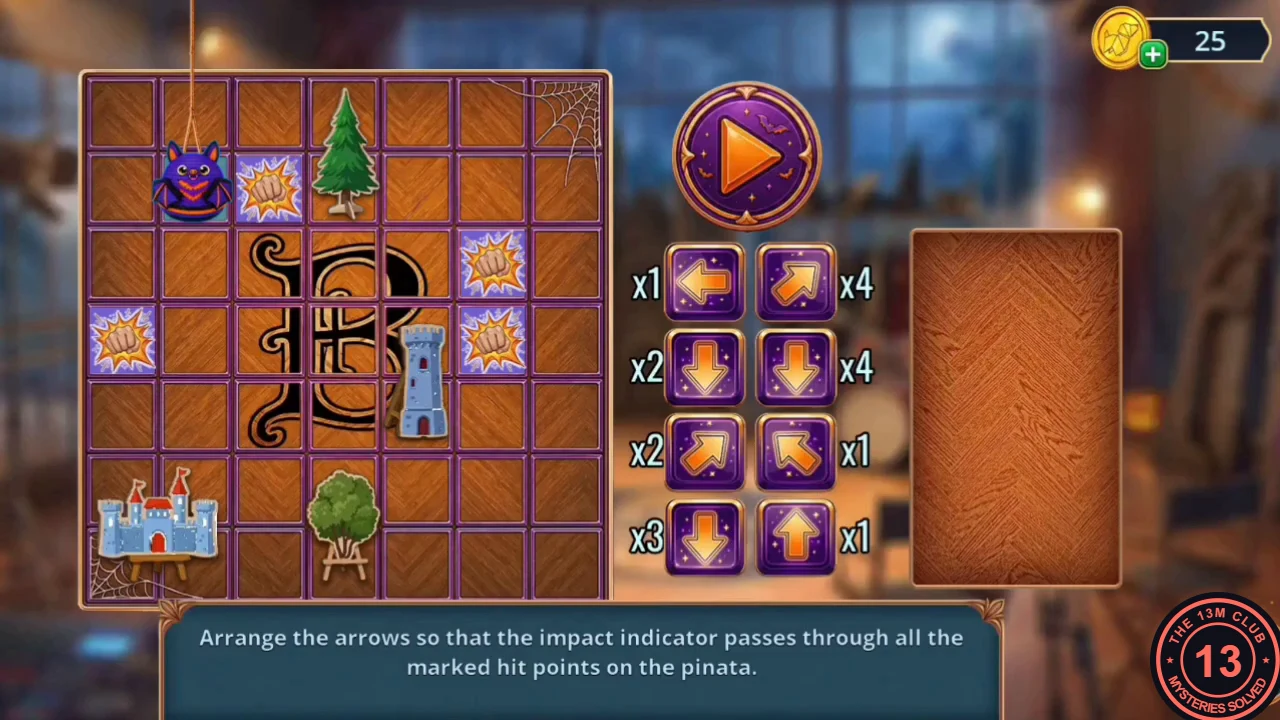
Example round 1 arrows from step 3, ready to play. - Round 2: 1 Down, 2 Up-Right, 3 Right, 4 Down, 5 Down-Right, 6 Down-Left, 7 Left, 8 Up. If your slots show different step counts, plan a route that passes over every marked hit point.
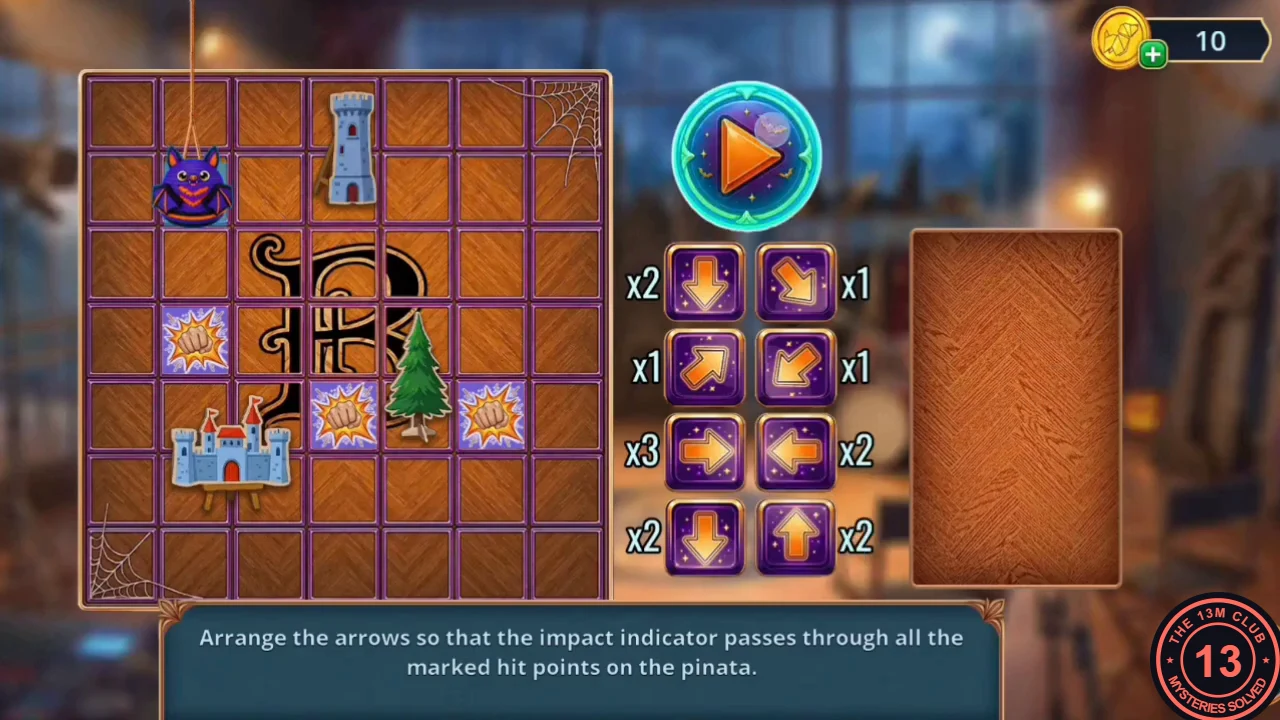
Example round 2 arrows from step 4, ready to play. - Take the Bat Hairpin from the broken piñata.
Director's Chair Pairs
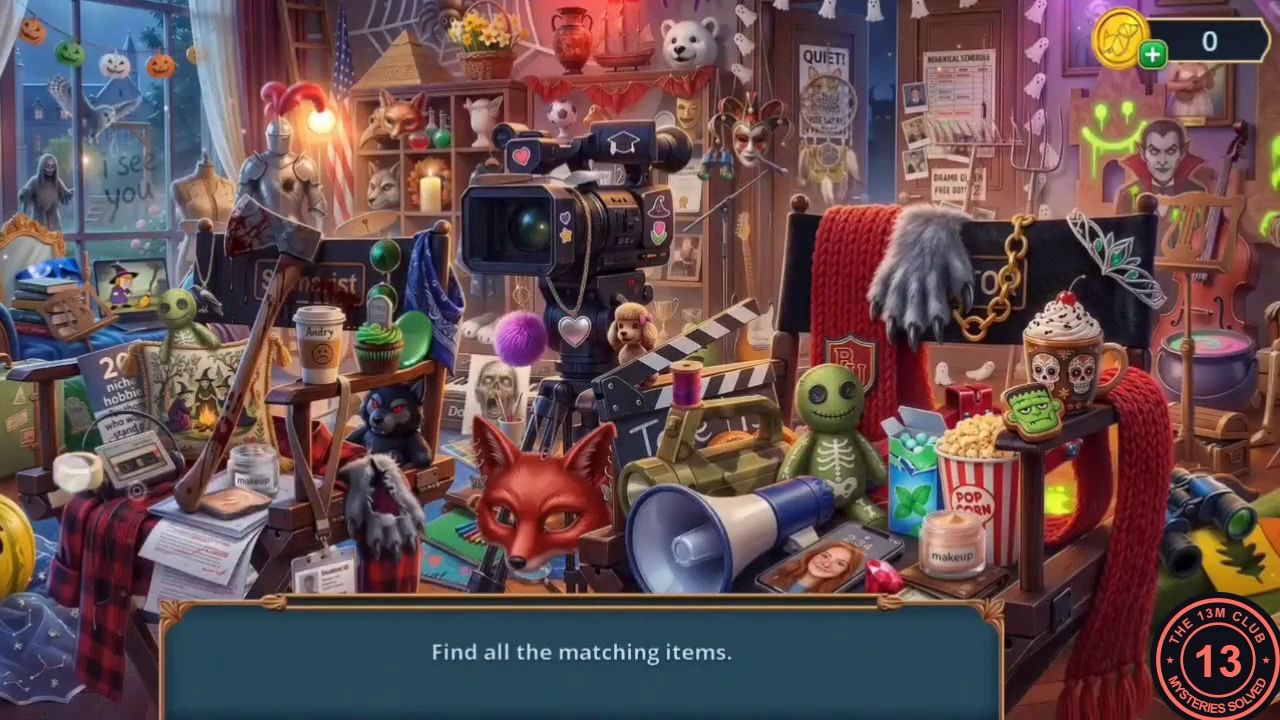
The director's chair is hidden in a cloud of stage fog.
- Take the Broken Referee's Whistle from the top of the red bag. Pick the bag's padlock with the Bat Hairpin and take the Hat.
- Use the Hat on the fog at the director's chair to wave it away. A pairs scene opens: "Find all the matching items." Tap matching pairs until the scene is clear. You receive the Jack.
- Put the Jack under the cardboard castle wall. The wall lifts to reveal a secret door to the Campus Radio Room.