Campus Radio Room
The radio room has a vampire mannequin behind a laser, a TV with a magician's box and a chess cabinet.
- On arrival, tap the purple Pumpkin Pin on the back of the purple sofa beside the orange spider cushion, then zoom in on the mixing desk and tap the Pumpkin Pins in its lower-left corner. At the TV and magician's box, note the sketch (wand, dove and box with a lid). A ghost appears on the TV. Take the Propellers (1/2). The gap beside the recorder needs a wedge later. Tap the Pumpkin Pins on the paper jack-o'-lantern in front of the TV.
- At the chess cabinet, take the Wooden Boxes (1/2); the battery slots are empty. Tap the Pumpkin Pins at the bottom of the cabinet, right of the crate. Place the Horrid Pawn on the chessboard and take the TV Remote from the drawer.
- Use the TV Remote on the TV. It switches off and slides away; take the Batteries (2/2) and the Magic Wand.
- Put the Batteries into the chess cabinet. The top panel opens: take the Magician's Box Lid.
- Put the lid on the magician's box and tap it with the Magic Wand. A dove flies out. Take the Vial of Vinegar and the Pocket Mirror.
- Put the Pocket Mirror on the sill of the vampire window. It reflects the red laser away from the mannequin's box.
Vampire's Fingers
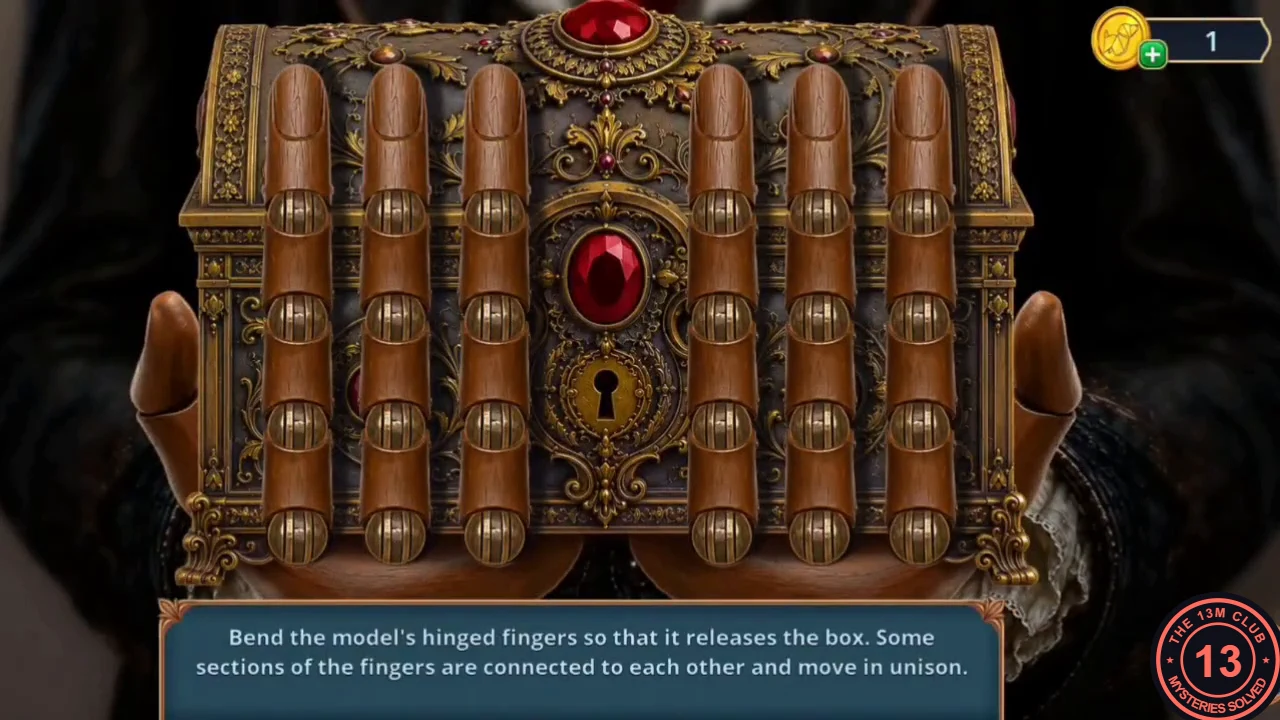
The vampire mannequin's hinged fingers hold a box.
- Puzzle: "Bend the model's hinged fingers so that it releases the box. Some sections of the fingers are connected to each other and move in unison." There are six fingers with a blue button under each. A button toggles its finger and any finger linked to it. Press a button and note which fingers move, then use those links to bend all six fingers down at once. Finding the links takes trial presses, so no fixed order is given.
- Open the released box and take the Fluffy Garland. Wipe the red slime off the mixing desk with it and take the Spare Cartridge.
Printer Gears
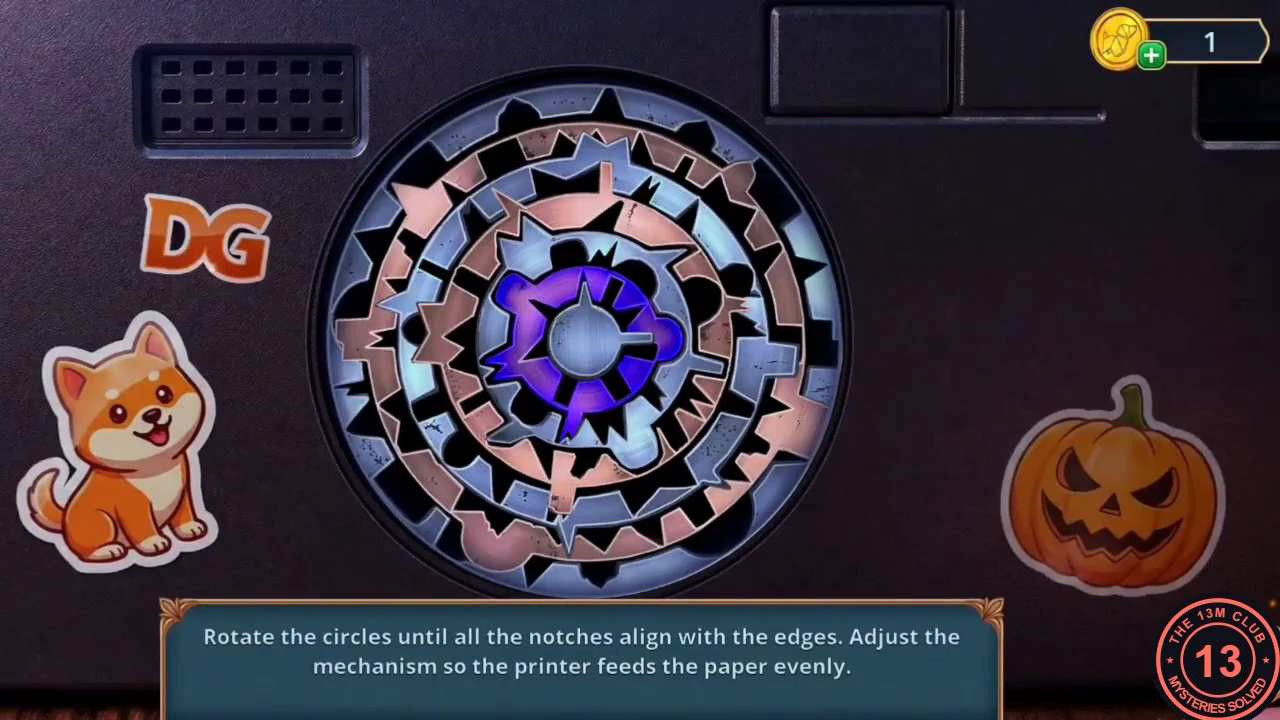
The Internet Cafe printer needs a cartridge and a working feed mechanism.
- In the Campus Internet Cafe, put the Spare Cartridge into the printer. Puzzle: "Rotate the circles until all the notches align with the edges. Adjust the mechanism so the printer feeds the paper evenly."
- There are five toothed rings. Tap a ring to rotate it; turn each one until its teeth mesh with the rings next to it and the whole gear looks solid. Start from the outer ring and work inward. Expect some trial and error; no fixed tap count is listed.
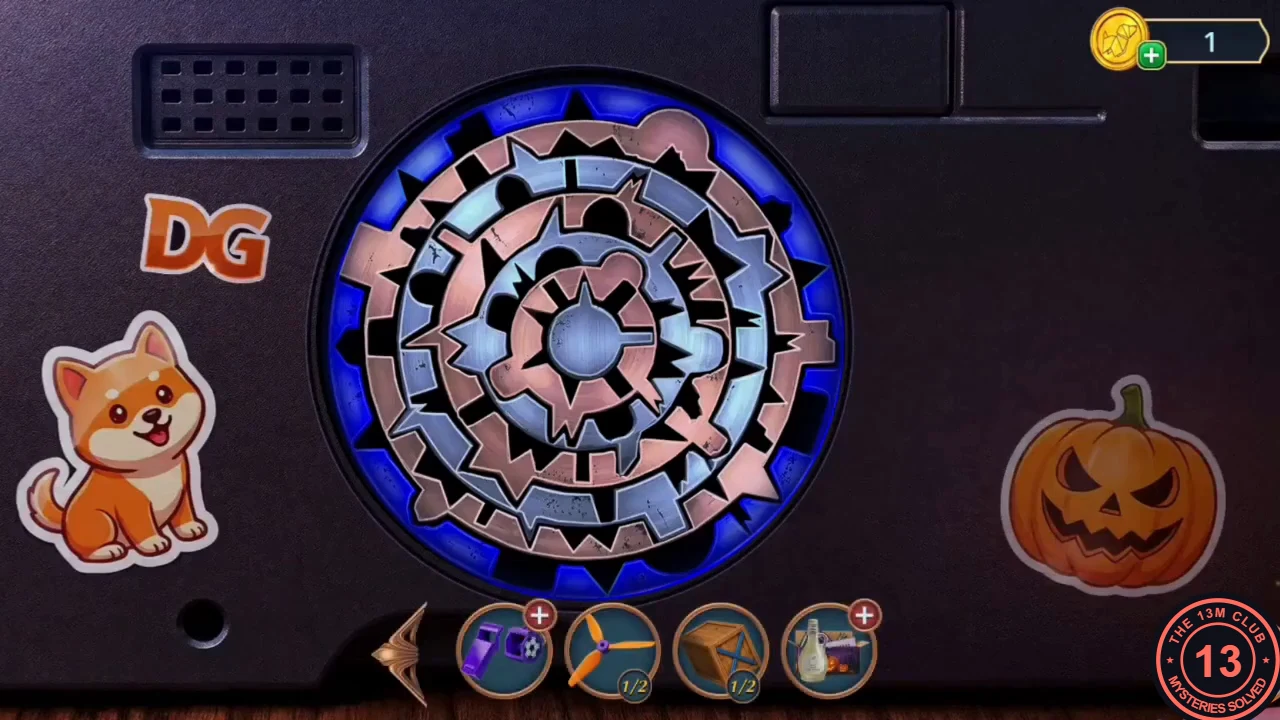
Solved: the rings mesh into one solid gear and the rim glows blue. - The printer prints the Legend of Jack-o'-Lantern (a mask comes off if its wearer sees special symbols drawn on a mirror), the Drawing with Symbols and the Halloween Party Flyer.
- At the locked library door, slide the Halloween Party Flyer under the door, then push the Fake Fang into the keyhole. The key drops onto the flyer; pull it back and the door opens to the Book Club Room.
Bookcase Box Ladder
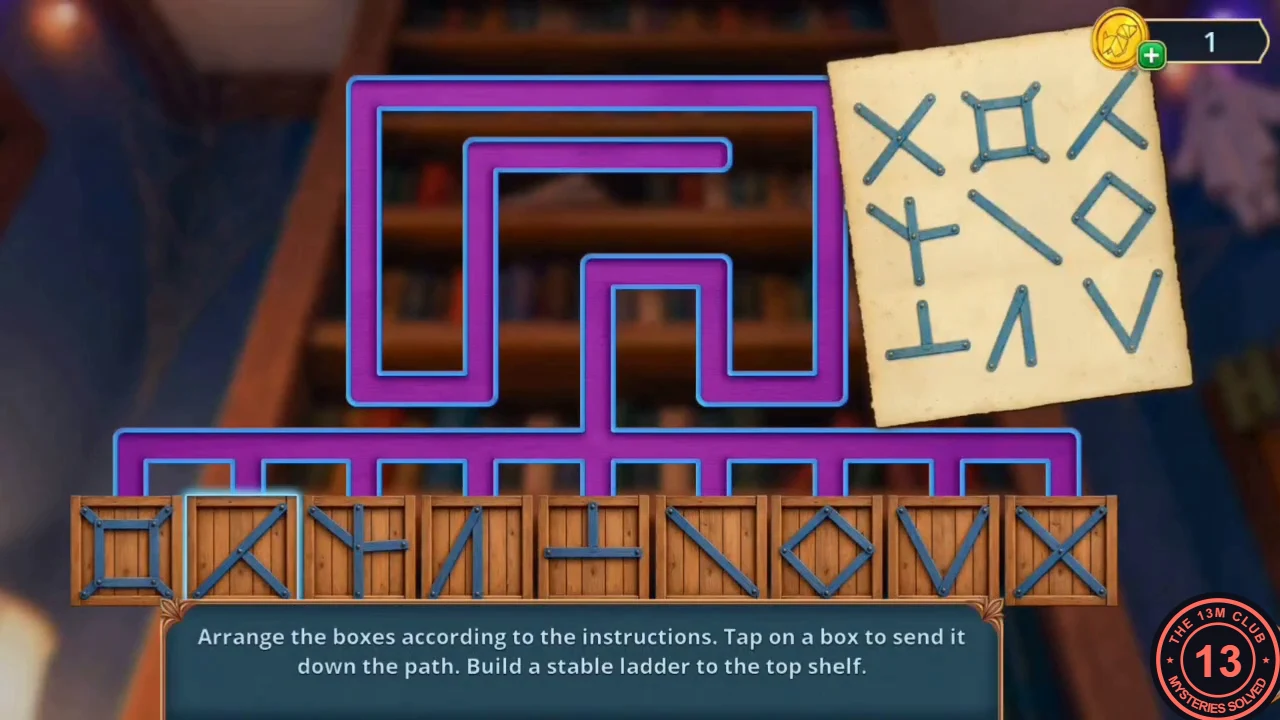
The top shelf of the Book Club bookcase is out of reach.
- At the Pumpkin Face mask board, lift the wooden crate off the toothy purple box. This is your second crate, so you now hold Wooden Boxes (2/2); the first came from the chess cabinet. The purple box itself stays shut ("Without a hint, I'm lost"). Take the Tube. In this close-up, tap the Pumpkin Pins in front of the toothy purple box, by the ghost figurines.
- Zoom in on the tall bookcase and place the Wooden Boxes (2/2) at its foot. Puzzle: "Arrange the boxes according to the instructions. Tap on a box to send it down the path. Build a stable ladder to the top shelf." The paper shows the target stack: top row X, square, K shape; middle row Y with a crossbar, backslash, diamond; bottom row inverted T, caret (^), V. The nine boxes in the row are, from the left: square, K shape, Y with crossbar, caret, inverted T, backslash, diamond, V, X. Tap them in this order: K shape, square, X, Y with crossbar, inverted T, V, diamond, backslash, caret. Each tapped box lights up, and after the ninth they all slide down the path and build the ladder.
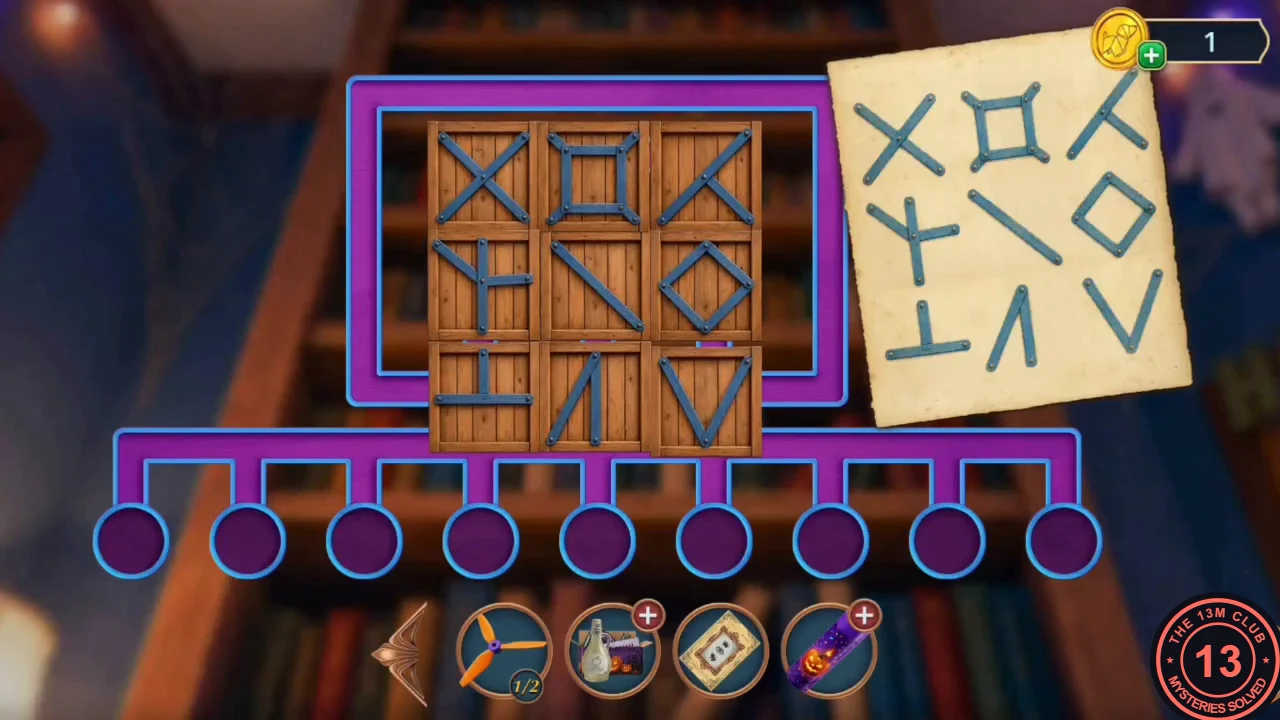
The finished ladder matches the paper row by row. - Take the Soda Bottle from the top shelf. Then look under the red floral armchair: take the Lemon Juice and the Mop.
- Open the Vial of Vinegar in your inventory and add the Lemon Juice. It still needs more ingredients.
Book Club Curtain: Combinations
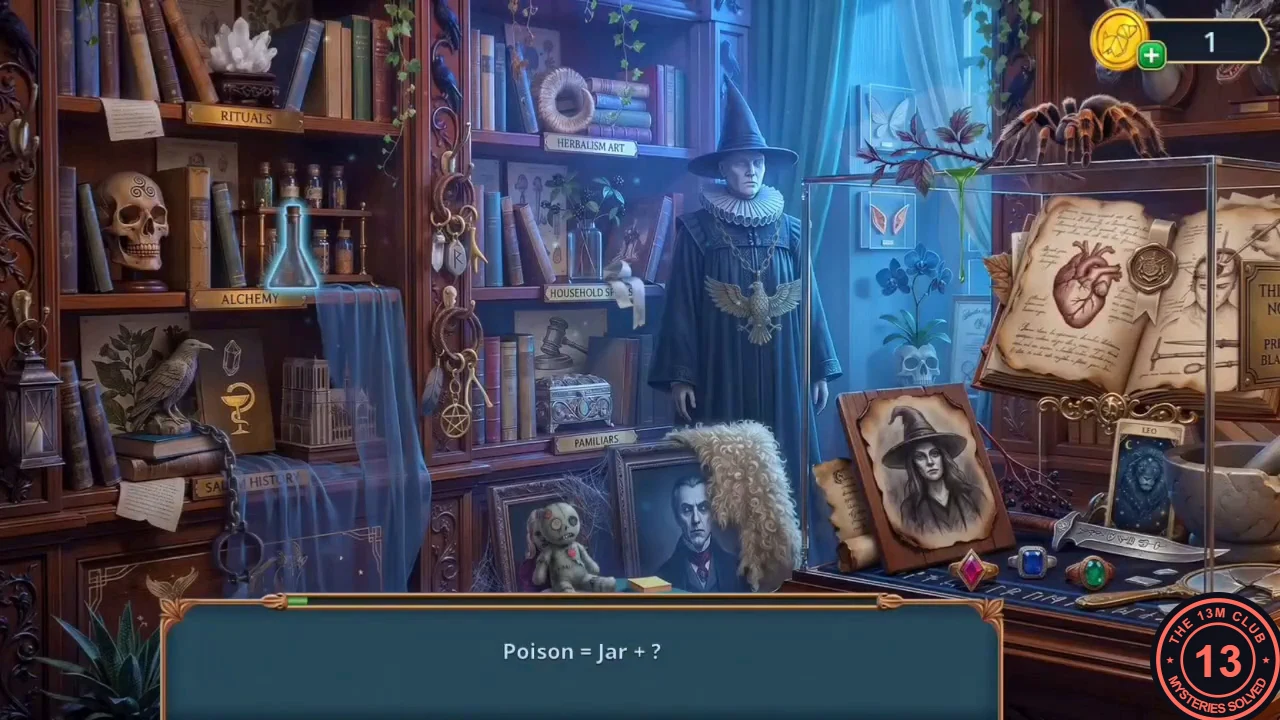
Behind the Book Club curtain is a witch's alchemy room.
- Open the curtain to start a combination scene. Each line reads "X = ? + ?"; find the two objects that make the word, and the line fills in as you find them. Poison = Jar (the glass flask on the ALCHEMY shelf, left) + Poisonous Branch (the dark sprig dripping green on top of the glass case, by the tarantula). Ram = Wool (the white curly fleece beside the man's portrait, bottom centre) + Horn (the coiled horn on the top HERBALISM ART shelf). Convicted = Judge's Mallet (the gavel picture on the middle shelf, above the silver casket) + Shackles (the shackle on a chain hanging at the left, under SALEM HISTORY). Mummy = Zombie (the stitched doll at the bottom centre) + Bandage (the white strip hanging under the HOUSEHOLD SPELLS label). Griffin = Eagle (the eagle emblem on the robed mannequin) + Lion (the LEO tarot card in the glass case). Order = Parchment (the rolled scroll left of the witch portrait) + Seal (the red wax seal on the open anatomy book). You receive the Clippers.
The Queen's Mirror
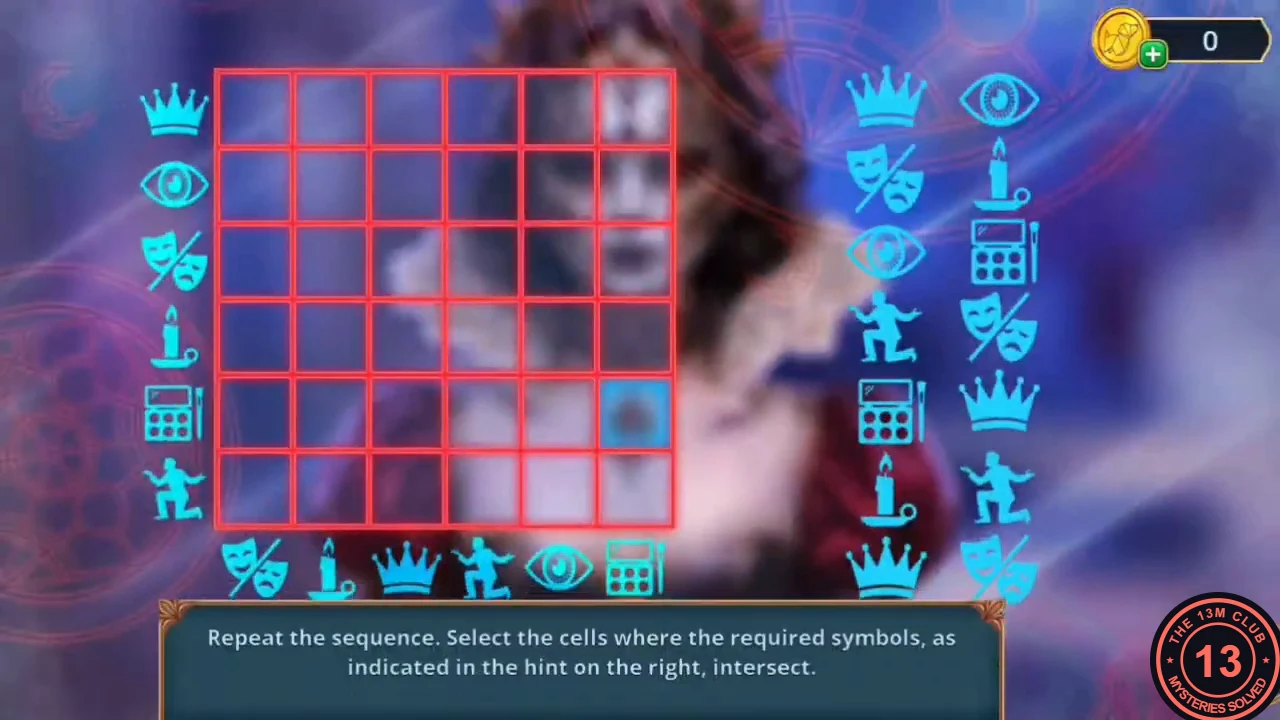
Melissa, the masked queen, stands at the mirror in the Rehearsal Hall.
- In the Rehearsal Hall, cut the green cable tie on the fan's side box with the Clippers. The fan spins and its grille comes off. Take the Heavy Statuette behind the blades and the Brush on the control box.
- At the queen's mirror, place the Drawing with Symbols on the stand to show the outlines (crown, eye, masks). Place the Paint, then use the Brush to trace the three symbols.
- Grid puzzle: "Repeat the sequence. Select the cells where the required symbols, as indicated in the hint on the right, intersect." Rows from top: crown, eye, masks, candle, palette, person. Columns from left: masks, candle, crown, person, eye, palette. In hint order, select crown × eye, masks × candle, eye × palette, person × masks, palette × crown, candle × person, crown × masks.
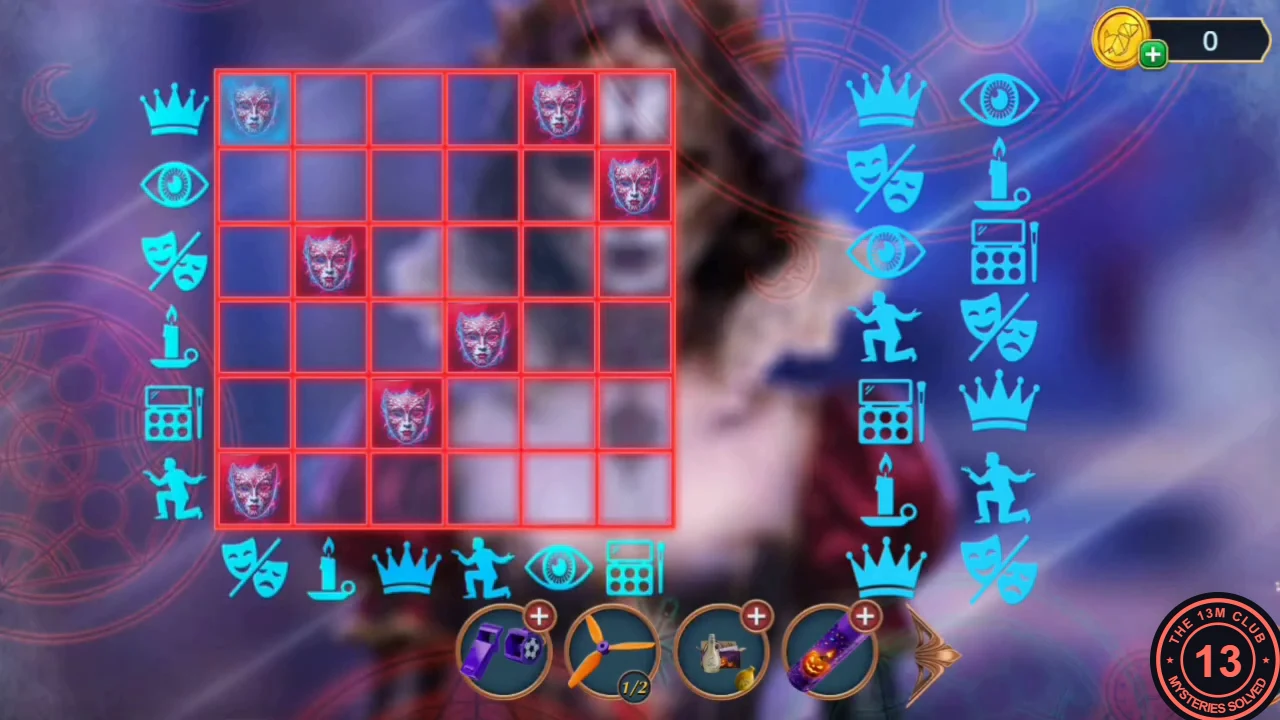
All seven intersections from step 3 selected. - Melissa is freed. Choice: "Thank you, Melissa! If you remember anything else, let us know right away." (60 coins, +2) or the free "Thankfully, you're fine now. Stay here and don't put the mask back on." This guide takes the free answer. Take the Queen's Diadem.
Referee's Whistle and the Opera CD
The Queen's Diadem fits the two holes of the purple box in the cafe.
- In the Campus Internet Cafe, insert the Queen's Diadem into the two holes of the purple box by the coffee machine. Take the Ball and the Antifreeze Spray.
- Spray the Antifreeze Spray on the frozen block under the printer desk. The ice melts; take the Glue Paste from the mini-fridge.
- Open the Broken Referee's Whistle in your inventory. Add the Glue Paste and the Ball to get the Referee's Whistle.
- In the Decorated Gym, blow the Referee's Whistle at the white mouse on the DJ booth. It runs off; take the CD with Opera and the Coal Dust.
- Back in the cafe, put the CD with Opera into the console on the gaming desk. The cobwebbed "Boo" case opens: take the Wick and the Lighter. In the same gaming-desk close-up, tap the purple and orange Pumpkin Pins at the foot of the second monitor (the one with the mummy picture), right of the "Boo" shelf. Take the Baking Soda from the coffee table.
Homemade Acid
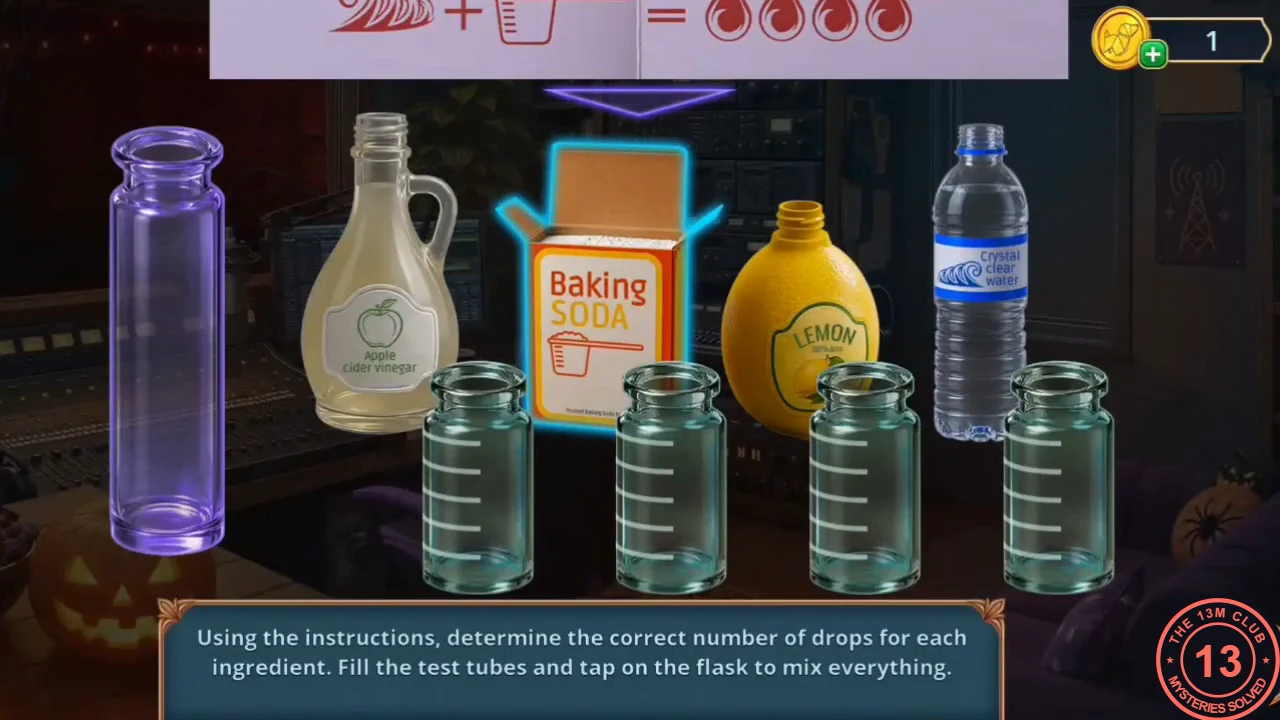
The Vial of Vinegar becomes an acid that can eat through a chain.
- Open the Vial of Vinegar again and add the Baking Soda and the Soda Bottle. A mixing puzzle opens: "Using the instructions, determine the correct number of drops for each ingredient. Fill the test tubes and tap on the flask to mix everything."
- The note gives sums: vinegar + baking soda = 5, lemon + baking soda = 3, lemon + vinegar = 4, water + baking soda = 4. So fill Apple Cider Vinegar 3 drops, Baking Soda 2, Lemon Juice 1 and Water 2, then tap the flask. Take the Homemade Acid.
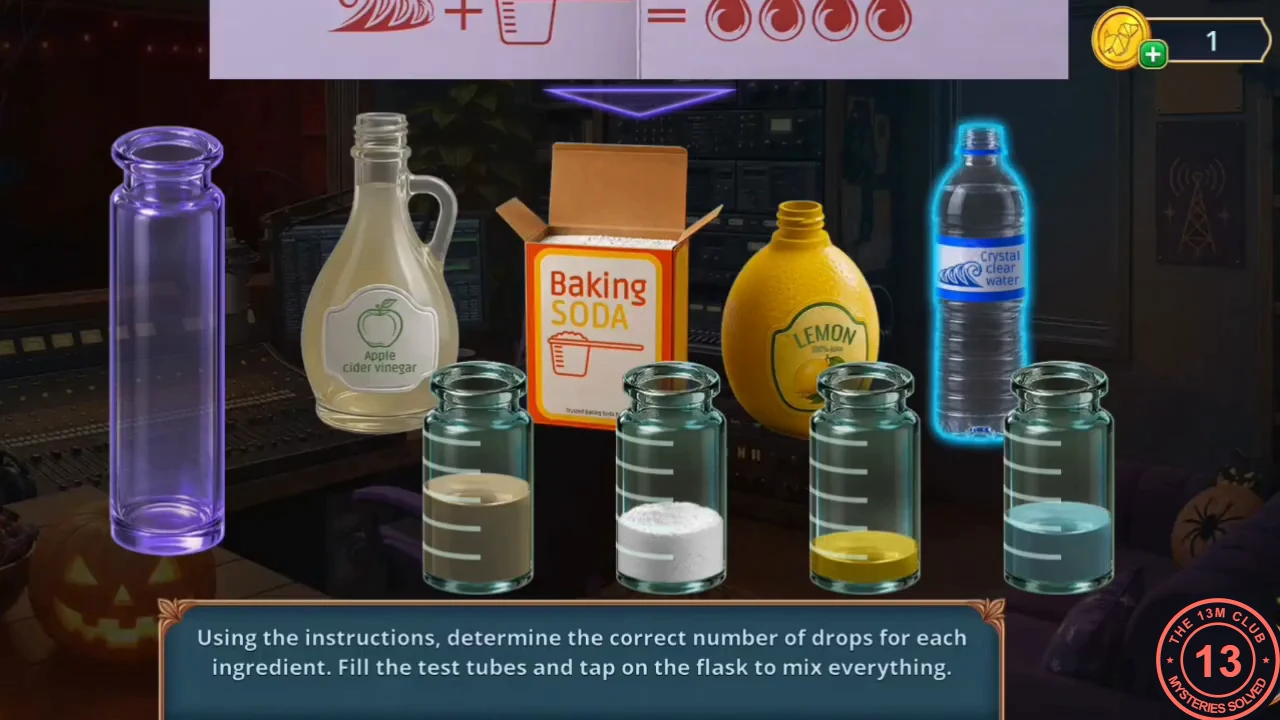
Filled correctly: vinegar 3, baking soda 2, lemon 1, water 2. Tap the flask next. - In the Campus Radio Room, pour the Homemade Acid on the chained lock of the chess cabinet. Take the Battery, the Glasses Frame and the Plastic Wedge.
- Open the Tube in your inventory and add the Wick and the Coal Dust. It still needs two more ingredients.
- Push the Plastic Wedge into the gap beside the recorder on the magician's box shelf, then strike the wedge with the Heavy Statuette (from the fan in the Rehearsal Hall) to drive it in. The recorder opens: take the Saltpeter, the Lenses and the Window Handle.
- Fit the Window Handle to the vampire window and open it. Climb through to the Service Exit to the Courtyard. On arrival, tap the Pumpkin Pins on the top shelf of the yellow cleaning cart beside the door. Then zoom in on the grey metal cabinet with a statue relief on its door, by the crates, and tap the Pumpkin Pins on the crate just right of it.
Cockroach Sink Fuse
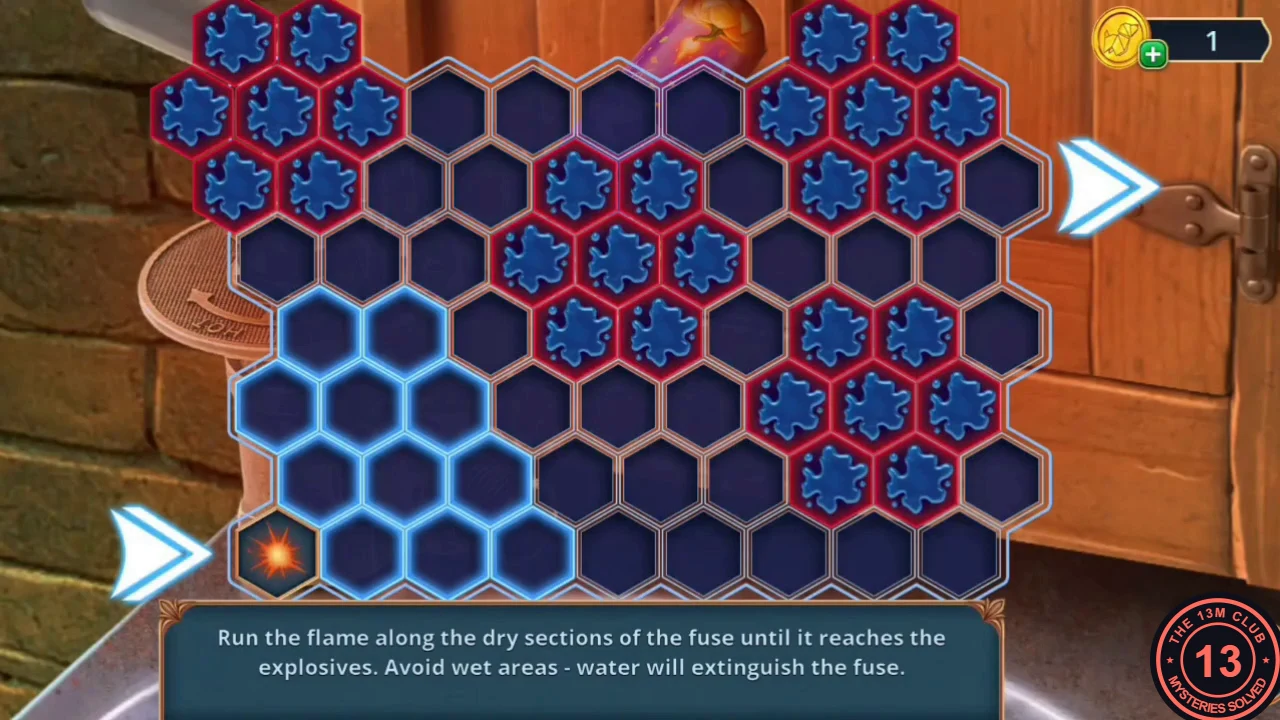
Cockroaches guard the sink by the service exit, and a wooden door above it hides supplies.
- At the broken red cabinet, take the Drone Body and the Sulfur, and tap the purple and orange Pumpkin Pins on the floor in the lower-left corner of this close-up. Open the Tube and add the Saltpeter and the Sulfur to make the Explosives.
- At the sink, put the Explosives into the hole in the wooden door and light them with the Lighter. Fuse puzzle: "Run the flame along the dry sections of the fuse until it reaches the explosives. Avoid wet areas - water will extinguish the fuse."
- The fuse runs across a hex grid from the arrow at the lower left to the arrow at the upper right. Tap a dry cell next to the flame to advance. The wet patches (blue snowflake cells) shift after each move, so look one step ahead and keep a dry cell in front of the flame. The wet layout changes as you play, so no fixed route is given.
- The explosion opens the cupboard. Take the Balloon, the Camera and the Saw.
Flags, Glasses and the Drone
Several items at the service exit come together into a flying helper.
- Saw through the boards beside the broken red window. Take the Broken Chain Link.
- At the exit door, hook the Broken Chain Link onto the hanging XXL sack to lift it. Take the Halloween Tape. The door lock needs a key ("Or many, maybe?").
- Open the Glasses Frame in your inventory and add the Lenses to get the Glasses with Light Filter.
- In the Rehearsal Hall, look at the fan through the Glasses with Light Filter. Hidden glowing signs appear and a Blackwood flag flies out: Flagpoles (1/2).
- At the service exit, use the Halloween Tape on the broken red cabinet to pull its contents closer. Take the second flag (Flagpoles 2/2) and the Propellers (2/2).
- Open the Drone Body in your inventory and add the Battery, the Propellers and the Camera to build the Drone.
- Send the Drone to the top of the grey locker at the service exit. It brings back the Clock Weights (1/2).
- In the Administrative Building, put the Flagpoles on the Blackwood University model (its towers are still missing). Open the spiderweb bowl on the office floor and put the Lighter in it; the bowl needs two more parts.
Sports Cart: Unpaired Items
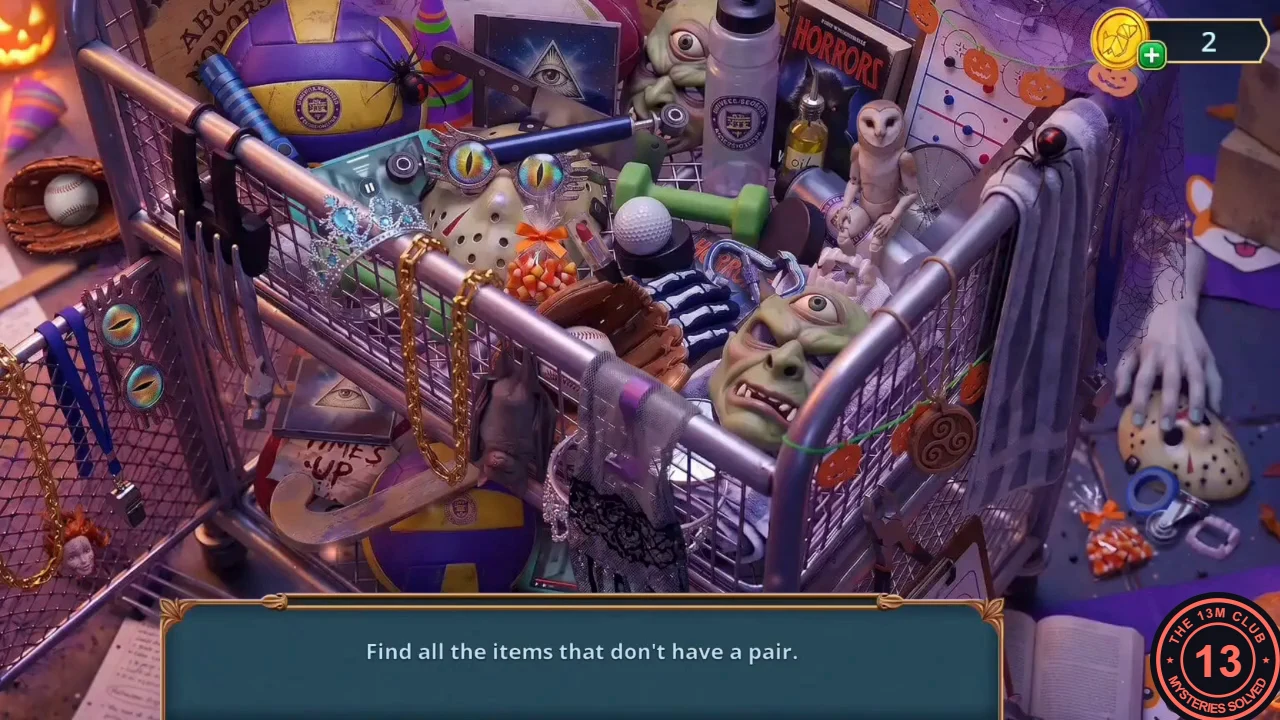
The sports cart sparkles again.
- In the Sports Equipment Room, open the sparkling cart. Scene: "Find all the items that don't have a pair." Tap every item that appears only once. You receive the Upside-Down Pumpkin Amulet.
- In the Book Club Room, place the amulet in the centre slot of the Pumpkin Face mask board. The toothy box opens; take the Towers.
- In the Administrative Building, add the Towers to the Blackwood model. The roof lifts; take the Window Cleaner.
Gym Junk Differences
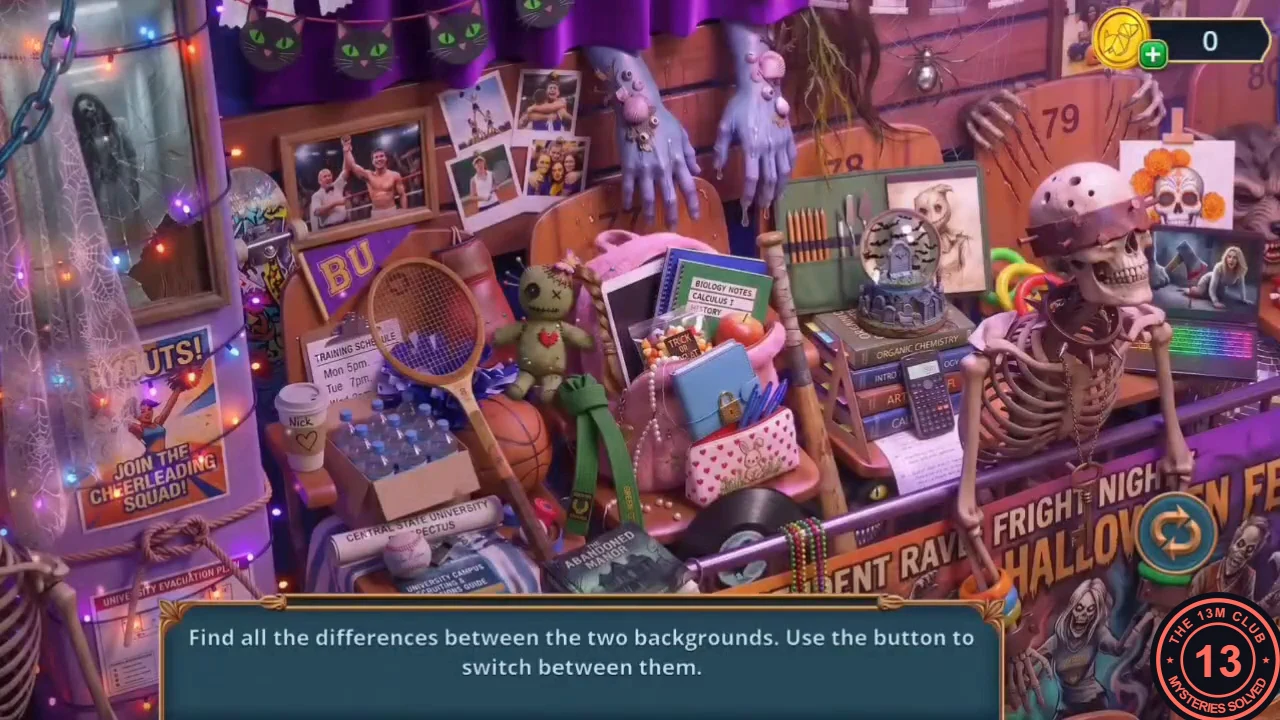
A dusty junk pile in the Decorated Gym hides more than it seems.
- In the Decorated Gym, spray the Window Cleaner on the sparkling spot. Scene: "Find all the differences between the two backgrounds. Use the button to switch between them." Switch back and forth and tap each difference. You receive the Duct Tape.
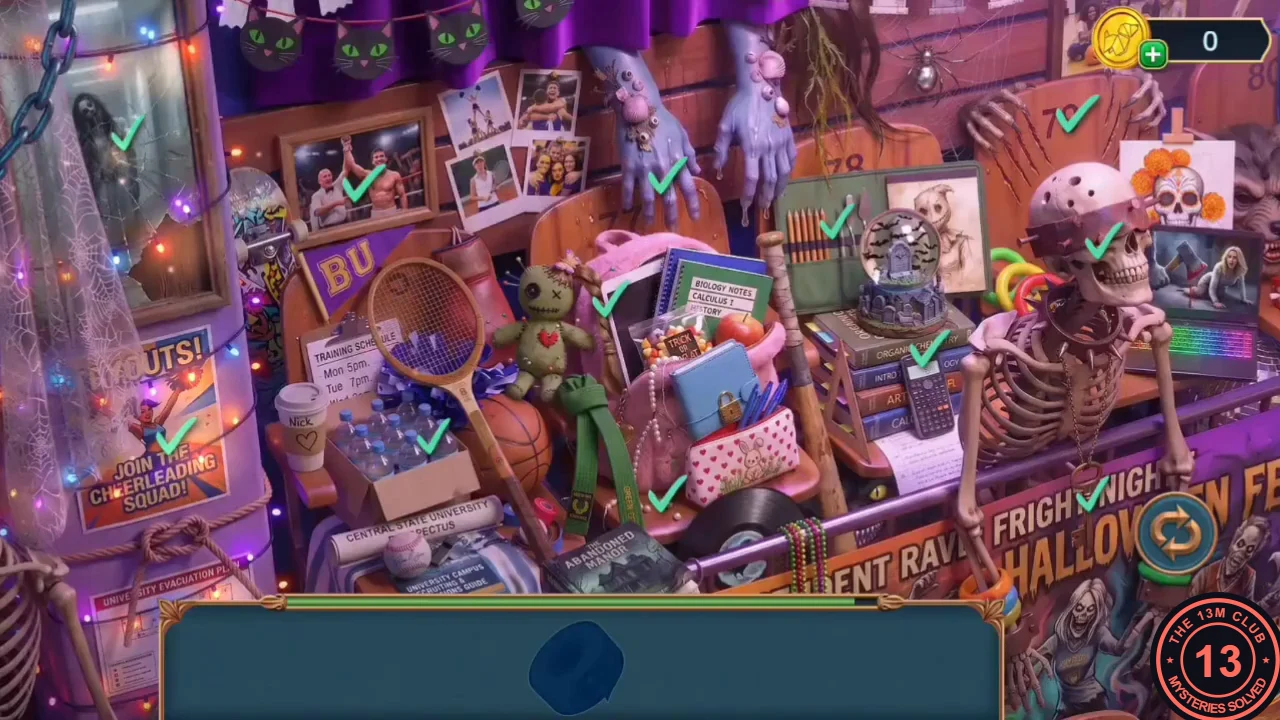
Every difference found in the example game, each marked with a check. - Tape the mouth of the snapping plant beside the clown with the Duct Tape. The clown's hand releases the Paper with Symbols. Tap the Pumpkin Pins on the wooden seat right of the clown's head.
Pumpkin Face Symbol Cards
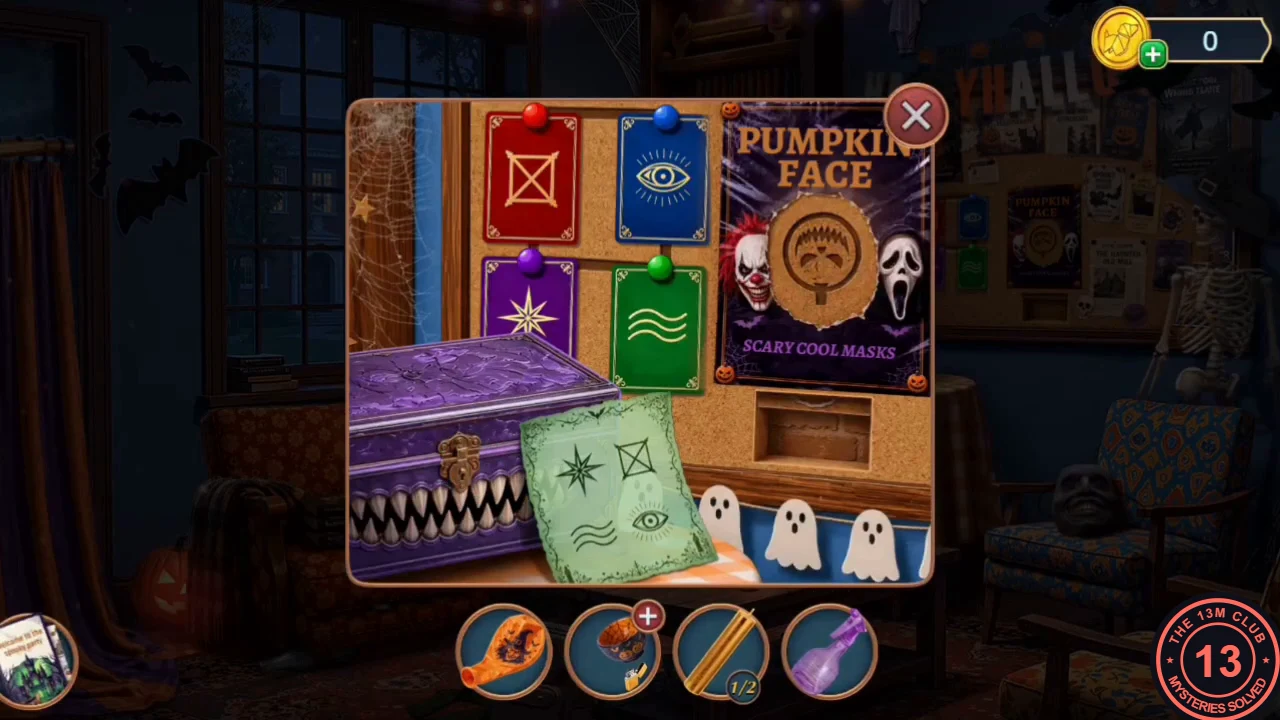
The four coloured cards on the Book Club mask board guard the toothy box.
- Place the Paper with Symbols on the mask board. Tap two cards to swap them until they match the paper: top row purple star, red X-box; bottom row green waves, blue eye. The toothy box opens; take the Essential Oil.