Crimson Moon Dessert
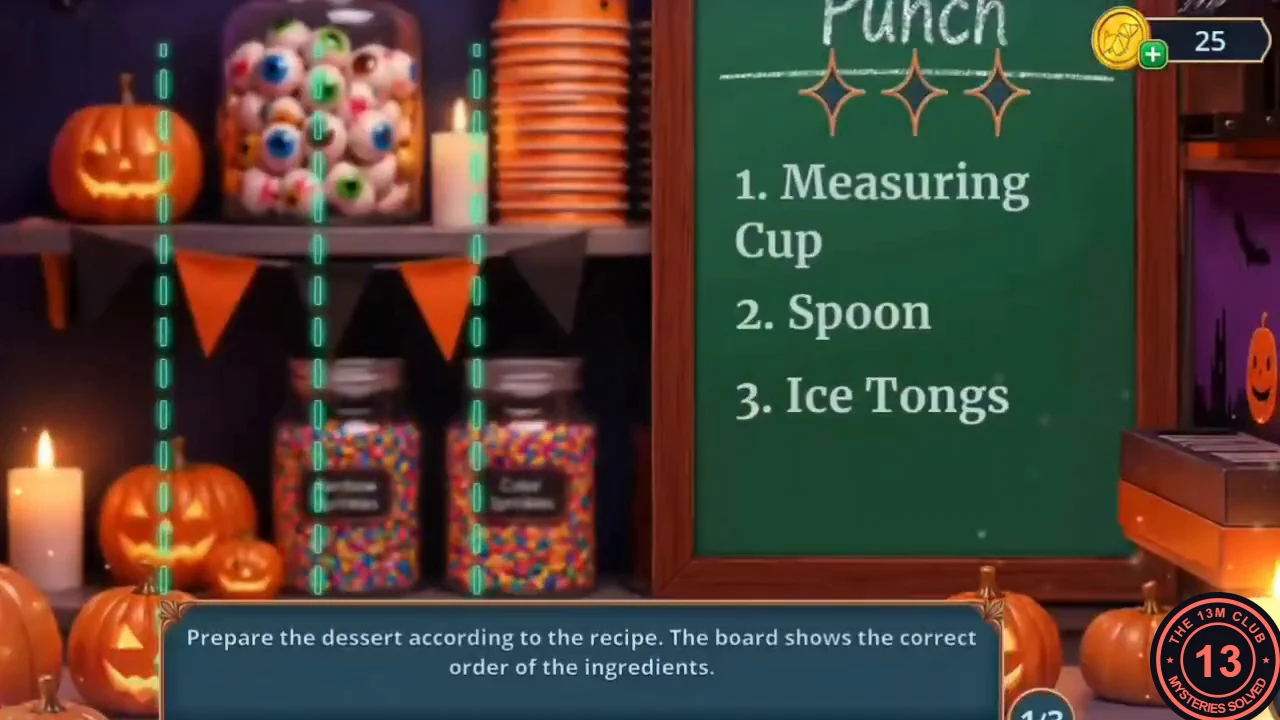
The coffee truck on the Main Alley can make a "Crimson Moon Punch" dessert once it has three ingredients.
- On the Main Alley, open the brick pedestal with the berry bush and use the Stocking to collect the Cranberries.
- Open the coffee truck counter. Place the Cranberries and the Bottle of Punch in the ingredient slots. Casey needs one more ingredient.
- Go to University Hall and open the toothy chest beside the skull. Take the Milk.
- Return to the coffee truck and add the Milk. In the recipe mini-game, the board briefly shows the ingredients in order; then tap the matching icons on the shelf in that order. In the example game there were three rounds: Measuring Cup, Spoon, Ice Tongs; then Cranberry, Bottle of Punch, Milk, Cream; then Sugar, Ice, Waffle Cone, Tea Spoon, Berry Topping. Follow the board in your own game. Take the Ice Cream.
Raccoon, Cola and the Trophy Cabinet
The ice cream buys you a banknote, and a cola can clean the trophy cabinet in the student lounge.
- On the Main Alley, give the Ice Cream to the raccoon on the bench. When it leaves, take the Banknote.
- In the student lounge, put the Banknote into the red Blackwood vending machine under the corgi mascot. Take the Cola.
- Open the dirty trophy cabinet. Place the Loofah, pour the Cola on the glass, then wipe it clean. The cabinet opens.
- Take the gold Missing Letter (2/3) and the Medal. Tap the Pumpkin Pins on the dark stand at the right end of the shelf, beside the tall gold cup.
Domini Art Catalogue
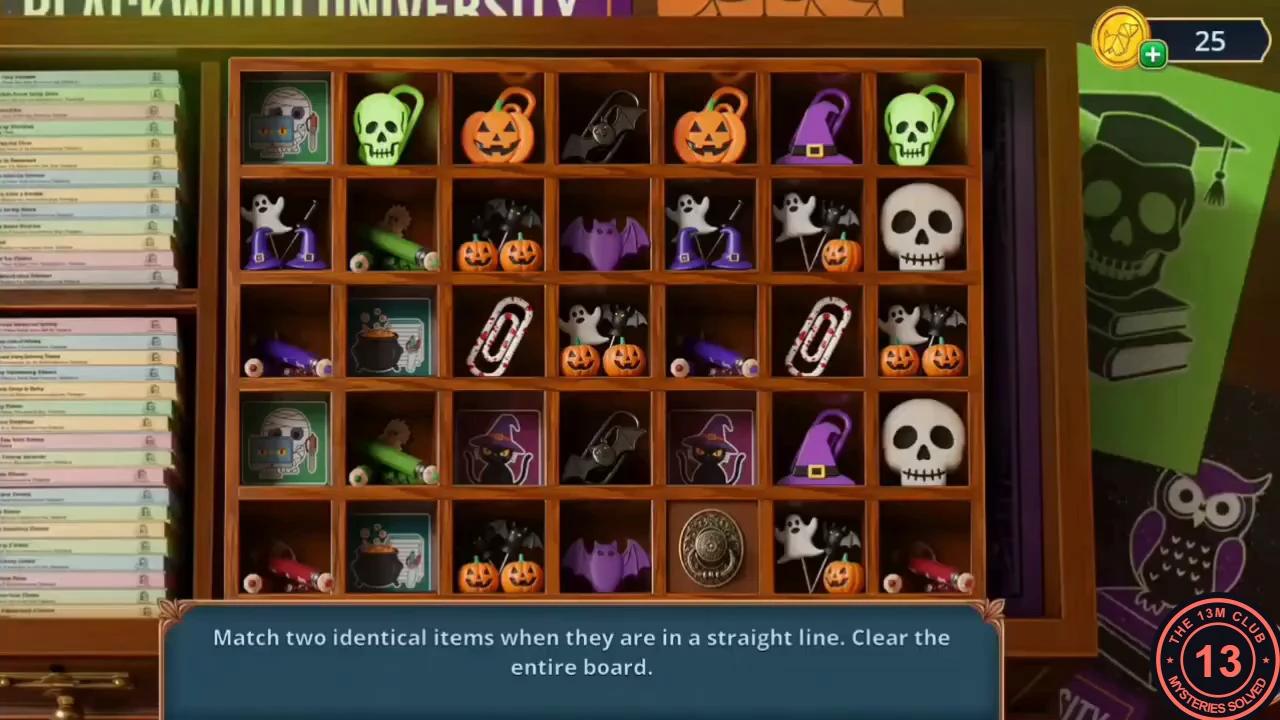
The library catalogue cabinet has a medal-shaped slot on top.
- In the library, open the Domini Art catalogue and place the Medal in the slot on top. A matching board opens.
- Goal: "Match two identical items when they are in a straight line. Clear the entire board." Tap two identical tiles that line up in the same row or column with nothing between them; they disappear. Clear outer tiles first to open lines for the inner pairs. The tile layout may differ in your game, so no fixed tap order is listed.
- When the board is clear, the side drawer opens with a Fall Recruitment brochure about the Jack-o'-Lantern legend. Read it; nothing needs to be taken from the drawer.
A Crutch for Noah
Noah is hurt and needs help to walk.
- In the library, take the Spreader beside Noah.
- Open the library windowsill and use the Spreader to lift the window. Take the Batteries (1/2). Tap the Pumpkin Pins at the right end of the sill, beside the window clamp.
- Use the Saw from the ghost lamp on the branch outside the window to cut off the Short Branch.
- Open the Billiard Cue in inventory; it has three empty slots. Add the red tape roll, the Torn Costume and the Short Branch to make the Improvised Crutch. Give it to Noah.
- Noah tells the story of the Jack-o'-Lantern masks. Choice: Hear him out (60 coins, +2 decision points) or Be skeptical (free). This guide takes the free Be skeptical. Take the Remote Control. A new task appears: Escape. Use the map to go to the Study Hall.
Projector Pairs Search
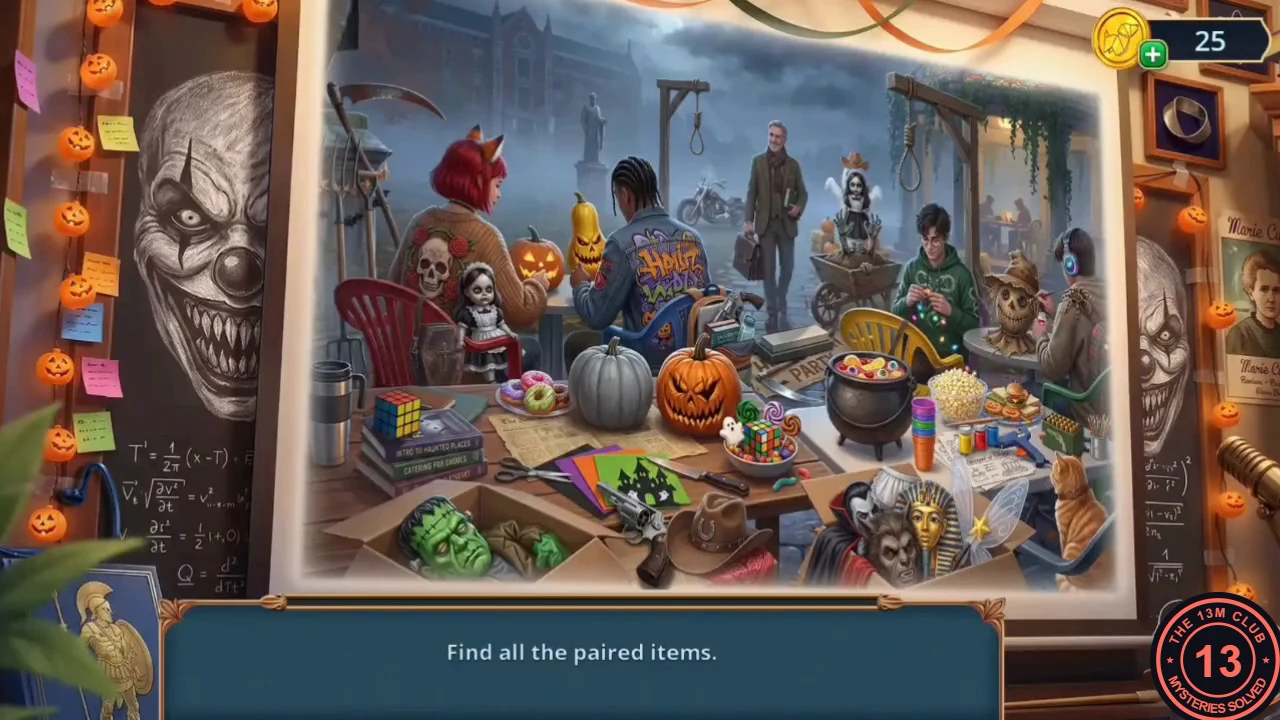
The remote control turns on the projector screen in the Study Hall.
- Use the Remote Control on the projector. The screen opens a hidden-object scene.
- Goal: "Find all the paired items." Tap matching halves of each pair (for example, a gun-like item needs its ammo; Casey says "No ammo, no shooting." if you tap it alone). Complete all pairs to take the Headphones.
- The lower drawer of the lightbox desk has no handle. Fit the Headphones into its two holes as a handle and pull it open. Take the Plastic Spiders (1/2) and the Souvenir Magnet.
University Hall Mailboxes
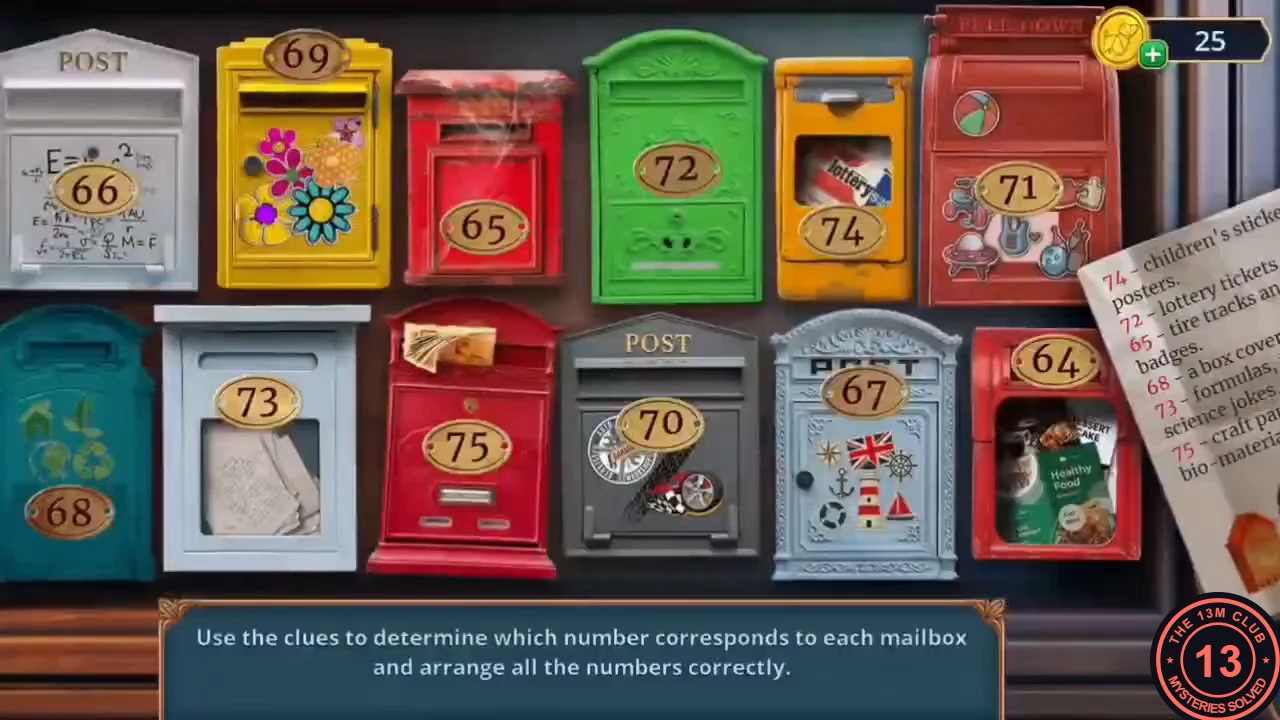
The red cobweb-covered post box in University Hall has a metal emblem holder.
- Place the Souvenir Magnet on the emblem of the red post box. The mailbox number puzzle opens.
- Goal: "Use the clues to determine which number corresponds to each mailbox and arrange all the numbers correctly." Tap two number plates to swap them. Read the clue note: each number describes a mailbox's decoration (for example, 68 is the box covered in cobwebs, 73 has formulas and science jokes, 65 has tire tracks and racing badges, 72 has lottery tickets and flyers, 74 has children's stickers, 75 has craft paper and eco-slogans).
- Example of the accepted layout; check each box against your own clue note. Top row, left to right: 73 (white POST box with formulas), 70 (yellow with flowers), 68 (red with cobwebs), 67 (green), 72 (orange with lottery tickets), 74 (red with stickers). Bottom row, left to right: 75 (teal eco box), 66 (white with newspapers), 71 (red with banknotes), 65 (grey POST box with racing badges), 64 (light blue with anchors and a flag), 69 (red with healthy food).
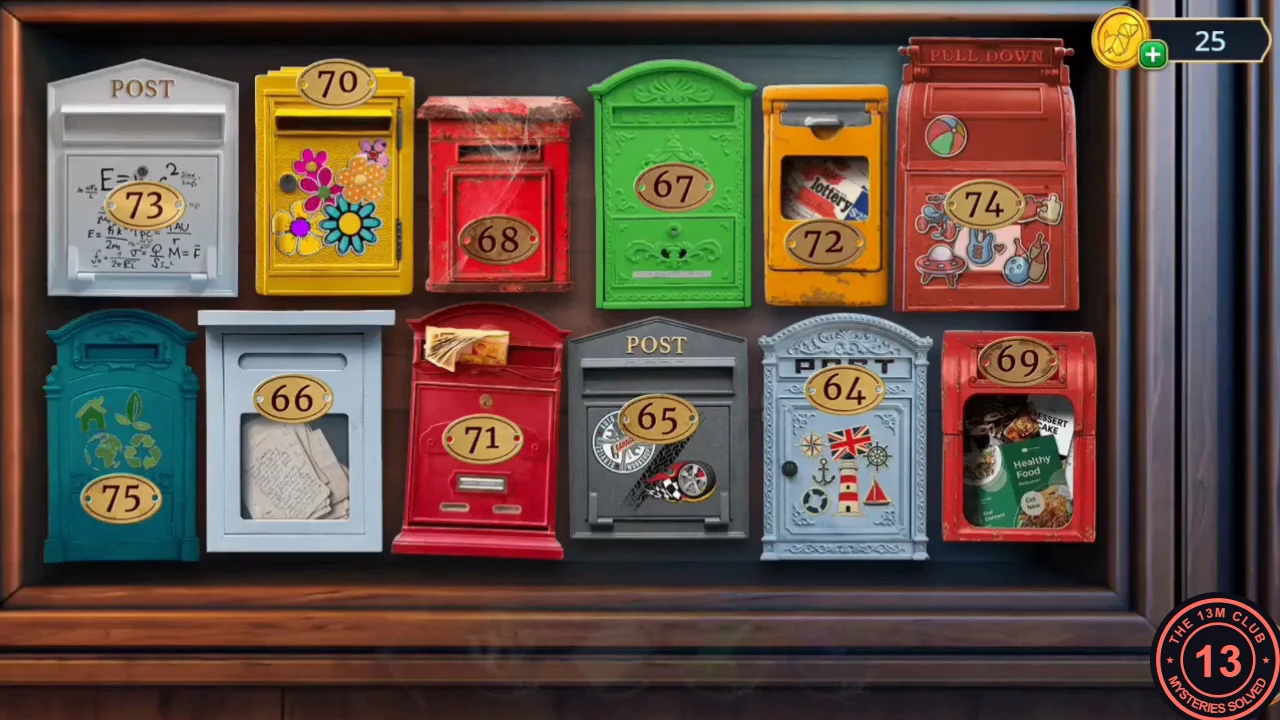
The accepted layout from step 3: top row 73, 70, 68, 67, 72, 74; bottom row 75, 66, 71, 65, 64, 69. - The post box opens. Take the Gummy Eye.
Missing Letters and the Skeleton Hand
The skull on the toothy chest and the university sign at the reception window are both missing pieces.
- In University Hall, open the skull on the toothy chest and put the Gummy Eye into the empty eye socket. The jaw opens. Take the gold ring from its mouth: it is the last Missing Letter (3/3).
- Open the reception window. Place the Missing Letters on the "Blackw_o_d Univer_ity" sign. The completed sign slides aside. Take Mr. Skeletus's Hand from the hidden drawer.
Posing the Skeleton
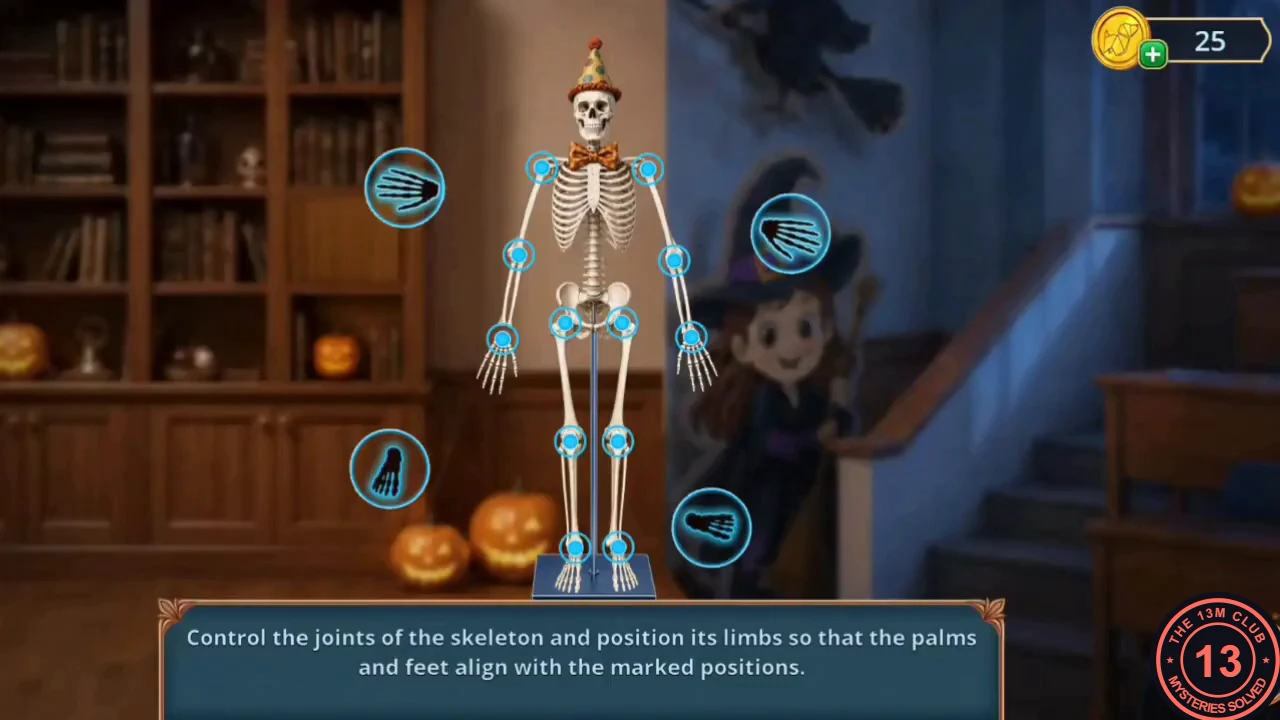
The skeleton beside the Study Hall bookcase is missing a hand.
- In the Study Hall, attach Mr. Skeletus's Hand to the skeleton. A posing puzzle opens.
- Goal: "Control the joints of the skeleton and position its limbs so that the palms and feet align with the marked positions." Four markers are shown: a hand marker at upper left beside the head, a hand marker at upper right beside the chest, a foot marker at lower left and a foot marker at lower right. Drag the shoulder, elbow, hip and knee joints until each palm or foot sits on its marker.
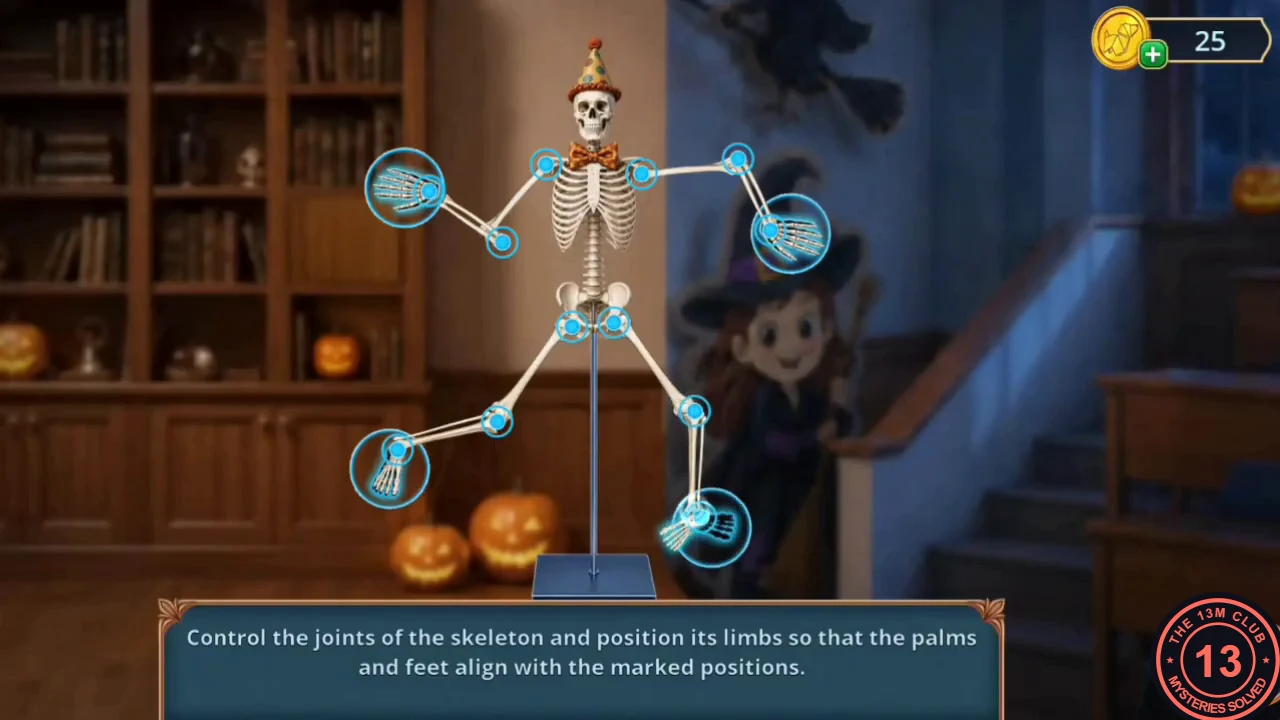
The finished pose: each palm and foot rests inside its marker. - The skeleton holds its new pose. Take the Werewolf Weather Vane that appears in its close-up.
Diorama, Mirror and the Carriage Doll
The campus diorama in the Study Hall has an empty spot on its tower.
- Open the campus diorama and put the Werewolf Weather Vane on the tower. The box opens. Take the Lipstick.
- Take the pink pumpkin Mirror from the Study Hall desk.
- Go to the campus entrance and open the doll in the carriage. Put the Mirror in the doll's hand. Its eyes turn green and the Photo Mask falls out. Take it.
Photo Standee Fragments
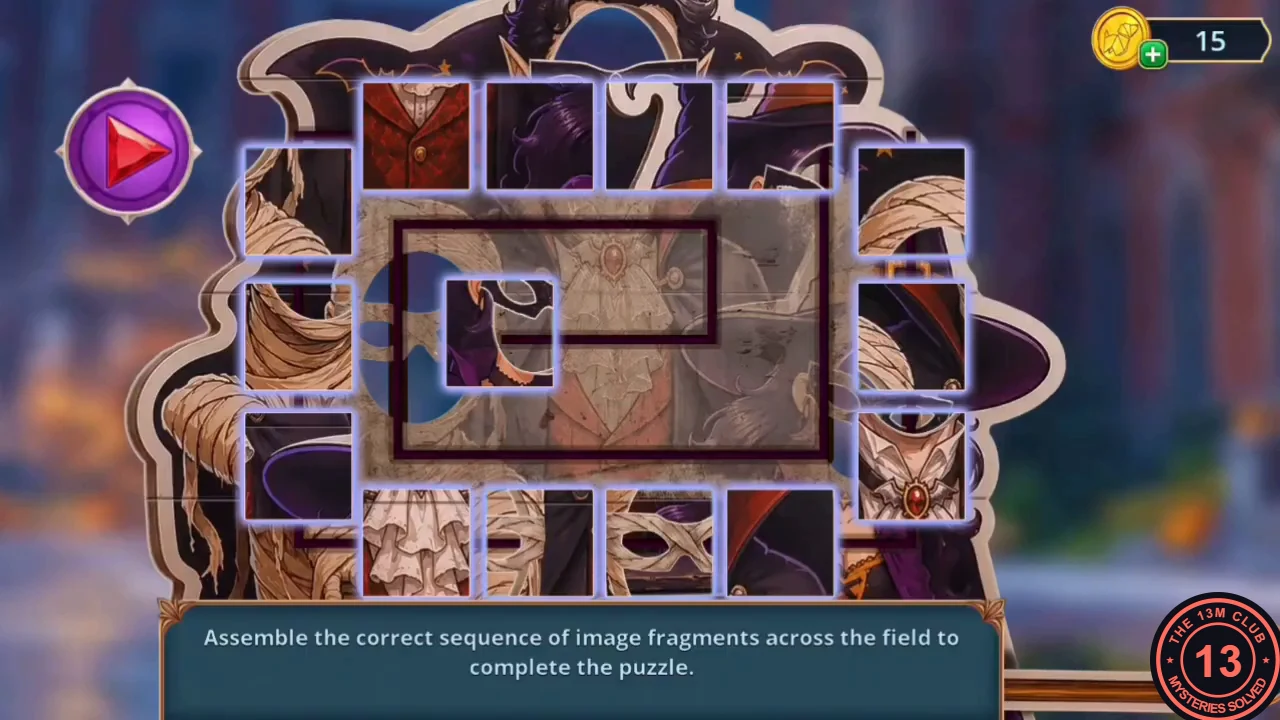
The photo-booth standee of a mummy, a vampire and a witch at the campus entrance has a blank space.
- Open the photo standee and place the Photo Mask. The fragment puzzle opens.
- Goal: "Assemble the correct sequence of image fragments across the field to complete the puzzle." Fourteen fragments sit on a track around the frame, and one more sits in the start slot inside it. Tap a fragment (it lights green), then tap another to swap them. When you press the purple Play button at the top left, the fragments run along the track and coil into the frame in ring order, so arrange the whole ring first. The solved order is: start slot = the mummy face with the blue mask eye. Clockwise from the top-left corner, the top row is the vampire's face with the jewelled collar, the red-lined cape collar, the dark purple crown of the witch's hat and the white frilly jabot. Down the right side: the witch's hat tip, the hat brim with purple hair, and the witch's masked face. Along the bottom from right to left: the witch's purple hair, the vampire's red waistcoat, mummy bandages with the dark cape edge, and the mummy's bandaged body. Up the left side: the mummy's bandaged arm, the mummy's chest with the star, and the mummy's shoulder under the vampire cape. Then press Play.
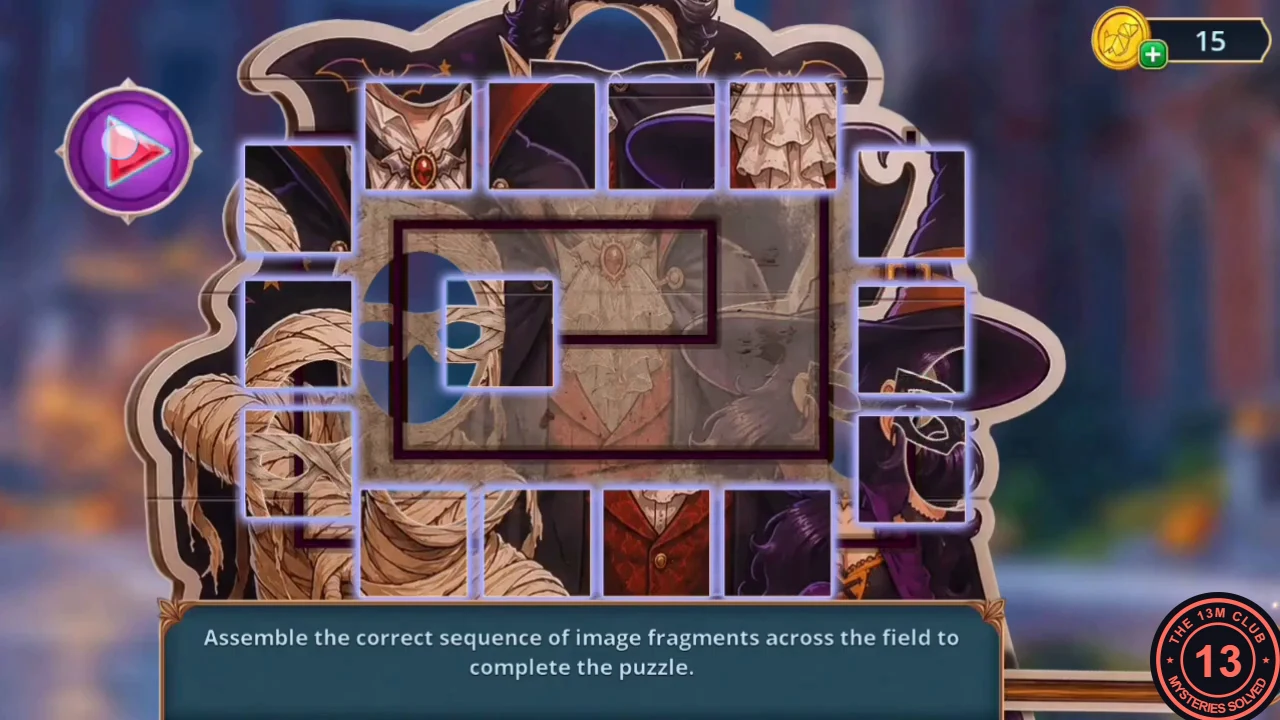
The ring arranged in the solved order from step 2, just before pressing Play. 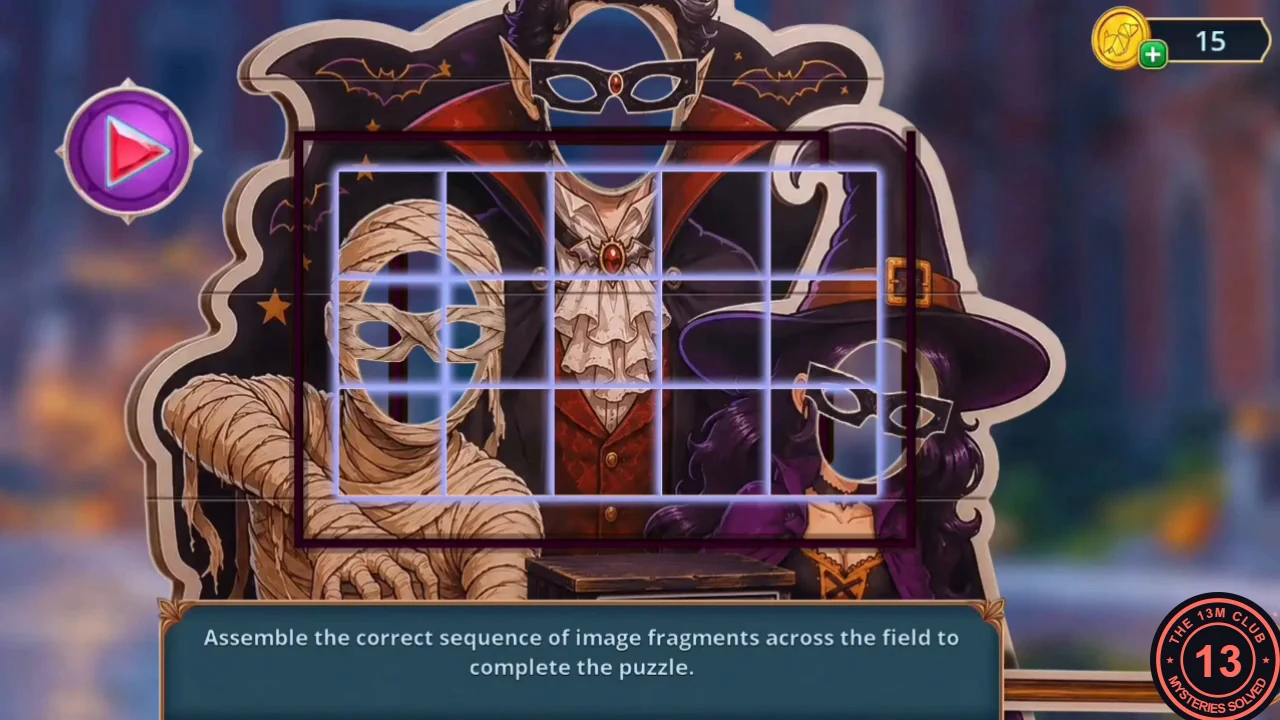
The completed picture: mummy on the left, vampire in the centre and witch on the right. - When the picture is complete, take the Photo Frame.
Suspicious Footage Differences
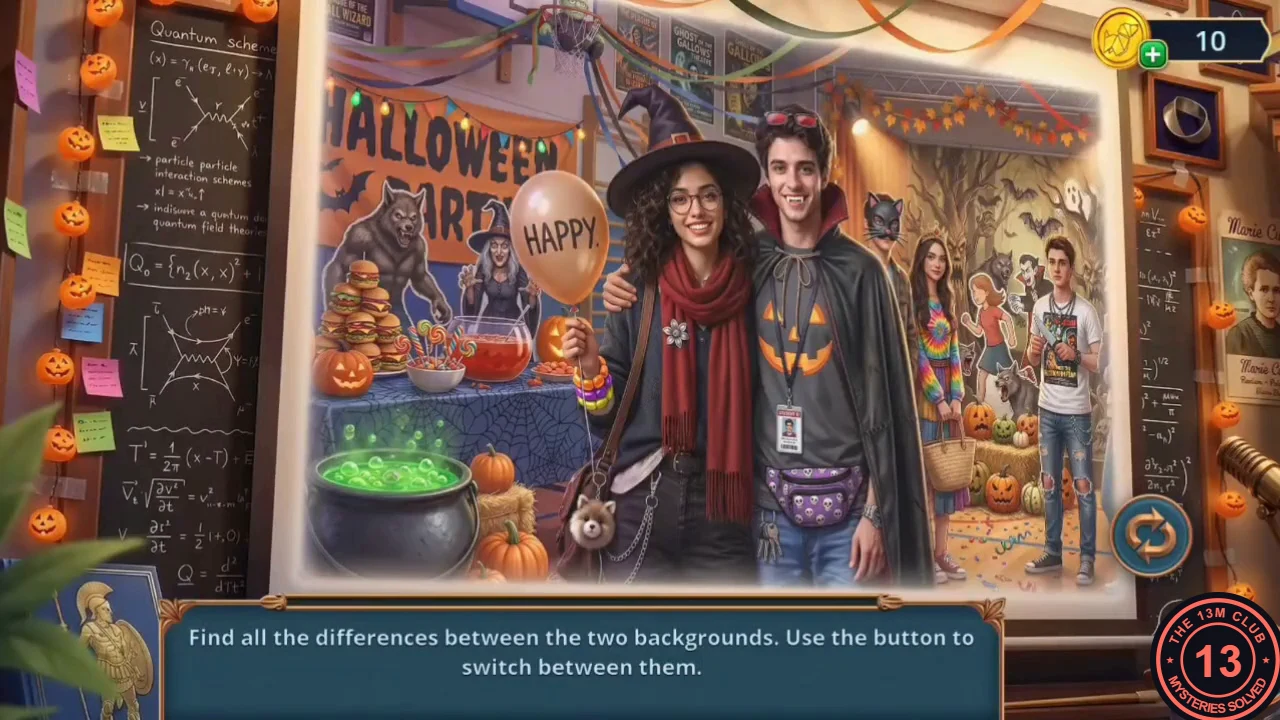
The lightbox desk and the Domini projector in the Study Hall reveal what really happened at the party.
- In the Study Hall, place the Photo Frame on the lightbox desk. Look through the magnifier, then take the Suspicious Footage.
- Put the Suspicious Footage into the Domini projector on the desk. A differences puzzle appears on the screen.
- Goal: "Find all the differences between the two backgrounds. Use the button to switch between them." Tap the circular arrow button at lower right to switch views and tap each changed spot. The changed spots include the HALLOWEEN PARTY banner, the HAPPY balloon, the young man's head, the garland at top right, the cat on the top shelf, figures at upper right, the man in the white T-shirt, the scarf, the ID badge, the punch bowl and the food on the left table.
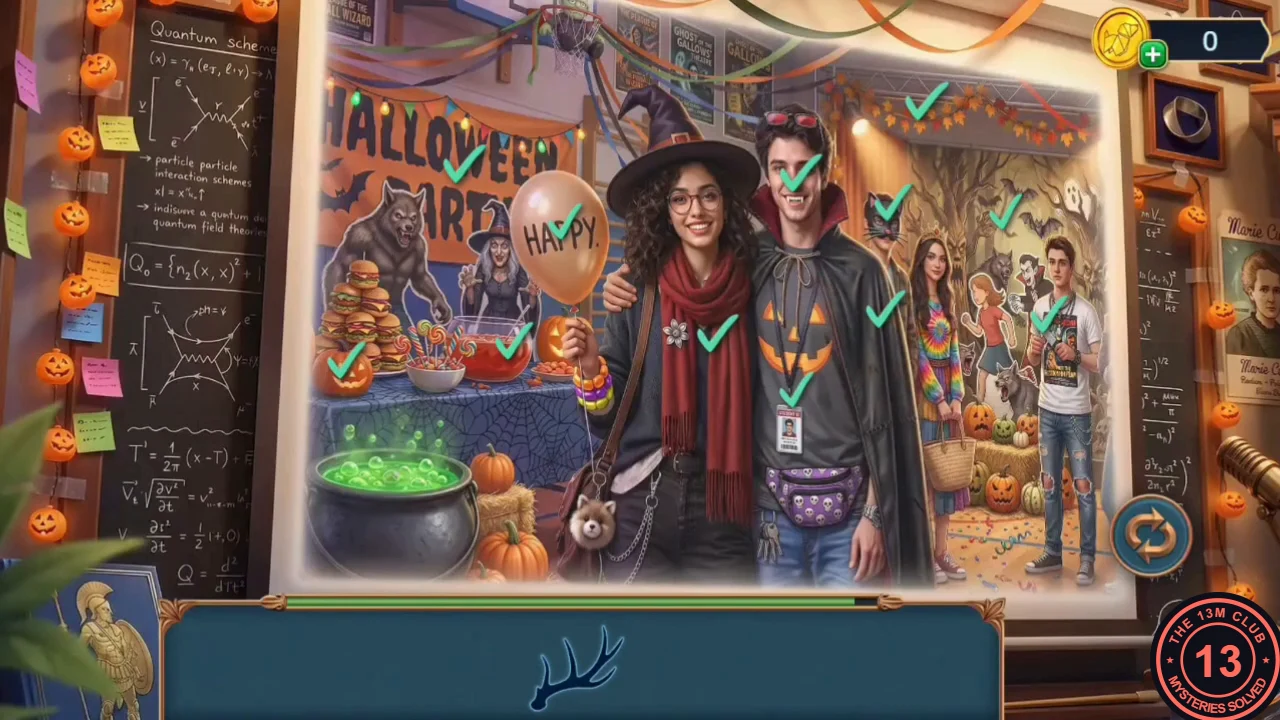
Every changed spot found in the example game, each marked with a green check. - The screen breaks open. Take the Antler.
Amulet and the E-Pass
The skull chest and a leather satchel in University Hall still hold items.
- In University Hall, open the skull on the toothy chest and give it the Antler. Take the Amulet.
- Open the leather satchel with the round gold clasp in University Hall. Fit the Amulet into the clasp and take the E-Pass.
University Hall Turnstile
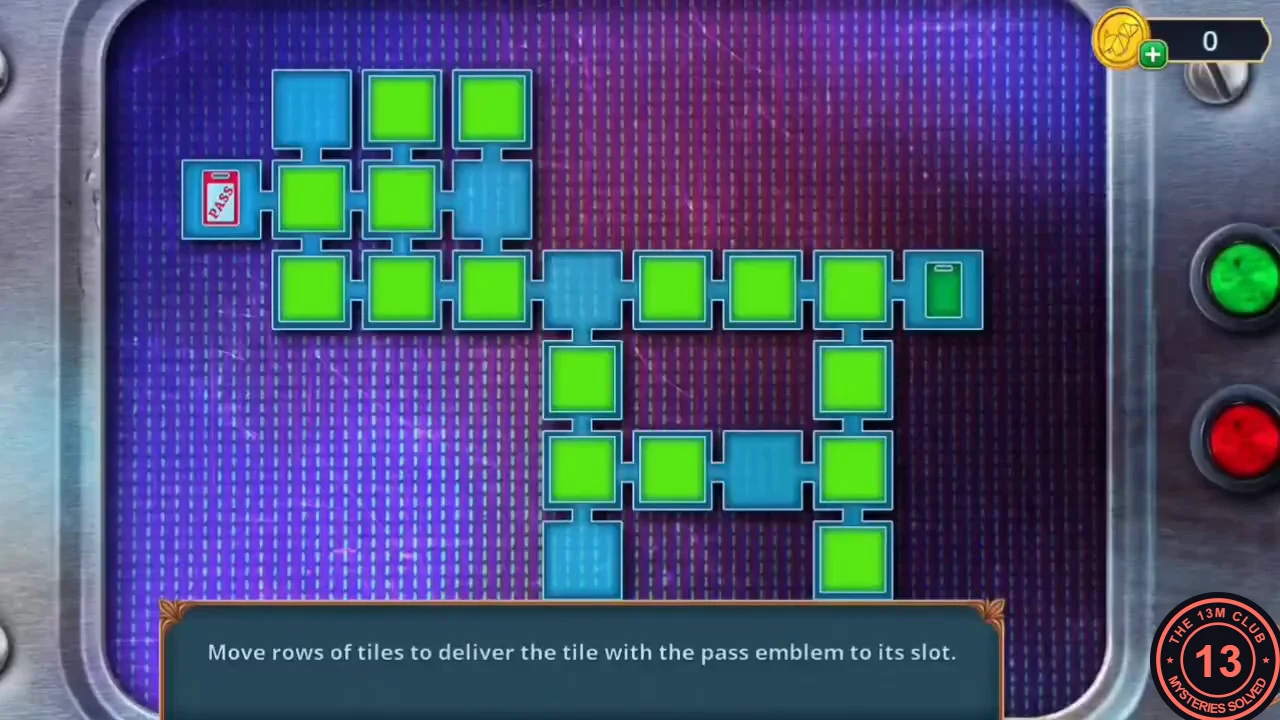
The turnstile reader in University Hall is the way out of the trapped campus.
- Use the E-Pass on the University Hall turnstile reader. A sliding-tile puzzle opens.
- Goal: "Move rows of tiles to deliver the tile with the pass emblem to its slot." The board has an upper block of short rows and columns at the top left, a long middle row that ends at the green slot on the right, and a lower loop below it (two columns running down from the long row, joined by a bottom row). The blue squares are empty spaces; there are always five. Tap a tile to slide it one space toward an empty space in the same row or column. Any tiles between it and that space move with it, so a completely filled line cannot move. The pass tile starts at the left end of the upper block. First, empty the long-row square under one of the upper columns, then slide that column down to bring the pass into the long row. Next, clear the squares between the pass and the slot. Push the long-row tiles down into the lower loop, and work empty spaces round the loop and back up into the row. If the pass is in the way, park it one space down the left loop column, then bring it back up once the row ahead of it is empty. Finally, tap the pass to move it right one space at a time into the slot. The layout of filled and empty squares depends on your earlier moves, so this is a method, not a fixed move list.
- If you have collected every Pumpkin Pin given in this chapter, the counter now reads 35/140. Chapter 1 ends with the decision summary (2/12 on this route): Agree and support the idea was +2; Freeze with fear, Rush him and Shrug it off skeptically were 0. Unchosen options were Ask Ryan for help (+2), Rush to save the student (+6), Calm Noah (+2) and Calm him down (+2). The summary shows reward tiers at 0, 4 and 10 points; this route only unlocks the 0-point tier. A 10-point chapter score adds extra scenes; see High Decision Scores at the end of this guide. Chapter 2: Face of Fire begins.