Dormitory Courtyard
A fire burns on the dormitory steps. The Campus Cafe door has a scale lock.
- Take the Plastic Net from the bicycle and attach the Hose to the red hydrant. The bicycle chain is rusty.
- Spray the WD-40 on the rusty bike chain. The bike stands up; take the skull underneath to complete the Plastic Skulls (2/2). Tap the purple Pumpkin Pins among the leaves at the top right of the bike-rack close-up, above the purple bag. The purple bag nearby needs something sharp.
- Put the Plastic Skulls on the empty pan of the scale at the Campus Cafe door (a pumpkin sits on the other pan). A drawer opens: take the Folded Umbrella.
- Zoom in on the lamppost with the voodoo doll. Hook the Trowel hanging high on the post with the Folded Umbrella's handle and take it. Also tap the Pumpkin Pins on the lower-left part of the orange pumpkin banner hanging at the upper right of this close-up.
- Dig in the flowerpot by the burning dormitory steps with the Trowel. Take the Wet Wipes and the Iodine.
- Open the Plastic Net in your inventory and add the Wet Wipes; it still needs a second part. Then open the Faded Poster and apply the Iodine: it becomes the Poster with Wiring Diagram.
Staff Room Computer
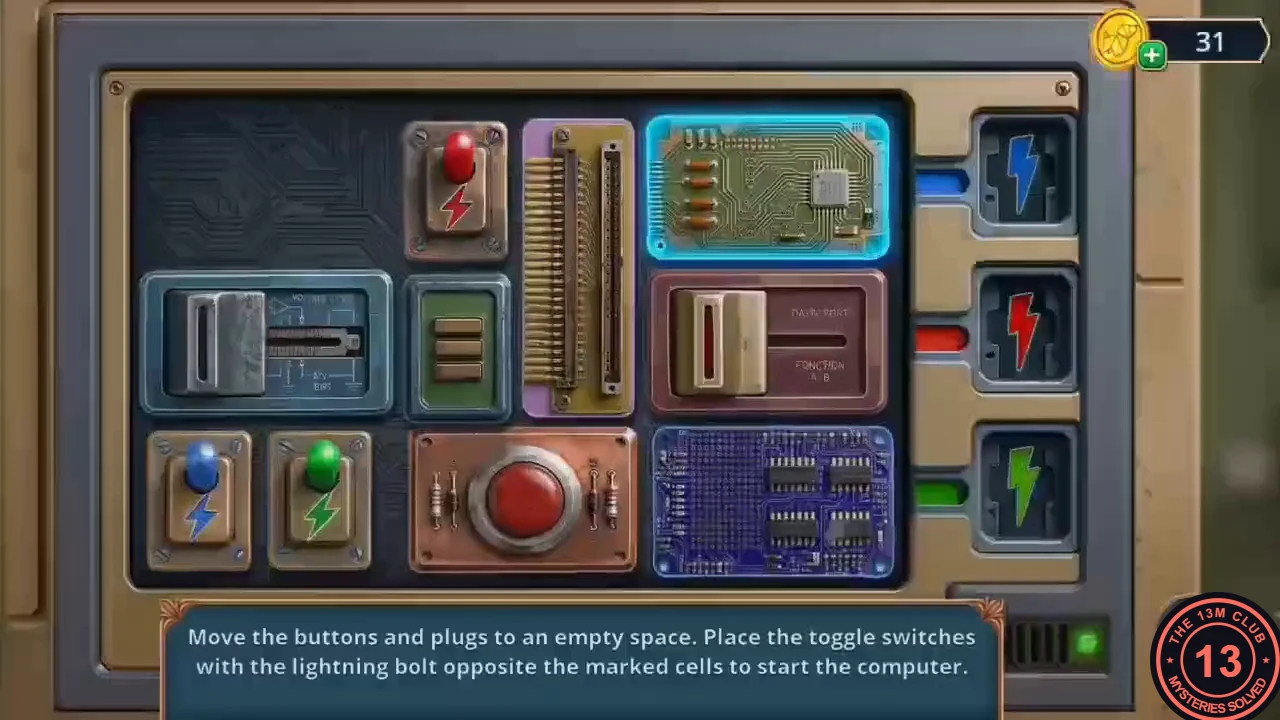
The open computer case in the Staff Room needs its wiring sorted.
- In the Staff Room, place the Poster with Wiring Diagram at the open computer. Puzzle: "Move the buttons and plugs to an empty space. Place the toggle switches with the lightning bolt opposite the marked cells to start the computer."
- Slide the pieces through the free space like a sliding-block puzzle. The goal is to bring the blue, red and green lightning-bolt toggles to the rightmost column, each beside the socket of its own colour (blue at the top, red in the middle, green at the bottom). Clear a path for one toggle at a time and park finished toggles in their slots. This takes many moves, so no fixed move list is given.
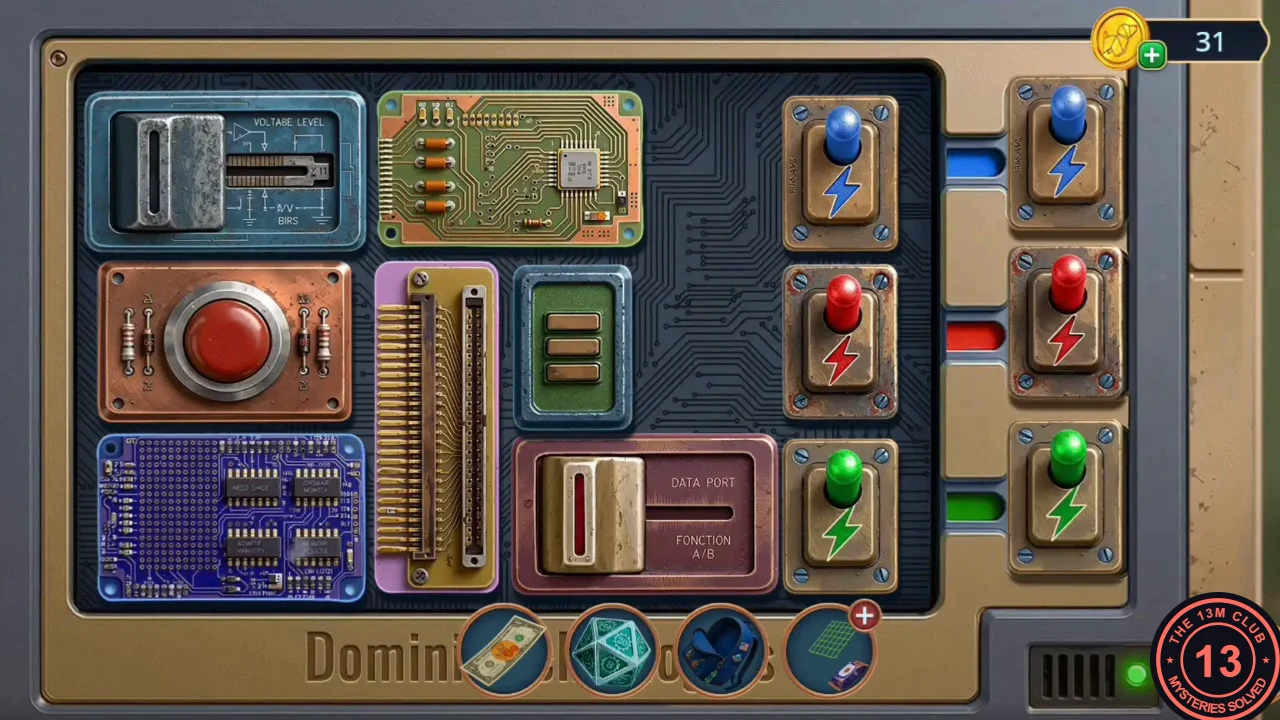
The solved board: blue at the top, red in the middle and green at the bottom of the right column. - Take the Elastic Slime (purple bat toy) from the computer's drive tray. Throw it at the lit ceiling hatch that is out of reach and take the Adjustable Wrench.
Fire Hose
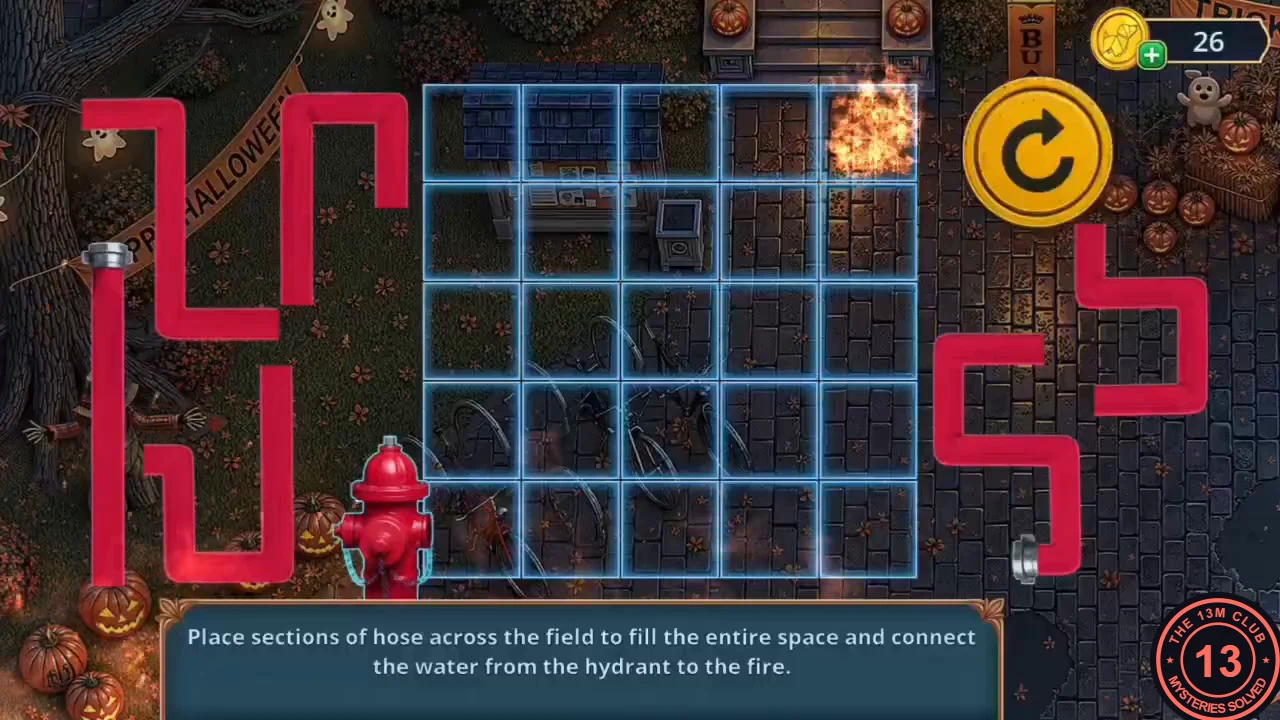
The hydrant in the courtyard now has the hose attached.
- Use the Adjustable Wrench on the hydrant. Puzzle: "Place sections of hose across the field to fill the entire space and connect the water from the hydrant to the fire." The field is 5×5; rotate pieces with the rotate button.
- Solution path (rows from the top, columns from the left). The water enters at the bottom-left and runs: row 5 from column 1 to 5; row 4 from column 5 back to 1; row 3 columns 1-2; row 2 column 2 to column 1; row 1 columns 1-3; down to row 2 column 3; row 3 columns 3-5; row 2 column 5 to column 4; row 1 column 4, which feeds the nozzle at the top-right fire. The fire is put out.
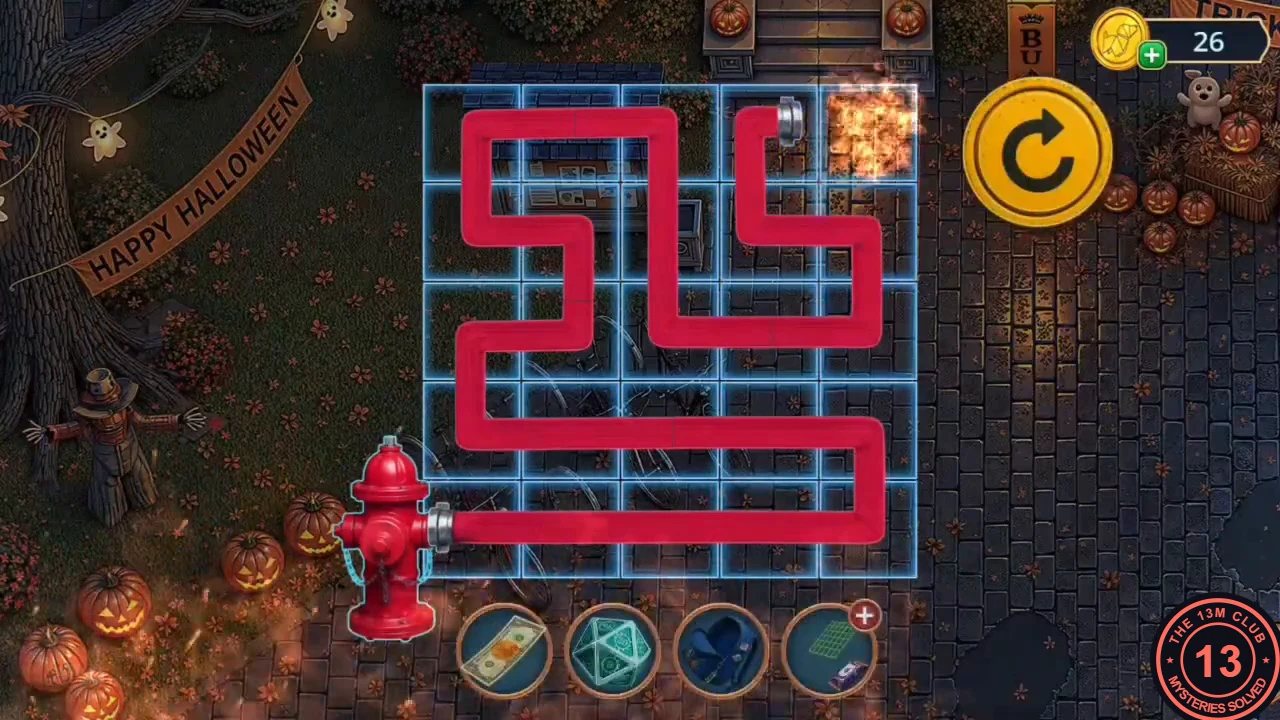
The finished hose path, matching the row-by-row route in the step above.
Dormitory Foyer
The flooded dormitory foyer has a pirate soda vending machine, a plush creature and a ghost policeman by the crime-scene tape.
- In the foyer, tap the purple and orange Pumpkin Pins on the bottom steps of the staircase, between the two small pumpkins left of the hose. Look at the blue plush creature on the table and tap the Pumpkin Pins in the jack-o'-lantern bucket at the lower left of this close-up. Open the pirate vending machine, insert the Banknote into the "INSERT A BILL" slot and take the Toy Octopus and the Salt. The pirate skeleton is missing one eye.
- Throw the Salt at the ghost policeman by the police tape. It vanishes and a hidden-object scene opens.
Police Tape Multiples
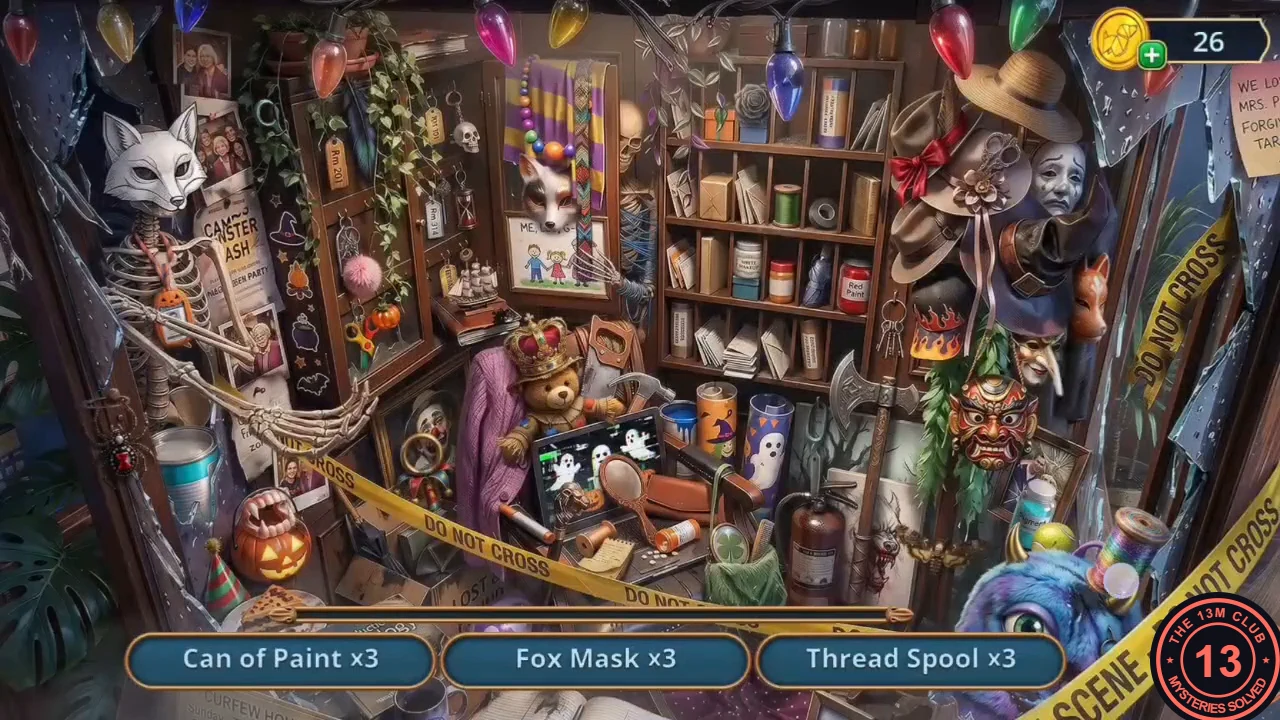
This scene asks for several copies of each item.
- Find three Cans of Paint, three Fox Masks and three Thread Spools. When the masks are done, their line changes to three Scissors. Two items need an extra action. Fox Mask: the white fox mask on the skeleton at the top left is unpainted. Drag the paintbrush (white tip, red handle) lying in front of the laptop onto it; the mask turns orange and you can collect it. The other two fox masks are the small orange one hanging at the right edge among the hats and the one on the child's drawing at the top centre. Can of Paint: tapping the open teal can by the skeleton's hand at the left says "It's still missing an important ingredient." Drag the small teal Pigment bottle from the right (beside the framed photo) into the can, then collect the can. The scene runs below the screen edge, so move the view down to search the floor as well. You receive the Moon Button.
- Back in the foyer, put the Moon Button into the round lock beside Noah's Room door ("DO NOT ENTER", purple smoke). A small panel opens: take the Graphite Pencil.
- Rub the Graphite Pencil over the HALLOWEEN PARTY poster on the foyer bulletin board. The poster peels off: take the Bulb Half and the Bands. Add the Bands to the Plastic Net to finish the Handmade Filter.
Smoke Filter
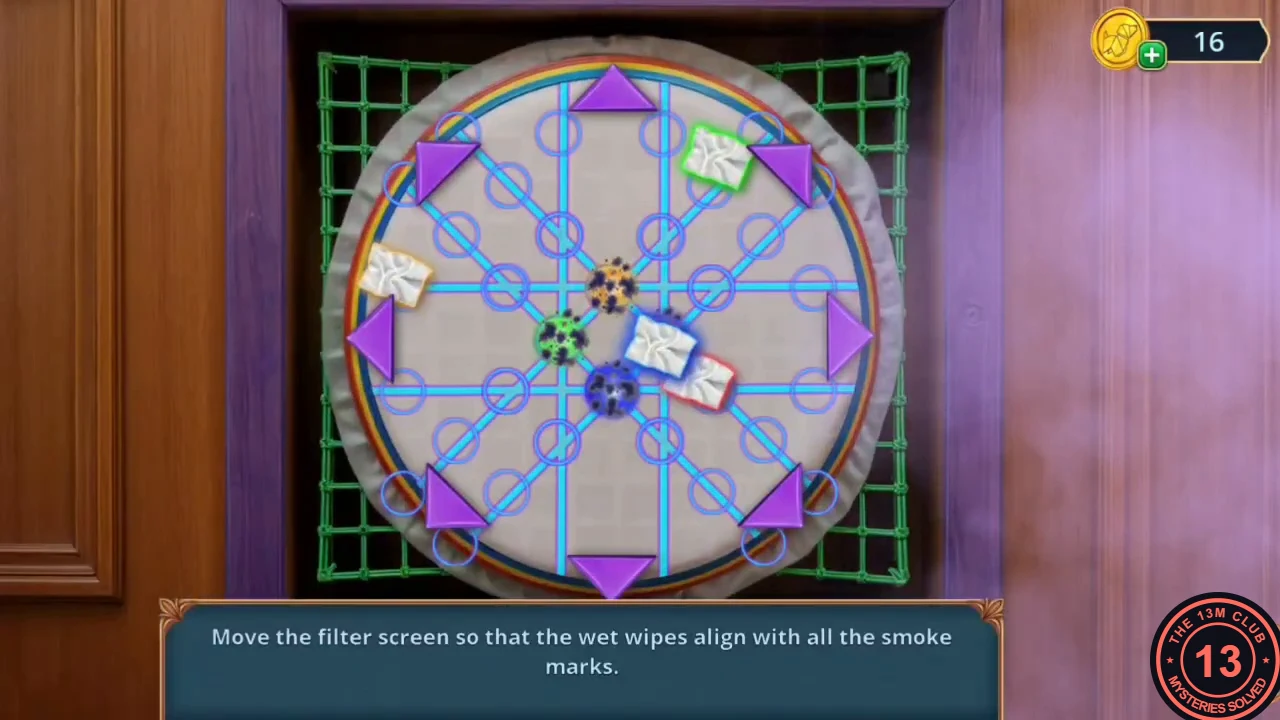
The smoke in Noah's doorway has to be filtered.
- Place the Handmade Filter on the vent at Noah's door. Puzzle: "Move the filter screen so that the wet wipes align with all the smoke marks." The purple arrow buttons around the frame slide the screen; move it until all four wipes cover the four smoke marks around the centre.
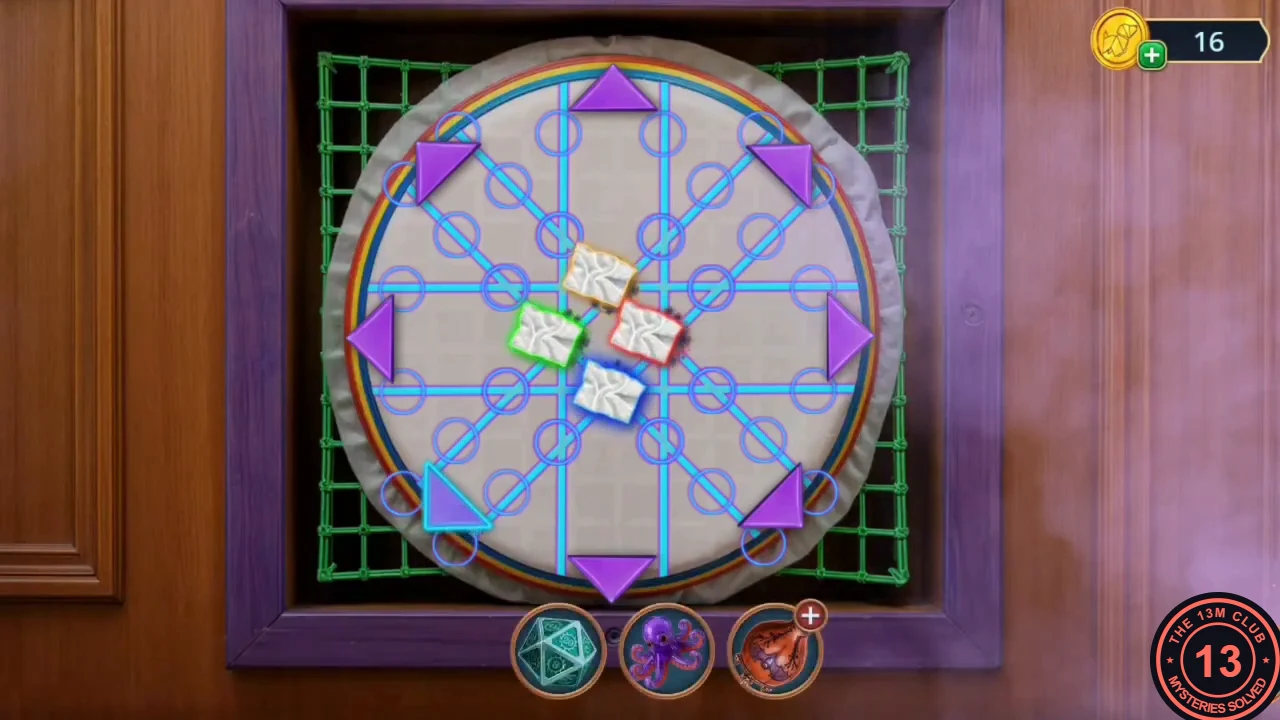
All four wipes on their smoke marks around the centre. - Noah says the old North Hollow legends book is in his room. Choice: "Noah, pull yourself together. Remember where you hid it!" (60 coins, +2) or the free "Let's look. But I hope you're not hiding anything." This guide takes the free answer.
Gargoyle Silhouette Slider
Noah's desk and bookshelf hide the next pieces.
- In Noah's Room, tap the Pumpkin Pins on the window sill between the big jack-o'-lantern and the small pumpkin, left of the desk. On Noah's desk, tap the Pumpkin Pins at the top left of the close-up, beside the jack-o'-lantern, then put the D20 Dice on the board game. The gold box opens: take the Bingo Chip (88) and the Demon Figurine beside the box.
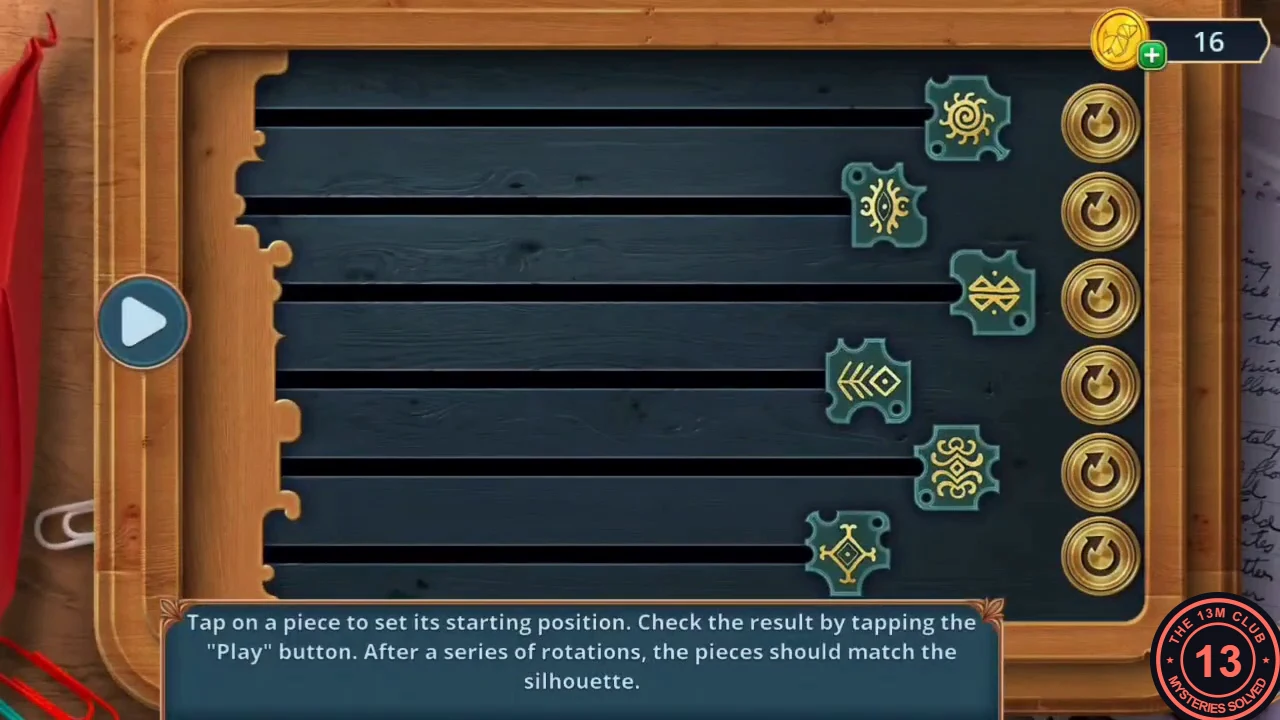
- Place the Demon Figurine beside the gargoyle on the bookshelf. Puzzle: "Tap on a piece to set its starting position. Check the result by tapping the Play button. After a series of rotations, the pieces should match the silhouette." Six tracks each hold a rune piece, and there are two controls. According to the instruction, tapping a piece itself sets where it starts on its track. The round arrow button at the right end of each track turns that track's piece one step on the spot, which sets the angle it starts from. When you press Play (the triangle button at the left), all six pieces slide to the left edge and keep turning as they go, so a piece's final angle depends on both its starting angle and how far it travels: a piece that starts further right makes more turns on the way. The aim is for the six pieces to lock together into the gargoyle silhouette at the left edge. In both example games, from the same deal, the pieces were left where they were dealt (rows 1, 3 and 5 further right, rows 2, 4 and 6 further left) and only their angles were changed with the arrow buttons. The starting angles that worked: the sun piece (top) turned slightly, the eye piece (second) turned upright, the third piece turned so its symbol runs diagonally, the feather-and-diamond piece (fourth) turned so its feathers point up, the fifth piece turned a quarter turn, and the sixth left almost as dealt. Match the picture of the setup before Play, then press Play.
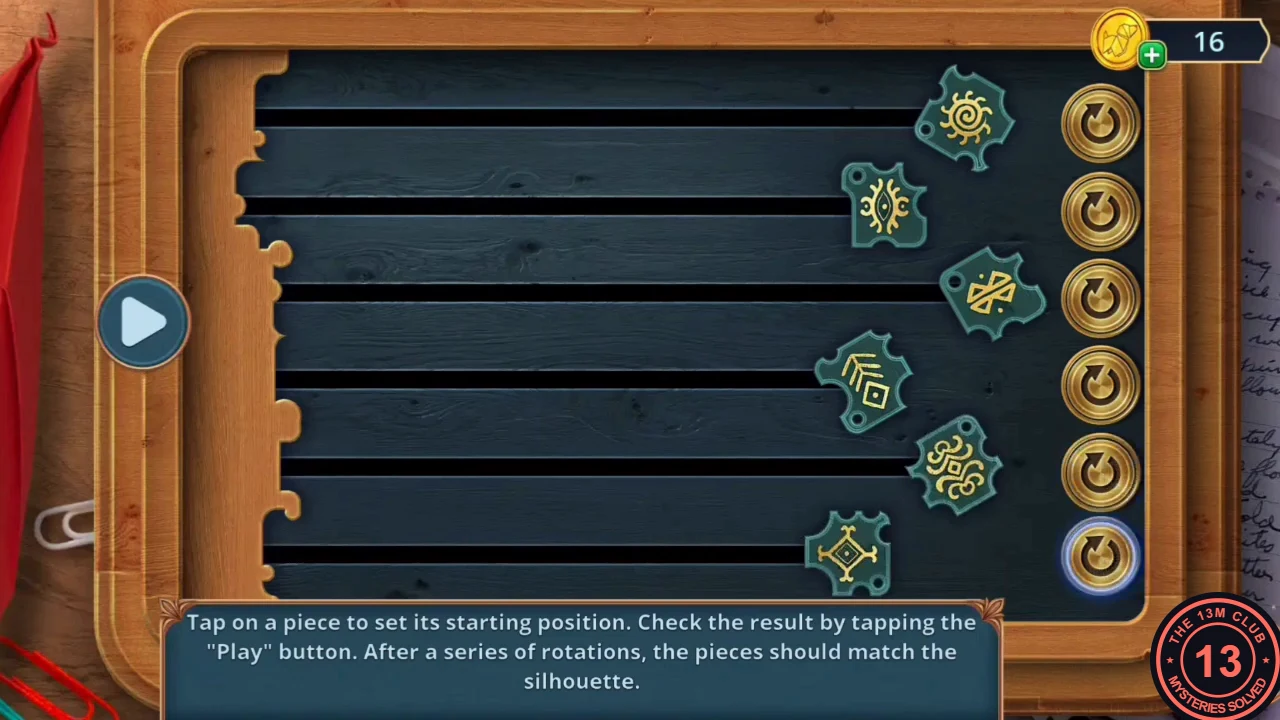
The setup that worked in both example games, just before pressing Play. 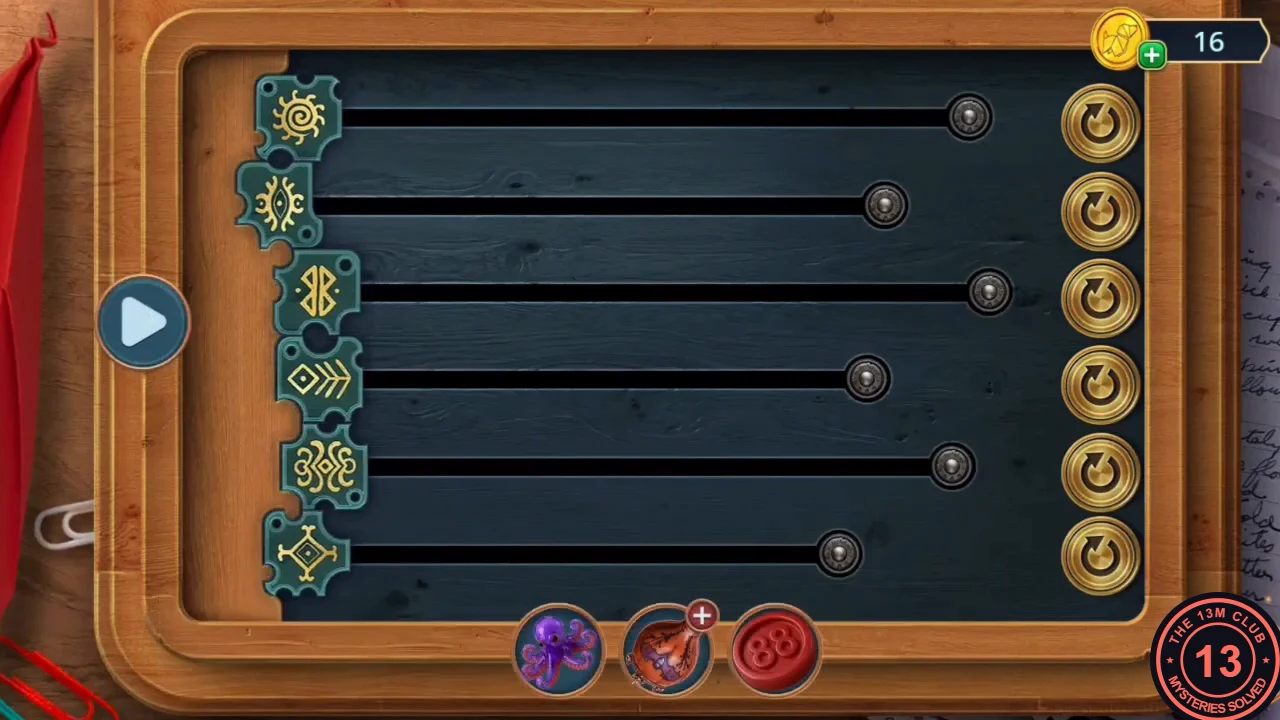
The solved slider: every piece has reached the left edge in the right orientation. - The box opens: take the Stickers. Stick them on the photos on the corkboard above the moss frame. A panel slides open: take the Hockey Puck.
Table Hockey Shot
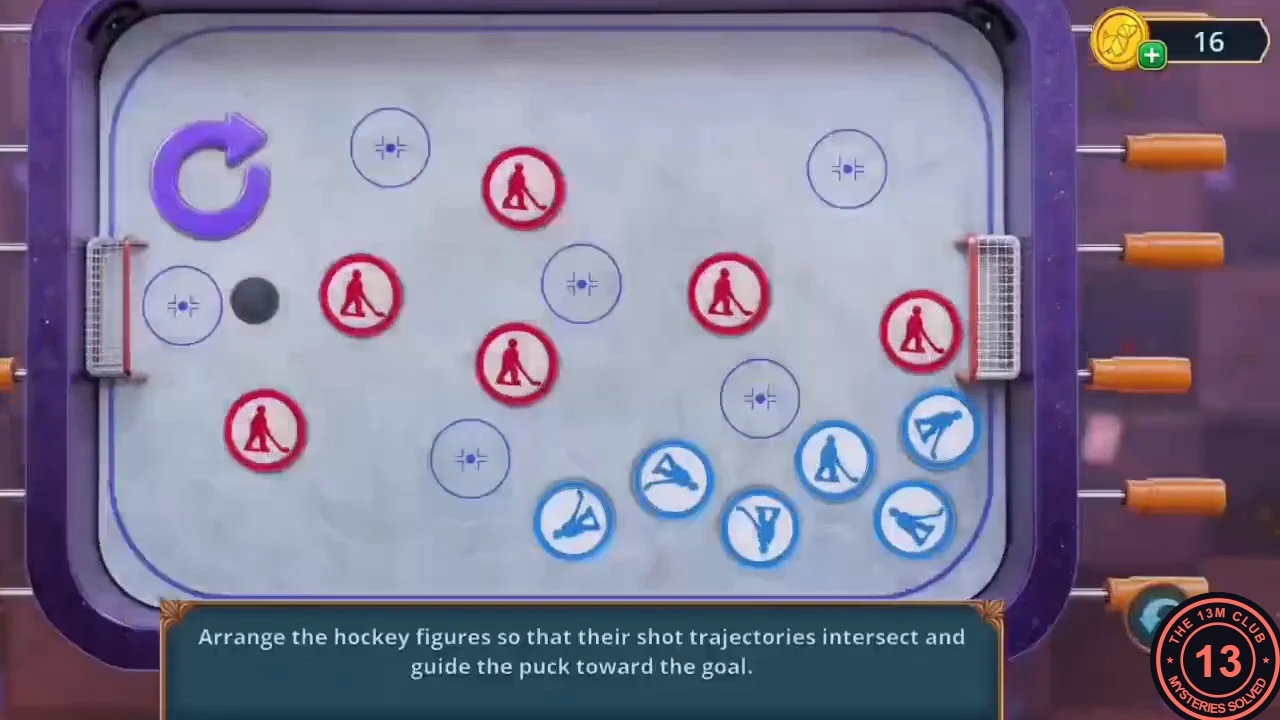
The Table Hockey in the Arcade Club now has all its pieces.
- In the Arcade Club, put the Hockey Puck on the Table Hockey. Puzzle: "Arrange the hockey figures so that their shot trajectories intersect and guide the puck toward the goal." Place the six blue figures in the six empty circles and turn them with the rotate button so each one passes the puck to the next.
- In the solved table, the puck goes from the circle next to it to the top-left figure, then bottom-centre, right-centre, centre, top-right and into the goal. Watch the trajectory line: it locks on the net when correct.
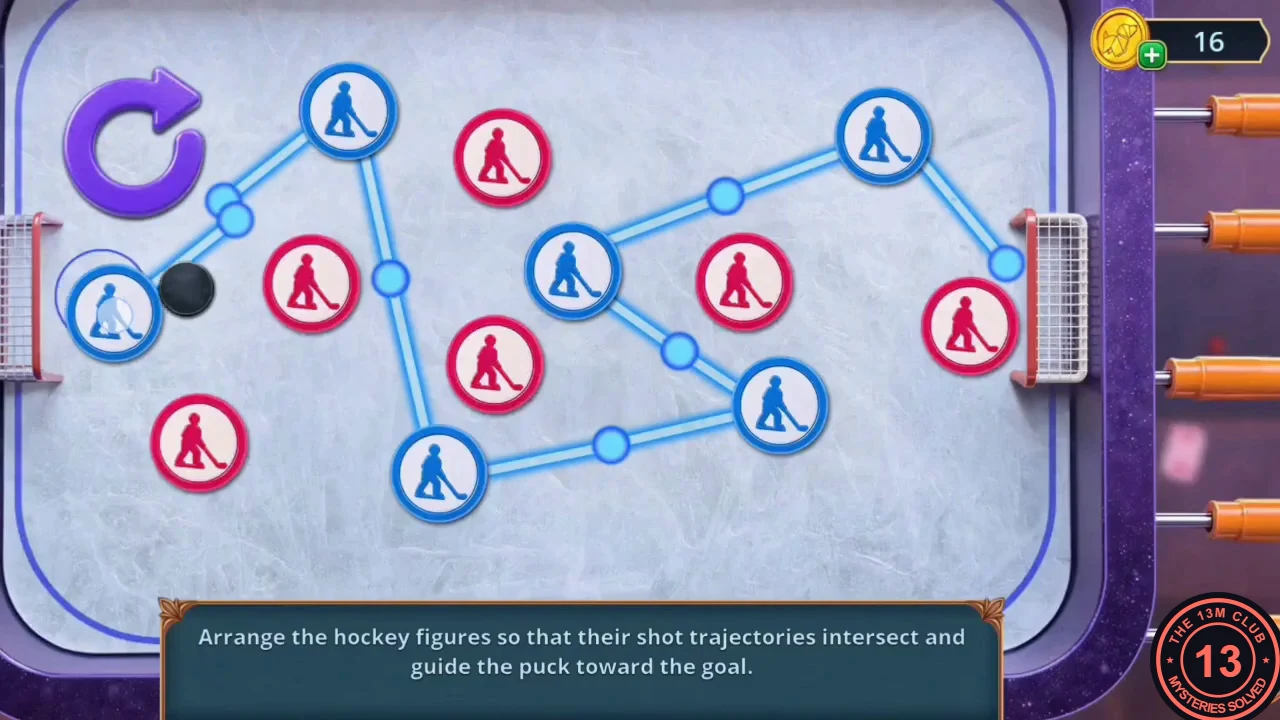
The solved table. Follow the blue line from the puck to the goal. - Take the Scraper from the table drawer. In Noah's Room, scrape the moss below the photo frame and take the Bubble Gum.
- The wooden box on Noah's bookshelf is pinned shut. Stick the Bubble Gum on the pin, press the Bingo Chip onto the gum and pull the pin out. Take the Screwdriver.
- In the dormitory foyer, unscrew the purple star panel on the side of the vending machine with the Screwdriver. Take the Pliers.
Crime Scene Riddles
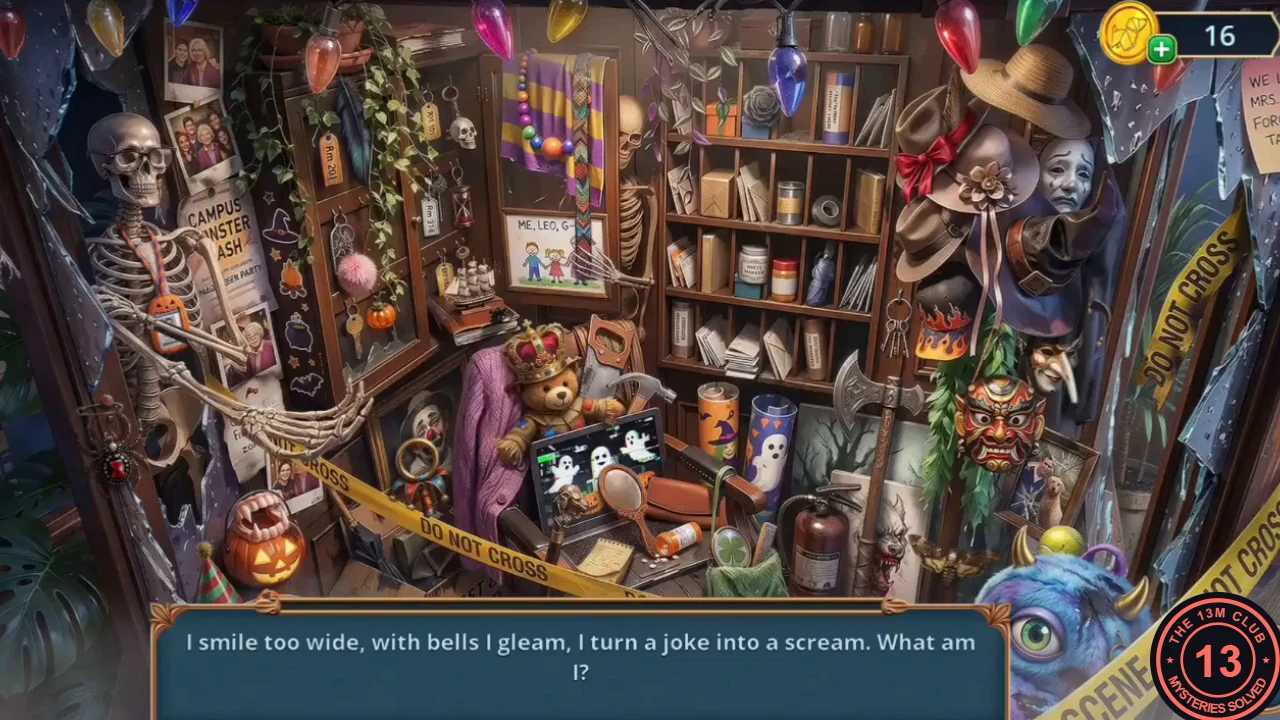
The crime-scene doorway in the dormitory foyer sparkles.
- Tap the sparkles at the taped-off doorway to open a riddle scene. Each riddle ends "What am I?"; tap the object it describes. The twelve riddles describe, in order: a grinning jester ("I smile too wide, with bells I gleam"); the black rose on the shelf ("I bloom in darkness, never red"); fangs ("I bite without hunger, white and small"); the hand mirror on the laptop ("I show your face but keep no name"); the crown on the teddy bear; the spider brooch pinned to the door frame ("I crawl on cloth but never move"); a ribbon that ties a mask; a small bell; face paint; the orange name badge on the skeleton's lanyard ("I name the helper for the night, orange and round"); a raven feather; and a moth. You receive the Knife.
The Voodoo Doll
The voodoo doll on the courtyard lamppost carries a curse.
- In the courtyard, cut open the purple bag by the hydrant with the Knife. Take the Thread and Needle and the Dart with Soft Tip.
- Throw the Dart with Soft Tip at the bottle hanging from the TRICK OR TREAT banner. It falls; pick up the Bottle (Zing Pop lemonade).
- The plush creature in the foyer needs its heart returned and its chest sewn up; come back later. Open the Bottle in your inventory and pry off the cap with the Pliers. Read the note inside and take the Voodoo Needle.
- Stick the Voodoo Needle into the voodoo doll on the lamppost (achievement "The Curse"). It burns in green fire and turns into a golden jack-o'-lantern. Take the Heavy Statuette, the "Witness" Card and the Lock Pick.
Campus Cafe Lock
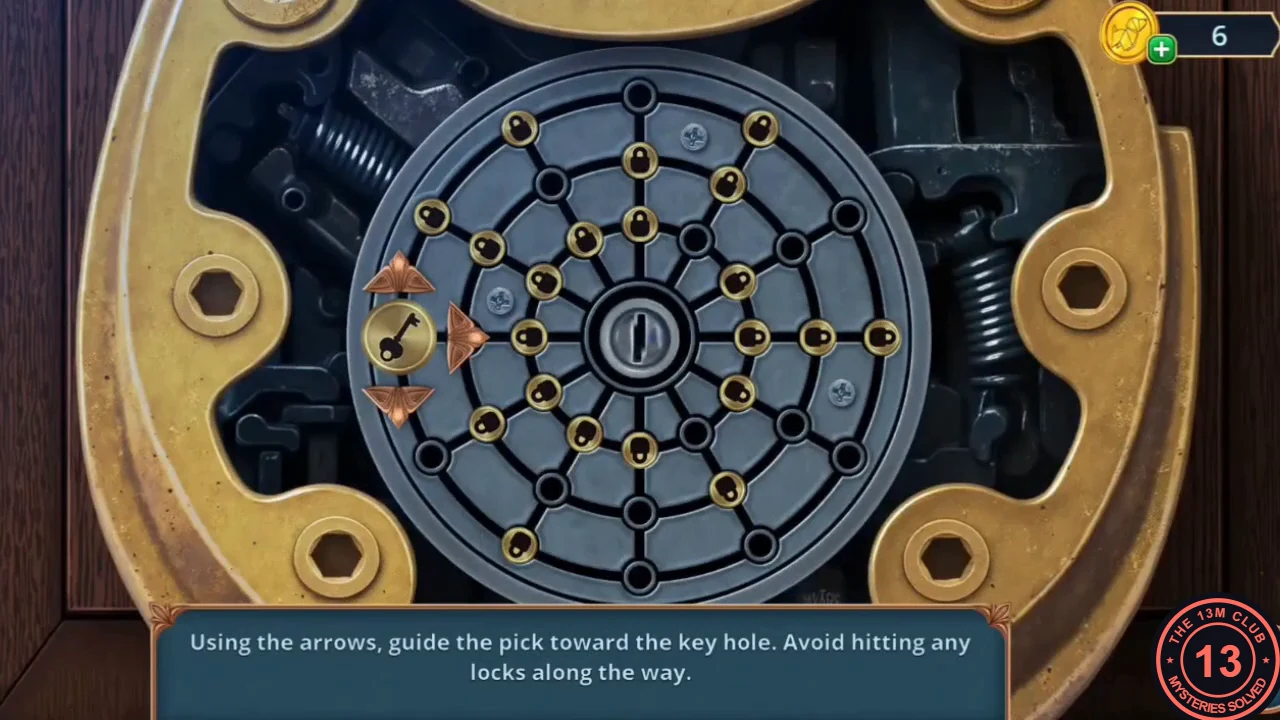
The Campus Cafe door has a round lock.
- Use the Lock Pick on the Campus Cafe door. Puzzle: "Using the arrows, guide the pick toward the key hole. Avoid hitting any locks along the way." The pick moves along the spokes and rings of a round web; the arrows around it move it one node at a time, and small padlocks sit on many nodes. The padlocks shift between moves, so check the next node before each step. Example route from one game: the pick started on the outer ring at 9 o'clock, went clockwise round the outer ring to 12 o'clock, moved two rings inward along the 12 o'clock spoke, ran anticlockwise along that ring back to 9 o'clock and then went straight in to the keyhole. Your padlock layout may differ, so use the free nodes you see.
Cafe Pastry Case Differences
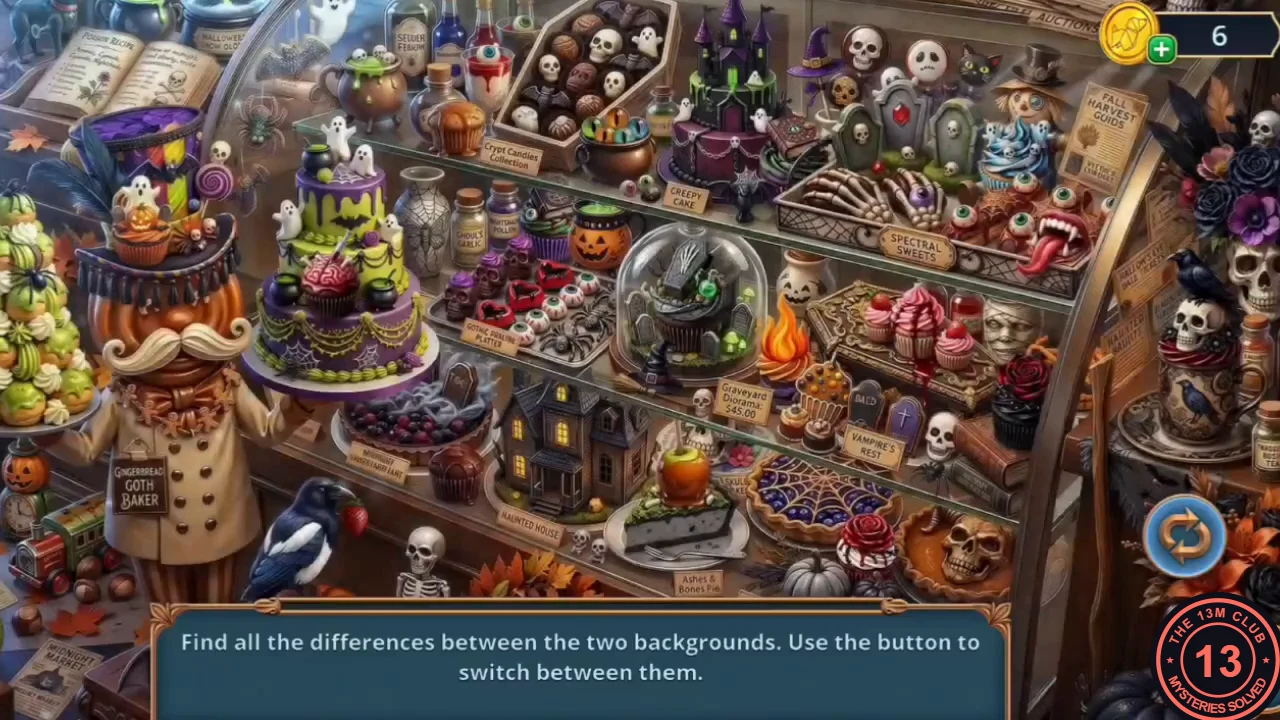
Inside the Dormitory Cafe, a music box and a card box sit on a table.
- Tap the three Pumpkin Pins (purple, orange, and teal with a skull charm) on the sill of the right-hand window above the red bench, left of the pastry case. Look at the music box and card box on the table: the deck is not full and a part of the music box is missing. At the glass pastry case, take the Prop Head (vampire bust) and the "Bride" Card. The case is shut; stick the Toy Octopus on the glass to pull it open. A differences scene opens.
- Find all the differences between the two pastry backgrounds; the round button at the lower right switches between them. You receive the Butterfly.
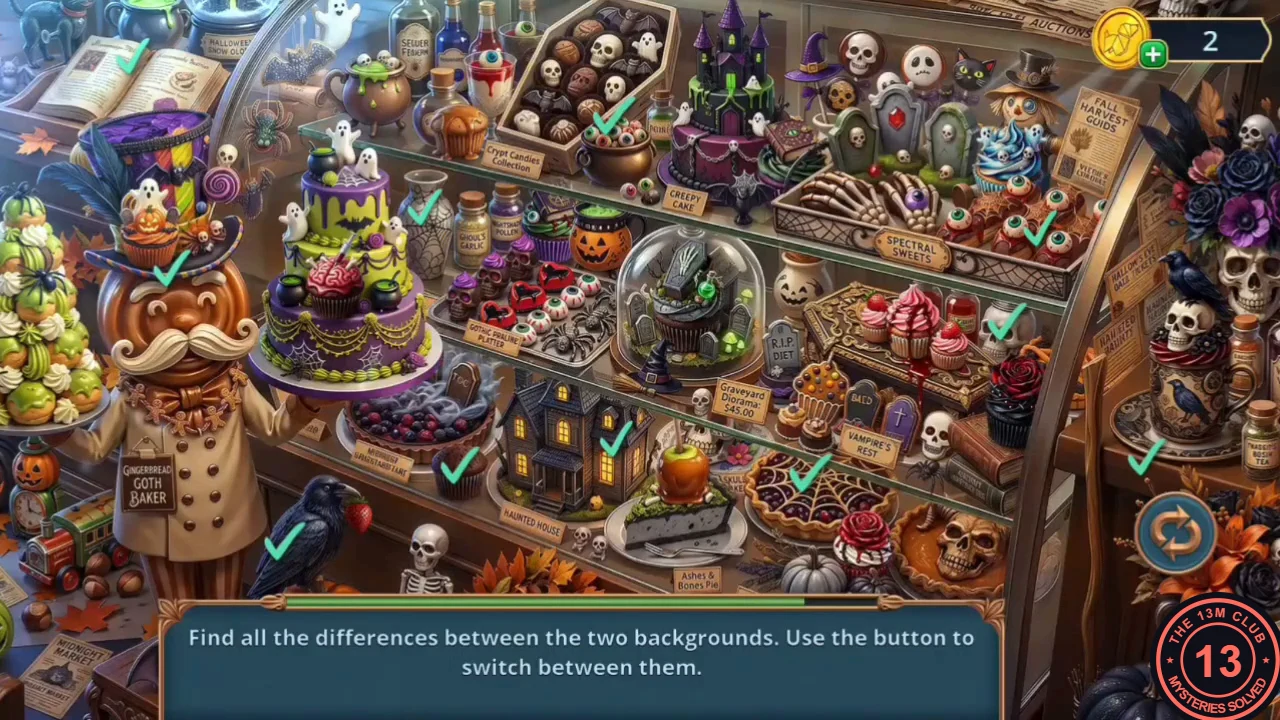
Nearly finished in the example game. The last difference was beside the glass dome: a flame in one version, an R.I.P. DIET gravestone in the other.
Coffee Serving Timers
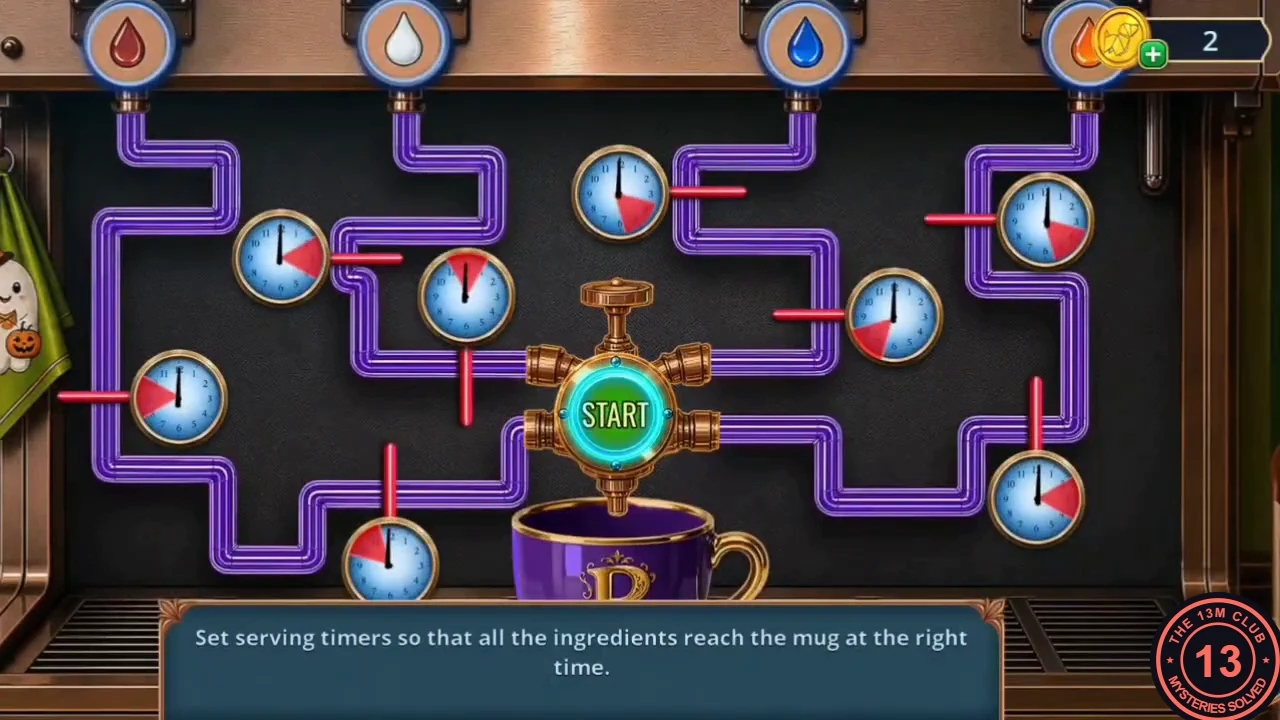
The cafe coffee machine has a broken steam spout.
- Put the Butterfly on the music box. Its drawer opens: take the Pear Half. Open the Bulb Half in your inventory and add the Pear Half to make the Vacuum Cuff.
- Fit the Vacuum Cuff on the coffee machine's spout. Puzzle: "Set serving timers so that all the ingredients reach the mug at the right time." Eight dials sit on the four ingredient pipes. Each has a black hand fixed at 12 o'clock and a red wedge that turns when you tap the dial. The setting that worked: far-left dial (by the towel) = wedge from 12 to about 3; upper-left dial (between the red and white taps) = 12 to about 2:30; centre-left dial (just left of START) = 12 to about 2:30; lower-centre dial (just left of the mug) = about 2 to 5, covering the 3 and 4; top-centre dial = 11 to 1, across the 12; dial right of START = 12 to about 3; top-right dial = 11 to 1, across the 12; lower-right dial = 12 to about 2:30. Copy the picture below, then press START.
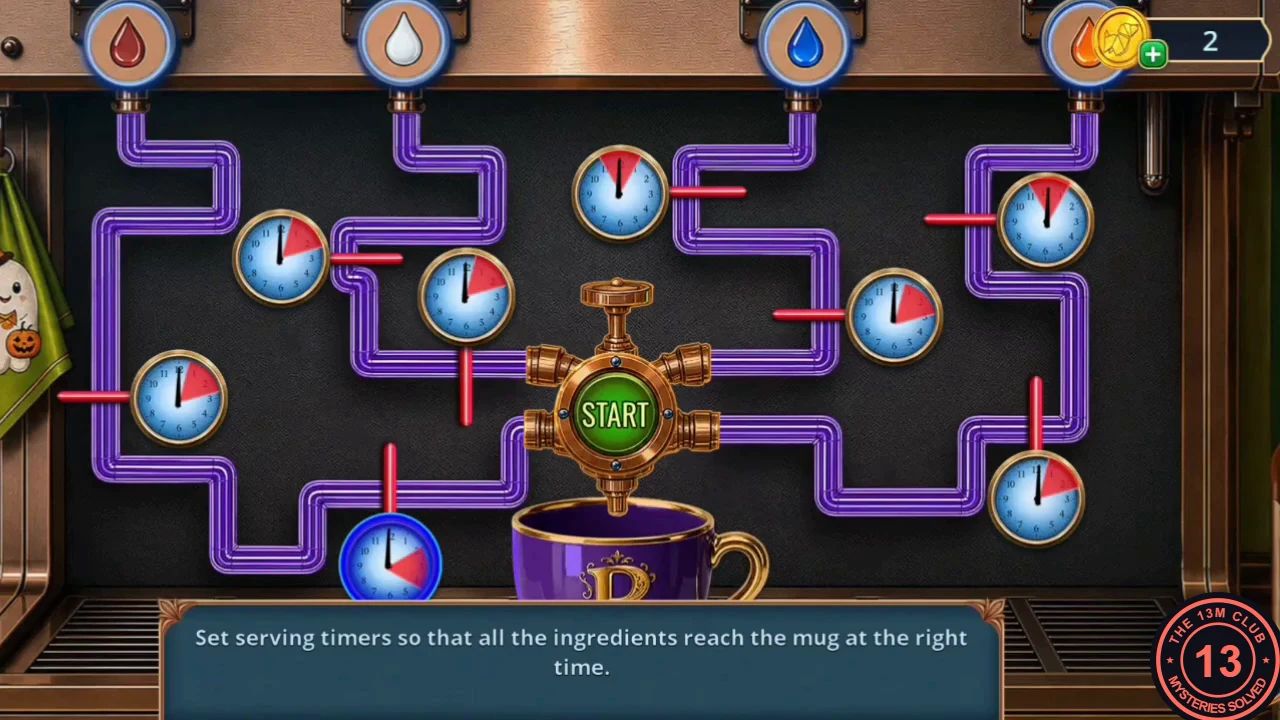
The timer layout that worked in the example game, just before START. - Take the Hot Cup. Pour it over the frozen tubs in the freezer counter under the cuckoo clock and take the Toy Heart. Tap the Pumpkin Pins at the left end of the freezer counter, under the cuckoo clock.