Founder's Statue, Coffee Truck and Library Window
Back on the Main Alley, the Skeleton Bone and Kiosk Key open the way to the library's back rooms.
- Open the founder's statue pedestal with the "Robert Blackwood" plaque. Insert the Skeleton Bone behind the plaque corner to open it. In this close-up, tap the three Pumpkin Pins on top of the pedestal beside the statue's boot. Take the Plaster Powder.
- Open the coffee truck shutter and use the Kiosk Key in the keyhole. The shutter rolls up. Take the Shears.
- Open the thorny library window. Cut the vines with the Shears and take the Billiard Cue. Use the cue to pry the window bolt (you keep the cue) and take the Dog Emblem.
- Enter the library. Open the satchel on the book vending machine, fit the Dog Emblem into its clasp and take the Library Card.
- Open the Domini Art card catalogue and use the Library Card on the drawer labelled S - V. Take the Suction Cup.
- Open the lower glass door of the bookcase with the Suction Cup. Tap the Pumpkin Pins on top of the books, right of the suction-cup lock, and take the White Glue.
Repairing the Wolf Statue
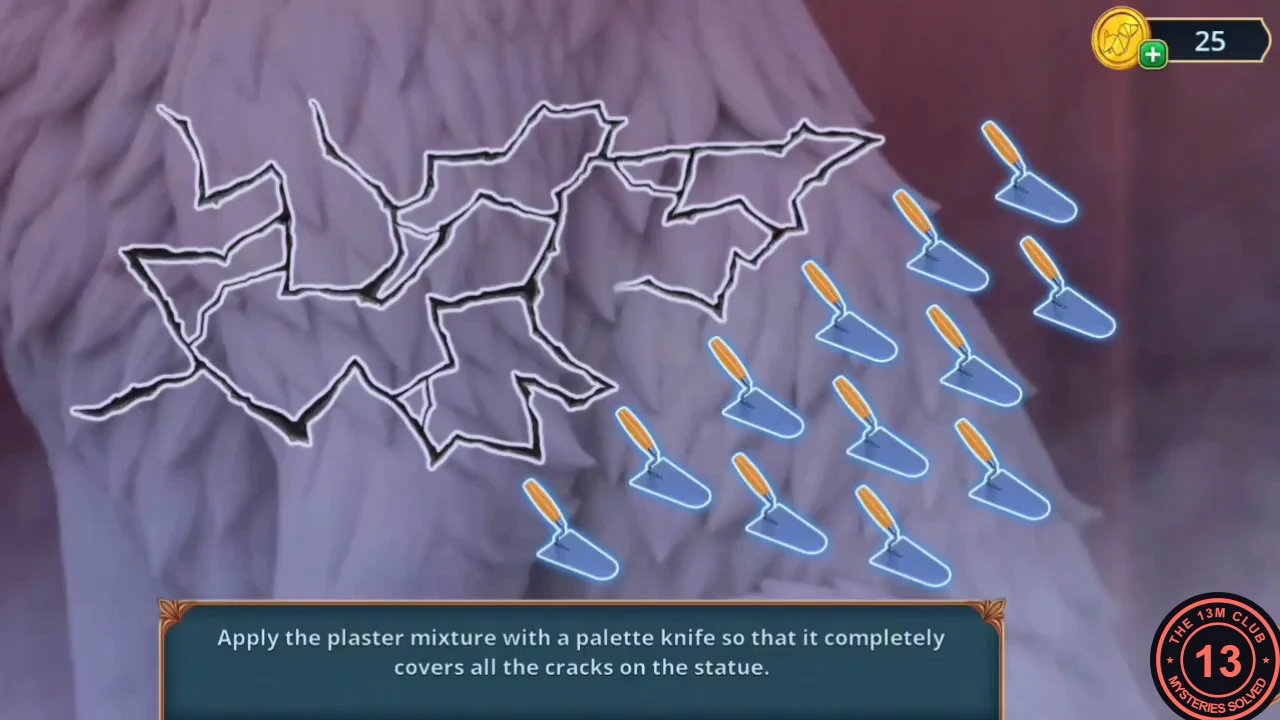
Casey noticed at the punch cauldron that mortar needs plaster, water and something to mix it with. Use the mixing bowl there, then fill every crack on the wolf statue.
- Use the map to go to the Decorated Gym. Open the punch cauldron and put the White Glue and Plaster Powder into the mixing bowl. The water is added and stirred automatically. Take the Bowl with Plaster, which has a palette knife in it.
- Go to the Walking Gallery, open the wolf statue and place the Bowl with Plaster on the table beside it. Use the palette knife on the cracks to start the mini-game.
- Drag the plaster-loaded palette knives from the tray on the right onto the points where crack lines meet. Each knife fills the crack lines next to its point with glowing plaster. Keep placing knives until the whole crack network glows.
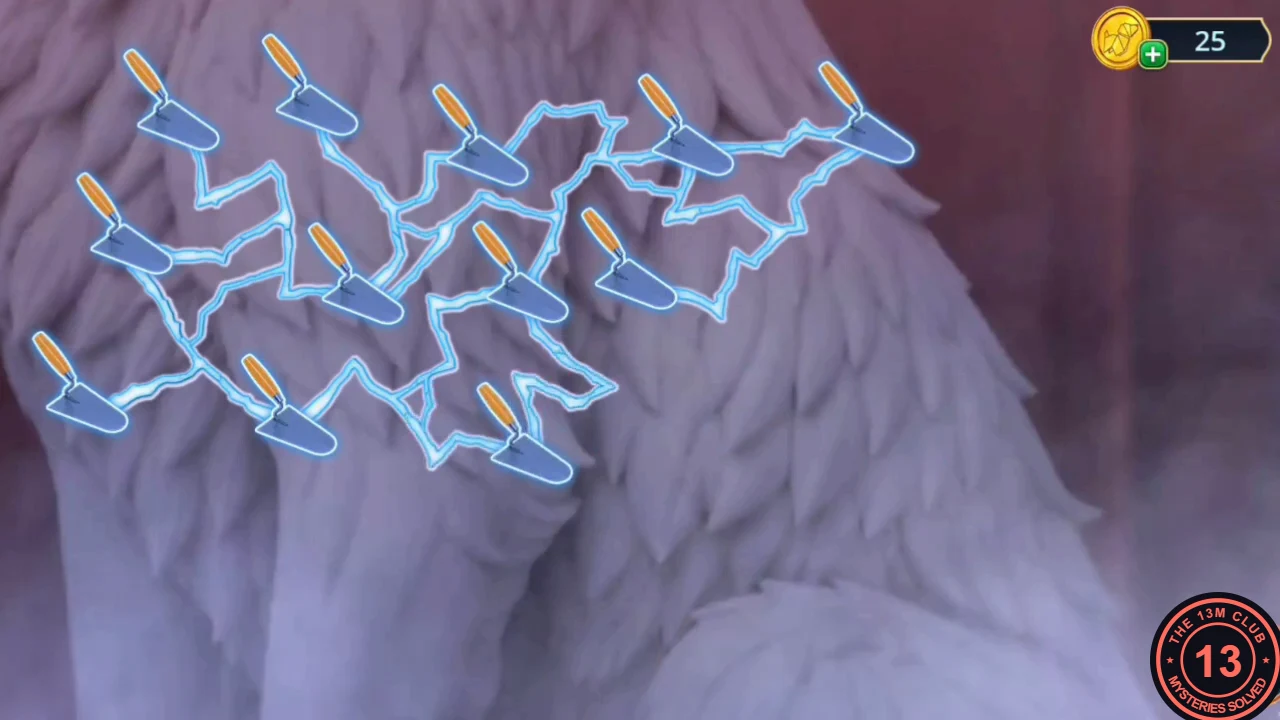
Completed repair: every crack line glows blue and each palette knife sits on a junction point. - Use the palette knife on the plaster blob on the pedestal to chip it away. Take the Costume List.
Garland Chest
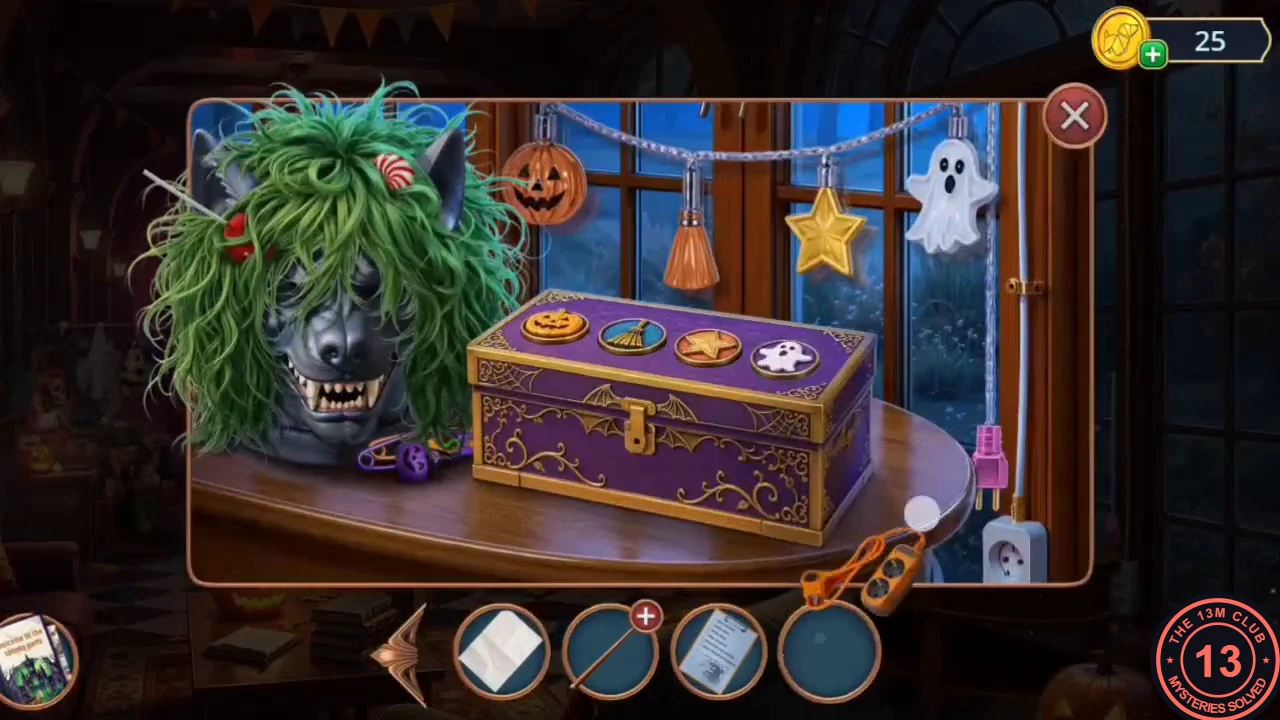
The purple chest beside the green-haired werewolf mask has four symbol buttons. The unlit garland above it shows the order.
- In the Walking Gallery, take the orange Extension Cord.
- Open the table with the werewolf mask and chest. Plug the Extension Cord into the socket on the right. The garland ornaments light up one at a time.
- Press the chest buttons in the same order the ornaments lit up. In the example game the order was pumpkin, ghost, star, broom; if your garland lights up differently, follow your own garland. The chest opens. Take the Moped Alarm from under the spider.
Costume Rack Texture Search
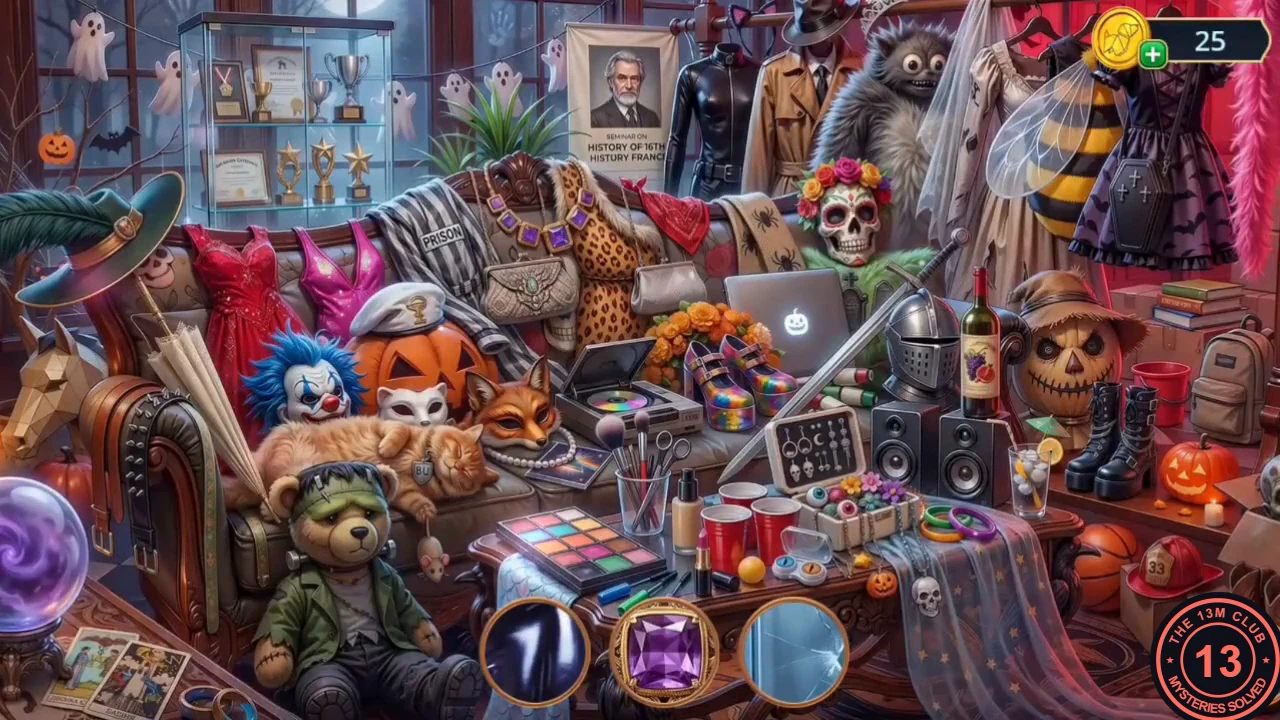
This hidden-object scene shows close-up textures instead of names. Find the object in the room that has each pattern.
- Attach the Costume List to the clipboard on the Walking Gallery costume rack to start the scene.
- Match each round swatch at the bottom to an object with that texture, such as the purple gem necklace on the mannequin, the knight's helmet visor, the ghost decoration, the rainbow CD, the cameo and the scaled high-heeled shoes. New swatches replace found ones.
- When the last swatch is found, take the Hair Brush reward. Back at the werewolf mask, Casey says the wig needs tidying up. The brush is left on the table for later.
Fishing Rod and the Library Window Latch
A moped blocks the bench where a raccoon sits on the Main Alley. A fishing rod can reach the latch of the library's ground-floor window.
- On the Main Alley, open the moped beside the raccoon bench and press the button on the Moped Alarm. The moped rolls away. Take the red Book Nook case left on the ground where it stood. Tap the Pumpkin Pins on the ground under the bench, right of the jack-o'-lantern, and take the Fishing Line.
- In inventory, attach the Fishing Line to the Billiard Cue to make the Fishing Rod.
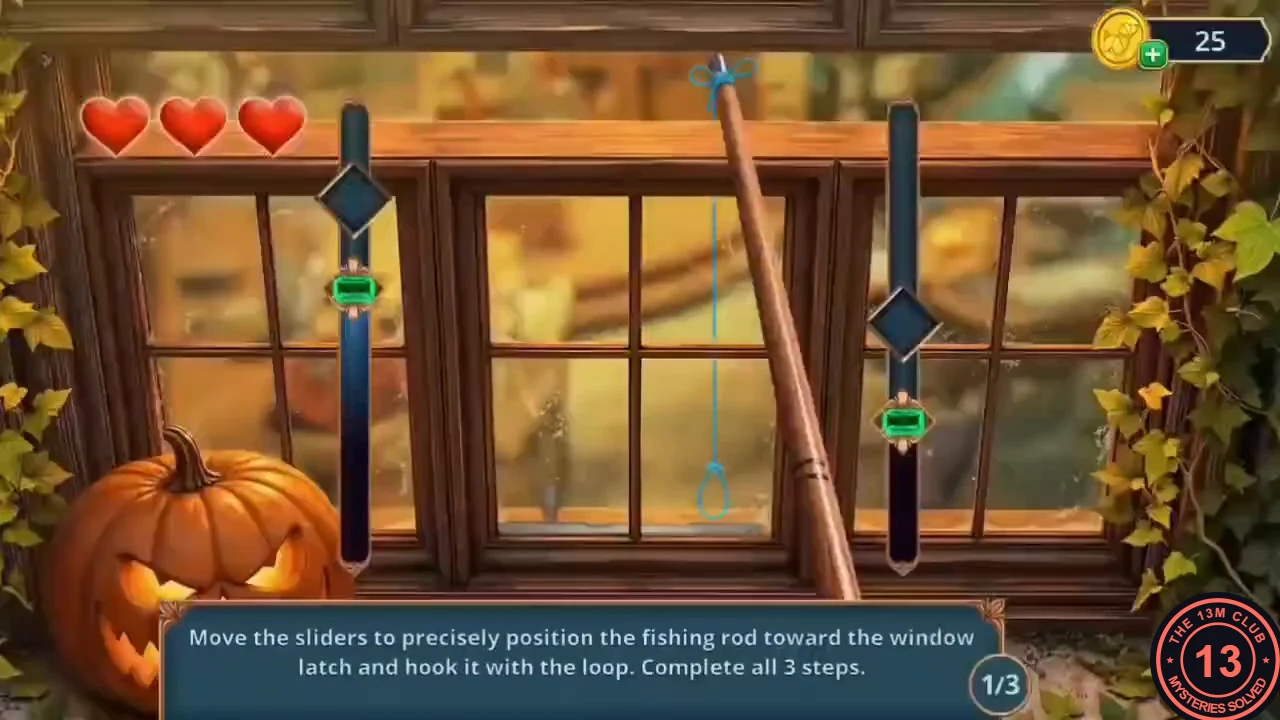
- Open the lit library window and use the Fishing Rod on it to start the latch mini-game.
- Each of the three steps has a vertical slider on each side. Drag each slider's marker to the highlighted target zone on its track. It turns green when correct, and mistakes cost one of three hearts. When both sliders are green the step advances. After step 3/3 the loop hooks the latch and the window opens.
Study Hall
The open window leads into the study hall, where a campus diorama has a small cemetery.
- On arrival, tap the purple Pumpkin Pin on the middle desk, in front of the stacked books. Open the lightbox desk. Take the Loofah and open the leather satchel. Take the Professor's Bag and the Gravestone of "Ryan W.". Tap the two Pumpkin Pins at the front left corner of the desk.
- Open the projector. Casey asks where the remote control is. Take the Mini-Moon from the projector.
- Open the campus diorama and read the card: "When the night's eye rises over forgotten names, the earth will remember those who sleep beneath it." Place the Mini-Moon on the rod above the courtyard, then place your gravestones in the cemetery. Casey says she needs all the tombstones, and the cemetery puzzle starts.
Cemetery Gravestone Layout
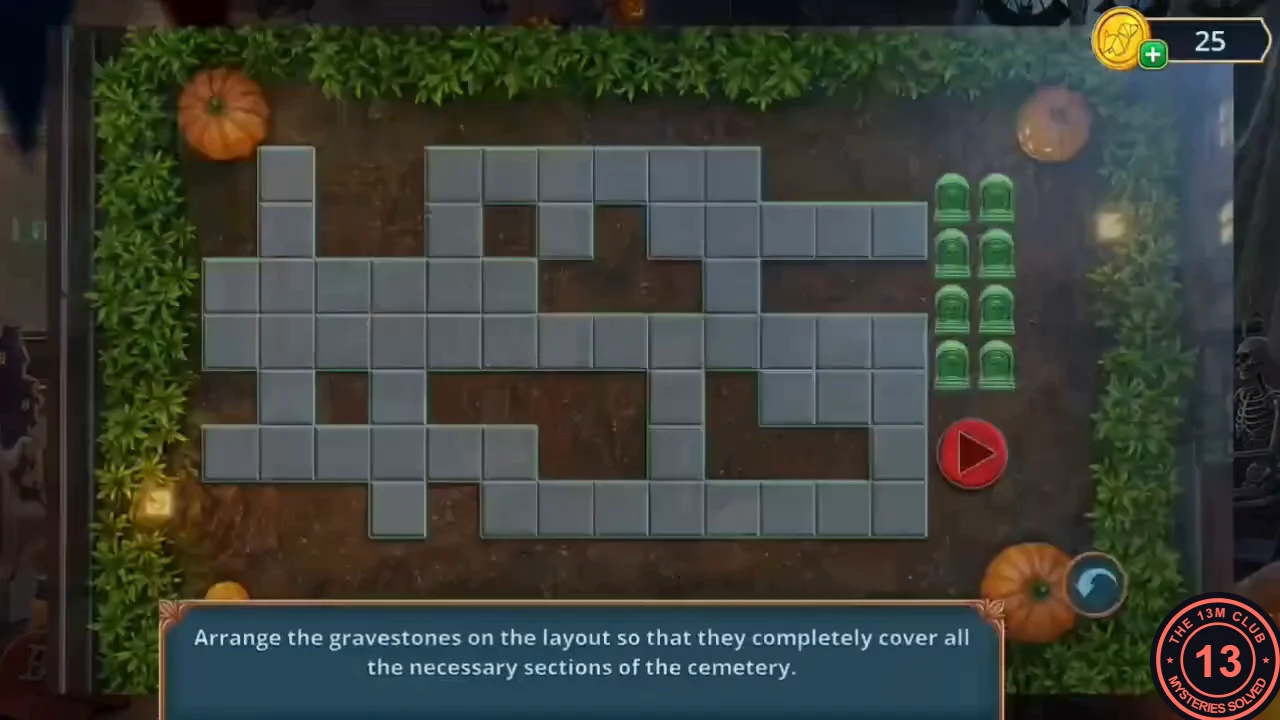
Place the eight gravestones from the right-hand tray so that, together, they cover every stone tile in the cemetery. The red triangle button checks your layout; the blue circular-arrow button at the lower right resets the board.
- Count the grid as 13 columns from the left and 7 rows from the top, including empty dirt squares. Place gravestones on these tiles: column 5 row 1; column 7 row 2; column 10 row 2; column 2 row 3; column 4 row 4; column 13 row 5; column 2 row 6; column 9 row 7.
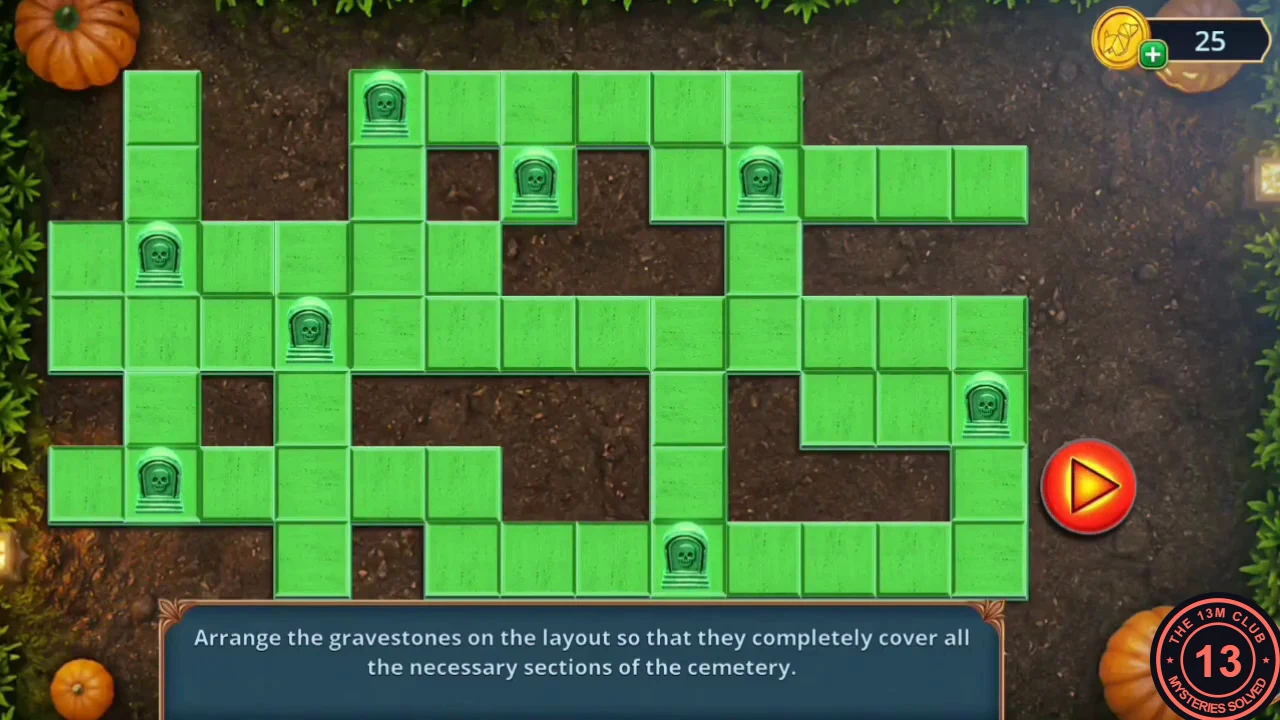
The solved layout. The eight gravestones sit on the tiles listed in step 1 and every tile turns green. - Press the red triangle button. Green spreads from each gravestone across the tiles; when every tile is green, the diorama pumpkin opens. Take the Scotch Tape.
Skeleton, Werewolf Wig and Ghost Lamp
A tidy wig reveals a tool that loosens the ghost lamp in the Walking Gallery.
- In the study hall, take the Cigar Cutter.
- Open the costumed skeleton by the bookcase and cut the purple ribbons with the Cigar Cutter. Take the Plastic Material and the Hair Conditioner it was holding.
- Go to the Walking Gallery and open the werewolf mask. Spray the green wig with the Hair Conditioner (keep the Plastic Material spool for later), then brush it with the Hair Brush from the table. This earns an achievement for tidying the werewolf's hair. Take the Bike Wrench from the mask's forehead. Also tap the purple Pumpkin Pins on the table in front of the werewolf mask in this close-up.
- Open the ghost wall lamp and loosen its bolt with the Bike Wrench. The lamp swings aside. Take the Saw (a coiled wire saw with red handles) and the University Stamp from the niche behind it.
QR Code and the Repaired Record
A relief on the library windowsill prints a code, and the broken record can be mended.
- In the University Library, open the windowsill with the embossed relief. Lay the Lecture Notes (the white sheet from the library bookcase) over it and press the University Stamp on it. Take the QR-Code.
- In inventory, open the Broken Vinyl Record. Put the Plastic Material and the 3D Pen in the two empty slots. The record is repaired.
- Go to the Decorated Gym, open the DJ turntable and put the Vinyl Record on the platter. A hidden-object scene starts on the DJ table.
DJ Table Search
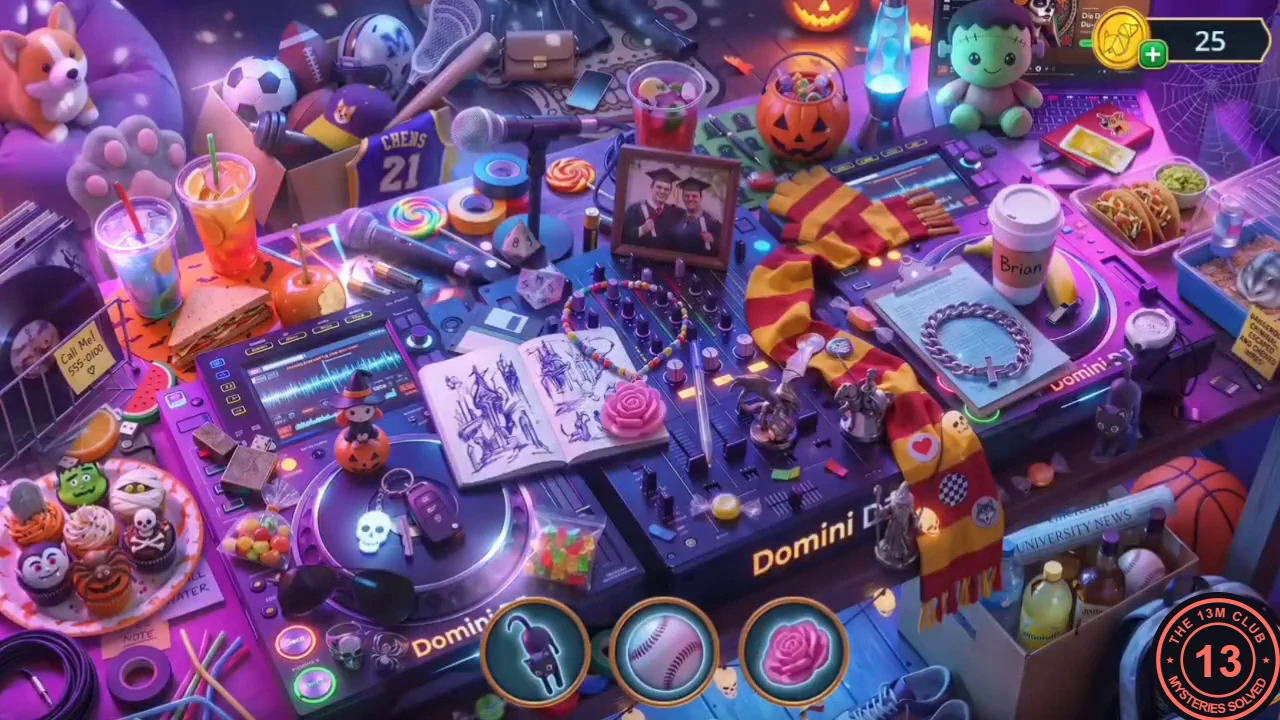
Find the objects shown in the round slots at the bottom of the cluttered DJ table.
- Find each pictured object. New pictures replace found ones. Finishing quickly and without wrong taps earns two hidden-object achievements.
- Take the Tap reward, a bat-shaped faucet.
Punch Bottle and the Book Vending Machine
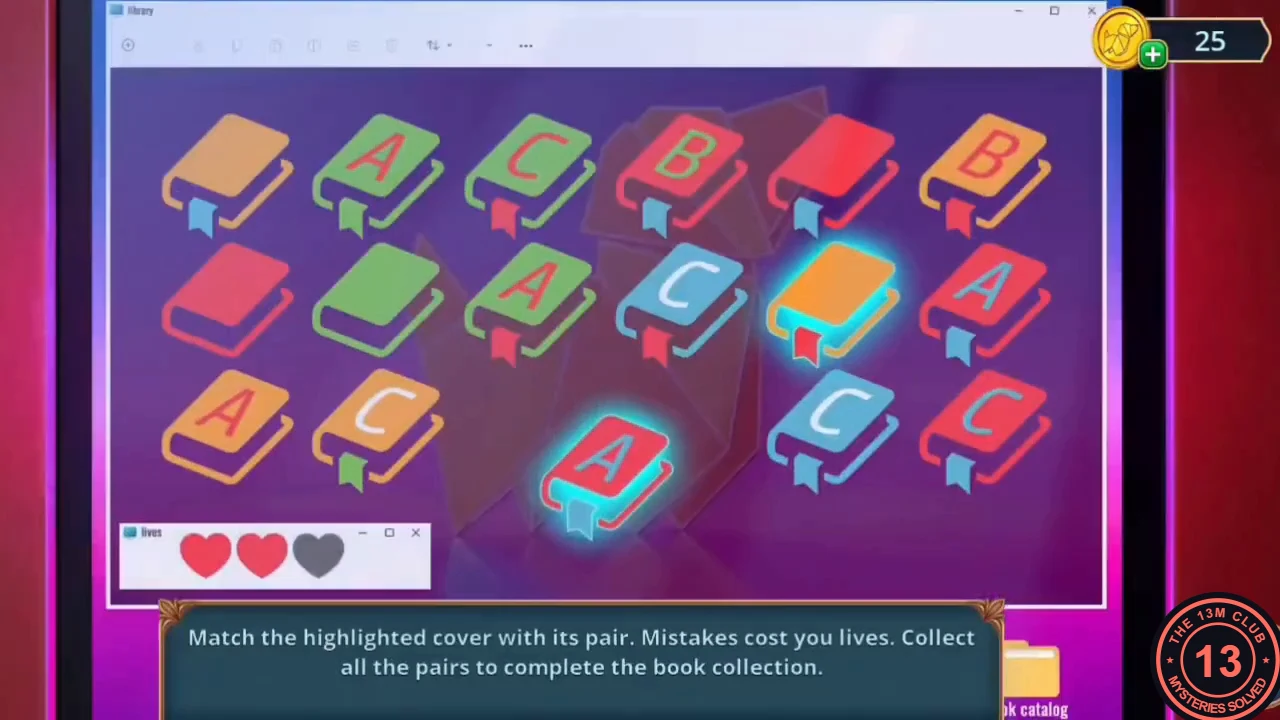
The vending machine in the library accepts a QR code and then runs a cover-matching game.
- In the Decorated Gym, open the punch cauldron. Attach the Tap and hold the Bottle under it. Take the Bottle of Punch.
- In the University Library, open the book vending machine and scan the QR-Code on its red reader.
- One book cover at a time is highlighted. Tap the other cover with the same colour and letter. Mistakes cost one of three hearts. Clear every pair to finish the collection.
- Take the Book with Skeleton from the machine.
Halloween Book Nook and the Photo Standee
The book nook completes the library bookcase, and its prize opens the photo standee outside.
- In inventory, open the Book Nook (the Halloween street diorama from the Main Alley) and put the Book with Skeleton in its empty slot. You now have the Halloween Book Nook.
- Open the library bookcase and put the Halloween Book Nook in the empty top shelf. A compartment opens. Take Missing Letters (1/3), a wooden S, and the Stand Button.
- Use the map to go to In Front of the Gym. Open the photo standee and fit the Stand Button on its stand. A compartment opens. Take the Torn Costume.
Costume Shop Riddles
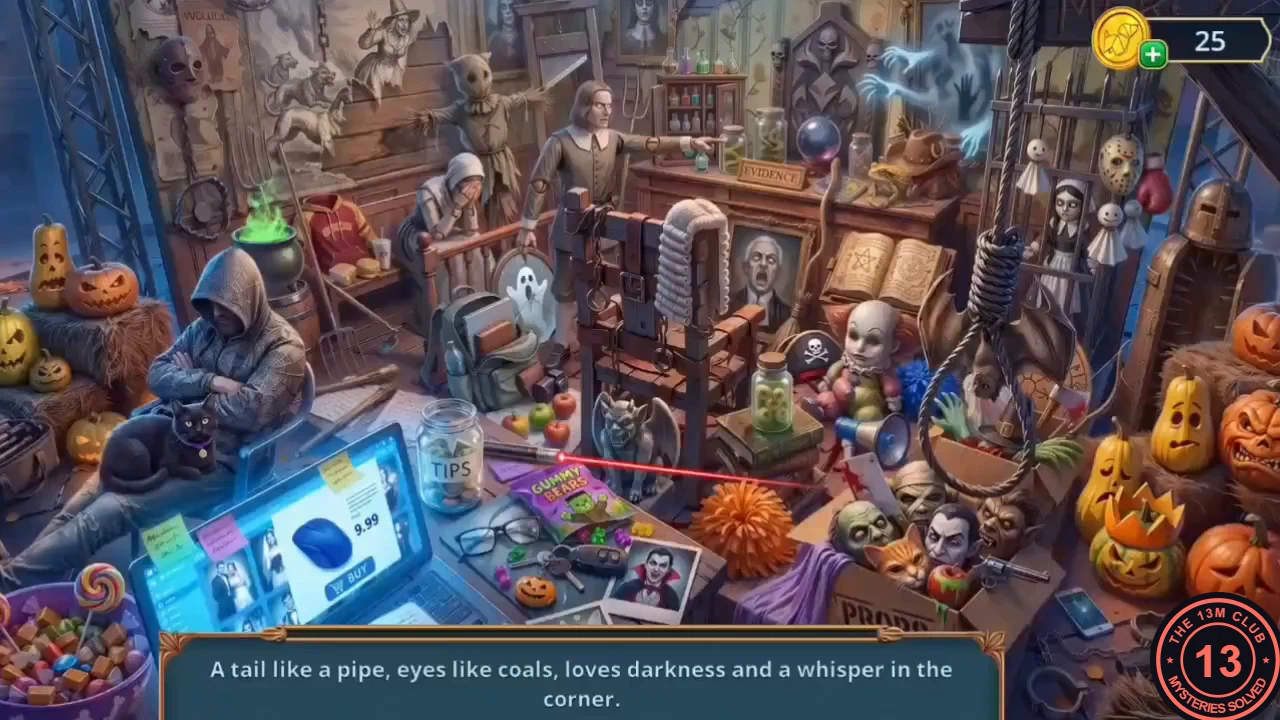
Casey wants to check the entrance again. A riddle hidden-object scene opens at the sparkling spot by the entrance. Each prompt is a riddle for one object.
- Solve the riddles as they appear: "A tail like a pipe, eyes like coals..." is the black cat; "Not your own, but you wear it boldly..." is the white wig; "Two glasses sit on the nose..." is the glasses; "A thin ray, like a needle..." is the laser pointer; "Friends with the sea for a long time..." is the black pirate hat beside the doll.
- Continue: "Not needed for the cold, but for a strong blow" is the boxing glove; "Pot-bellied, black, stands in the fire..." is the black cauldron of green potion; "White, soft, not scary..." is the white ghost plush; "Hides in the darkness during the day..." is the bat under the ceiling sheet.
- "Doesn't squeak or run, but has a tail" is the blue computer mouse on the shop display screen. "Hat, spurs, dust of the road..." is the cowboy hat on the high shelf at upper right. "Not a wreath and not a headband..." is the gold crown on the green jack-o'-lantern.
- The last prompt is a stocking silhouette. Find it to finish the scene and take the Stocking.