Clerk Office
The panel opens the way to the room the map calls Clerk Office, where a safe holds the evidence you need.
- Answer George's question about the safe with "Let's open it. We need real evidence, not rumors." for +2 stars. The other answer is "Let's look around first. We shouldn't make any noise!"
- Open the flower sill at the window and take the Safe Spinners (1/2) lying between the pots.
- Open the stained-glass doors and take the Flowerpot. Back at the flower sill, put the Flowerpot in the empty place. Now the swap puzzle starts: tap two pots to swap them, and use the note to set the order.
Window flowers
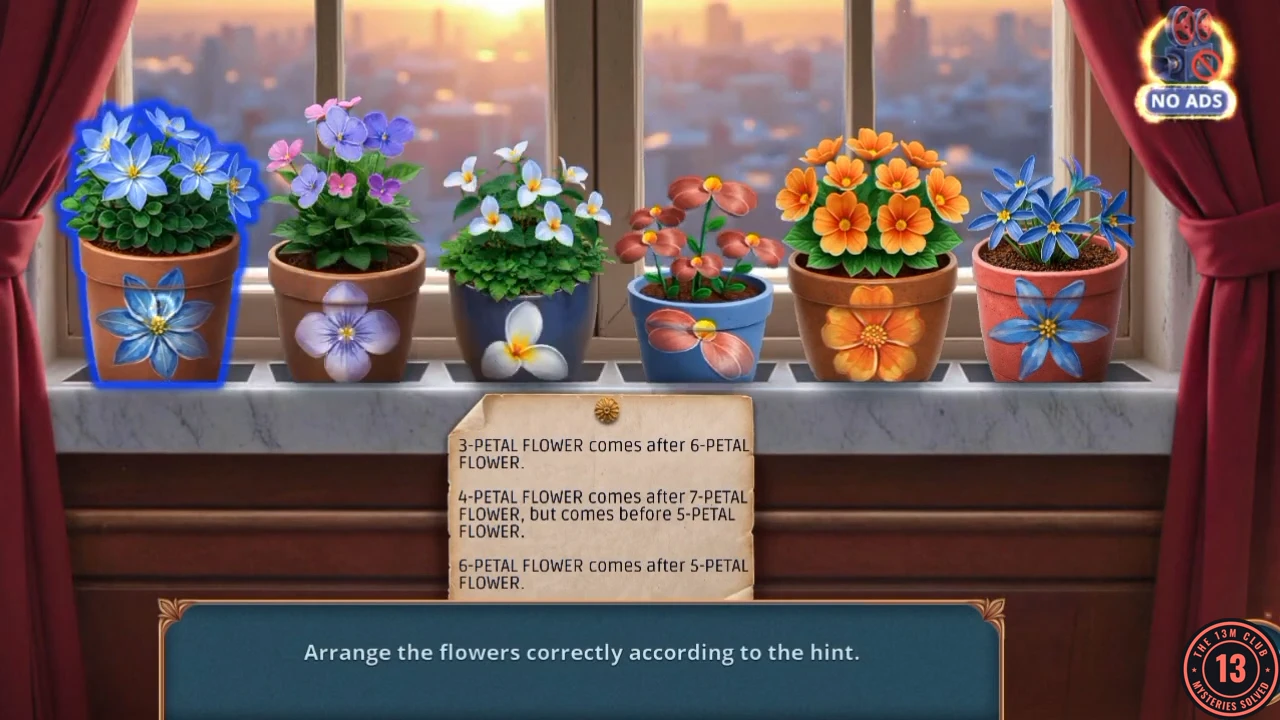
Prompt: Arrange the flowers correctly according to the hint. Hint: the 3-petal flower comes after the 6-petal flower. The 4-petal flower comes after the 7-petal flower but before the 5-petal flower. The 6-petal flower comes after the 5-petal flower. The 7-petal flower stands first.
- Swap the pots so they read, left to right: 7-petal blue, 4-petal purple, 5-petal orange, 6-petal blue in the red pot, 3-petal white, and the red-flowered pot last. The pots slide apart when correct.
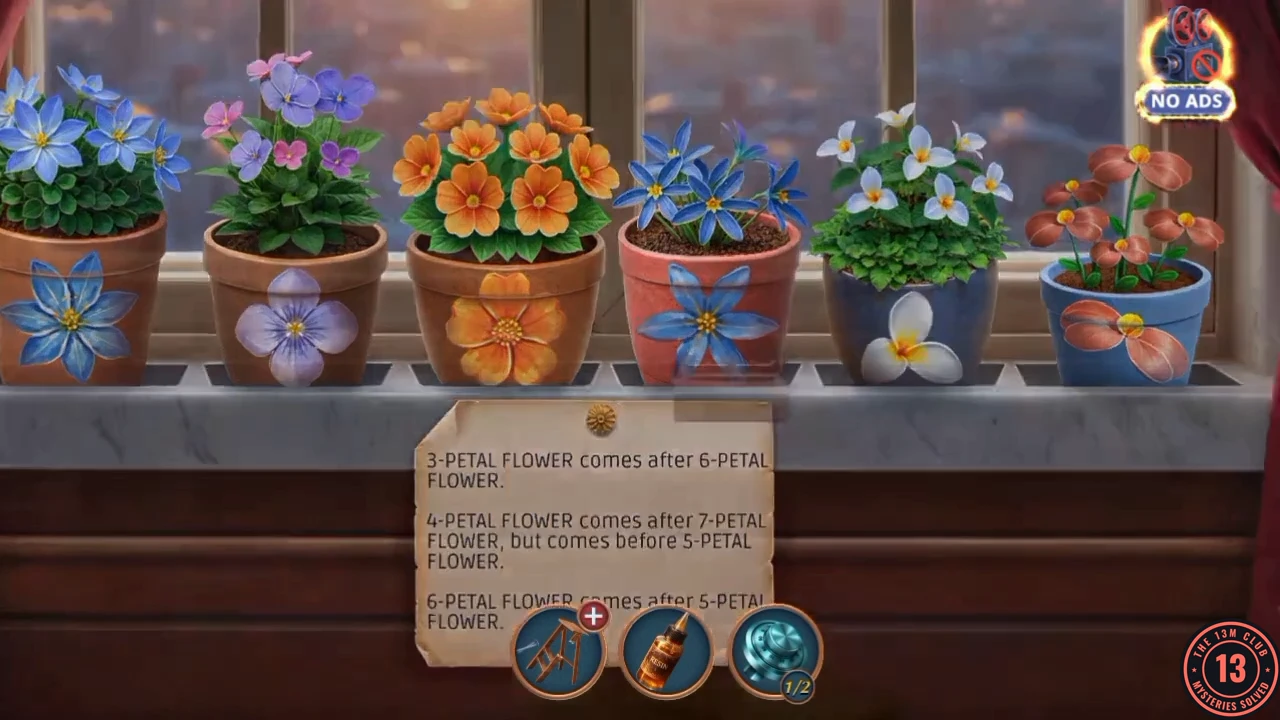
The solved order of the pots, matching the hint note. - Take the Wooden Plank from the cabinet that opens under the sill.
- Open the Broken Stepladder view and fit the Plank. It still needs one more part. Thomas says the globe on the desk looks suspicious ("Maybe break it?"), but leave it for now.
Closet riddles
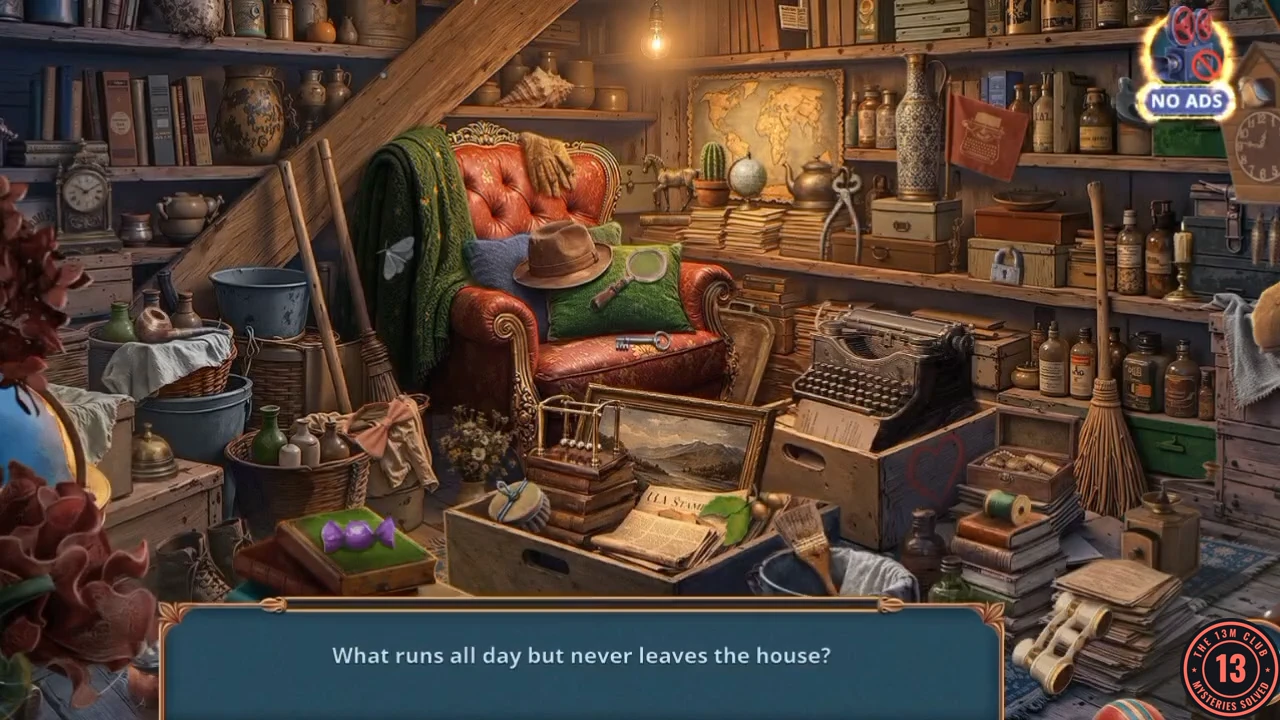
The closet door in City Hall sparkles. Each riddle has one object.
- Tap the object for each riddle. Start with the clock on the top-left shelf ("What runs all day but never leaves the house?"), then the heart scribbled on the crate beside the typewriter, the conch shell on the upper shelf above the red chair, left of the wall map ("What whispers prophecies of the sea when held to your ear?"), coffee grinder, pine branch (needles), service bell, hammer, flower, picture (window to other worlds), flag, serving tray and jar lantern. Take the Sandwich.
- Go to City Hall's Park, open the drain and give the Sandwich to the raccoon. It runs off and reveals a Plaster Lion statuette; take it.
- Open the sundial and place the Plaster Lion on the empty pedestal at the right, then tap the panel.
Animal sliding tiles
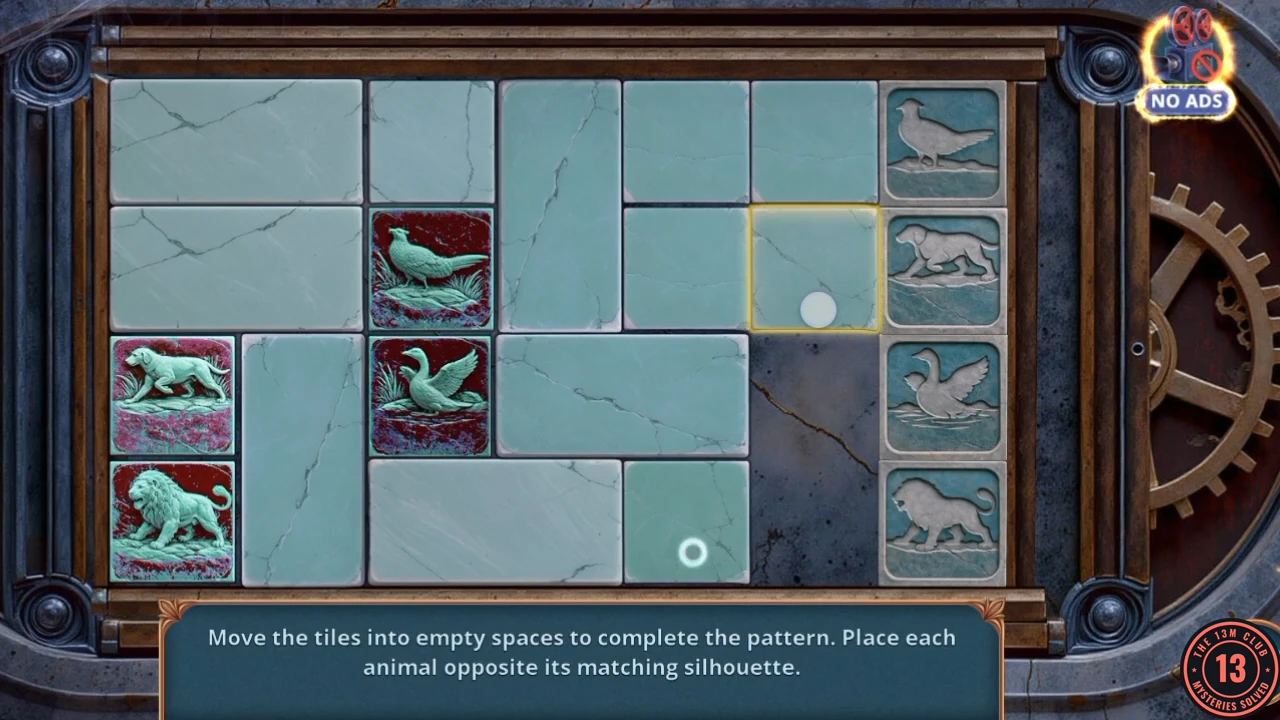
Prompt: Move the tiles into empty spaces to complete the pattern. Place each animal opposite its matching silhouette.
- Slide the blank tiles aside and walk the four animal tiles to the right column so each sits next to its silhouette. From top to bottom: long-tailed bird, hound-like animal, bird with raised wings, lion.
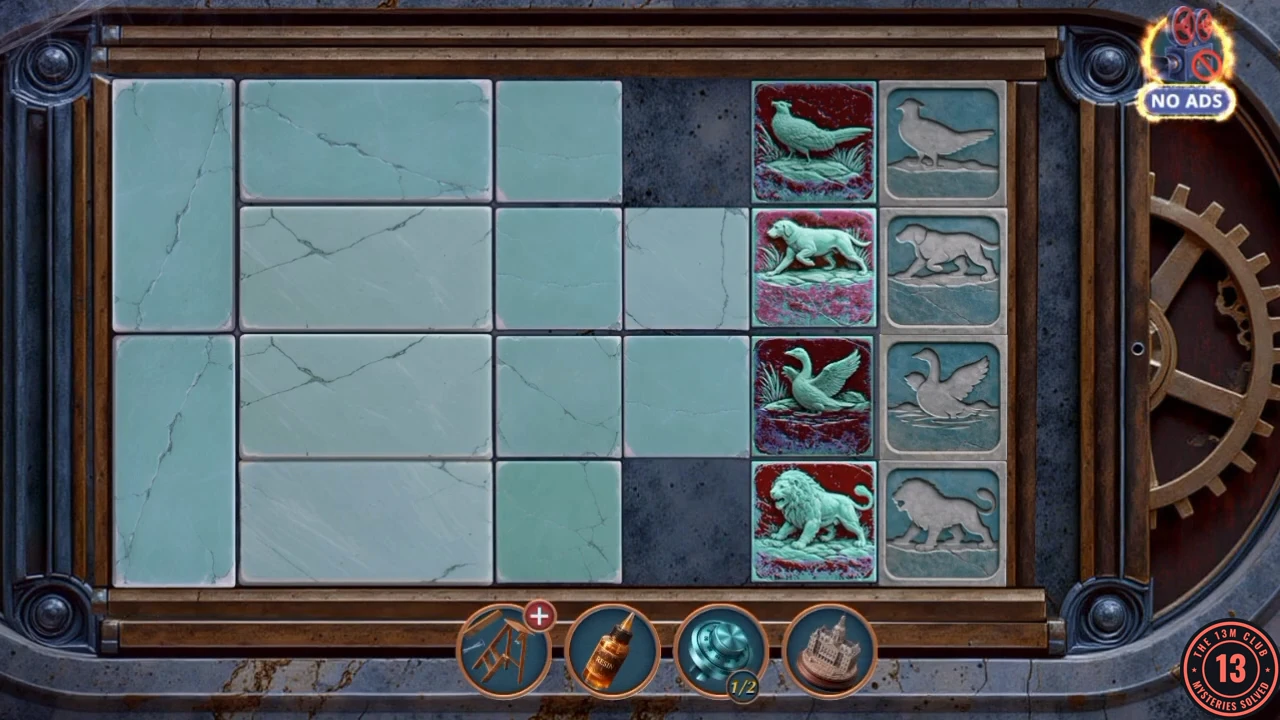
Solved: each animal tile sits next to its silhouette. - The compartment under the sundial opens: take the Heavy Shoe.
- Open the Broken Stepladder view and add the Heavy Shoe as a hammer. Take the Small Stepladder.
- Return to the Clerk Office, open the stained-glass doors and put the Small Stepladder in front of them to reach the upper latch. The doors open onto the balcony.
Balcony clutter
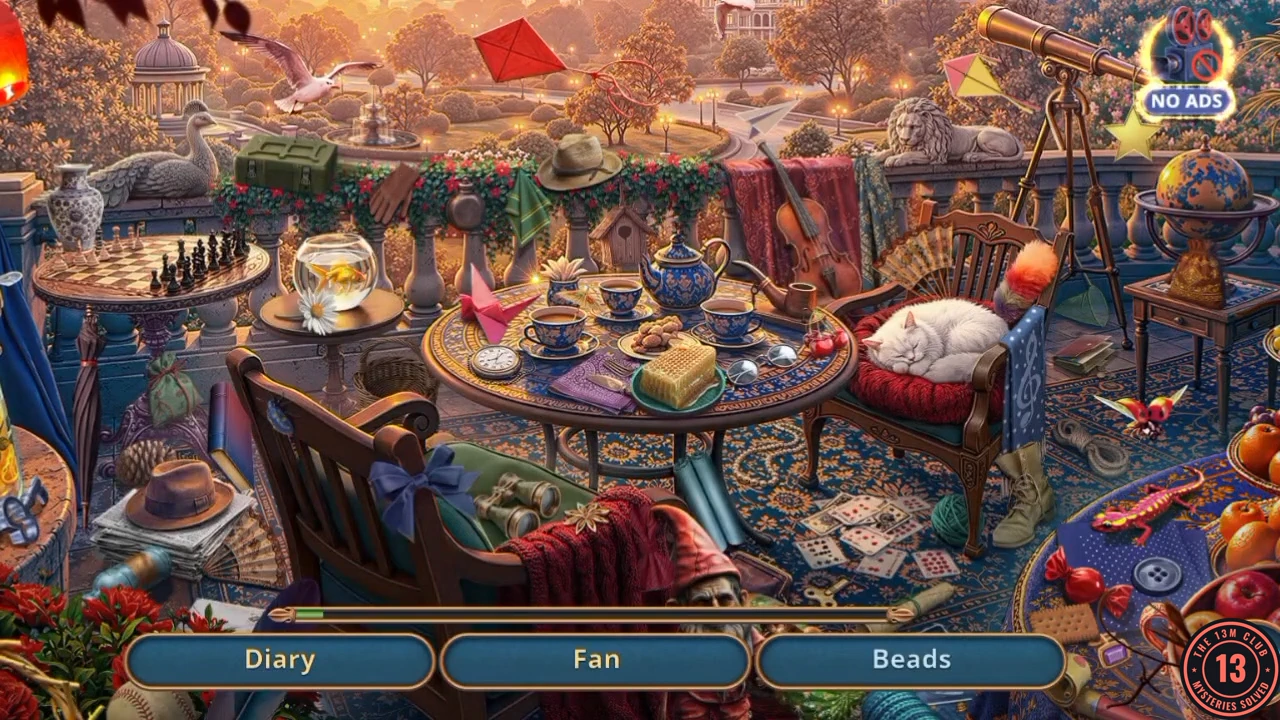
List scene with three names at a time. The view scrolls, so look at both ends. Fan and Diary need a step first, given below.
- Find the listed objects: Balloon, Fan, Button, Umbrella, Goldfish, Birdhouse, Beads, Diary, Fountain, Binoculars, Paper Plane and Treble Clef, and finally the shown silhouette. Fan: half of it is already on the back of the right-hand chair. Tap the other half, sticking out of the newspaper stack under the brown hat at lower left, then tap the whole fan on the chair. Diary: tap the drawer of the small table under the globe at the far right, then the book in the open drawer. The Fountain is in the park at the top left, above the green case. Take the Paw.
- Go to the Assembly Hall, open the lucky-cat cabinet and attach the Paw to the cat. It waves and drops the Scale Weights. Take them.
- Open the clock shelf and place the Scale Weights on the small scale. The clock face swings open; take Safe Spinners (2/2), the Candelabra and the Candles inside.
- Open the Candelabra in the item view and place the Candles in their slot. The other slot stays empty for now.
- Open the Clerk Office. Thomas says "We need to check it again." The balcony now sparkles: go out for the texture search.
Balcony textures
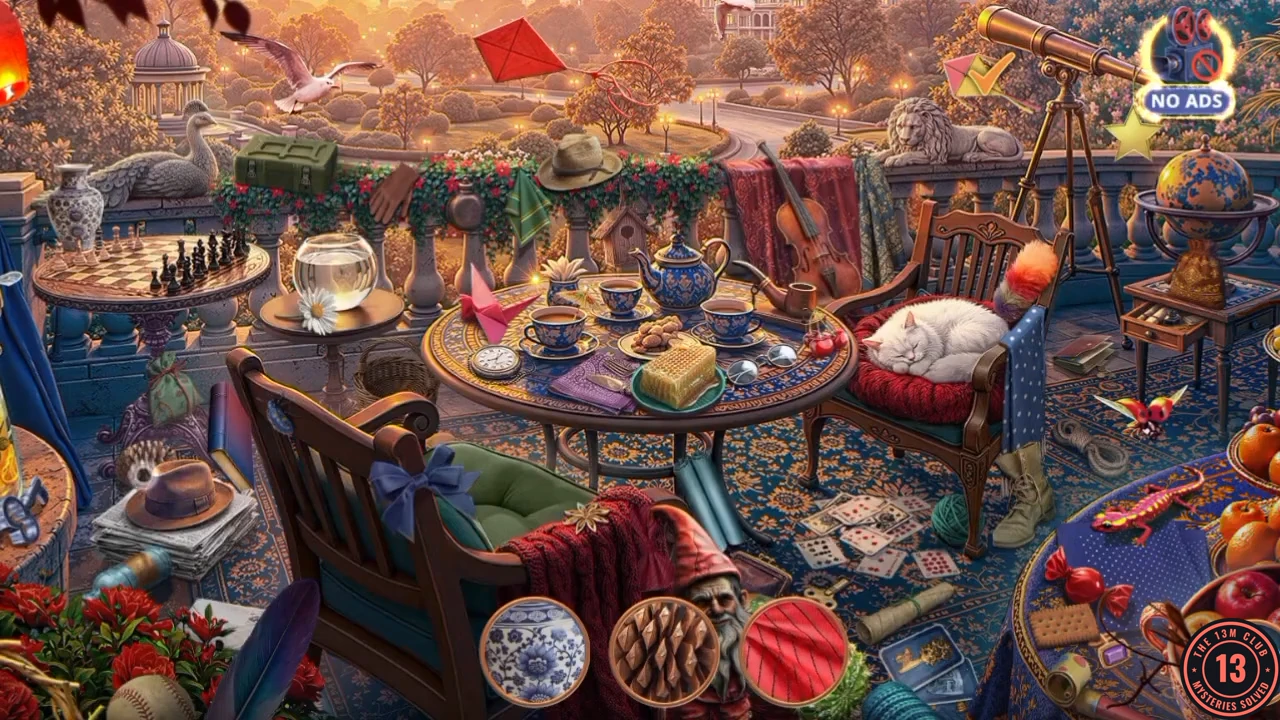
Three round texture discs show at the bottom. Tap the object in the scene with the same surface pattern. Each find brings the next disc.
- Match every texture disc to its object until the bar empties. Take the Caliper.
- Open the globe and use the Caliper on its hidden seam. The globe opens: take the Safe Code diagram inside.
- Open the safe and use the Safe Code on the slot at its left. Then place the Safe Spinners (2/2) on the door. A warning appears: "If you complete this task, you won't be able to go back to previous locations and find the remaining items. Do you want to continue?" Answer No if you still want Circus Tickets or the Mayor's Office in this chapter; Yes continues.
Safe spinners
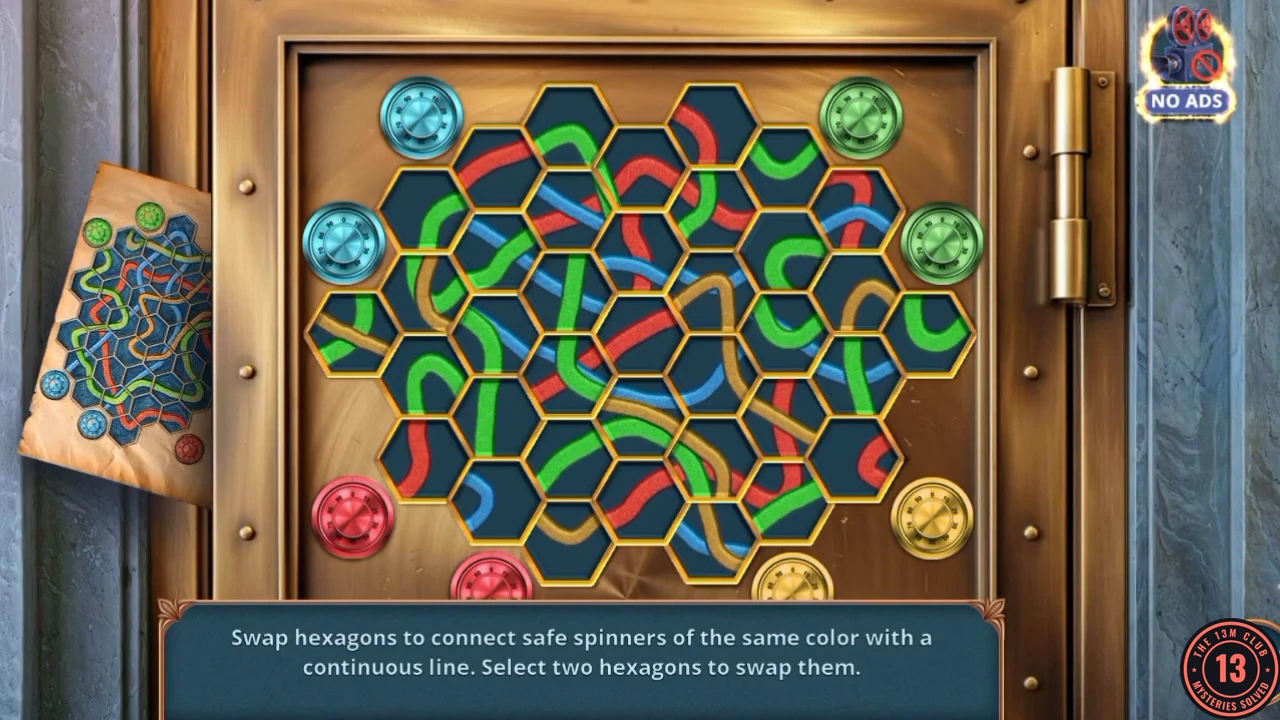
Prompt: Swap hexagons to connect safe spinners of the same color with a continuous line. Select two hexagons to swap them. The Safe Code diagram clipped at the left shows the finished pattern.
- Select two hexagons to swap them, using the diagram as a map, until each spinner connects to the spinner of its colour: green, blue, red and yellow lines all run unbroken.
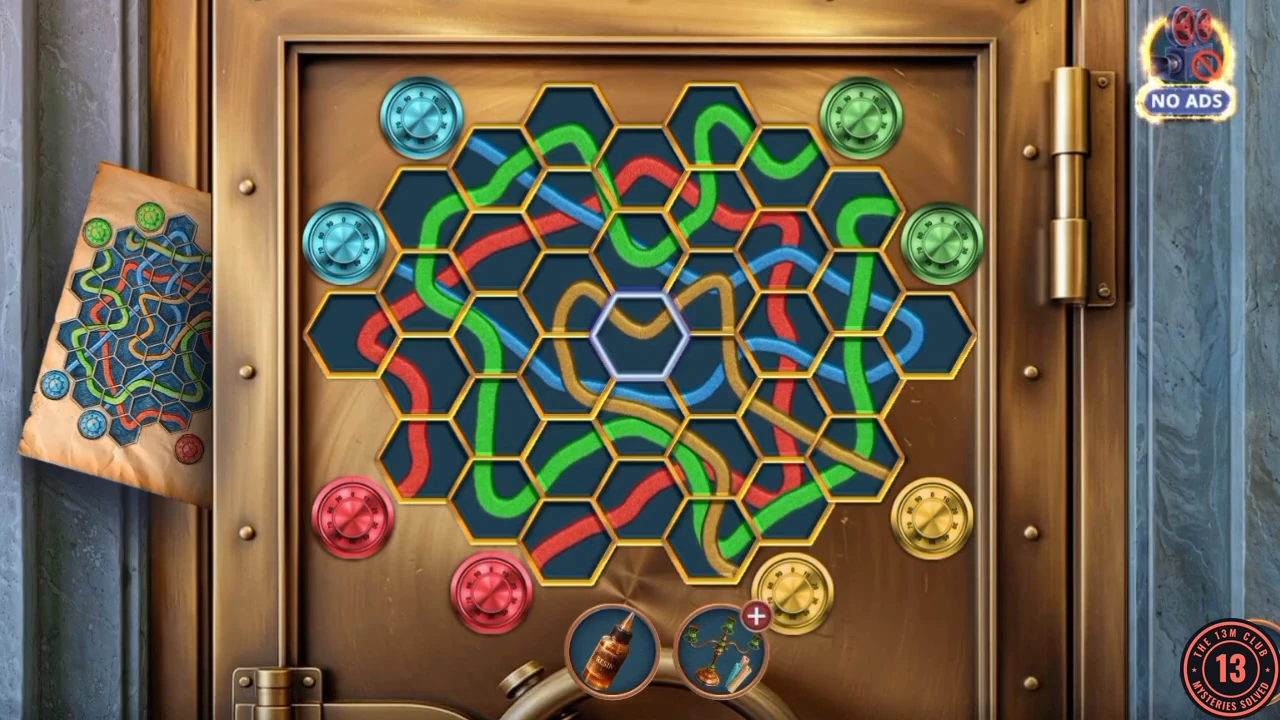
One finished pattern, with each colour's line unbroken. - Open the notebook in the safe, read the Circus Stage Plans and take them. The chapter summary shows your decision points; a guard shouts as Chapter 3 closes.