City Hall courtyard
The lab analysis is done. Mr. Banks says the circus needs a permit from City Hall, and the guard at the booth has to be distracted first.
- Open the storm drain beside the raccoon and take the Trash Bin Pedal and Mayor's Medals (1/2) from the grate.
- Open the guard booth on the right and fit the Pedal on the striped trash bin. Read the Official Notice to Citizens and take the Clock Hand.
- Open the sundial, place the Clock Hand on its face and apply the Glue. The gnomon sets upright and a compartment opens; take the Line and Hook.
- Back at the drain, use the Line and Hook through the grate to lift out the Smoke Bomb.
- Open the Smoke Bomb in the item view and use the Flint on it to light the fuse. George warns "It's barely giving off any smoke. It might not work." Choose "Set off smoke bomb" (+6 stars). "Throw smoke bomb and run" gives +2, "Ask George for help" gives none.
City Hall: finding the blueprints
Task: Find the circus blueprints.
- In the room's main view, tap the Circus Ticket at the counter on the left, by the tall stool. Then open the desk with six drawers on the left. Take the folded wooden Broken Stepladder standing in front of the map, then the gold bird figure lying on the map (1/2; its tray label reads Frame Parts).
- Open the statue. There is nothing to take yet: Thomas says "Letters are here, but where is the ink?"
- Open the door at the back right, take Mayor's Medals (2/2) from the handle.
- Open the desk again and use the Mayor's Medals on the top row to start the medal puzzle.
Mayor's medals
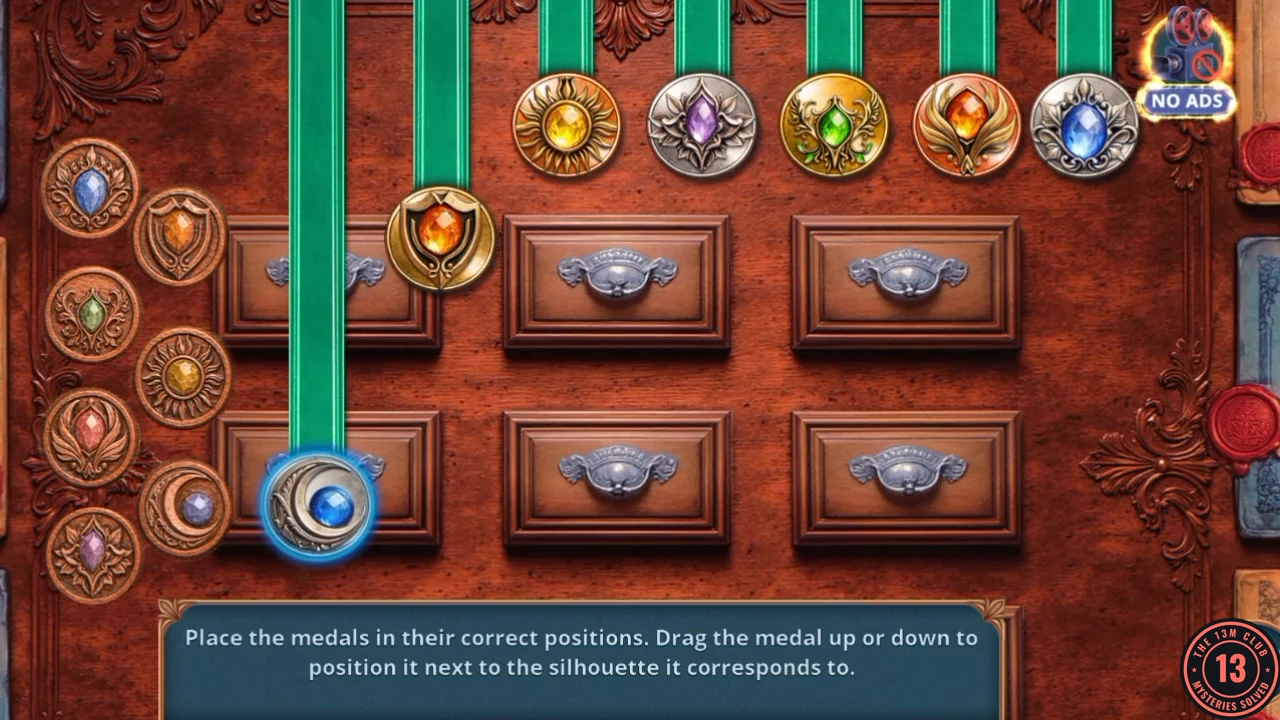
Prompt: Place the medals in their correct positions. Drag the medal up or down to position it next to the silhouette it corresponds to.
- Drag each medal on its ribbon until it is level with the silhouette at the left with the same shape: moon, purple diamond, shield, sun, green leaf, orange flower and blue diamond.
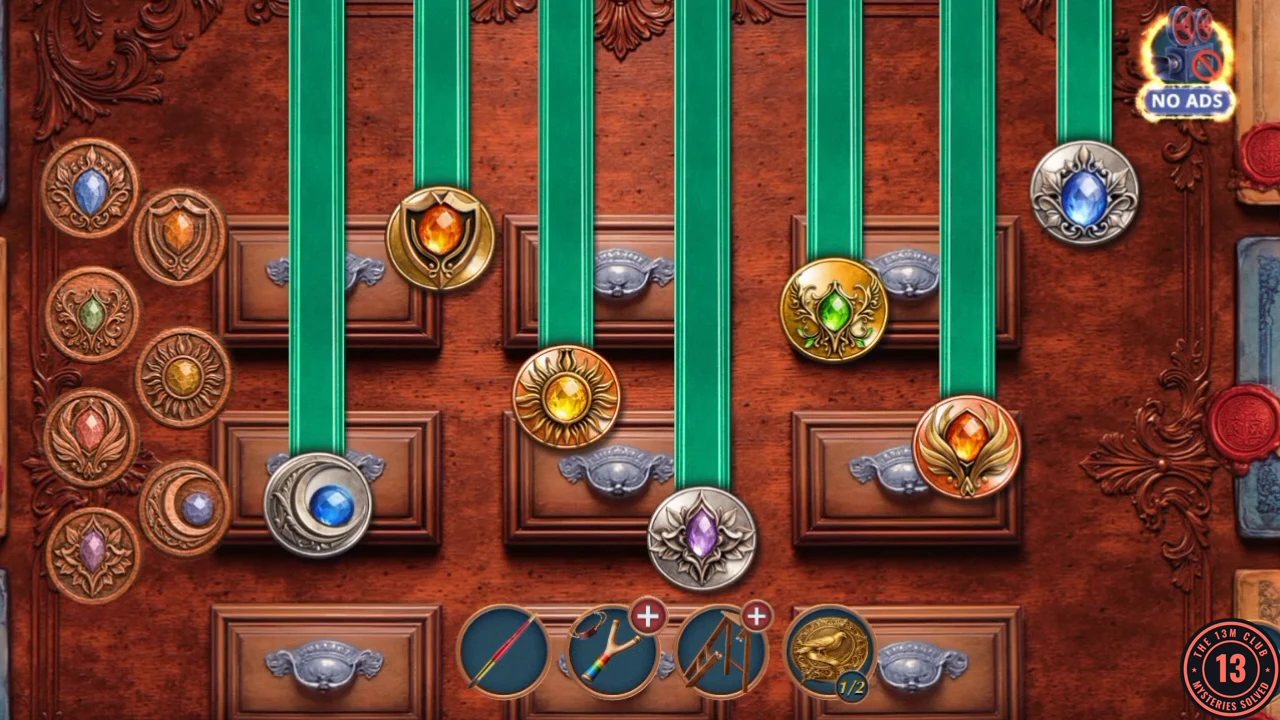
Solved: each medal is level with its own silhouette. - A drawer opens. Read the Service note ("By order of the mayor, complaints concerning the Carnevale de Lumiere circus are not subject to public review until the end of the tour.") and take the Prize Goblet.
- Open the statue and place the Prize Goblet in her raised hand. She lowers her other hand; take the Old Books (1/2).
- Open the door at the back right. The Ramrod is on the Lady Justice figurine beside it: take it.
- With the door open, use the Ramrod on the musket hanging above the Lady Justice figurine. It fires out a Cannonball; take it.
- Open the Slingshot in the item view and add the Elastic Band and the Cannonball to it.
- Return to City Hall's Park. Open the Souvenirs booth and use the Slingshot on the magnet hanging by the awning.
Souvenirs slingshot
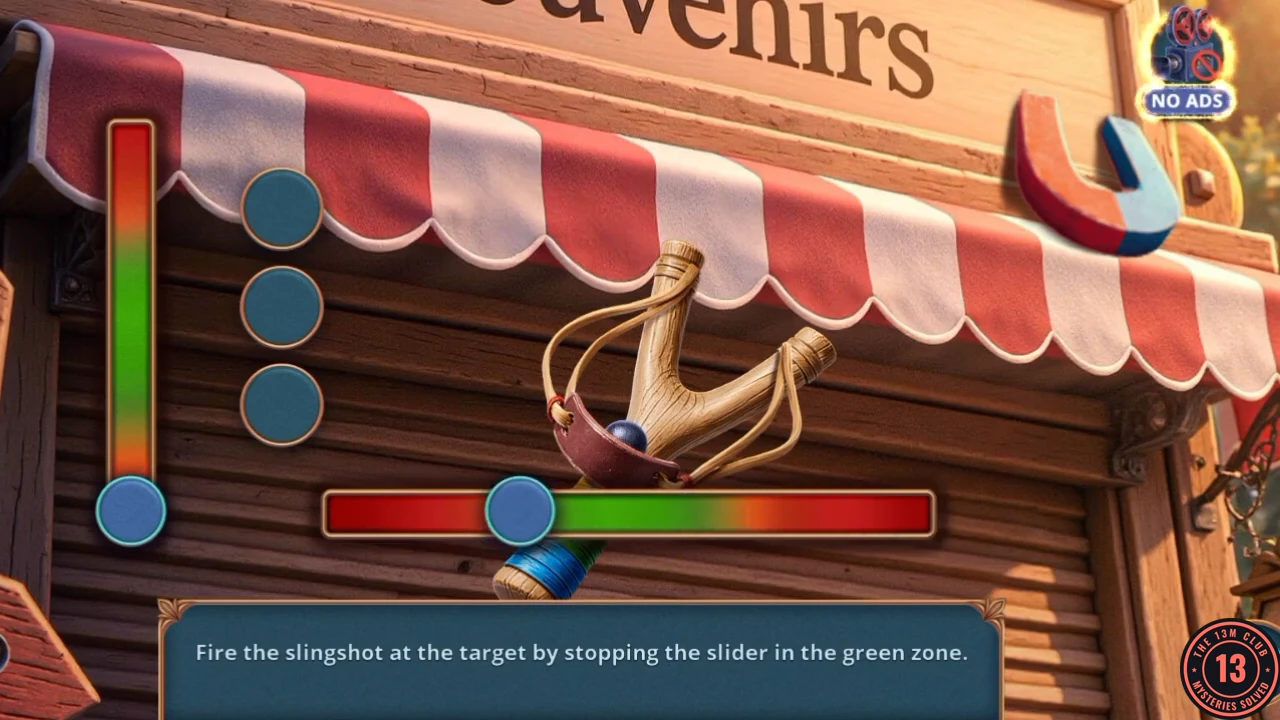
Prompt: Fire the slingshot at the target by stopping the slider in the green zone. Each hit lights one of three lamps.
- Stop the horizontal slider and the vertical slider inside their green zones. Repeat until all three lamps are lit. The slider speeds vary, so wait for a clear pass.
- Go back to City Hall, open the statue's plinth and put the Magnet on its hatch to draw the latch back. Take the Small Weight.
- Open the Lady Justice figurine beside the door and place the Small Weight on her scale to bring up the weighing puzzle.
Animal weights
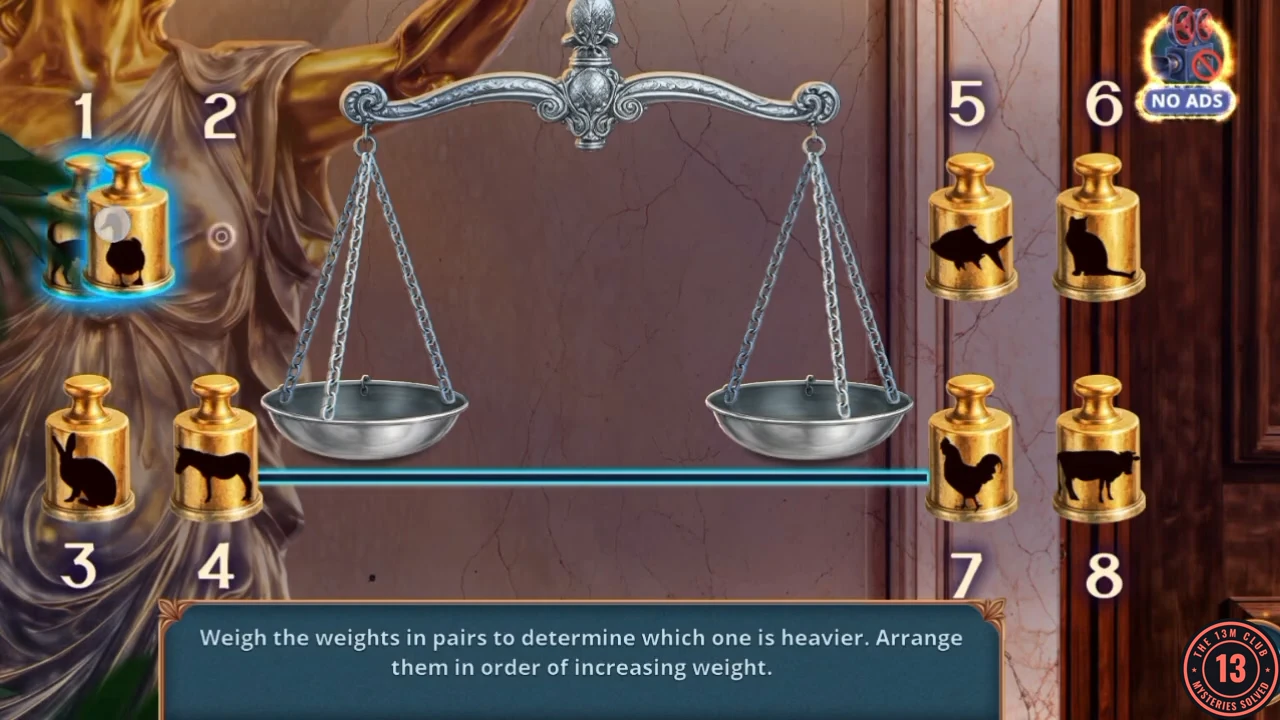
Prompt: Weigh the weights in pairs to determine which one is heavier. Arrange them in order of increasing weight. Eight weights carry animal silhouettes in slots 1 to 8.
- Drag weights to swap them until slots 1 to 8 read: duck, rabbit, horse, dog, cat, fish, cow, rooster. This is an example order: if your game refuses it, use the scale to compare pairs and sort from the results.
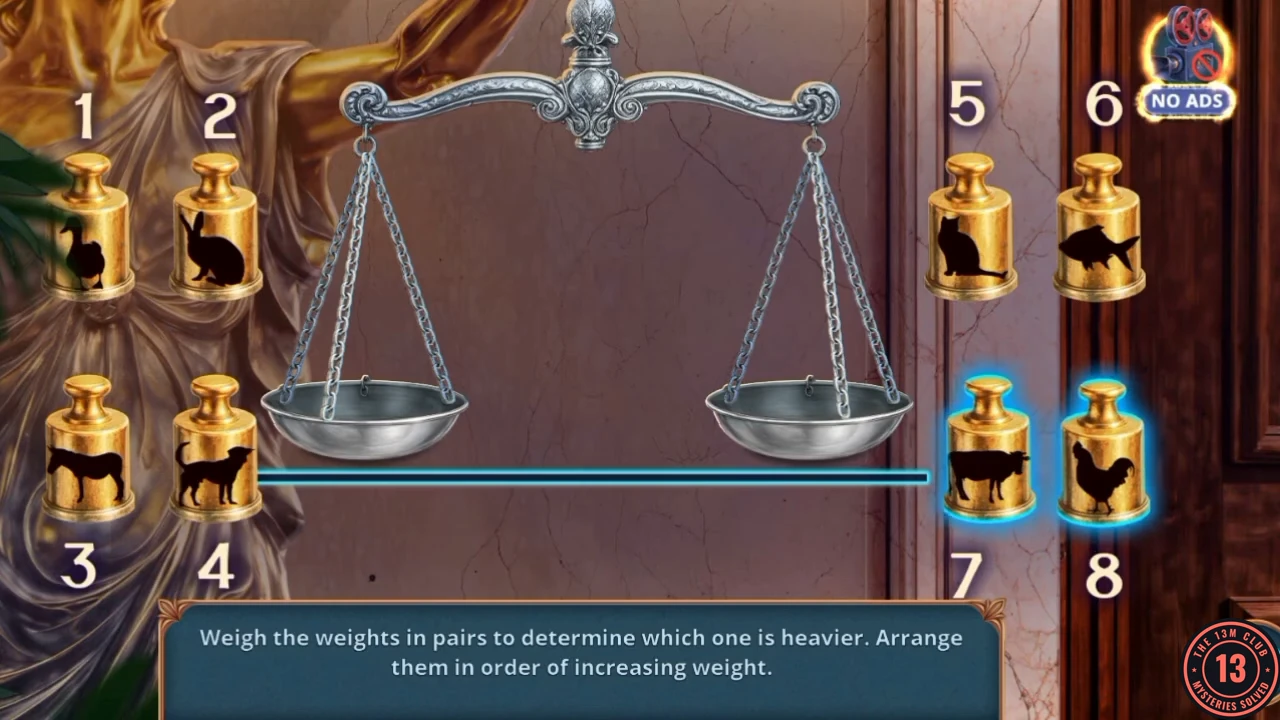
An example order, slots 1 to 8. - Use the door at the top of the stairs to enter the Assembly Hall. Emily suggests the mayor's office. "Let's go. If the mayor was covering something up, we'll find out what." (+1 star) opens the optional Mayor's Office. In the Google Play game this line has a gold DELUXE badge, which marks paid Deluxe content (see the notes for this guide). To play it, follow Chapter 3 bonus in the Extras part alongside the next steps. The other answer, "First, the circus plans. Then the mayor's office, if there's time.", stays on the main route.
Assembly Hall
The hunt for the blueprints moves upstairs into the Assembly Hall.
- Open the clock shelf and read the Minutes of the Meeting. Tap the Circus Ticket on the shelf and take the Wine bottle.
- Open the lucky-cat cabinet at the right and put the Wine in the empty hole of the rack. A panel opens: take the Lamp Oil. Thomas also notices the cat's missing paw ("Where is your cute little paw?").
- Open the wall lamp beside the portrait and pour in the Lamp Oil. Take the Bust Part that the light reveals.
- Open the bust on the back table and place the Bust Part on the map panel to start the tile puzzle.
City map tiles
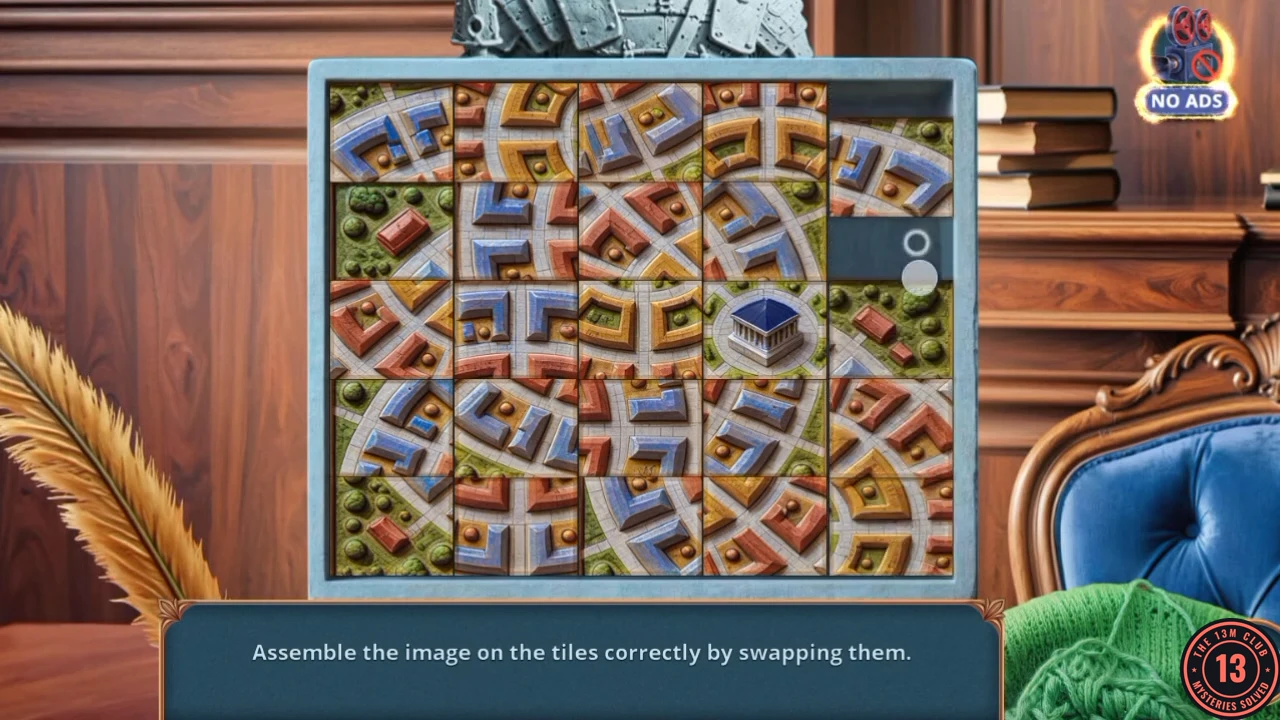
Prompt: Assemble the image on the tiles correctly by swapping them. One gap moves as you slide tiles. The finished picture is a ring of streets with the blue building in the centre. This is a long rearrangement, so the guide gives the target rather than every slide.
- Slide tiles through the gap to restore the concentric street rings: complete the outer ring first, then the centre with the blue-roofed building.
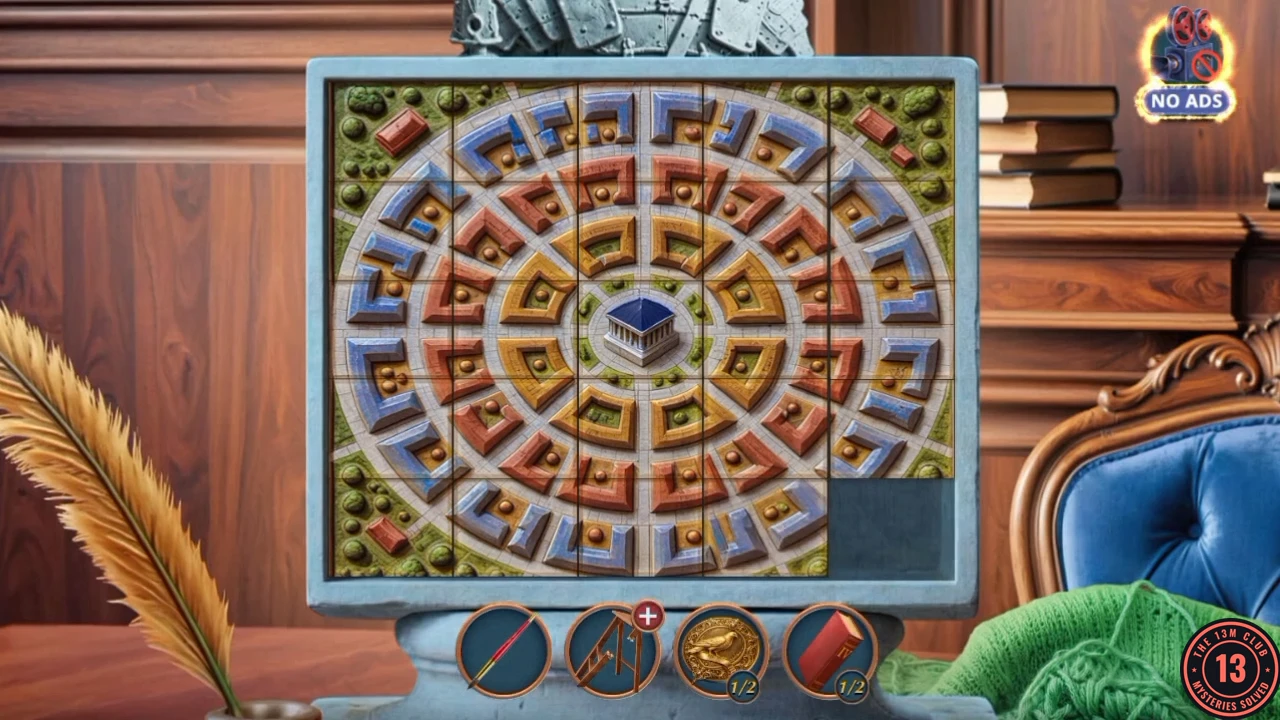
Solved: the street rings are complete around the blue-roofed building. - The plinth opens: take Old Books (2/2) and the Nails.
- Open the Broken Stepladder in the item view and fit the Nails into its first slot. It still lacks parts, so it stays in the tray.
- Open the clock shelf and put Old Books (2/2) in the box to complete volumes I to V. A drawer slides out: take the Ink Developer.
- Go to City Hall, open the desk and pour the Ink Developer on the blue-stained paper, then wipe across it with the Small Brush. A code appears on the paper: 1324 in this example. Use the digits you see if yours differ.
- Press the code on the desk buttons (1, 3, 2, 4 in this example). The lid lifts: take the Closet Lever.CODE1324
- Open the door at the back right and fit the Closet Lever on the bracket by the handle. Go through to the closet search.
Closet clutter
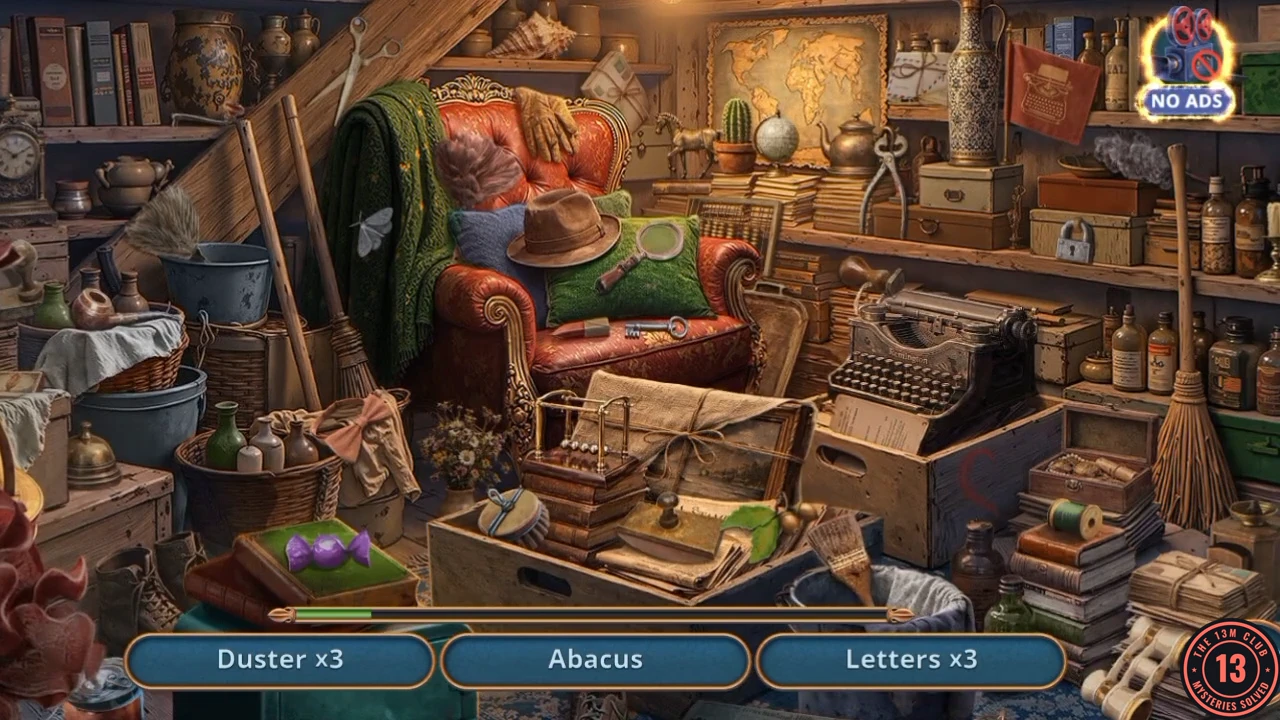
Find the listed objects, three at a time: Duster x3, Abacus, Letters x3, Stamp x3. The scene pans sideways, so scroll for the remaining objects.
- Find every listed object and take the Crochet Hook.
- Back in the Assembly Hall, open the bust and use the Crochet Hook on the green yarn. Take the bird figures (2/2) and the Resin.
- Open the wall lamp and use the bird figures on the slots on the panel to start the untangling puzzle.
Raven and dove panel
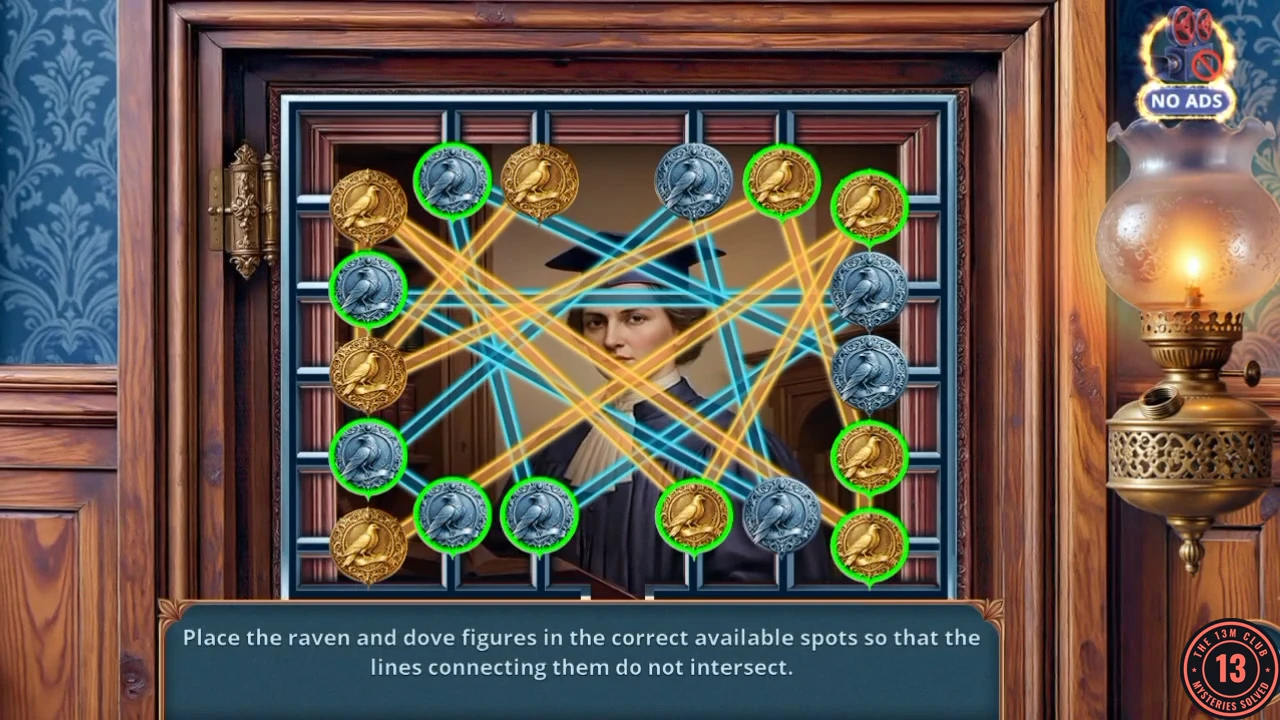
Prompt: Place the raven and dove figures in the correct available spots so that the lines connecting them do not intersect. Each figure's line leads to figures of the same metal. This takes many moves, so the guide gives the method rather than every swap.
- Move all silver figures to the left half and all gold figures to the right half, then swap neighbours in each half until the lines form one closed loop with no crossings. A correctly untangled figure ring shows green.
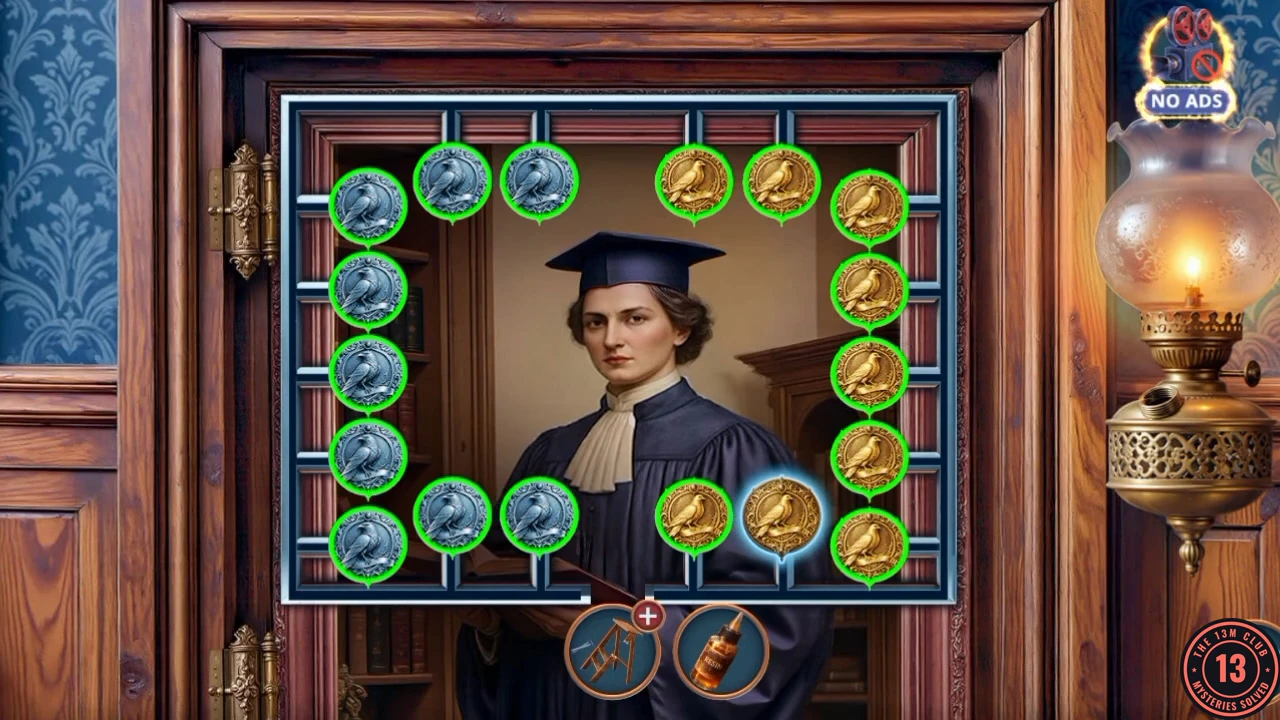
Solved: silver on the left, gold on the right and no crossing lines.