Wonderland Toy Shop: waking Emily and George
The Crescent Pin leads to the Throwing Knife, and the knife to the last of your friends' belongings.
- In the Toy Shop open the table and use the Crescent Pin on the hatch. Take the Throwing Knife inside.
- Open Emily's green bag on the clock shelf, cut its cord with the Throwing Knife and take the item inside (Friends' Belongings 2/2).
- Use the Friends' Belongings on Emily and George lying on the floor to start the anti-hypnosis puzzle.
Anti-hypnosis pattern
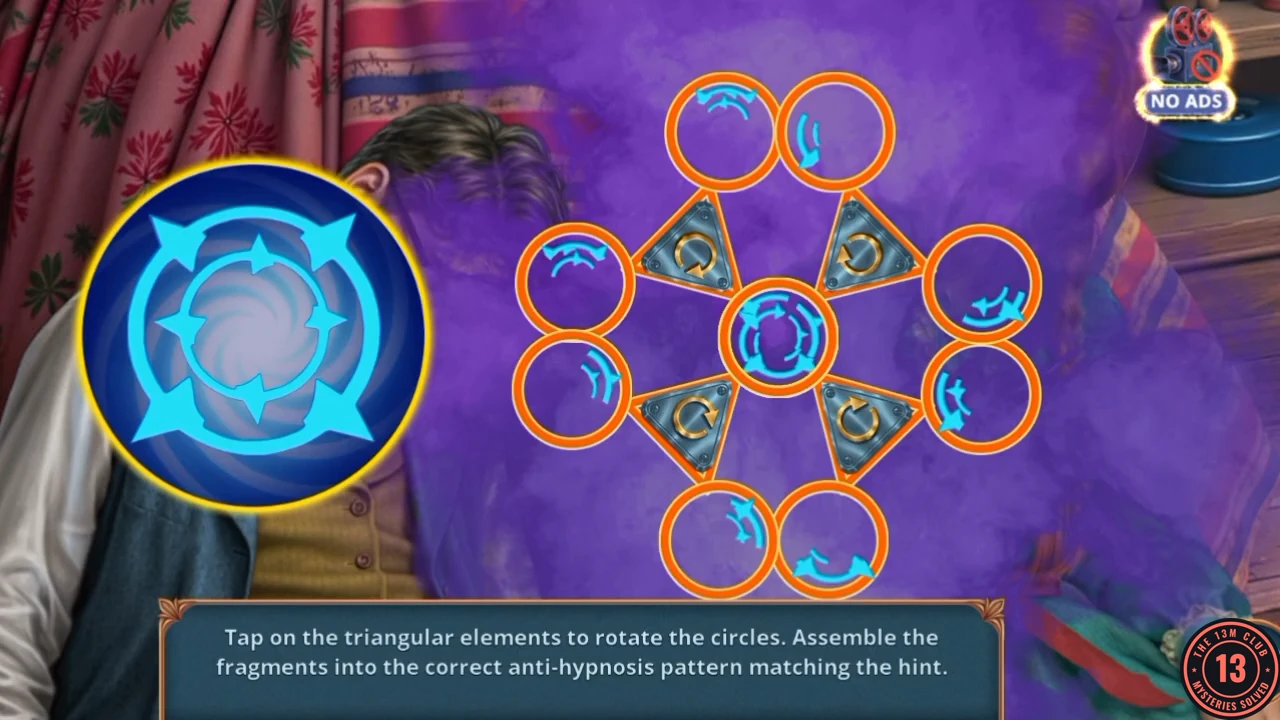
Prompt: Tap on the triangular elements to rotate the circles. Assemble the fragments into the correct anti-hypnosis pattern matching the hint.
- Tap the triangles to rotate the circles of fragments around them, and keep going until the assembled shape matches the hint disc on the left.
Getting backstage: from the horror house decision to the wheel
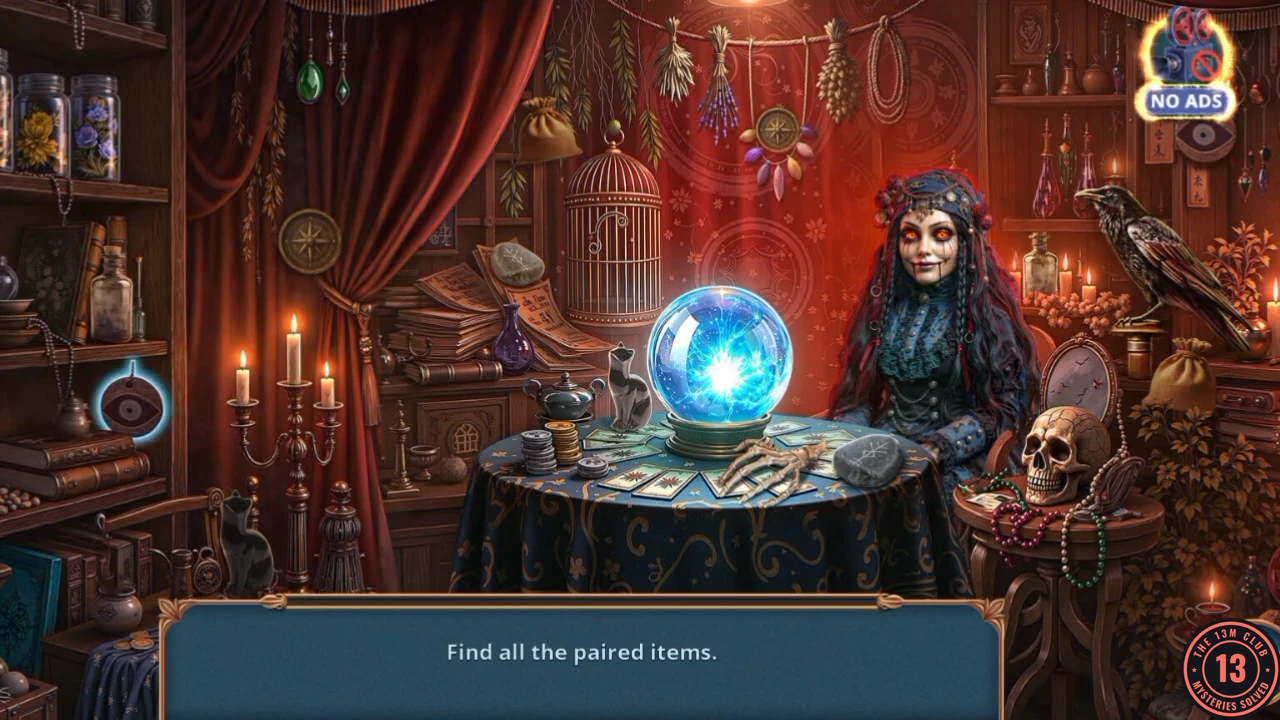
Emily then recalls seeing the clown at the horror house.
- Answer Emily. "I agree. Let's it check it out." (the game's own wording, +1 star) opens the optional Wagon of Horrors, and the game's tip here says "Some choices unlock bonus locations." In the Google Play game this line has a gold DELUXE badge, which marks paid Deluxe content (see the notes for this guide). To play it, follow Chapter 1 bonus in the Extras part alongside the next steps. The other answer, "You must've been mistaken. No time for this.", stays on the main route.
- Accept the Clown Scales the conversation awards.
- Open the clown and hang the Clown Scales on his empty arm, then take the Horn.
- Open the crow on the welcome sign and use the Horn to frighten it off. Take the Bottle from the branch.
- Open the Fortune Teller's room (it sparkles). Find all the paired items: in this scene you tap matching pairs. Take the Lion Ear.
- At the entrance open the lion head and fit the Lion Ear. Take the Oil with Wick from its mouth.
- Open the Lantern in the item view and add the Oil with Wick.
- Open the pinata booth and place the Lantern on the counter to start the Fortune Wheel.
Fortune Wheel
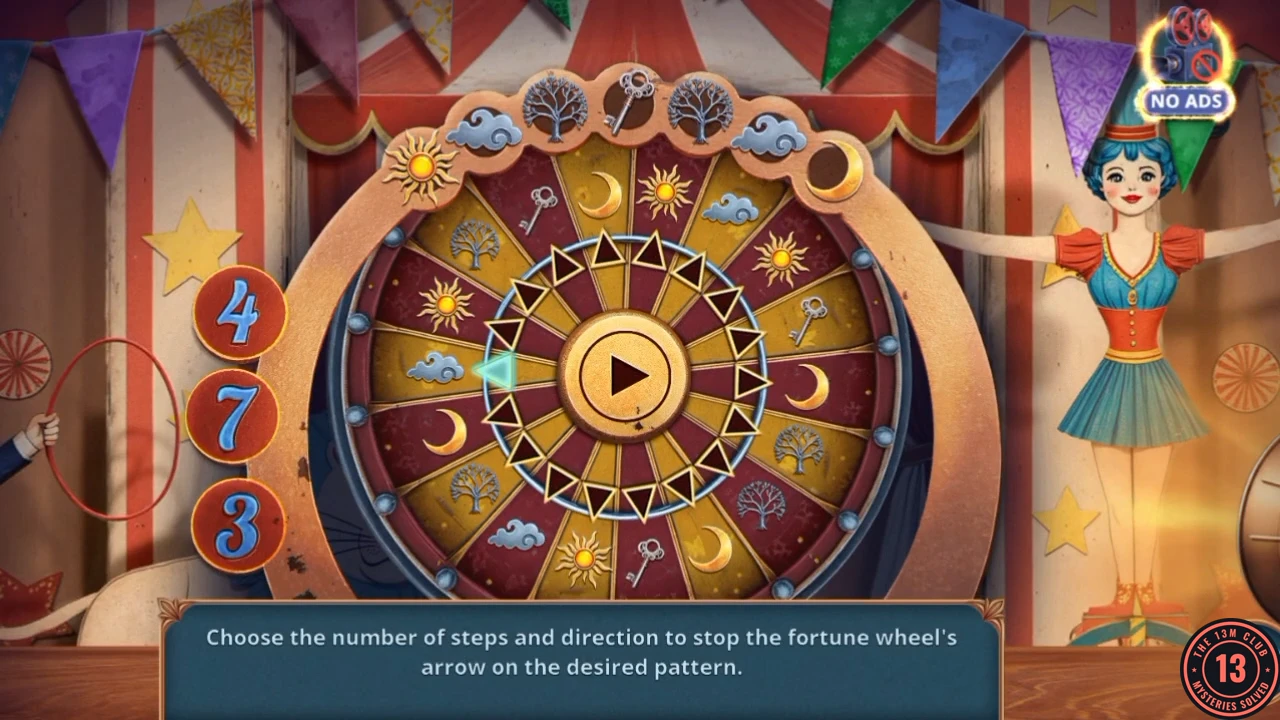
Pick 4, 7 or 3 steps at the left, then tap one of the large arrows. The left arrow moves the pointer clockwise and the right arrow moves it counter-clockwise. The pointer must land in turn on the symbols along the top: Sun, Cloud, Tree, Key, Tree, Cloud, Moon. The example below starts with the pointer on the Cloud at the left. If yours starts elsewhere, count the slices to the next symbol and combine 4, 7 and 3 step moves to land on it.
- Example moves, in order: 4 right (Sun), 4 left (Cloud), 7 right (Tree), 3 right (Key), 3 left (Tree), 4 left (Cloud), 7 left (Moon). Take the Clock Hands when the wheel opens.
Toy Shop counter and the cat
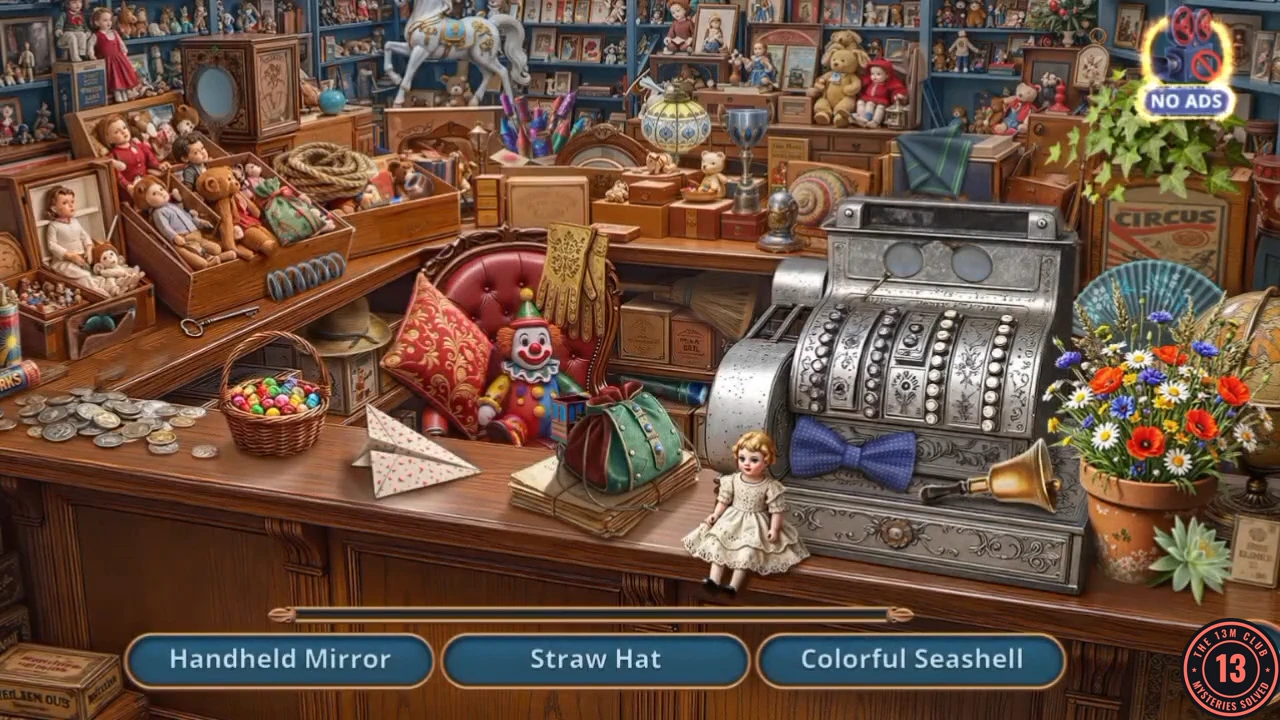
The Clock Hands go back to the Toy Shop.
- Open the clock shelf and attach the Clock Hands. Take the Stopper from the door that opens above the clock.
- Open the table with the jack-in-the-box and use the Stopper on it. The box lid flips open: take the Matches lying inside. Thomas also asks how to reach the piece of the key in the hatch.
- Open the sparkling counter for a hidden-object scene and find: Handheld Mirror, Straw Hat, Colorful Seashell, Fan, Smoking Pipe, Trophy, Handkerchief, Coin Purse, Toy Flashlight, Pince-Nez Glasses, Fireworks and Broom. Take the Toy Train.
- Open the model station and place the Toy Train on the track. When the train stops, take the Eyes and the Wind-Up Mouse from the platform, then collect the Circus Ticket.
- Back in the tent, note the strongman blocking the entrance. Open the flame chest and use the Wind-Up Mouse on the cat to start the mouse game.
Find the matching mouse
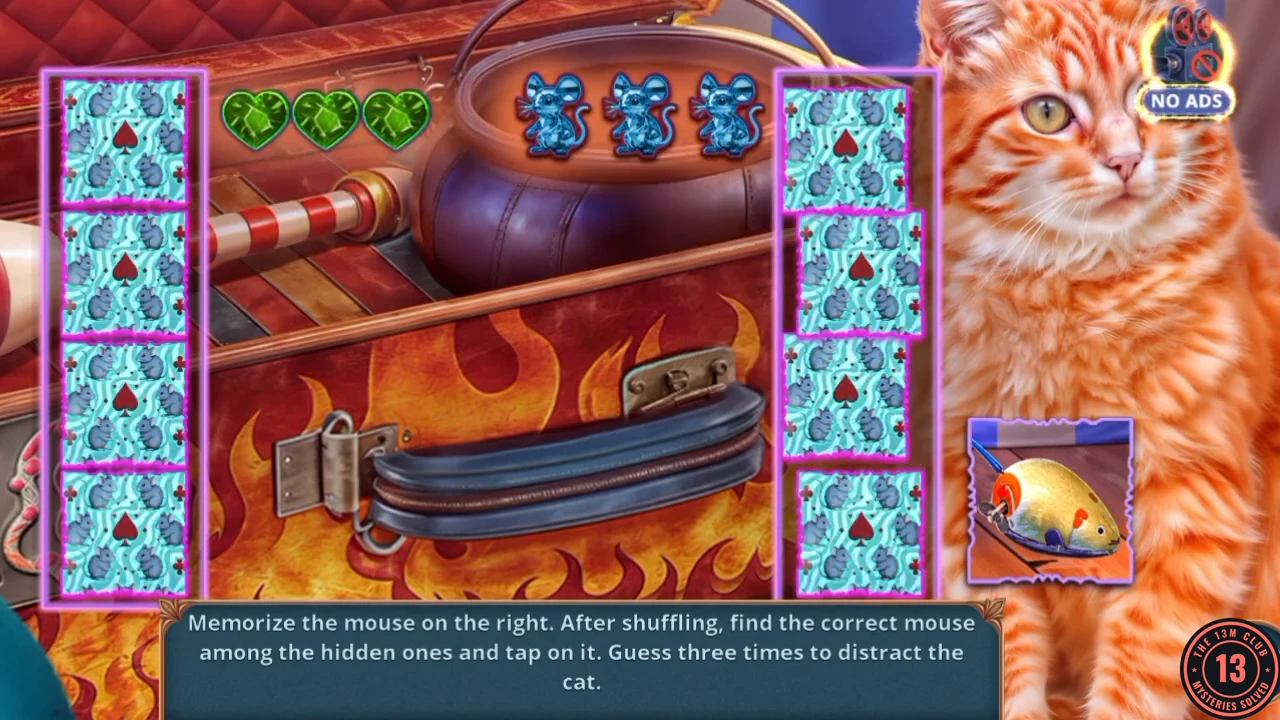
Prompt: Memorize the mouse on the right. After shuffling, find the correct mouse among the hidden ones and tap on it. Guess three times to distract the cat. The target and the shuffle change each round, so follow the moving card rather than a set position.
- Memorize the mouse shown bottom right, follow its card through the shuffle, and tap it. Repeat until you have three correct guesses (three of the blue toys at the top disappear).
The cannon and backstage
With the cat gone, the trunk view shows a purple ball.
- Take the Cannonball that the cat was hiding, next to the flame chest.
- Open the cannon, load the Cannonball, then on the rear view light the fuse with the Matches. The shot scatters the strongman.
Behind the tent: the clown's trailer
Task: Find evidence of the clown thief. You are now at Circus Backstage, beside the Clown's Trailer.
- George asks about the plan when you arrive. Answer "We'll find all the evidence we need. I'm sure it's here." for +2 stars rather than "Maybe, we were wrong, and he's not here." You receive a Pencil and the task Find evidence of the clown thief.
- Open the laced tent flap. Use the Bottle on the sharp edge to break it, then cut the red cord with the broken bottle and enter the dressing room.
Circus dressing room
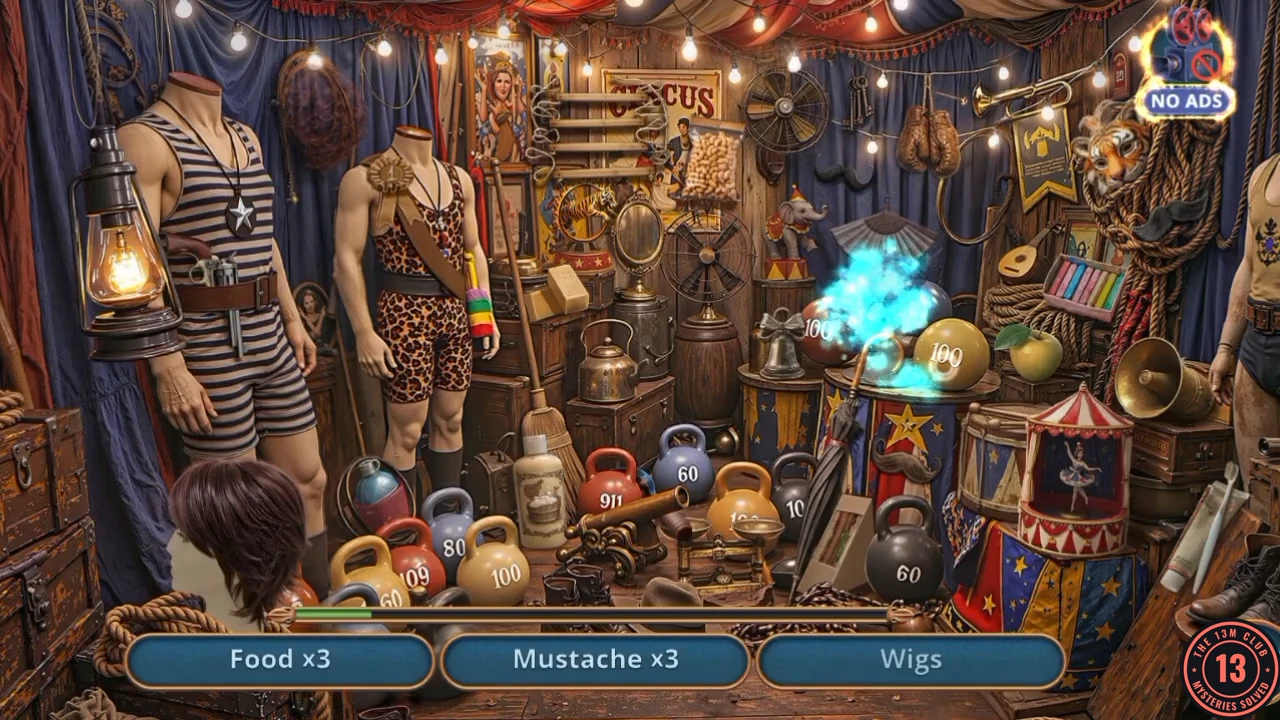
Each label names a category and how many items it needs.
- Find three of each category: Wigs, Washing Up, Mustache and Food. Then find the final silhouette and take the Drawknife.
Breaking into the trailer
The tree hollow beside the trailer holds the keys.
- Open the hollow tree, use the Drawknife to shave the bark away, and take the Bunch of Keys from the nest.
- Open the trailer padlock and use the Bunch of Keys on it to start the key lock puzzle.
Trailer key lock
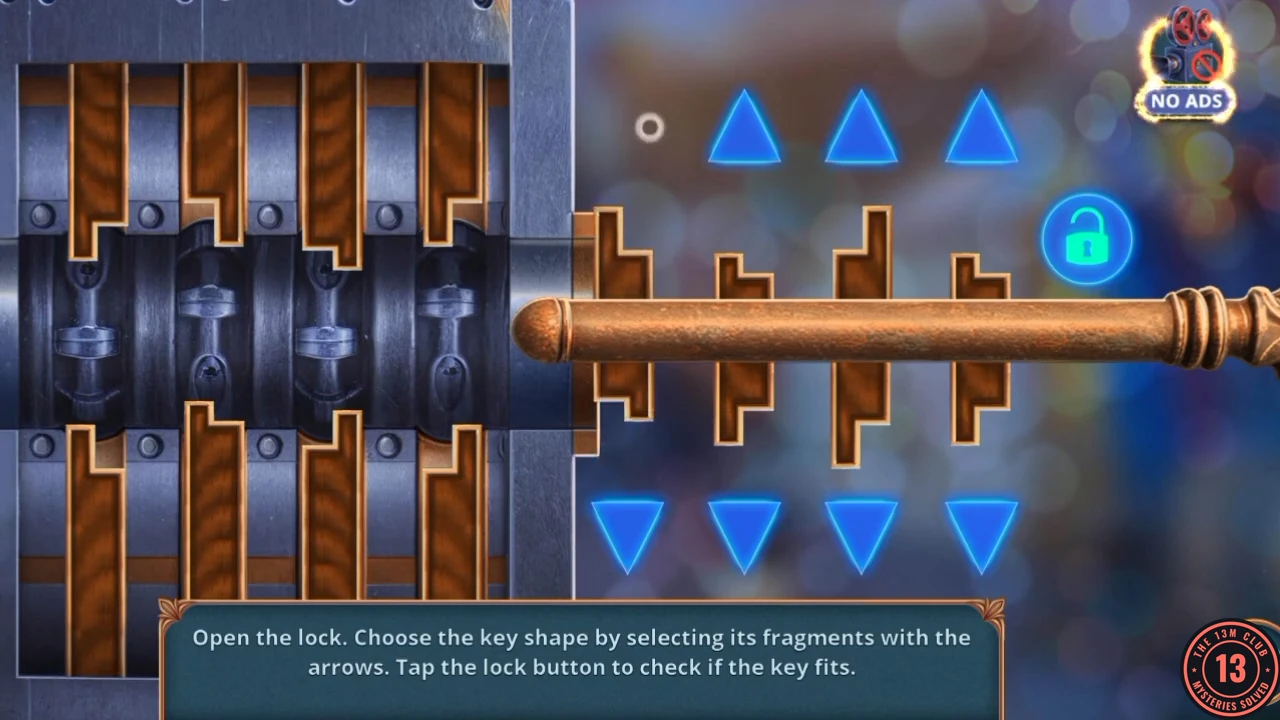
Prompt: Open the lock. Choose the key shape by selecting its fragments with the arrows. Tap the lock button to check if the key fits. Each column has an arrow above and below that changes that key fragment.
- Change each fragment until the key's outline fits the tumblers at the left: every upper fragment must fill the gap under the top pin and every lower fragment the gap over the bottom pin in the same column. Tap the padlock button. The finished key is pictured below.
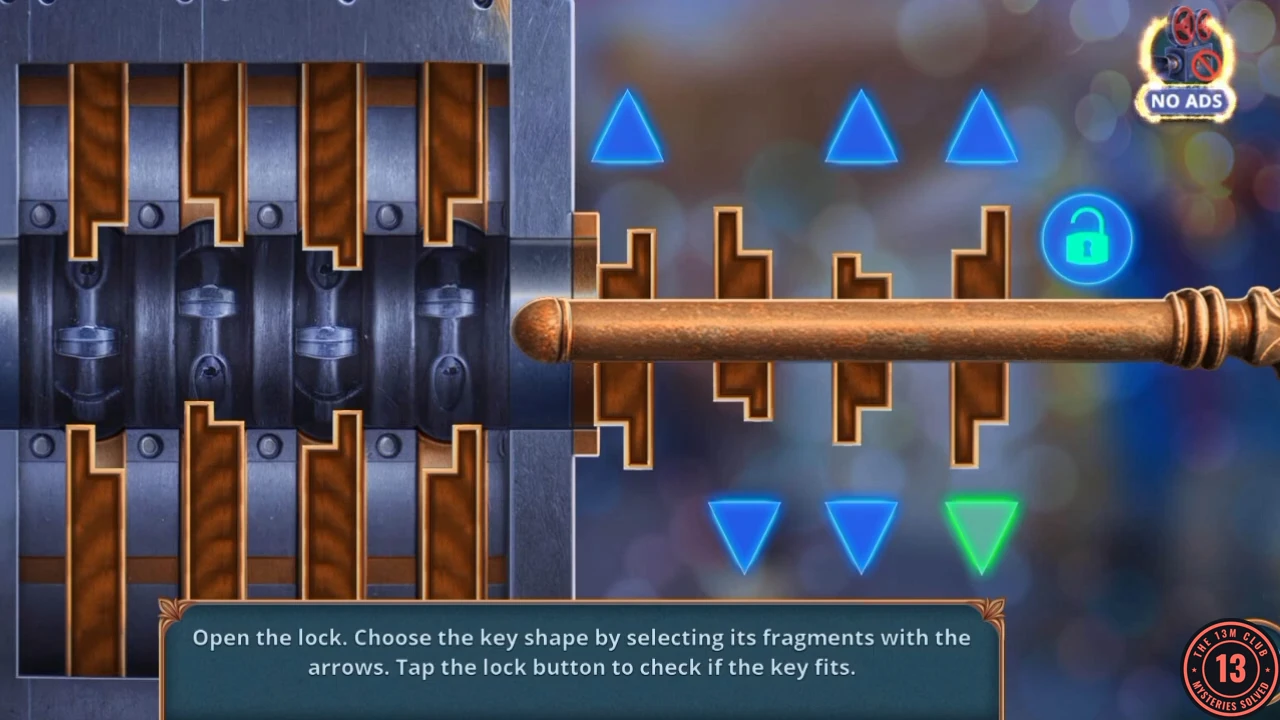
An example of the finished key, fitting the tumblers.
Inside the clown's trailer
Emily joins you inside and points out the safe.
- Emily says there is a safe under the big dolly. Answer "Keen eye, Emily. Let's open it." for +2 stars rather than "It might just be part of the decor."
- Open the blue drawer latch and take the Gunpowder, then open the desk and collect the Circus Ticket.
- Inspect the doll ("I need to somehow copy these symbols") and the cupboard above the chest, whose lock has symbol slots. Use the map to go outside to Circus Backstage.
- Open the birdcage beside the trailer and take the Paper from it. Both eye sockets above stay empty for now.
- Back in the Clown's Trailer, open the doll. Place the Paper on its chest and rub it with the Pencil to copy the symbols, giving Paper with Symbols. This also shifts the doll and reveals the safe.
- Open the chest under the cupboard and place the Paper with Symbols on its slots. Take the Nails and the Firecracker. Thomas says he should find gloves to clear the cupboard's broken glass.
- Open the Firecracker in the item view and add the Gunpowder.
- Open the desk with the wig stand and inspect it (a missing part; Thomas will have to improvise). Go to Circus Backstage where the tent now sparkles.
Dressing room riddles
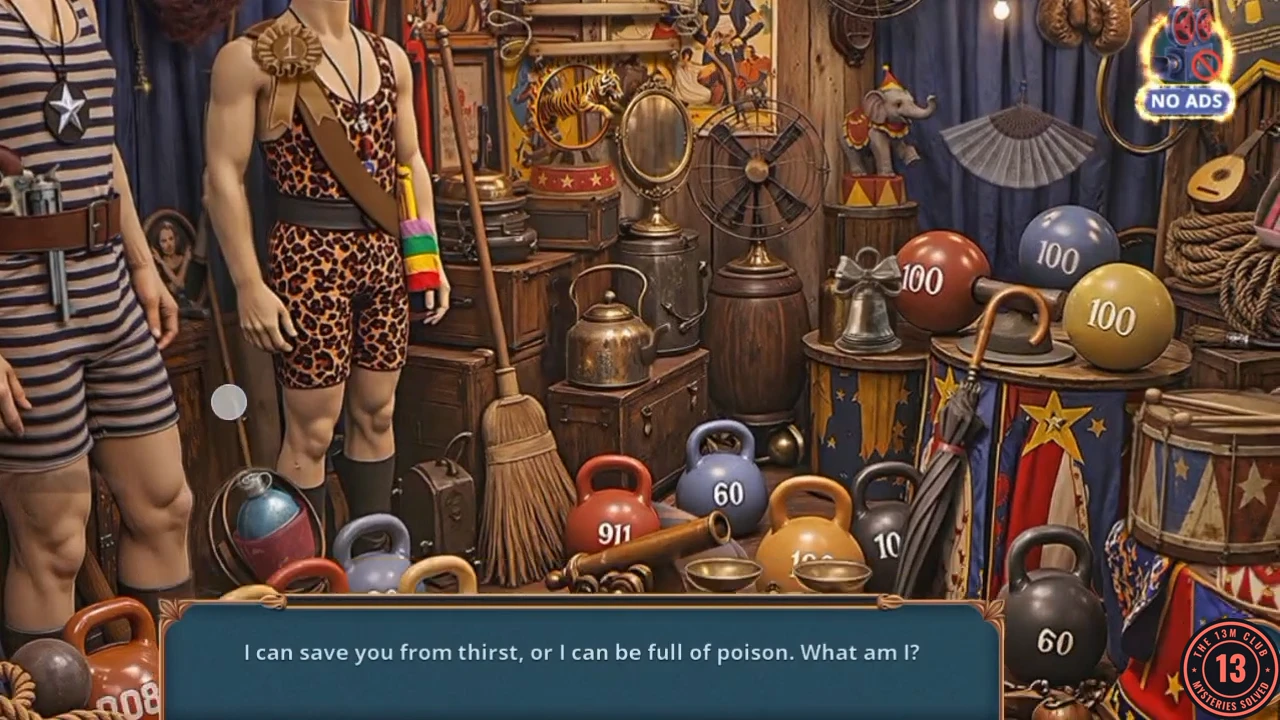
The strip shows one riddle at a time; tap the object given for it. The view pans, so scroll if an object is off screen. Riddle text is exactly as shown in the game.
- Tap in this order. "I can save you from thirst, or I can be full of poison": the blue and red flask at the foot of the striped mannequin, lower left. "I show your strength, but I am made of metal and glass": the oval mirror on its stand beside the tiger picture. "I burn bright, but I do not feel the heat": the lantern hanging by the striped mannequin's left arm. "I mark the winner, but I am only a ribbon": the rosette sash on the leopard-print mannequin. "I make loud noise, but have no voice": the bell standing on the barrel. "I cover your face, yet show your wild side": the mask by the rope at top right. "I help you climb, and I'm made of wood": the wooden rungs left of the CIRCUS poster. "I know how heavy things are, though I cannot lift them": the balance scales on the floor at centre. "I make you louder, but I never shout": the brass megaphone at right. "I hold chalk, though I'm not a hand": the chalk box on the rope at right. "I beat without a heart and set the rhythm": the drum under the little ballerina tent, lower right. "I protect your hands, though I am thin and worn": the boxing gloves hanging on the wall at upper right. A last oval silhouette then appears: tap the Lid lying on the floor at bottom centre and take it.