The basement: subduing the Strongman
"They are here... Be quiet - we can't be noticed." Emily saw traces of purple smoke; samples could knock the Strongman out. The new task is to put the Strongman to sleep.
- Answer Emily: "Let's do it. Better to knock him out than get punched." gives +2 stars; the other answer is "It could be too dangerous." Then Emily agrees: "I don't want to cause harm... but right now, this is the only safe way out."
- Open the red cage on the shelf ("This ring is too high. Let me grab something to pull it down."). Open the shelf and take Wires (1/2) and Circus Emblems (2/4) beside the green chest. Open the barrel ("Is there something that needs to be put on this pin?") and use the Cork on its pin. The barrel opens to a shelf scene.
Barrel shelf riddles
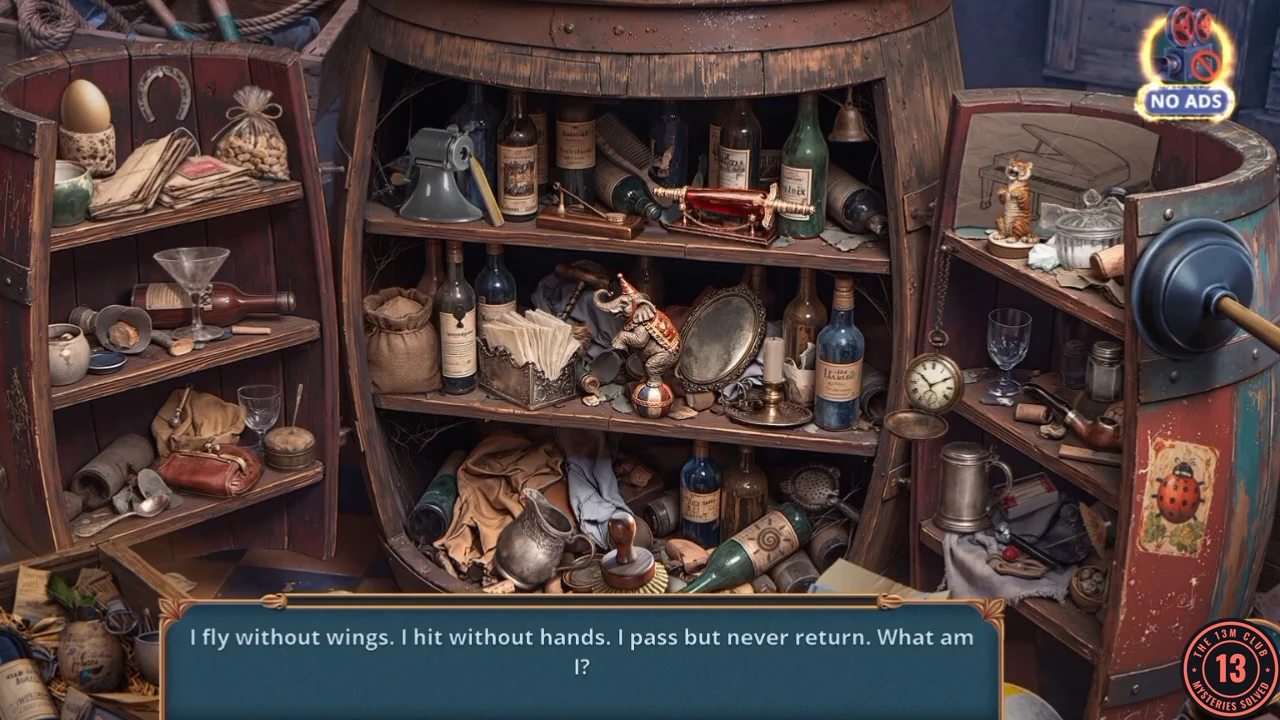
Tap the object each riddle describes. There are 12 riddles and then a final silhouette. Riddle text is as shown in the game.
- Tap in this order. "I fly without wings. I hit without hands. I pass but never return.": the pocket watch on its chain, right middle shelf. "I am full of keys, but cannot open any locks. I can play music, but have no voice.": the piano drawn on the paper behind the tiger figurine. "I have a single eye, but I cannot see. I am sharp and used for sewing.": the needle stuck in the pincushion, lower left shelf. "I have many teeth, but I cannot bite. I am used to make hair look tidy.": the comb beside the bottle on the top shelf. "I am a sheet of glass that shows you your present.": the round mirror on the middle shelf. "I come from a mine and get surrounded by wood. Everyone uses me.": the pencil on the top shelf. "I am a small, flat object you stick on a letter to send it.": the red stamp on the letters, left shelf. "I have a head that is always cold, but I cannot think. I strike metal to make a spark.": the box of red-tipped matches by the pewter tankard, lower right. "I am hot. I live in the sky. I am bright. Don't look straight at me. I disappear in the night.": the sun on the label of the green bottle lying down. "You cannot eat me until you break me first.": the egg at top left. "I have six legs. I can fly, and I am red with black spots.": the ladybird on the red panel. "Children use me to build. Wind uses me to destroy. I can get in your eyes, or show you the time in a glass toy.": the burlap sack of sand, middle shelf left. A last silhouette then appears: take the Poker from the bottom shelf.
- Open the red cage and pull the ring down with the Poker. Take the Palette Amulet.
- Use the map to go to Inside the Warehouse, open the suitcase and place the Palette Amulet in the palette recess. Take Circus Emblems (3/4) from the tray that opens. A new scene opens on the dresser ("We need to check again.").
Dresser drawers, named list
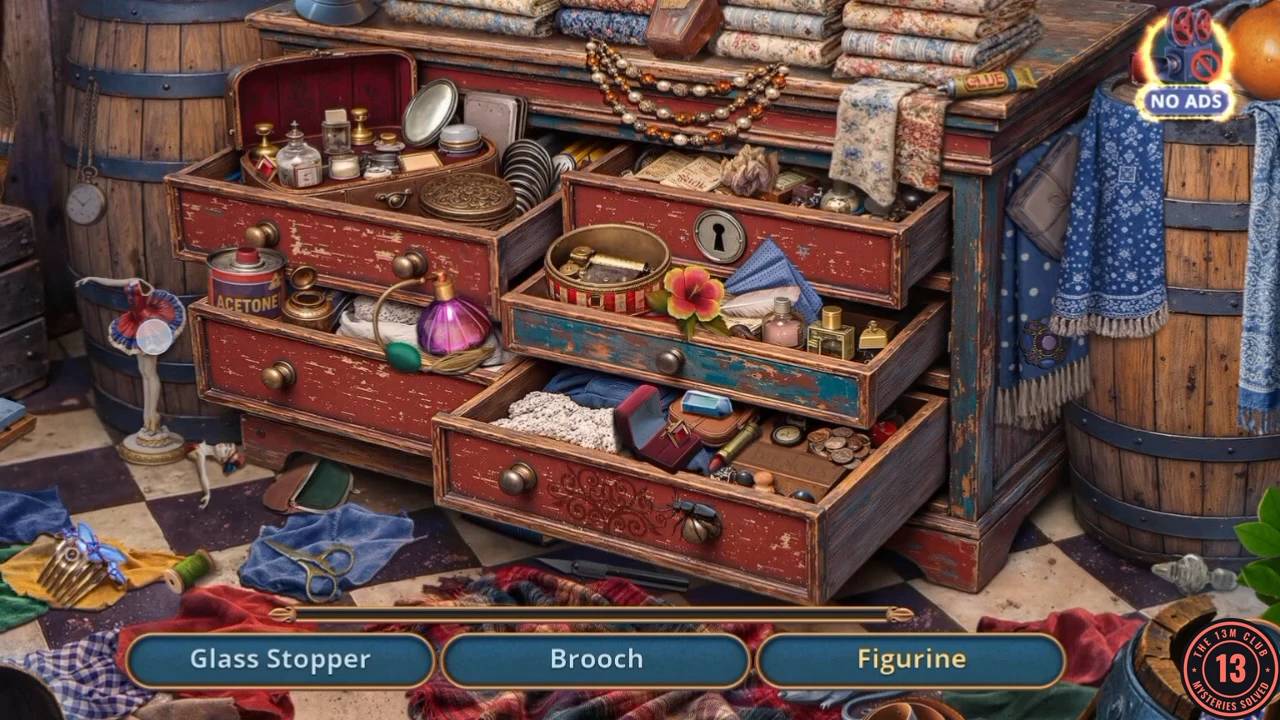
Three names show at the bottom; each find brings the next. Four of them need a step first, given below.
- Find: Glass Stopper, Figurine, Signet Ring, Coin Purse, Inkwell, Old Pocket Watch, Letters, Wax Seal, Cigarette Case, Paper Knife, Jewelry Box and Brooch. Four need a step. Figurine ("What's happened to your body? I should repair it."): tap the GLUE tube on top of the dresser's right end, beside the draped floral cloth, then the broken clown figurine on the pedestal at far left, then tap the repaired figurine. Signet Ring: tap the small round lidded box in the upper-left drawer, in front of the coil; the lid comes off and the ring counts. Inkwell: tap the white feather quill in the teal middle drawer, between the flower and the small bottle, then tap the brass inkwell in the left drawer beside the ACETONE tin. The quill stands in the inkwell and that completes the find. Jewelry Box: the open red box in the bottom drawer holds one earring ("I need a pair of those."). Tap the small red earring on the tray in the upper-left drawer, then the red box, then tap the box again. Take the Notebook.
- In the basement open the desk with the striped bag. Place the Notebook on the table and rub the carved symbols with the Red Feather and the ink; take the copied Hint.
- Open the shelf and place the Hint on the green chest to start the swap puzzle.
Green chest tile swap
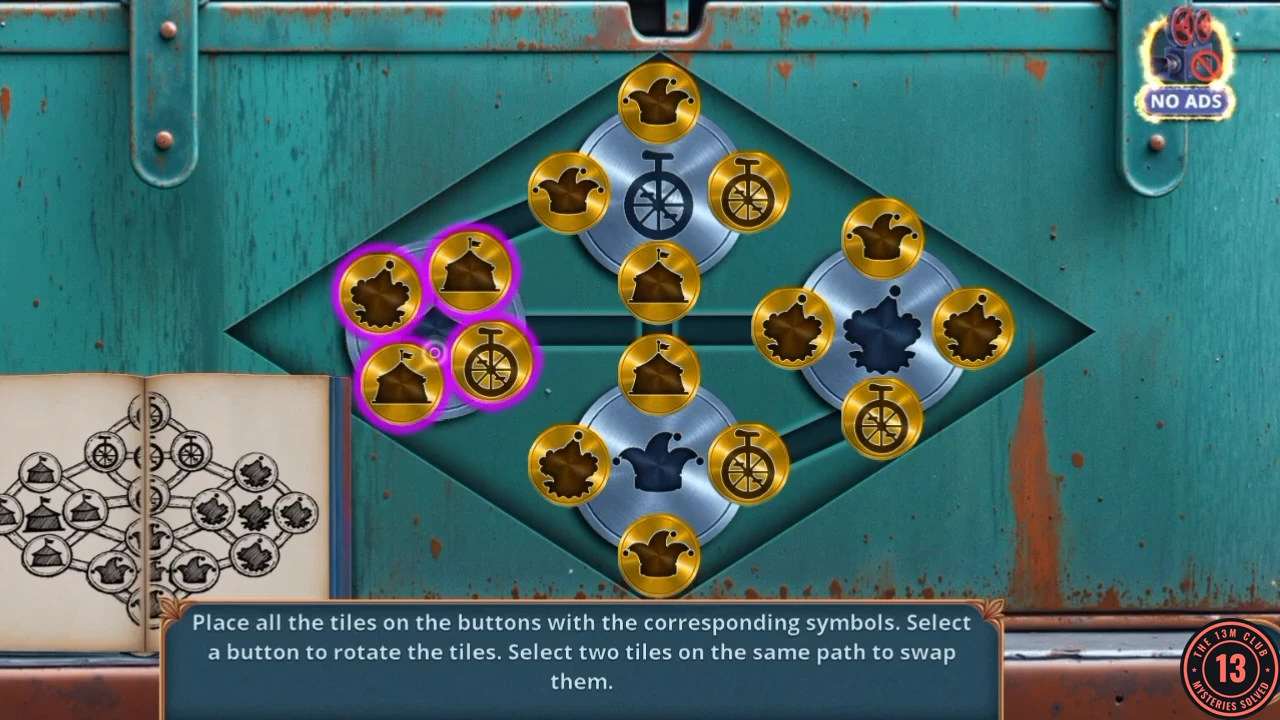
Prompt: Place all the tiles on the buttons with the corresponding symbols. Select a button to rotate the tiles. Select two tiles on the same path to swap them. The Hint card at bottom left shows which symbol goes where.
- Rotate groups around their dark buttons and swap tiles along paths until every tile sits on a button of the same symbol. Four symbols repeat across the tiles: wheel, tent, cog and crown. The Hint card is the target layout, so check it after every few moves.
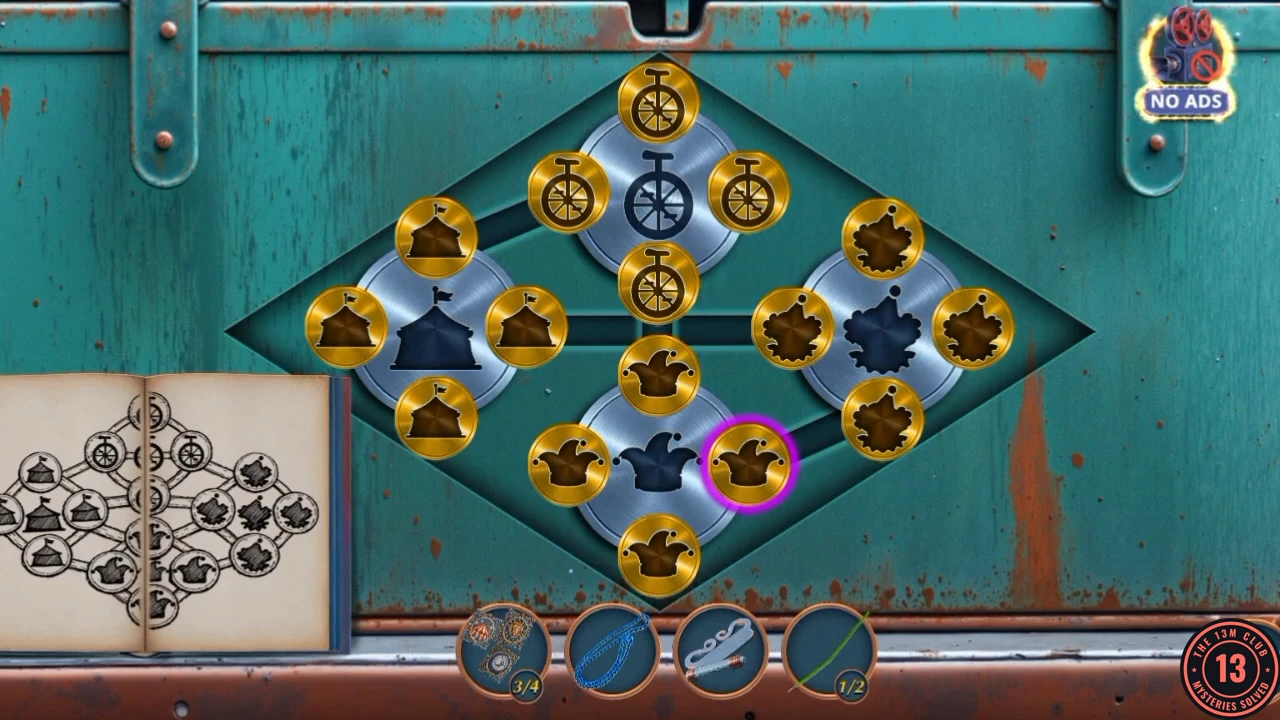
Near the end: each group of tiles matches its button, as on the hint card. - Take the Fuel from the green chest that opens. Go to the warehouse yard, open the tractor and pour the Fuel into the tank above its tread. Take the Insecticide that appears on the cobbles, and tap the Circus Ticket near the tree.
- Open the moss and grate and use the Insecticide on the bushes there to start the droplet puzzle.
Weedkiller droplet
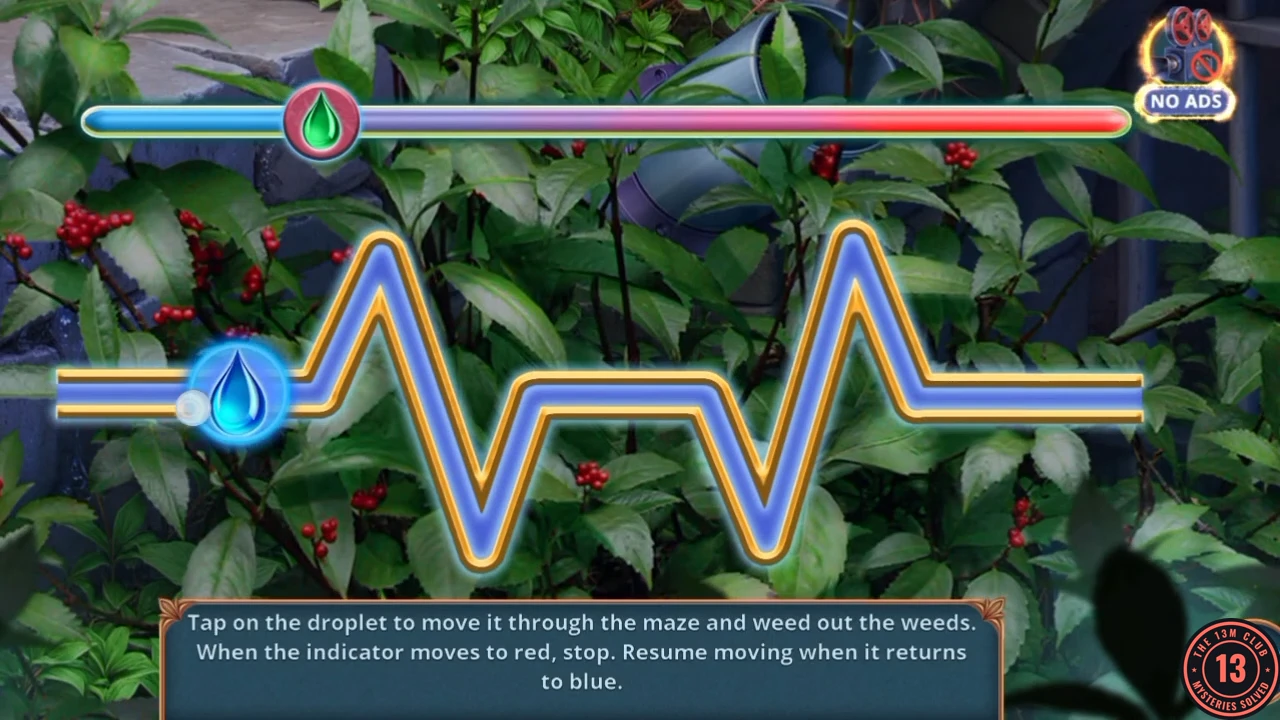
Prompt: Tap on the droplet to move it through the maze and weed out the weeds. When the indicator moves to red, stop. Resume moving when it returns to blue. A slider at the top moves between blue and red. The droplet only advances while you hold it on blue.
- Hold the droplet while the top indicator is on the blue side, let go as soon as it reaches red, and press again on blue until the droplet reaches the right side. Take the Feeder Tube from the dead bushes.
Emblems, Tea Strainer and the smoke sample
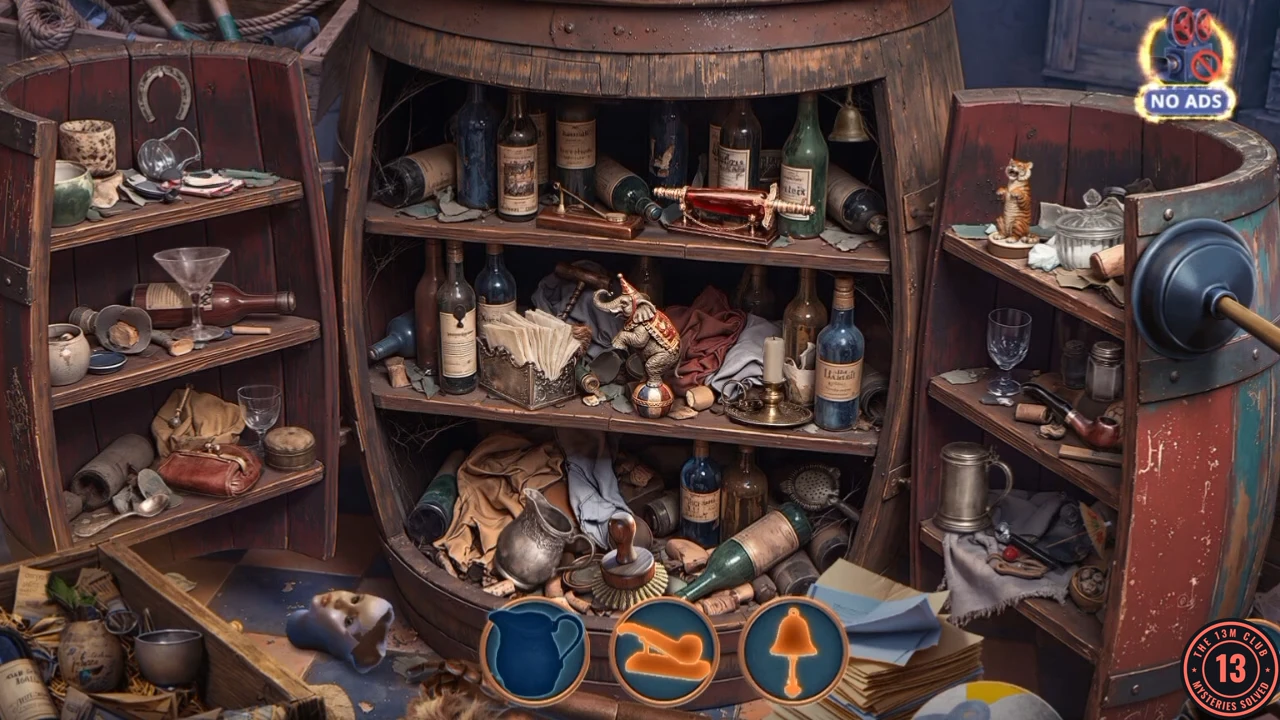
Return to the basement with the Feeder Tube.
- Open the red cage and fit the Feeder Tube at the pipe above the papers. Gold pours down and an emblem flies free, giving Circus Emblems (4/4).
- Open the shelf with the now-open green chest and place the Circus Emblems (4/4) in the panel's four round slots. Take the Tea Strainer.
- The barrel sparkles again. Clear the barrel's silhouette scene: blue icons are plain finds, and three orange icons need a step. Bell: tap the metal clapper rod lying on the burlap sack on the lower-left outer shelf, then the bell at top right inside the barrel to hang it there, then tap the bell. Glass: tap the paper cocktail umbrella stuck in the grey cloth on the lower-right outer shelf, then the martini glass on the left outer shelf. Pipe: tap the smoking pipe on the right outer shelf, then the empty stand on the barrel's top shelf, left of the red dagger. Take the Mask Amulet.
- Open the striped bag on the desk and use the Mask Amulet on its plate. The bag opens and you collect the purple smoke sample. Tap the Strongman to start the smoke puzzle.
Purple smoke tiles
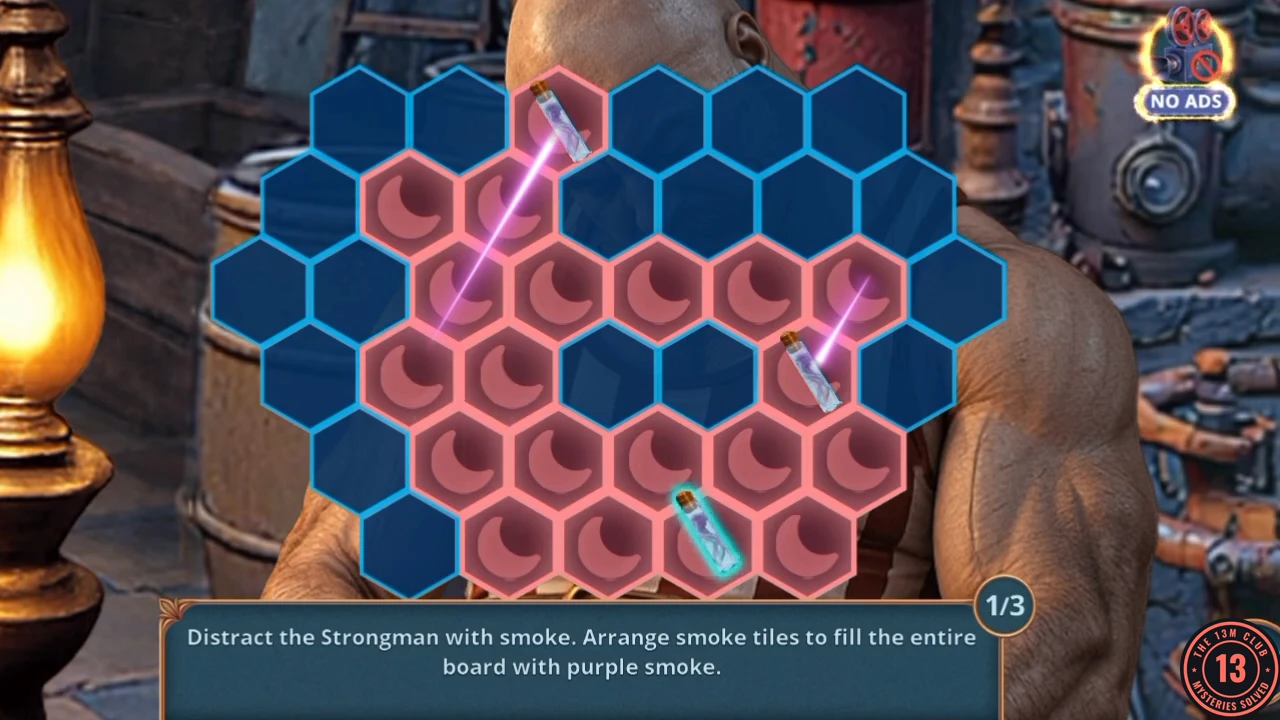
Prompt: Distract the Strongman with smoke. Arrange smoke tiles to fill the entire board with purple smoke. There are three boards, counted bottom right. Drag a glass vial to a new cell: each vial throws straight lines of smoke, and the cells they reach turn pink. A board can move on as soon as the vials reach the pictured layout, even with a few dark cells left, so use the pictures as your target.
- Drag the vials to match the pictured layout on each of the three boards. Board 1: vials on the upper left, lower middle and bottom row. Board 2: one just left of centre, one in the bottom row left of centre and two at upper right, whose lines cross. Board 3: one top right, one on the upper left edge, one on the right side and one on the bottom row.
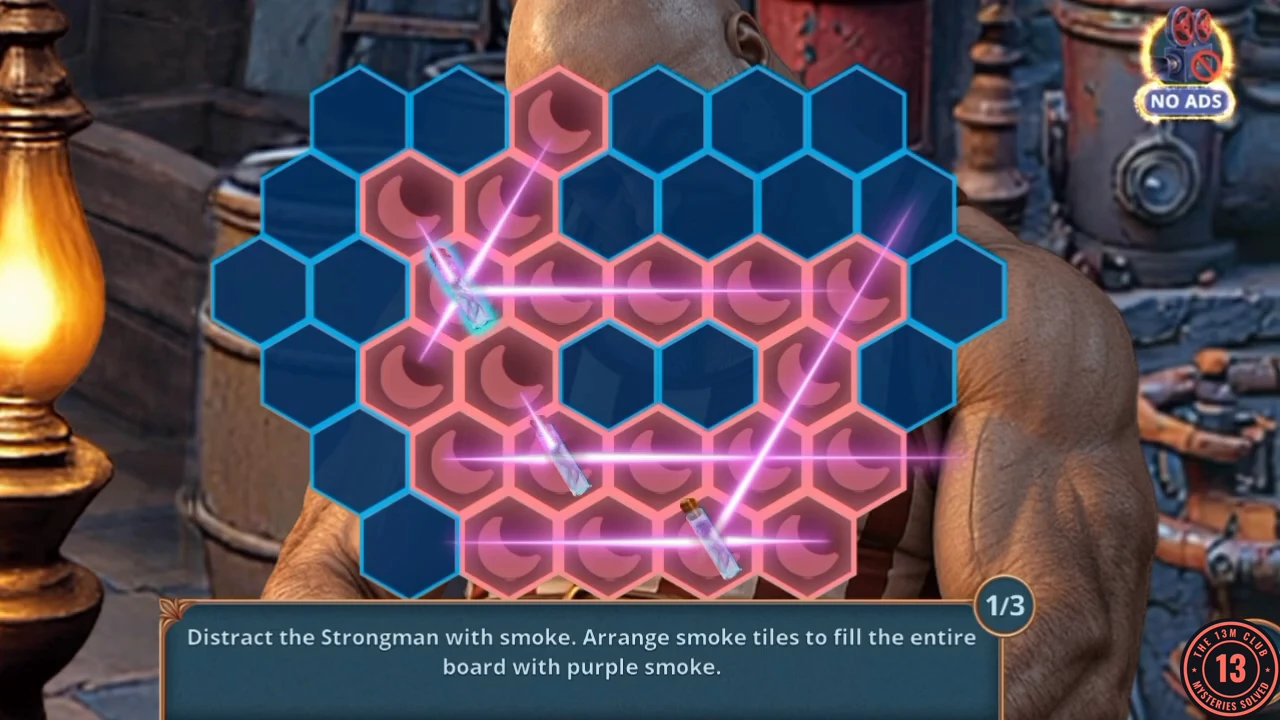
Board 1: the vial layout just before the game moves on. A few dark cells remain. 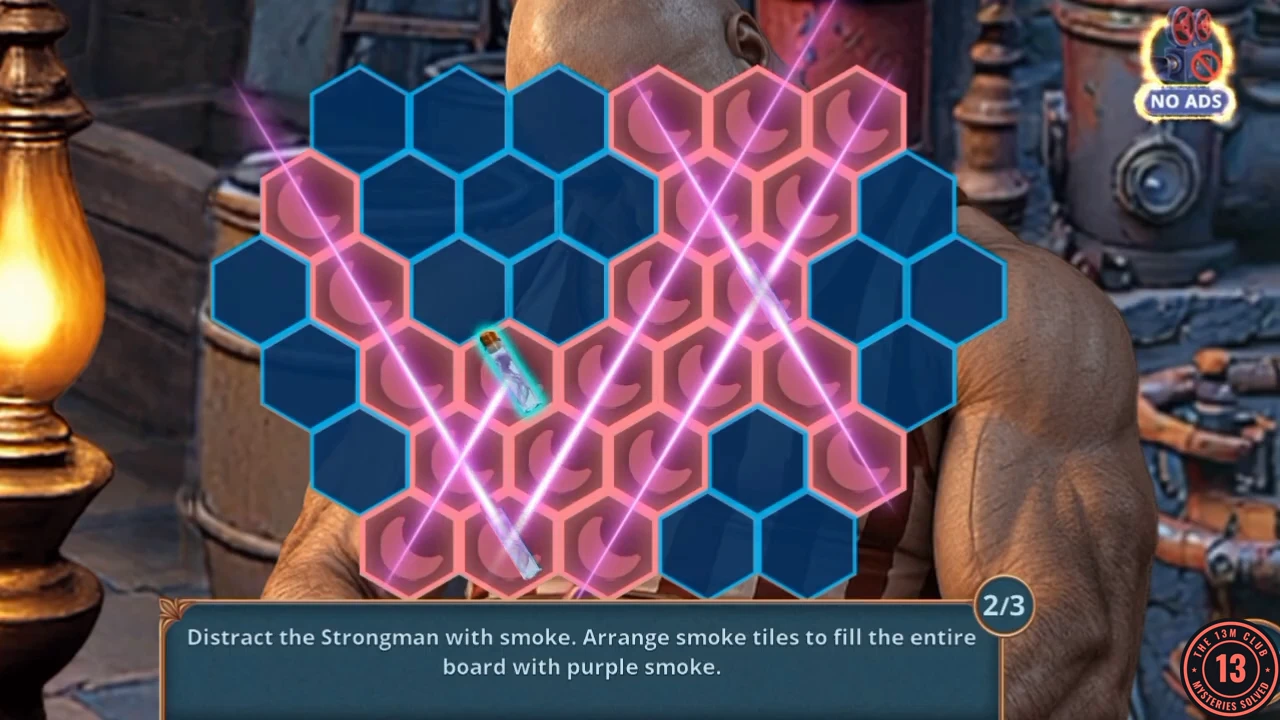
Board 2: the vial layout just before the game moves on. The vial left of centre is highlighted. 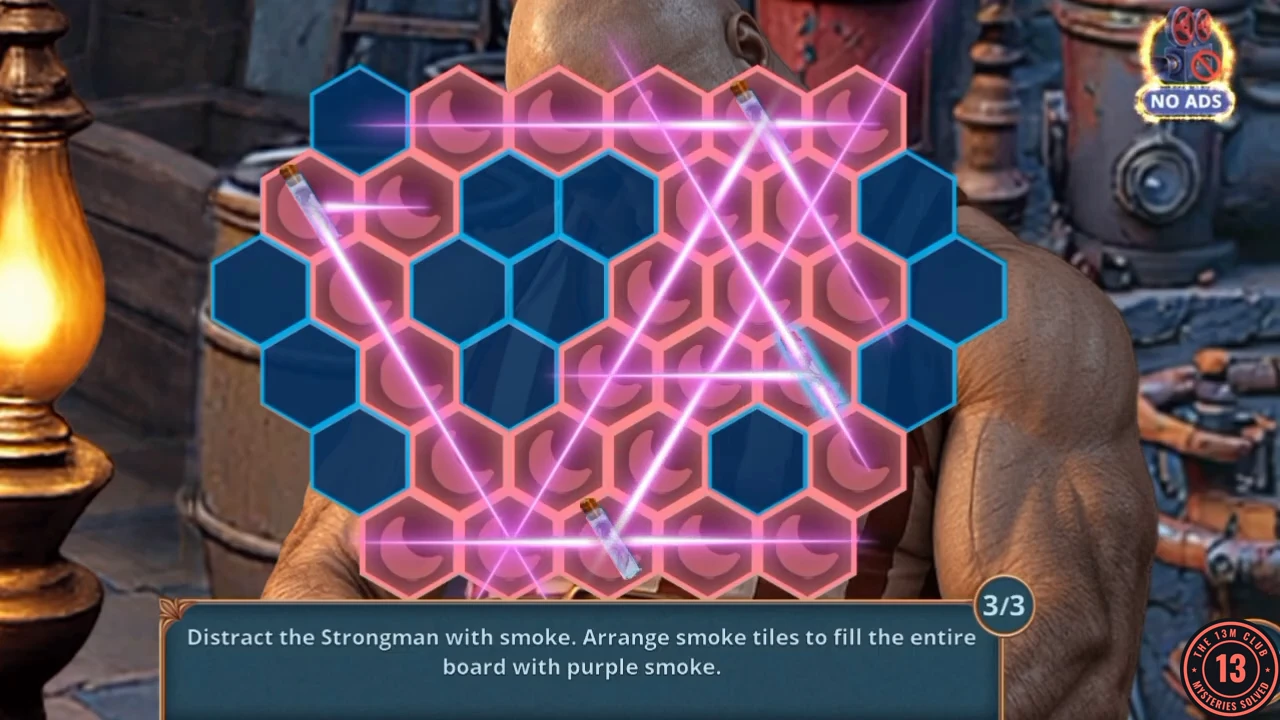
Board 3: the last layout, which ends the puzzle. - Listen to the scene, then read the Decision Points summary for Chapter 2. Rows: Disagree/Agree to go to the teacher (+1), Be doubtful/Support George (+2), Do nothing/Ask Emily for help (+2)/Drag George inside (+6), Be chicken/Be brave (+2), Think about the best solution/Agree with Emily (+2). Reward tiles at 0, 4 and 10 stars.