In Front of the Circus: three lost tickets
Tap Play and choose a difficulty. Casual marks active zones and charges Skip and Hint quickly. Advanced hides active zones and charges them slowly. Hardcore also disables Skip, Hint, the tutorial and the available-action marks on the map. Custom lets you set each option. Chapter 1, The Carnival of Veils, then opens at the Carnevale de Lumiere entrance with the task Find the circus tickets.
- Open the pinata booth on the left. Take the Tickets (1/3), the Slingshot and the Pinata Bat from the counter.
- Use the bat on the pinata, then take the Game Token that drops onto the counter.
- Open the coin slot on the Toys claw machine at the right and insert the Game Token.
Claw machine toy pile
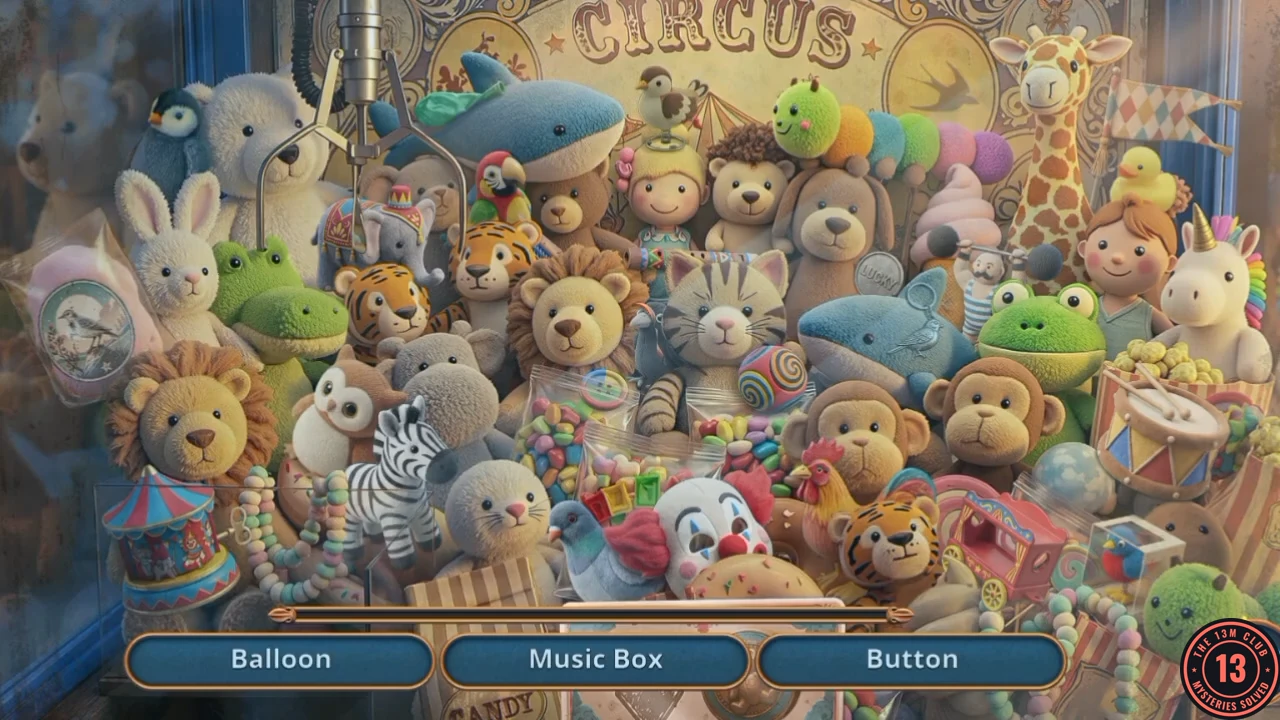
Hidden-object scene with three names at a time; each find brings the next name.
- Find Balloon, Music Box, Button, Circus Flag, Circus Cart, Drum, Toy Strongman, "Lucky" Token, Toy Elephant, Flute, Toy Zebra and Clown Mask, then finish with the last object shown by silhouette. Collect the Fishing Rod.
Finishing the ticket hunt
Two more tickets remain near the entrance.
- Open the rose bush. Use the Fishing Rod on the bag in the thorns, then take Tickets (2/3) and the Handkerchief from it.
- Open the notice pillar. Use the Slingshot on the colourful garland caught at the top, take the Garland with Flags when it falls, and take the Paper Clip from the Missing poster as you read it.
- Look behind the poster and take the last Tickets (3/3).
- Speak to George and Emily at the entrance. Answer George with "We'll make it! I even came early to get us the best seats!" for +2 stars; the other answer is "We can always take a peek through the gaps in the tent."
Circus Grounds: clearing the crowd
Task: Get into the Fakir Show. Tap the gate to reach Circus Grounds.
- Open the Fortune Teller's curtain. Emily says it is too dark to go in; take the File from the ivy.
- Open the clown. A Circus Ticket sits on his sign. Use the File on his raised arm and take the Prop Bone.
- Open the carousel. Read the newspaper, then use the Prop Bone in the box slot, and take the Prop Snake from the horse.
- Open the crowd on the path ahead and use the Prop Snake on them.
Route through the crowd
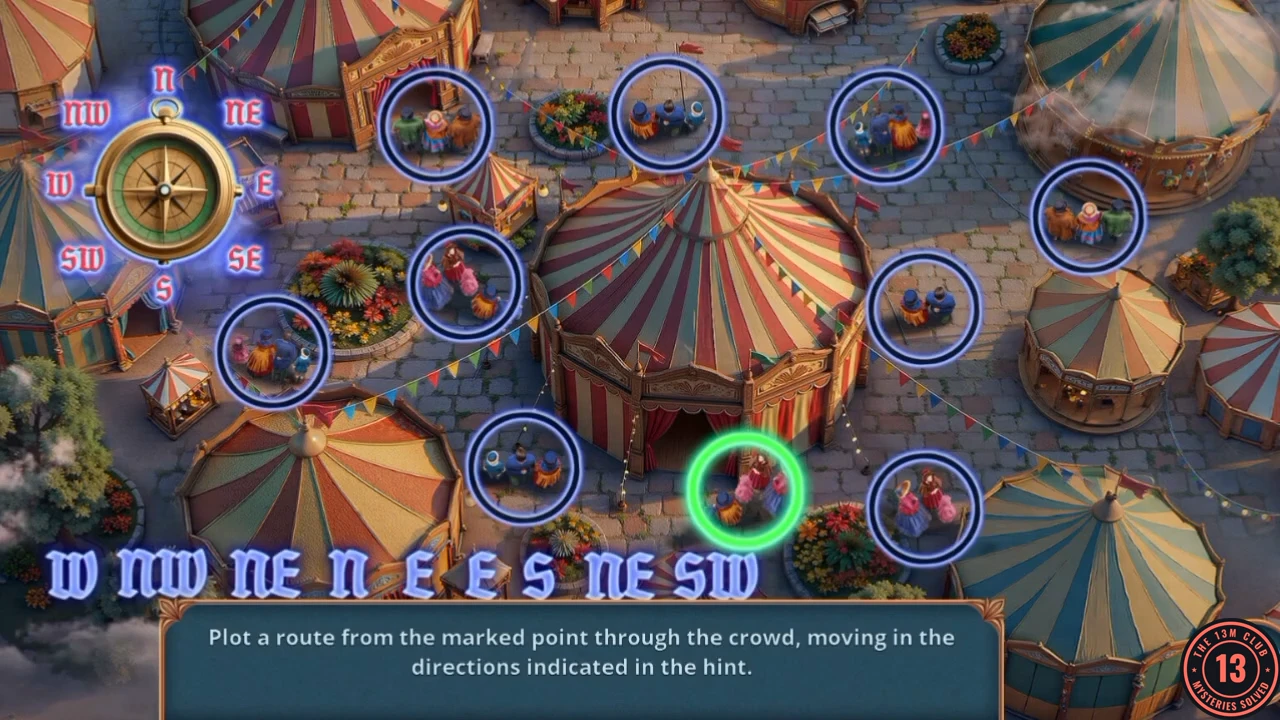
Tap the cleared path to open the route puzzle. A compass sits top left and the hint strip at the bottom reads W NW NE N E E S NE SW. Start from the green-ringed circle and tap the next circle in each direction.
- Tap the circles in this order from the green start: west, north-west, north-east, north, east, east, south, north-east, south-west.
- Watch the Fakir show. Emily says he went out through the back, completing Get into the Fakir Show.
Inside the Tent: out through the back
Task: find the fakir.
- Open the cannon on the left and take the Hand Pump.
- Open the crates over the deflated purple balloon. Use the Hand Pump on the valve so the elephant inflates. Take the small figure (the Assistant Figurine), the Circus Ticket and the Rug.
- Open the doorway on the right and lay the Rug on the broken glass, then go through it.
Shooting Gallery Square: finding a way in
The fakir runs into the toy shop and you need a way inside.
- Open the striped cart's wheel near the tracks and take Gears (1/2).
- Check the shutter (no fastening for it yet) and the high striker with its star-locked suitcase, then use the map to return to the tent.
- Open the flame-painted chest beside the cat and use the Paper Clip on the lock. Take the Flask with Water.
- Open the stage table. Place the Handkerchief on the resin, pour the Flask with Water over it, and wipe. Take the cleaned Handkerchief, Gears (2/2) and the Adhesive Resin, and read the Circus scheme board.
- Return to the square. Open the panel with the gauges below the empty crate and place Gears (2/2) on it to start the gear puzzle.
Shooting Gallery gear panel
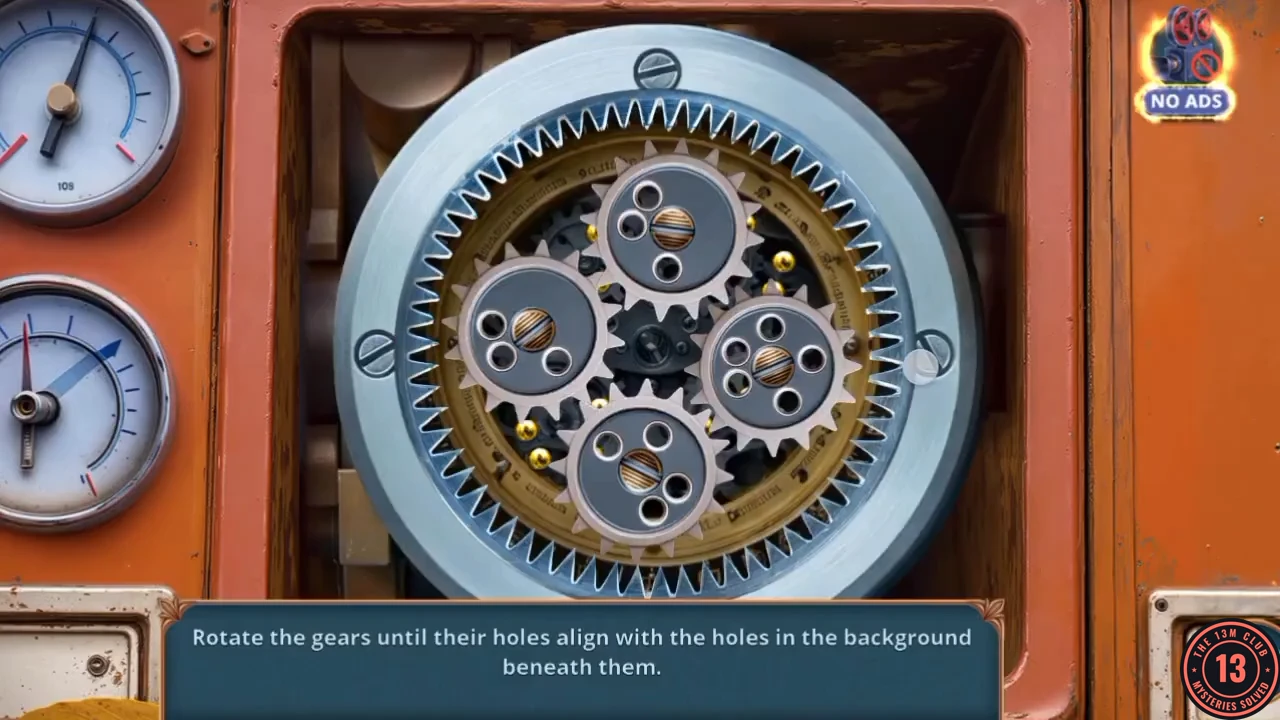
Prompt: Rotate the gears until their holes align with the holes in the background beneath them. A gold pin shows in each hole that lines up. Tapping a small gear turns only that gear. Tapping the large outer ring carries all four gears round to other corners and turns them, so use it to choose the layout and leave it alone afterwards.
- Tap the outer ring until the gear with five holes sits lower left, the four-hole gear upper left and the two three-hole gears on the right. Then tap each small gear in turn until a gold pin shows in all of its holes. A single tap moves no other gear, so a finished gear stays finished. If you do tap the ring by mistake, keep tapping it until this layout comes back. Take the Star Emblem from the crate above when the puzzle closes.
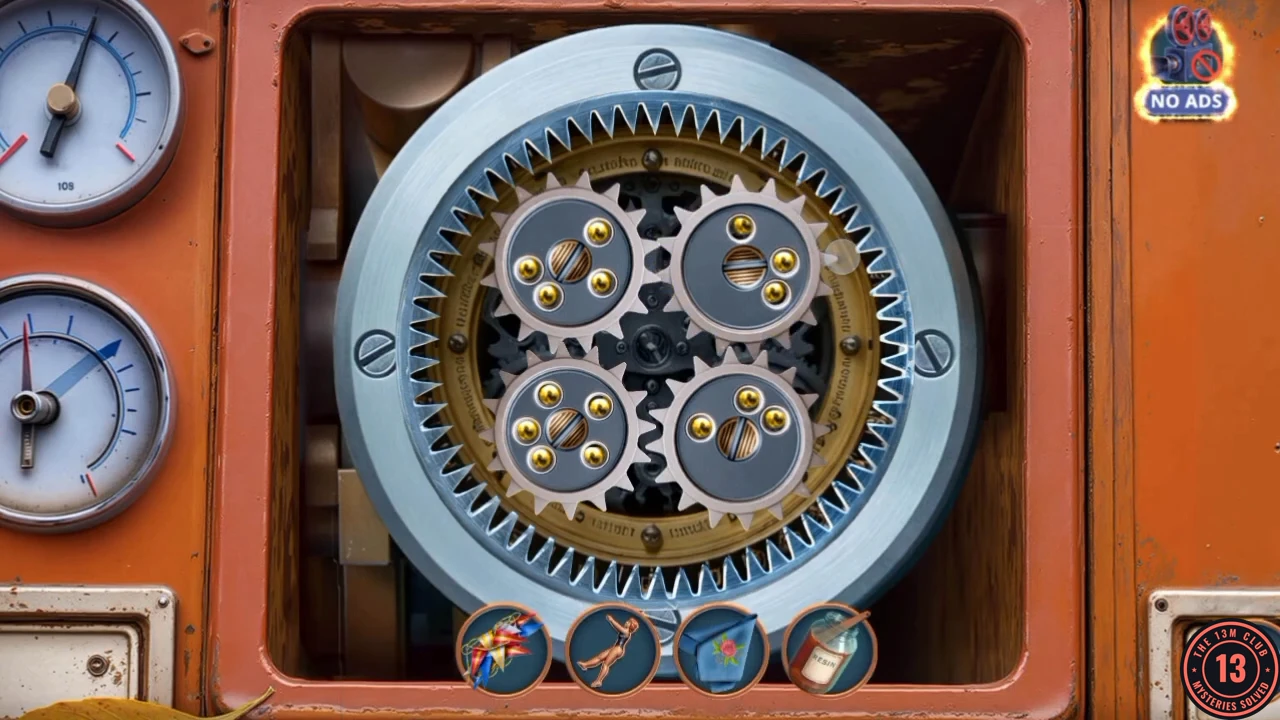
Solved: a gold pin shows in every gear hole.
Opening the Fortune Teller
Make a hook for the shutter and open the Fortune Teller.
- Open the striped suitcase at the high striker, use the Star Emblem on its lock and take the Hook.
- Open the Hook in the item view and place the Garland with Flags on it to make Garland with Hook.
- Open the shutter with the ring and use the Garland with Hook on the ring. Take the Curtain Holder from the counter behind it.
- Go to Circus Grounds, open the Fortune Teller's curtain and use the Curtain Holder.
Fortune Teller's room
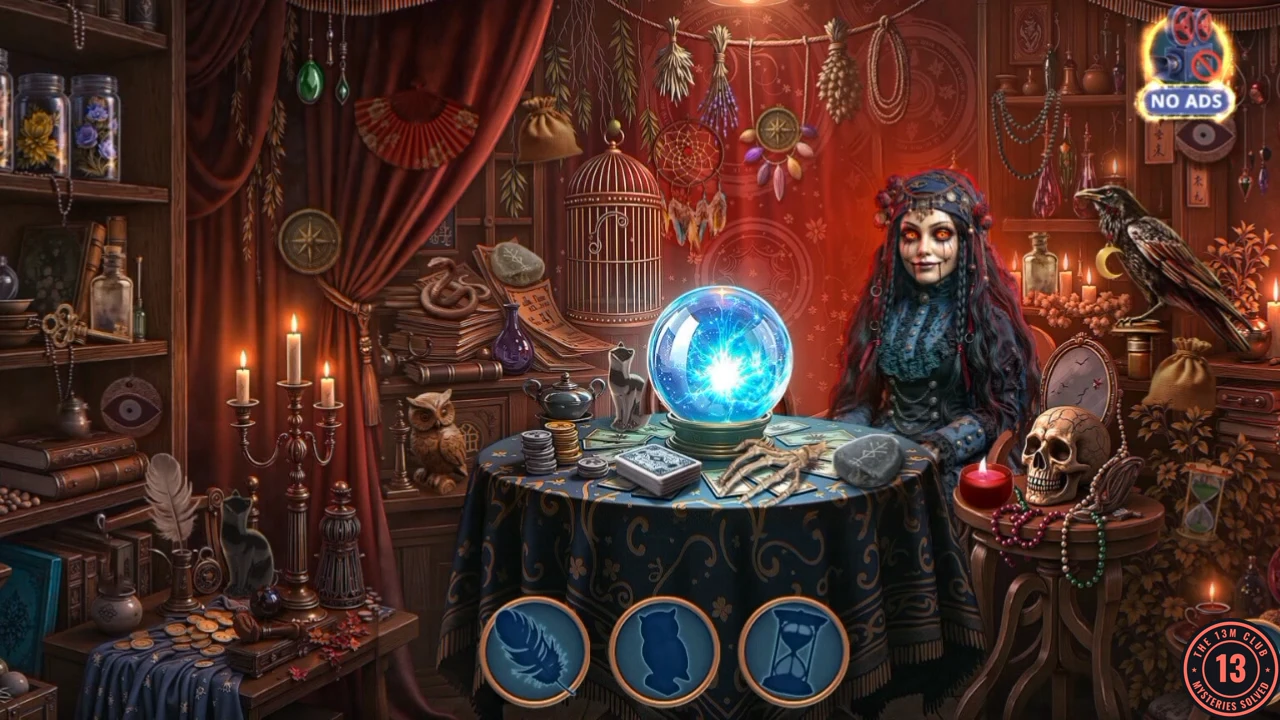
Silhouette scene: find the shape shown in each of the three circles; a new shape replaces each find.
- Find each shape until the circles are empty and take the Roulette Wheel.
Into the Wonderland Toy Shop
The Roulette Wheel fits the broken cart on the square.
- On the square open the striped cart and fit the Roulette Wheel. The cart moves away from a grate; take the Circus Ticket and the Key there.
- Open the Toy Shop door (it is locked) and use the Key.
Wonderland Toy Shop: the hypnotist clown
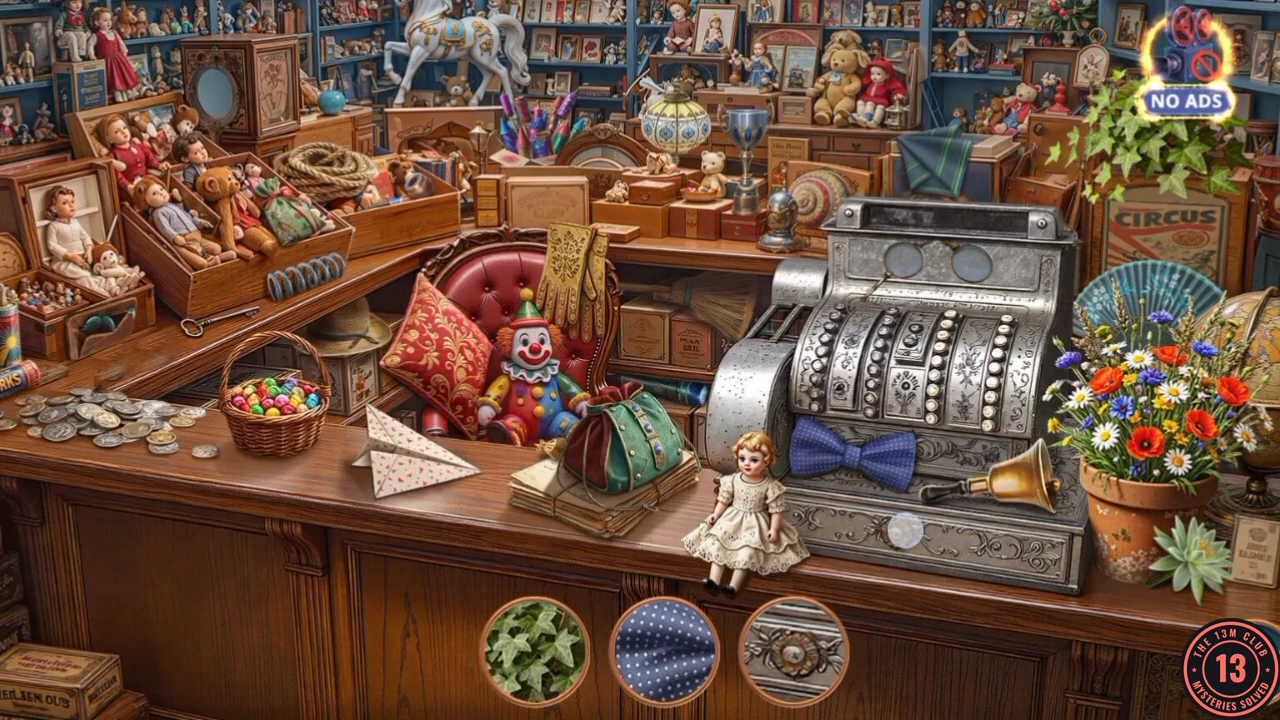
The clown hypnotises your friends, so the task becomes bringing Emily and George out of their trance.
- When the clown chants, choose the +6 answer "Interrupt the Clown". "Cover your ears" gives +2 and "Do nothing" gives 0. The chapter summary later calls the +6 answer Try to hum the tune.
- Open the round table with the tin and the brown bag. Open the spiral book lying on the bag and read George's note. Thomas realises that Emily and George need their favourite things.
- Open the brown bag, take the Pencils (Friends' Belongings 1/2), and open the tin as well: it is a jack-in-the-box that only startles Thomas.
- In the room's main view, tap the Circus Ticket on the shelf below the large round dial, left of the clock and the green bag. Then open the clock shelf and take the Lantern and the Magician Figurine beside the clock. The Lantern has a + badge because it still needs a part. Thomas notes that the clock has no hands and that the green bag is Emily's.
- Open the double cabinet with the two silhouettes. Place the Magician Figurine and the Assistant Figurine in their matching outlines to open the counter scene.
- Clear the texture-matching scene: each circle shows a close-up detail, so match it to the object on the counter. Take the Stud Earring.
- Open the model station on the table in the middle and use the Stud Earring on its door. Take the Perfume.
- Go to the entrance, open the rose bush and use the Perfume on the wasps. Take the Bow, then use the Adhesive Resin on the broken gnome to mend it. Take the Wick as the gnome spreads its arms. The claw machine now sparkles for the next search.
Claw machine birds
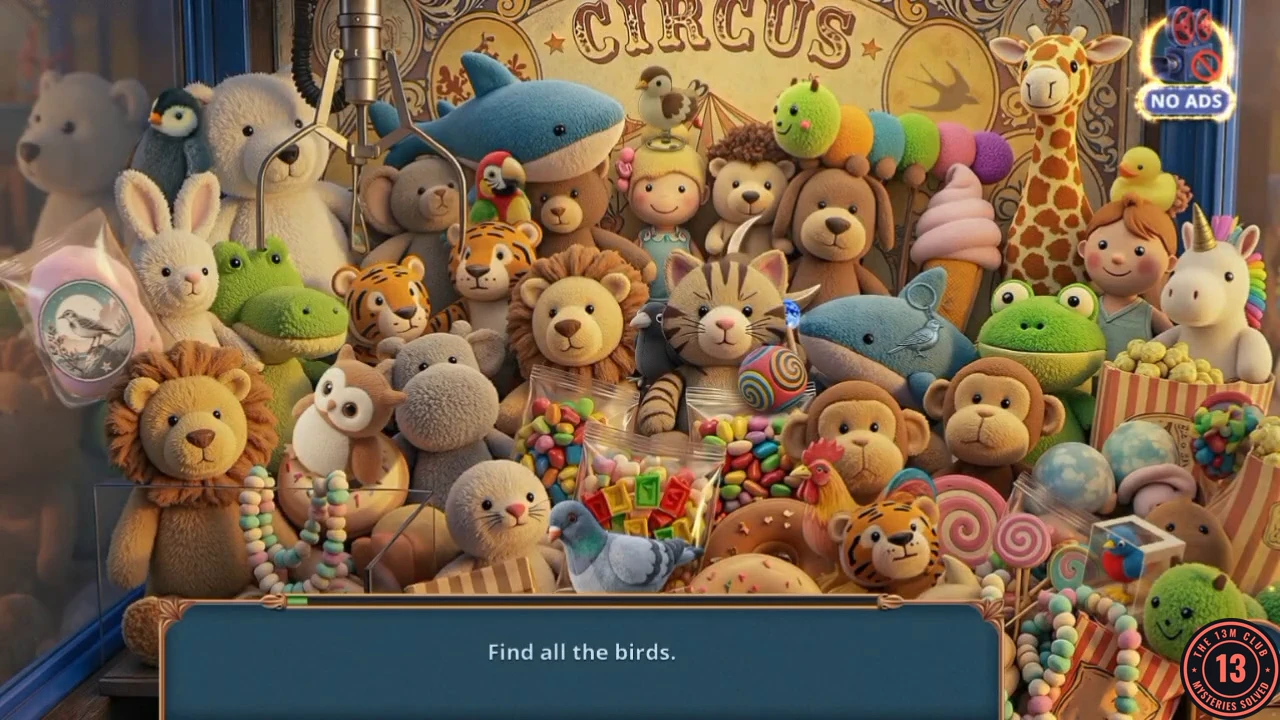
Prompt: Find all the birds. A bar fills as you tap them, and then one last item appears as a silhouette.
- Open the claw machine again. Tap the 12 birds: the penguin behind the rabbit (upper left), the sparrow on the cotton-candy bag's label, the parrot left of the tiger under the whale, the pigeon at bottom centre, the small bird on the doll's head, the crow behind the tabby cat, the owl left of the hippo, the rooster beside the tiger at lower right, the bird outline on the blue fish, the yellow duck by the giraffe, the bird in the clear box at lower right and the swallow on the poster at upper right. Then tap the crescent silhouette, the pale curved shape above the tabby's head, and take the Crescent Pin.