Chapter 2 opening: the Banks' yard
Chapter 2 is The City in a Haze. You begin outside the Banks house by the treehouse, marked Near Emily's House on the map.
- Listen to Emily and Mr. Banks, then open the gazebo steps and read Thomas's remark about the damaged column.
- Tap the Circus Ticket by the path and open the flowerbed. Tap the toppled red clown lying in the grass to take the Heavy Figurine, and take the Lock Picks (1/2) at the lower right.
- Open the ladder base and place the Heavy Figurine on the lower plank, then use the Nails on the plank. The ladder drops. Climb to the treehouse.
Treehouse hidden objects
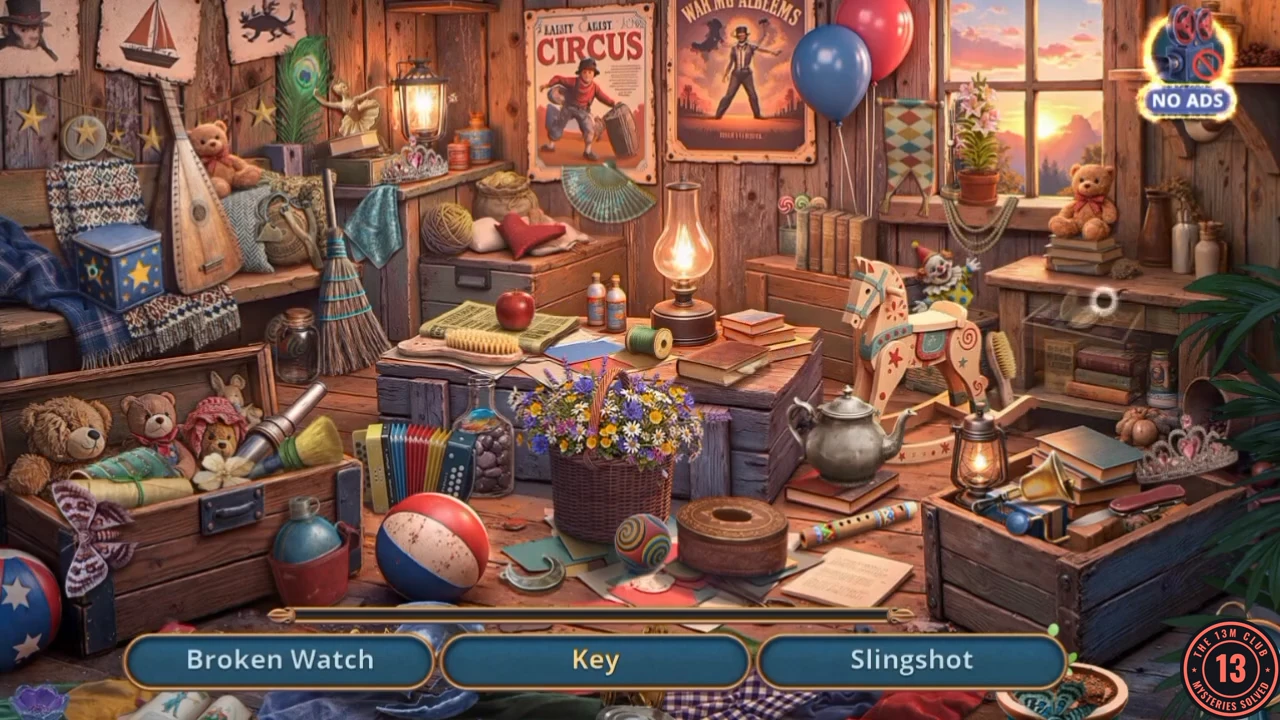
Three names appear at a time; find and tap each. Drag the view to pan the scene. Some objects need a small interaction first, given below.
- Find the listed objects: Broken Watch, Pocket Knife, Key, Magnifying Glass, Slingshot, Map, Coin Purse, Candy Box, Colored Pebble, Tin Soldier, Bird and Threads. Three need a note. Broken Watch: tap the right-hand drawer of the desk to open it, then tap the watch inside. Key: tap the ballerina figurine at upper left, by the head of the lute, then the round music box with a hole in its lid at lower centre. She stands on the box: tap it to open it, and that completes the Key. Bird: a brown bird sits under the upper-right shelf, partly hidden by the No Ads badge. Drag the view until you can see it and tap it. When the list empties a silhouette panel appears and a red Handkerchief lies on the table left of the flower basket: tap it and take the Handkerchief.
Fixing the gazebo step
Use the Handkerchief where the vines block you.
- Open the flowerbed and use the Handkerchief on the thorns. Take the Rope beneath them. Keep the Handkerchief.
- Open the gazebo steps and use the Rope on the winch to lift the fallen beam. Read the London Herald page and take the Board.
- Open the hole marked Renovation and use the Board to start the board puzzle.
Plank jigsaw
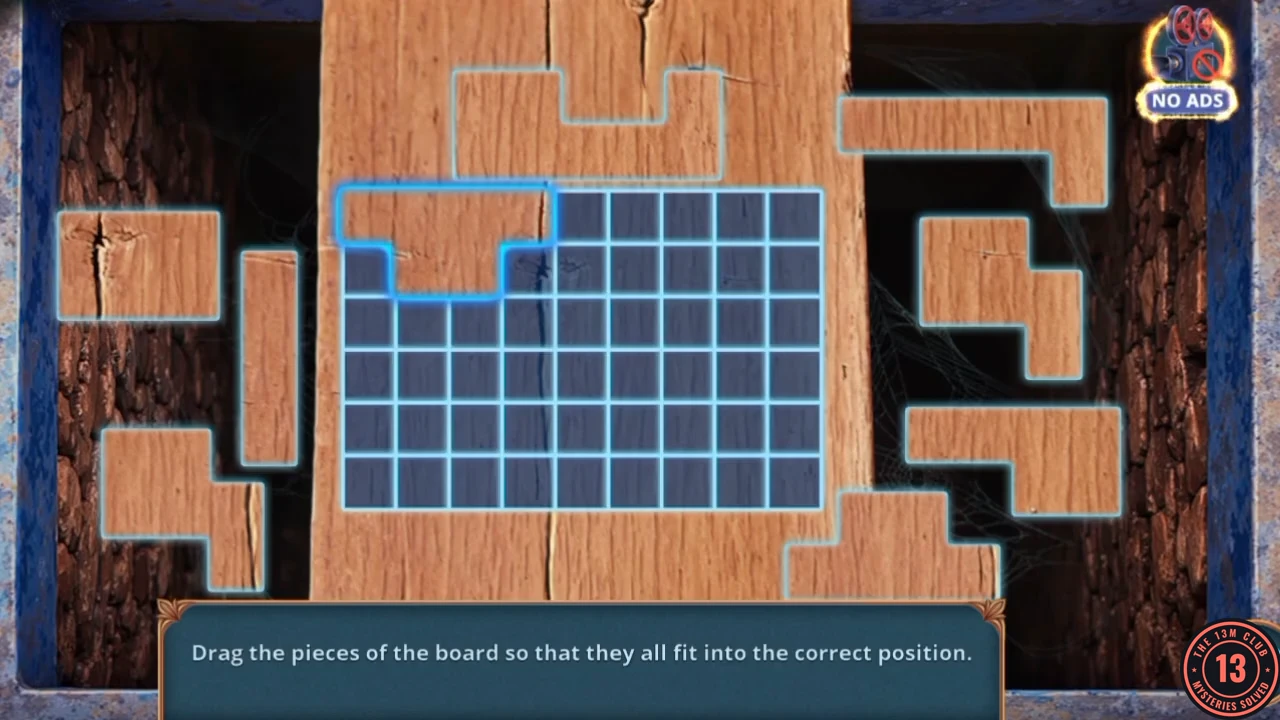
Prompt: Drag the pieces of the board so that they all fit into the correct position.
- Drag the plank pieces around the grid until they fill it completely. The long narrow piece fits the left edge and the plain rectangle sits in the centre. The picture below shows how the rest interlock.
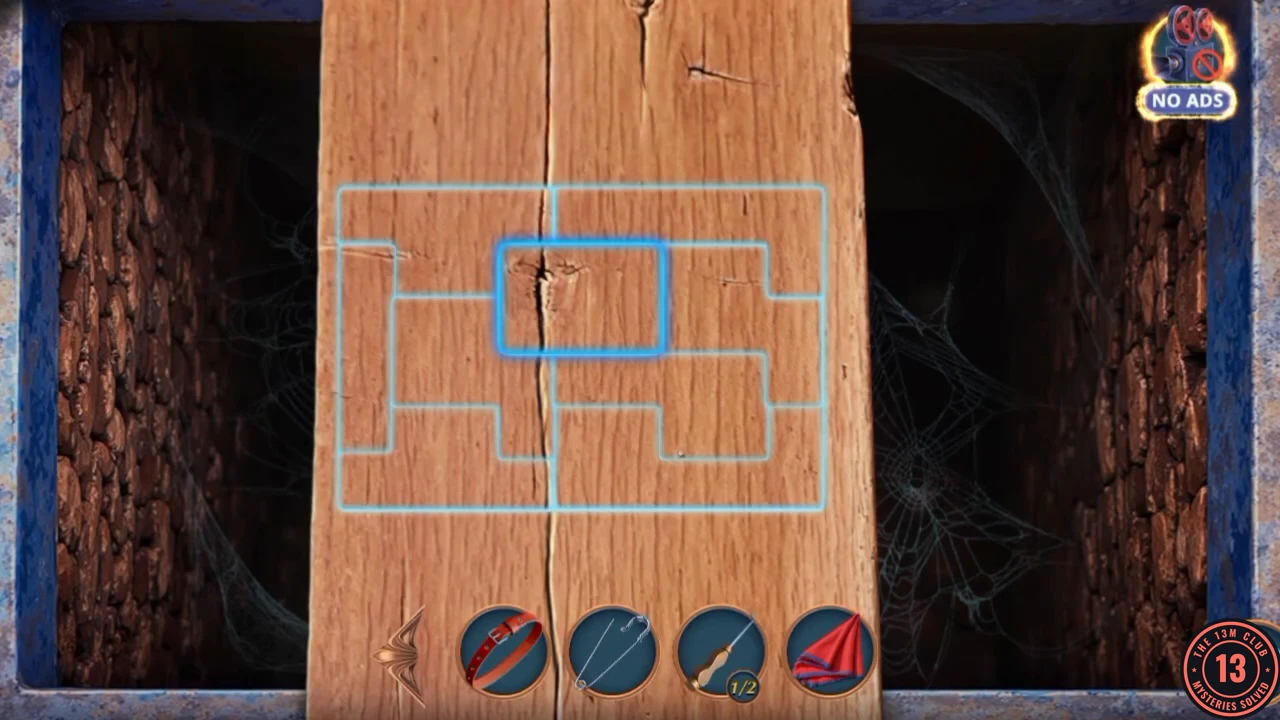
The finished plank, with the outlines showing where each piece fits.
The city square: tailing the suspect
Leave the yard by the road on the left. A man in a blue coat crosses the Archive square and goes out through the left archway. Task lines at the top say you must keep up with him.
- Take the road on the left of the yard to reach the square.
- Open the red Newspaper box beside the water pump and put the Coin in its slot. Read the Missing poster, then take the Circus Ticket and the Gear inside.
- Open the winch box on the pillar at the left and fit the Gear, then use the Belt on the broken chain to the left of the gears. The basket lowers: take the Watering Can from the bag. Thomas says the ribbon on the box needs a knife or scissors.
- Open the statue niche beside the Archive door ("Who needed to smear mud on the lantern anyway?"). Use the Watering Can and then the red Handkerchief on the lantern to wash it. Read the note from T.T. Briggs. Take Levers (1/2) and the Cloak from the niche.
- Open the archway at the left ("He might recognize us... hide") and use the Cloak on the rail. Thomas says he won't pay attention to you now, and the lamp map opens.
Lamp map of the estate
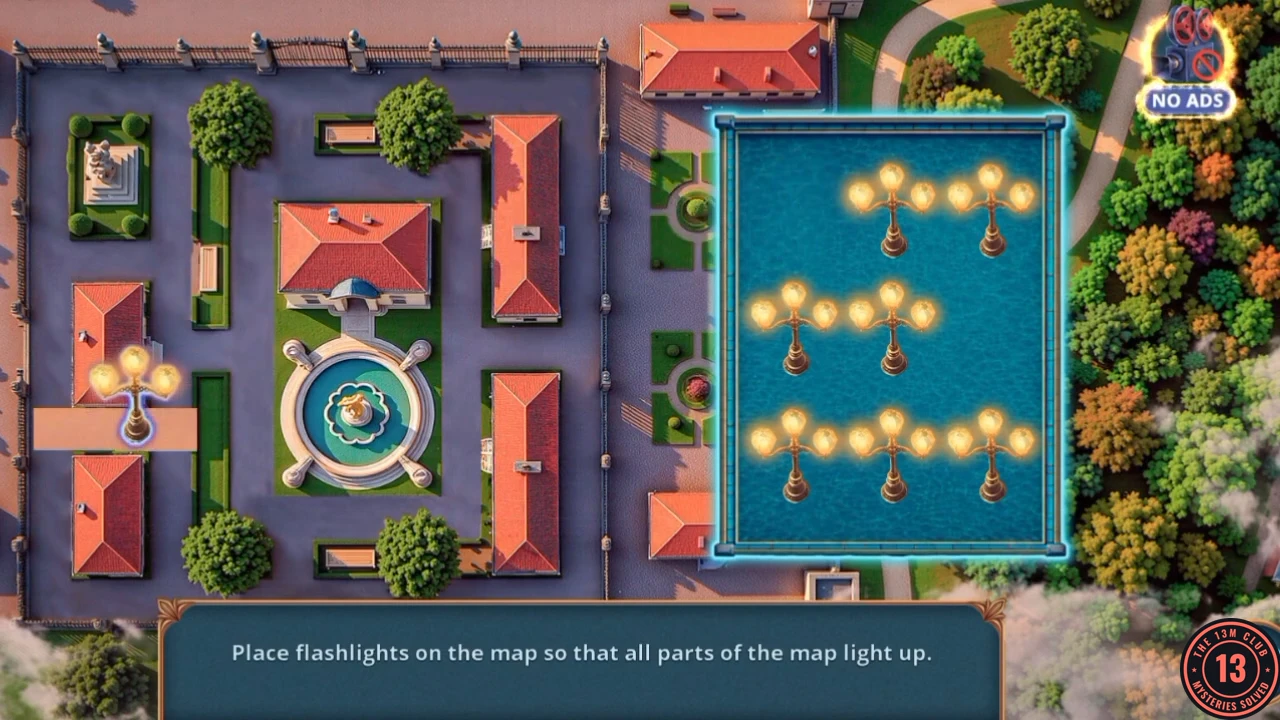
Prompt: Place flashlights on the map so that all parts of the map light up. You have eight lamps; each one lights the straight stretches of path around it.
- Drag the eight lamps from the blue pool onto the paths: top-left corner of the grounds; top path above the main house; left path just below the statue square; left of the main house; right of the main house; left path between the two lower-left buildings; below the fountain; bottom-right end of the right-hand path.
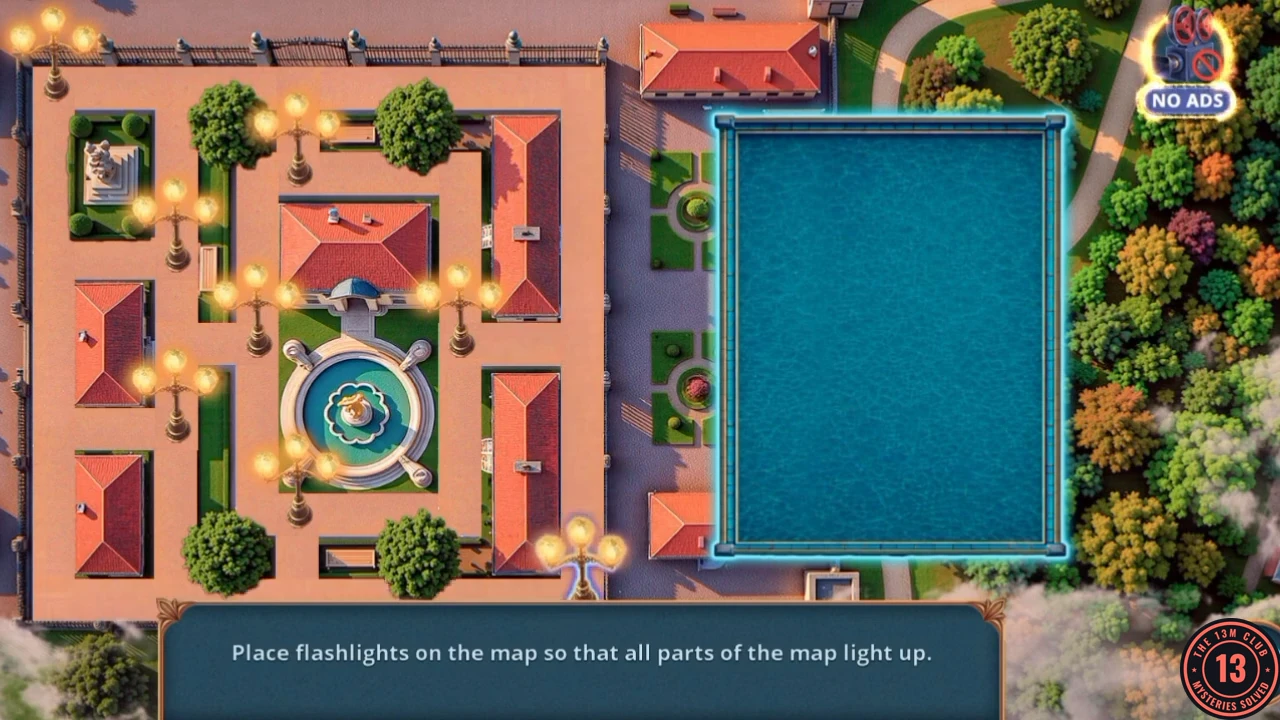
One finished layout: all eight lamps placed and every path lit. - Watch the postman hand an envelope to a cloaked man. Emily suggests her music teacher, who lives nearby, could explain Grimas's flute. "Then let's go to him right now!" (+1 star) opens the optional Music Teacher's House. In the Google Play game this line has a gold DELUXE badge, which marks paid Deluxe content (see the notes for this guide). To play it, follow Chapter 2 bonus in the Extras part alongside the next steps. The other answer, "I'm not sure this will help.", stays on the main route.
- The cloaked man drops the envelope: "This is our chance. We need to pick it up before anyone notices." Open the red toolbox beside the flowerpot and take the Fan.
- Open the Mailboxes and tap the round lock on the upper-left blue box.
Mailbox reel lock
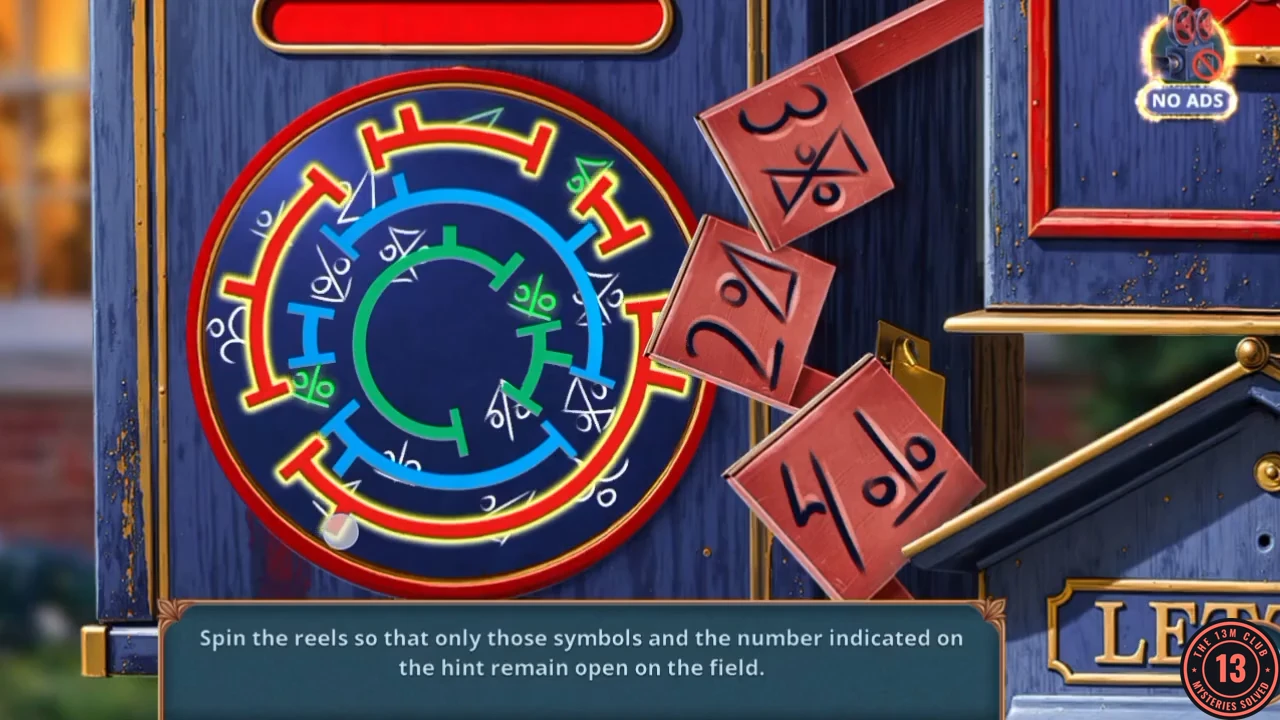
Prompt: Spin the reels so that only those symbols and the number indicated on the hint remain open on the field. Three red tags give the target: 3 hourglass symbols, 2 triangle symbols and 4 percent-like symbols. Three coloured rings cover the others.
- Rotate the red, blue and green rings until exactly nine symbols are left uncovered: 3 hourglasses, 2 triangles and 4 percent marks. They turn green when correct. Take the Spoon from the mailbox that opens.
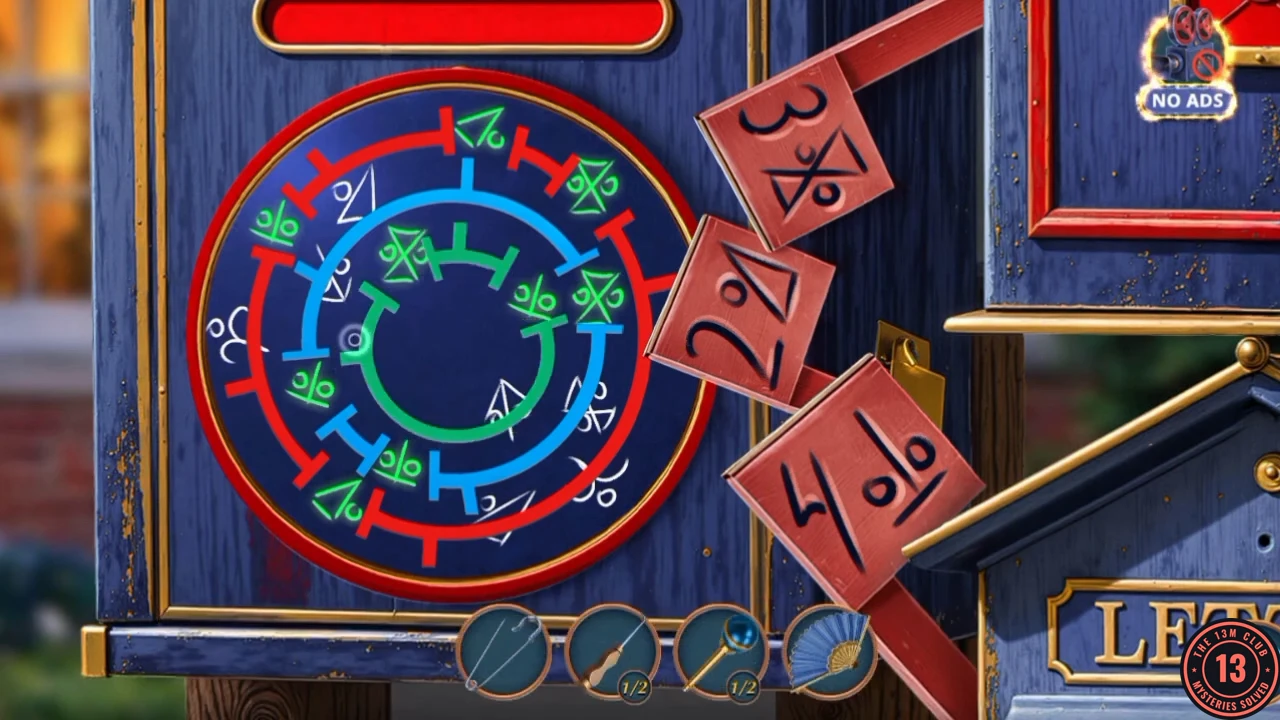
Solved: only the nine hinted symbols remain open, and they turn green.
Constable's Street: the wet envelope and the garage
The dropped envelope lands in a puddle.
- Open the puddle by the kerb ("The envelope is all wet! Just our luck."). Inspect the envelope, which has two item slots: you will need to dry it.
- In the same view use the Spoon on the dirt mound. Take Levers (2/2) and the Bolt.
- Open the red garage doors and place Levers (2/2) in the slot on the left. Tap the open garage.
Garage workshop
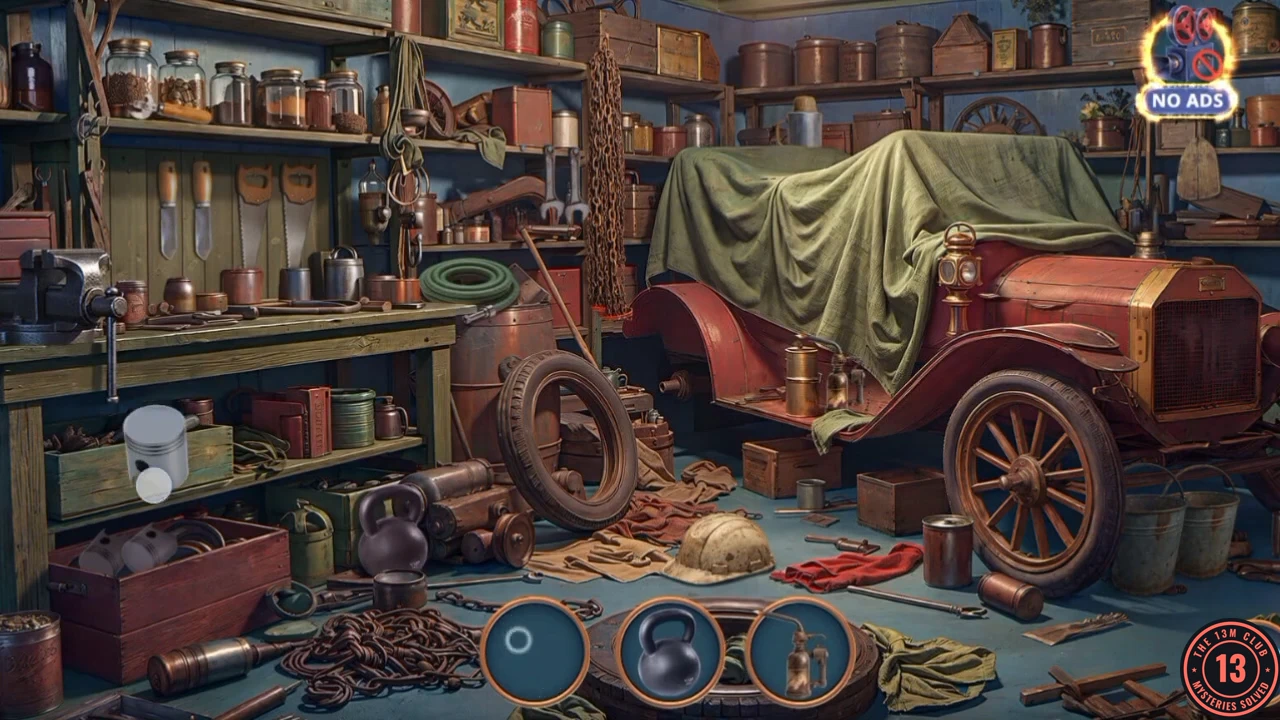
Silhouette scene: three circles at the bottom show object shapes (kettlebell, hose, wheel, broom, wrench and so on). A find brings the next shape. The final T-shaped handle appears on its own.
- Find each shape until the circles empty, finish with the T-handle at the car, and take the Hook.
- Open the Mailboxes and use the Hook on the upper-right blue box. Take the Broken Amulet, which has a + badge for an item it still needs, and Lock Picks (2/2).
- Open the map and go to Near Emily's House. Open the toolbox in the flowerbed and use Lock Picks (2/2) on it to start the wire lock.
Toolbox wire lock
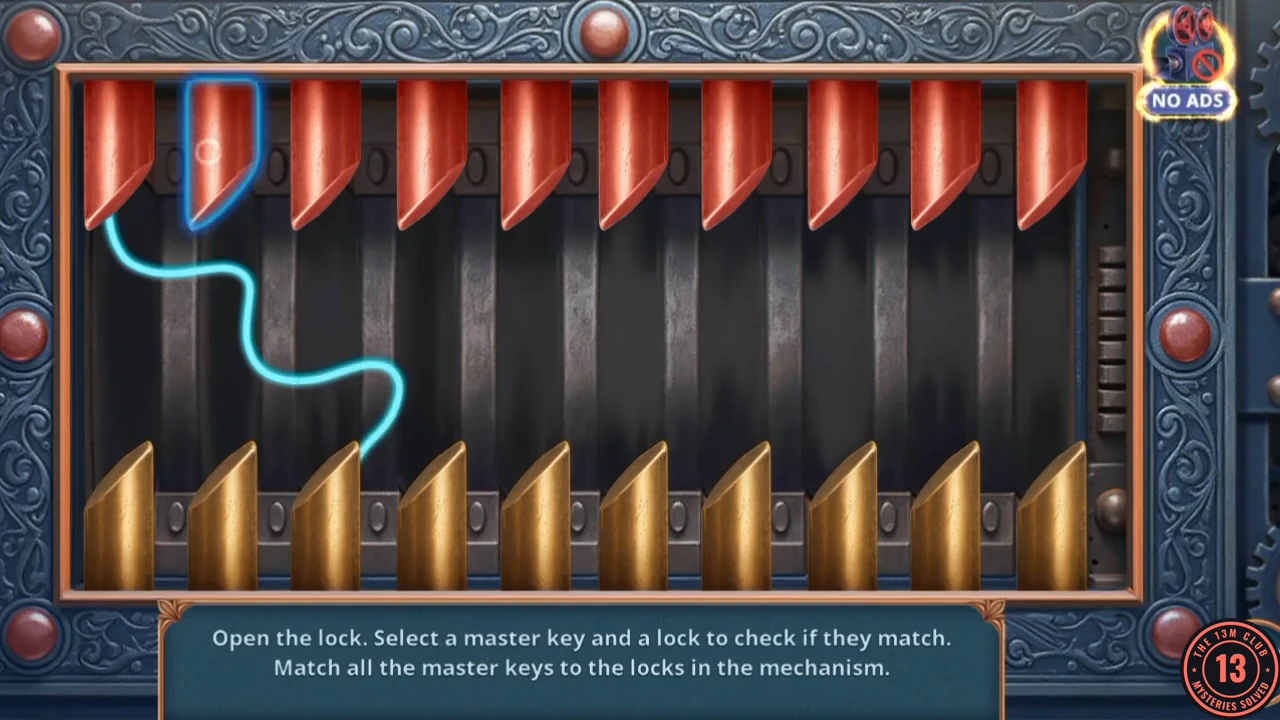
Prompt: Open the lock. Select a master key and a lock to check if they match. Match all the master keys to the locks in the mechanism. Each correct pair draws a glowing wire. The pairs below are a worked example, numbering keys and locks 1 to 10 from the left. If a pair is refused, test that key against the other locks until the wire appears.
- Tap a red key at the top and then a gold lock at the bottom to pair them: 1-3, 2-5, 3-2, 4-9, 5-1, 6-10, 7-4, 8-8, 9-6, 10-7.
- Take the Hand Drill and the Sieve from the open box. A Circus Ticket is in the box too; tap it.
- Open the gazebo steps and use the Sieve on the sack beside the winch. Take the Pencil you sift out.
- Return to the puddle and open the envelope. Place the Fan and the Pencil in its two slots to dry it and bring up the embossed CIRCUS seal: "Here is the proof..."
- Answer George ("We'll find the notes, and then we'll have proof, not just words."): "Good idea, George!" gives +2 stars; the other answer is "Archive? It will take time..." The task becomes Find clues about the circus.
- Open the garage again ("I need to check the garage again."). The scene now sparkles for a second search.
Garage workshop, second search
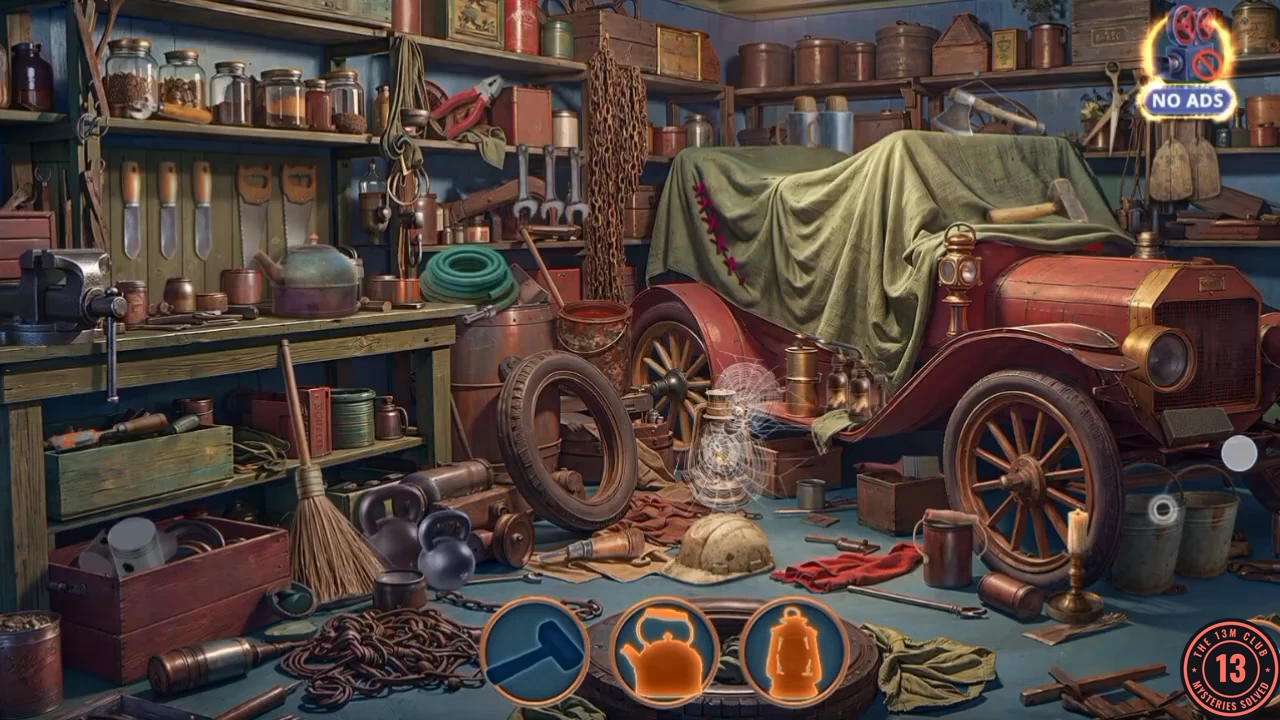
Silhouette scene again. Blue shapes are plain finds. Orange shapes need the action listed below first, and blue sparks mark the change.
- Clear the shapes. For the orange ones: tap the curved handle on the tall brown can on the floor by the front wheel, and it flies to the kettle on the bench, then tap the kettle. Tap the broom leaning at the bench, and it sweeps the web off the lantern, then tap the lantern. Tap the scissors hanging at the top right of the back wall, then the stitched seam of the tarp at left, and tap the yellow object they reveal. Tap the dark sanding block on the ledge under the radiator, and it scrubs the rusty tool in the green crate under the bench, then tap the tool. Tap the brush on the small box behind the front wheel, and it goes into the red pail on the barrel by the rear wheel, then tap the pail. When the circles are empty, take the Pliers.
City Square: the scales
The Pliers go back to the ribboned box.
- On the square open the winch basket and use the Pliers on the ribbons around the box. Take the Amulet Part and the Scales of Justice inside.
- Open the statue niche and give the statue the Scales of Justice to start the weight puzzle.
Weights of Justice
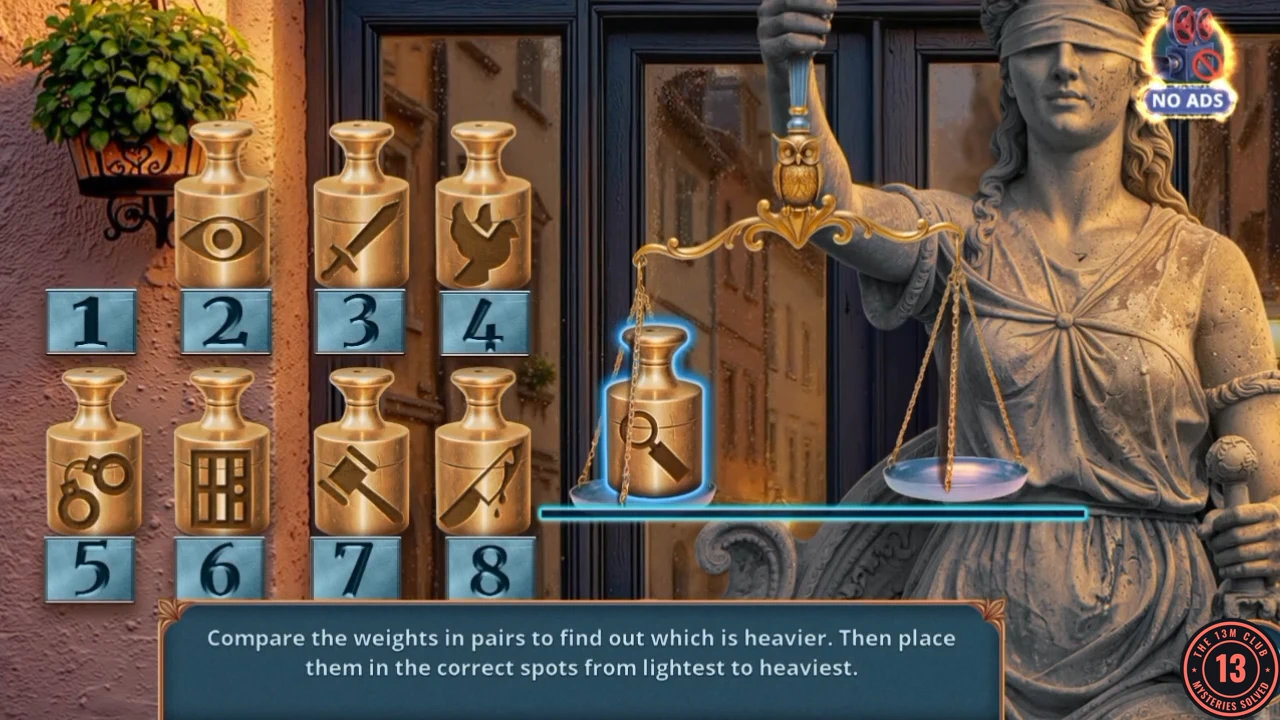
Prompt: Compare the weights in pairs to find out which is heavier. Then place them in the correct spots from lightest to heaviest. Drag two weights onto the pans to see which is heavier, then drag them into the numbered slots. The order below is an example. If your game refuses it, weigh pairs yourself and sort from the results.
- Put the weights in this order, lightest to heaviest: 1 Eye, 2 Sword, 3 Bird, 4 Magnifying Glass, 5 Bars, 6 Handcuffs, 7 Knife, 8 Gavel. The statue swings aside and the Archive door opens. Go inside.
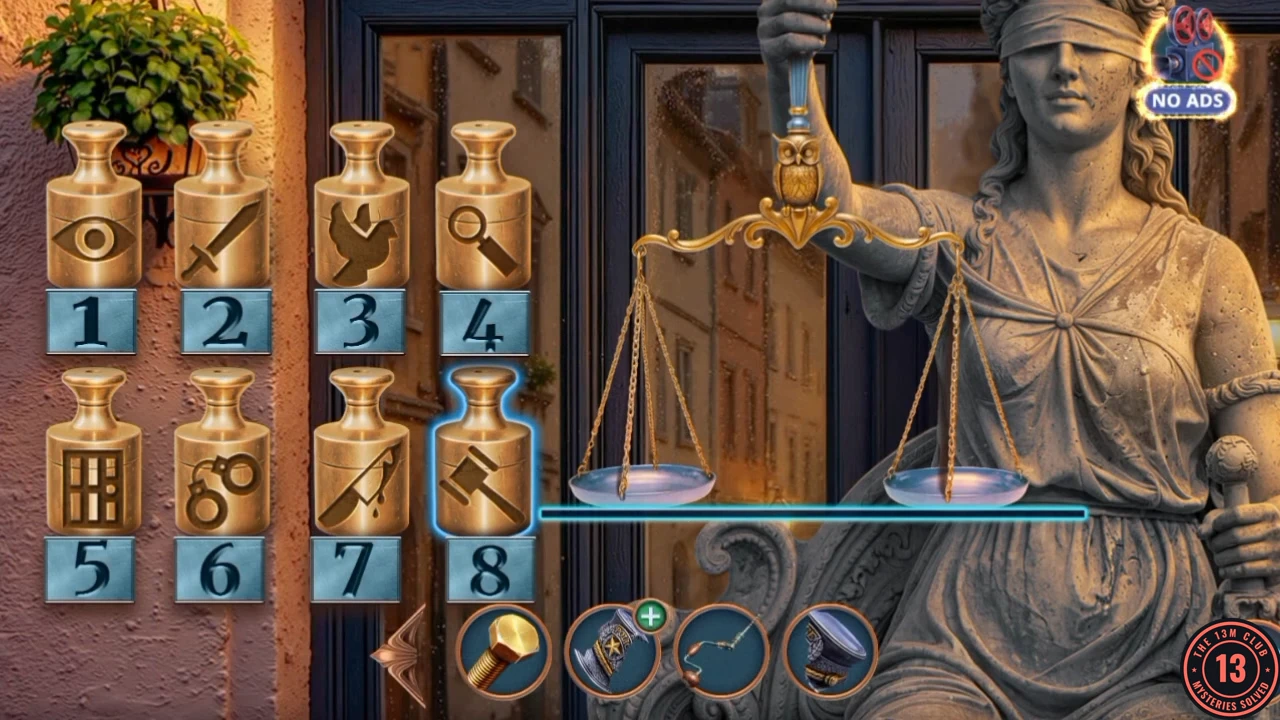
The solved order, lightest at spot 1 to heaviest at spot 8.