The birdcage lock
Use the Lid to reach the second Eye.
- Open the steaming pot on the backstage campfire and use the Lid on it. Take the Eyes (2/2) from the stones.
- Open the birdcage and place both Eyes in the sockets to start the hexagon lock.
Birdcage hexagon lock
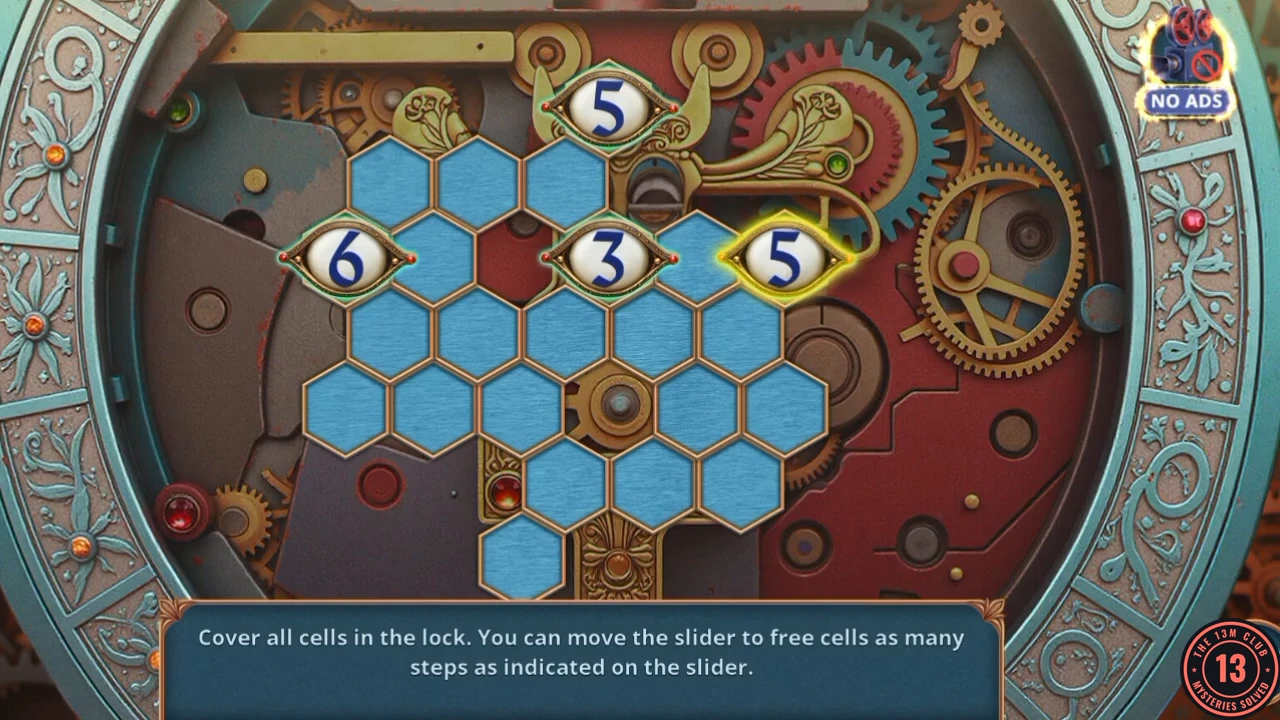
Prompt: Cover all cells in the lock. You can move the slider to free cells as many steps as indicated on the slider. Four eye sliders hold 5 (top), 6 (left), 3 (centre) and 5 (right); together they exactly cover all 19 cells. The route below is one working solution. If your layout differs, start from the dead-end cells so that no cell is left stranded.
- Drag the right 5 slider down-left, down-right, left, down-right, left. Drag the centre 3 slider right, down-left, left. Drag the left 6 slider down-right, down-left, right, right, down-right, down-left. Drag the top 5 slider down-left, left, left, down-right, down-right. Take the Bracelet from the cage.
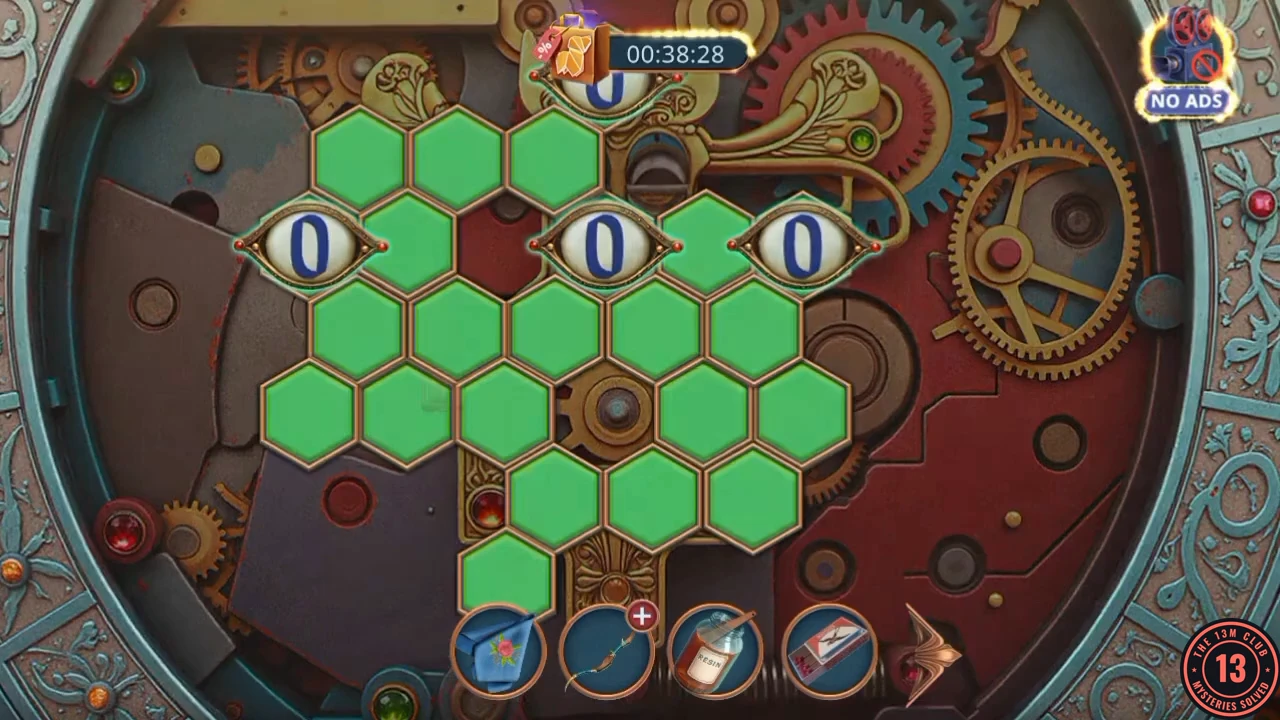
Solved: all the cells are covered and the sliders read 0.
Bowstring and shooting gallery
Back to Shooting Gallery Square.
- On the square open the fire hydrant by the striped cart. Use the Bracelet on the loose hose to clamp it onto the hydrant: the water bursts through and lifts out the Bowstring.
- Open the Bow in the item view and fit the Bowstring to it.
- Open the shooting gallery counter and place the strung Bow on the stand to start the target puzzle.
Shooting gallery targets
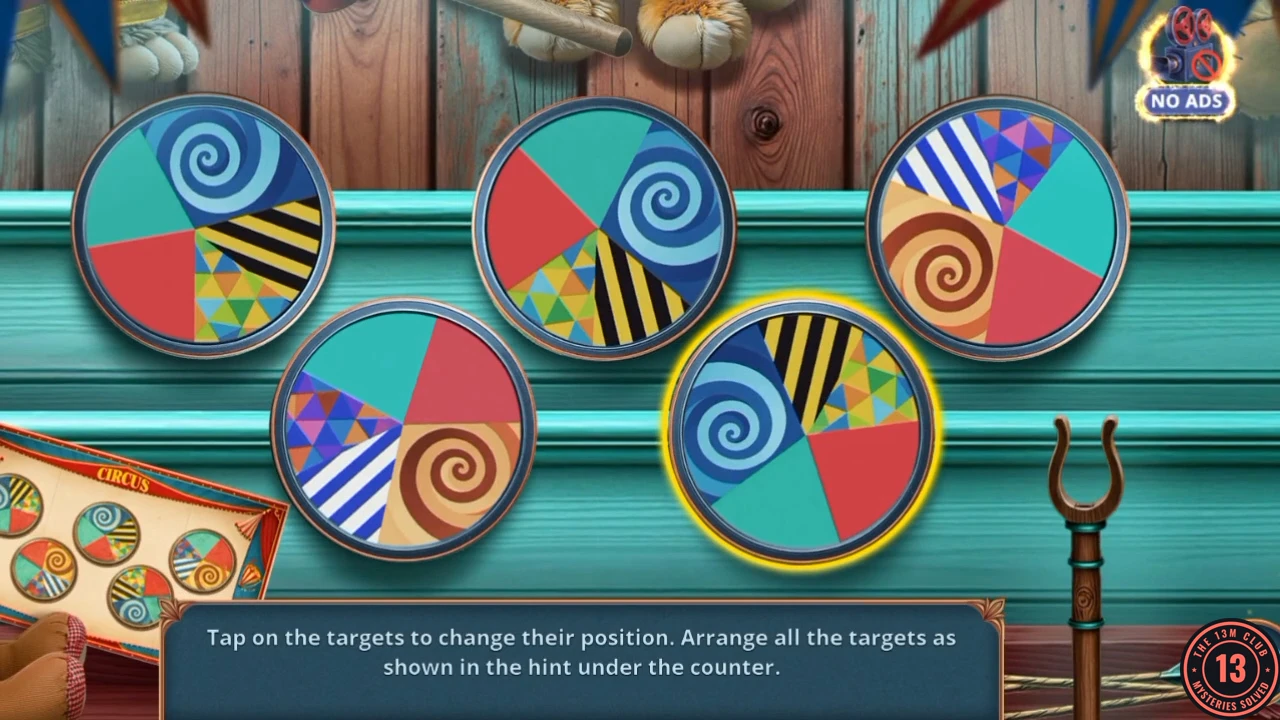
Prompt: Tap on the targets to change their position. Arrange all the targets as shown in the hint under the counter. The small hint card is bottom left of the screen.
- Tap the targets until each matches the card: the top row has a blue swirl/striped target, a blue swirl target and a brown swirl target, and the bottom row a brown swirl target and a blue swirl target, with the swirls turned as shown on the card. Take the Sledgehammer that falls.
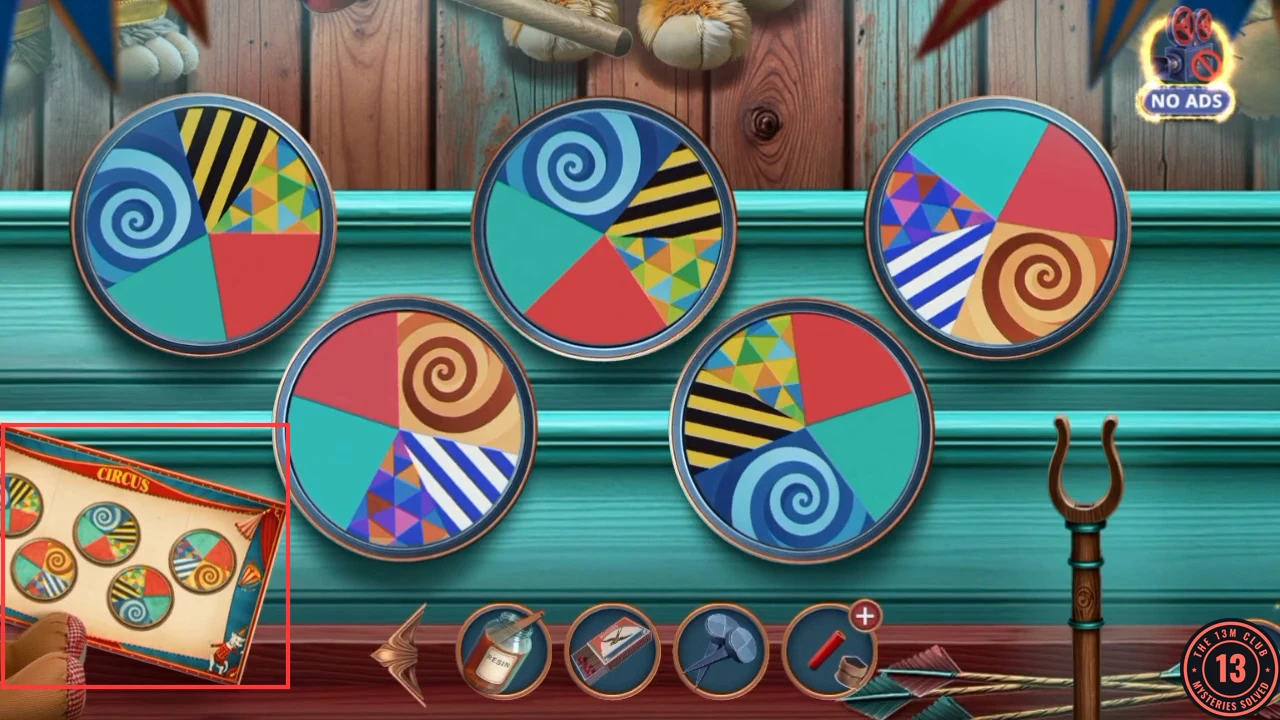
The completed arrangement, with the hint card outlined at lower left.
Glove, magnet and nose
Test your strength, then finish the trailer.
- Open the high striker base and use the Sledgehammer on the pad. Take the Monster Paw Glove from the box that opens at the top.
- Go to the Clown's Trailer, open the chest and use the Monster Paw Glove to clear the broken glass. Take the Magnet and the Coin.
- Open the blue drawer latch and use the Magnet to release it. Take the Clown Nose from the drawer.
- Open the wig stand on the desk and fit the Clown Nose. The stand opens: take the Belt and the Key.
- Go to Circus Backstage, open the tree stump pillar and use the Key on its triangular lock.
Lantern cylinders
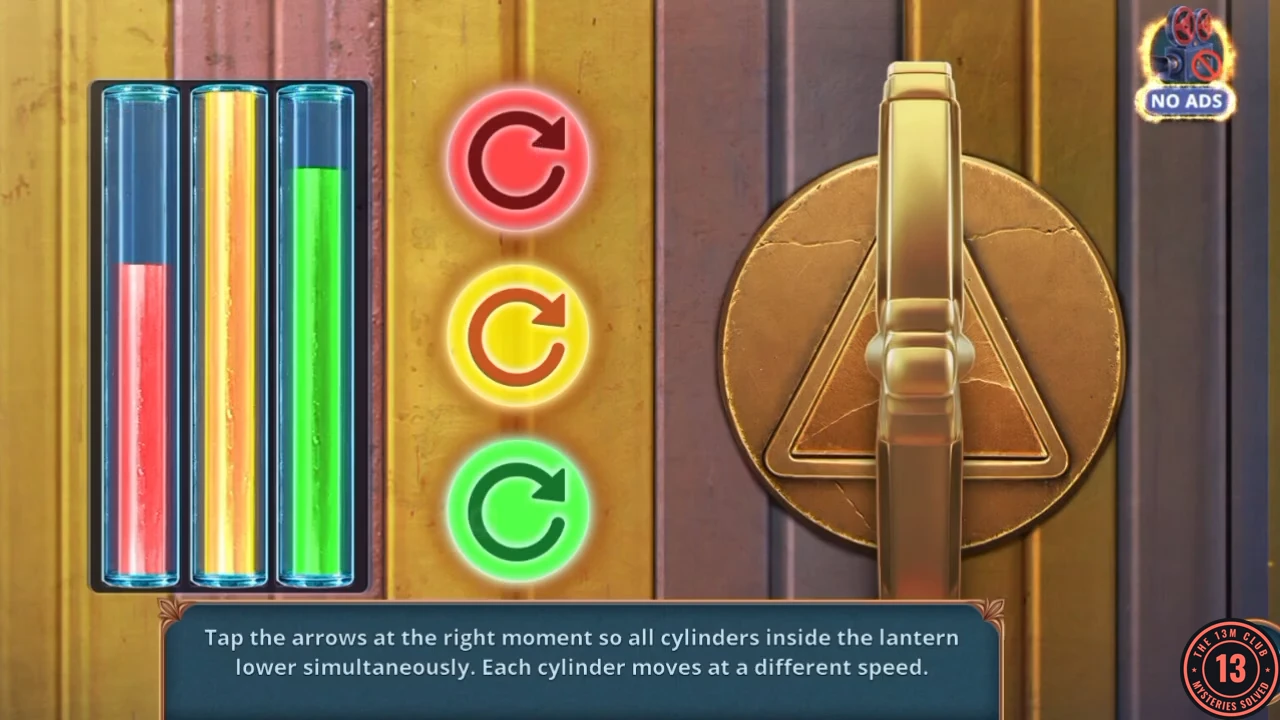
Prompt: Tap the arrows at the right moment so all cylinders inside the lantern lower simultaneously. Each cylinder moves at a different speed.
- Tap the arrows to raise each cylinder, then time your taps so all three cylinders fall to the bottom together. Each cylinder falls at its own speed, so start the slowest one first and the fastest last. Take the Lantern Lid.
The carousel model
The carousel model on the elephant table is what the Circus scheme fits.
- In the tent open the purple elephant's foot and use the Lantern Lid on it. Take the Tent Figurine.
- Open the stage table with the Circus scheme and place the Tent Figurine on the carousel slot to start the figurine puzzle.
Circus scheme figurines
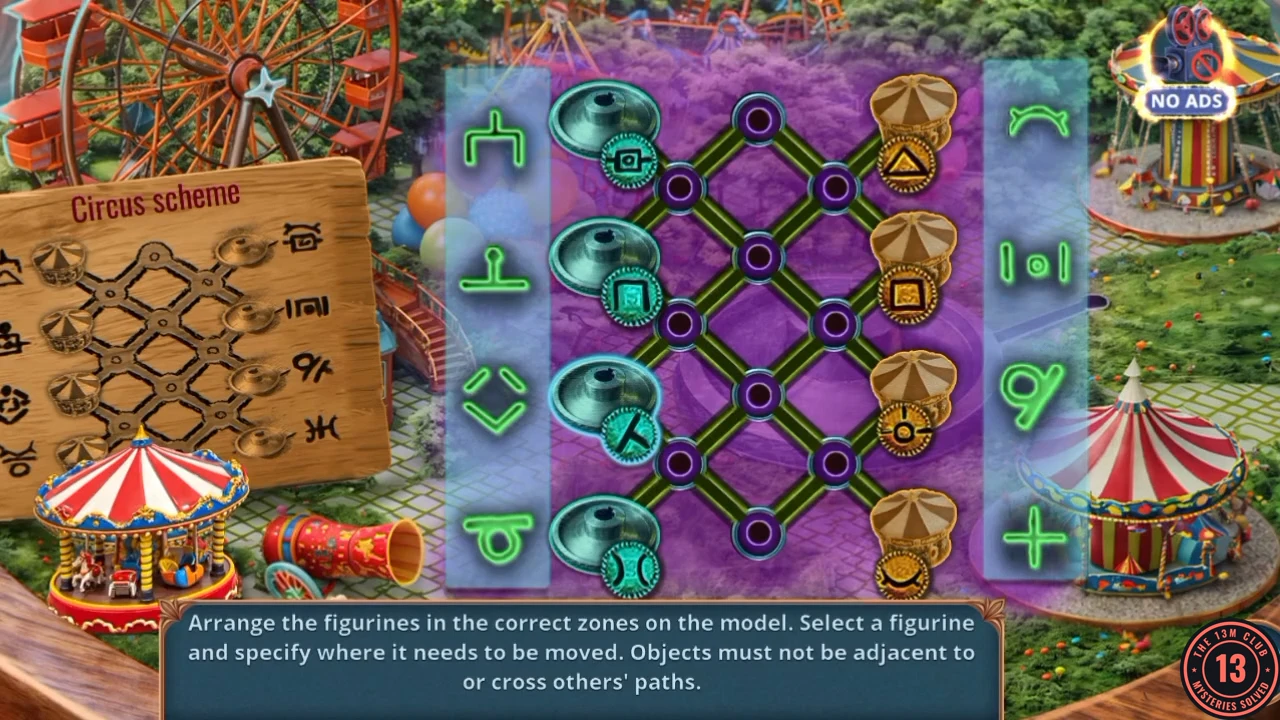
Prompt: Arrange the figurines in the correct zones on the model. Select a figurine and specify where it needs to be moved. Objects must not be adjacent to or cross others' paths. Move figurines along the lines. The Circus scheme card at the left shows which symbol belongs in each zone.
- Move each tent figurine to the left column and each dish to the right column, keeping every piece at the same height it started: the Circus scheme shows tents on the left and dishes on the right. A move only works when no other piece sits on or next to its path, so park pieces in the middle row out of the way and work the outer columns first. This takes many moves. Take the Corkscrew.
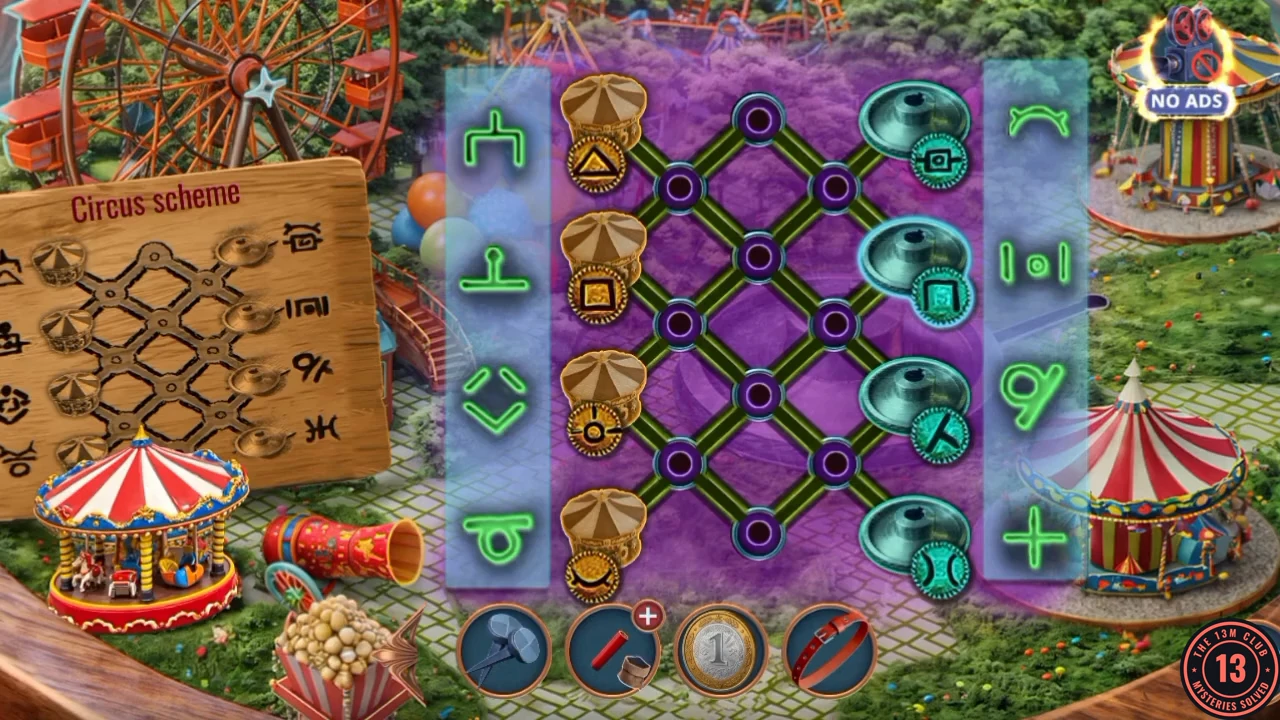
Solved: tents on the left and dishes on the right, each at its starting height.
Blowing the safe
Last tasks in the Clown's Trailer. This is your last chance for Chapter 1's Circus Tickets and the Wagon of Horrors, because the game closes the chapter after the safe.
- Go to the Clown's Trailer, open the desk and use the Corkscrew on the panel knob. Take the Thread from the box that opens.
- Open the Firecracker in the item view and add the Thread as a fuse.
- Open the safe under the doll and place the Firecracker on its handle. Then use the Matches on the fuse. Before you confirm: the game warns that if you complete this task you cannot return to earlier locations for the remaining items, so collect anything you still want first. Choose YES to light the fuse and start the match puzzle.
Match path through the safe lock
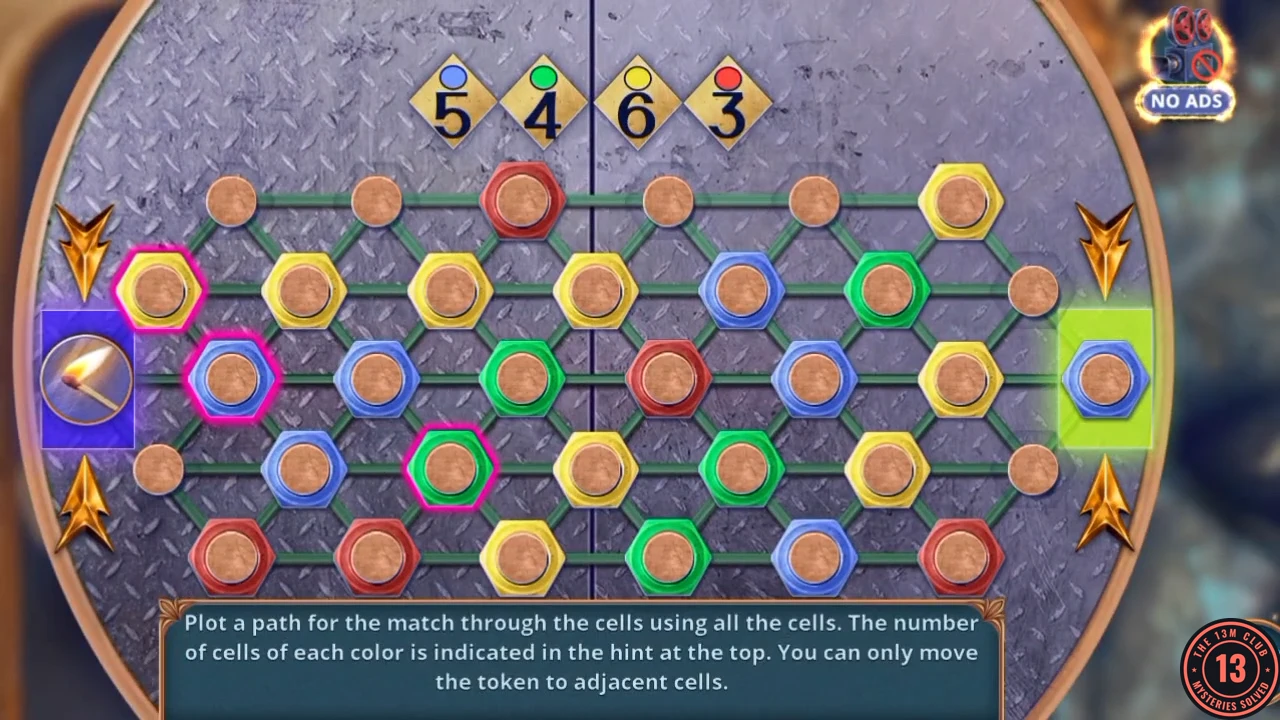
Prompt: Plot a path for the match through the cells using all the cells. The number of cells of each color is indicated in the hint at the top. You can only move the token to adjacent cells. The counters read blue 5, green 4, yellow 6, red 3. If your board differs, plan back from the exit so that all four counters reach zero together.
- Move the match along these cells: right to blue, down-right to blue, down-right to red, right to yellow, right to green, up-left to yellow, left to green, up-left to blue, right to green, up-left to yellow, up-right to red, down-right to yellow, down-right to red, down-right to green, up-right to blue, down-right to yellow, up-right to yellow, then right into the blue exit on the green panel.
- Take Emily's Pendant and read the threatening note in the open safe. The chapter summary then shows your Decision Points.