CHAPTER 3
Gridiron above the Stage
Marco is on the walkway. Make a lorgnette to pass the blinding spotlights.
- Read the note in the chest (its hinges are stiff) and take the YO-YO. Take the MECHANISM PART and fit it into the CONTROL LEVER panel.
- Untangle the harlequin doll's threads with the HOOK and take the DRYING OIL.
- Open the LORGNETTE FRAME in the inventory and add the SOOT, the DRYING OIL and the LENSES to make the PROTECTIVE LORGNETTE.
- Look at the spotlights through the PROTECTIVE LORGNETTE.
CHAPTER 3
Puzzle: cross the light field
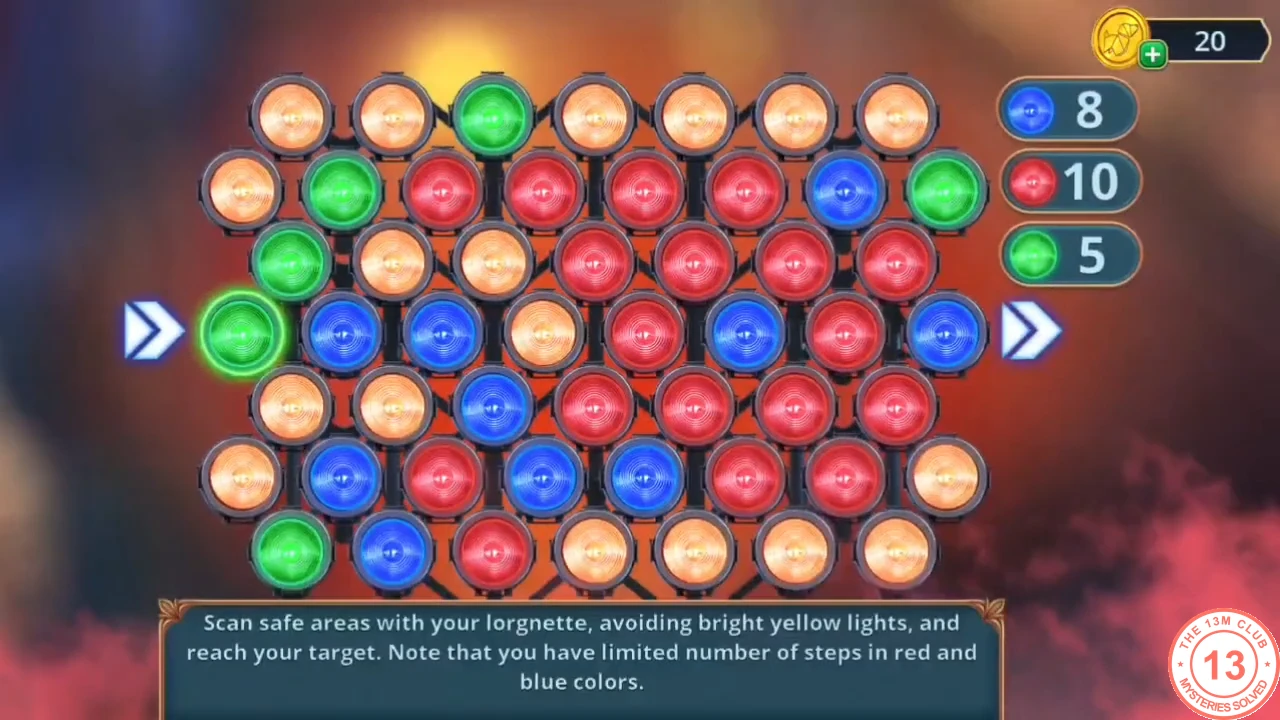
Scan safe hexes and reach the exit within the step limits.
- Move across the hex field from the arrow on the left to the exit on the right, stepping only on safe cells and avoiding the bright yellow lights. Red and blue steps are limited, so plan before moving. Take the DREAM CATCHER.
- Fish the GLASS EYE out of the soapy-water bucket with the DREAM CATCHER; set it in the doorman statue's socket on the stage and take BANKNOTES 1/2.
- Search the stage seats hidden-object scene again to get the TIMPANI STICK; dip it in the fat in the frying pan.
- Grease the chest hinges on the gridiron with the TIMPANI STICK WITH FAT and take the KNIGHT'S GAUNTLET.
- Reach into the hot spotlight with the KNIGHT'S GAUNTLET for the KNITTING NEEDLE; use it on the harlequin to get WING-SHAPED AMULET 2/2 and the FORK.
- Fit the WING-SHAPED AMULET in the owl clasp of the red bag in the director's office and take the TUNING PEGS.
- Put the TUNING PEGS on Marco's harp.
CHAPTER 3
Puzzle: push the string stops
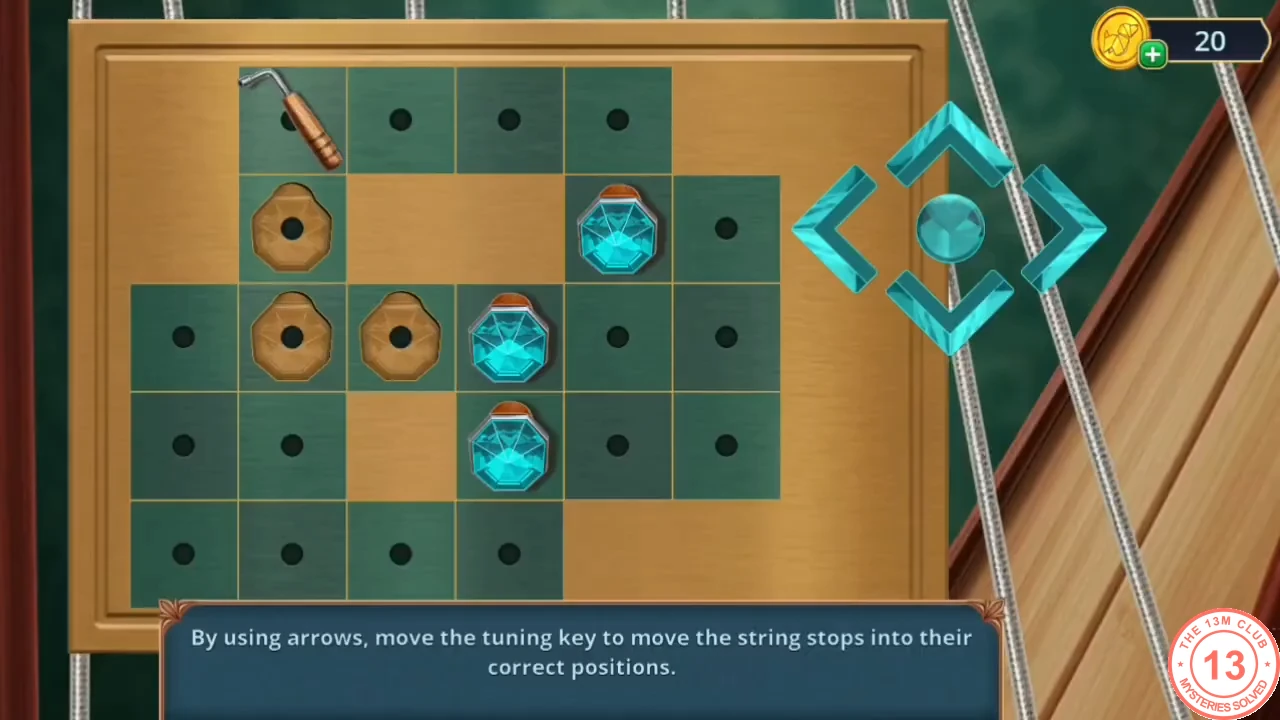
A long pushing puzzle (like Sokoban), so this guide gives the method rather than every move. Use the tuning key to push the three string stops onto their marks.
- With the four-way arrows, move the tuning key to push each blue string stop onto a brown ring target. Stops can only be pushed, never pulled, so avoid pushing one into a corner or against a wall away from its target.
- Take the SILICONE JAR from the pot beside the harp. Stick it on the glass of the bucket shelf on the gridiron, pull the glass away and take SWAN BROOCHES 2/2.
- Set both SWAN BROOCHES in the chest slots. A warning marks the end of Chapter 3 collectibles in earlier locations; tap YES and take the SHACKLES.
- Use the SHACKLES on Marco.
CHAPTER 3
Puzzle: trap Marco
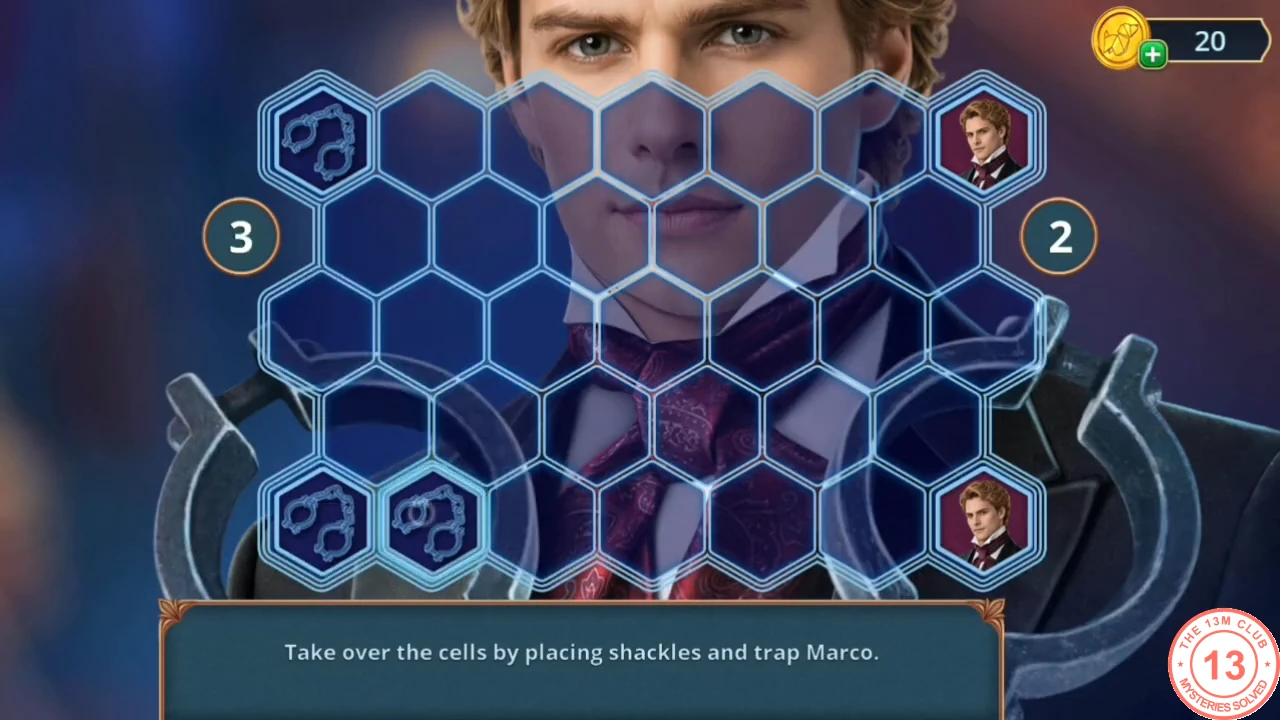
The board starts with two shackle cells on the left and two Marco cells on the right (2 to 2). You and Marco take turns until every cell is filled; the counters beside the board show the score.
- Tap one of your shackles to light up the free cells around it, then tap a lit cell right next to it. A new shackle fills that cell, the original stays, and every Marco cell touching the new shackle turns into a shackle (for example, 19 to 7 became 23 to 4 in one move). Marco then does the same to your cells. On each turn, pick the free cell that touches the most Marco cells. Cells two steps away also light up, but the recording only used neighbouring cells. When the board is full, finish with more cells than Marco (the recording ended 23 to 9).
- The Chapter 3 decision summary appears; with only free replies the 0-star outcome plays. Marco is handcuffed on the stage.