Theater Street and the opera entrance
Barbara Clark sends you, her crime reporter, to cover the closed dress rehearsal at the opera house. Tap NO if you want to skip the tutorial prompt.
- At the hotel side window, take the NUT, the GEAR and the BANKNOTE, then give the BANKNOTE to the hand in the window.
- Tap the souvenir showcase and find every listed souvenir in the hidden-object scene to receive the CREAM AND BRUSH.
- Use the CREAM AND BRUSH on the stuck zipper of the purple bag beside the poster: take the REHEARSAL INVITE and the HAIR POWDER.
- Give the REHEARSAL INVITE to the doorman at the opera entrance to go backstage.
- Melinda Watson explains the situation. The free reply "Thanks for the info..." earns a decision star; the other reply earns nothing.
Theater Backstage
Collect the first backstage tools while Garrett waits for water and pills.
- Take the NOTEBOOK, open it from the inventory and remove the METAL FEATHER bookmark.
- Zoom into the side of the red cabinet and turn the golden wheel: take the VALVE and the METRONOME.
- Pry the loose floorboard by the dresser with the METAL FEATHER to get the SPINNING TOP.
- Wedge the SPINNING TOP under the short corner of the wobbly luggage cart to start the packing puzzle.
Puzzle: pack the luggage cart
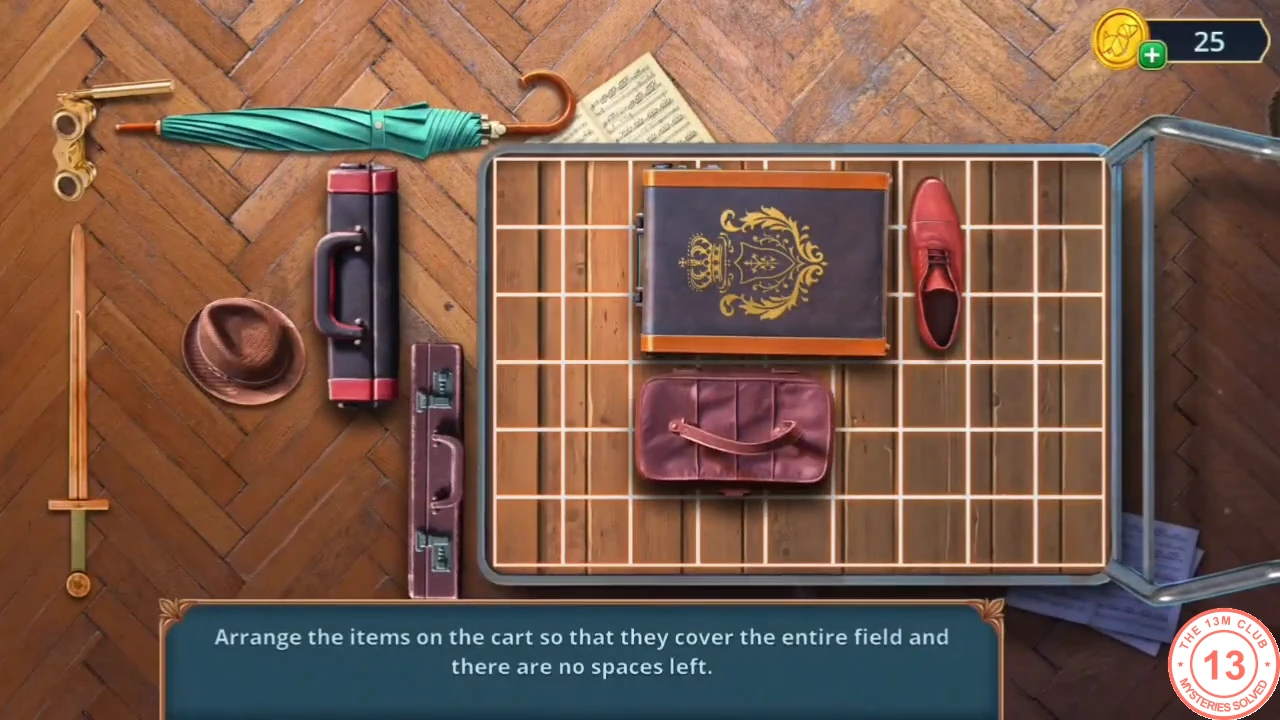
Fit all six pieces of luggage onto the cart. The puzzle is complete when the grid is filled with no gaps and no overlaps.
- Drag the briefcase, opera glasses, umbrella, hat, purple case and sword onto the cart grid. Place the large and long pieces (the cases and the sword) first, then fill the remaining gaps with the small ones.
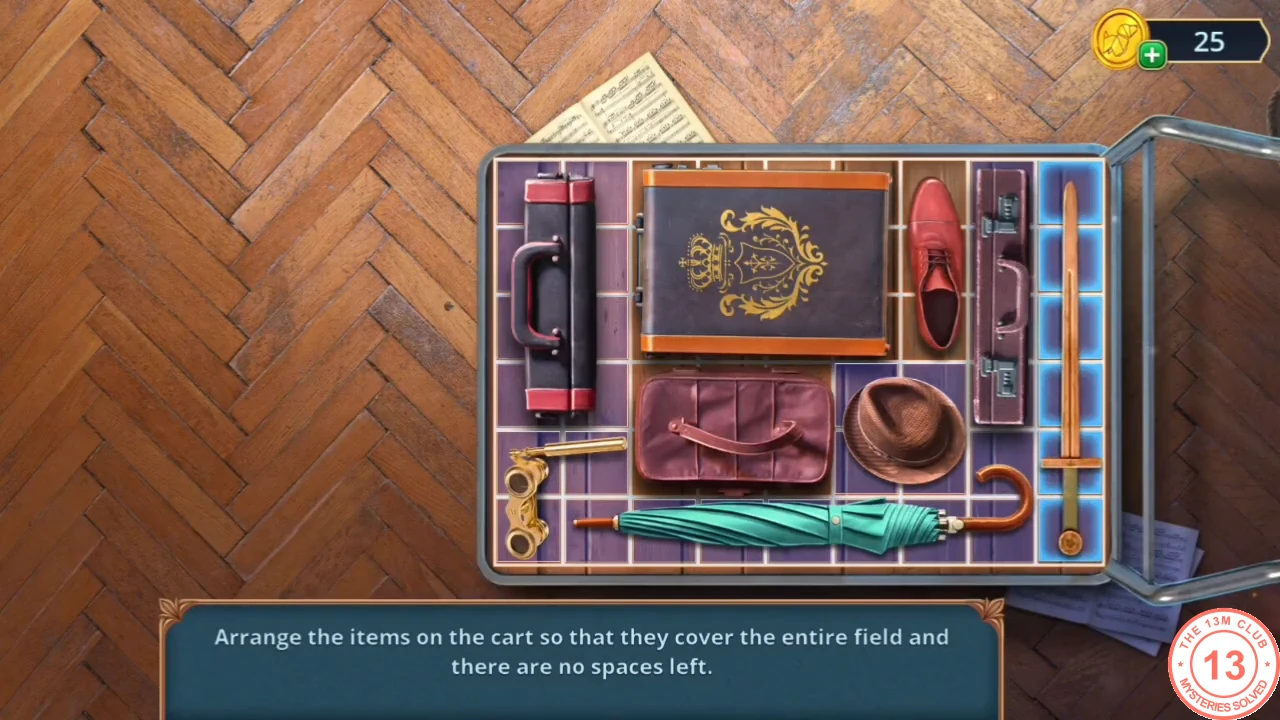
Completed cart in our game: every cell is covered.
The Stage
Lift the tree prop off the trapdoor and recover the metronome parts.
- At the piano take the GLASS OF WATER; pick up the SHOEHORN lying on the stage.
- Return to the piano and take the OILER.
- Oil the trapdoor mechanism with the OILER and insert the GEAR so the tree prop lifts.
- Examine the shell casing in the trapdoor, take the HANDKERCHIEF and the L-shaped key behind it.
- Fit the L-shaped key into the METRONOME in the inventory.
- Pick up the METRONOME SLIDING WEIGHT from the stage floor beside the red drape, then set the metronome on the sheet music and fit the weight on it.
Puzzle: assemble the correct image
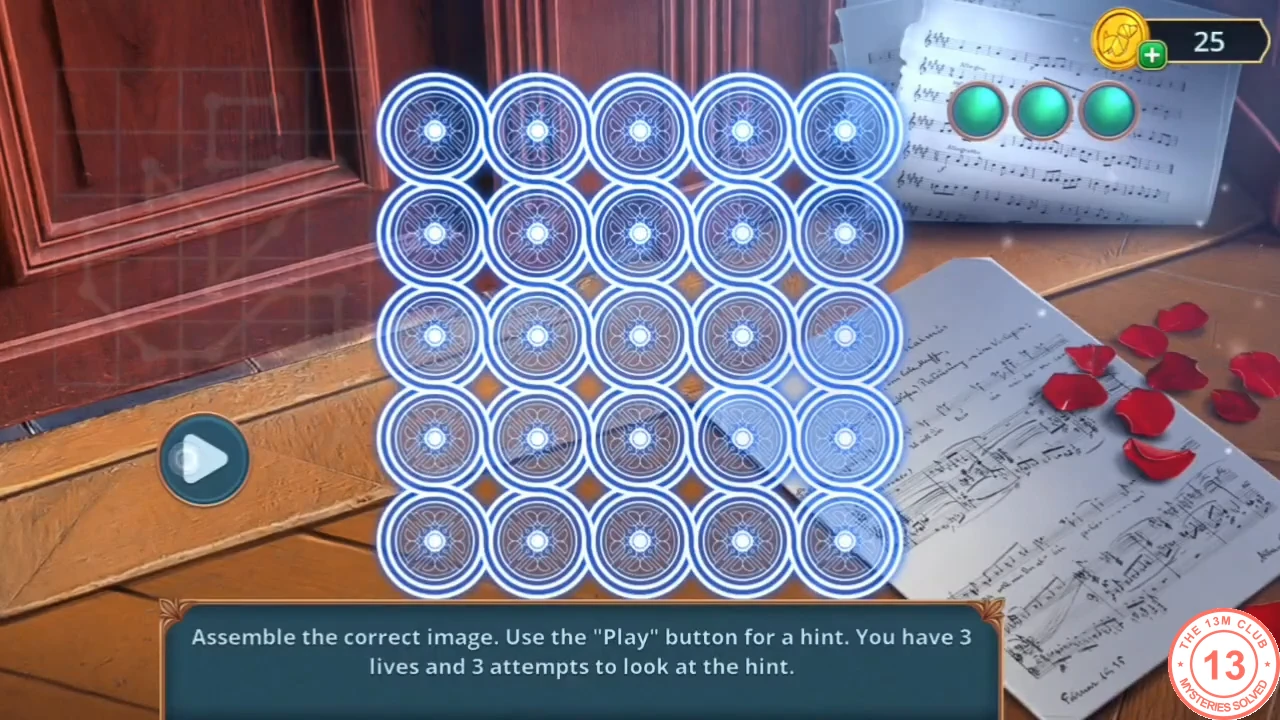
A memory puzzle on a 5x5 grid of nodes. The target shape may differ between games, so copy the one your own hint shows.
- Press Play to briefly see the target line pattern, then draw the same shape by connecting the nodes. Remember where the shape starts and which way each line turns. A wrong line costs one of your three lives, and you can replay the hint up to three times.
Fountain water and the red cabinet
Restore the fountain, then dust the red cabinet panel for fingerprints.
- At the cherub fountain on Theater Street, put the NUT on the hex bolt and the VALVE on the pipe, turn it, then take the rose CHIPS and the SMALL BRUSH.
- On the front of the red backstage cabinet, use the HAIR POWDER and then the SMALL BRUSH on the six-button panel.
- Press the fingerprinted buttons in this order: spiral, sun, star. Take the CORK.
- Fit the CORK into the dresser drawer as a knob and take the SEDATIVES.
- Give Garrett the SEDATIVES and the GLASS OF WATER.
Puzzle: comedy and tragedy masks
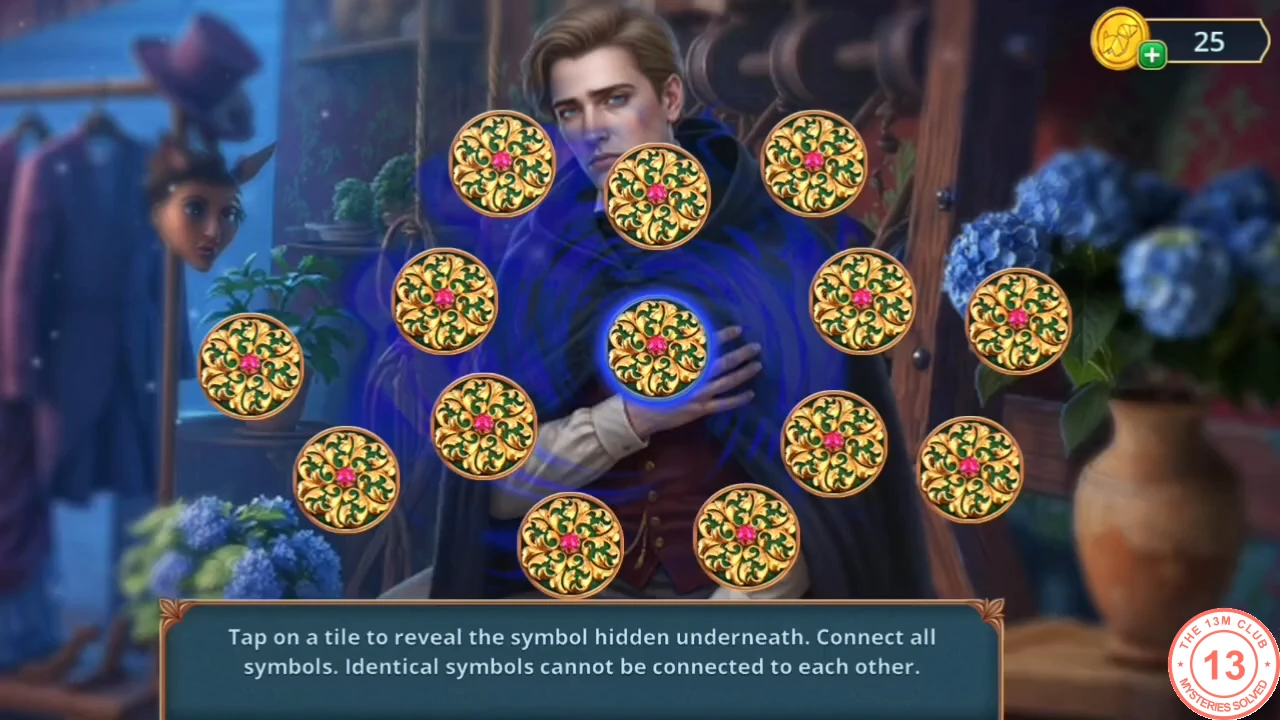
Each tile hides a mask. Reveal them all and link every tile into one chain where two identical masks are never connected.
- Tap each tile to turn it over and see whether it hides a blue comedy mask or a red tragedy mask. Then connect the tiles so the chain alternates between blue and red. If the chain will not close, look for a stretch where two masks of the same colour are joined and route around it. Your arrangement may differ from other games.
- Question Garrett. The coin replies give extra decision stars; the free reply "I need facts..." still completes the chapter. Take the BEST ACTOR AWARD.
Scissors, sketch and the opera figurine
Use the statuette as a weight and follow the clues to the music box.
- Hang the BEST ACTOR AWARD on the hook inside the red cabinet; the hatch drops. Take the award back and the SCISSORS.
- Cut the band on the money in the dresser drawer with the SCISSORS: take the RELIEF SKETCH and the MUSICAL SCORE.
- Place the RELIEF SKETCH on the statue painting on the stage and find all the differences to get the OPERA SINGER FIGURINE.
- Put the OPERA SINGER FIGURINE in the piano music box: take the second CHIPS and the first PHOTOS.
- Place both rose CHIPS on the mannequin necklace.
Puzzle: swap the chips
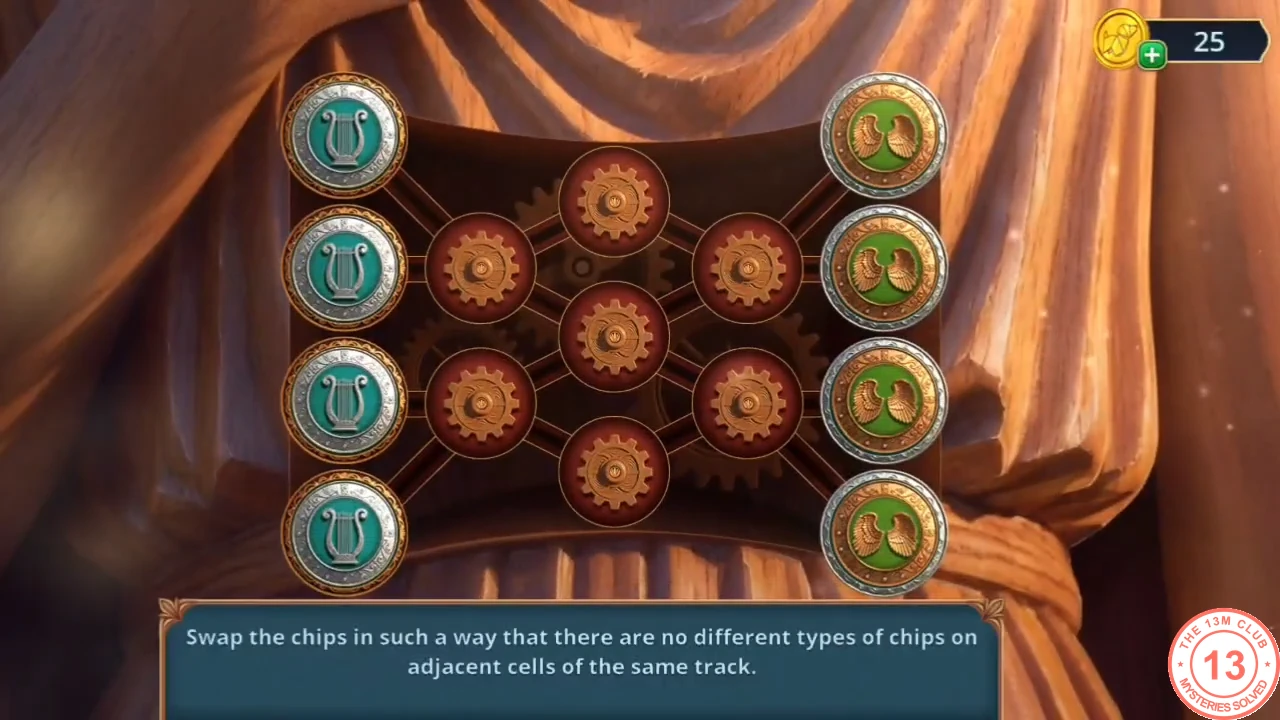
A lengthy swapping puzzle, so this guide gives the target and a method rather than every swap. No two different types of chip may sit next to each other on the same track.
- At the start, four lyre chips sit in the left column, four wing chips in the right column and eight gear chips in the centre network. Swap chips two at a time. Work towards this target: wing chips fill the left column, lyre chips fill the right column and gear chips fill the whole centre network. Move one column at a time and leave each chip in place once it is correct.
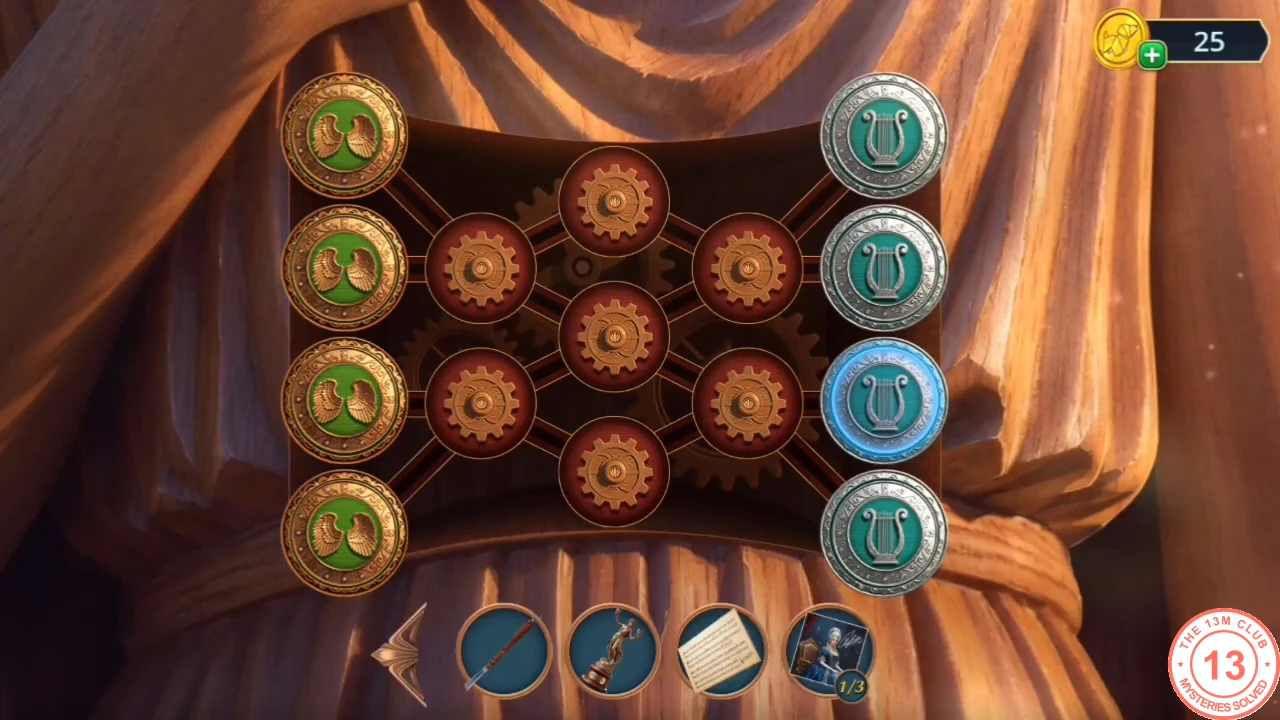
The target arrangement: wings left, lyres right, gears in the centre.
Evelyn's Dressing Room
Show the score to Evelyn, then work through the gramophone and the wasp chest.
- Go to Evelyn's dressing room and show her the MUSICAL SCORE. Paying 90 coins to look at the rehearsal hall is optional; "Now's not the time" is free.
- Open the gramophone drawer lock with the SHOEHORN and take the PERFUME.
- Spray the wasps on the chest with the PERFUME and take the SCREWDRIVER.
- Remove the screws on the stage piano side panel with the SCREWDRIVER.
- Report to Melinda; she gives you the red NOTEBOOK. Open it in the inventory to get the TUNING INSTRUMENT.
- Use the TUNING INSTRUMENT on the piano pins: take the INSTRUCTIONS chess diagram and the first ROSE AMULET.
- Play the list hidden-object scene at the stage statue (ribbons, A.M. monograms, candles) to get the BIRD CLAW.
- Attach the BIRD CLAW to the gramophone bird to receive the ACID; melt the chest chains with the ACID and take the LANTERN.
- Hang and light the LANTERN on the poster kiosk on Theater Street.
Puzzle: chase away the bats
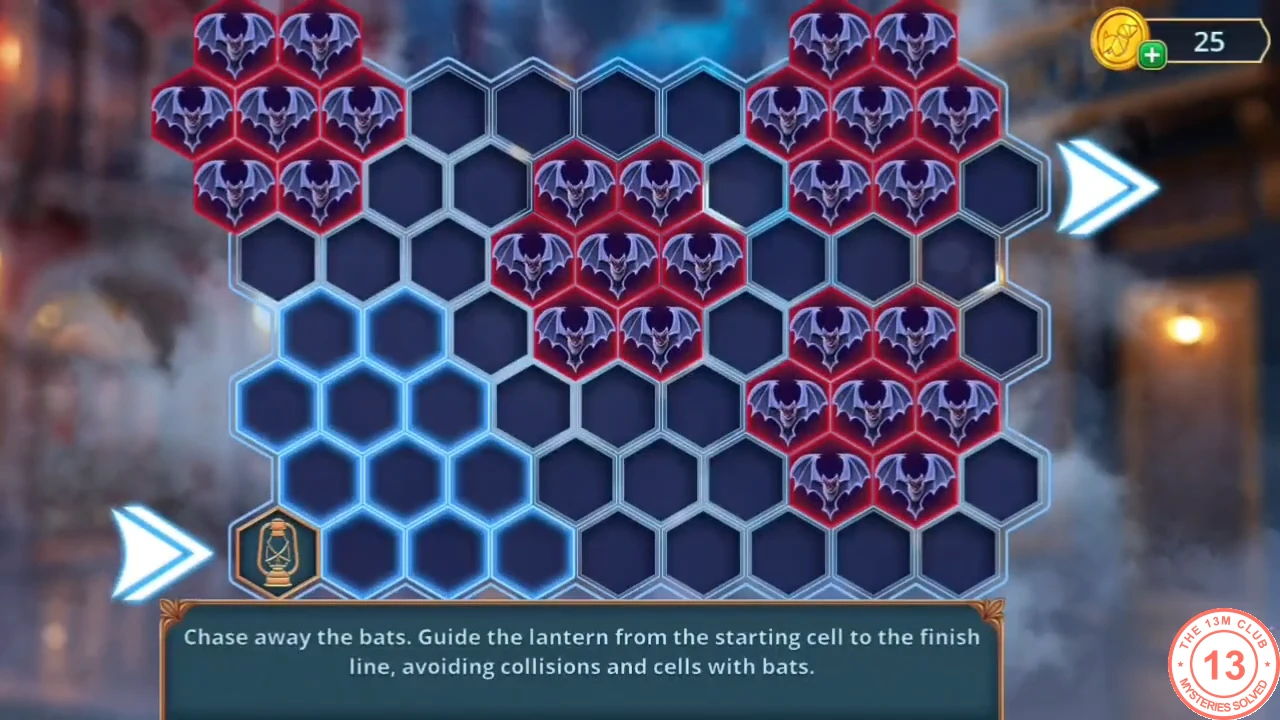
A timing puzzle: guide the lantern from the starting cell to the finish line without colliding with the bats or entering a cell they occupy.
- The bat groups move across the hex board. Move the lantern one hex at a time, wait in a safe cell while a group passes, then step forward into the space it leaves. Once the lantern reaches the finish line, take the WIRE CUTTERS from the kiosk.