Theater storage
Search the storage room and repair the projector.
- Take EMERALD EYES 1/2 from the flower pot.
- The apron pocket is sewn shut: cut it with the CIGAR GUILLOTINE and take the TWEEZERS. The red box below is too dark to search for now.
- Move the broken zipper of the purple bag on the wardrobe with the TWEEZERS: take the NUTCRACKER and the CHAIN.
- Fit the CHAIN onto the projector.
Puzzle: cross the river
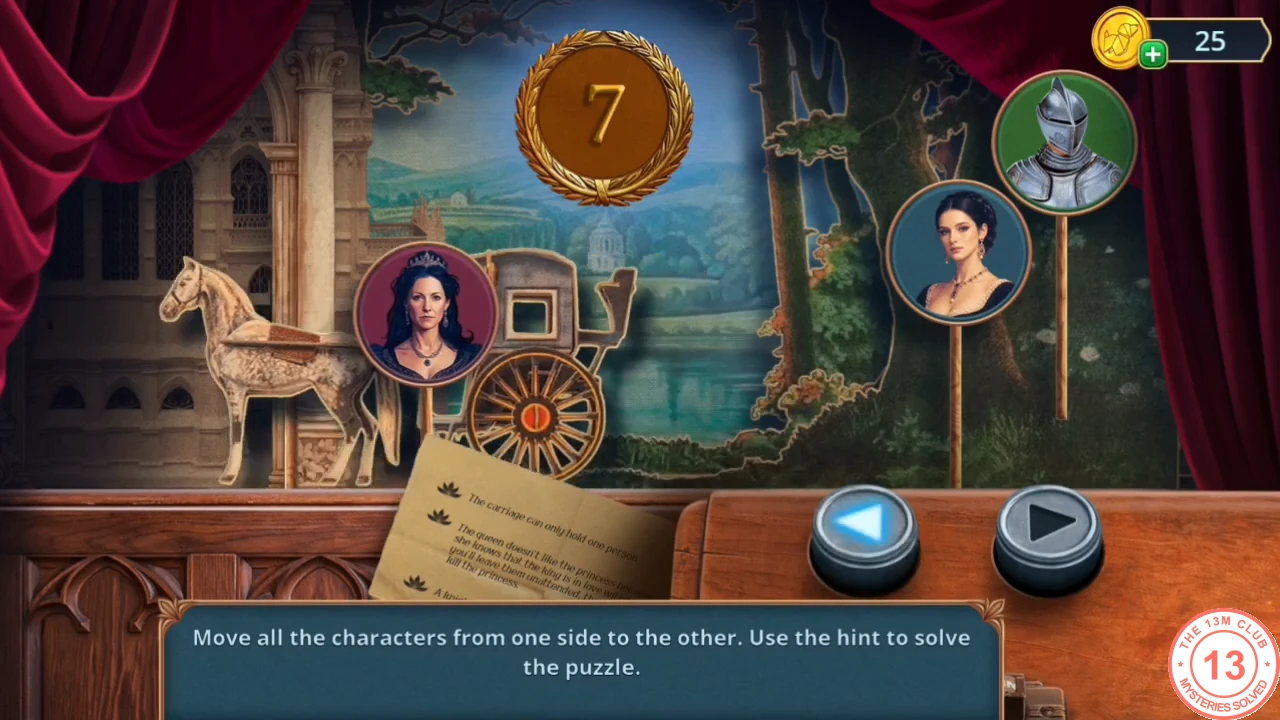
The carriage carries you and one character at a time.
- Rules: the Queen may not be left alone with the Princess, and the Knight may not be left alone with the Queen. All three start on the right. Solution used: take the Queen across; return empty; take the Knight across; bring the Queen back; take the Princess across; return empty; take the Queen across.
- Take the DUSTER and the LANTERN.
The prop room
Light the dark corner, then search the props for the basement door.
- Light the dark corner beside the apron with the LANTERN to open the passage to the prop room.
- Give ASTRID'S PHOTO to the director. Asking to go into the basement costs 60 coins (+1 star); the free reply still lets you look around.
- At the puppet theater, read the staff note and take the GOLDEN TEAPOT, the ROPE and the ACID.
- Dissolve the carving on the BASEMENT door with the ACID. Move the flint in the hat box below and take EMERALD EYES 2/2.
- Give the porcelain cat chest its EMERALD EYES and take the CUPBOARD KEY from the cat.
- Unlock the wardrobe in the storage room with the CUPBOARD KEY and complete each costume (Poseidon, Peacock, Ballerina, Flower Fairy, Pirate, Native American) by pairing its items. Take the SPADE AMULET.
- Insert the SPADE AMULET into the spade slot on the projector and take the SMALL RAKE.
- Use the SMALL RAKE on the flower pot.
Puzzle: trim the thorny weeds
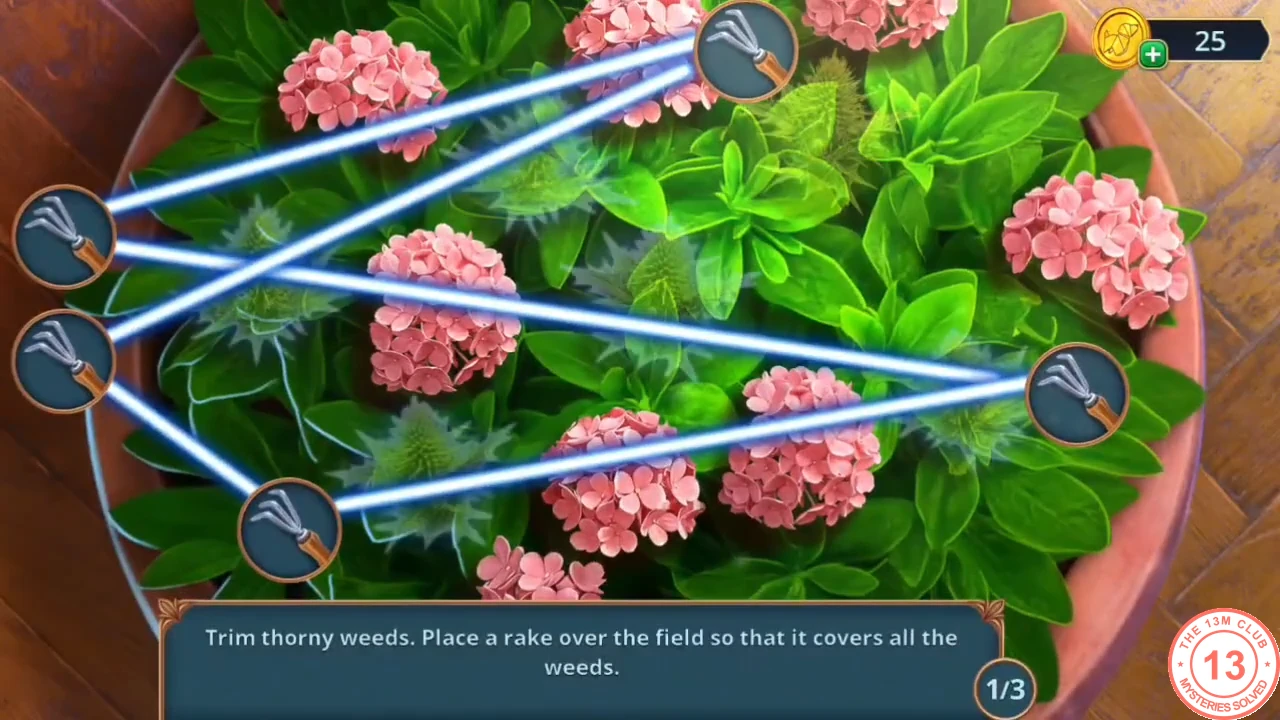
Place the rake over the field so that it covers all the thorny weeds. There are three rounds.
- In each round, drag the rake's nodes so the lines between them pass over every blue thistle. Start by placing the nodes near the weeds that are farthest apart, then adjust the rest until no weed is left uncovered. Take the VINTAGE CAT DOLL.
- Scare the rat at the rocking horse with the VINTAGE CAT DOLL and take the HAIRPIN.
- Use the HAIRPIN on the round lock of the BASEMENT door.
Puzzle: open the hatch lock
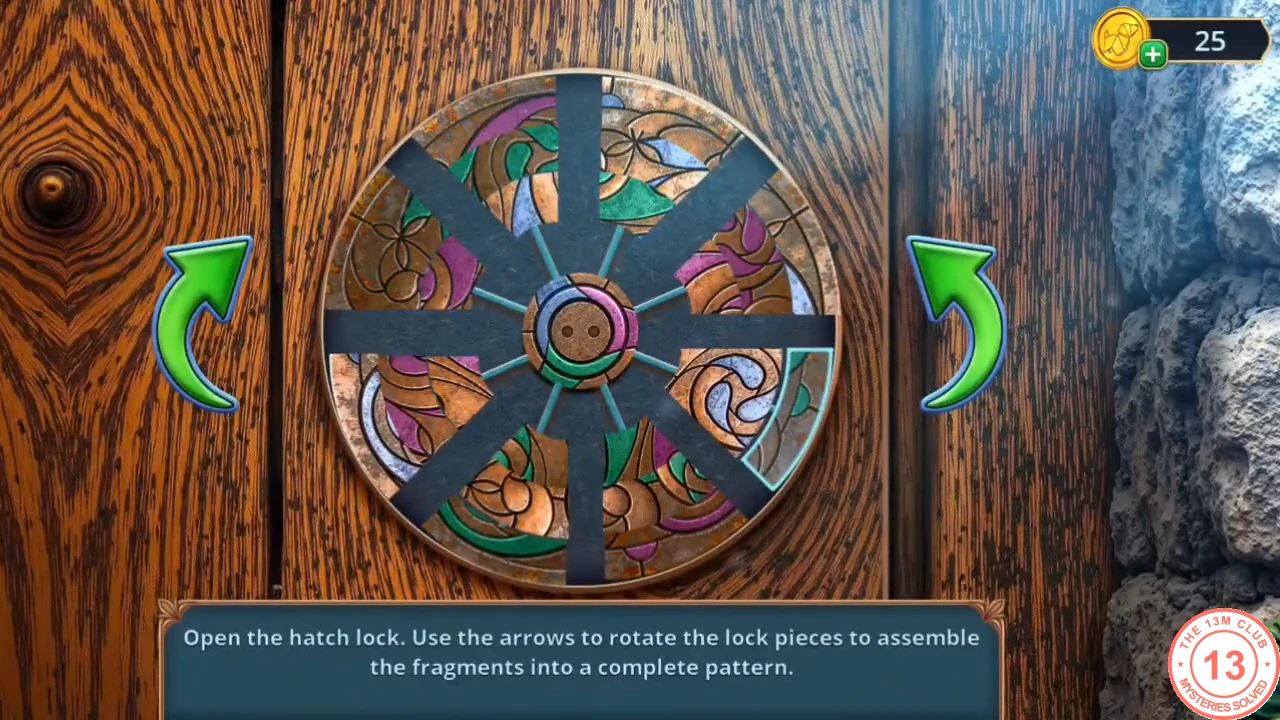
A long rotation puzzle, so this guide gives the target and a method rather than every move. Grow the pattern outwards from the centre until the fragments form one complete picture.
- The two curved arrow buttons rotate only the assembly in the centre of the lock; the fragments lying in the eight sectors between the dark spokes stay where they are. Tapping a fragment in a sector slides it inwards until it locks onto the centre assembly. The target is a copper disc with a three-armed swirl in blue, green and purple (see the completed lock below). The hub already carries a short blue, green and purple ring: pick a fragment that continues one of those colours, turn the centre until the matching end faces that fragment's sector, then tap the fragment. Keep extending the three arms outwards this way until the disc is complete. The door opens; a cloaked figure flees through the basement.
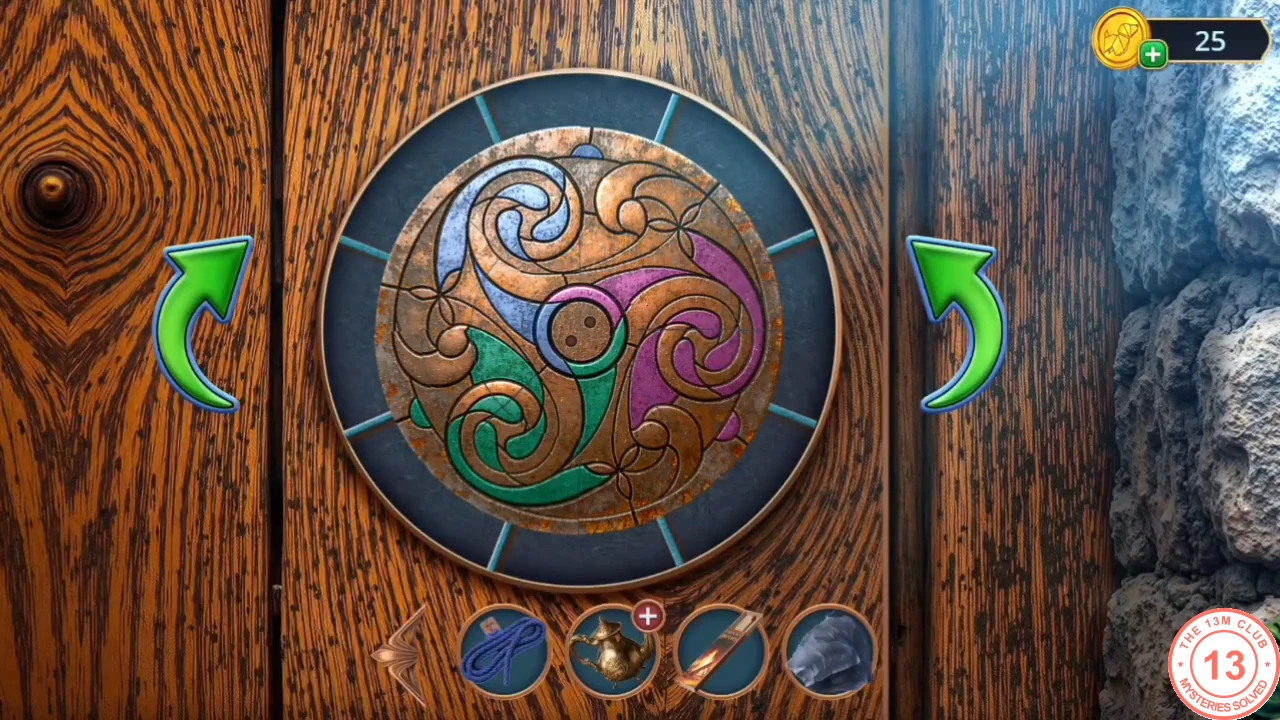
The completed hatch pattern.
The basement
Start on the figurine stand and the cobwebs.
- Take the QUEEN FIGURINE lying by the carpet roll and stand it in the figurine holder; two figurines are still missing.
- Clear the cobweb corner with the DUSTER and find the outlined fragments in the hidden-object scene to get the JACK.
- Straighten the spring of the rocking horse in the prop room with the JACK: take the JOINTS and the RED PAINT.
- At the easel in the basement, put the RED PAINT on the empty left shelf below the blue jar, then lay the MAKEUP BRUSH on the lower shelf by the green jar. The colouring puzzle starts.
Puzzle: colour the picture
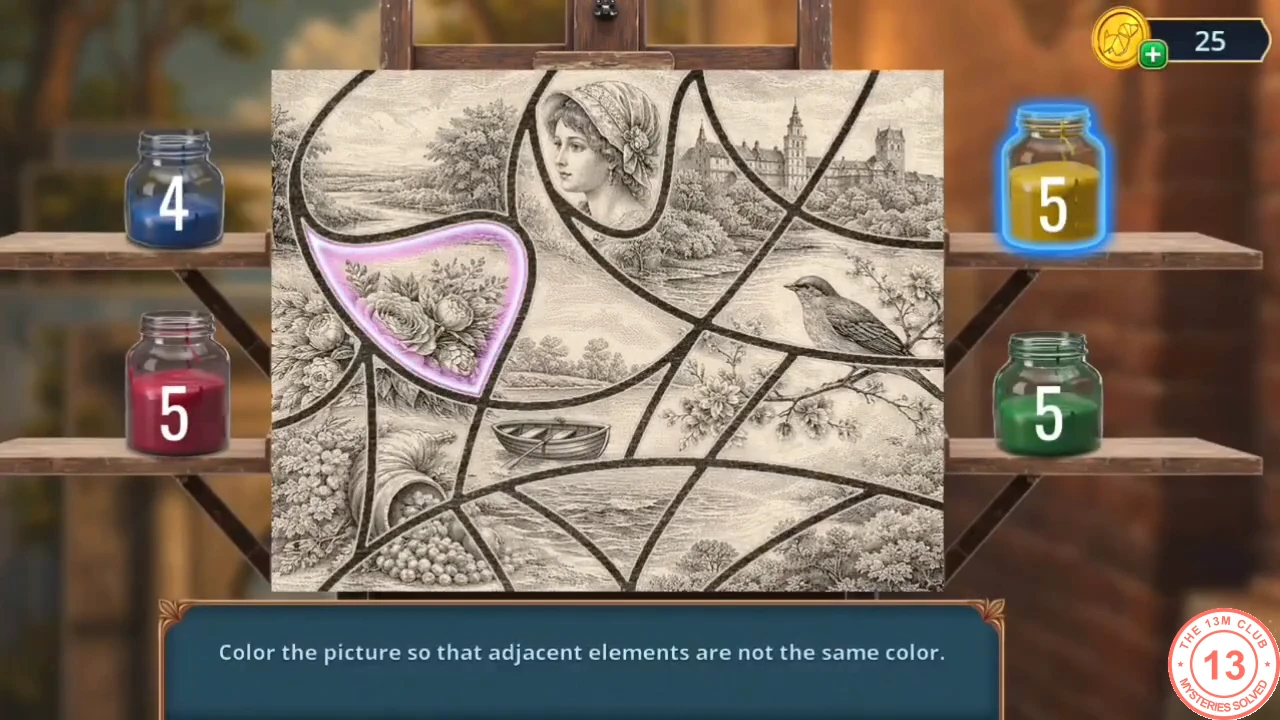
Colour the picture so that no two neighbouring areas share a colour. The picture is the same in every game.
- There are four jars (blue, red, yellow and green), and each holds only a limited number of uses (4, 5, 5 and 5 at the start). Select a jar, then tap an area to fill it. Begin with the areas that touch the most neighbours, and save the colour with only four uses for areas that touch few others.
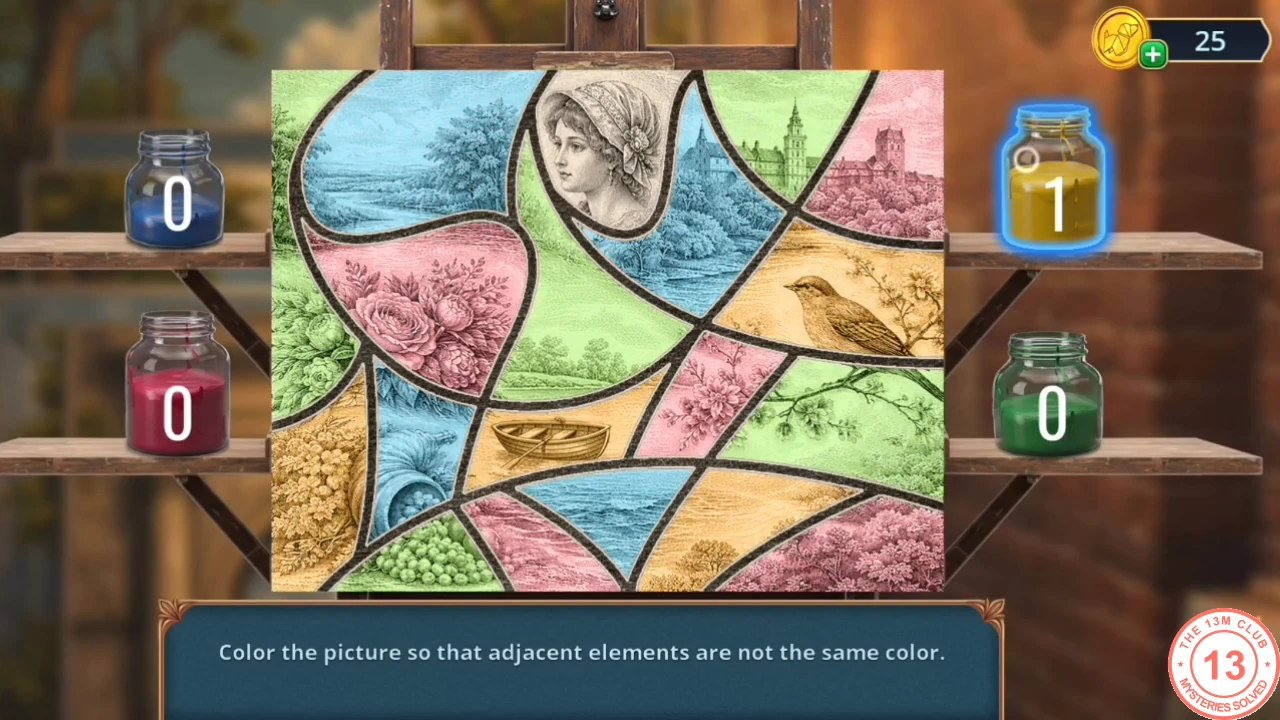
A completed colouring from our game. - Take the KING FIGURINE from the niche behind the painting and stand it in the figurine holder: take the TINTED GLASS and the BULLET.
- Put the BULLET on the padlock of the porcelain cat chest and squeeze it with the NUTCRACKER.
Puzzle: cover every cell
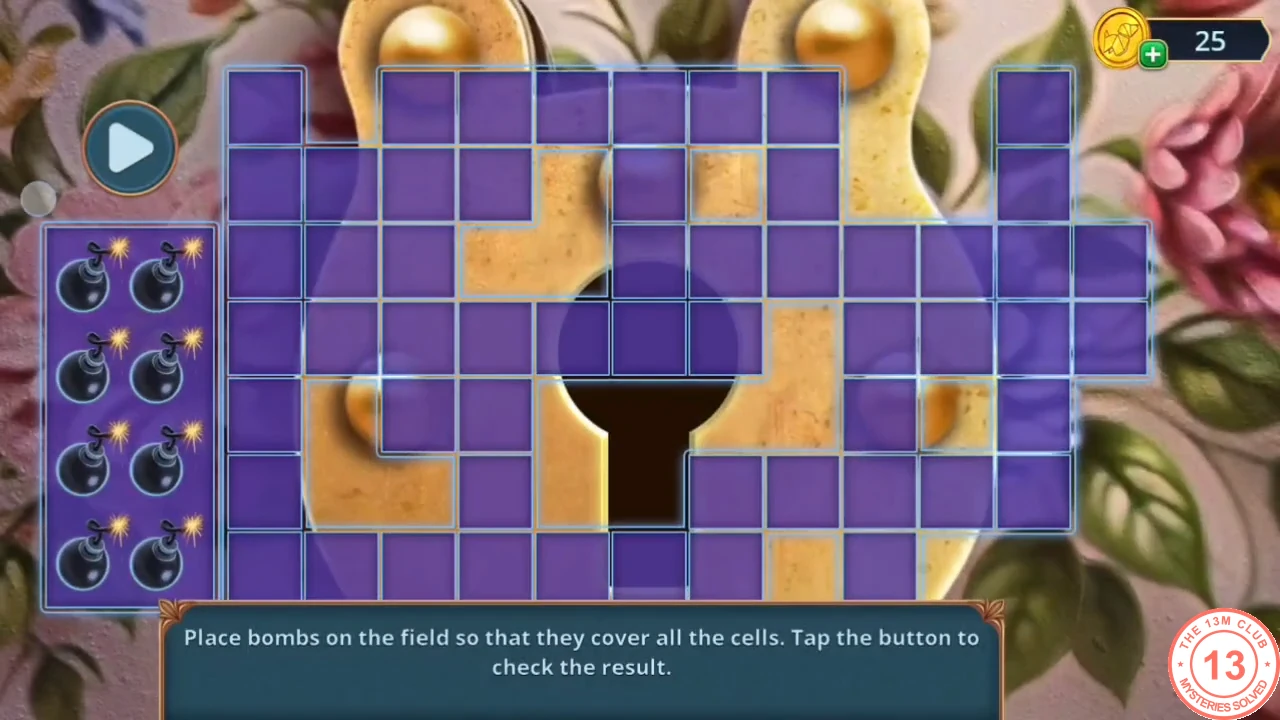
Place the bombs on the field so that their blasts cover every cell, then check the result.
- You have a limited number of bombs, and each one covers its own cell plus the area its blast reaches. Place them so every cell is covered while the blast areas overlap as little as possible, then tap the button to check. If cells remain uncovered, move a bomb and check again. The padlock blows open; take the SANDPAPER and the TOY ACTRESS.
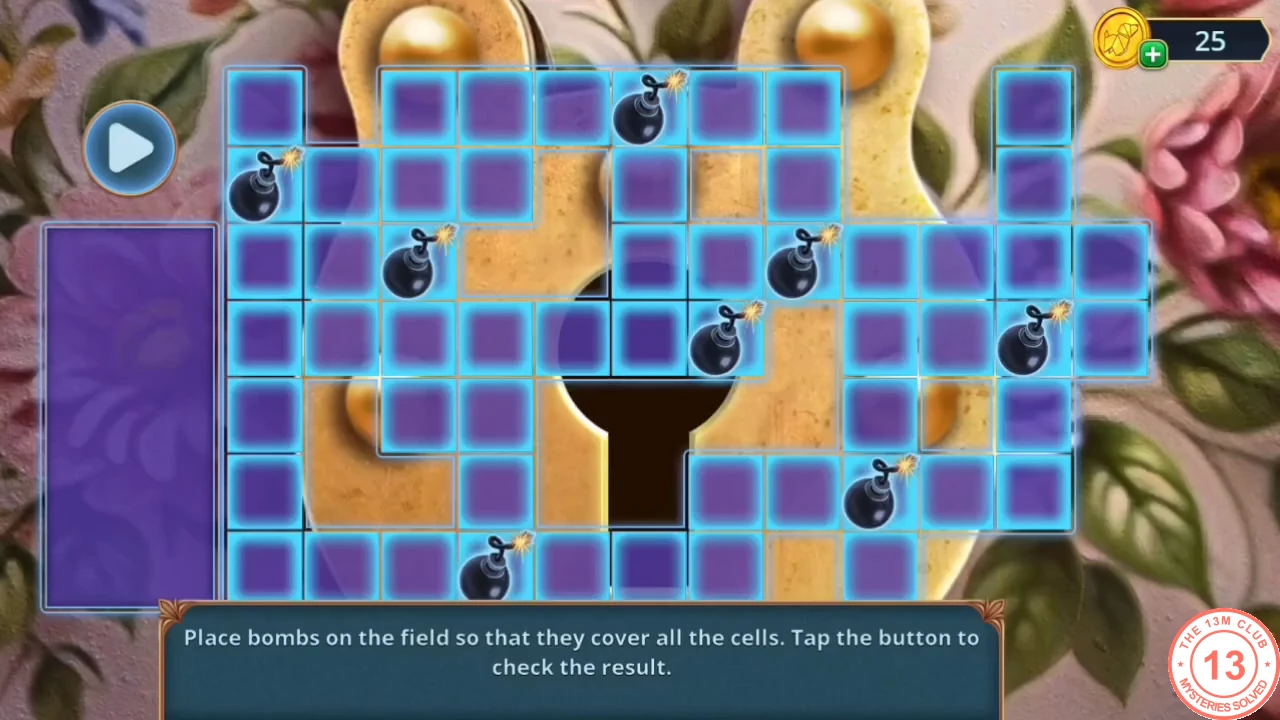
Example solution from our game: eight bombs cover every cell.
The suit of armor
Build a smoker and free the armor.
- Stand the TOY ACTRESS beside the boy puppet in the puppet theater and take the MEDAL.
- Fit the MEDAL on the basement armor's breastplate and take the STEEL.
- Find the blue silhouettes in the basement corkboard hidden-object scene. Read A.V.'s note and take the AWL.
- Add the STEEL and the JOINTS to the GOLDEN TEAPOT in the inventory.
- Pierce the heavy sack on the easel with the AWL and take the DRY GRASS.
- Add the DRY GRASS to the teapot to make the HOMEMADE SMOKER.
- Smoke the beetles off the paper under the storage flower pot with the HOMEMADE SMOKER and take the KNIGHT PHOTO.
- Search the storage wardrobe hidden-object scene again to get the DAGGER.
- Slit the carpet roll in the basement with the DAGGER and take the pink WARMER and the KNIGHT PART. Keep the WARMER: it is needed in Chapter 3.
- Fit the KNIGHT PART on the armor's shoulder.
Puzzle: pose the knight
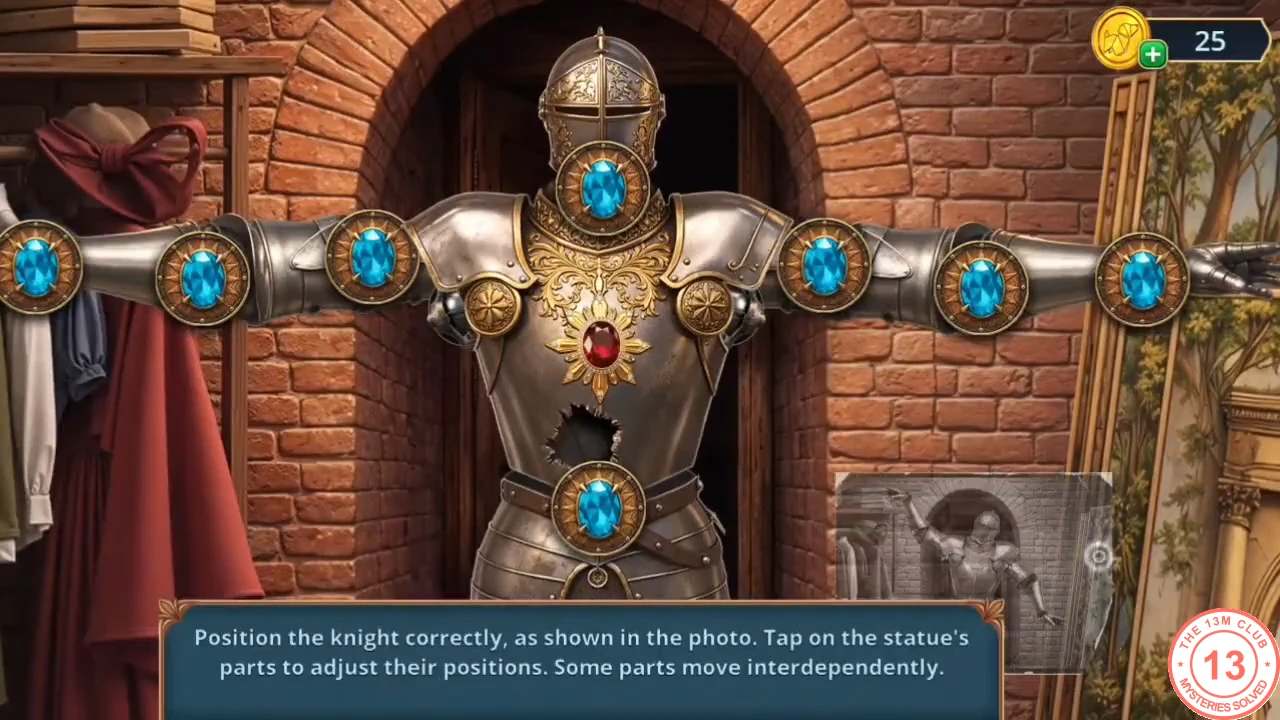
Position the knight exactly as shown in the KNIGHT PHOTO.
- Tap the blue jewel joints to turn the knight's parts. Each arm has three joints (shoulder, elbow and wrist), and there is one more at the neck and one at the waist; these two tilt the head and the upper body. Parts move together, so set the shoulders first, then the elbows and wrists, and fine-tune the neck and waist last. Match the KNIGHT PHOTO in the bottom-right corner: the arm on the left of the screen raised high above the head, the arm on the right lowered and bent at the elbow, and the head tilted to the right.
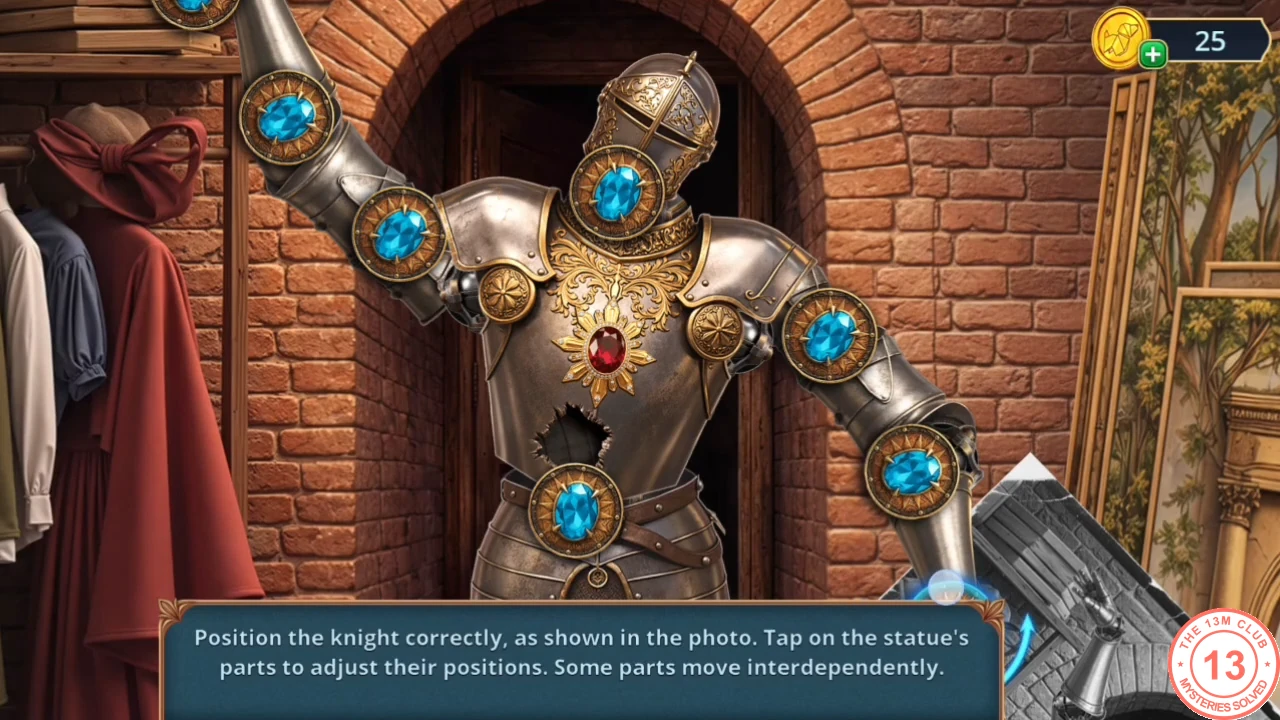
The finished knight pose, matching the photo. - The decision summary for Chapter 2 appears. With only free replies you have 0 of 13 stars and see the 0-star outcome: the cloaked figure in the basement corridor with a gun.