CHAPTER 3
The Director's Office
Melinda joins the investigation. The director says the key to the service corridor is somewhere on his desk.
- Talk to Melinda at the police office, then to the director. The coin reply only adds a decision star; the free reply "Tell me exactly where to look for the key!" is enough.
- Take GEMSTONES 1/2 from the red bag on the window sill. The mirror is too heavy to move for now.
- Lay the TINTED GLASS on the desk beside the jewel box, place the circle template on it and take the GLASS CUTTER from the desk.
- Cut the circle out of the stained-glass window with the GLASS CUTTER and take the FRAME FRAGMENT.
- Add the FRAME FRAGMENT to the wall panel beside the OFF/ON switch.
CHAPTER 3
Puzzle: drop the frame pieces
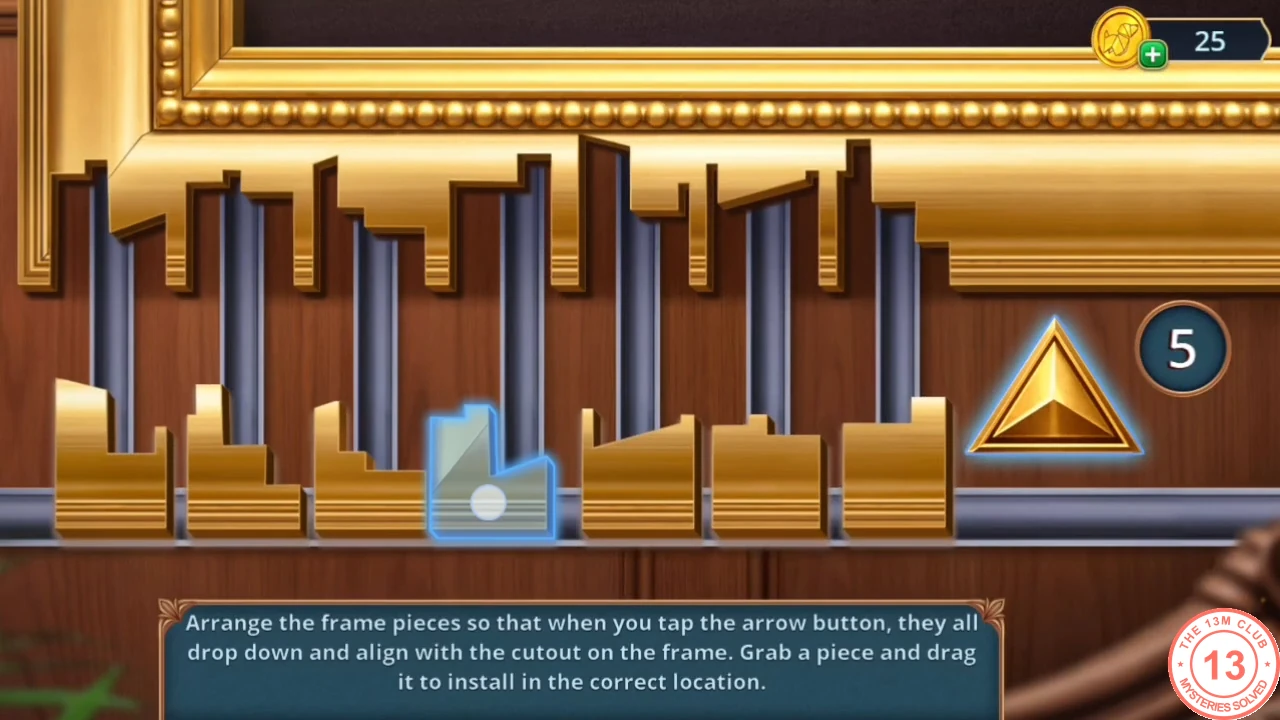
Arrange the pieces so they all fall into the cut-out.
- Drag the frame pieces into positions where, after tapping the arrow button, each one drops into its matching cut-out. You have a limited number of tries.
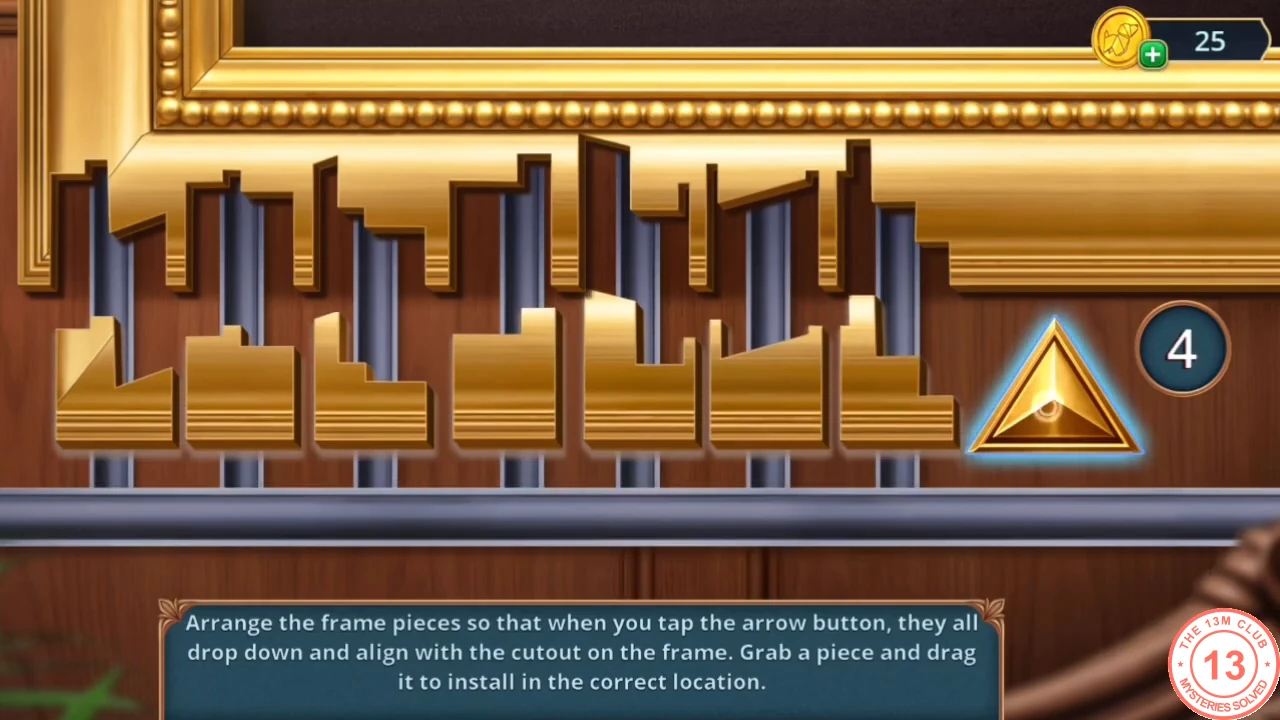
Pieces in the correct order rising into the frame (our game). - Read the safety-committee note about the closed tunnel and take the SAFETY HOOK and the MANNEQUIN HINGE.
- Fit the MANNEQUIN HINGE beside the heavy mirror; the arm swings the mirror aside. Take the LID MECHANISM PART.
- Put the LID MECHANISM PART on the jewel box on the desk.
CHAPTER 3
Puzzle: open the jewel box
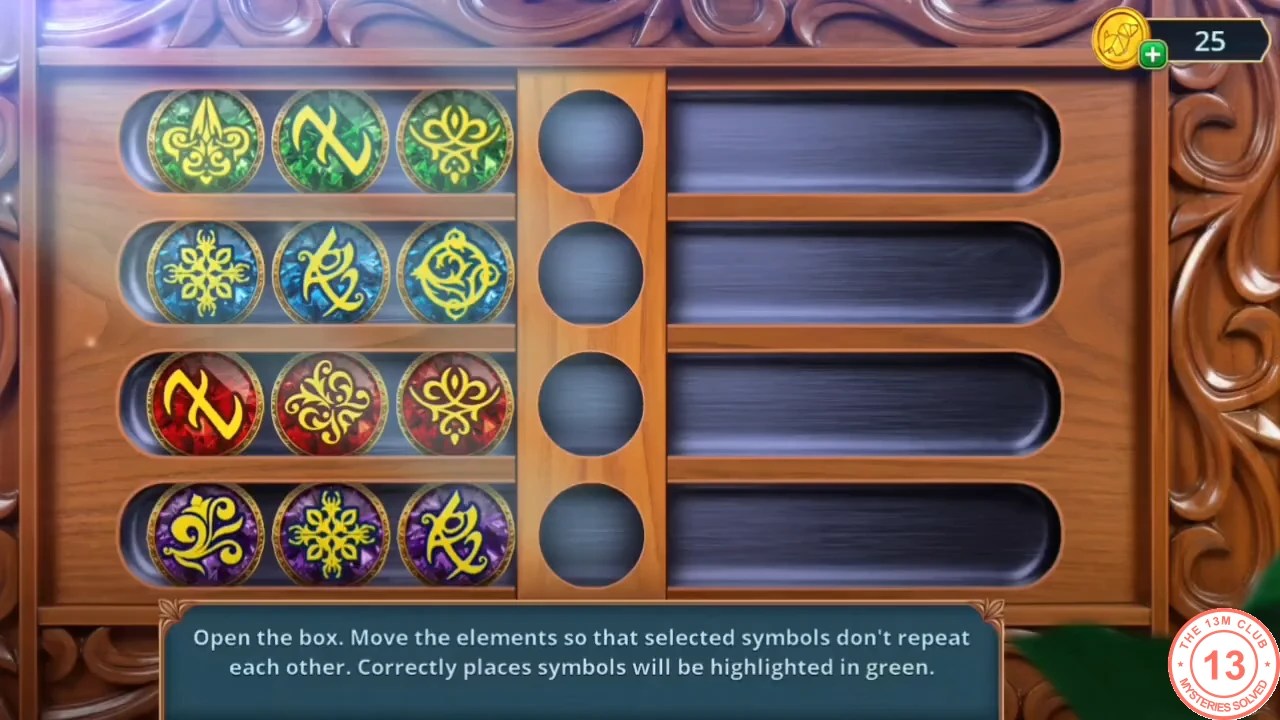
Slide the rows so the highlighted symbols never repeat.
- Slide the four rows so the symbols in the marked centre column are all different; correct symbols turn green. Take the SERPENT FINIAL.
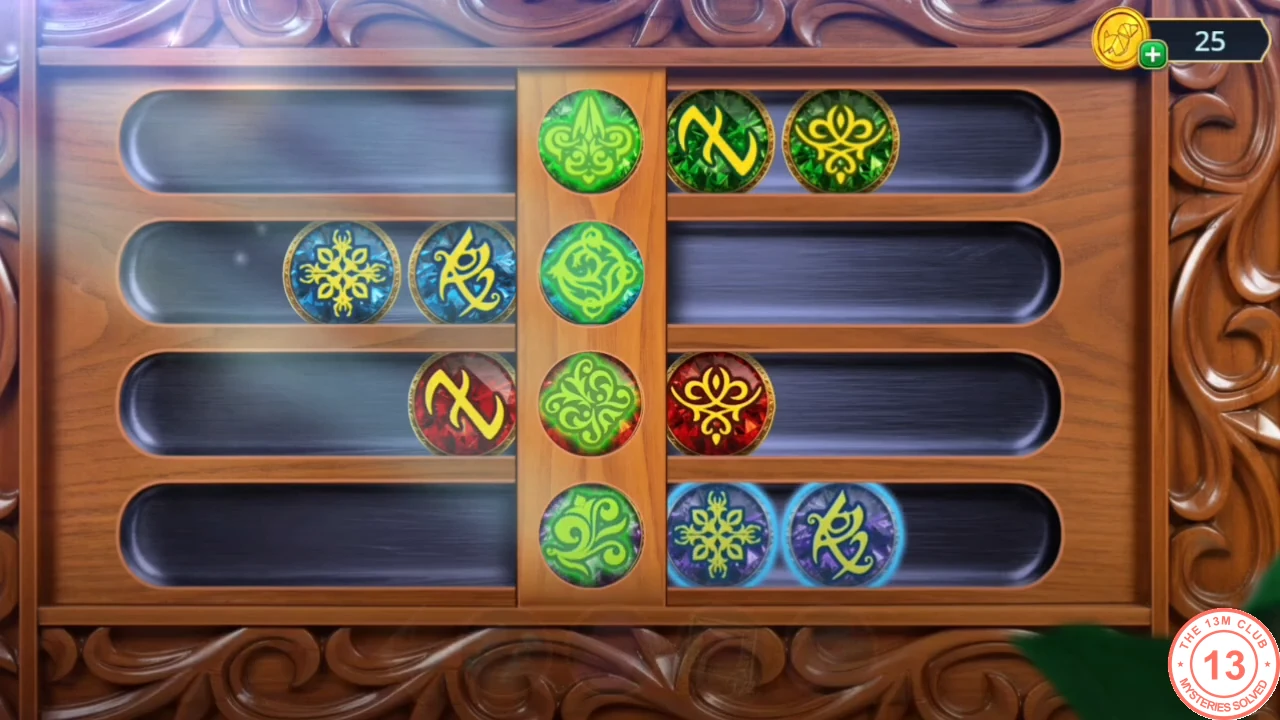
Solved: four different symbols in the centre column, all green.
CHAPTER 3
The Technical Corridor costume room
Hang up the costume pile and open the cabinet.
- Go through to the costume room. Take the SWORD HANDLE from the costume heap.
- Fit the SERPENT FINIAL on the blue wall panel by the heap and take the NECKLACE.
- Loop the NECKLACE over the two gears of the cabinet lock as a chain and pull the lever.
- Find every listed item in the cabinet hidden-object scene to get the BUTTON.
- Fit the BUTTON as the missing planet of the orrery beside the helmet: take the gemstone and the SWORD GUARD.
- Set the gemstones in the bear's collar.
CHAPTER 3
Puzzle: level the stones
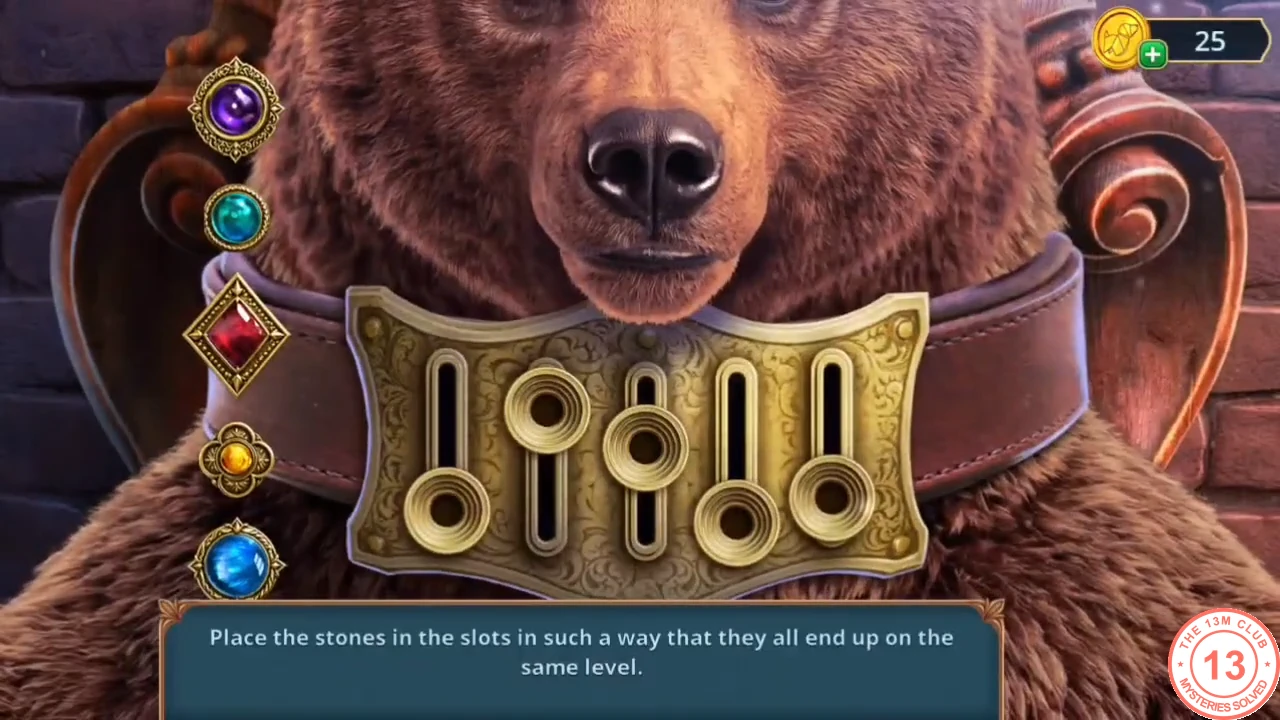
Every stone must end at the same height.
- Place the five stones in the five slots so that, given the different slot depths, all of them end up level. Take the BELL LID from the bear's paw.
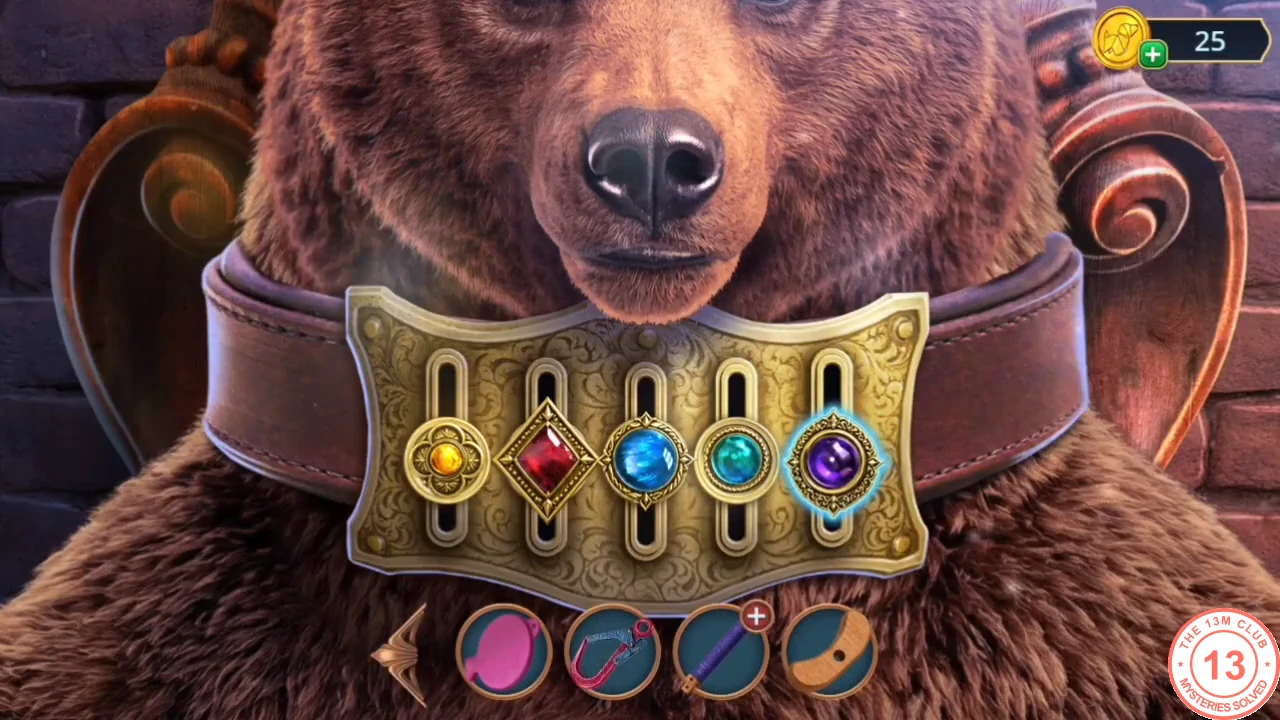
Solved: all five stones level (orange, red, blue, teal, purple from the left). - Put the BELL LID on the jewel box in the director's office: read the note to Mr. Hale and take the ACID.
- Melt the padlock of the red chest by the mirror with the ACID and take the CLOTHES HANGER.
- Use the CLOTHES HANGER on the costume heap.
CHAPTER 3
Puzzle: complete the costumes
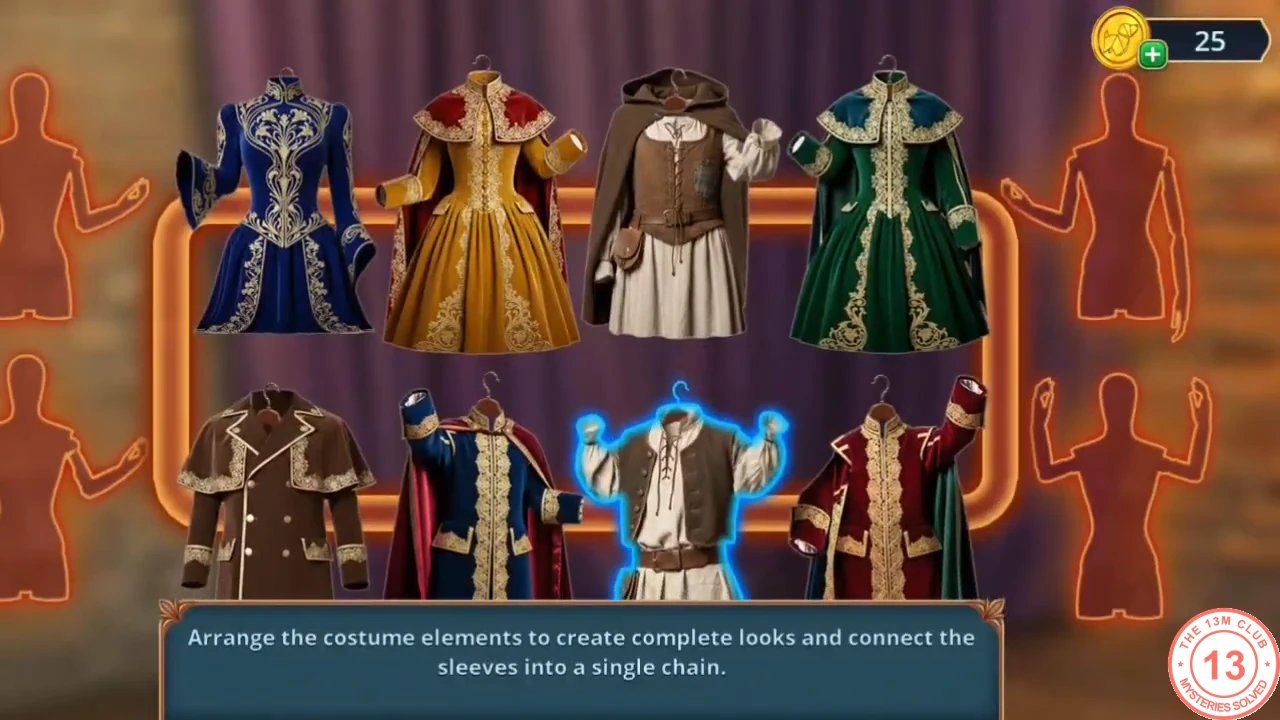
Swap the eight garments on the rail until their sleeves join into one chain in each row.
- The rail holds eight whole garments in two rows of four, with a silhouette at each end of both rows. Tap one garment and then another to swap them; swaps work within a row and between the rows. Each garment holds its sleeves at a fixed angle, so arrange each row so that every sleeve meets the sleeve of the garment beside it, linking the hand of the left silhouette to the hand of the right one. A row's silhouettes turn green when its chain is complete. The arrangement that worked in our game: top row gold dress, green coat, red coat, blue coat; bottom row blue embroidered coat, brown coat, hooded brown jerkin, white shirt with waistcoat. The doorway to the basement corridor opens.
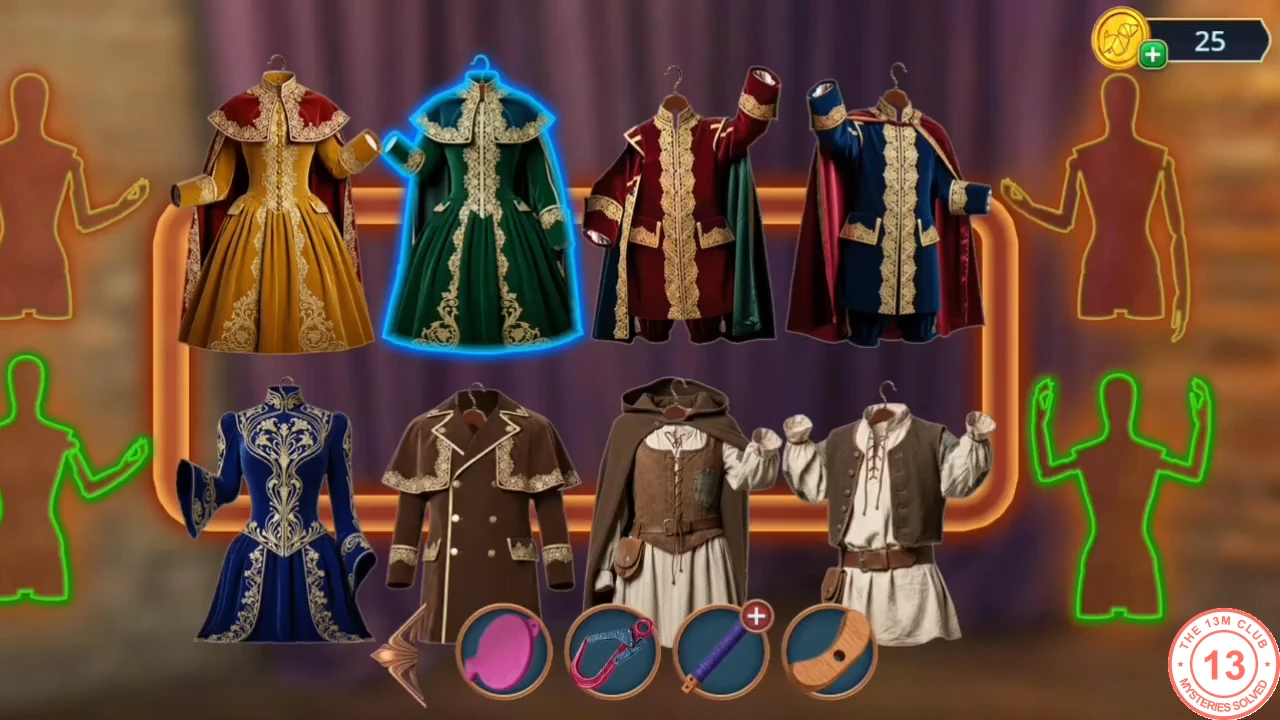
The arrangement that solved the puzzle in our game; the top-row silhouettes turn green a moment later.
CHAPTER 3
Inside the Basement
Recover Astrid's letter and the Charon coins.
- Lift the blue bag beside the glass case with the SAFETY HOOK. Read Astrid's letter to Clara and take CHARON'S COIN 1/2 and the INK.
- Pour the INK over the symbol panel on the boarded armor.
CHAPTER 3
Puzzle: rune dial lock
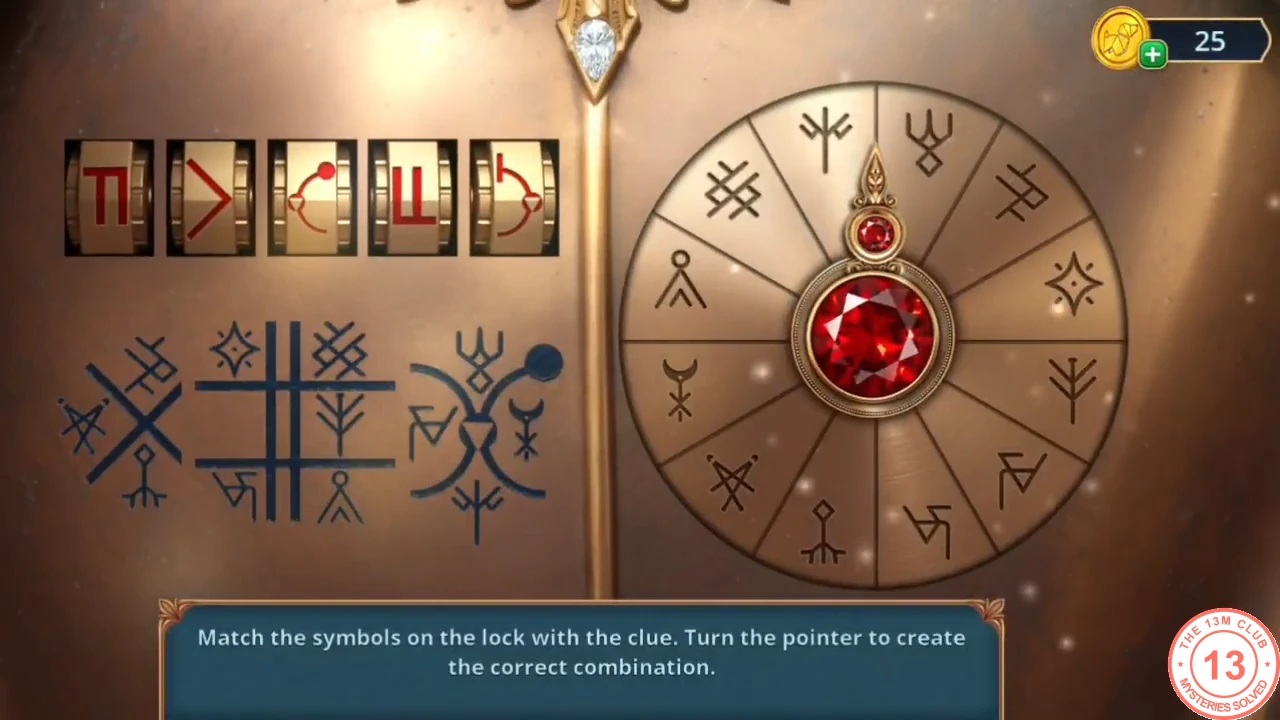
Read the inked clue and turn the pointer to the five matching runes.
- The five drums above the clue each show a red fragment of the clue's line drawings (the X on the left, the grid in the middle and the pair of arcs on the right). For each drum, find the small rune drawn beside that part of the clue, then turn the pointer to the same rune on the dial; the drum lights green when it is right. The order that opened the lock in our game: 1 the hooked rune shaped like a 5 (at the bottom of the dial, just right of the lowest point); 2 the A crossed by an X (lower left); 3 the crescent above a cross (left, just below the middle); 4 the lattice of crossed lines (upper left); 5 the flag-like rune (lower right). Take the BALL and CHARON'S COIN 2/2.
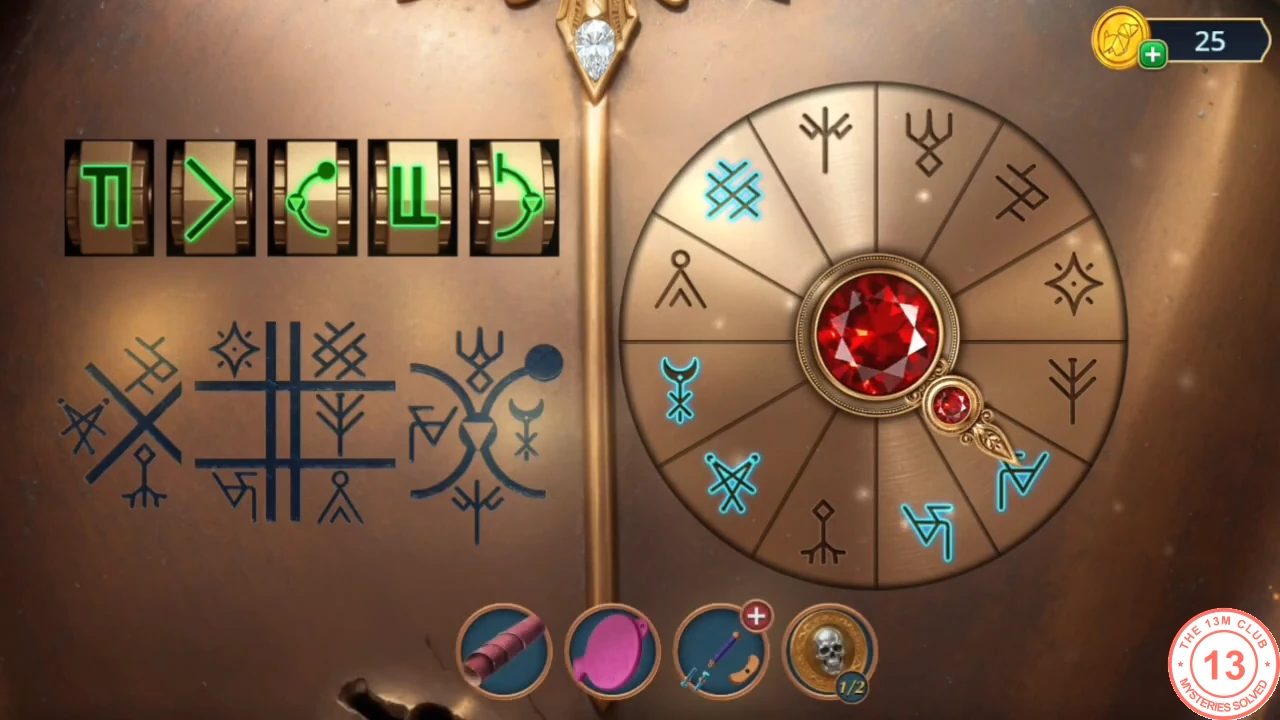
Solved: all five drums lit green. - Take the WEDGE (the curved wooden piece barring the blue wardrobe beside the skeleton), then put both CHARON'S COINS in the skeleton's hand to get the PLANE.
- At the workbench vise, fill the three tool slots with the WEDGE, the PLANE and the SANDPAPER.
CHAPTER 3
Puzzle: shape the wood
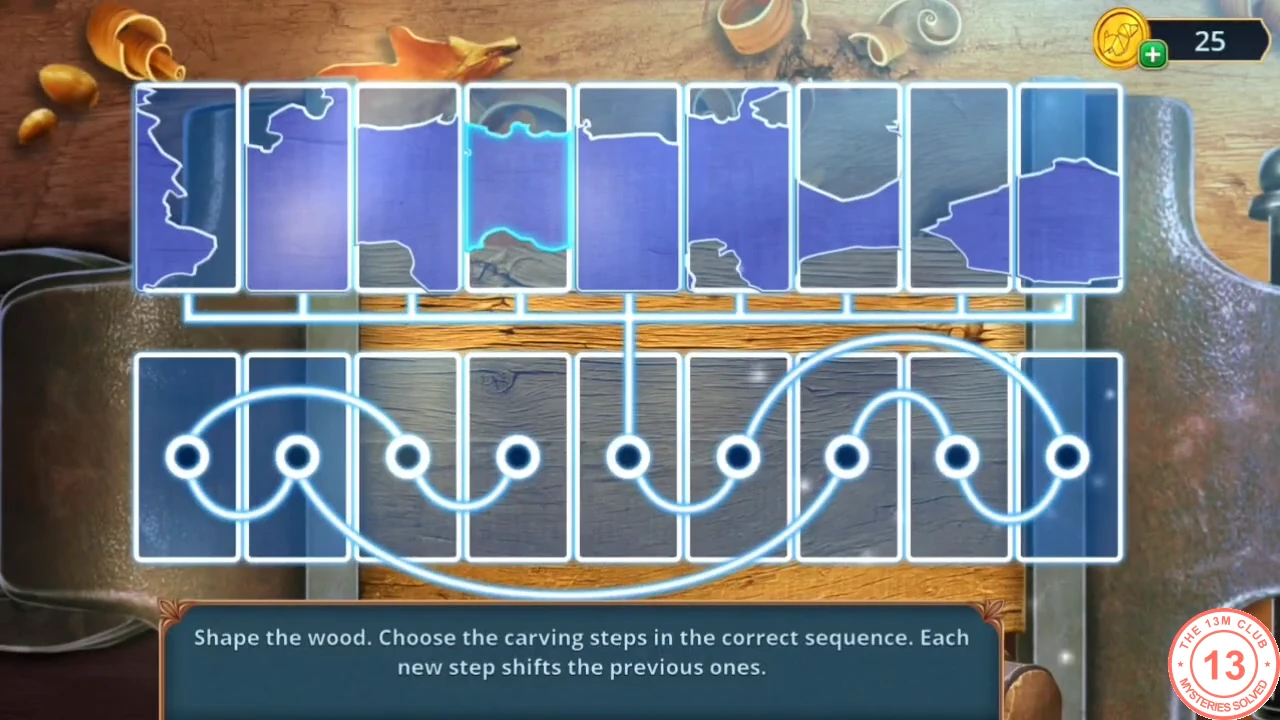
Choose the carving steps in the correct sequence.
- There are nine carving cards in the top row and nine wood panels below, joined by channels. Tapping a card queues it and shows its number; after the ninth tap the cards drop through the channels in queue order, and each new step shifts the ones before it. Counting the top cards from the left, this order worked in our game: card 4, card 7, card 8, card 9, card 5, card 2, card 1, card 6, card 3. The wood is then shaped. Take the WOODEN PLANET.
- Fit the WOODEN PLANET in the costume-room orrery and take the HOT IRON from its drawer.
- Melt the sealing wax of the parcel on the vise with the HOT IRON and take the CANDLE.
- Search the costume room hidden-object scene again to get the WINGED RING.
- Open the blue wardrobe beside the skeleton with the WINGED RING and take the sword blade. Assemble the SWORD HANDLE with the blade, the SWORD GUARD and the pin to make the WOODEN SWORD.
- Give the WOODEN SWORD to the boarded armor; the passage to the Understage Passage opens.