CHAPTER 4
The Orchestra Room
Mr. Hale shows you the props and instruments.
- Answer Mr. Hale. "I'll take a look here first" is free; the 90-coin workshop reply only adds decision stars.
- Pull the blue cloth off the desk cabinet: a chained chest is underneath ("Art is an explosion!" — it needs a charge later). Take the DRUMSTICK.
- Strike the drum with the DRUMSTICK and take the BLINDS HANDLE.
- Fit the BLINDS HANDLE on the window blinds, open them and take the BUTTON.
- Put the BUTTON in the round slot of the blue cello cabinet. Read Astrid's letters: Clara is behind the accidents. Take the HEARING TUBE.
- Use the HEARING TUBE on the bell-shaped safe in the Technical Corridor and tap START.
CHAPTER 4
Puzzle: the sound safe
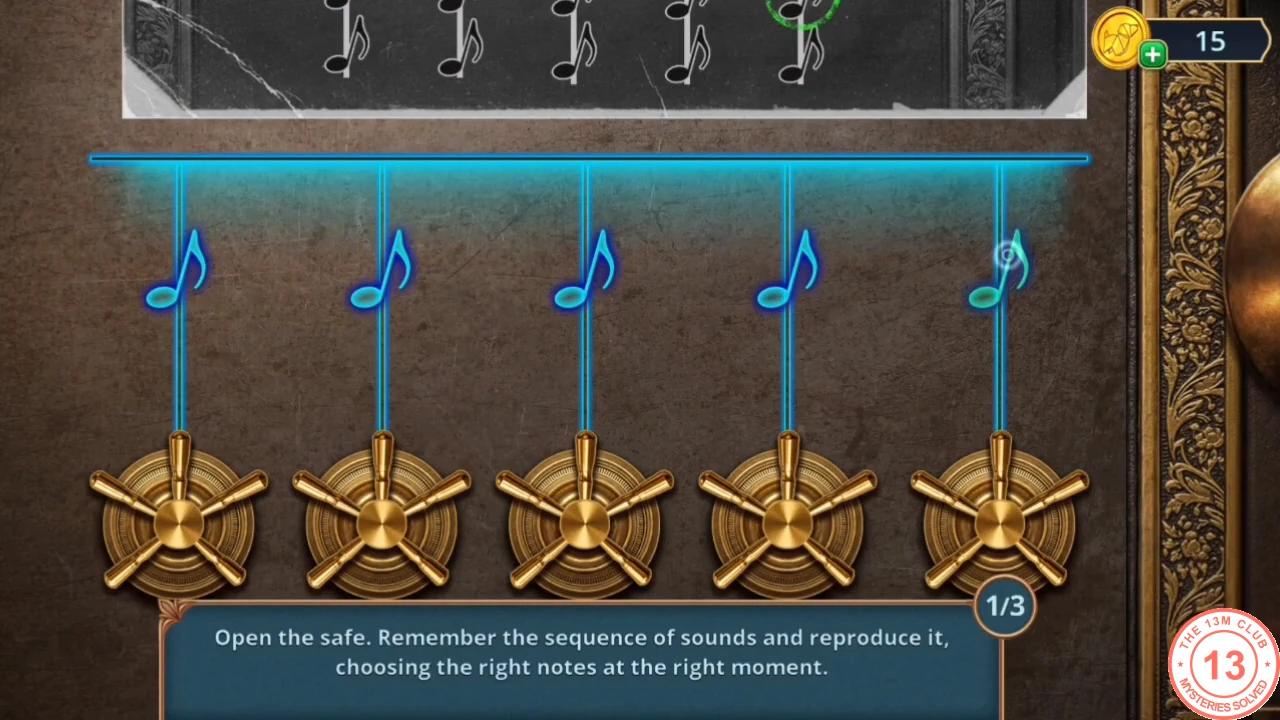
Repeat three random sound sequences.
- The sequences are random, so there is nothing to copy from another game. Listen and memorise which pegs light up, then tap the matching notes as they pass the line. Complete all three rounds. Take the BLANK SHEET and the EARRING.
- Slip the EARRING through the round window of the cello-case door to lift the chain latch, then enter Clara's Dressing Room.
CHAPTER 4
Clara's Dressing Room
Clara admits everything, throws something and runs. Search her room.
- Answer Clara. "Just watch" is free; the 30- and 60-coin replies only add decision stars.
- Read the newspapers on the table and take the FIGURINES.
- Rub the BLANK SHEET on the lion plaque to get the PATTERN IMPRINT.
- Look at the broken telephone (sand on the desk) and the angel figurines with the pin above the fireplace. Take the LION CRYPTEX from the top of the wig dresser.
- Open the LION CRYPTEX and apply the PATTERN IMPRINT.
CHAPTER 4
Puzzle: the lion cryptex
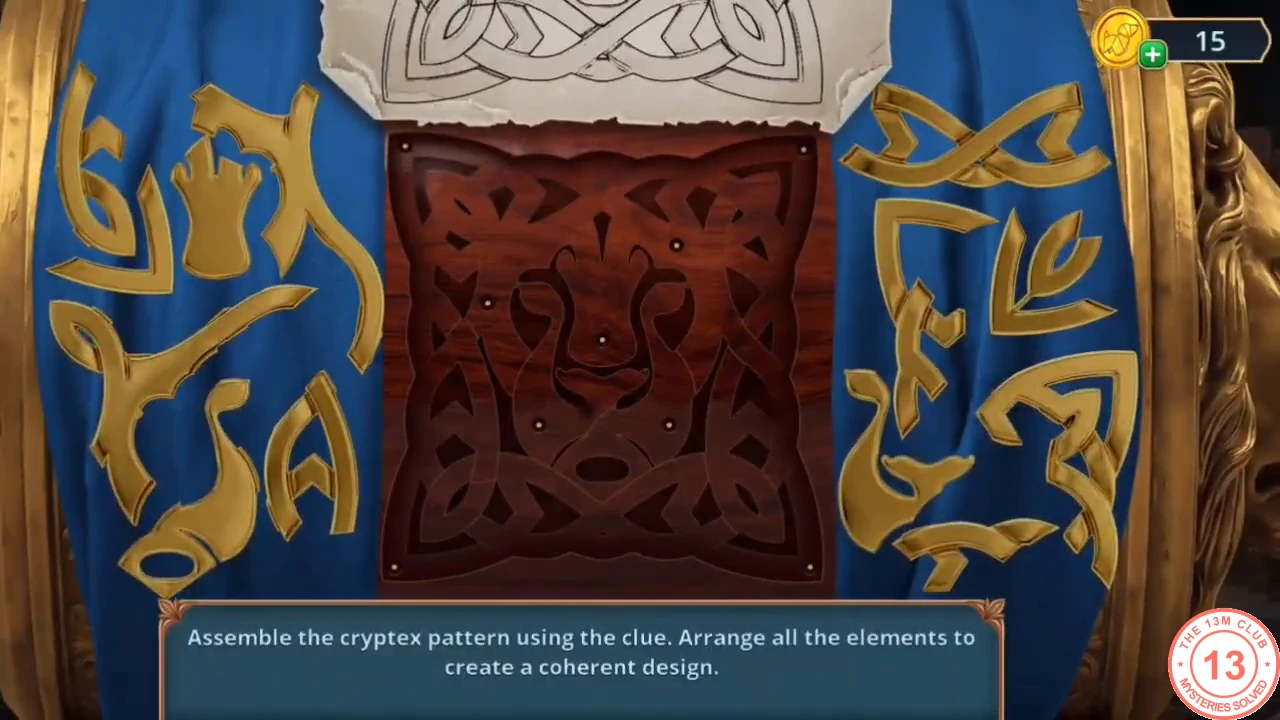
Rebuild the knot pattern from the imprint.
- Drag the gold knot pieces into the frame so they form the same lion-knot design as the PATTERN IMPRINT. Read Clara's note and take the LONG COMB.
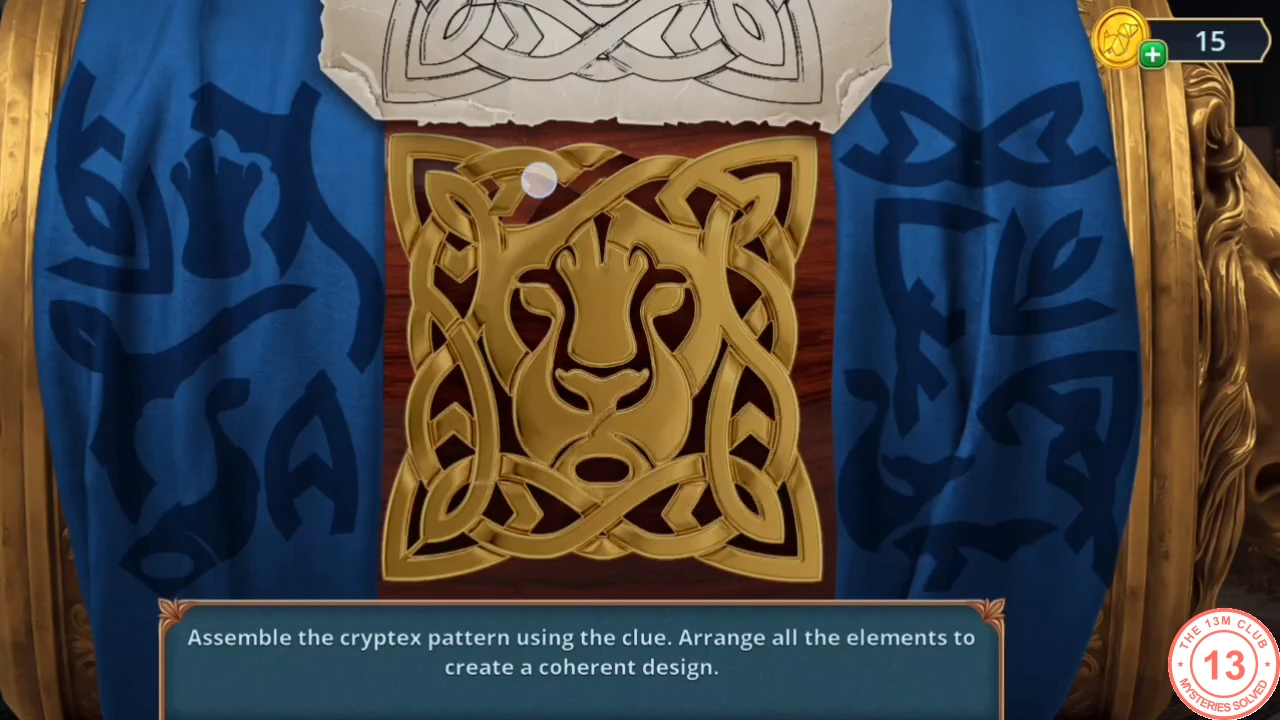
The completed lion knot. - Comb the wig on the stand with the LONG COMB and take the TOY DART WITH SUCTION CUP.
- Stick the TOY DART on the safe in the telephone cabinet to pull it open: read the newspaper and take the TOWEL. Take the NEWSPAPER CLIPPINGS.
- Pin the NEWSPAPER CLIPPINGS to the board by the lion plaque and find the silhouetted items in the collage hidden-object scene to get the SHELL-SHAPED HAIRPIN.
- Put the SHELL-SHAPED HAIRPIN on the pin by the angel figurines above the fireplace and take the KNITTING NEEDLES.
CHAPTER 4
Call Melinda
Repair the telephone and get the code from Melinda.
- On the Promenade, untangle the knitted pouch on the boat with the KNITTING NEEDLES and take the EMPTY POUCH.
- Play the pub hidden-object scene again, this time finding the paired items, to get the SPATULA.
- Scoop the sand from Clara's desk into the EMPTY POUCH with the SPATULA to get the SAND. Take the CIGAR CASE.
- Put out the fireplace with the SAND, then reach into the grate with the TOWEL and take the TELEPHONE DIAL.
- Fit the TELEPHONE DIAL on the telephone and call Melinda. "It's too dangerous..." is free; the 60-coin reply only adds a decision star. Note the CODE 7314.
- Set the blue cello case in the Orchestra Room to 7-3-1-4, read the clipping and take the SAXOPHONE VALVES.
- Fit the SAXOPHONE VALVES on the saxophone.
CHAPTER 4
Puzzle: tune the saxophone
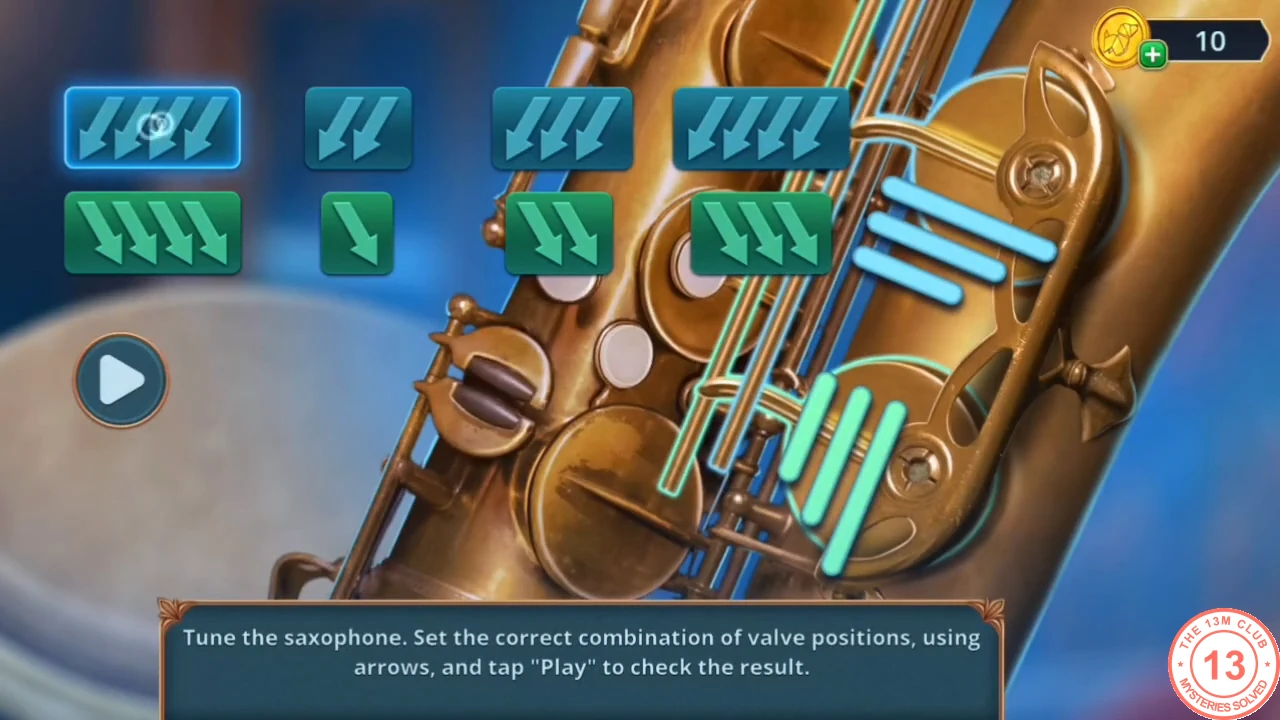
Set the number of arrows on each of the eight valve tiles (two rows of four), then tap Play.
- Tap a valve tile to change how many arrows it shows. Set the top row to 4, 3, 1 and 2 arrows and the bottom row to 2, 3, 4 and 1 arrows (left to right), then tap Play (left). The tiles light green one column at a time until all eight are green. The recording set these counts without a clue on this screen and was right first time, so we cannot show what Play does with a wrong tile. The bust opens: take the gold FIGURINE.
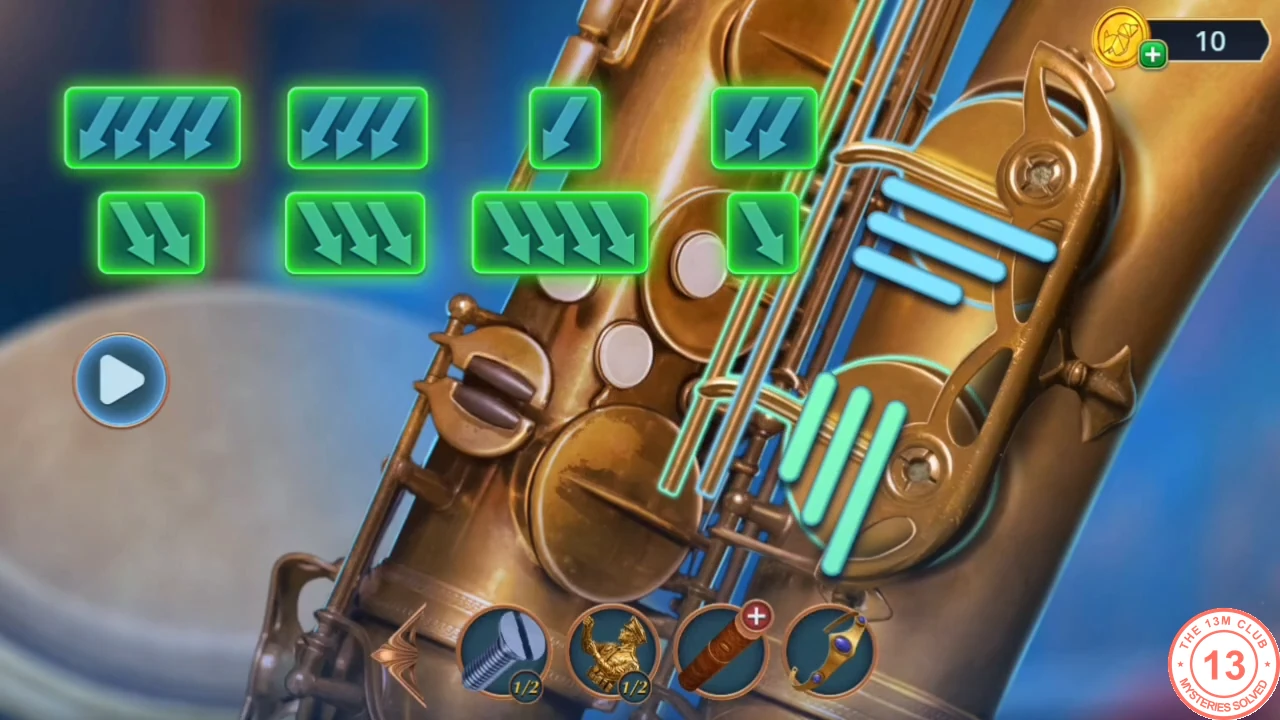
Solved valves in our game: top row 4-3-1-2 arrows, bottom row 2-3-4-1. - Place the FIGURINE in the empty hand-shaped slot of Melinda's desk drawer and take the DUCT TAPE.
- Use the DUCT TAPE at the police key cabinet to pick up the pink BUTTON.
- Play the police desk hidden-object scene again (silhouettes) to get the METAL STAG BEETLE.
- Put the METAL STAG BEETLE in the lock of the green chest beside the armchair on Theater Street and take the second blue bolt.
- Fit the pink BUTTON as the handle of the drawer under the wig in Clara's room and take the WAXED CORD.
- Play the collage hidden-object scene again to get the GLASS DOME.
- Trap the spider in the tree hollow on Theater Street under the GLASS DOME and take the red HEART.
- Hang the HEART on the chain of the lion statue at the fountain and take the SMOKY GUNPOWDER.
CHAPTER 4
An explosive solution
Build a charge for the chained chest in the Orchestra Room.
- Open the CIGAR CASE in the inventory and add the SMOKY GUNPOWDER (the other two slots stay empty for now).
- Find all the differences in the Technical Corridor scene (use the button to switch backgrounds) to get the STAINED GLASS PART.
- Fit the STAINED GLASS PART in the Orchestra Room window and take the SEALING WAX.
- Add the WAXED CORD and the SEALING WAX to the CIGAR CASE to make the EXPLOSIVES.
- Place the EXPLOSIVES on the chained chest. A warning says you cannot return to earlier locations afterwards; tap YES and light the charge with the KEROSENE BURNER.
CHAPTER 4
Puzzle: break the chain
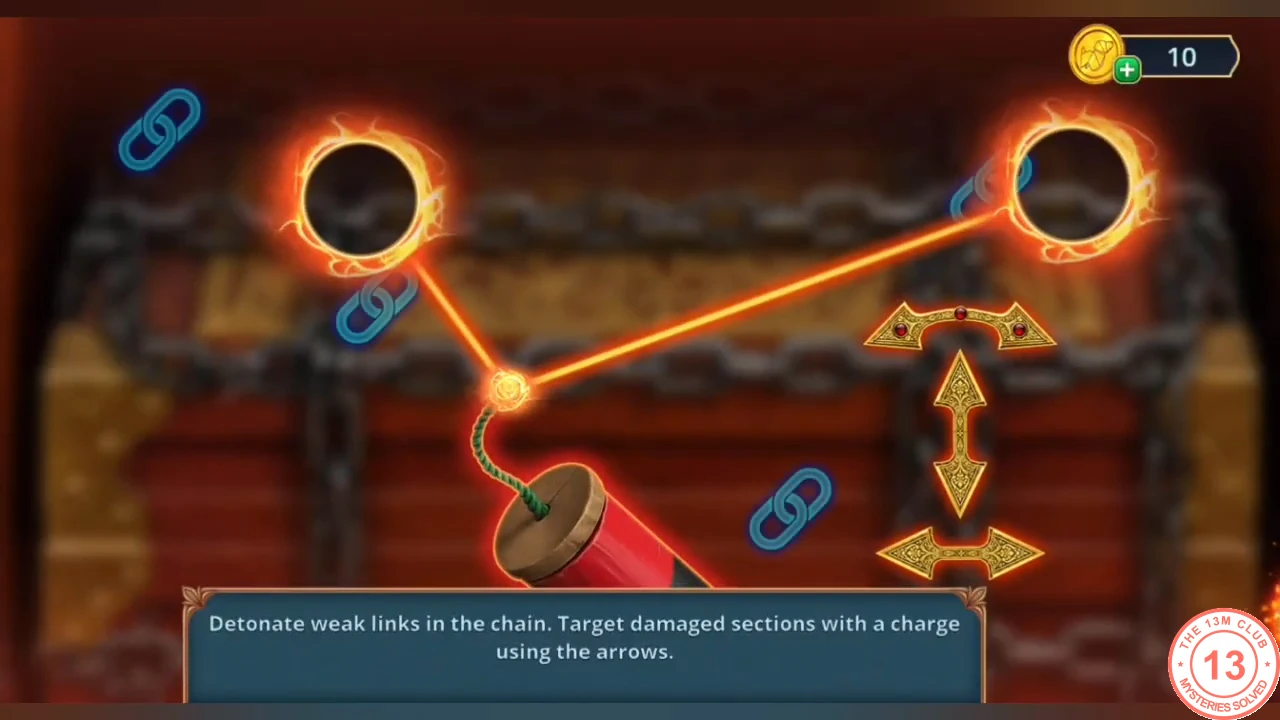
Blow apart the weak links.
- A long aiming puzzle with no fixed move list. Use the arrows to aim the charge so each blast hits a damaged (blue) link of the chain, and keep firing until every weak link is destroyed. The chest opens: take the REVOLVER.
- In a back corridor a dark-haired woman aims a revolver at a frightened red-haired woman in a red dress. The free-to-play story ends here, followed by a promotion for the Symphony of Death Collector's Edition.