The Statue Plaque, the Binoculars and the Mailbox Flag
Clean the angel's plaque, repair the binoculars to watch Blackwood, then open the satchel and the mailbox.
- Pour the Aromatherapy Oil on the rusty plaque of the angel statue and scrub it with the steel-wool scrubber. The compartment opens; take the Lockpick part (1/2) and the round Lens.
- Repair the Broken Binoculars with the Lens. In the Service Hall, look through the Binoculars at the far end (Toast in the Crosshairs achievement): Blackwood swaps the bottle at Table 3, Victor Hale's place. Afterwards you receive the Handheld Fan.
- Near the church, blow the smoke away from the green satchel on the bench with the Handheld Fan. The satchel's lock is missing a button (for later). Take the Mailbox Flag and the Umbrella.
- Attach the Mailbox Flag to the red mailbox. It opens; take the carved Tile and the second lockpick part, which completes the Lockpick set.
Blackwood's Office Dial Lock
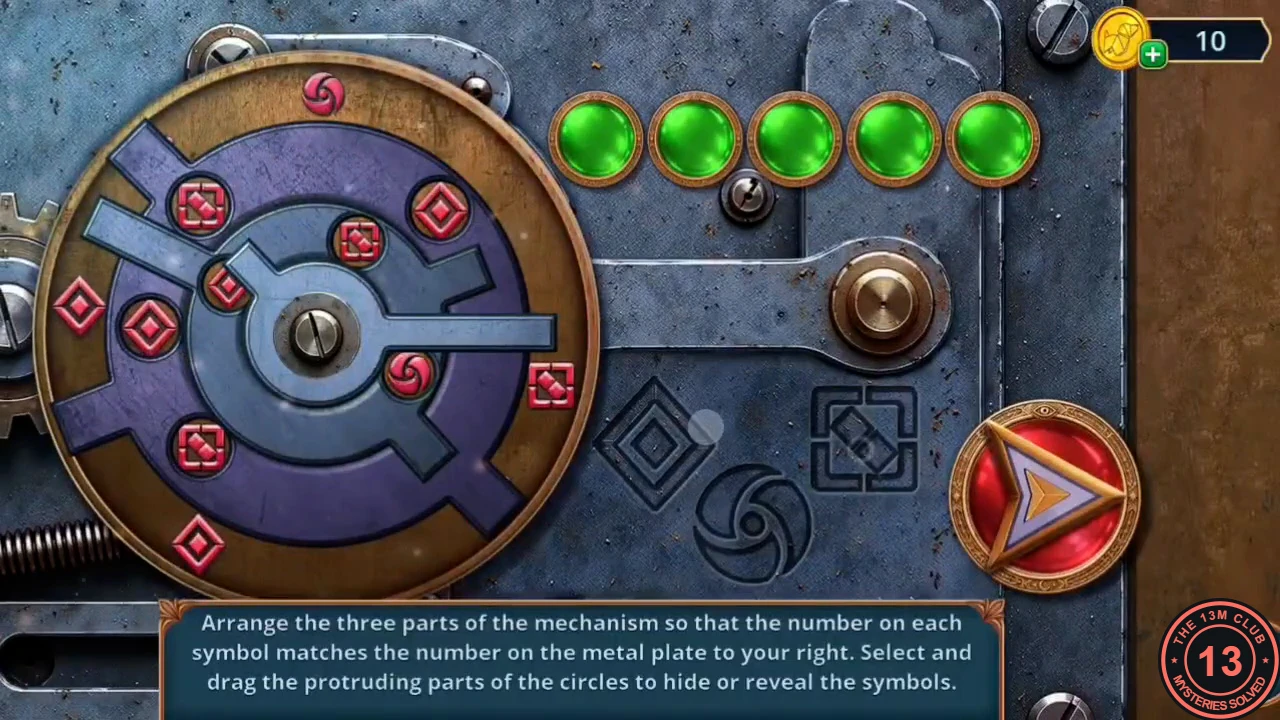
Get past the office door's dial lock and search the office.
- Use the handle of the office door in the Service Hall to start the dial lock. The starting layout was identical in two separate playthroughs. Drag the protruding parts of the three circles into this final position, then press the red arrow button: the inner light-blue piece has its long arm pointing straight up (12 o'clock); the middle steel-blue ring has its long arm pointing left and slightly down (about 8 o'clock) and its short tab at about 1 o'clock; the outer purple ring has its three tabs pointing left (9 o'clock), right (3 o'clock) and down-left (about 7 o'clock). The lock opens and you enter Blackwood's office. The Skip button is also available.
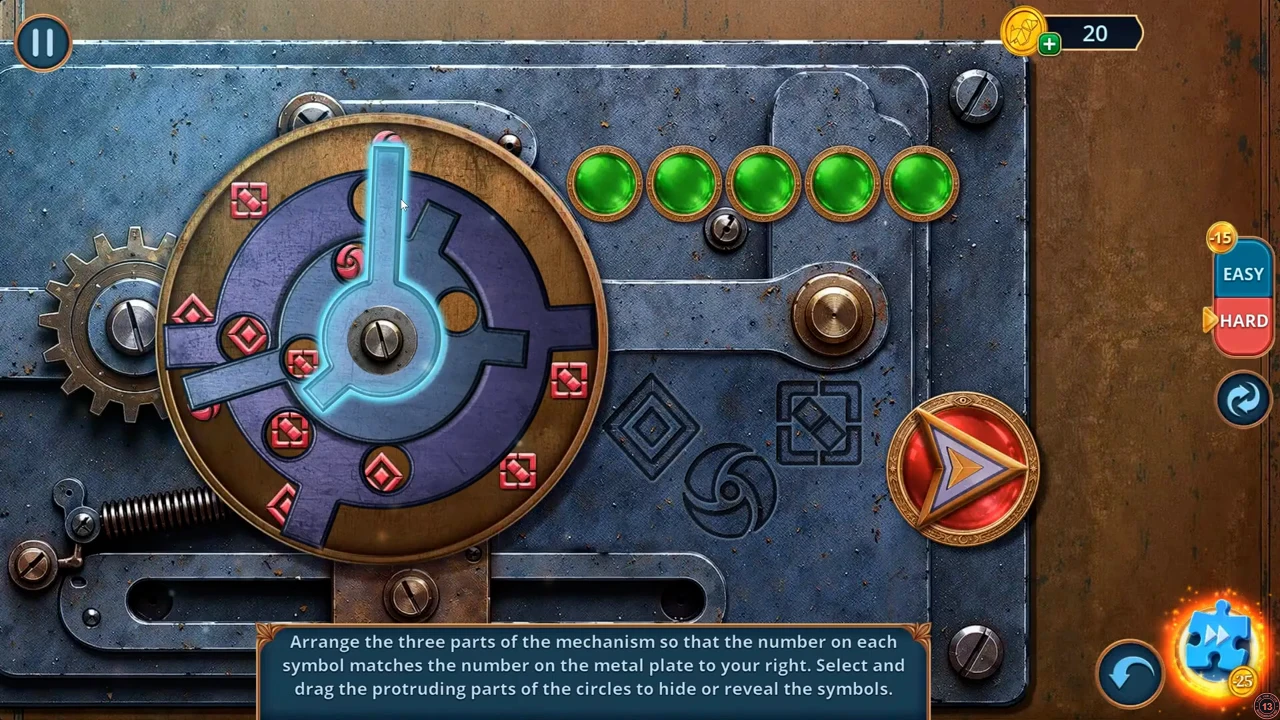
The solved dial lock, from a second playthrough with the same starting layout. - Decision point: Look for hard evidence (2 stars) or Look for what Blackwood missed (free, 0 stars; in the dialogue: Search for anything Blackwood left behind).
- Take the Cupboard Key from the flower stand under the portrait; you need it much later. Take the Expensive Belt from the office. Use the belt on the flower stand's fretwork cabinet to open it and take the Leather Gloves.
Blackwood's Desk Clues
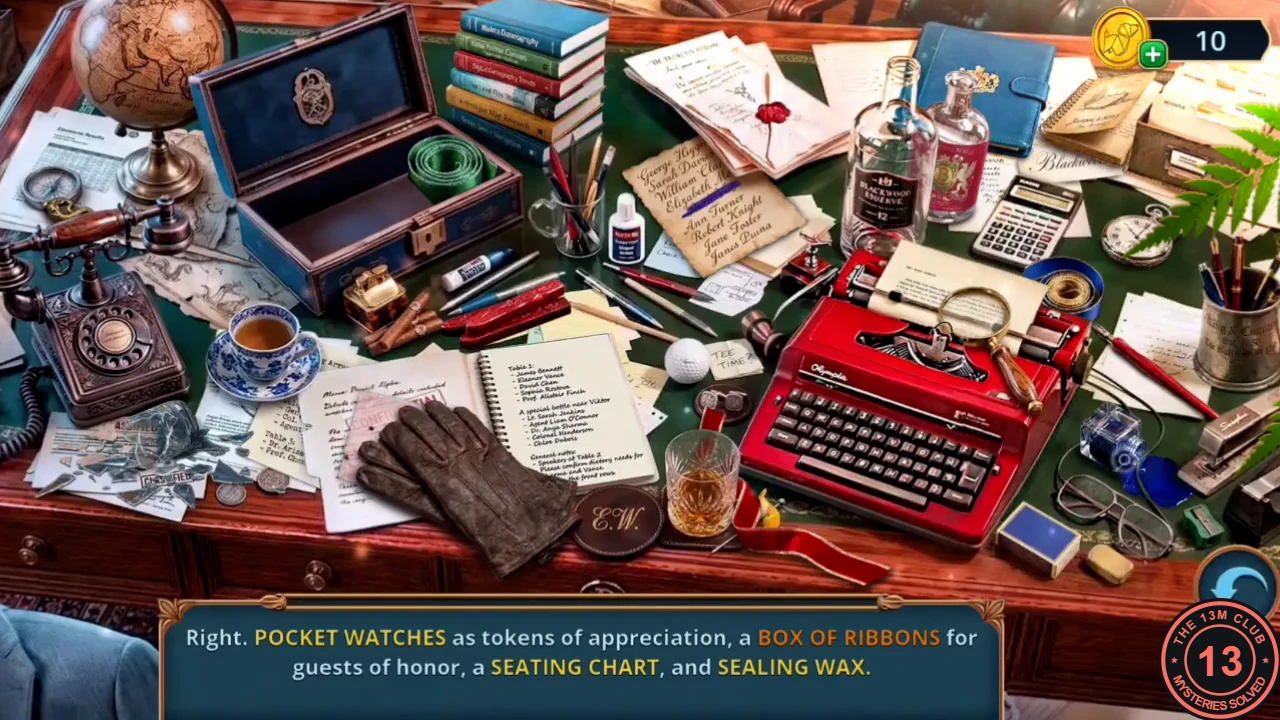
Gather the evidence on Blackwood's desk.
- Lay the Leather Gloves on the broken glass on the desk to start the desk hidden-object scene. The capitalised words in the text are the items: Pocket Watches, Box of Ribbons (it needs three ribbons), Seating Chart, Sealing Wax, Pen, Ink, Ruth Vale, Note About Victor, Bottle with Coat of Arms, Envelope Cutter, Broken Glass and Blackwood's Signature. Dry the wet ink with the rocker blotter first. Your reward is the Draft of Blackwood's Speech.
The Dinner Poster Deduction
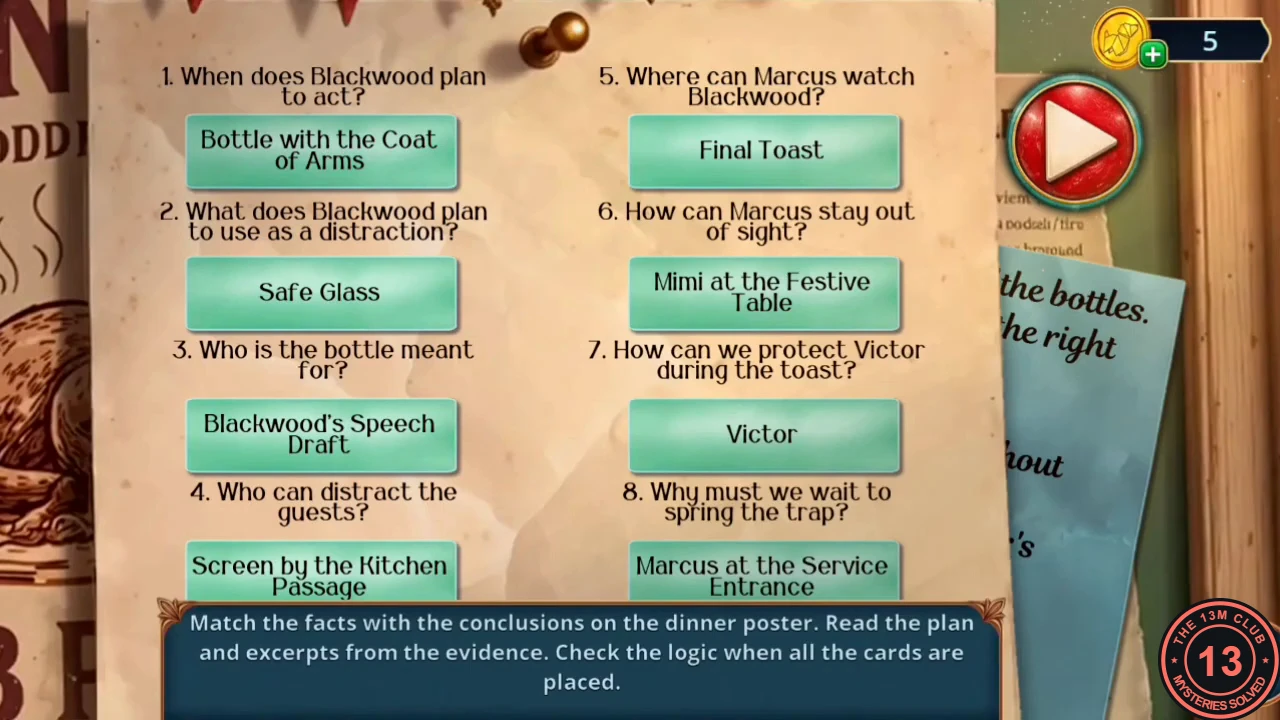
Plan the trap on the Harvest Charity Dinner board, then open the satchel, the leather case and the blue chest.
- Near the church, put the Draft of Blackwood's Speech on the Harvest Charity Dinner board. Match each question with its fact card, then check the logic. Solution: 1 When does Blackwood plan to act? Final Toast. 2 What does he plan to use as a distraction? Blackwood's Speech Draft. 3 Who is the bottle meant for? Victor. 4 Who can distract the guests? Mimi at the Festive Table. 5 Where can Marcus watch Blackwood? Marcus at the Service Entrance. 6 How can Marcus stay out of sight? Screen by the Kitchen Passage. 7 How can we protect Victor during the toast? Safe Glass. 8 Why must we wait to spring the trap? Bottle with the Coat of Arms.
- Take the Spikelet Pin from the board's compartment. Press the satchel's clasp on the bench with it. Take the Camera Body, the lemon-print Apron and the Pumpkin Keychain.
- In the cider cellar (Cider Warehouse), attach the Pumpkin Keychain as the zipper pull of the red leather case. Take the Gauze and the Bottle Figurine.
- Put the Bottle Figurine in the slot on the lid of the blue chest by the drain. Take the glass Cider Tube and the Empty Pot. A Sunflower Flag is in this close-up.
The Pantry Cupboard Sliders
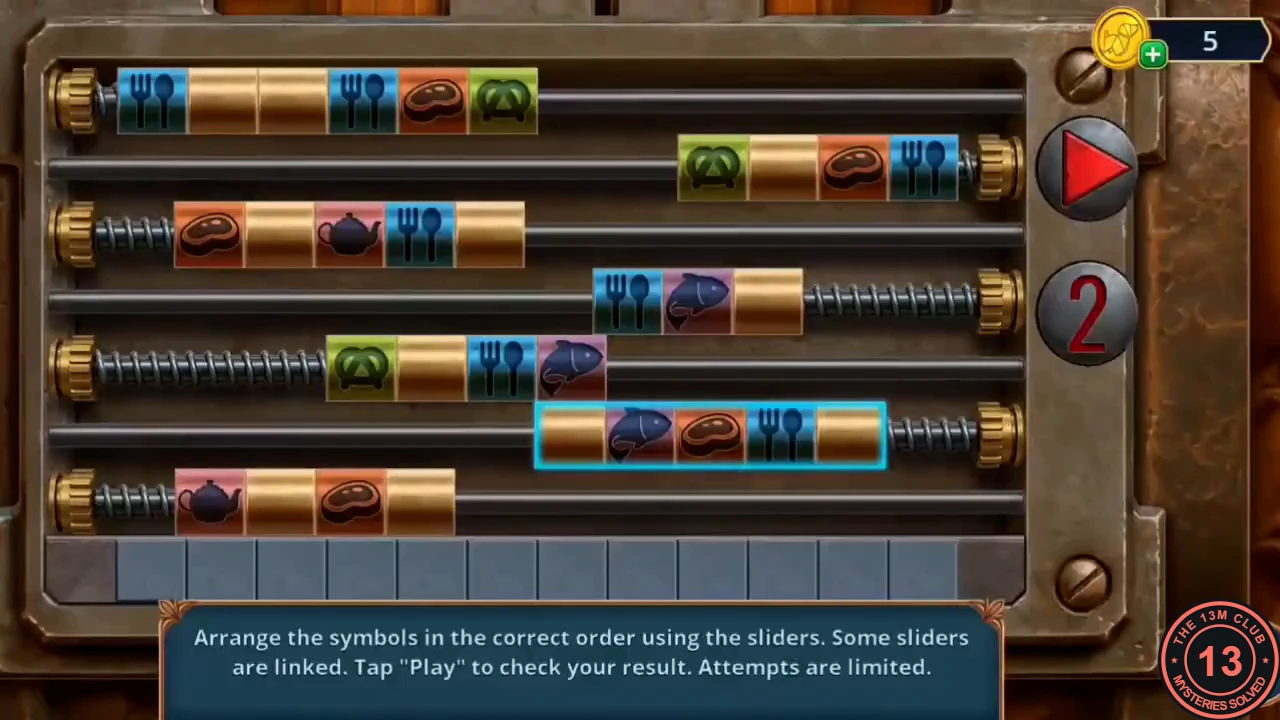
Melt ice for a magnet, solve the carved apple cupboard and give the cat some milk.
- In the kitchen, fill the Empty Pot with ice from the freezer. Put the Pot of Ice on a burner to melt it and take the Magnet from the pot.
- In the pantry, use the Magnet on the latch of the carved apple cupboard to start the slider puzzle; some sliders are linked and attempts are limited. Line the rows up so each of the 12 columns shows one symbol type. Final rows from top to bottom (the starting column, then tiles from left to right; blank = gold tile): row 1 from column 4: fork, blank, blank, fork, steak, pretzel. Row 2 from column 1: pretzel, blank, steak, fork. Row 3 from column 8: steak, blank, teapot, fork, blank. Row 4 from column 4: fork, fish, blank. Row 5 from column 9: pretzel, blank, fork, fish. Row 6 from column 1: blank, fish, steak, fork, blank. Row 7 from column 6: teapot, blank, steak, blank. Press Play. The bottom strip should read pretzel, fish, steak, fork, fish, teapot, fork, steak, pretzel, teapot, fork, fish. The cupboard below opens: take the Glass and the Bottle of Milk.
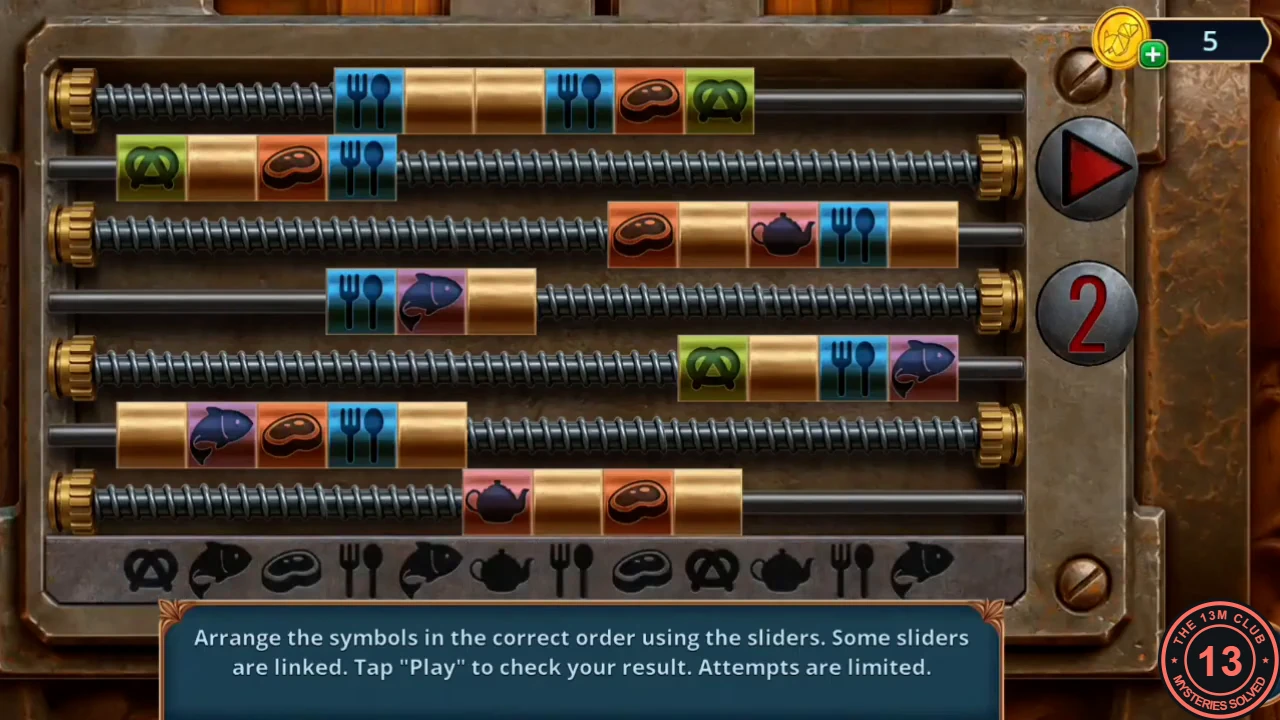
The finished slider rows, matching the bottom strip. - In the dining hall, pour the Bottle of Milk into the cat's bowl. The cat steps off its chair to drink: take the Camera Lens from the chair seat and the Rowan Berry Amulet from the cat's collar.
- Insert the Rowan Berry Amulet in the berry relief of the Book of Gratitude lectern drawer. Take the Screen Hinges and the Camera Shutter from the drawer.
The Cat Tag Photo and the Folding Screen
Build a camera, photograph the code on the cat's tag and set up Marcus's hiding place.
- In your inventory, add the Camera Lens and the Camera Shutter to the Camera Body to make the Camera.
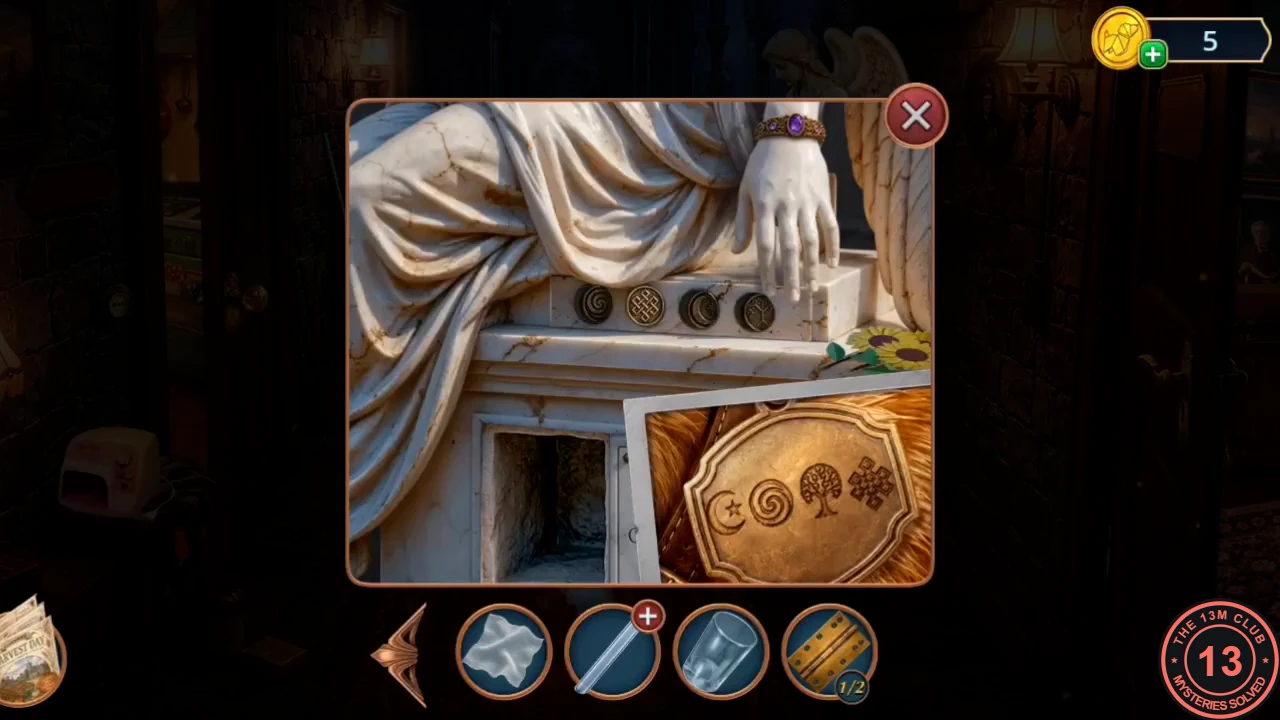
- Photograph the tag on the cat's collar with the Camera to get the Photo with Code. Its symbols from left to right are a crescent moon with a star, a spiral, a tree and a knot.
- At the angel statue in the Service Hall, place the Photo with Code. Press the four symbol buttons above the plaque in order: crescent moon, spiral, tree, knot. Take the UV Flashlight and the folding screen part.
- Marcus needs something to hide behind in the corridor. Add the screen panels (including the Screen Panel from the backyard) to the Folding Screen and place it by the statue. Marcus goes over the plan, and you receive the Blackwood Signet Ring.
Hiding in the Office and the Desk Drawer
Hide from Blackwood, then search his desk drawer and safe.
- In the office, the folding screen, armchair and curtains hiding spots do not work. Use the Cupboard Key on the tall wardrobe at the back and tap inside to hide. Blackwood comes in with the cider crate and reveals his plan for Victor.
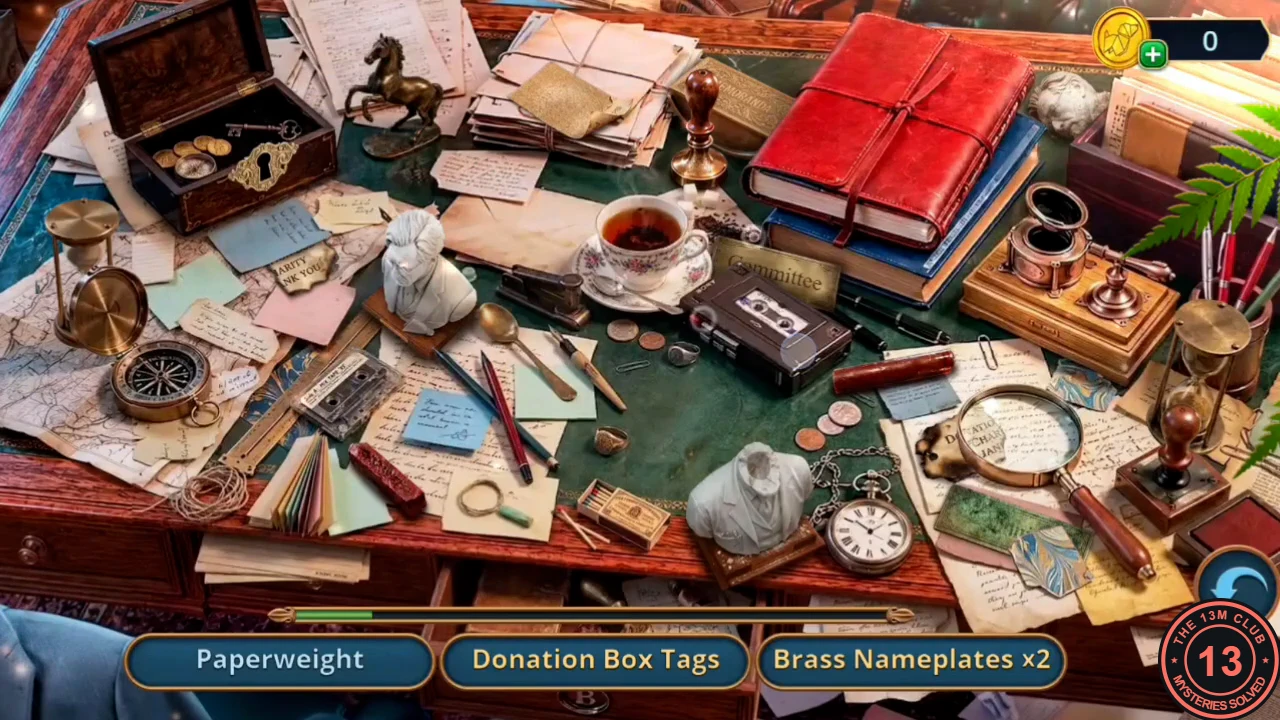
- Put the Blackwood Signet Ring on the desk drawer with the B crest to open a hidden-object scene of paired items, such as two Paperweights, Donation Box Tags, Brass Nameplates, Plaster Busts, Hourglasses and Seal Wax Prints. Your reward is the Safe Handle.
- Attach the Safe Handle to the safe in the bookcase. Take the Award (a golden statuette).
UV Fingerprints
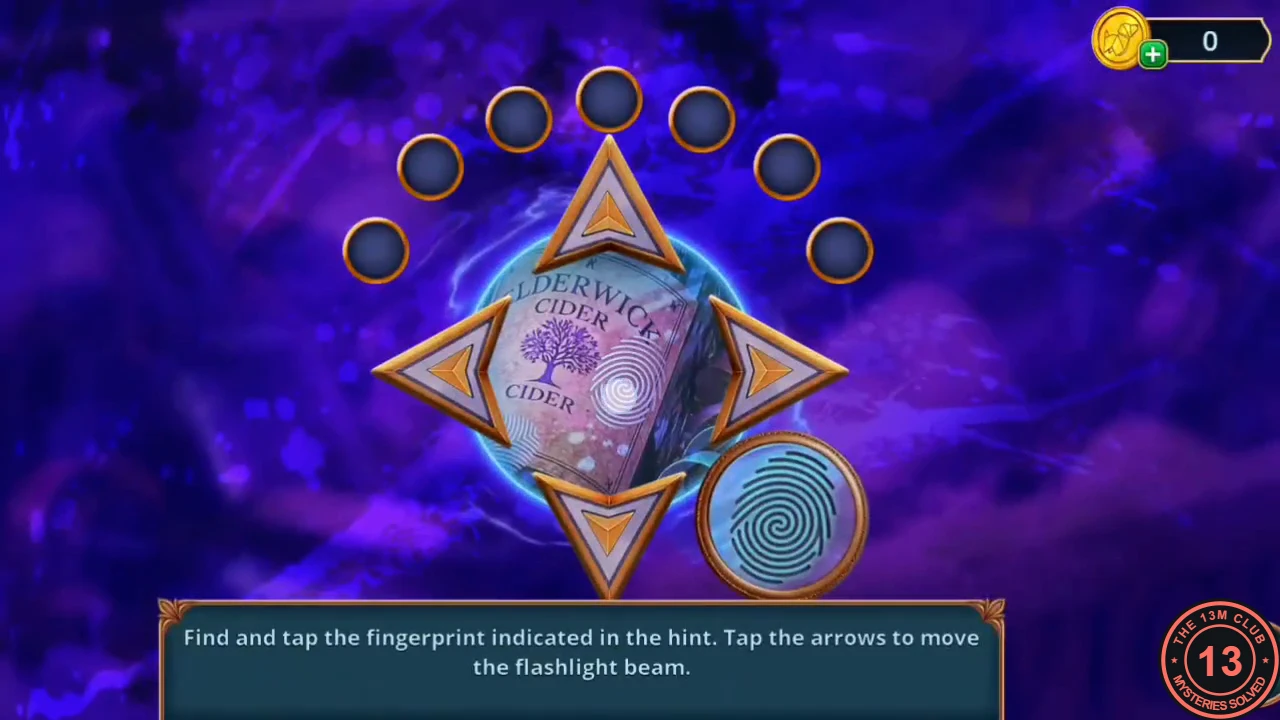
Check the cider crate under UV light.
- Check the ELDERWICK CIDER crate on the flower stand with the UV Flashlight. In each of nine rounds, use the arrows to move the beam over the crate. Tap the fingerprint that matches the one in the hint circle at the bottom right; it changes every round. The crate opens: take the blue-ribbon Private Batch Q cider bottle and the Antique Dagger.
The Greenhouse Potting Bench
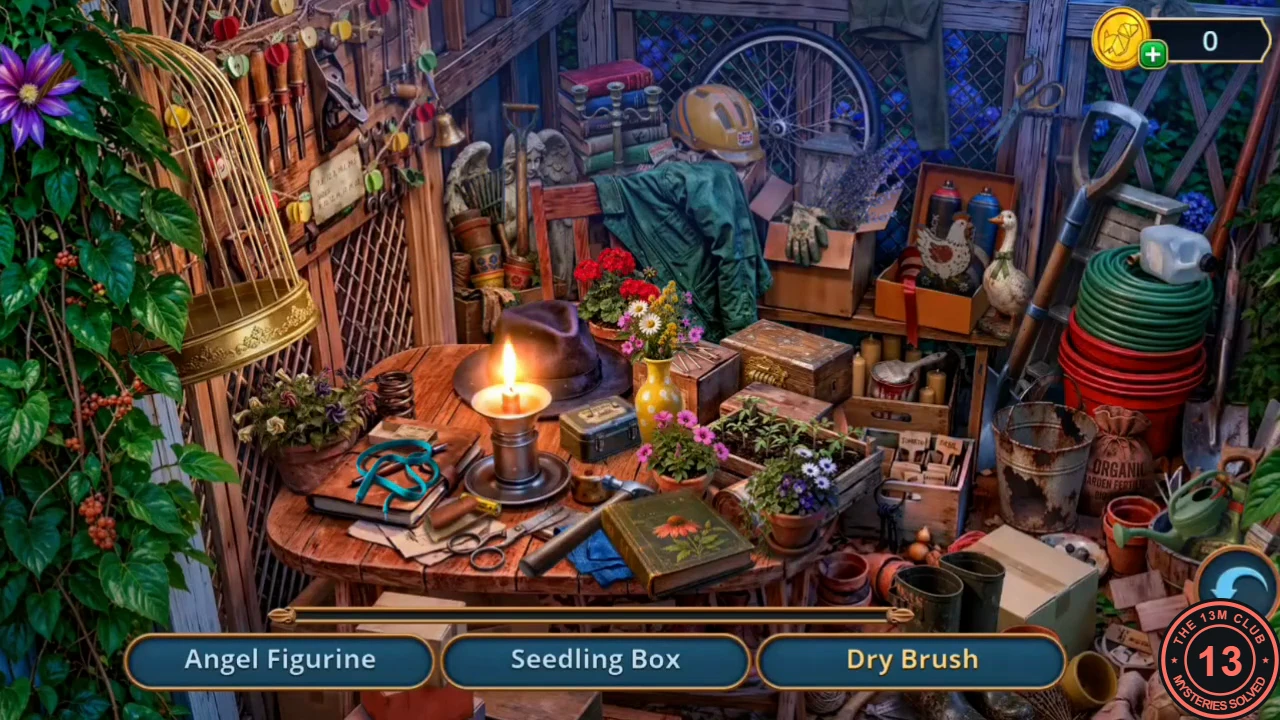
Cut into the greenhouse and dig in the backyard.
- In the backyard, cut the ivy over the greenhouse window with the Antique Dagger to start the potting bench hidden-object scene: Angel Figurine, Seedling Box, Dry Brush, Petunias, Birdcage, Matchbox, Garden Lantern, Brass Bell, Old Candlestick, Fertilizer, Rusty Pitchfork, Folding Stepladder and more. Your reward is the Garden Trowel. Leave the insects on the gazebo table for now.
- Dig the backyard soil bed with the Garden Trowel. Take the Long Stick and the Metal Ring.
The Cider Colour Analysis
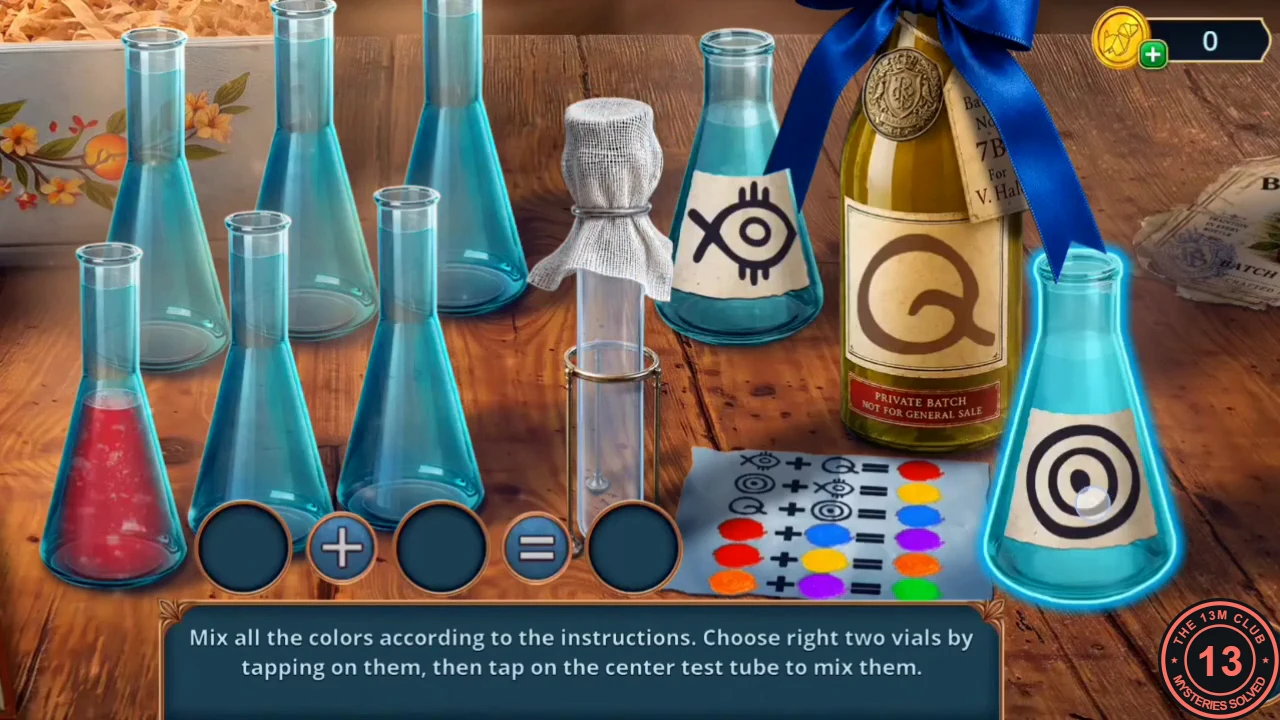
Seal the cider tube and mix the colours to test the poisoned cider.
- In your inventory, add the Gauze to the Cider Tube first, then the Metal Ring (the ring alone snaps back off). This seals the tube.
- At the cellar table with the Sommelier's Guide, place the sealed tube on the stand along with the Private Batch Q bottle, the Blackwood Cider bottle and the Cider Label. To mix, tap two vials, then the centre test tube. Recipe: eye flask + Q bottle = red; target flask + eye flask = yellow; Q bottle + target flask = blue; red + blue = purple; red + yellow = orange; orange + purple = green. You get the Cider Analysis Results, and the Blue Ribbon drops off the Q bottle.
- In your inventory, tie the Umbrella onto the Long Stick with the Blue Ribbon to make a hook.
The Costume Box Differences
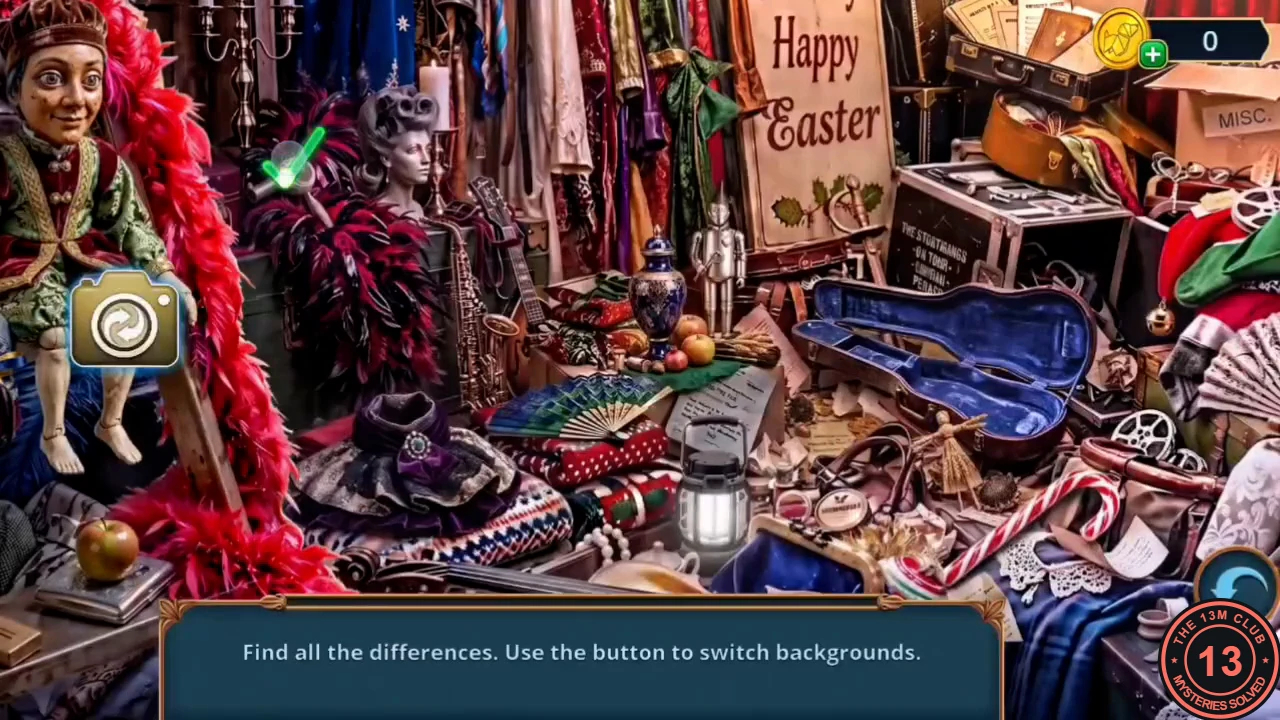
Fetch the cane from the costume cupboard, then face Blackwood's toast.
- In the dining hall, pull the items off the costume cupboard's top shelf with the hook. Tap the sparkling costume box and find all the differences, using the button to switch backgrounds. Your reward is the Walking Cane.
- Blackwood starts his toast. Decision point: Accuse Blackwood (free, 0 stars), Expose the false heroism (3 stars, 30 coins) or Present the evidence (6 stars, 60 coins). This guide follows Accuse Blackwood. A fire breaks out.
Putting Out the Dinner Fire
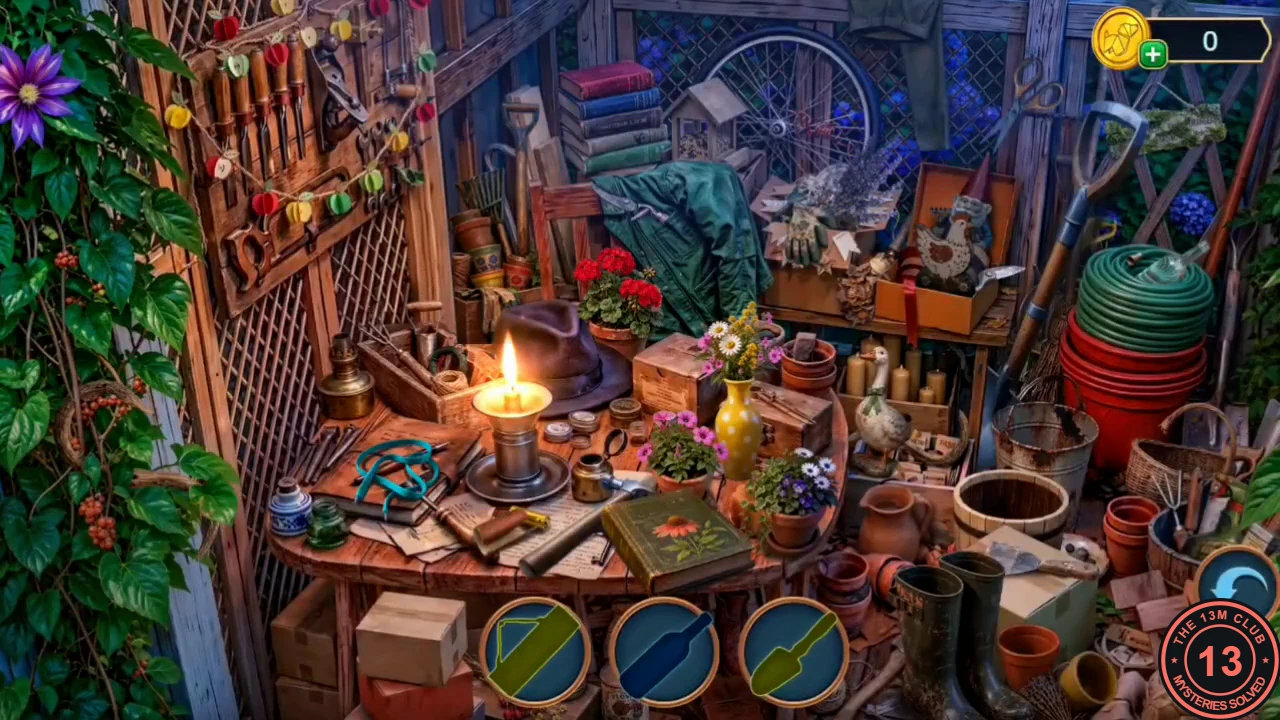
Smother the burning book, clear the insects from the gazebo and put out the burning table.
- Lay the Apron on the burning Book of Gratitude to smother the flames. From the lectern drawer, take the Chisel and the Mosquito Repellent Coil.
- In the backyard, put the Mosquito Repellent Coil in the dish on the gazebo table. The smoke clears the insects. Search the garden-shed potting bench: find the silhouetted items (carpet beater, trowel, wicker basket, pinwheel, bottle), find the basket's handle first, then collect the bucket fragments. Your reward is the Empty Bucket.
- Put the Empty Bucket under the backyard pump's spout and pump to get the Bucket with Water. Throw it on the burning table in the dining hall. Marcus hands you the Handcuffs; the new task is Detain Blackwood.
Catching Blackwood: The Mirror Pattern
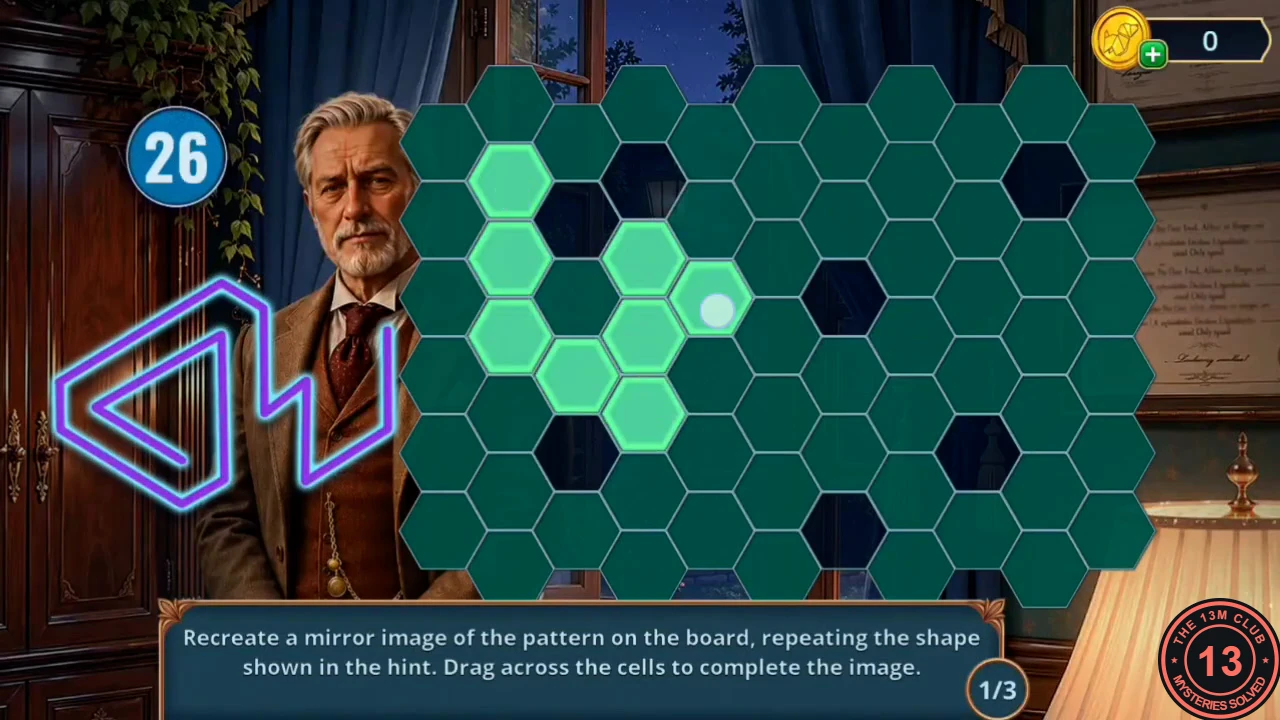
Get the office key from under the rug and stop Blackwood at the window.
- In the corridor, place the Chisel at the edge of the loose blue tile in the torn rug and strike it with the Award. The tile lifts and you get the key.
- Open the office door with the key. Blackwood is climbing out of the window; use the Handcuffs on him.
- In the mirror pattern minigame, each of three rounds has a 30-second timer. The board shows half of the shape outlined in the purple hint on the left; drag across the cells to draw the mirror-image half.
- Chapter 4 ends with Your Decision Points: Offer to fix the dish 0 or Make it sound official 2; Ask about Blackwood's reasons 0 or Question his concern for order 2; Look for what Blackwood missed 0 or Look for hard evidence 2; Accuse Blackwood 0, Expose the false heroism 3 or Present the evidence 6. The ending photo depends on your stars: 0, 4 or 10. With 0 stars, Blackwood is led away in handcuffs before the Unsolved Case: Forgotten Name title card. The paid answers and the memory photos are described in Endings and Extras.