CHAPTER 3
The Signpost Path Puzzle
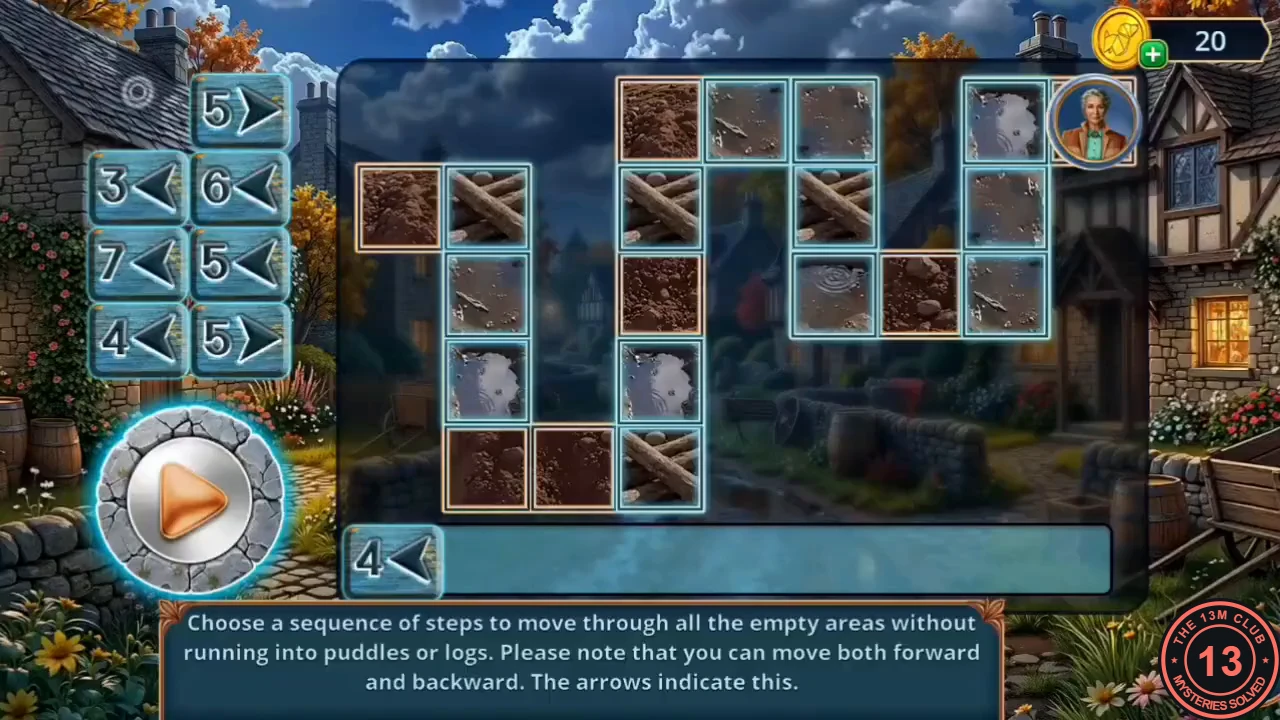
Make a rake, clear the hay and fit the signs to find the way to the Harvest Park.
- At the mill's water wheel, screw the Parish Volunteer Corkscrew into the plug of the barrel and pull it out. The barrel drains; roll it aside and take the Duct Tape and the Sewing Kit.
- In your inventory, add the Duct Tape and the Comb to the Stick to make an improvised rake.
- Rake the hay pile on the street behind the Parish House. Take the Firecracker and the Harvest Park sign.
- Fit the two signs on the wooden signpost by the flowerbed: Harvest Park on the left, Thomas Reed's Mill on the right. In the path puzzle, choose a sequence of steps that covers every empty area without hitting puddles or logs; arrows mark forward and backward moves. Solution: 4 forward, 7 forward, 3 forward, 5 back, 6 forward, 4 forward, 5 back, 5 forward, then press Play.
CHAPTER 3
The Harvest Park Prize Stall
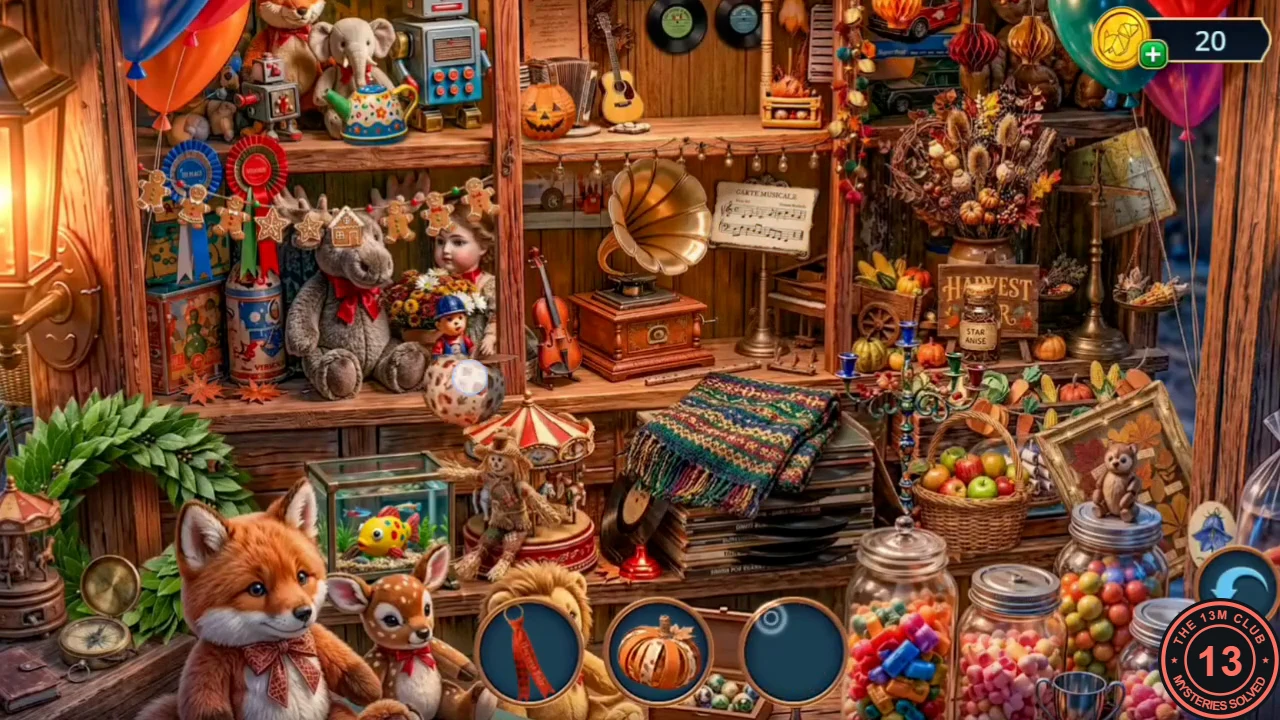
Calm the bees with incense smoke and search the prize stall.
- At the drain grate in the Harvest Park, take the Incense. A Sunflower Flag is in this close-up.
- In your inventory, put the Incense in the brass censer and light it with the Lighter.
- Smoke the beehive on the first-aid cabinet with the censer to calm the bees.
- Search the prize stall in a silhouette-mode hidden-object scene. Some items need an action first: place the rosette medal, give the ornament to the plush donkey, and follow the blue bird figurine as it moves across the shelves. Your reward is the Sheet of Music.
CHAPTER 3
The Harpsichord Notes
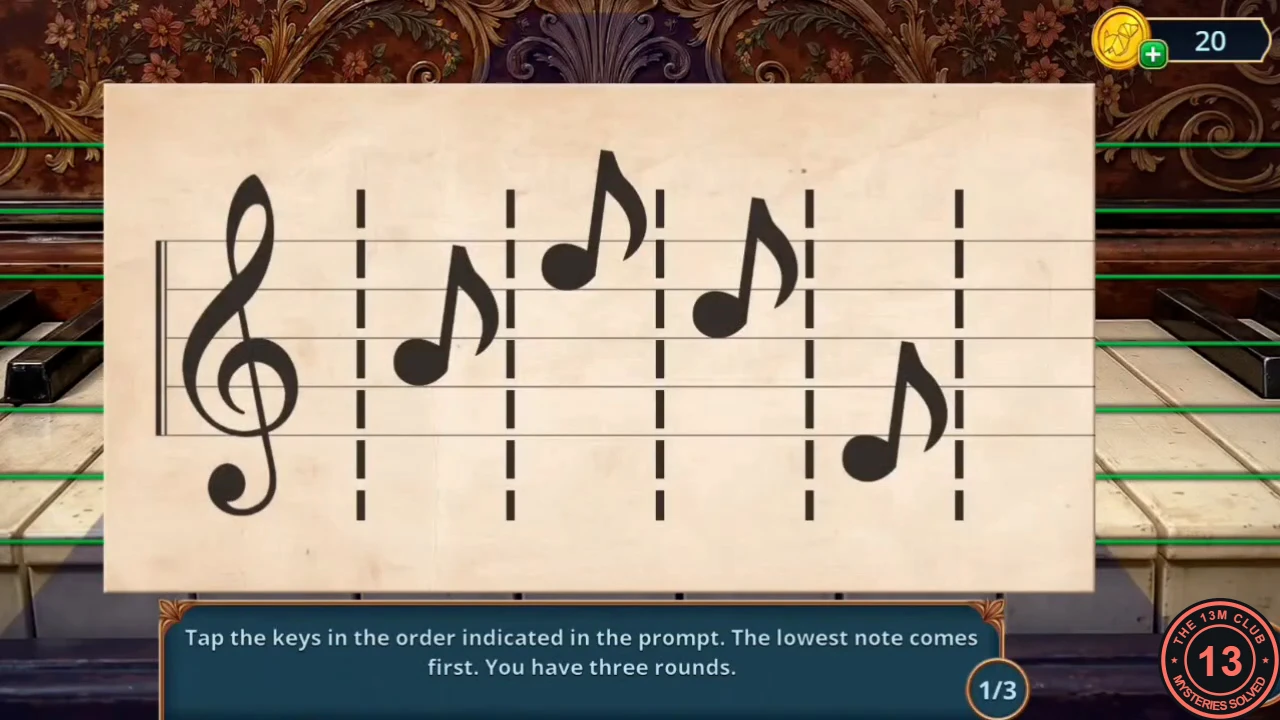
Play the three rounds of notes on the harpsichord.
- Put the Sheet of Music on the harpsichord's rack in the Parish House hall. In each of the three rounds, tap the note buttons for the prompt's columns from the lowest note to the highest. Example taps: round 1 (4 notes) 4, 1, 3, 2; round 2 (5 notes) 1, 5, 3, 2, 4; round 3 (6 notes) 2, 6, 1, 5, 3, 4. If your prompt differs, follow the lowest-to-highest rule.
- From the harpsichord compartment, take the Metal Cylinder. A Sunflower Flag is in this close-up.
CHAPTER 3
The Basket Symbols
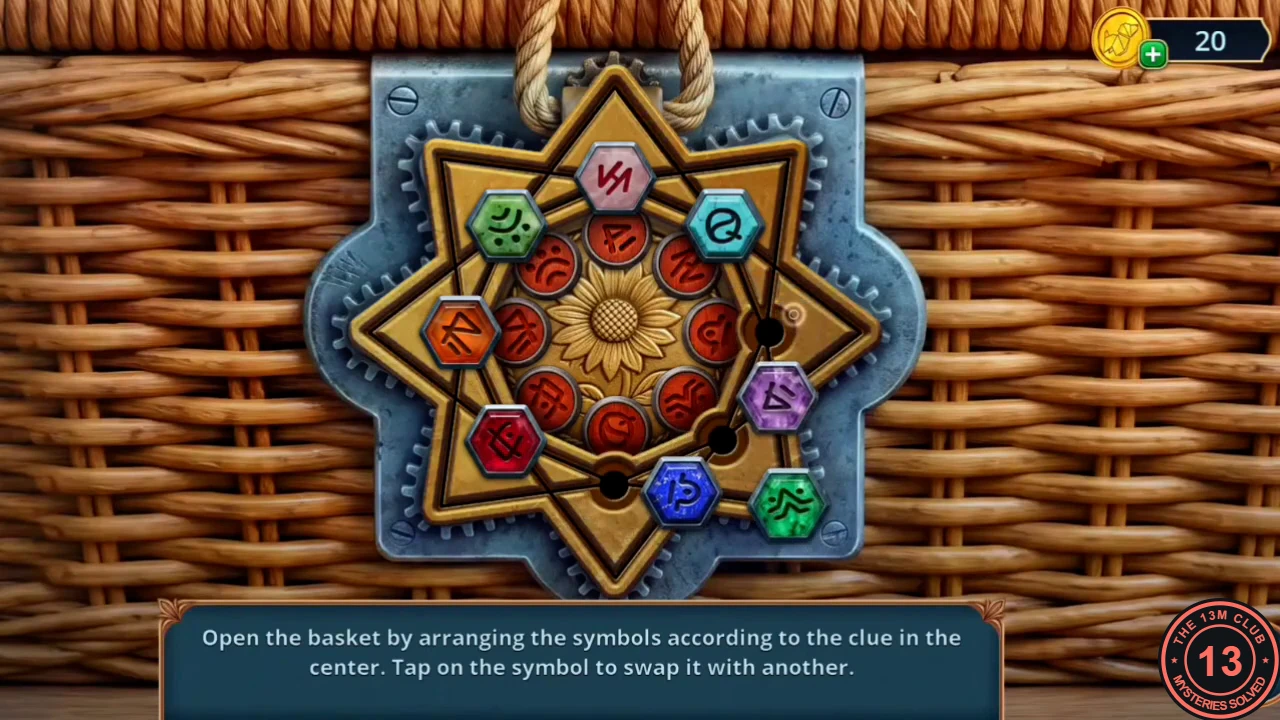
Open the Utility Room basket's symbol lock.
- In the Utility Room, take the Flower Emblem from the shelf cabinet.
- Put the Flower Emblem in the basket's medallion. Each outer hexagon must show the same glyph as the red disc next to it on the inner ring. Tap a symbol to move it; the symbols shift along the connecting lines. Solved layout, clockwise from the top: purple (triangle glyph), pink (slashed glyph) at the upper right, dark blue P on the right, green running figure at the lower right, turquoise Q at the bottom, red at the lower left, orange on the left and light-green wave at the upper left. Check each symbol against its disc: for example, the P sits beside the disc with the same P curl, and the running figure beside the running-figure disc. Take the Graph Paper and the Matches.
CHAPTER 3
The Symbol Buttons
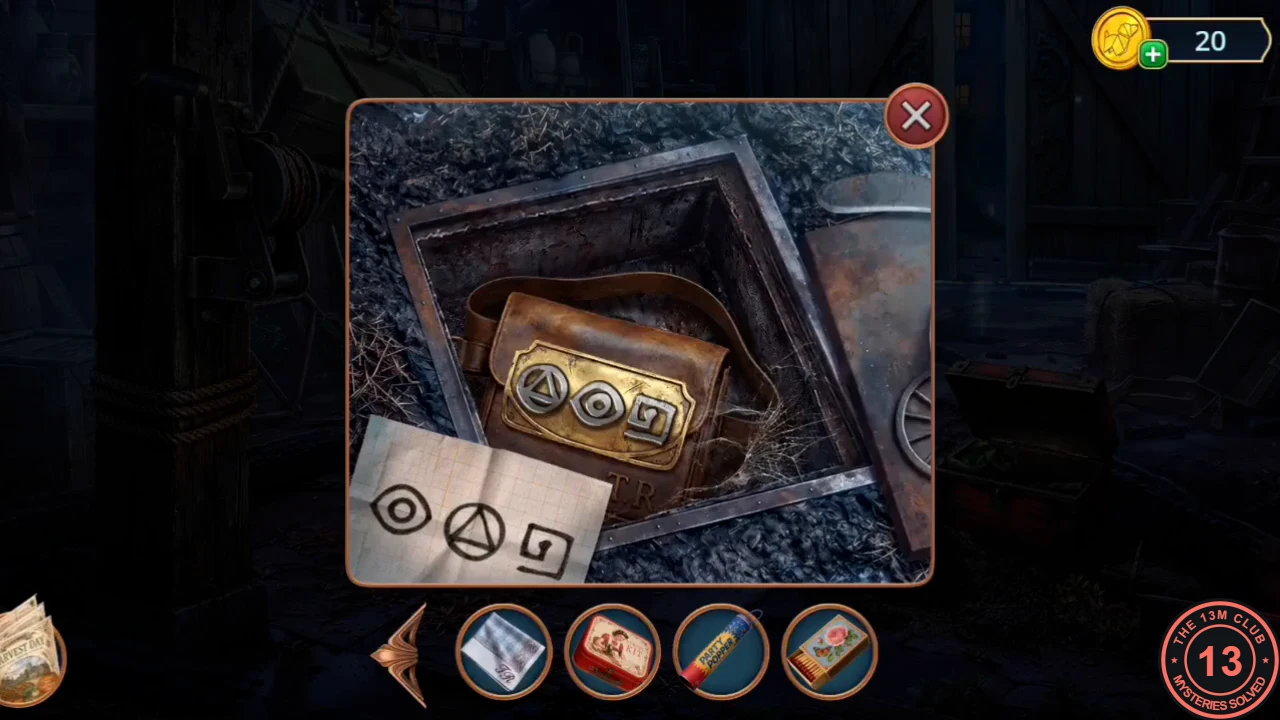
Copy the carved symbols and open the satchel in the hatch.
- In the Burnt Barn, lay the Graph Paper over the carving on the winch post and rub it. The paper shows three symbols: a circle spiral, a triangle and a square spiral.
- At the floor hatch, press the satchel's three round buttons in the rubbing's order: circle spiral, triangle, square spiral. It opens; take the Boot Covers.
CHAPTER 3
The Mill Storeroom Differences
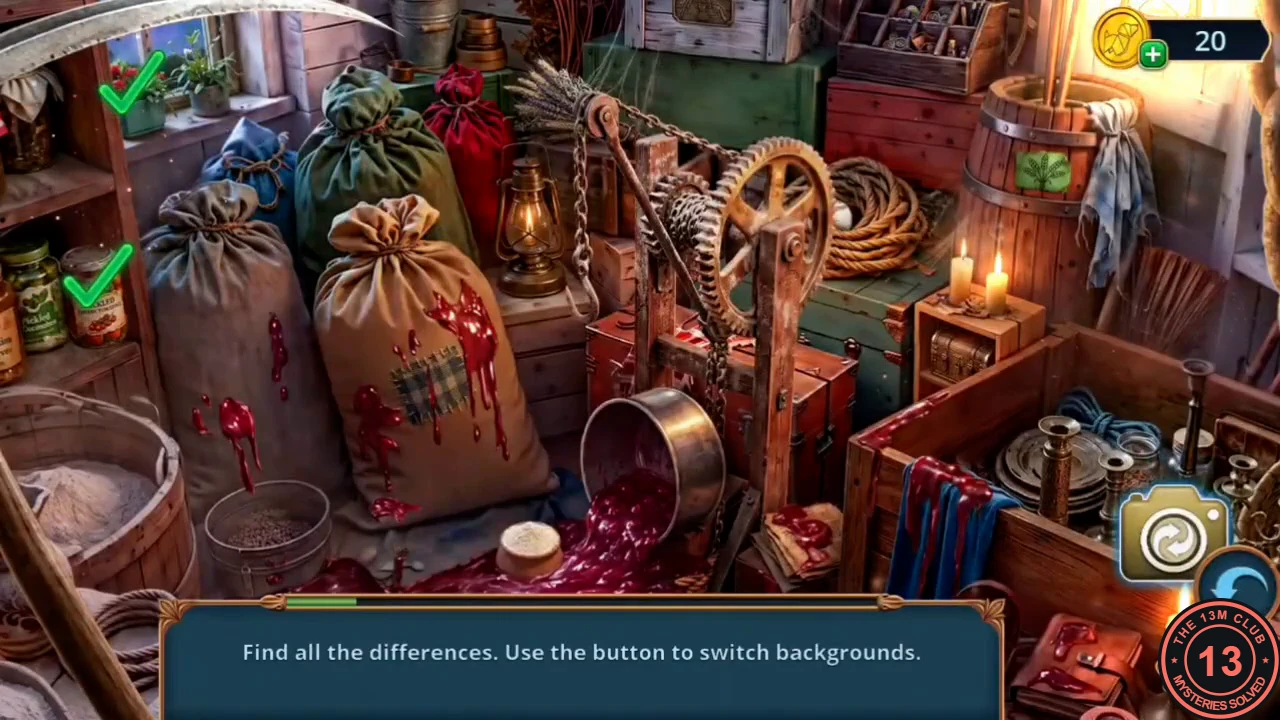
Find the differences for a piece of cheese, then use the mouse to scatter the crowd.
- In Thomas Reed's Old Mill, put the Boot Covers on the puddle of red liquid by the cupboard beside the grandfather clock. Find the 10 differences between the two storeroom pictures; the last one is the plastic food box. Your reward is the Piece of Cheese.
- Give the Piece of Cheese to the mouse on the flour sack and catch it: you get the Mouse.
- At the Old Park Pavilion, tap the cobblestones between the crowd's feet to release the Mouse. The crowd scatters and the stall is free.
CHAPTER 3
Riddles at the Pavilion
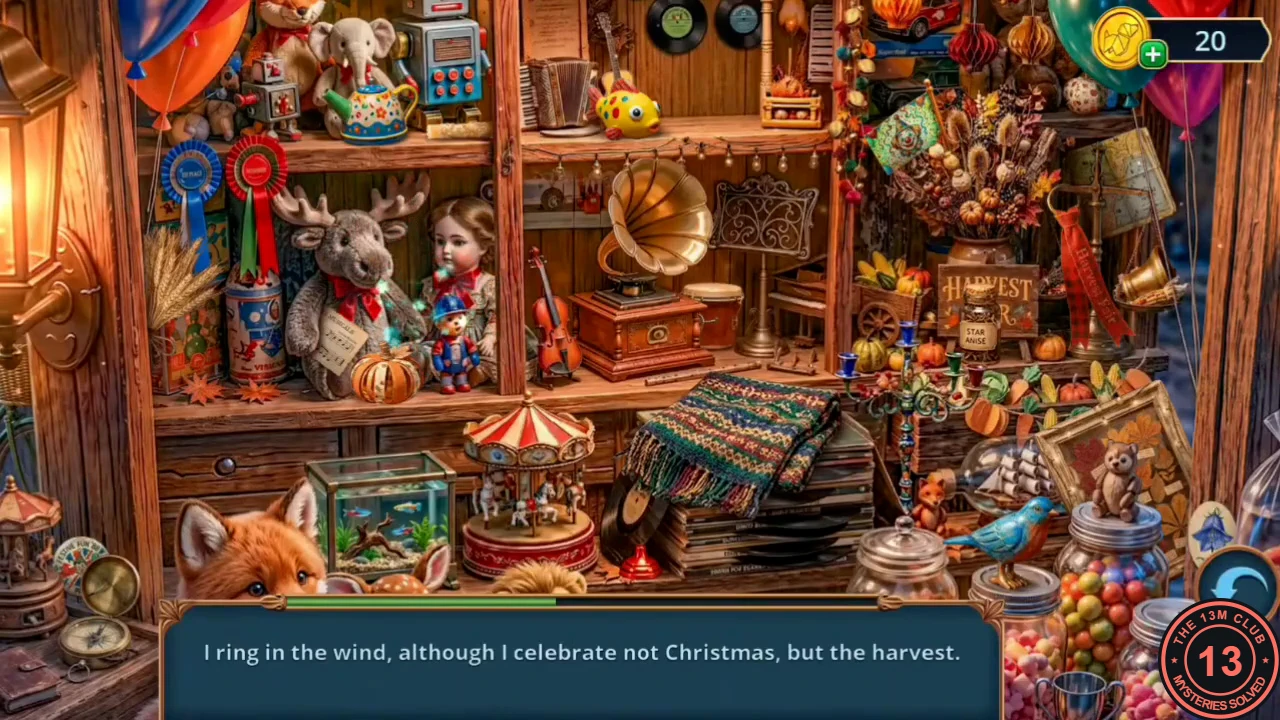
Answer the prize stall's riddles.
- At the pavilion prize stall, tap the object each riddle at the bottom describes. The riddles appear in this order: 1) Placed at the door so autumn greets the guests first: the green leaf wreath at the left edge. 2) Light without a wick, lit by children's smiles: the jack-o'-lantern on the top shelf. 3) The harvest looks richer in me than in the barn: the wicker basket of apples behind the blue bird. 4) Not a bird, but stands on a pole and scares crows: the little scarecrow on the carousel. 5) Smells of cinnamon, but don't eat it: the gingerbread garland on the upper-left shelf. 6) Takes the holiday home to the windowsill: the pot of flowers between the toy moose and the doll. 7) Rings in the wind for the harvest: the small blue bell ornament at the lower right, beside the candy jar. 8) Shows the village as if it had no secrets: the folded map at the top right, beside the brass scales. 9) Keeps the tea ceremony beautiful: the flowered teapot in front of the toy elephant. 10) Laid on laps as the evening gets colder: the striped blanket. 11) Spices as important as family secrets: the STAR ANISE jar by the Harvest Fair sign. 12) Collects autumn under glass: the glass-fronted frame of autumn leaves behind the toy bear. Your reward is the Toy Fishing Rod.
- Victor collapses. Decision point: Freeze in fear (free, 0 stars), Catch the criminal (3 stars) or Help Victor (6 stars). This guide follows Freeze in fear.
CHAPTER 3
Saving Victor: The Bandage Game
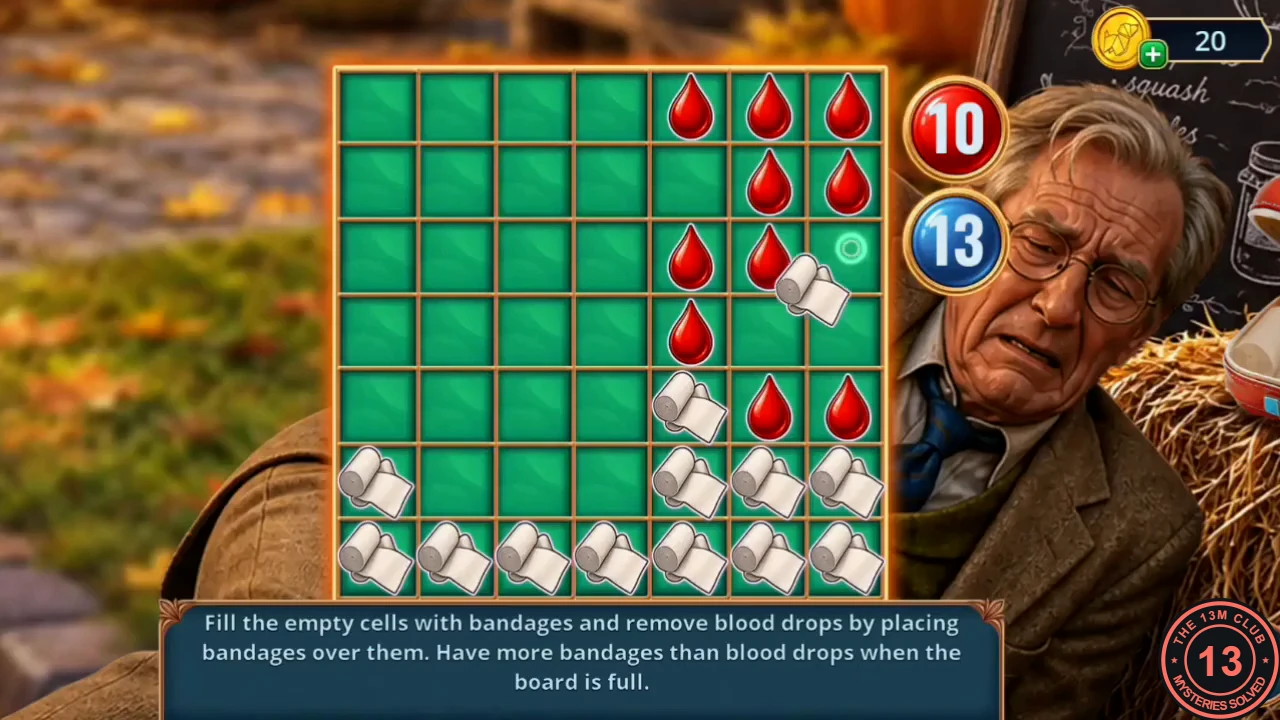
Get the first-aid kit and win the bandage game to save Victor.
- Fish the key out of the pavilion's storm drain grate with the Toy Fishing Rod: First-Aid Kit Key.
- Unlock the first-aid wall cabinet (the bees are already calm) and take the First-Aid Kit.
- Use the First-Aid Kit on Victor to start the bandage game on a 7x7 board. Tap a bandage, then a cyan cell next to it to add a new bandage, or a purple cell two spaces away to jump there. Blood drops touching the destination turn into bandages. The blood drops then take their turn. Finish with more bandages than blood drops once the board is full. Spread from the bottom row and convert large groups of drops. One winning board finished with 31 bandages to 18 drops.
- Chapter 3 ends with Your Decision Points: Put a stop to the row 0 or Hear Eleanor out 2; Suggest going to the mill 0 or Point out Thomas's fear 2; Ask about the next steps 0 or Reassure Thomas 2; Freeze in fear 0, Catch the criminal 3 or Help Victor 6. Memory photo tiers are 0, 4 and 10 stars; with fewer than 4 you receive the 0-star photo. The paid answers and the memory photos are described in Endings and Extras.