Kitchen silhouette scene
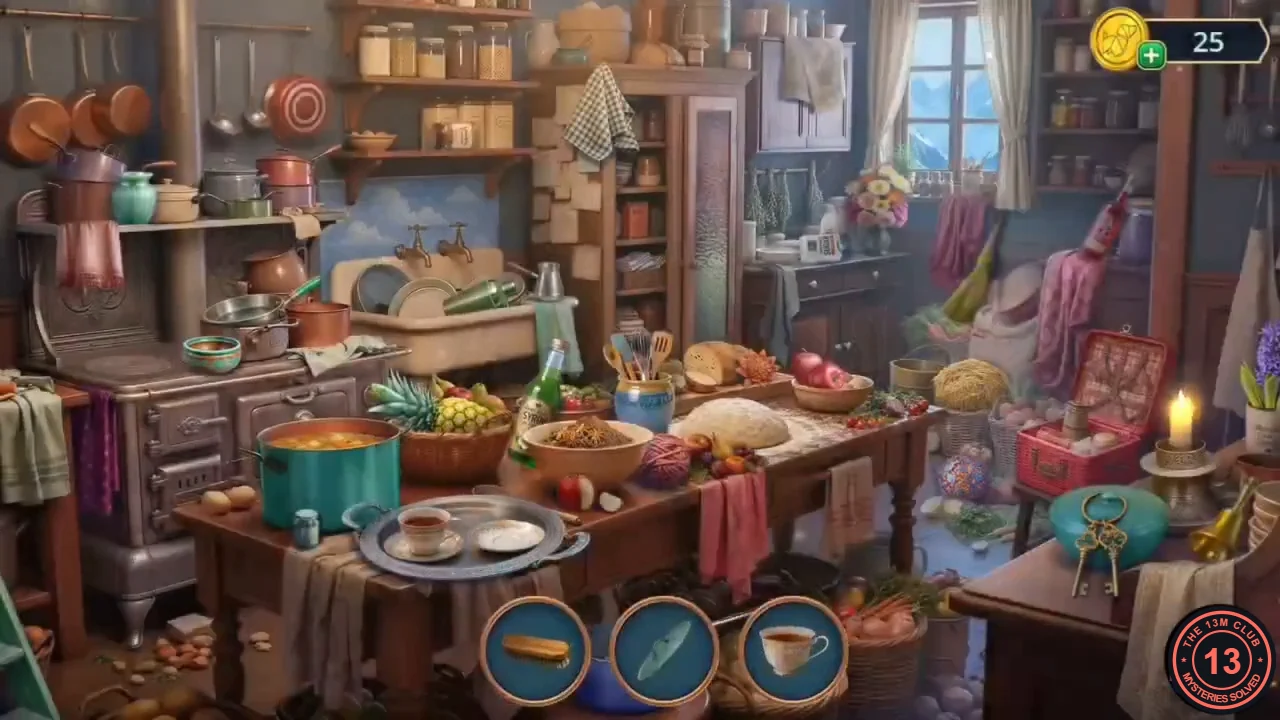
The round slots at the bottom show objects missing from the kitchen, three at a time. Tap the place in the kitchen where the shown object belongs. It flies there and the next object replaces it in the slot. Twelve objects are listed below in the order our example playthrough placed them.
- Place the first six objects. Wooden scrubbing brush: in the sink, on the dishes. Teacup: on the empty saucer on the silver tray at the front of the table, beside the other cup. Tea towel: on the hook on the right wall, right of the window. Bunch of dried lavender: on the rail of hanging herb bunches under the window, left of the flower vase. Wooden spoon: in the blue utensil crock on the table, behind the dough. Copper canister: at the left end of the middle canister shelf on the upper-left wall.
- Place the other six. Old key: on the bunch of keys lying on the teal covered dish on the right-hand table, in front of the candle. Red polka-dot kettle: on the empty hotplate of the stove on the left. Red round canteen with a strap: in the open red picnic basket beside the candle. Rolling pin: on the dough in the middle of the table. Teal pot lid: on the teal soup pot at the front left of the table. Matchbox: on the right-hand table between the candle holder and the brass bell. The scene ends. Reward: CHEESE CRACKER.
- In the locomotive cab give the CHEESE CRACKER to the mouse on the workbench tools. Take the SIGNAL FLAG.
- At the Abandoned Train Station place the SIGNAL FLAG in the model-railway diorama case to start the rail puzzle.
Rail loop
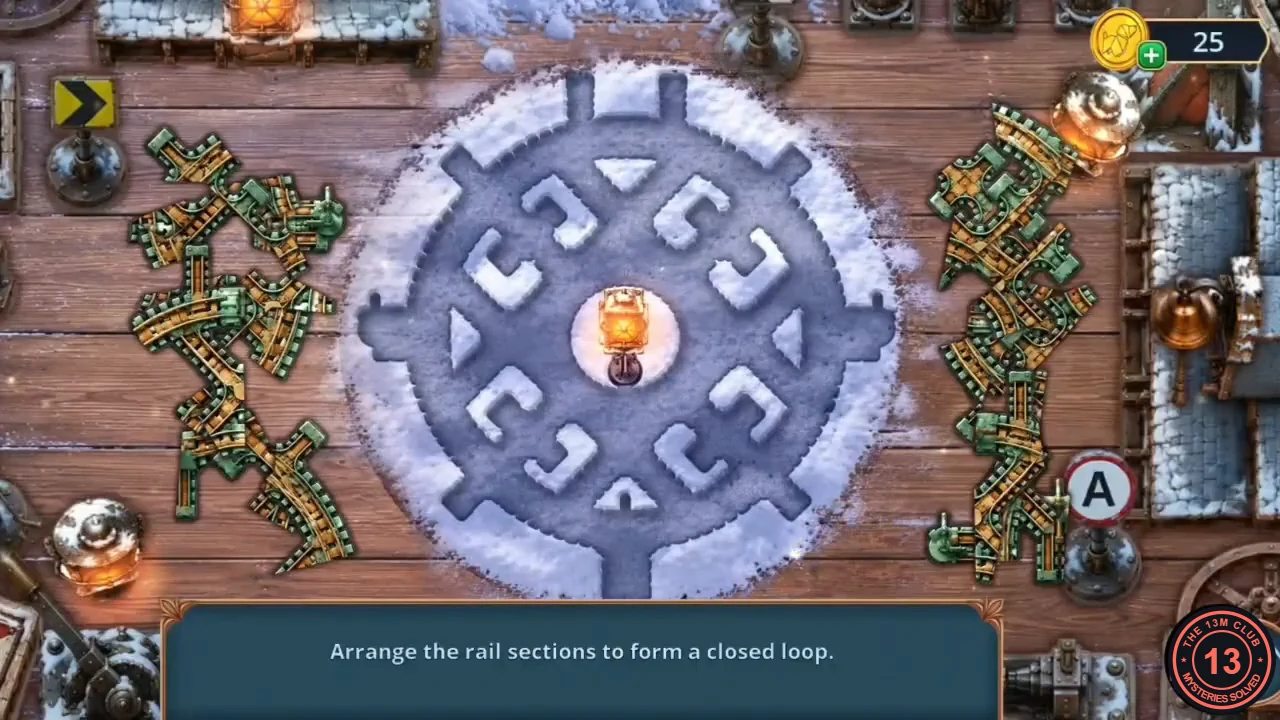
Rule: "Arrange the rail sections to form a closed loop." Drag the rail pieces from both sides onto the matching snowy outlines around the central lantern.
- Place each rail piece on the outline with its shape. The finished track has an outer ring, eight spokes, an inner ring and eight corner hooks. Each outline accepts only the piece with the same curve, so match by shape. The solved image shows the closed loop.
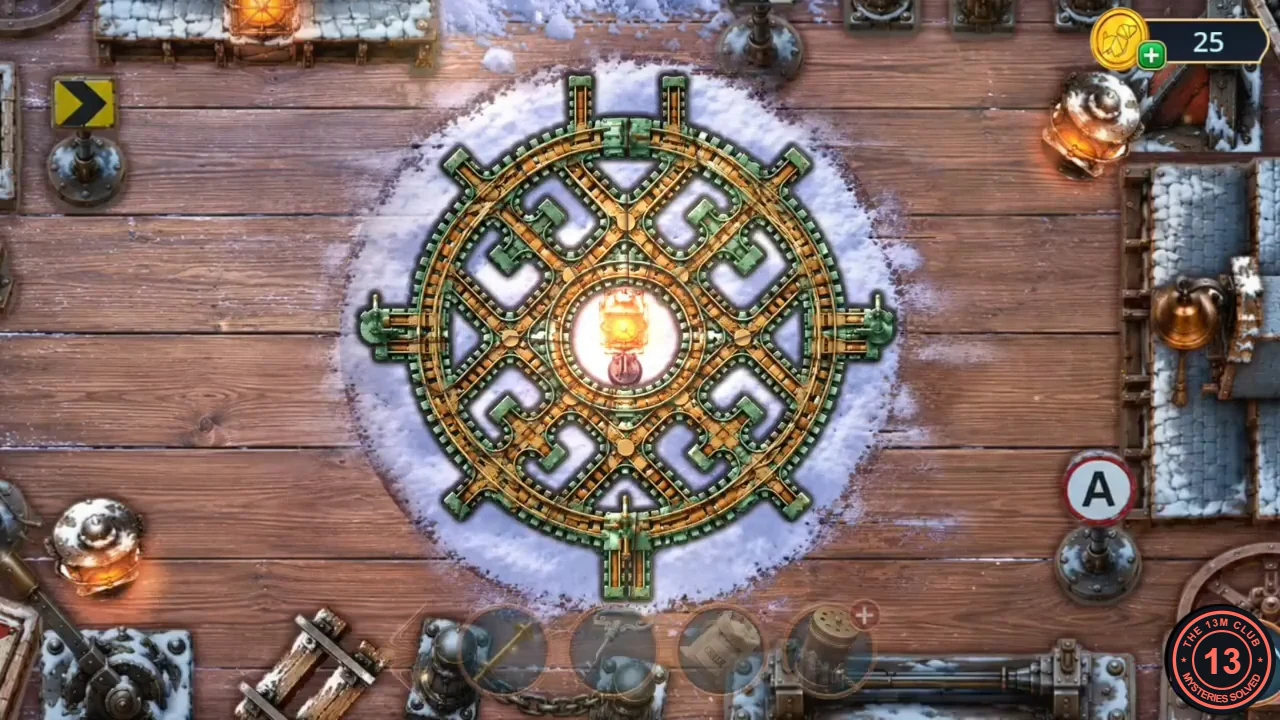
Solved: every rail section sits on its matching outline. - Take the RUBBER BALL and the OLD NUTCRACKER from the diorama.
- At the Bridge use the OLD NUTCRACKER on the box under the brass horn. Take the DEVELOPED PHOTOS (1/3) and the OLD BLANKET.
- At the Mountain Pass lay the OLD BLANKET in front of the green tent and sew it over the rip with the NEEDLE WITH THREAD. The tent opens another hidden-object scene.
Tent fragment scene
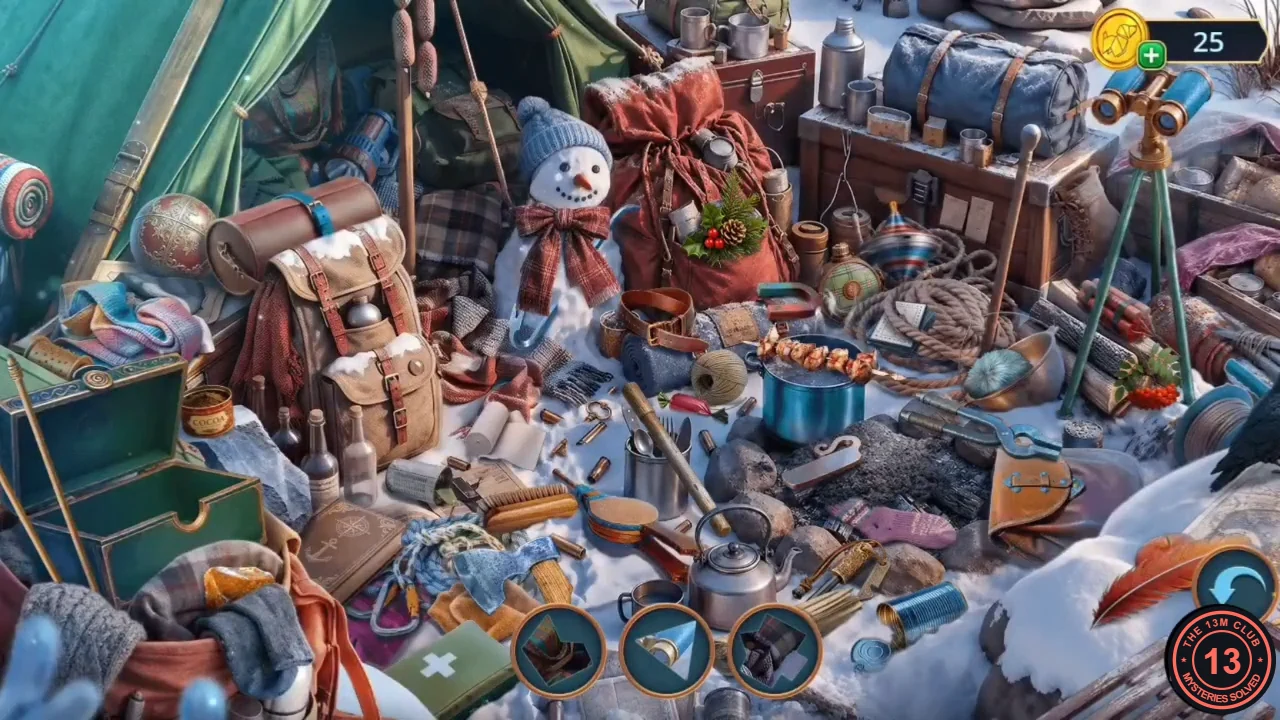
Three round slots at the bottom each show a magnified fragment of an object in the snowy camp. Tap the whole object to clear the fragment; the next fragment then fills the slot. Twelve fragments are listed below in the order our example playthrough found them.
- Find the first five. Dark red tartan fragment: the tartan cloth hanging just inside the tent opening at the upper left, above the blue lantern. Blue barrel with a silver ring: the binoculars on the tripod at the upper right. Plaid fragment: the folded brown plaid blanket between the backpack and the snowman. Pink fragment: the pink wool sock on the fire-pit stones, right of the kettle. Pastel knitted fragment: the folded pastel striped scarf in the open green box at the left.
- Find the other seven. Holly fragment: the holly sprig with pine cones on the red sack beside the snowman. Leather fragment: the brown leather belt with a buckle on the blue cloth in the centre. Tan fragment with a stud: the front pocket of the beige backpack, with the brass button on its flap. Red berries: the sprig of rowan berries on the log at the right. Brown-and-white fragment: the COCOA tin beside the open green box at the lower left. Orange striped fragment: the oval wooden paddle with an orange rim and a blue-wrapped handle, next to the scrubbing brush at the lower centre. Last fragment: the round canteen wrapped in tartan cloth between the red sack and the coiled rope. Reward: FISHING ROD.
- Near the Old Shelter zoom in on the frosted window left of the door. Use the FISHING ROD on it and hang the RUBBER BALL on the line; the swinging ball opens the window.
- Zoom in on the purple chair inside. Take the EXTINGUISHED LANTERN and the RECORDING CYLINDER. The chair's mechanism is missing a part.
- Open the EMPTY ROLLER in the inventory and add the gold rod and the RECORDING CYLINDER to make the horn's music roller (achievement I HOPE YOU LIKE MUSIC).
- At the Bridge use the music roller on the brass horn mechanism to start the note puzzle.
Horn note chain
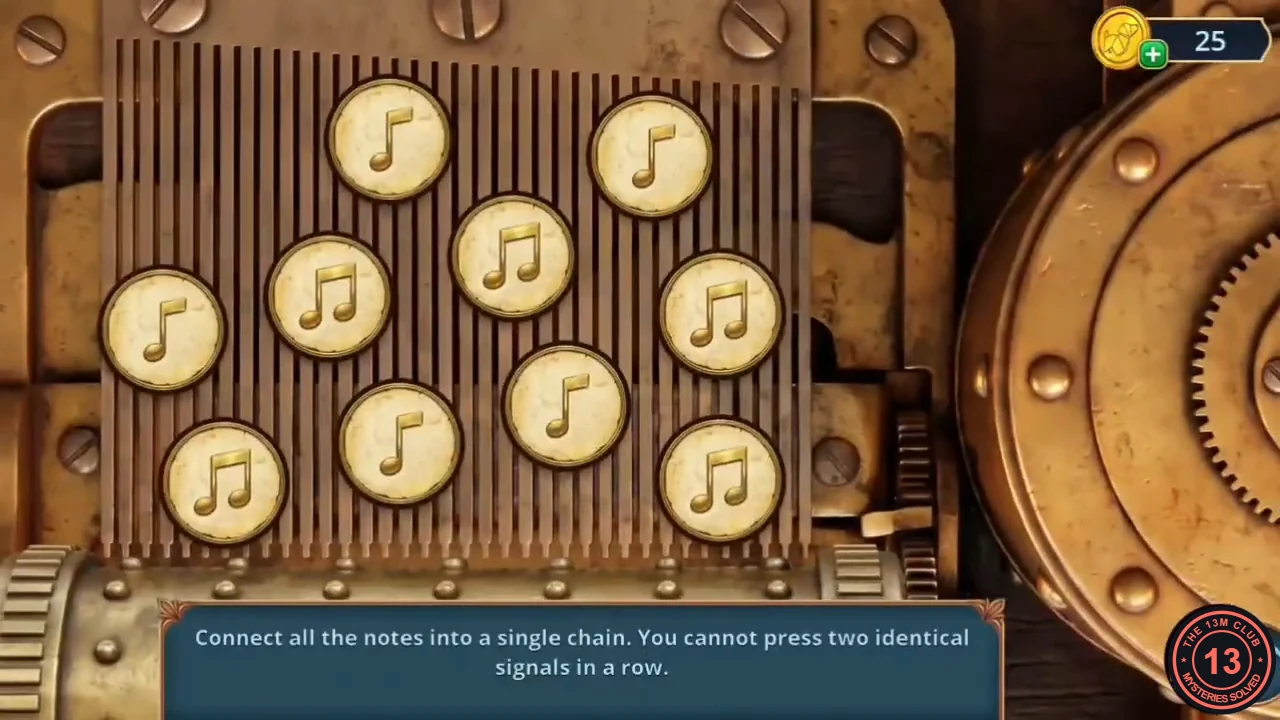
Rule: "Connect all the notes into a single chain. You cannot press two identical signals in a row." Ten gold discs show a single note or a double note.
- Start at the far-left single note and alternate single and double notes, each time moving to a neighbour: far-left single → bottom-left double → bottom-centre single → left-centre double → top-left single → centre double → top-right single → right double → lower centre-right single → bottom-right double.
- Take the SMALL BRUSH that drops from the eagle's nest.
- In the Old Shelter zoom in on the stuffed squirrel. Dust it with the CHALK POWDER and clean it with the SMALL BRUSH, then read the letter behind it: an anonymous complaint to the council about Eliza. Take the HEAVY FIGURINE (owl) and the LIGHTER.
- Open the DRY SMOKE COMPOUND in the inventory and put the LIGHTER in its side holder: SIGNAL SMOKE. Near the Old Shelter use the SIGNAL SMOKE on the attic hatch at the top of the ladder. A hidden-object scene opens.
Attic silhouette scene
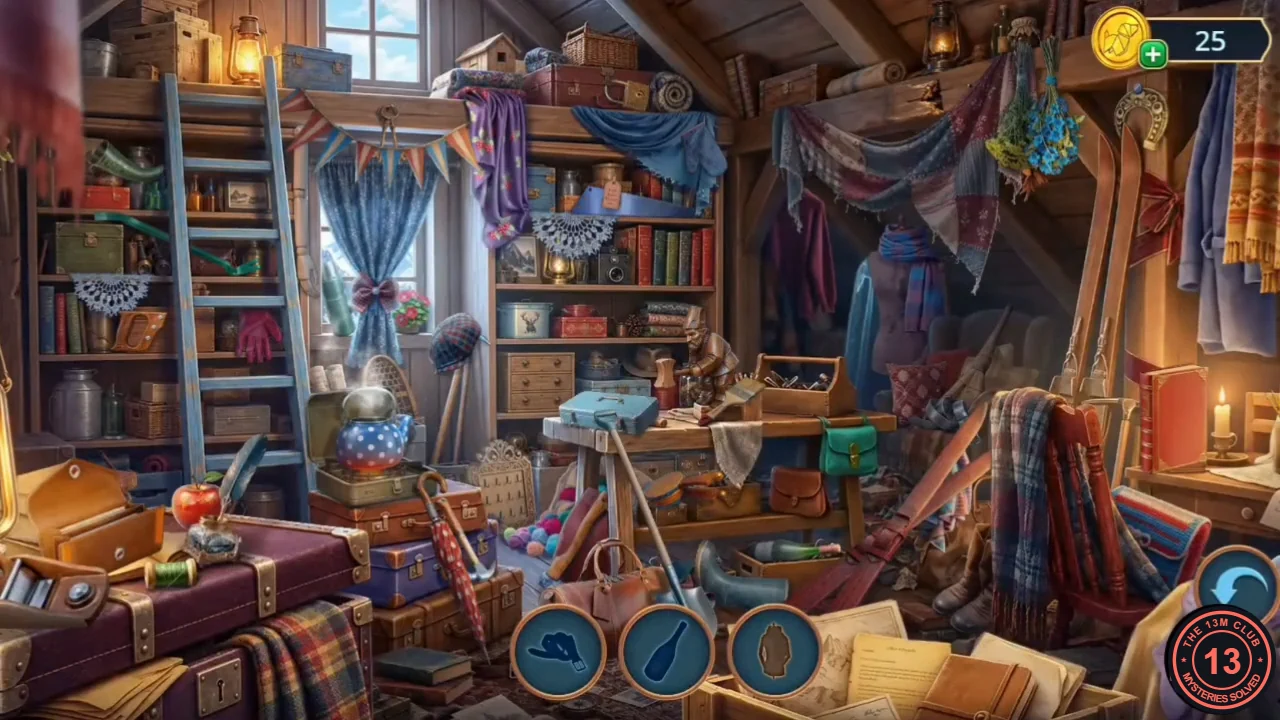
Three round silhouettes at a time. The brown wooden-figurine silhouette is interactive: take the missing limb from the upper bookshelf and set it back on the carved figure on the desk.
- Find every silhouetted object (bottle, curved blade, saw, wooden figurine, scraper, boot, hammer, glove, horseshoe, polka-dot teapot, padlock, felt hat). Reward: HANDLE.
- At the High Cliff use the HANDLE on the crank socket of the signal apparatus right of the cart and take the BAROMETER NEEDLE.
- In the Old Shelter place the BAROMETER NEEDLE on the dial of the bearded man's portrait. Take the PIECE OF RAILWAY TRACKS and the DEVELOPED PHOTOS (2/3).
- At the High Cliff place the PIECE OF RAILWAY TRACKS in the railway-diorama case to open a hidden-object scene.
Diorama two-part objects
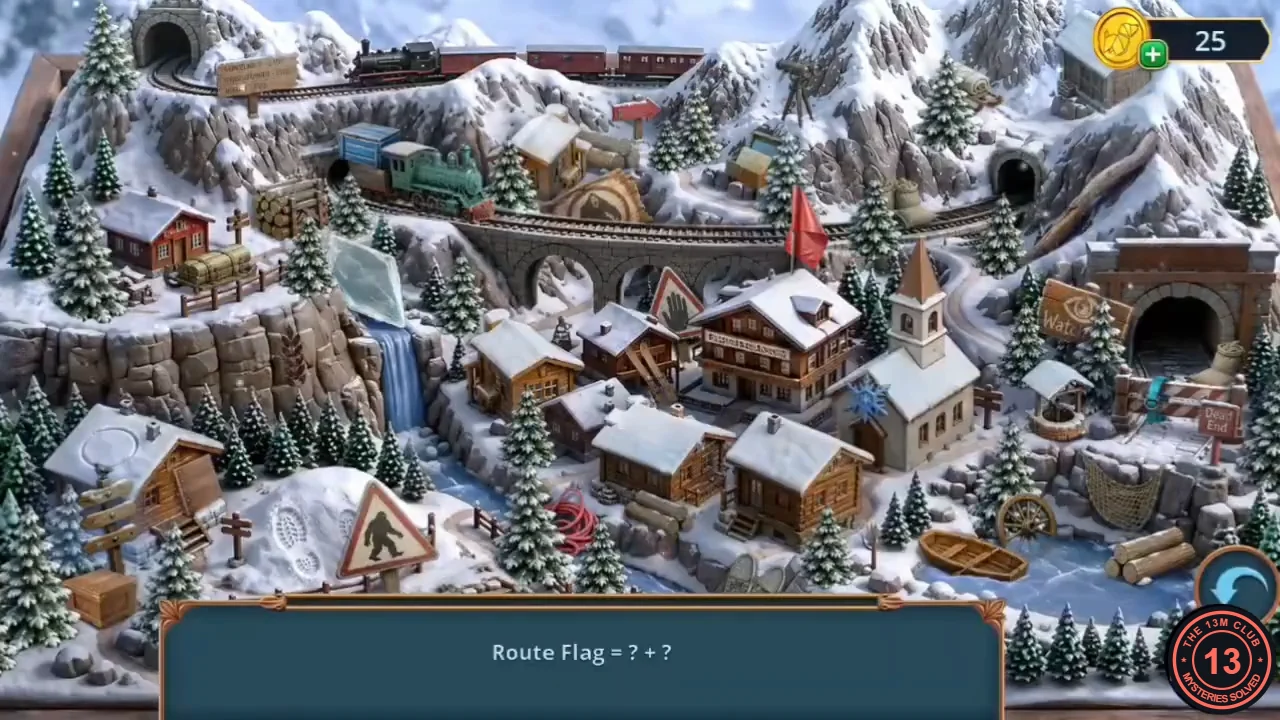
The bar shows one recipe at a time ("Target = ? + ?"); find both parts in the alpine-village model.
- Build: Route Flag = Boot Prints + Flag; Glove = Hand + Leather Belt; Ski Pole = Snowflake + Stick; Lens = Crystal + Eye; Mill = Wheat + Wheel; Compass = Circle + Arrow. Reward: AEROSOL DEODORANT.
- At the Mountain Pass zoom in on the frozen blue cabinet beside the tent. Place the AEROSOL DEODORANT in it and ignite it with the LIGHTER to melt the ice. Collect the EDELWEISS BROOCH on the cabinet floor at the bottom right and take the SMOKING PIPE.
- Near the Old Shelter zoom in on the purple armchair inside the open window. Put the SMOKING PIPE in the brass bracket at the base of the seat; it works as a lever and the backrest rises. Take the ERASER.
- In the locomotive cab put the ERASER on the bare pin of the firebox ash door as a handle. Take the DEVELOPED PHOTOS (3/3) from the ash.
- At the High Cliff use the DEVELOPED PHOTOS on the clothesline left of the old camera to start the photo puzzle.
Clothesline photos
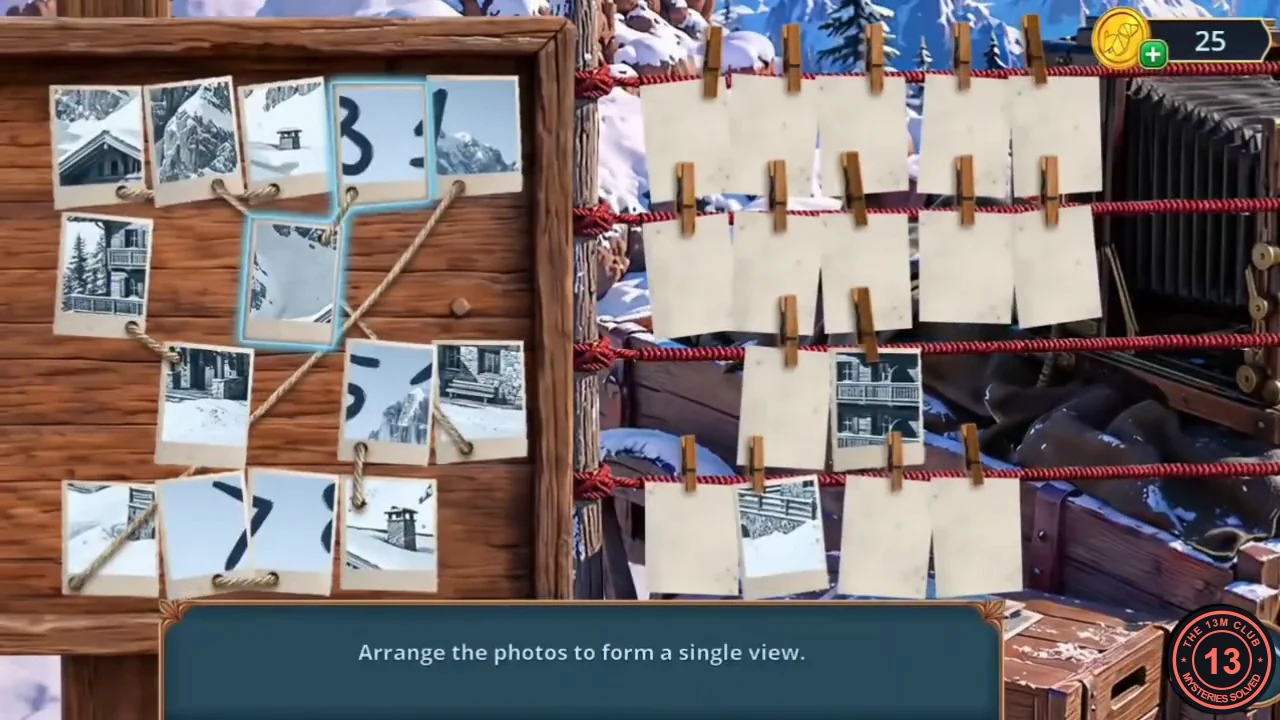
Rule: "Arrange the photos to form a single view." Drag the loose photos onto the clothesline pegs; photos tied together with rope move as a group, and two are already hanging.
- Hang the photos so the mountain panorama runs across the top row (it shows the handwritten digits 7 8 5 1), the ridge and chalet roof with two chimneys in the second row, and the balcony and stone base in the lower rows. Place the rope-tied groups first, because they fill several pegs at once, then fit single photos into the remaining gaps. The solved image shows the complete view.
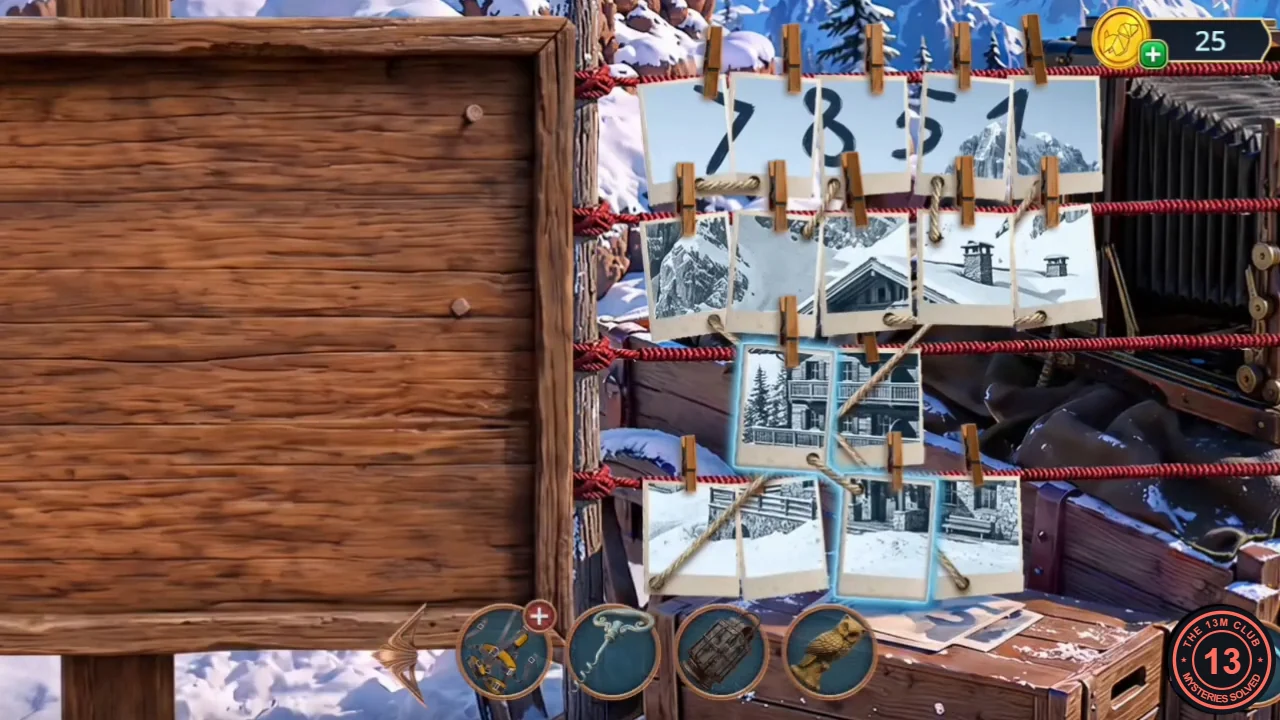
Solved: the photos form a single view of the chalet. - Set the four-wheel lock of the red toolbox on the cart to 7851 and take the OLD FLASK.CODE7851
- Open the OLD FLASK in the inventory and pull its cork with the CURVED CORKSCREW: VINEGAR.
- In the Hotel Hall pour the VINEGAR into the clogged service sink. Read the staff note about things breaking too often and take the DIAMOND RING.
- In the Old Shelter place the DIAMOND RING in the slot of the bearded man's portrait to start the segment puzzle.
Portrait circle segments
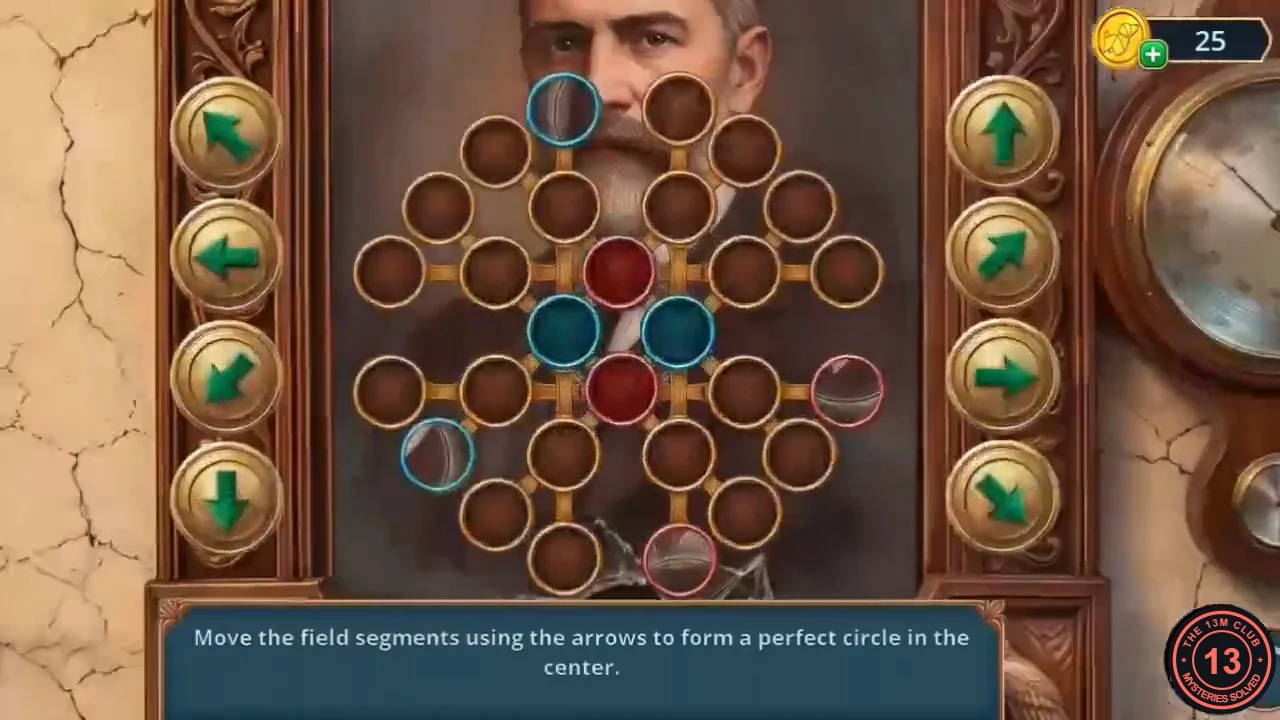
Rule: "Move the field segments using the arrows to form a perfect circle in the center." Four glass segments (two blue, two red) sit on a diamond lattice of sockets. Each arrow press moves every segment one socket in that direction if a bar leads that way; segments without such a bar stay put. Red targets are above and below the centre, blue targets left and right.
- From the starting position press: ↗, →, ↗, ↑, ↑, ←, ↗, ↓, ↓, ←. The four segments meet on their coloured targets.CODE↗ → ↗ ↑ ↑ ← ↗ ↓ ↓ ←
- Read the plaque about August Wald, founder of the shelter, and take the ICE SPLITTING TRIDENT.
- At the Bridge zoom in on the chained wooden chest in front of the cabin porch. Wedge the ICE SPLITTING TRIDENT into the chain and strike it with the HEAVY FIGURINE. Take the OLD ROUTE MAP and collect the EDELWEISS BROOCH at the right edge of the chest beside the rope-wrapped post.
- In the Old Shelter place the OLD ROUTE MAP on the desk relief board to start the jigsaw.
Old route map jigsaw
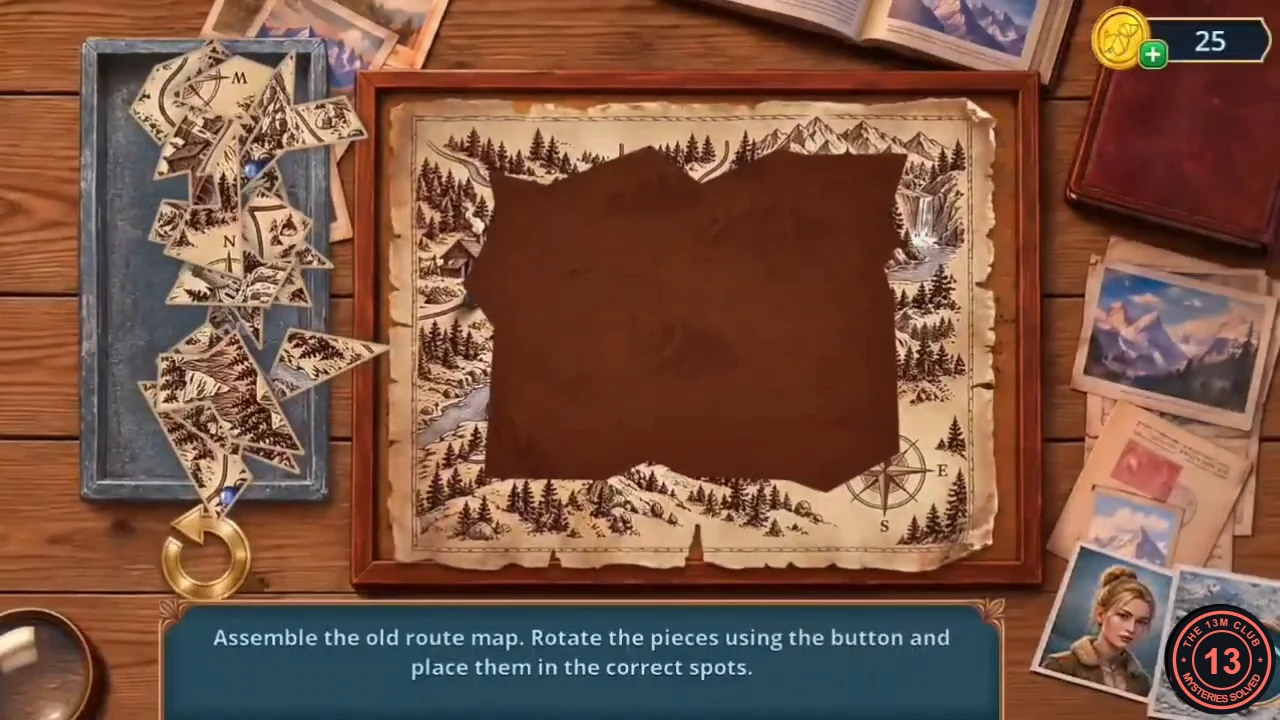
Rule: "Assemble the old route map. Rotate the pieces using the button and place them in the correct spots." The irregular parchment pieces are piled on the left; the round button at the bottom left rotates the selected piece.
- Place the edge pieces first (the compass corner goes bottom right), then fill the middle, rotating each piece until its trail lines and labels continue. The solved image shows the assembled map.
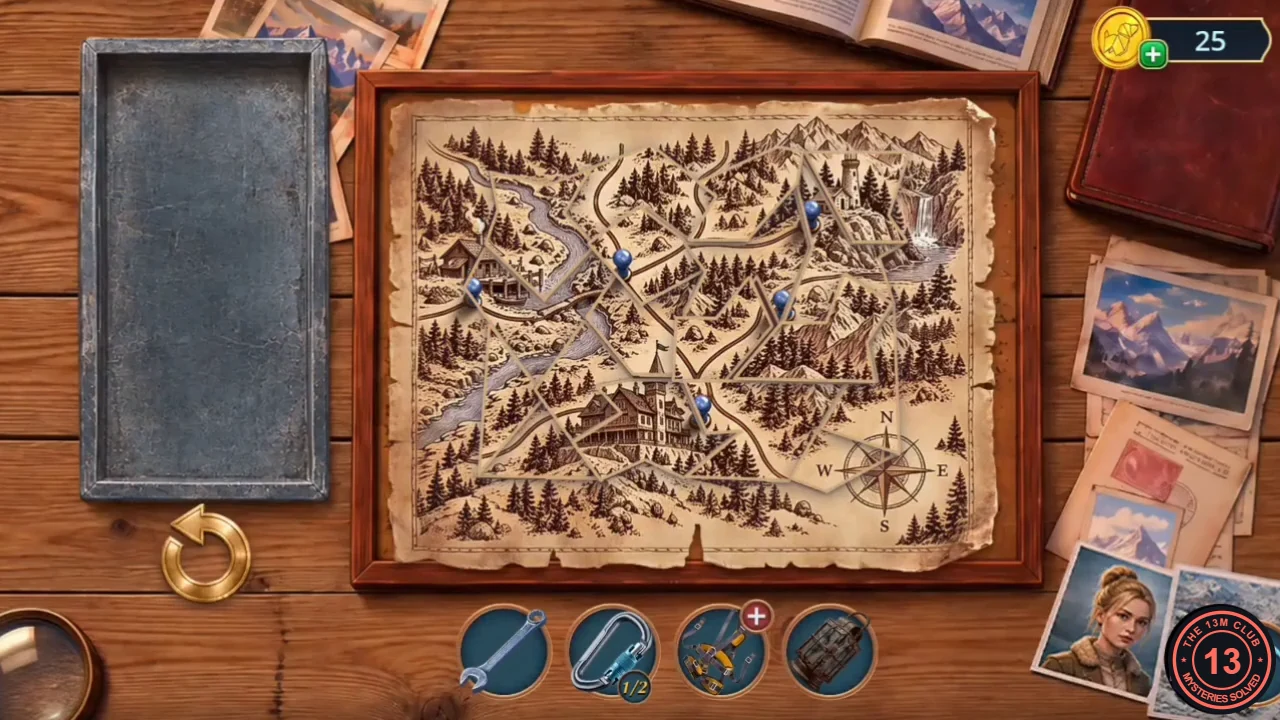
Solved: the assembled route map with every piece placed and rotated. - A tray slides out of the relief board: read the "Edelweiss Acquisition Plan", Leonard's scheme to divert Walter's group and blame Eliza.
- The Chapter 3 results show your decision points out of 12 and the 0/4/10 outcome panels. Chapter 4 begins at the frozen waterfall.