Hotel Hall: open the kitchen
The rescued guest sits in the green armchair, chilled to the bone. Clara asks for hot tea from the kitchen, which is locked.
- Zoom in on the bellboy mannequin with the cloche and take the ROPE PIECE. The bolt on his collar has a hexagonal head; you need something to grip it.
- Zoom in on the electrical panel and kerosene canister on the right. Take the SIGNAL POWDER and the JACK HANDLE. The torn wires need tape later.
- Travel to the Mountain Pass. Zoom in on the green tent (it is missing a fastener) and take the DIVIDERS.
- Back in the Hotel Hall use the PLIERS on the bellboy's collar bolt and take the BOLT.
- Open the BROKEN CARRIAGE JACK in the inventory and add the BOLT and the JACK HANDLE: JACK.
- At the Mountain Pass zoom in on the rubble with fallen planks and place the JACK. Take the EMPTY CANISTER and the SMALL MIRROR.
- In the Hotel Hall zoom in on the carved kitchen door. Place the SMALL MIRROR in the oval panel to see the chain latch through the gap, then use the wire HOOK from Chapter 2 on the chain (the Dividers do not work). The door opens onto a hidden-object scene.
Kitchen pattern scene
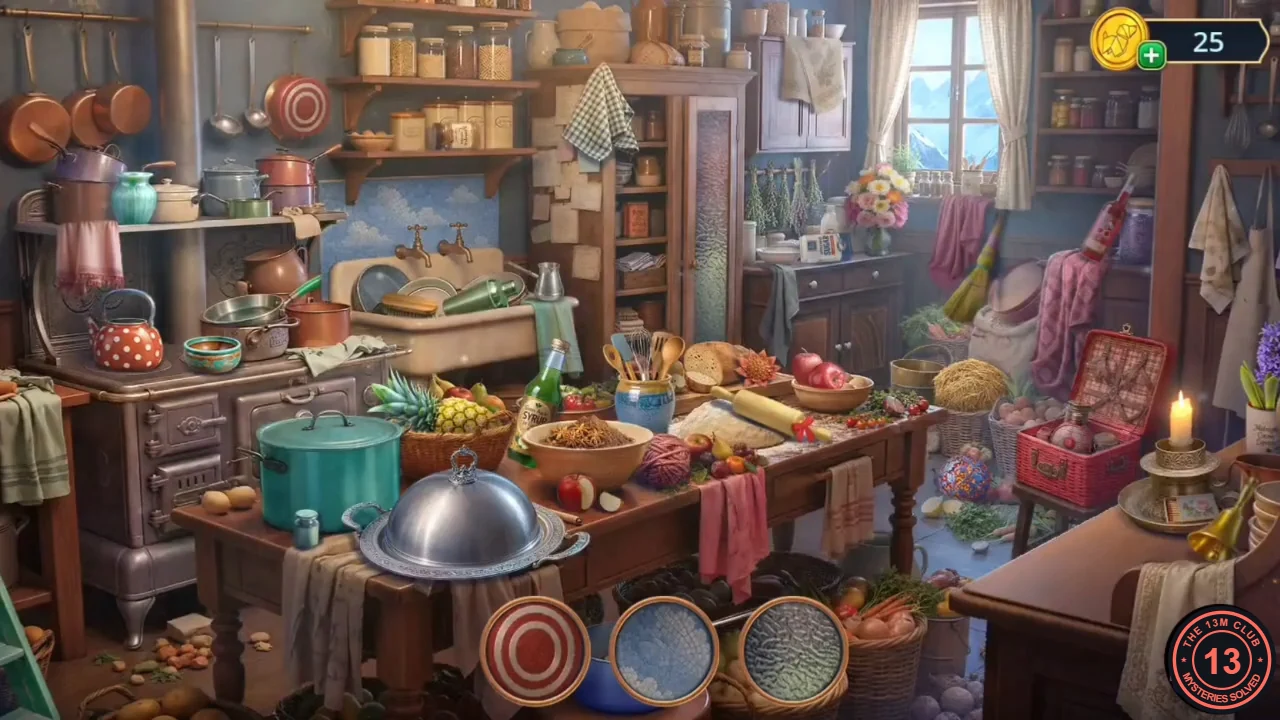
The tray at the bottom shows three round pattern swatches at a time (red rings, woven basket, grains, noodles, eggs, chili, checked cloth, honeycomb and so on). Tap the kitchen object that carries each pattern.
- Match every pattern until the tray is empty. Reward: WARM TEA.
- Give the WARM TEA to the guest, Heinrich Walter. Decision: "Ask what he remembers about the Council man." (60 coins, 2 points) or "Ask if the others are all right." (free, 0). Heinrich offers to show the way and gives you the FUSE. New task: get to the old train station.
Blast the drift and fuel the bridge engine
Blast the snowdrift at the Mountain Pass, then collect what you need at the Bridge to fuel its frozen engine with kerosene.
- At the Mountain Pass zoom in on the snowdrift and fill its three slots with the SIGNAL POWDER, the FUSE and the METAL SIGNAL CASING from Chapter 2. The charge clears the path (achievement DYNAMITE ASSISTANT).
- At the Bridge zoom in on the rusty barrel under the broken window and take a MIRROR SHARD (1/4).
- Zoom in on the shuttered window above the chained chest. Open the shutter padlock with the PAPER CLIP and take the HOSE.
- Zoom in on the horn post and take the RUBBER BULB (red "+" badge) from the horn. The chained chest below cannot be opened yet.
- In the Hotel Hall zoom in on the kerosene canister: put the EMPTY CANISTER under the tap and attach the HOSE to fill it with KEROSENE.
- At the Bridge zoom in on the frozen engine beside the bridge and pour the KEROSENE into its tank to free the gear panel.
Bridge rune gears
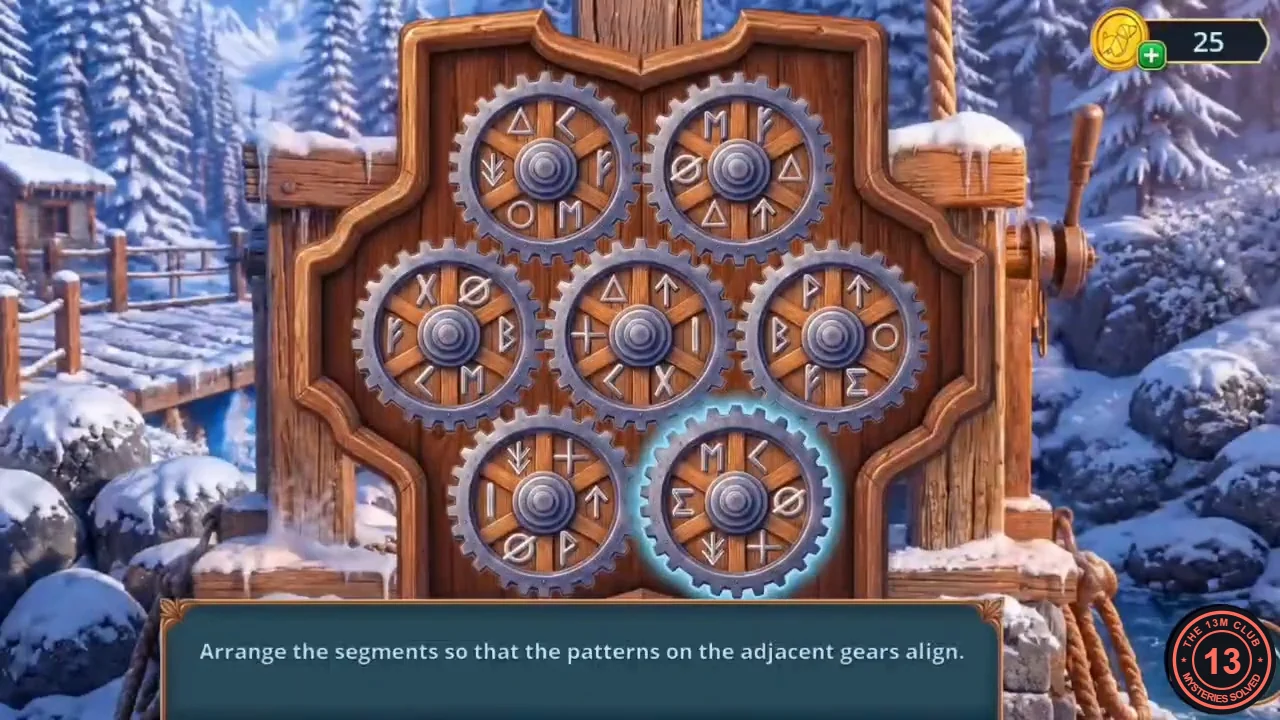
Rule: "Arrange the segments so that the patterns on the adjacent gears align." Seven gears: top-left, top-right, middle-left, centre, middle-right, bottom-left and bottom-right. Tap two gears to swap them; matching runes facing each other glow green.
- Swap top-left with centre, then middle-left with centre, then bottom-left with top-right, then bottom-left with bottom-right. All facing runes glow green.CODETL↔C, ML↔C, BL↔TR, BL↔BR
- Cross the bridge to the Abandoned Train Station. Eliza wants to get the old train running to reach the shelter faster.
Train Station: magnet, belt buckle and the tent
The locomotive door is rusted solid.
- Take the red horseshoe MAGNET stuck on the locomotive door handle.
- Zoom in on the ticket window. Read the "Voice of the Mountain" newspaper and take the VACUUM MASSAGER from the shelf. The wooden block on the shelf can be carved later.
- Zoom in on the model-station drawer with coal by the booth and take the PIECE OF TOURNIQUET (red "+" item). You need something to gather the coal into.
- At the Bridge use the MAGNET through the hole in the broken window above the barrel and pull out the BELT BUCKLE.
- At the Mountain Pass attach the BELT BUCKLE to the green tent strap. The tent opens a hidden-object scene.
Tent paired items
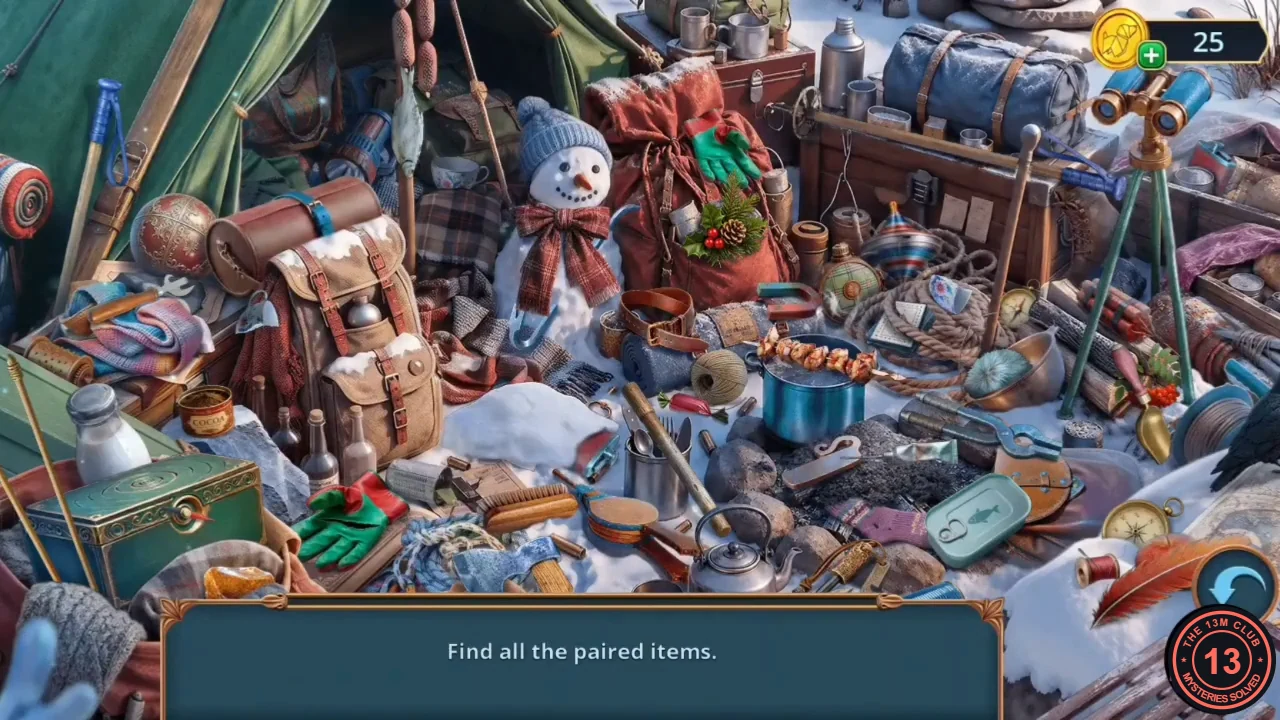
Rule: "Find all the paired items." Tap both matching objects of each pair in the camp. Two pairs need an action first: one object is buried under a snow mound and has to be dug out with a scoop, and one cup lies broken and has to be glued together.
- Tap matching objects in pairs; the selected half of a pair is outlined until you tap its twin.
- Tapping the snow mound below the backpack (left of the tin of cutlery) only gives the hint "Something's buried underneath – I just need to dig it out." Tap the small gold SCOOP standing near the tripod leg right of the blue pot, beside the red berries; it digs the snow away and uncovers a red leather HIP FLASK, one half of a pair.
- The broken blue-and-white cup lies between the striped scarf and the backpack, by the end of the brown bedroll ("It needs some sort of binding."). Tap the left side of the blue cooking pot, beside the red radish, to bring out a white TUBE OF GLUE; it glues the cup together. Pair the repaired cup with the matching blue-and-white cup left of the snowman.
- Find the remaining pairs. Reward: WAX.
- At the Abandoned Train Station apply the WAX to the locomotive door hinges and enter the cab. Take the MOLD WITH SAND from the tool cabinet.
- Use the VACUUM MASSAGER (suction cup) on the smooth metal lid of the console under the tube lamp and take the GLASSES. Half of the console diagram is worn off.
- Zoom in on the workbench under the right window and place the GLASSES in the open case in the drawer to start the toolbox puzzle.
Pack the toolbox
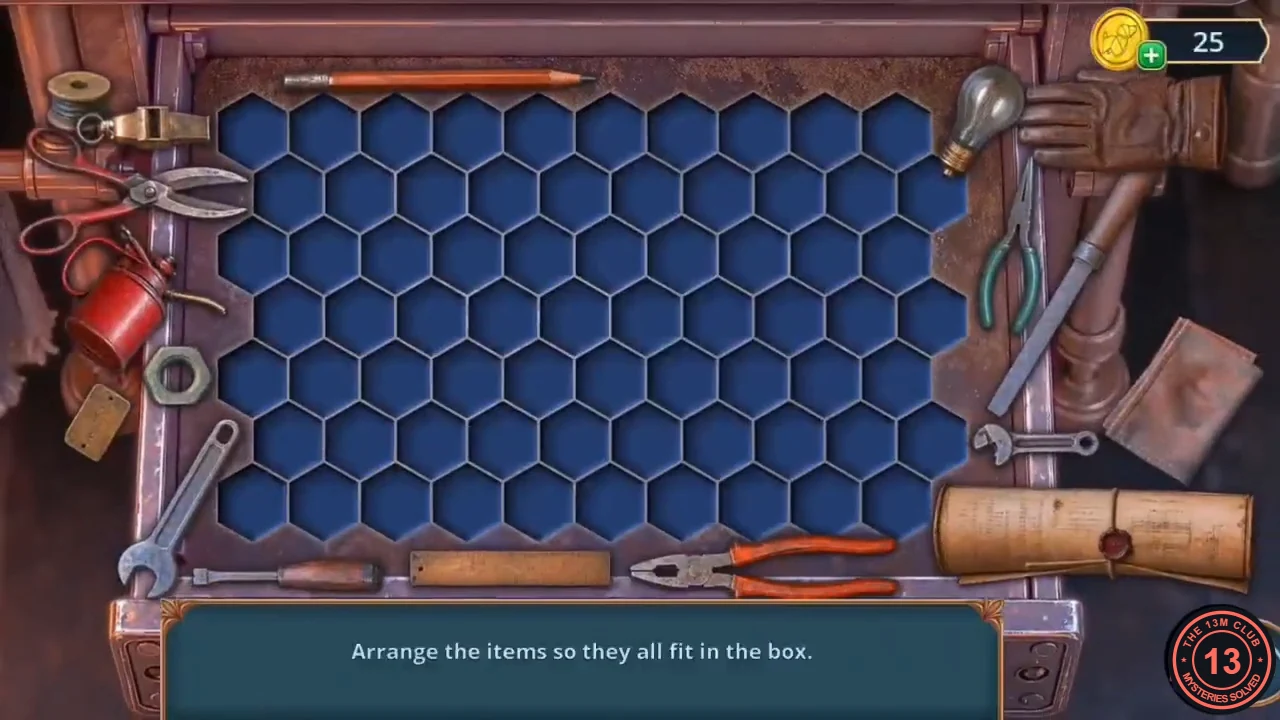
Rule: "Arrange the items so they all fit in the box." Drag each tool onto the grid so nothing overlaps or sticks out.
- Fit all the tools: along the top the pencil, file, whistle, light bulb and tag; the red oil can and leather notebook on the left; the glove in the centre; the adjustable wrench, long file, green pliers and small wrench on the right; red pliers, scissors-pliers, spool, ruler, rolled paper and hex nut along the bottom. Place the large pieces first; the small nut, tag and spool fill the last gaps. The solved image shows the packed box.
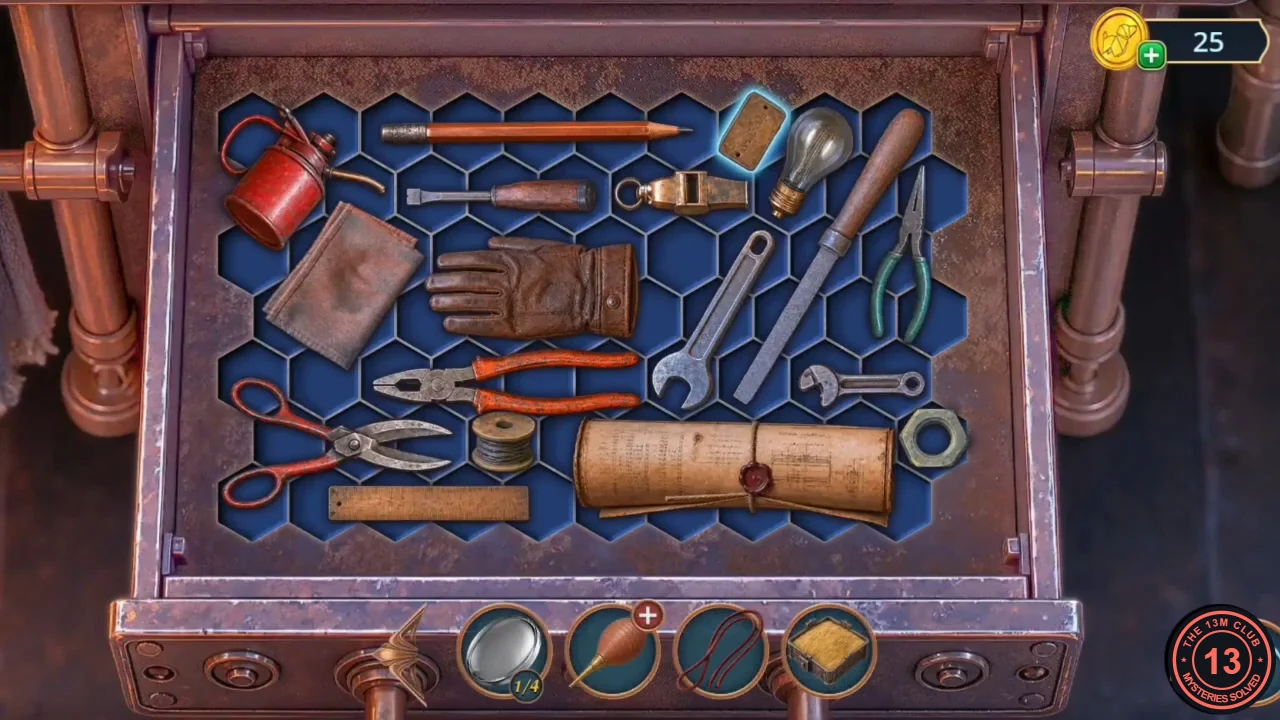
Solved: all tools fit inside the box. The cyan outline only marks the last piece placed. - Take the DUCT TAPE and the WRENCH from the drawer. The burner on the workbench now has three slots for a melt-and-cast job later.
- In the Hotel Hall apply the DUCT TAPE to the torn wires in the electrical panel and take the CABLE.
- Open the ROPE PIECE in the inventory and add the PIECE OF TOURNIQUET and the CABLE: LASSO.
- At the Abandoned Train Station use the LASSO on the broken ladder on the blue wall left of the booth to start the climb.
Rope climb
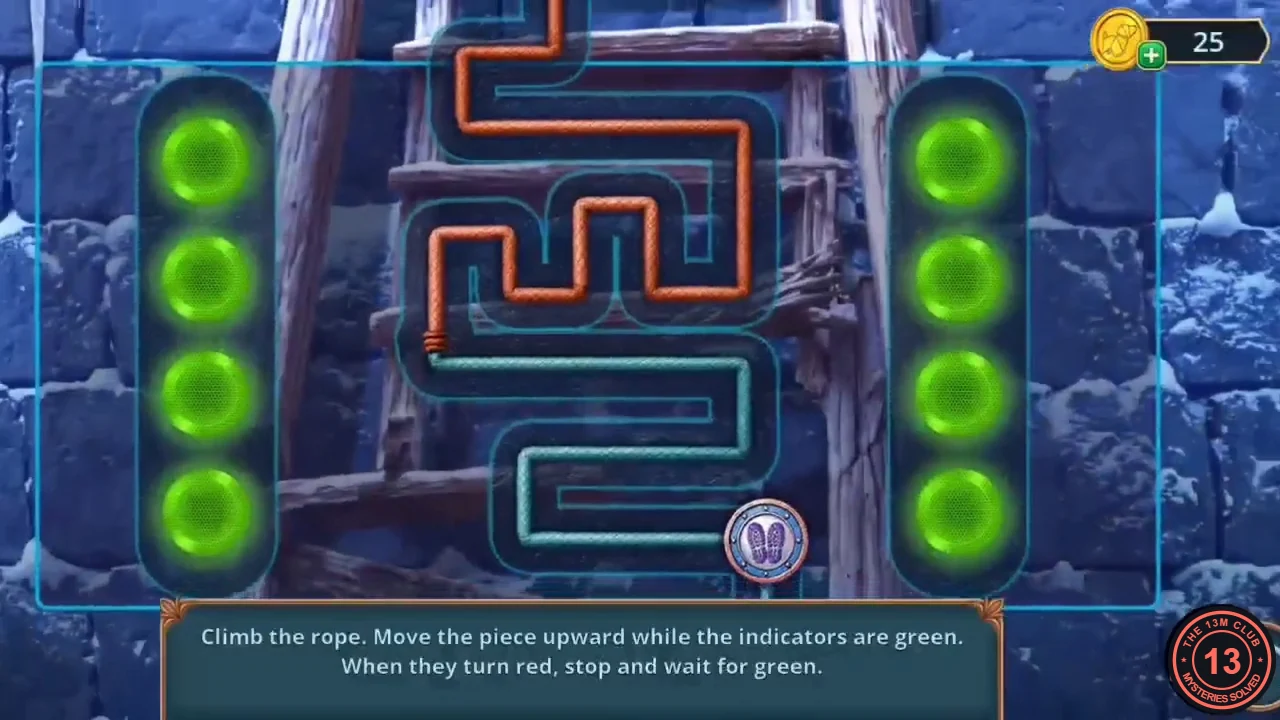
Rule: "Climb the rope. Move the piece upward while the indicators are green. When they turn red, stop and wait for green."
- Drag the token up the winding path only while the lamps on both sides are green; let go as soon as any lamp turns red and wait.
- Michael stops to take pictures. Decision: "Remind Michael why you're here." (60 coins, 2 points) or "Give Michael a moment." (free, 0).
- Zoom in on the log sled in the left foreground. Collect the EDELWEISS BROOCH in the snow left of the log and take the METAL PIN.
- Zoom in on the signal board on the right and take the SMALL PEDAL.
- In the locomotive cab zoom in on the tool cabinet and fit the METAL PIN into the lower-left drawer as its handle. Take the SAFETY HELMET.
- At the Abandoned Train Station use the SAFETY HELMET to scoop the coal in the model-station drawer: COALS. Also take the LUMINESCENT PAINT.
- In the cab put the COALS in the firebox, then brush the LUMINESCENT PAINT over the worn console diagram to start the steam puzzle.
Steam valves
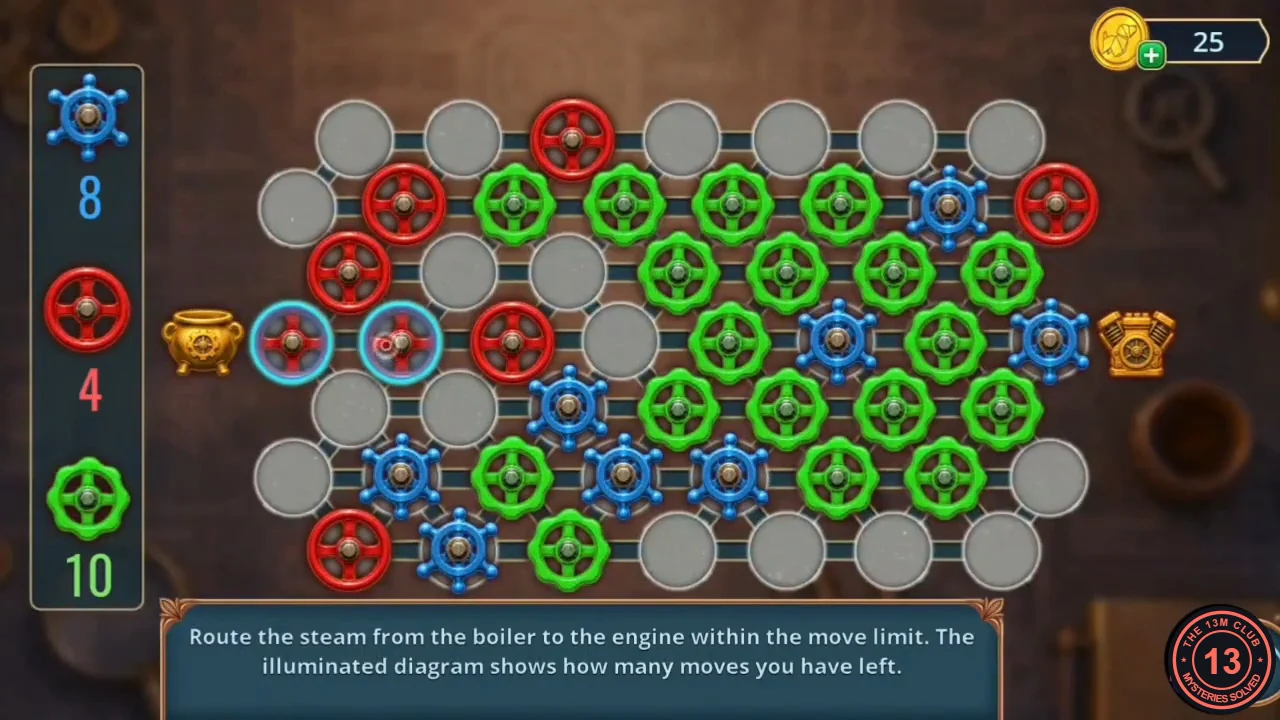
Rule: "Route the steam from the boiler to the engine within the move limit. The illuminated diagram shows how many moves you have left." Each tapped valve spends one move of its colour: 8 blue, 5 red and 10 green. The red valve touching the boiler on the left is already lit. The grid has 7 rows; rows 1, 3, 5 and 7 have 7 valves and rows 2, 4 and 6 have 8.
- Extend one path from the boiler to the engine using every move: go right along the boiler row through one red, climb through two reds to row 2, go right through two greens, drop through three greens to row 5, go left via blue, green and blue to the bottom-left red, run right along the bottom row (blue, green), climb to row 6 and go right through two blues, then up through green (row 5), blue (row 4), green (row 3), up to the top-right blue and red, and back down through green (row 3) to the blue beside the engine. All three counters reach 0.CODER(4,2) R(3,1) R(2,2) G(2,3) G(2,4) G(3,4) G(4,5) G(5,4) B(5,3) G(6,3) B(6,2) R(7,1) B(7,2) G(7,3) B(6,4) B(6,5) G(5,5) B(4,6) G(3,6) B(2,7) R(2,8) G(3,7) B(4,8)
Near the Old Shelter: scraper, logs and keys
New task: get to the old shelter.
- Zoom in on the screw press and the RAGS bin. Put the SMALL PEDAL on the bin's foot bracket, press it and take the SCRAPER.
- Take the log wedged across the frosty window of the small hut on the left: LOGS (1/3).
- At the base of the ladder take the MANUAL PRESS (red "+" item).
- At the High Cliff use the SCRAPER on the frozen stretcher in the left foreground and take the BUNCH OF OLD KEYS. Keep the Scraper.
- Near the Old Shelter use the BUNCH OF OLD KEYS on the ram-head padlock of the door to open the dial lock.
Shelter door dial lock
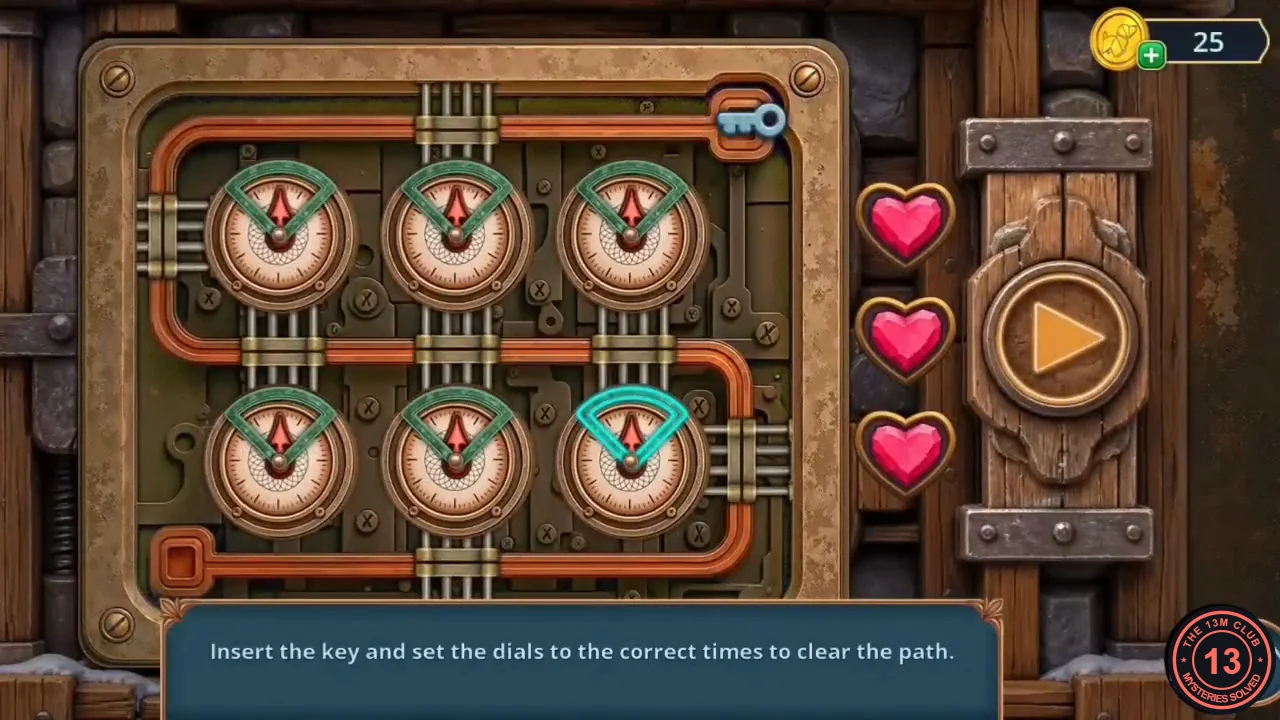
Rule: "Insert the key and set the dials to the correct times to clear the path." Six dials in two rows of three each show a green arc; tap a dial to turn its arc. You have three hearts. All arcs start pointing up.
- Set the arcs: top-left on the lower right (3 to 6 o'clock); top-middle and top-right on the right side (about 1 to 5); bottom-left on the left side (about 7 to 11); bottom-middle at the bottom (about 4 to 8); bottom-right on the lower left (6 to 9). Press the orange Play button: the key runs through every pipe to the exit.
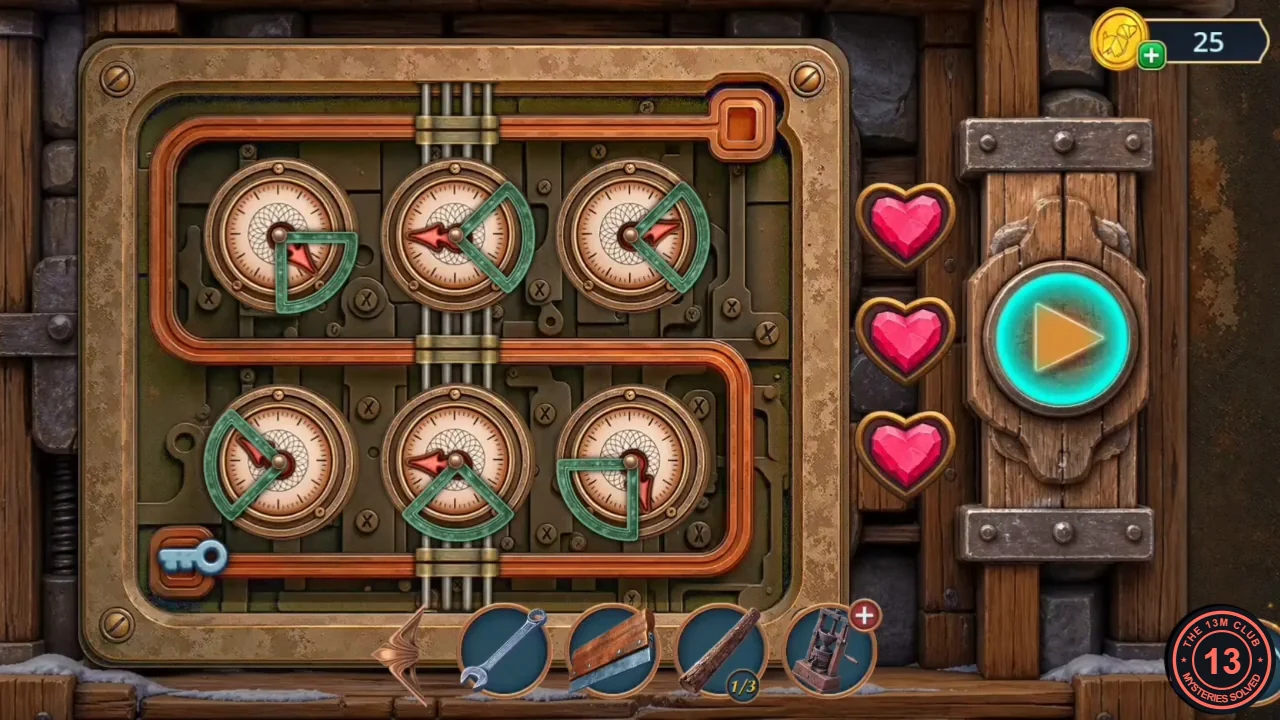
Solved: the arc positions that let the key run through every pipe to the exit. - Enter the Old Shelter. Heinrich cannot explain where the group went. Decision: "Accuse Heinrich" (free, 0), "Look around" (30 coins, 3 points) or "Search for clues" (60 coins, 6 points). New task: find out why Heinrich's group left.