Ice cave fragments
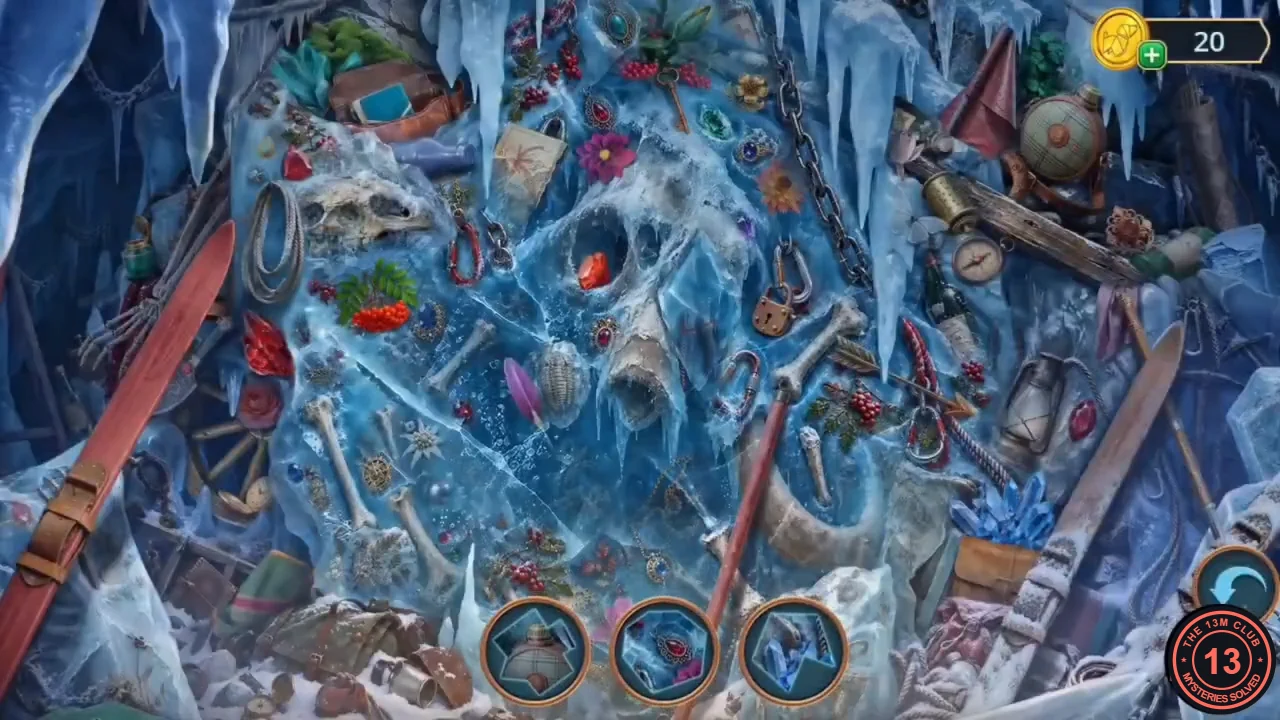
The three round slots show cut-out fragments of the scene instead of names. Find each fragment's spot in the frozen debris and tap it; a new fragment replaces each one you find (12 in all).
- Find the fragments: plaid canteen, red gem with a small pink flower, pocket watch with a blue gem, star-shaped patch with a red ski edge and a white shell, red heart (upper left), padlock (centre right), pink feather, red rowan berries (left centre), red brooch with a pink flower, dark-blue star-shaped patch, white butterfly and blue crystal with a fish-like shape.
- The bar then shows the CUTTERS silhouette. Tap the cutters at the lower right by the blue crystals. Reward: CUTTERS.
Fire hook and light bulb
Cut open the fire cabinet in the courtyard, fish the light bulb out of the chimney and light the shed.
- In the Hotel Courtyard zoom in on the red fire-equipment cabinet on the far-left wall and cut the wire on its handle with the CUTTERS. Collect the EDELWEISS BROOCH at the lower left inside the cabinet and take the FIRE HOOK.
- On the Hotel Roof zoom in on the stone chimney and look down the flue. Use the FIRE HOOK to pull out the LIGHT BULB and a broken pressure gauge (a dial with no needle, a "+" item).
- At the Descent to the Hotel zoom in on the open shed and screw the LIGHT BULB into the empty lamp socket. Tap the lit shed to start a hidden-object scene.
Craft-room textures
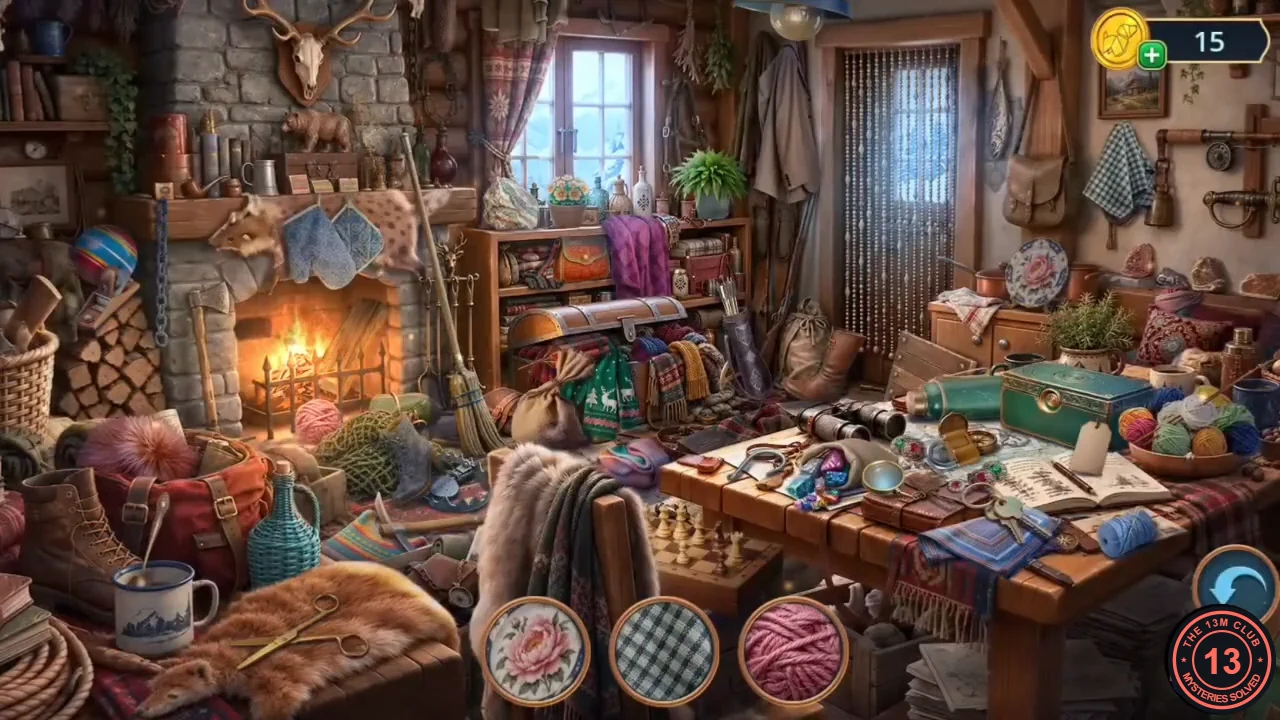
The three round slots each show a close-up texture. Find the object in the room with that surface; a new texture replaces each one you find (12 in all).
- Find the objects with these surfaces: pink yarn ball, blue-white checked fabric, pinkish fur pompom, orange embossed leather with a button, green fern, red-and-blue star-medallion carpet, pink peony embroidery, green marble, red/blue/yellow striped ball, chessboard with pieces, turquoise-pink zigzag knit and agate stone layers.
- The bar then shows a dark-blue block silhouette. Tap it at the centre right of the room. Reward: RAW RUBBER.
Tailor's thimble
Recover the tailor's thimble from the dormer window sill and use it on the cable-car cabin panel.
- On the Hotel Roof zoom in on the green-shuttered dormer window. Press the RAW RUBBER into the crack of the wooden sill at the lower left; it pulls out the TAILOR'S THIMBLE.
- At the Descent to the Hotel zoom in on the red cable-car cabin. Put the TAILOR'S THIMBLE in the empty round socket of the metal wall panel at the upper left to start the postcard puzzle.
Cable-car postcards
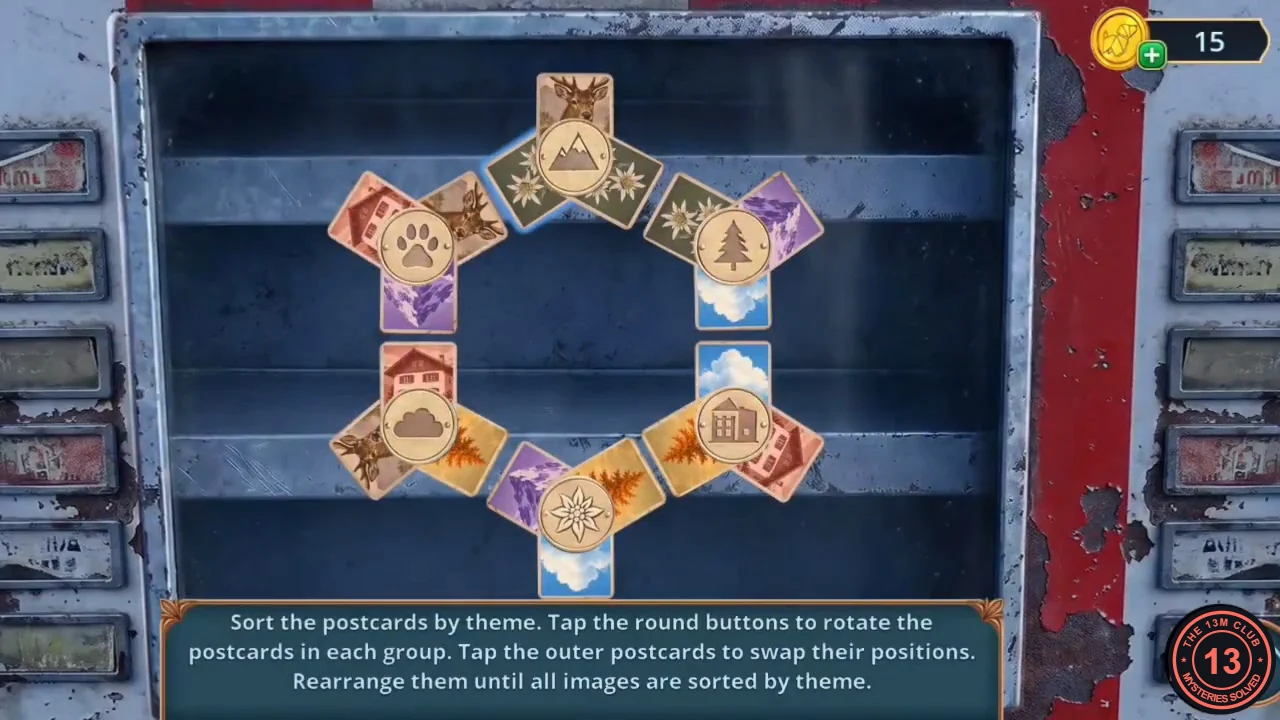
Rule: "Sort the postcards by theme. Tap the round buttons to rotate the postcards in each group. Tap the outer postcards to swap their positions. Rearrange them until all images are sorted by theme." Six groups form a ring, each with a themed round button and three postcards. Start: Mountain (top): deer, edelweiss, edelweiss; Paw (upper left): house, deer, mountain; Fir tree (upper right): edelweiss, mountain, cloud; Cloud (lower left): house, deer, fir branch; House (lower right): cloud, fir branch, house; Edelweiss (bottom): mountain, fir branch, cloud.
- Swap outer cards and rotate groups until each group holds its own theme: Mountain = the three purple mountain cards, Paw = the brown deer cards, Fir tree = the orange fir-branch cards, Cloud = the blue cloud cards, House = the red house cards, Edelweiss = the green edelweiss cards. Rotating a group only cycles its own three cards, while swapping outer cards moves a card into a neighbouring group, so first use swaps to bring each card into the correct group and then rotate as needed. The solved image shows every group sorted.
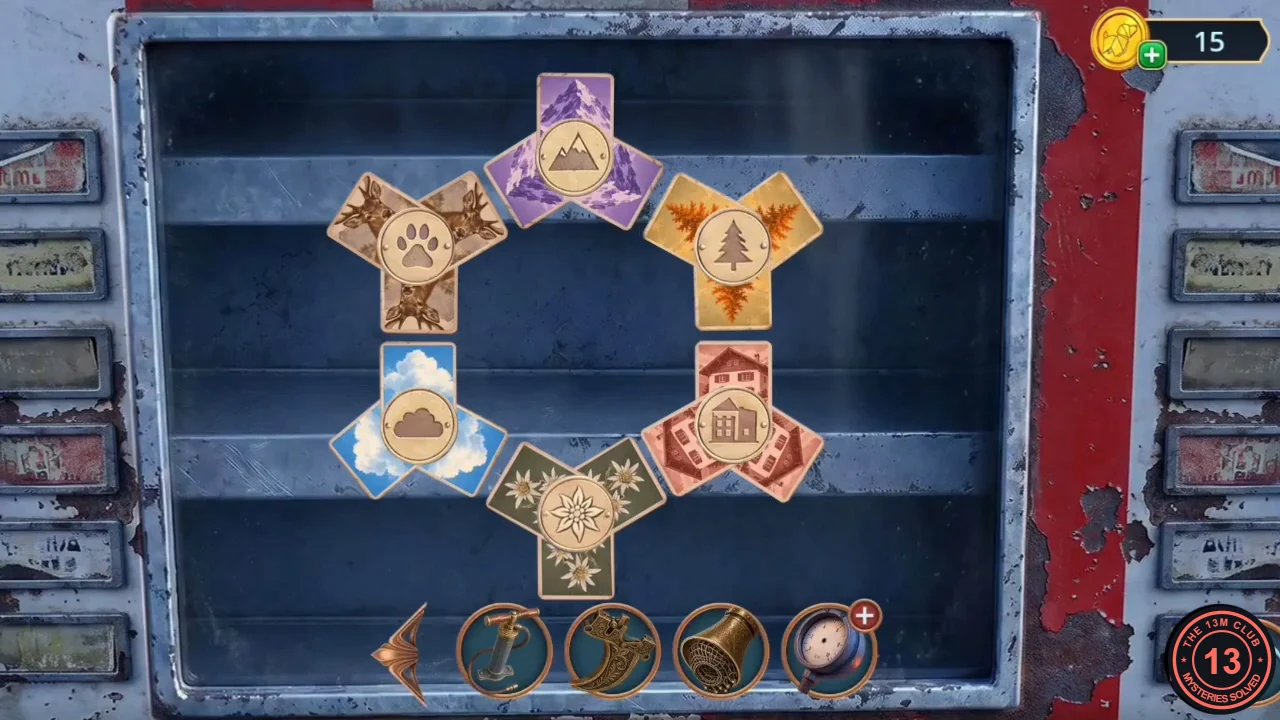
Solved: each group holds the three cards of its own theme. - Take the MOUNTAIN POSTCARD from the wall panel.
Warmer, net thrower and silver medal
Open the roof toolbox with the mountain postcard, float up the net thrower and silver medal in the cave pool and start the generator puzzle.
- On the Hotel Roof zoom in on the grey metal toolbox at the bottom left with a mountain relief on its lid. Place the MOUNTAIN POSTCARD on the lid to open it and take the DEFLATED WARMER. The corroded inner tray needs acid later.
- In the Ice Cave zoom in on the pool under the waterfall by the stone tunnel. Put the DEFLATED WARMER in the water and inflate it with the PUMP. Two objects float up: take the NET THROWER (a "+" item) and the SILVER MEDAL.
- In the Hotel Pump Room zoom in on the copper generator on the left and place the SILVER MEDAL in the centre of the wire window to start the tile puzzle.
Generator lines
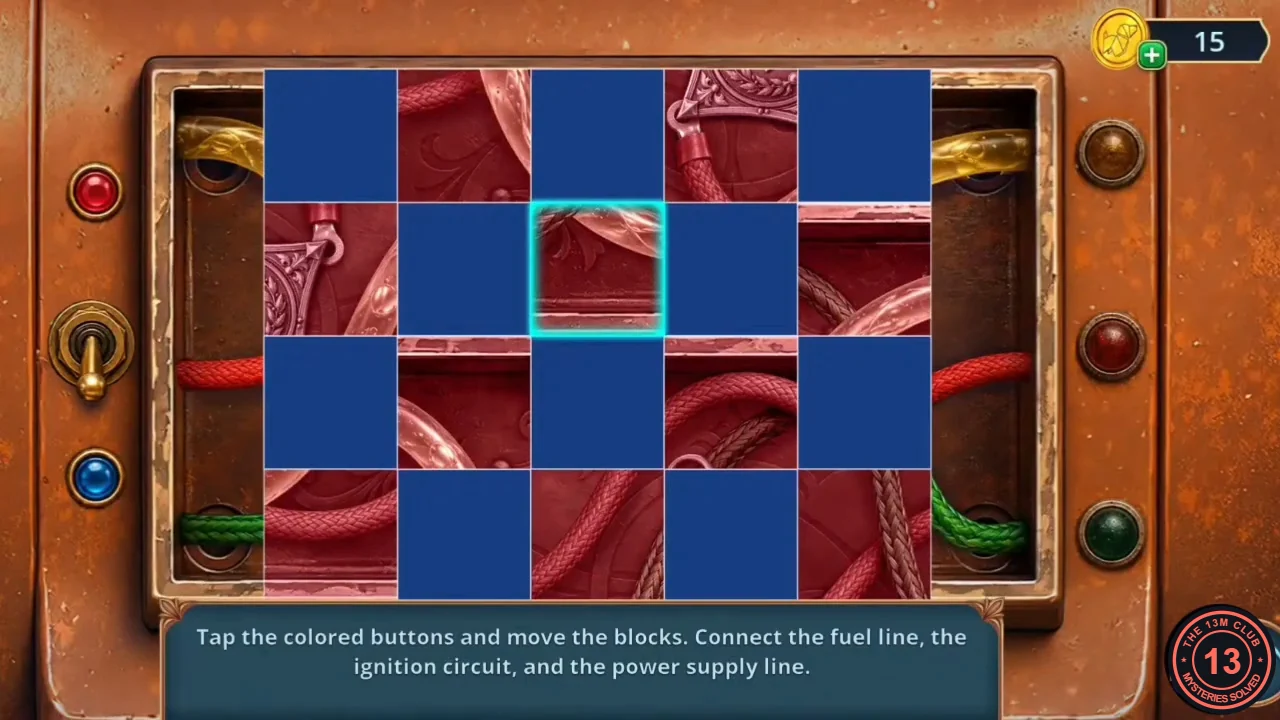
Rule: "Tap the colored buttons and move the blocks. Connect the fuel line, the ignition circuit, and the power supply line." The 4 × 5 board is a checkerboard of two layers, red tiles and blue tiles. The red button, a brass lever and the blue button are on the left. Only fragments of the active colour can be picked up; tiles of the other colour show as solid blue (or red) placeholders. Tap an active fragment to select it, then tap the cell it should go to. That cell can be a placeholder of the other colour. In red mode, for example, tapping a solid-blue cell moves the red fragment there, and its old cell becomes a blue placeholder. Use the lever to switch to the blue fragments. Gold glass-tube ends are at the top, red cables in the middle and green cables at the bottom of the frame.
- In red mode, move the red-tinted fragments into their places. They may go into solid-blue cells. Then pull the lever: the red fragments become solid-red placeholders and the blue-tinted fragments become active. Place those the same way. Finish with one picture: a clear glass tube that snakes from the gold end at the upper left down and back up to the gold end at the upper right, a red braided cable from the left middle to the right middle and a blue braided cable joining the green ends at the bottom left and bottom right. All three lines cross around the silver medal in the centre. The yellow, red and green lamps on the right light up. The solved image shows the finished picture.
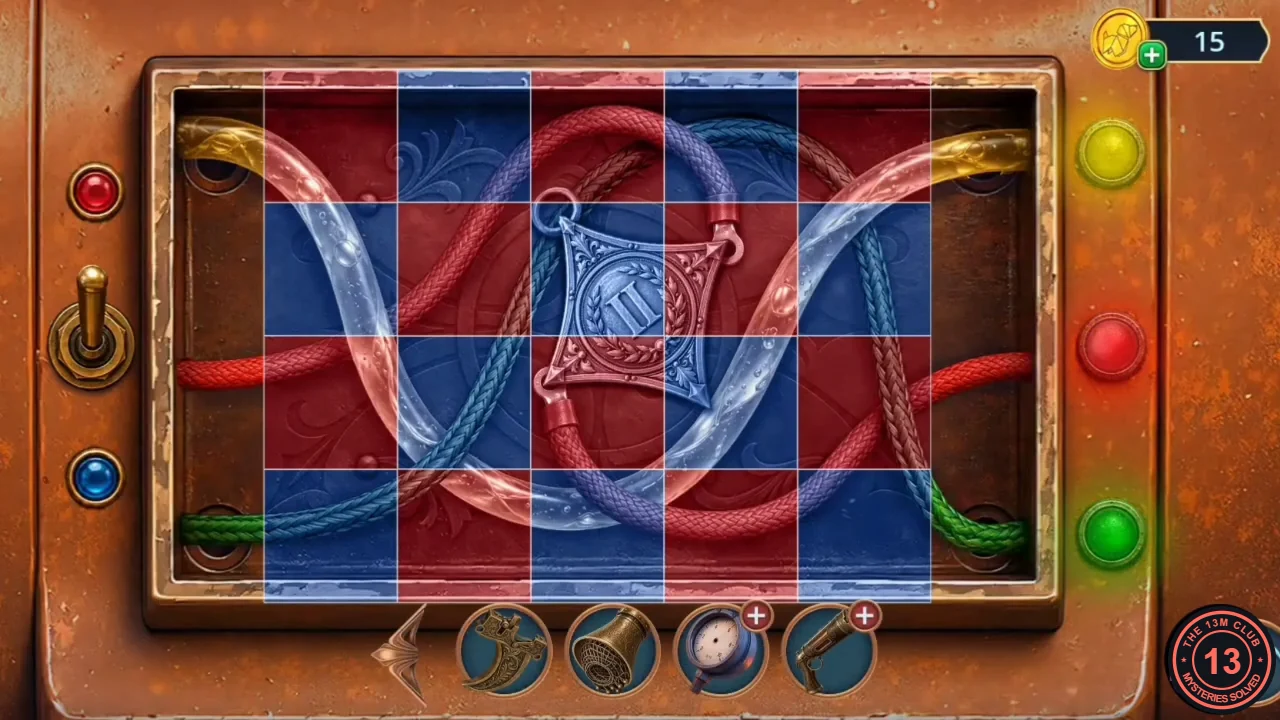
Solved: fuel line, ignition circuit and power line connected; the yellow, red and green lamps are lit. - A hatch at the top of the generator opens. Take the PROTECTIVE GLASS and the HALF OF LEMON.
Empty box for the lift
Clean the repair box with the lemon to get an empty box, then use it on the luggage in the lift.
- On the Hotel Roof zoom in on the open REPAIR BOX. Squeeze the HALF OF LEMON over the corroded tray, then sweep it out with the FIREPLACE BRUSH. Take the EMPTY BOX.
- In the Burning Lobby zoom in on the luggage pile in the lift and put the EMPTY BOX in front of it. Tap the sparkle to start a hidden-object scene.
Luggage riddles
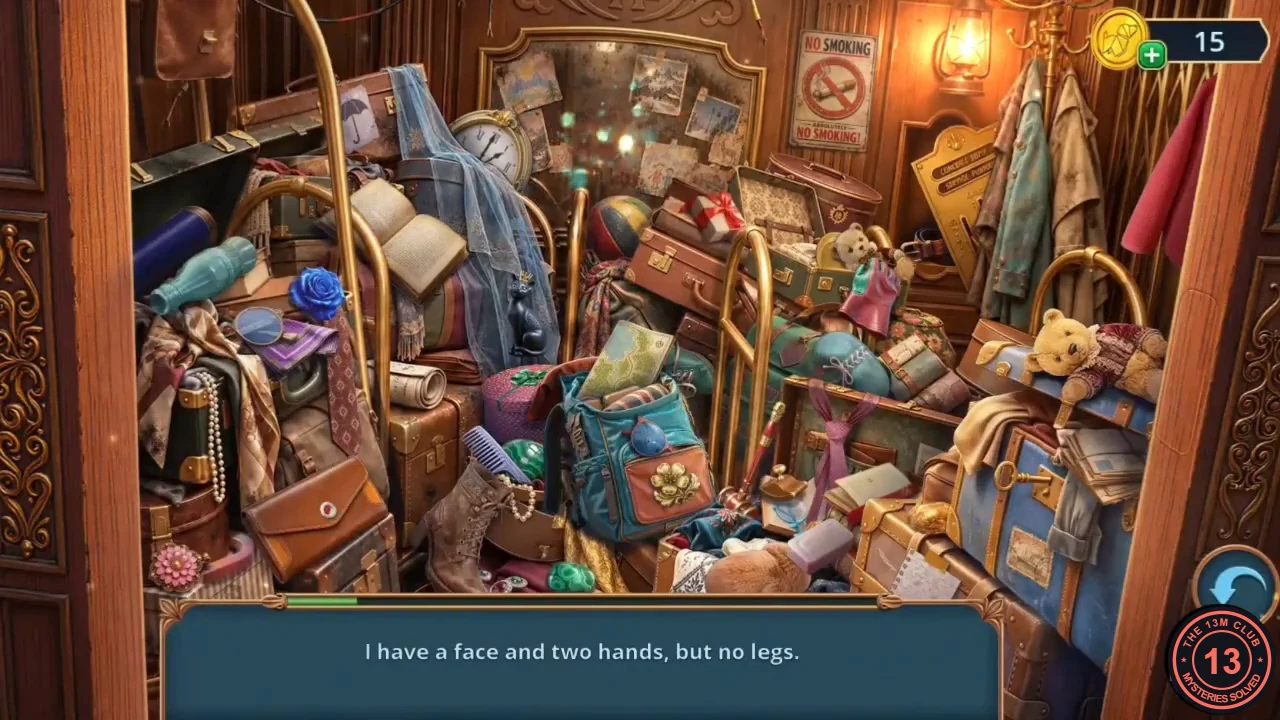
One riddle at a time appears in the bottom panel. Tap the object that answers it.
- "I protect the head, but I'm not hair." → Hat (purple bowler, centre above the teal backpack). "I have one eye, but I can't see anything." → Needle (near the top centre by the mirror). "I have a face and two hands, but no legs." → Clock (upper left). "I have ribs, but no bones." → Umbrella (upper left). "I have many teeth, but I don't bite." → Comb (lilac, left of the backpack by the boot). "I wrap around the waist." → Belt.
- "I get smaller every time I'm used." → Soap (pale bar, bottom centre). "I open doors, but I don't enter them myself." → Key (on the blue trunk, right centre). "I travel all over the world, staying in one corner." → Stamp (on the blue trunk, lower right). "The more I'm wiped with, the wetter I become." → Towel (top-right edge). "I have a neck, but no head." → Bottle (upper left). "I have a thumb and four fingers, but I'm not a hand." → Glove.
- The panel then shows a pencil silhouette. Tap the pencil. Reward: GRAPHITE PENCIL.
Pressure gauge
Reveal the lock code with the graphite pencil, complete the pressure gauge and fit it in the courtyard.
- In the Hotel Pump Room zoom in on the wall pipe board. Rub the GRAPHITE PENCIL over the blank brass plate at the upper left to reveal 542. Set the three-wheel lock of the box below to 5-4-2 and take the BRASS ARROW. The "Emergency Instructions" note says water must flow from the external reservoir through the pump into the piping to the floors, with all valves open.CODE542
- Open the broken pressure gauge in the inventory and add the BRASS ARROW and the PROTECTIVE GLASS: PRESSURE GAUGE.
- In the Hotel Courtyard zoom in on the frosted water pipe by the metal tank and fit the PRESSURE GAUGE on its empty mount to start the gauge puzzle.
Gauge chains
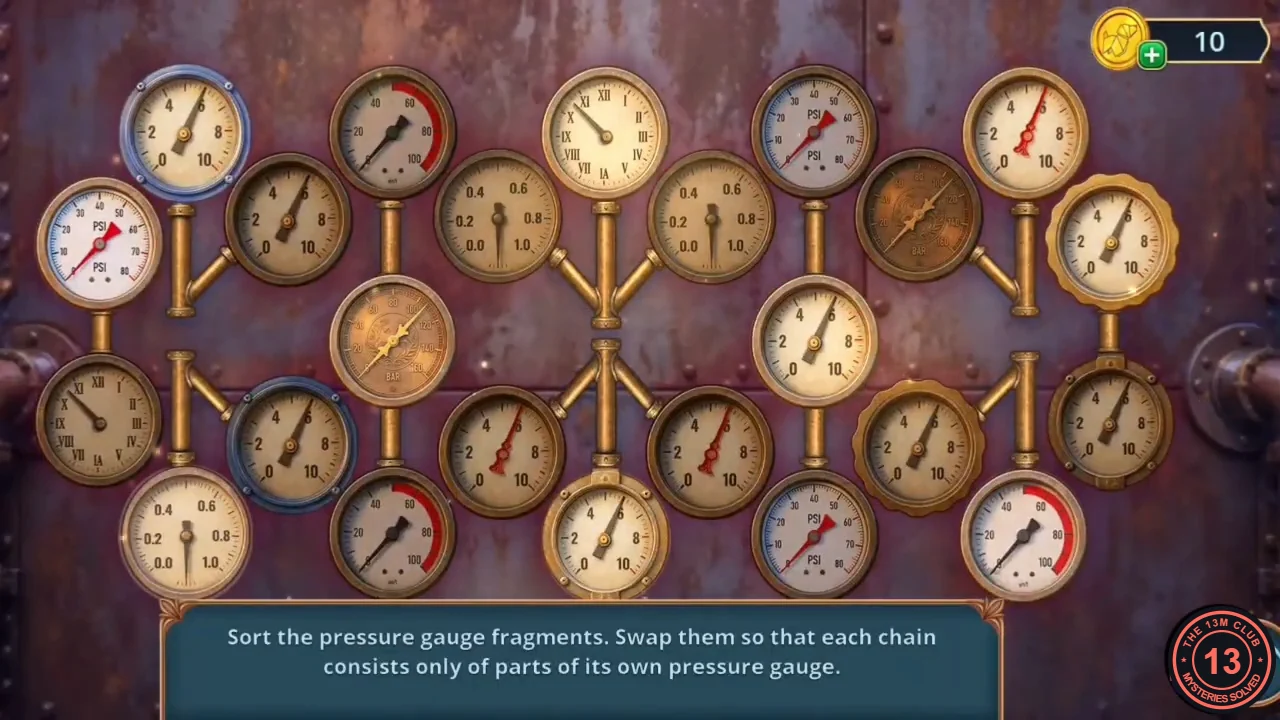
Rule: "Sort the pressure gauge fragments. Swap them so that each chain consists only of parts of its own pressure gauge." 24 gauges sit on ten fixed brass pipe chains. Tap one gauge (cyan ring), then another, to swap them.
- Give each chain one style. Left block: the top-left gauge and its right branch take plain cream 0–10 dials with black needles; the far-left vertical pair takes the Roman-numeral clock faces; the lower-left Y and its right branch take 0–10 dials with blue bolted rims. The left-centre column of three takes the red-arc dials (20–100). Centre: the upper Y (three gauges) takes the 0.0–1.0 decimal dials; the lower Y (three) takes 0–10 dials with red needles. The right-centre column of three takes the white PSI dials. Right block: the upper-right Y and its left branch take the bronze BAR dials; the far-right vertical pair takes 0–10 dials with square bolted brass rims; the lower-right Y and its left branch take 0–10 dials with scalloped gold rims.
- Water runs to the hotel. A blank WOODEN STAMP comes out of the tank pipe into your inventory.
Ownership documents and the net gun
Make the stamp imprint that opens the roof chest of ownership documents, face Leonard and stop him with the net gun.
- In the Burning Lobby zoom in on the small wall hatch at the lower right of the lift, where the mouse came out. Press the blank WOODEN STAMP onto the five raised symbols on the soot-blackened wood to its right: IMPRINT.
- On the Hotel Roof zoom in on the dormer window and place the IMPRINT on the sill under the chest with the five-wheel symbol lock. It sets the code moon, tree, leaf, moon, sun and the chest opens (if you need to turn the wheels yourself, use that order). Take the Hotel Ownership Documents (Property Deed and Insurance Policy) and the BRASS CARTRIDGE.CODEmoon, tree, leaf, moon, sun
- Leonard appears and demands the documents. Decision: "Threaten him with the police" (free, 0) or "Get Leonard to confess" (60 coins, 2 points).
- Open the NET THROWER in the inventory and add the BRASS CARTRIDGE, the brass mesh cone and the TRIGGER: NET GUN. Use it on Leonard to start the net mini-game.
Catch Leonard
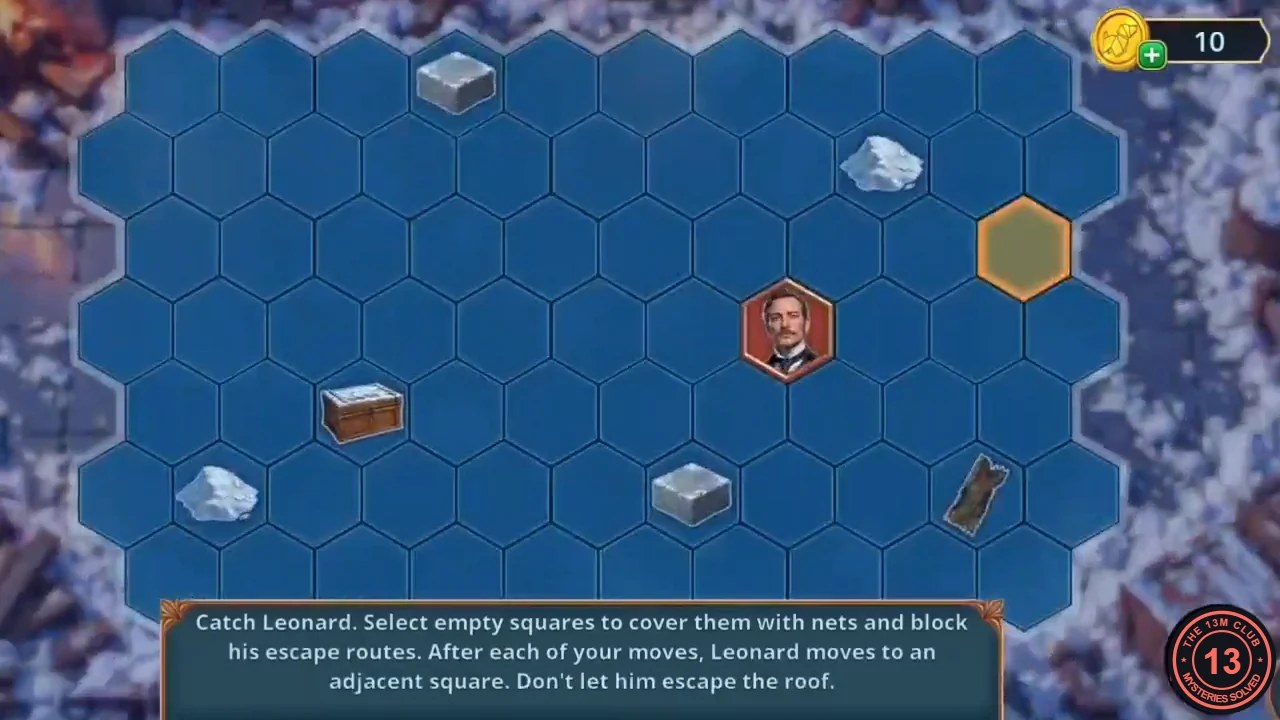
Rule: "Catch Leonard. Select empty squares to cover them with nets and block his escape routes. After each of your moves, Leonard moves to an adjacent square. Don't let him escape the roof." The roof is a hex grid with fixed crates, ice lumps, grey blocks and a board. An Easy/Hard toggle is available.
- Leonard reacts to your nets, so there is no fixed sequence. Always block the edge he is heading for: first the cells between him and the top edge, then the right side as he runs right, then close the bottom and left. Use obstacles as part of the ring until he has no free neighbouring cell.
- The Chapter 4 results show your decision points out of 12 and the 0/4/10 outcome panels, followed by the matching ending scene (in the 0-point ending Leonard is led away by the police and Eliza vows not to give up her father's hotel).