Near the Tower: the pine marten
The tower door is frozen shut. Thaw the latch, mend the knitted toy and give it to the pine marten in the tree hollow.
- Zoom in on the iced-over tower door. Take the EMPTY WARMER (red hot-water bottle) from the snow, then use the BED WARMER on the frozen latch and take the PIN. Icicles still block the door.
- In the inventory open the TORN KNITTED MOUSE and add the PIN to make a KNITTED MOUSE (achievement HANDMADE).
- Zoom in on the tree hollow to the right of the tower and give the KNITTED MOUSE to the pine marten. It drags the toy inside and a hidden-object scene opens.
Tree hollow hidden-object scene
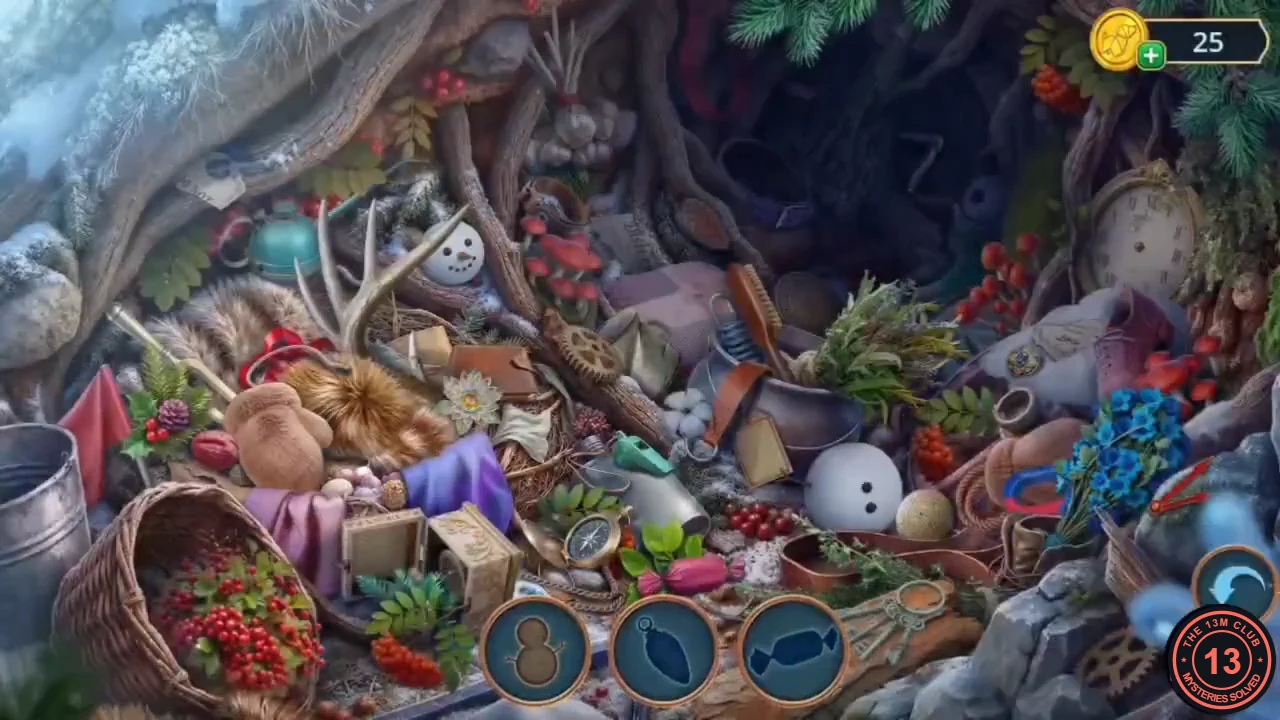
A silhouette hidden-object scene: the bottom bar shows object outlines to find in the scene.
- Find every outlined object. The reward is the RUBBER MALLET; finishing within one minute also earns BEAM OF TRUTH ("Finish a HOP in one minute").
- Use the RUBBER MALLET on the icicles over the tower door and enter the Watch Tower.
Watch Tower: the binoculars
The first-aid kit on the shelf has a three-digit combination lock (its wheels currently read 157). You find the code later in this chapter.
- Take the PHOTO FRAME from the shelf and the BINOCULAR LENS near the binocular stand.
- Zoom in on the binoculars ("One lens is missing from the binoculars.") and insert the BINOCULAR LENS to start the search mini-game.
Binocular search
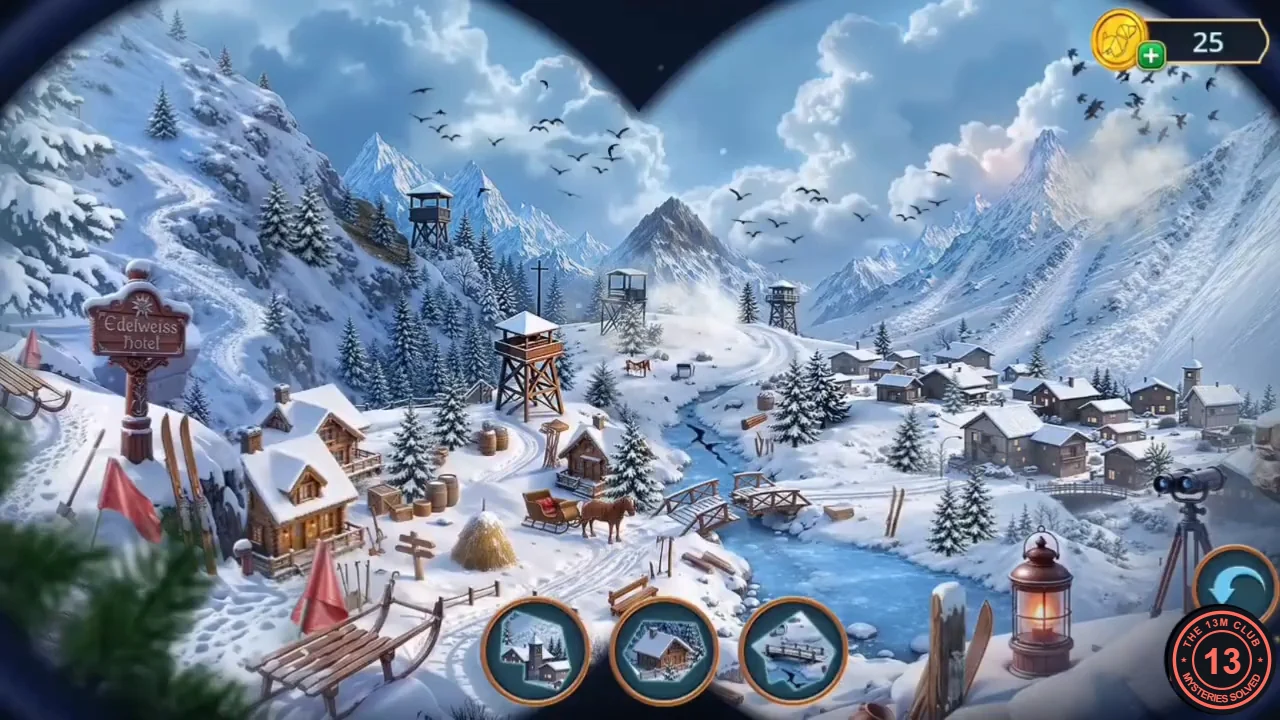
Look through the binoculars and find the silhouettes shown in the three slots (houses, a mountain ridge and similar landmarks). Found shapes are replaced by new ones.
- Pan the view, find every requested silhouette, then take the DE-ICER from the compartment that opens.
- Use the DE-ICER on the frozen gauge at the tower window and take the WHEEL.
- Go to the Second Floor Corridor, zoom in on the luggage cart and attach the WHEEL. Eliza notices the same sabotage mark; the luggage puzzle starts.
Pack the luggage cart
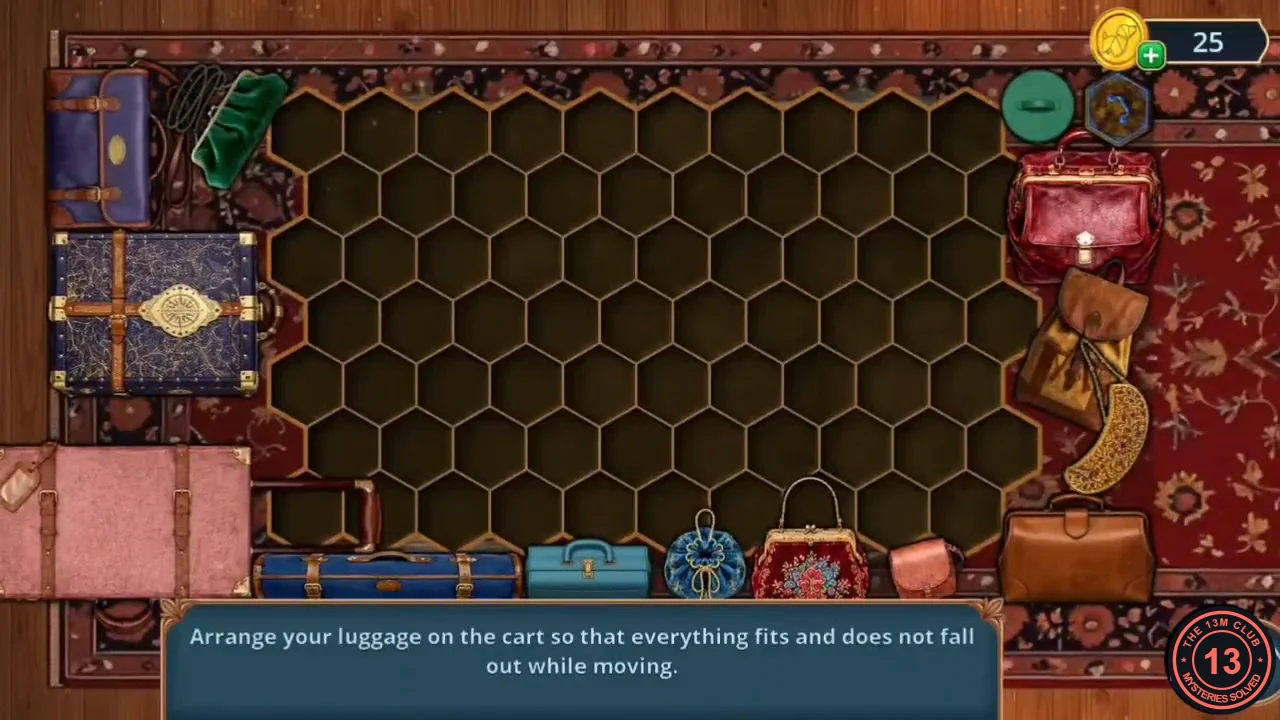
Rule: "Arrange your luggage on the cart so that everything fits and does not fall out while moving." Every piece must fit inside the cart outline with no overlaps.
- Drag each piece onto the honeycomb grid; pieces cannot overlap or stick out. In our example playthrough the finished cart looks like this: the gold crescent cloth, green clutch and brown backpack across the upper left with the blue drawstring pouch under the crescent; the tan briefcase top centre and the ornate blue trunk top right, with the long blue case directly below the trunk. The round green box and the red floral purse sit in the middle. Along the bottom, the dark blue satchel is low on the left with the small teal case beside it, the red leather handbag above the teal case, the pink suitcase low in the centre, then the small red bag and a small blue hexagonal piece in the bottom-right corner. The solved-layout image shows the finished packing.
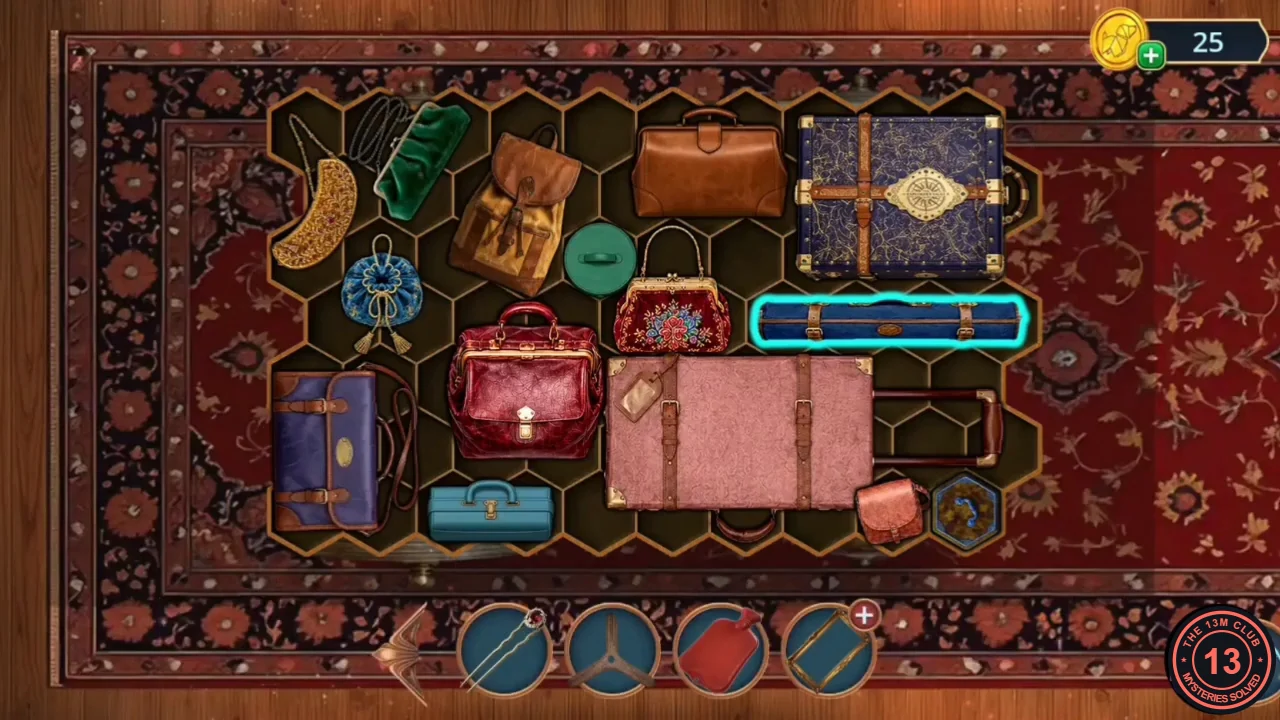
Solved: every piece fits inside the cart outline. The cyan outline only marks the last piece placed. - Take the LARGE CARPET ROLL from under the cart.
Telegraph Room: the cut wire
The Telegraph Room is upstairs from the Second Floor Corridor, but the wooden stairs at the end of the corridor are wet and slippery ("Caution! Wet floor"), so cover them with the carpet first. Inside, the telegraph wire has been cut; new task "Repair the telegraph wire".
- In the Second Floor Corridor zoom in on the slippery stairs beside the wet-floor sign and lay the LARGE CARPET ROLL over them. Then go up the stairs into the Telegraph Room.
- Zoom in on the sparking wire on the floor by the lantern. Take the BELT; a CLOTHESPIN is clipped to it (Clothespins 1/2).
- Use the EMPTY WARMER (rubber) to push the live wire aside and take the UMBRELLA.
- Zoom in on the stove. Take the DUCT TAPE, then use the UMBRELLA to hook the OIL CAN from behind the stove. The stove is still burning.
- Use the DUCT TAPE on the live wire. It is not repaired yet; the real fix comes later.
- Go to the Second Floor Corridor window where the raven sits. Collect the EDELWEISS BROOCH on the sill, use the OIL CAN on the window latch, read THE ALPINE HERALD and take the NEWSPAPER. Keep the Oil Can.
- Zoom in on the locked office door in the corridor. Slide the NEWSPAPER under the door, push the key out of the keyhole with the HAIRPIN, pull the paper back and use the key.
Keyhole number maze
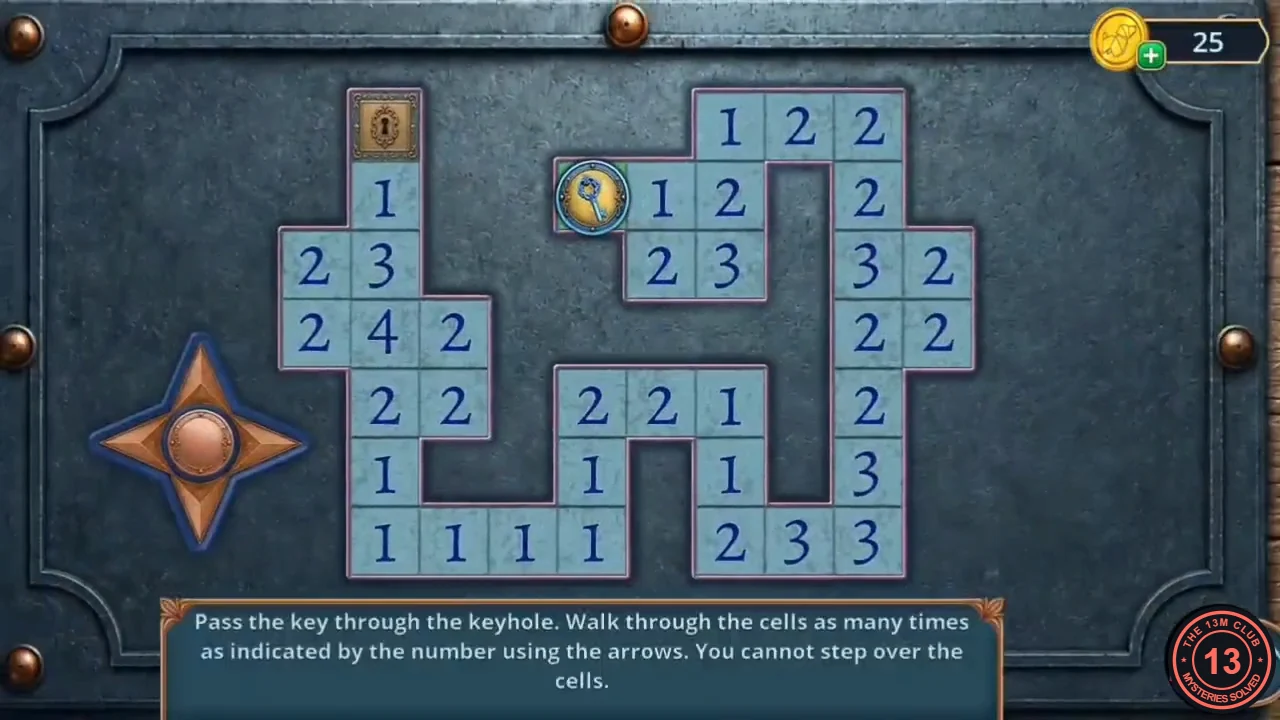
Rule: "Pass the key through the keyhole. Walk through the cells as many times as indicated by the number using the arrows. You cannot step over the cells." Each number shows how many times that cell must be entered; finish by moving into the keyhole at the top left once every count is used up.
- One verified move sequence from the green start cell (U up, D down, L left, R right), followed by a final U into the keyhole: RDRUDLRUURRLRDDUDDURDUDLDDUDDUDLLRRLLUULLRLDDLLLUUUUDUDDRUDULLUDURU, then U. Other orders that use up every count also work.CODERDRUDLRUURRLRDDUDDURDUDLDDUDDUDLLRRLLUULLRLDDLLLUUUUDUDDRUDULLUDURU U
Eliza's Office: the photo with Father
The fireplace grate is white-hot and something lies behind it; you come back for it later. The bag on the fur coat has a rose-shaped lock.
- Take the GLUE near the fireplace and the RESIN SOLVENT at the bag on the fur coat.
- In the inventory open the PHOTO FRAME and add the GLUE and the PIECES OF PHOTO to make the PHOTO WITH FATHER.
- Zoom in on the wall of portraits by the candle and place the PHOTO WITH FATHER to start the Memories puzzle.
Memories: connect the portrait frames
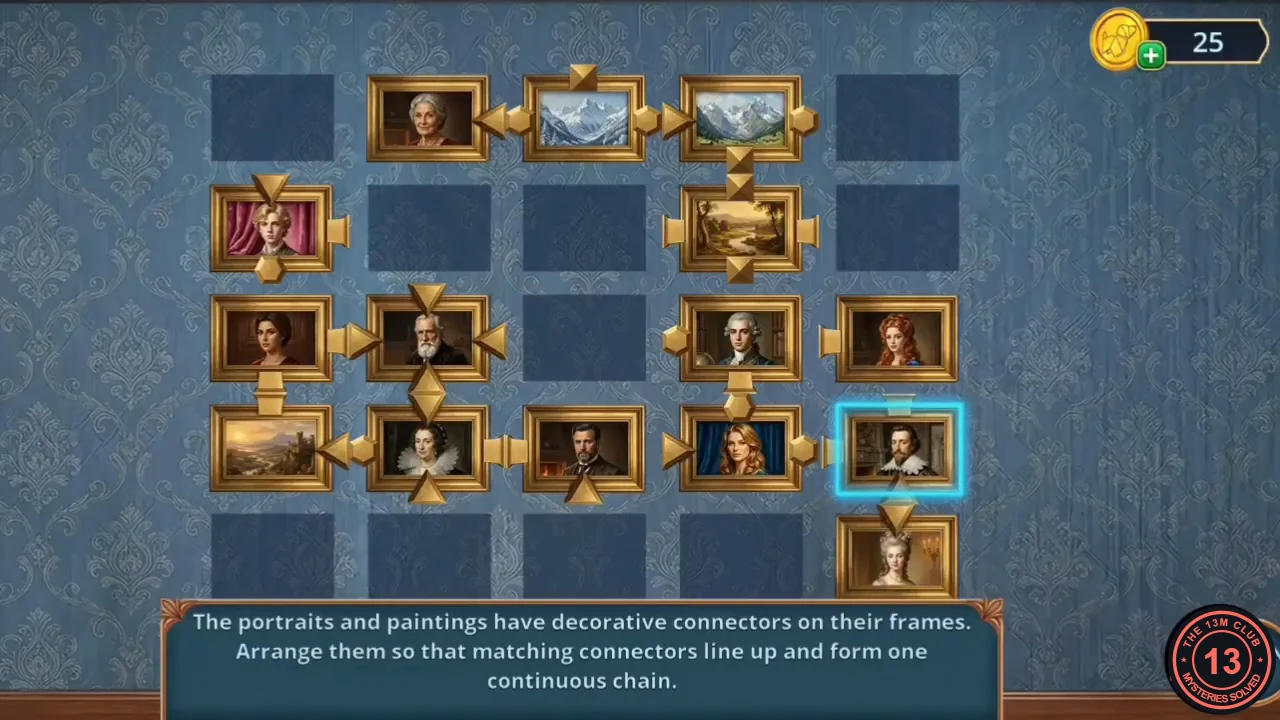
Rule: "The portraits and paintings have decorative connectors on their frames. Arrange them so that matching connectors line up and form one continuous chain."
- Swap the pictures until every connector meets a matching connector on its neighbour and the chain runs unbroken across the wall. Work from one end of the wall: a connector shape must always meet the same shape on the next picture, so place the pictures whose connectors you can already match first and fill the gaps last. The solved image shows the finished wall.
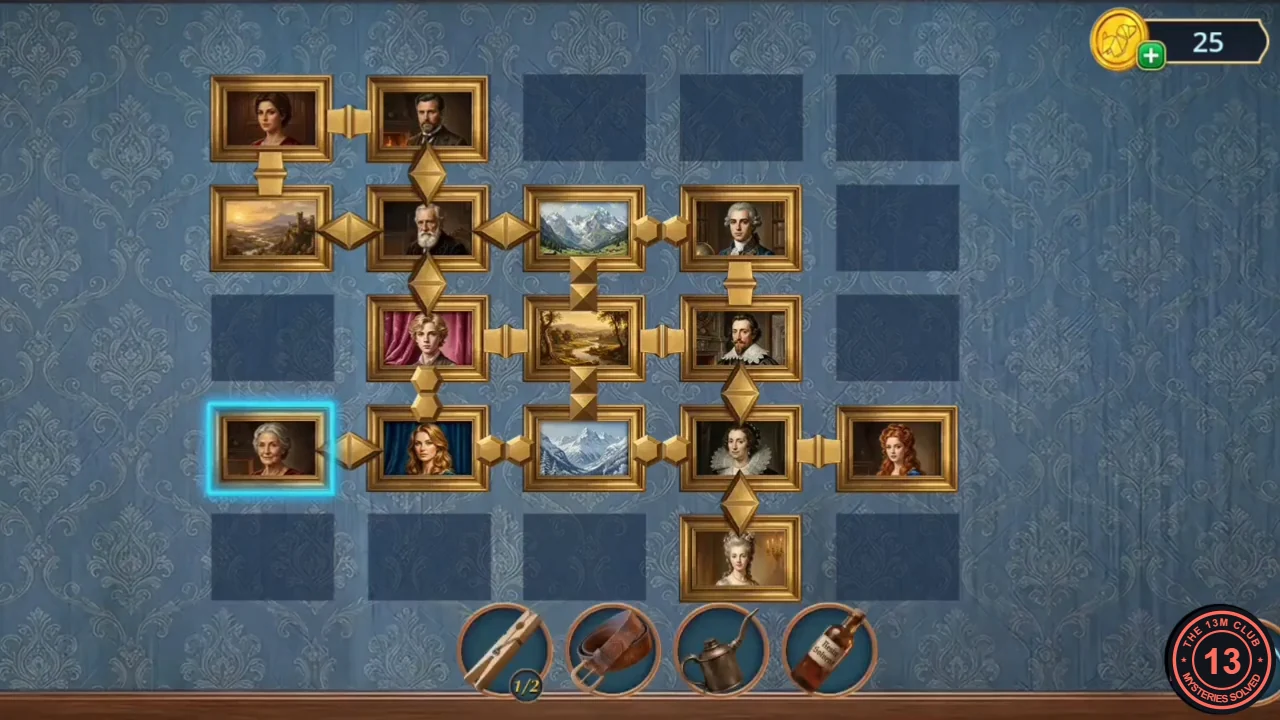
Solved: every connector meets a matching connector on its neighbour. The cyan outline only marks the last picture moved. - From the candle shelf take the KNOT MANUAL (incomplete book) and the BEAUTIFUL COMB.
- Use the BEAUTIFUL COMB on the fur coat and take the BROKEN KEY PIECE.
- Go to the Hotel Lobby and zoom in on the key rack again to open a second hidden-object scene.
Key rack: find the paired items
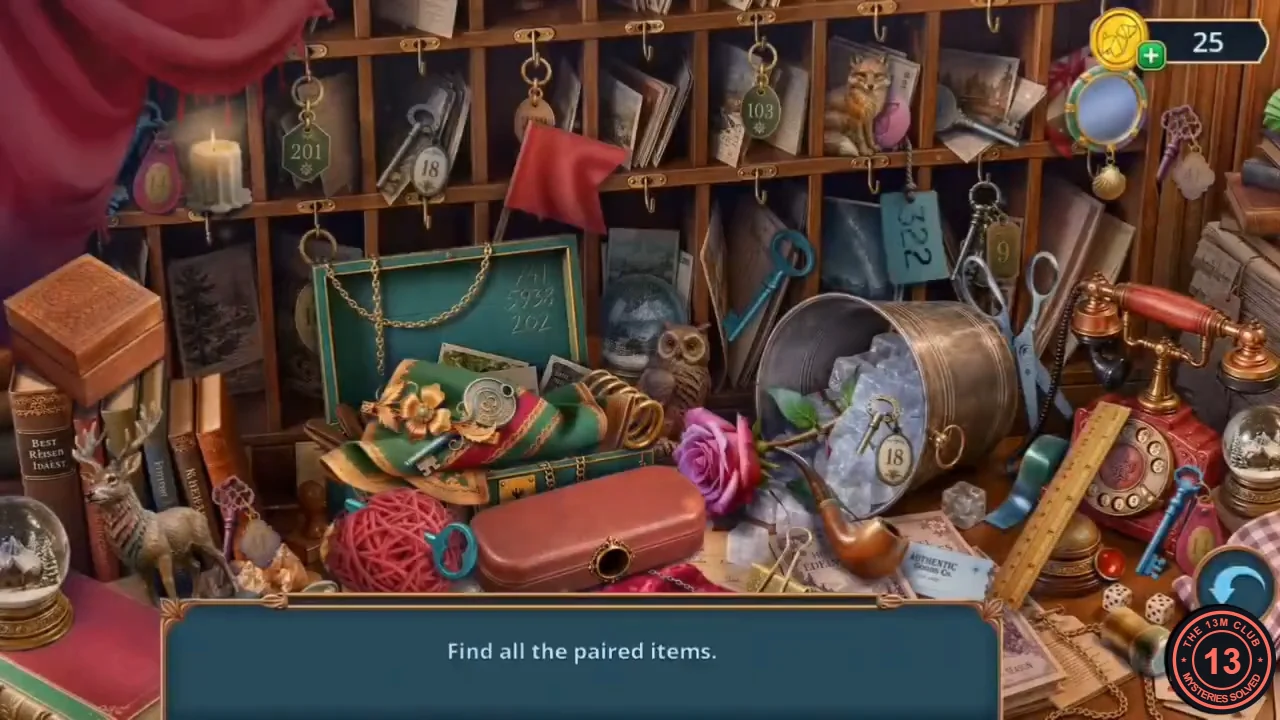
Rule: "Find all the paired items." Tap two objects that belong together to remove them as a pair.
- Match all the pairs to receive the GOLD CHAIN. One pair is hidden: tap the closed red glasses case lying in front of the yarn and rose to open it, then match the key inside with the key hanging on the brass "9" tag just right of the blue "322" tag. Achievements: VAULT OF KNOWLEDGE ("Find 40 objects", counted across all scenes so far) unlocked during this scene in our playthrough, and finishing it within one minute as the third hidden-object scene in a row done within one minute each earns SERIES OF DISCOVERIES ("Finish 3 HOPs in a row in one minute each").
- Zoom in on the reception desk, attach the GOLD CHAIN to the desk lamp and pull it. Take the CABLE CAR AMULET.
- Go to the Telegraph Room, place the CABLE CAR AMULET in the carved cabinet and take the NAILS and the COPPER WIRE.
- Use the COPPER WIRE on the severed wire by the lantern to start the token puzzle.
Telegraph wire: lightning and wire tokens
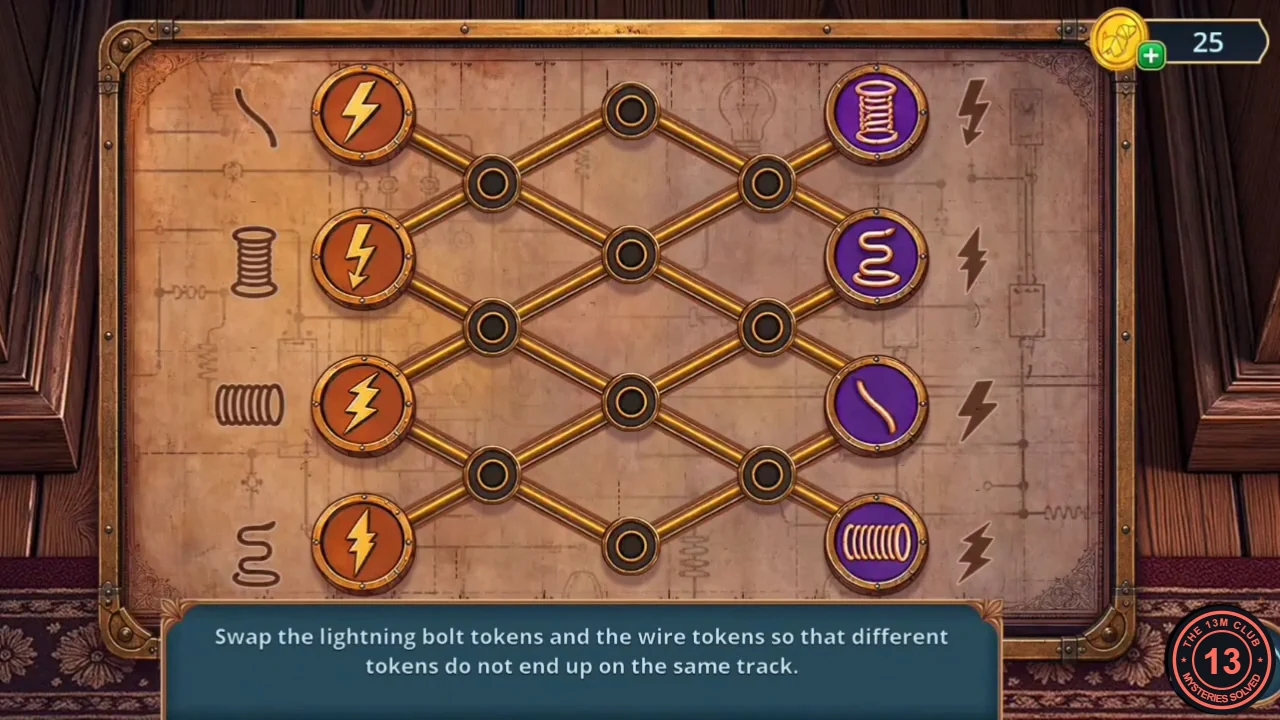
Rule: "Swap the lightning bolt tokens and the wire tokens so that different tokens do not end up on the same track." Tokens slide along the diamond tracks into neighbouring free spaces.
- Goal: the four purple wire tokens end in the left end slots, each beside its matching engraved symbol (squiggle at the top, then spool, coil and spring at the bottom); the four orange lightning tokens end in the right end slots. Shuffle tokens through the free centre spaces to swap the two groups.
- Take the OIL LANTERN (incomplete) and the WATER FLASK from beside the repaired wire.
- Use the WATER FLASK on the burning stove and take the IRON TONGS.