Pump Station: bolt and leaking pipe
Back in the Pump Station, retrieve the bolt, hang the towels to free the rubber pad and seal the leaking pipe, then open the bureau in Eliza's office.
- Go to the Pump Station, use the IRON TONGS on the boiler firebox and take the BOLT.
- Zoom in on the linen drawer and use both CLOTHESPINS on the clothesline to hang the towels. Take the RUBBER PAD. (The first Clothespin came with the Belt. The Clothespins counter still reads 1/2 just after the Memories puzzle and already reads 2/2 when this close-up opens, but none of the three playthroughs we checked shows where the second one is collected, so we cannot point you to it.)
- Zoom in on the steaming broken pipe. Apply the RUBBER PAD, then wrap the BELT over it. Take the TUNING FORK.
- Go to Eliza's Office and insert the BROKEN KEY PIECE in the round lock of the bureau to open a hidden-object scene.
Bureau hidden-object scene
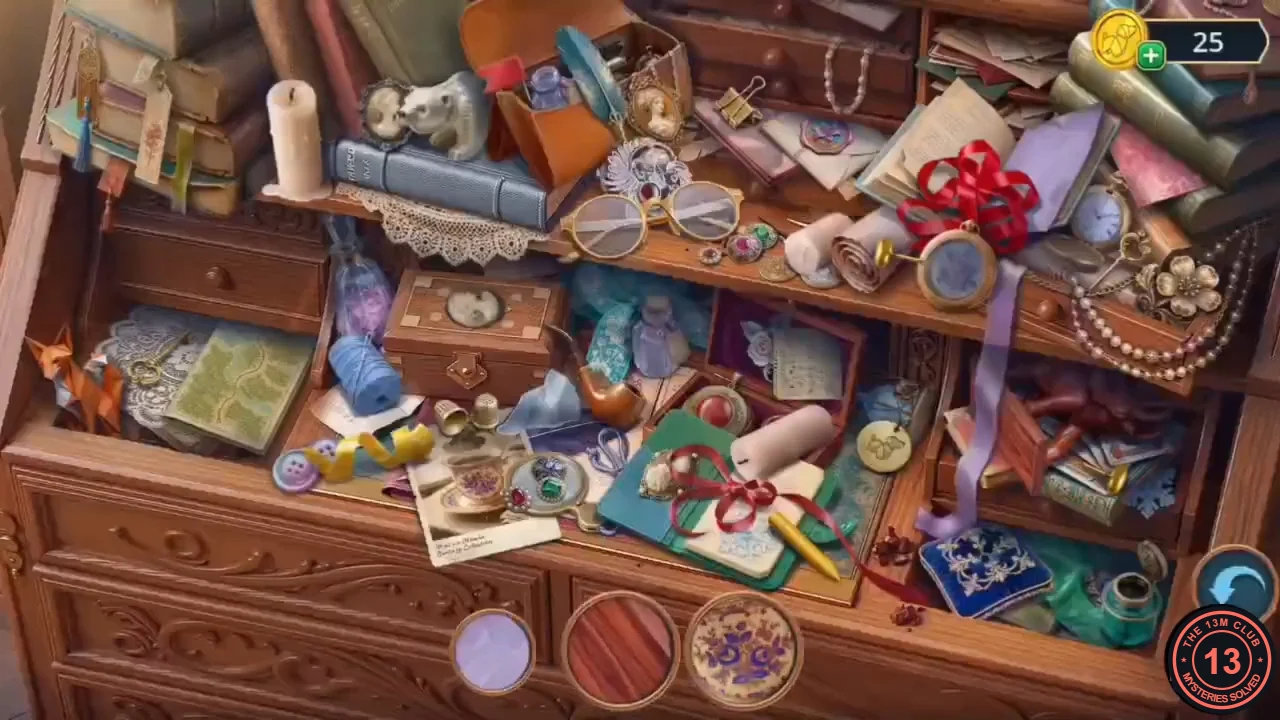
A fragment hidden-object scene: the three round slots at the bottom show enlarged close-ups of part of an object (for example lilac fabric, striped wood grain or a floral pattern) rather than outlines. Each matched fragment is replaced by a new one.
- For each round slot, find the object in the bureau whose colour, pattern or texture matches the enlarged close-up and tap it. When the last fragment is matched you receive the ROSE AMULET.
- Use the ROSE AMULET on the rose lock of the bag on the fur coat and take the TORN BOOK PAGE.
- Open the KNOT MANUAL (the open rope book in the office) and place the TORN BOOK PAGE. Take the completed KNOT MANUAL.
- Go to the Watch Tower and use the KNOT MANUAL on the tangled rope beside the first-aid kit. Take the HYGROMETER ARROW.
- Attach the HYGROMETER ARROW to the thawed dial at the window to start the hygrometer puzzle.
Hygrometer: Roman numerals
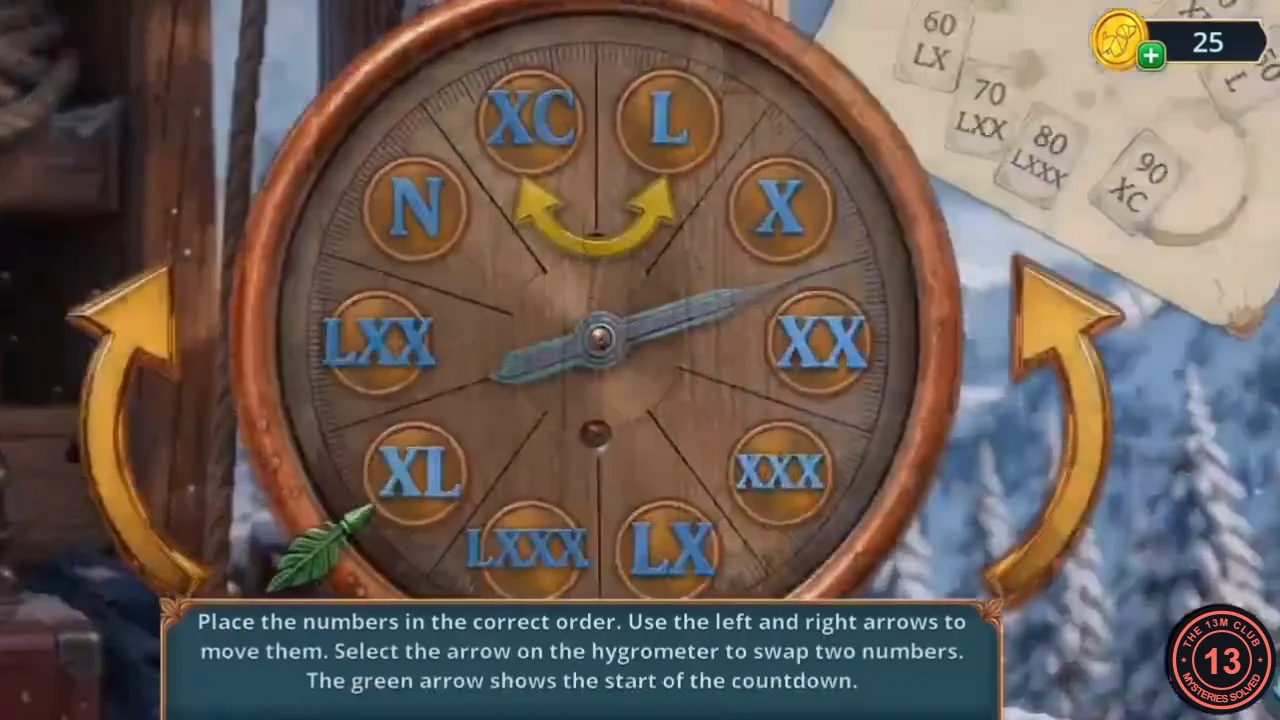
Rule: "Place the numbers in the correct order. Use the left and right arrows to move them. Select the arrow on the hygrometer to swap two numbers. The green arrow shows the start of the countdown." The note in the corner gives 50 = L, 60 = LX, 70 = LXX, 80 = LXXX, 90 = XC. The starting order may differ, so work towards the final order rather than copying moves.
- The numbers must run from N (zero) up to XC in steps of ten, clockwise from the green start arrow. In our playthrough the accepted dial, read clockwise from the top-left position, shows XXX, XL, L, LX, LXX, LXXX, XC, N, X, XX, with the green arrow beside N at the lower left.CODEN X XX XXX XL L LX LXX LXXX XC
- Open the compartment and the glass dome. Take the CANNED FOOD and collect the EDELWEISS BROOCH.
Kennel, lantern and the root burrow
Feed the husky at the kennel, finish the oil lantern and use it to light the dark burrow under the tree roots.
- Go to Near the Tower and zoom in on the kennel. Give the CANNED FOOD to the husky, then take the TELEGRAPH COIL and the LANTERN HANDLE. The sled has three empty slots for later.
- In the inventory open the incomplete OIL LANTERN and add the OIL CAN and the LANTERN HANDLE to make the OIL LANTERN.
- Use the OIL LANTERN on the dark burrow under the tree roots to open a hidden-object scene.
Root burrow hidden-object scene
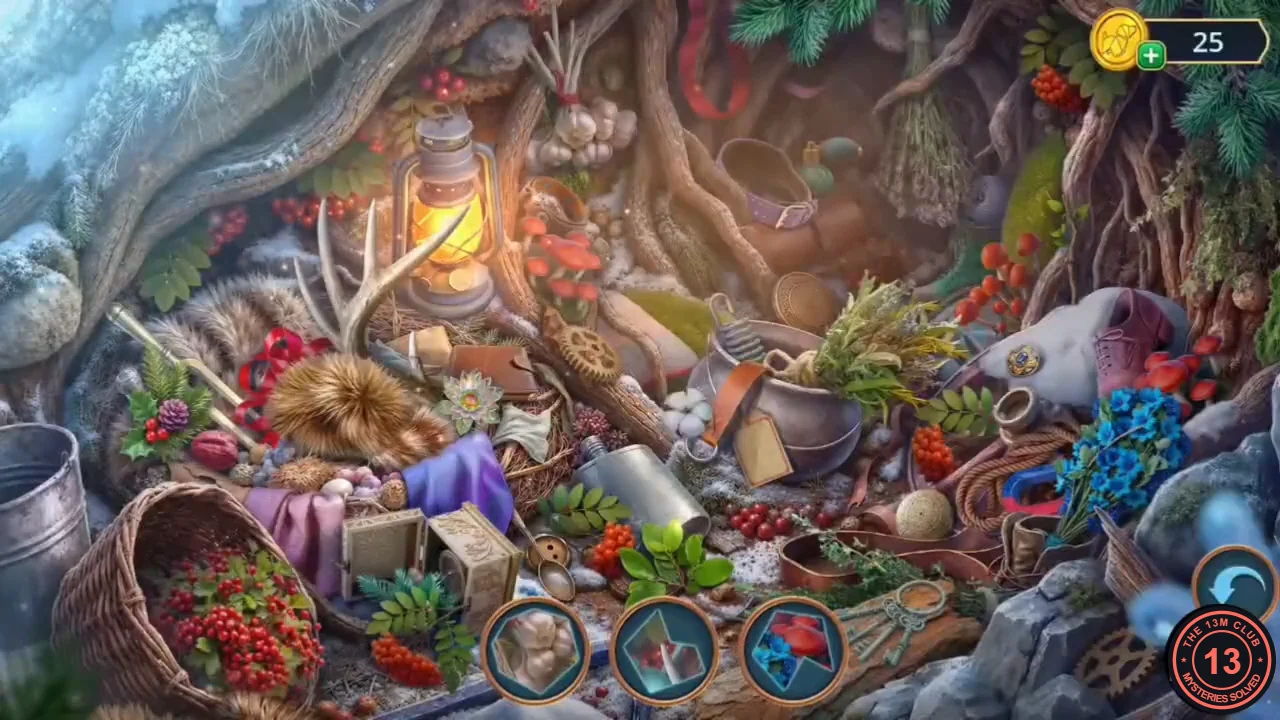
A fragment hidden-object scene: the three round slots at the bottom show enlarged, coloured close-ups of part of an object (for example antler tines or a geometric ornament) rather than outlines. Each matched fragment is replaced by a new one.
- For each round slot, find the object in the burrow whose colour, pattern or texture matches the enlarged close-up and tap it. When the last fragment is matched you receive the WIND CONE HANDLE.
- Place the WIND CONE HANDLE on the crank of the windsock mast by the "Edelweiss Hotel" signpost. Lower the windsock and take the RUBBER BAND.
- Go to the Hotel Courtyard. Use the RUBBER BAND on the pine branches in the shed and take the BATH WHISK.
- Zoom in on the leaf-covered cart axle and sweep it with the BATH WHISK. Collect the EDELWEISS BROOCH and take the HARNESS, the TELEGRAPH MANIPULATOR and the BATH HAT.
- Go to Eliza's Office. Use the BATH HAT to reach behind the white-hot fireplace grate and take the BRASS HANDLE.
- Attach the BRASS HANDLE to the lower bureau drawer to open a hidden-object scene.
Bureau drawer: find the sets
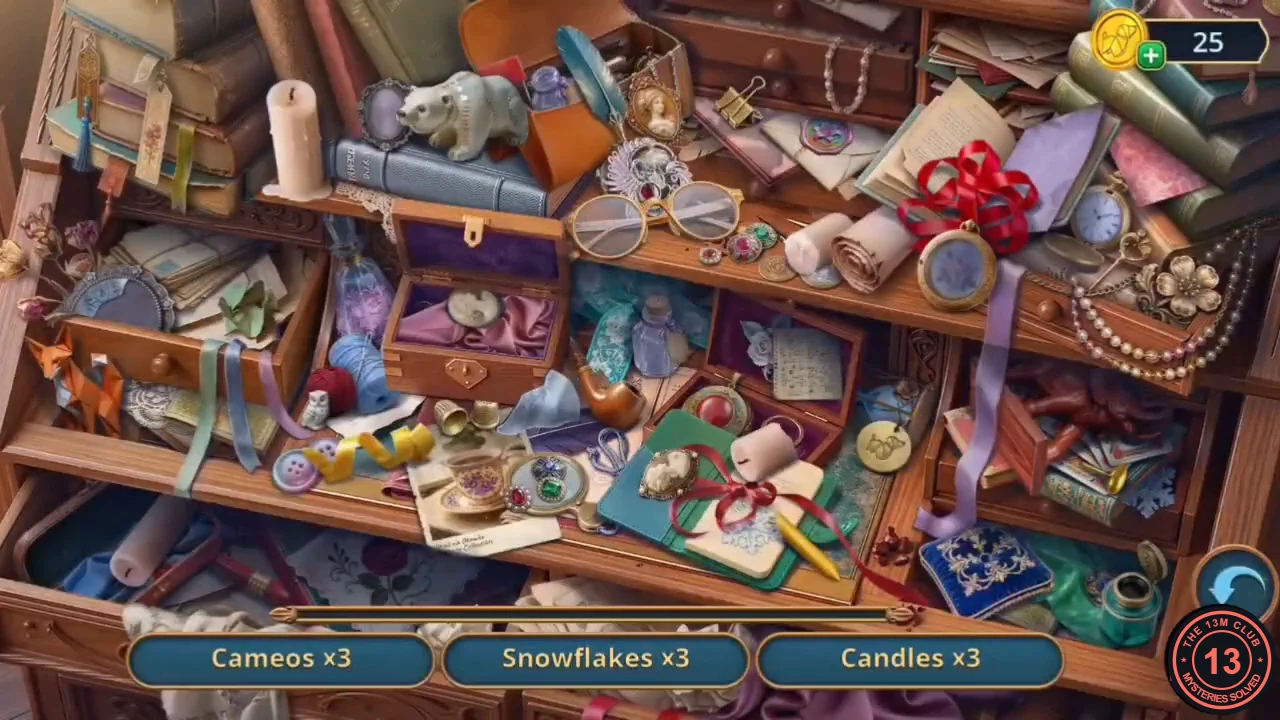
A find-list scene that asks for sets of three: three cameos, three snowflakes, three candles and three roses. The three roses are one at the gold pocket watch right of the big red bow, one inside the small open purple-lined jewellery box in the centre, and a dark-red rose embroidered on the pale cloth in the open bottom-left drawer, beside the blue fabric. One snowflake is hidden in the dusty hand mirror in the open drawer on the far left and only shows once you wipe the mirror clean.
- Find the cameos, snowflakes and candles. Roses: tap the rose at the gold pocket watch right of the red bow, the rose in the small open jewellery box in the centre, and the embroidered rose on the pale cloth in the open bottom-left drawer. Mirror snowflake: tapping the dusty hand mirror in the far-left drawer gives the hint "I need to restore the mirror." Tap the pale-blue handkerchief lying between the blue yarn ball and the pipe; it flies over and wipes the mirror, and the snowflake that appears in it is collected (Snowflakes x3 becomes x2). Completing every set gives the LIGHTER.
- Use the LIGHTER on the candle of the wall candelabra near the door. Take the HOTEL TOKEN and collect the EDELWEISS BROOCH.
- Go to the Pump Station, put the HOTEL TOKEN in the slot of the linen chest drawer and take the WARM BLANKET.
- Use the WARM BLANKET on the hot valve wheel of the boiler pipe and take the PIPE VALVE. The blanket stays in your inventory.
- Place the PIPE VALVE on the steaming pipe junction on the right wall to start the sliding pipe puzzle.
Sliding pipe puzzle
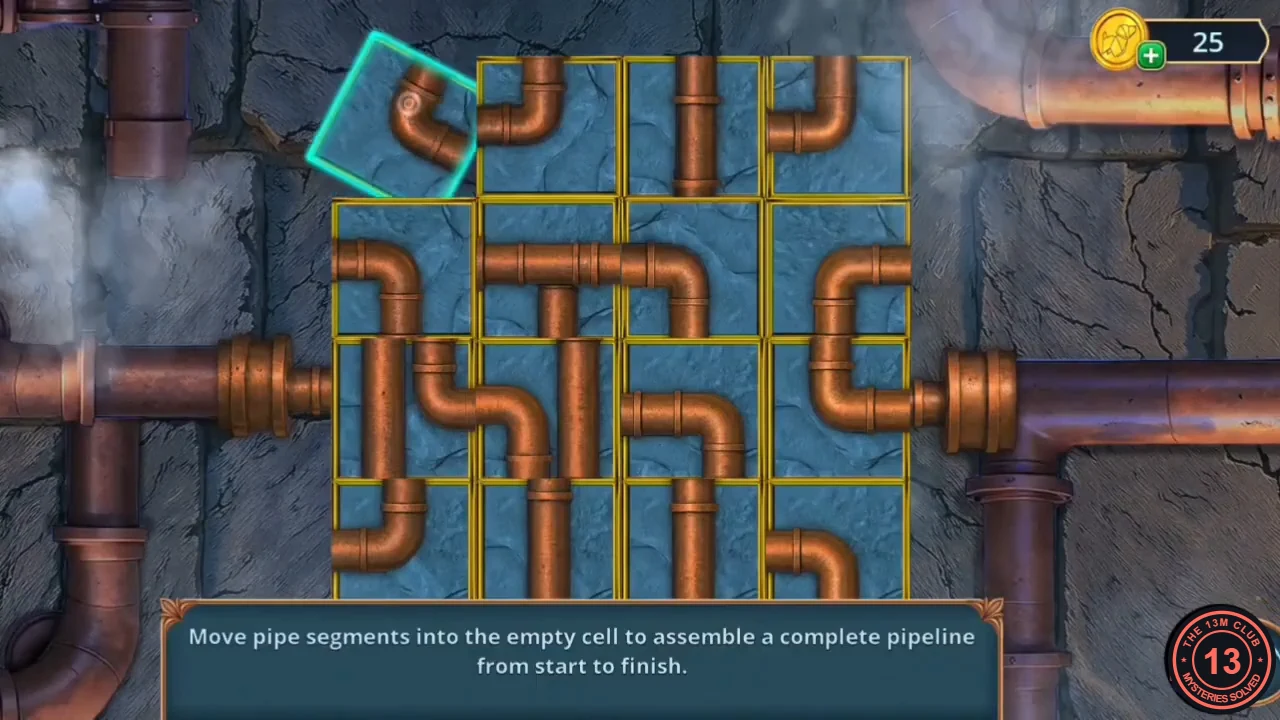
Rule: "Move pipe segments into the empty cell to assemble a complete pipeline from start to finish."
- Slide segments into the empty cell until a continuous pipeline joins the start and finish. Work along the route from the start pipe: slide the segment that continues the line next to the previous one, then bring the empty cell back to the next gap. The solved image shows the finished pipeline.
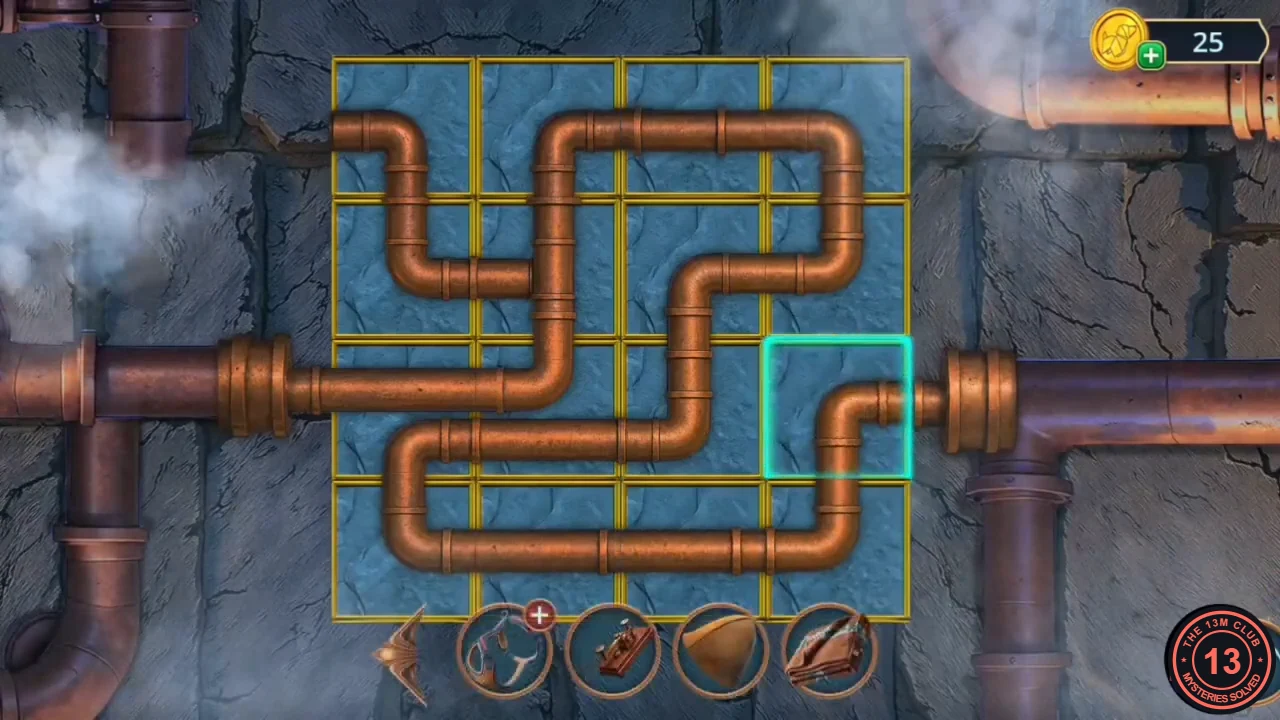
Solved: one continuous pipeline from start to finish. - Take the WATER PUMP HANDLE from the pipe junction.
- At the water pump by the coal heap, place the BOLT and the WATER PUMP HANDLE. Pump water and take the BOOK CARD numbered 19.CODE19
- Go to the Telegraph Room. Put the BOOK CARD in slot 19 of the numbered bookcase and take the MORSE CODE BOOK.
- At the telegraph desk place the MORSE CODE BOOK, the TELEGRAPH MANIPULATOR and the TELEGRAPH COIL to start the decoding puzzle.
Decipher the message: push the blots
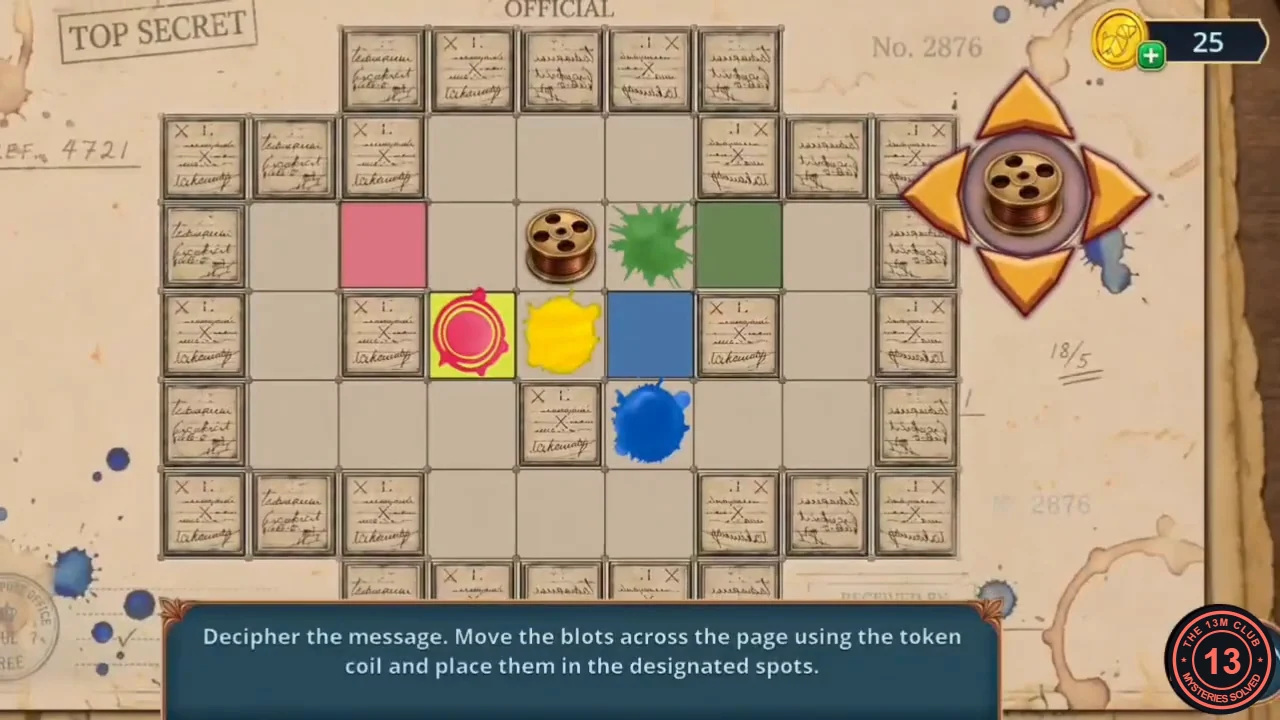
Rule: "Decipher the message. Move the blots across the page using the token coil and place them in the designated spots." The coil moves one cell per arrow and pushes a blot ahead of it; it cannot pull. Each coloured blot belongs on the square of the same colour.
- Verified 55-move solution from the start position (coil immediately to the left of the green blot; U up, D down, L left, R right): 1) R — green onto green. 2) LLLLDDRRU — pink up off the yellow square. 3) DLLUURR — pink one step right. 4) URRDDL — yellow onto yellow. 5) RUULLDLLDDRRDRRU — blue onto blue. 6) DLLULLUURRURRDLL — pink onto pink.CODER · LLLLDDRRU · DLLUURR · URRDDL · RUULLDLLDDRRDRRU · DLLULLUURRURRDLL
- Decision with Clara: "We'll find them. The Edelweiss is responsible for its guests." costs coins and gives 2 decision points; "I hope they're just delayed." is free (0). Clara gives you a CORN SNACK.
- Give the CORN SNACK to the raven at the Second Floor Corridor window and take the SNOW INLAY FRAGMENT.
- Place the SNOW INLAY FRAGMENT in the lid of the tin box under the luggage cart and take the MOUNTAIN POSTCARD.
Postcard differences
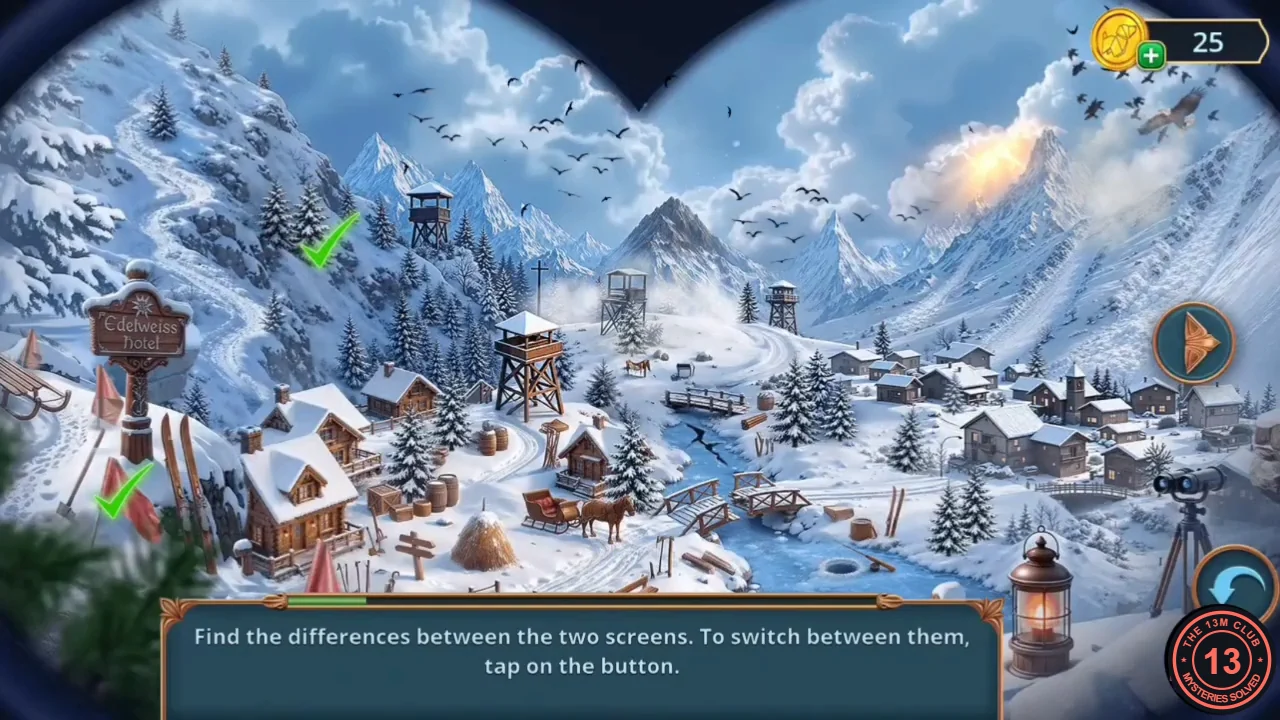
Rule: "Find the differences between the two screens. To switch between them, tap on the button." The two views of the snowy valley alternate when you tap the round arrow button on the right. Each difference you tap gets a green tick.
- Go to the Watch Tower and place the MOUNTAIN POSTCARD in the torn card mount on the binocular stand, then tap the eleven differences. In our example playthrough the ticks land on: the red flag at the lower left below the Edelweiss Hotel sign; a fir on the hillside left of the ski trail; a fir lower on the same slope; the wooden watchtower on the left ridge; the central mountain peak; the small tower on the right ridge; the snowy slope to its right; the smoking peak at the top right; the spot between the barrels and the haystack, left of the sleigh; the benches at the head of the stream; and the wooden bridge over the stream. The solved image shows all eleven ticks. Tapping five of them within five seconds earns FLAWLESS GRAB ("Find 5 hidden objects in 5 seconds"), so tap the spots listed above in quick succession.
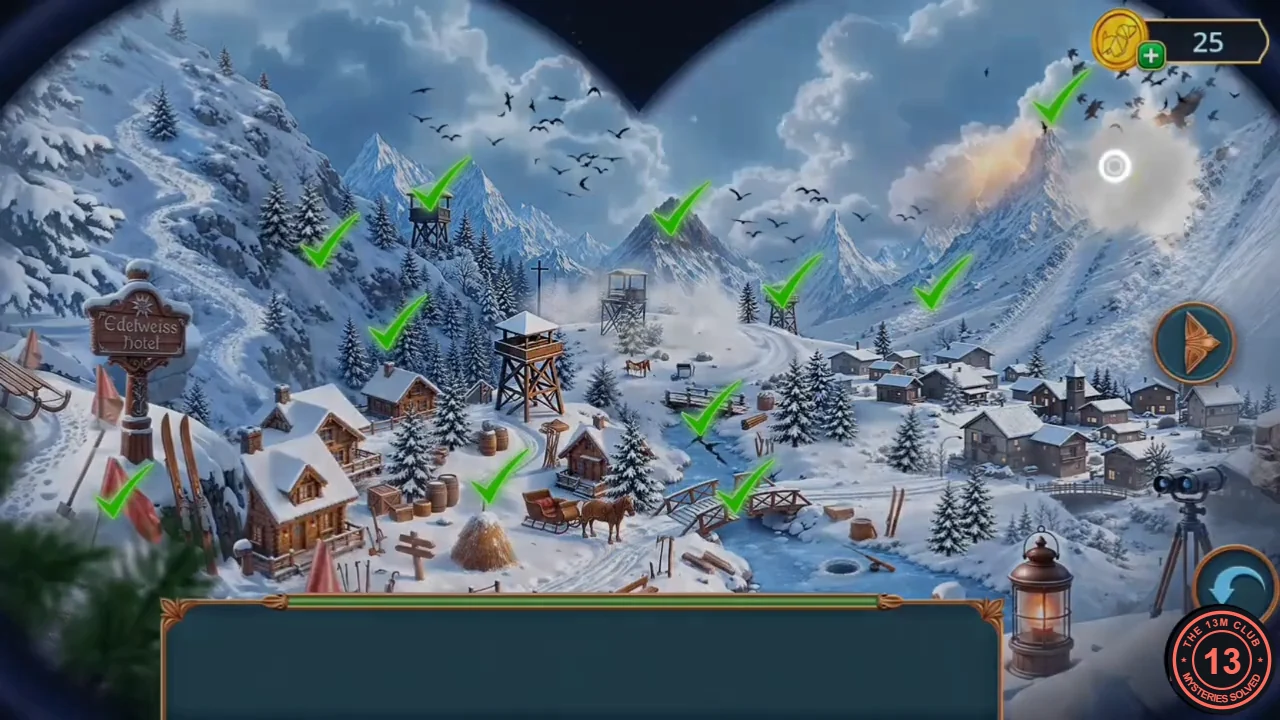
Solved: all eleven differences ticked in our example playthrough.
First-aid kit, harness and sled
The binoculars show the guests' coach stuck in the snow. Open the first-aid kit, fetch the leash and get the husky sled ready for the rescue.
- Look through the binoculars again: the guests' coach is stranded in the snow. Take the note "N472°". New task: help the guests.
- Use the note on the first-aid kit lock: set 4-7-2. Take the RING, the AREA MAP and the WATER BOTTLE.CODE472
- Go to the Telegraph Room, pour the WATER BOTTLE on the spill on the lower bookcase shelf and take the IRON LETTER "E".
- Go to Near the Tower and place the IRON LETTER "E" in the "Edelweiss Hot l" signpost. Take the LEASH from the flap.
- In the inventory open the HARNESS and add the LEASH.
- Decision with Clara: "I can't leave our guests stranded in the mountains." (60 coins, 2 points) or "The rescue team might not get here in time." (free, 0).
- Zoom in on the kennel and sled and fill the three slots: the HARNESS on the husky, the WARM BLANKET and the AREA MAP on the sled.
Dog-sled run
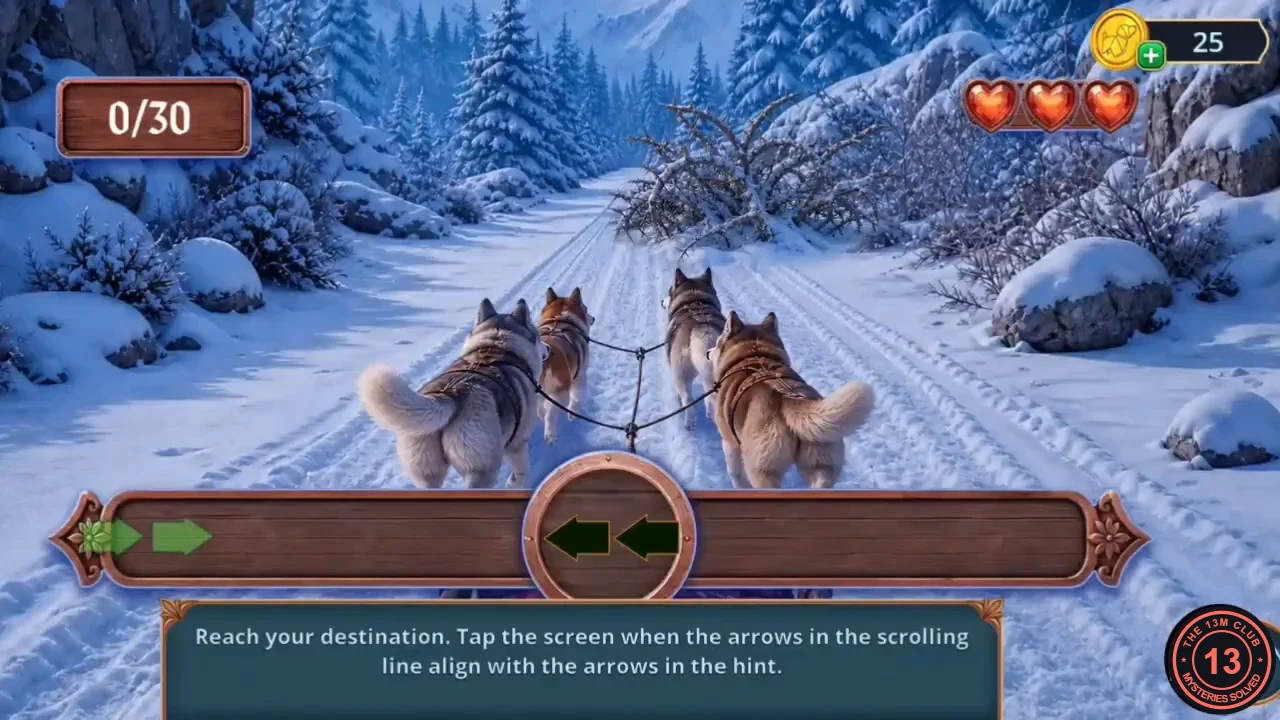
Rule: "Reach your destination. Tap the screen when the arrows in the scrolling line align with the arrows in the hint." You have three hearts; the counter needs 30 successful taps.
- Tap only when the scrolling arrows line up with the arrows in the hint box. Missed taps cost hearts; fill the 0/30 counter to finish.
- The Chapter 1 results show your decision points out of 12 and the 0/4/10 outcome panels. Chapter 2 begins on the mountain road.