Hexagon gear grooves
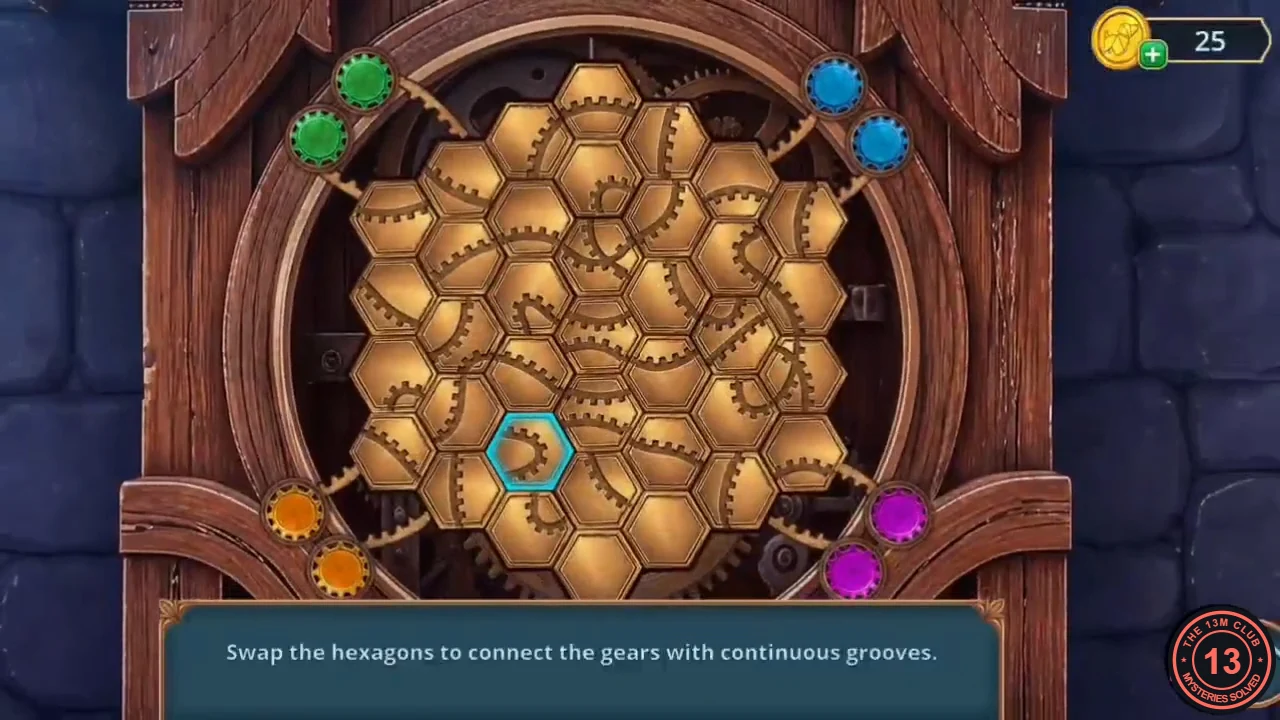
Rule: "Swap the hexagons to connect the gears with continuous grooves." There are four pairs of gears: green (top left), blue (top right), orange (bottom left) and purple (bottom right).
- Tap two hexagons to swap them. A dotted coloured line appears when a pair is joined; finish all four pairs. Work one colour at a time (our example playthrough joined green, then orange, blue and finally purple) and avoid swapping hexagons out of a groove that is already complete. The solved image shows all four grooves joined.
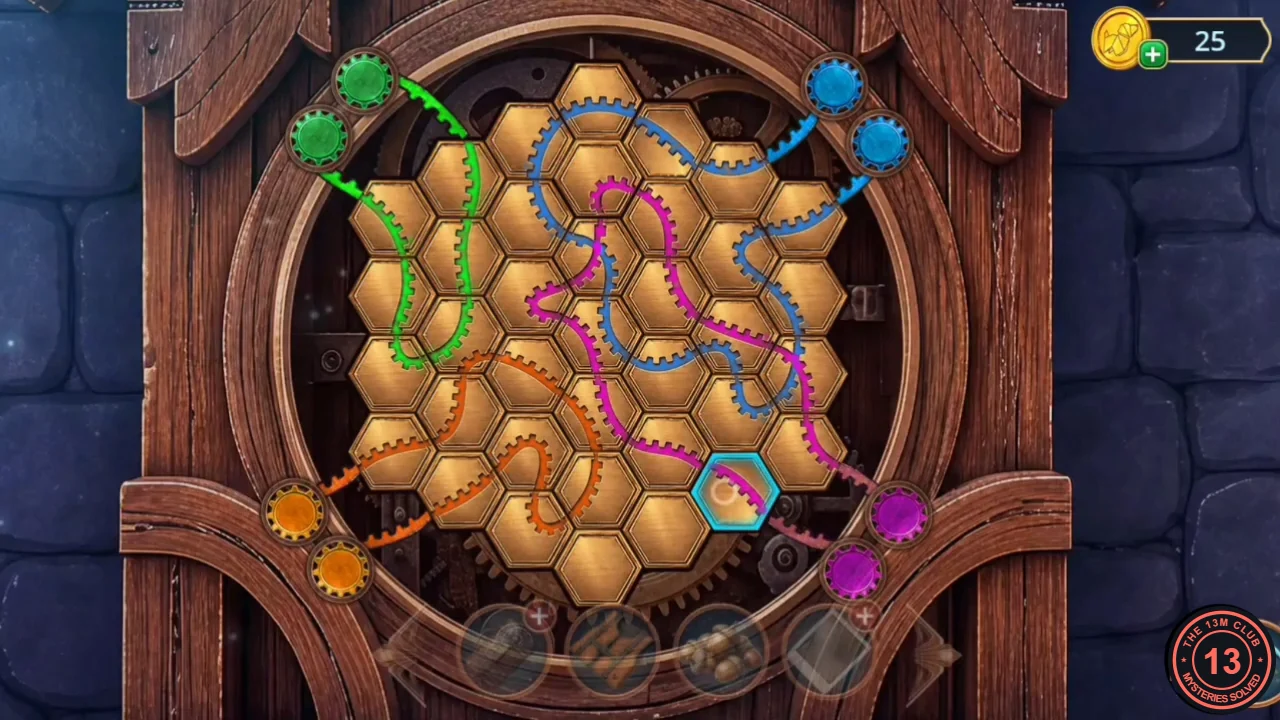
Solved: all four gear pairs are joined by continuous grooves. - The cuckoo bird hands out the TWEEZERS.
Stud earring, wooden fish and the beacon recipe
Follow a chain of small finds, from a stud earring to a carved fish, to the beacon recipe and the shed where its materials are kept.
- In the Hotel Courtyard zoom in on the floorboard gap right of the sleigh and use the TWEEZERS to pick out the STUD EARRING.
- At the Mountain Slope signal box put the STUD EARRING in the briefcase lock. Take the carved WOODEN FISH.
- At the Frozen Lake zoom in on the fisherman trophy on the cabin and hang the WOODEN FISH on its line. The plaque drops: read the beacon recipe (kindling at the bottom, the rag on top, the oil last). Take the FISHING ROD and the BEACON INSTRUCTIONS. The cabin door is jammed for now.
- Near the Rescue Station use the BEACON INSTRUCTIONS on the side shed door right of the red door. A hidden-object scene opens.
Shed association scene
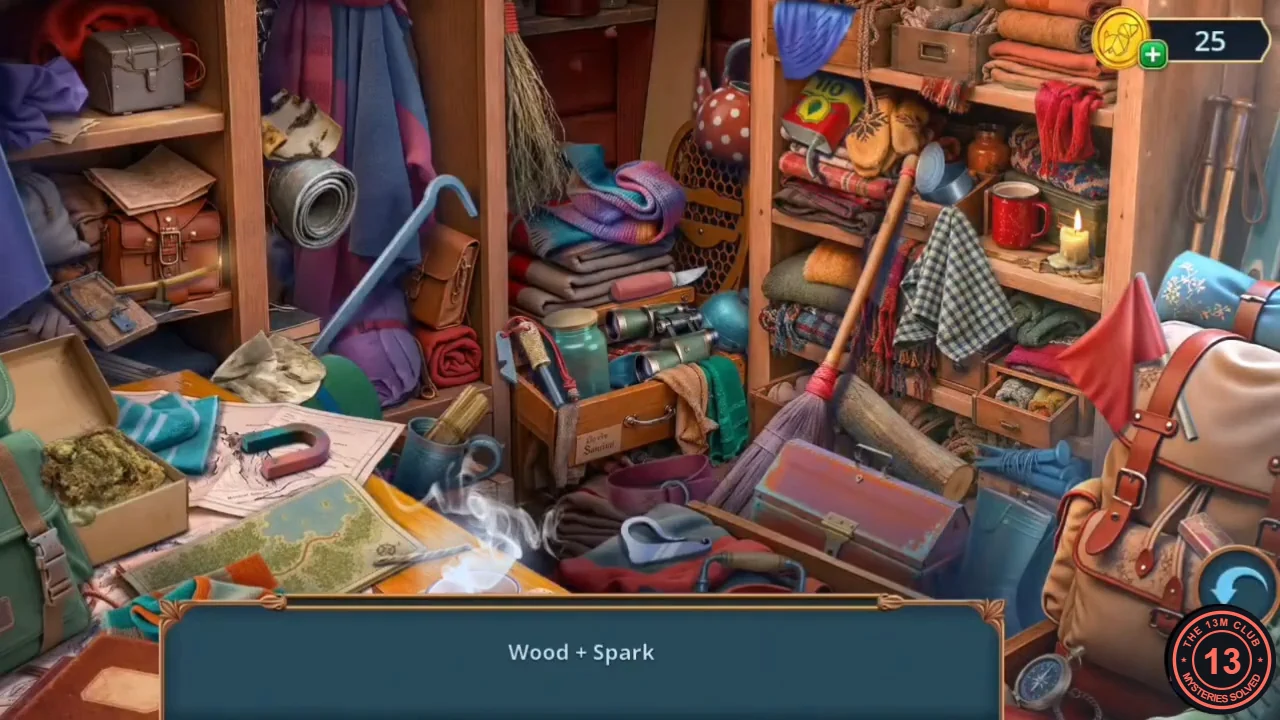
Each clue at the bottom pairs two words. Tap the one object in the shed that combines them. Twelve clues appear one at a time, then a bottle silhouette. In our playthrough the order was: Wood + Spark, Fabric + Oil, Stone + Fire, Liquid + Wick, Matchbox + Flame, Wax + Light, Metal + Spark, Metal + Container, Bark + Fire Starter, Forest + Tinder, Cord + Flame, Blade + Handle.
- Wood + Spark: the long wooden stick with a glowing tip lying across the mousetrap, in front of the brown leather satchel on the left shelf. Fabric + Oil: the crumpled, oil-stained beige rag just above the horseshoe magnet (centre left). Stone + Fire: the flint striker on a red cord hanging from the open drawer, left of the green glass jar. Liquid + Wick: the red-and-yellow oil can with a spout on the upper shelf, between the polka-dot kettle and the knitted mittens.
- Matchbox + Flame: the small pink matchbox tucked under the backpack strap at the lower right. Wax + Light: the lit candle beside the red mug on the right shelf. Metal + Spark: the C-shaped fire steel lying on the red blanket at the lower centre. Metal + Container: the open tin can with its lid, below the mittens and left of the red mug.
- Bark + Fire Starter: the piece of birch bark on top of the rolled grey mat at the upper left. Forest + Tinder: the dry moss in the open cardboard box at the lower left. Cord + Flame: the thin twisted fuse cord lying on the folded map at the lower centre-left, beside the steaming cup. Blade + Handle: the knife with a pink handle on the folded blankets in the centre, above the binoculars.
- The bottle silhouette appears last: tap the bottle lying on the folded map at the lower left. Reward: KINDLING (a bottle).
- In the Winter Forest zoom in on the fire pit: pour the KINDLING over the tinder and strike the MATCHBOX to light the fire.
- Put the FROZEN PIECE in the flames; the ice melts away from the METAL CLAW. Collect the EDELWEISS BROOCH here.
- In the Rescue Station insert the METAL CLAW into the round socket on the right side of the cuckoo clock. Take the DEER HARNESSES (2/2) and the PAPER.
- In the Winter Forest put the DEER HARNESSES on the stag and feed it the ACORNS.
Reindeer anchor path
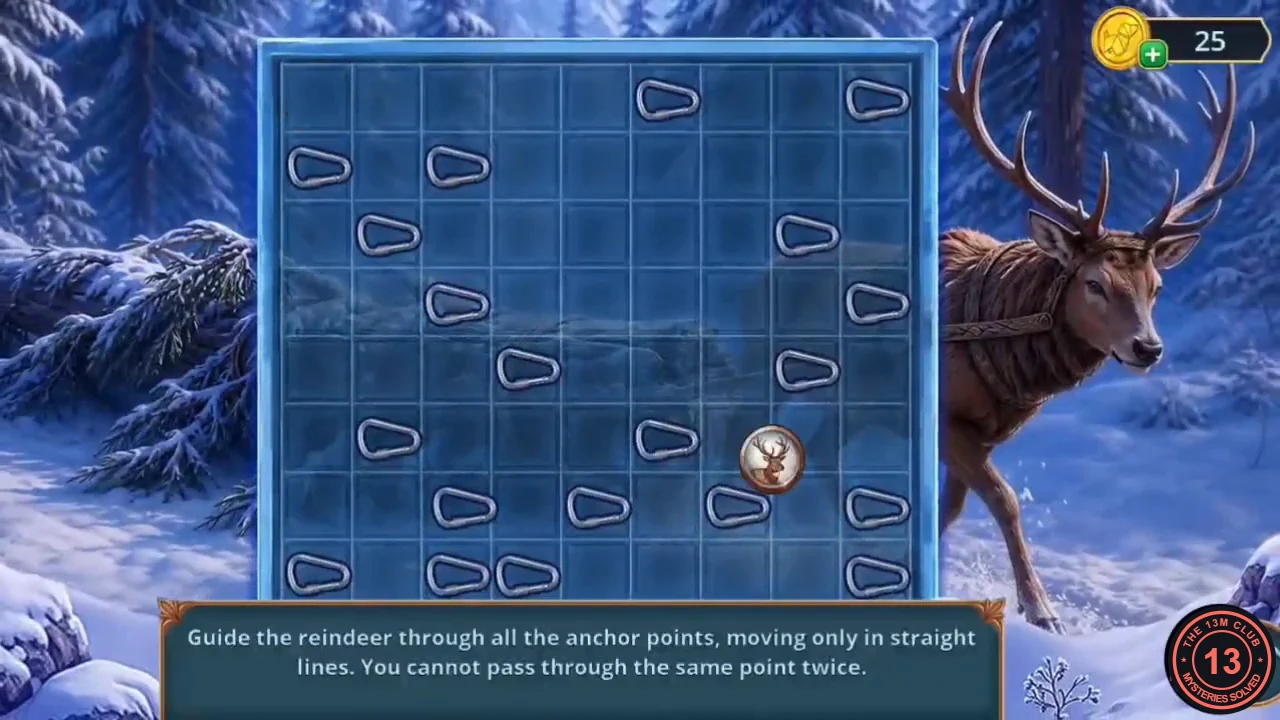
Rule: "Guide the reindeer through all the anchor points, moving only in straight lines. You cannot pass through the same point twice." The reindeer starts at the top-left anchor.
- Tap anchors in turn to lay straight horizontal or vertical straps from one to the next until every anchor is used once. Straps may cross, but no anchor may be reused. Plan the route before tapping: anchors on the outer edge with few straight-line neighbours must be visited from their only open direction, so route through them early. The solved image shows the complete path from our example playthrough.
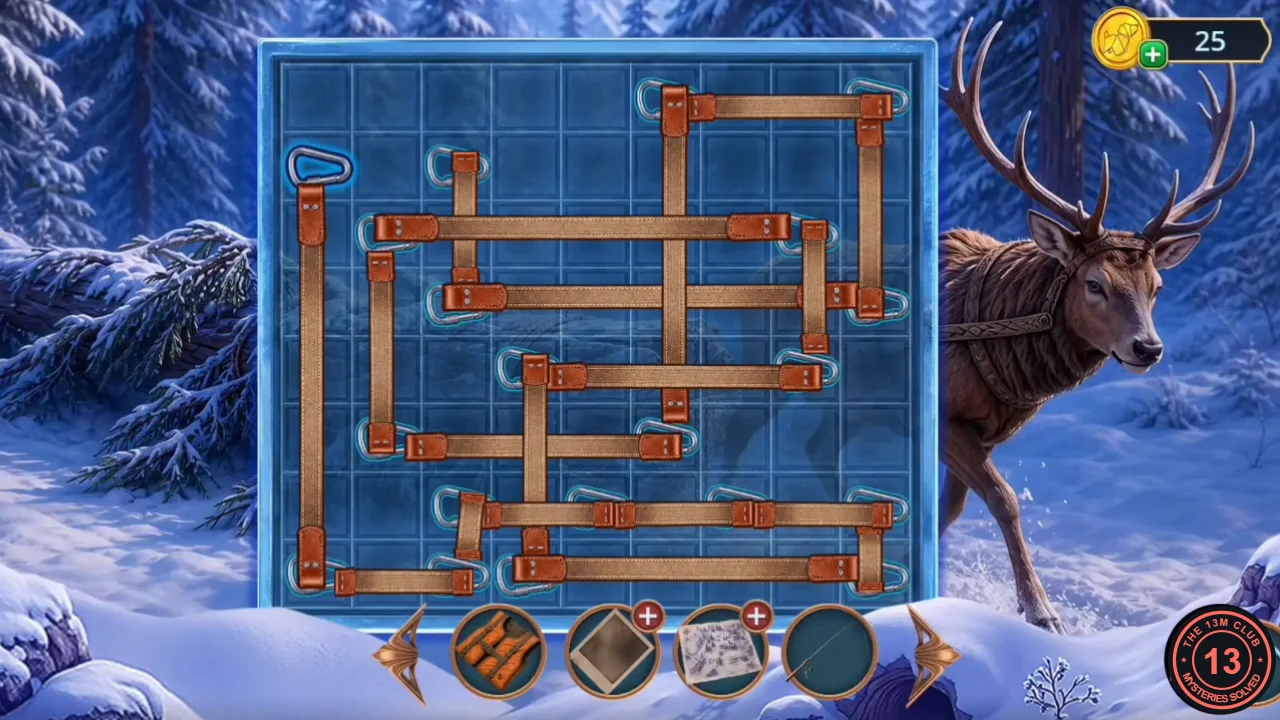
Solved: the complete strap path from our example playthrough, visiting every anchor once. - Take the NUTCRACKER from the snow where the log lay.
- In the Hotel Courtyard use the NUTCRACKER on the padlock of the frozen suitcase by the iced-up pump. Take the METAL SIGNAL CASING and the WOOL SCARF.
- At the Frozen Lake give the WOOL SCARF to the husky puppy (achievement BLOODHOUND FRIEND). The puppy brings the ICE AXE.
- On the Mountain Road zoom in on the frozen pond and use the ICE AXE to cut a hole in the ice.
- Use the FISHING ROD on the hole in the ice to start the matching game.
Ice-hole matching
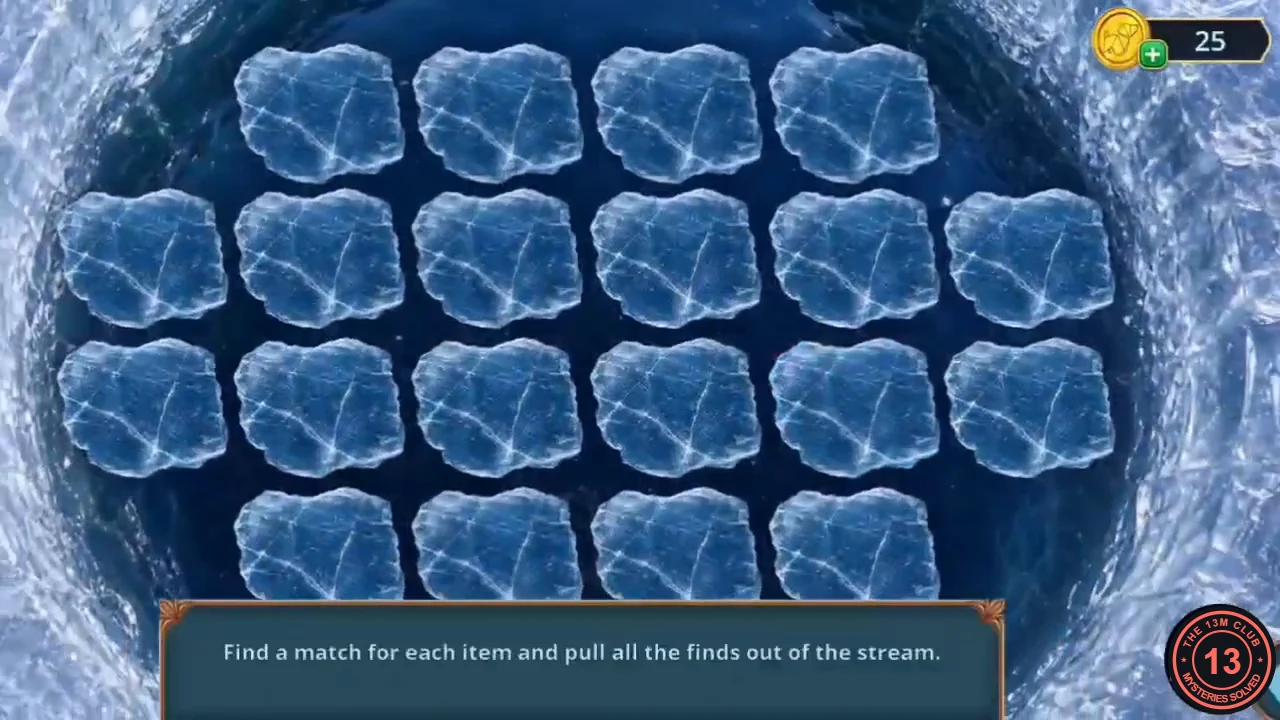
Rule: "Find a match for each item and pull all the finds out of the stream." The floes drift, so their layout is not fixed.
- Tap two ice floes to reveal what is under them (berries, pinecones, crayfish, seashells, fish, a float, a compass and so on). Matching pairs vanish; remember the rest and clear them all.
- A bobber surfaces: take the COMPASS NEEDLE. Collect the EDELWEISS BROOCH here.
- In the Rescue Station place the COMPASS NEEDLE on the brass compass on the window sill. Take the PUMP from the compartment below.
- At the Mountain Slope put the INFLATABLE LIFE VEST under the pile of packs and attach the PUMP. The vest lifts the pile: take the IRON HANGER.
- At the Frozen Lake use the IRON HANGER on the jammed boat drawer. Another hidden-object scene opens. Keep the hanger.
Boat drawer fragment scene
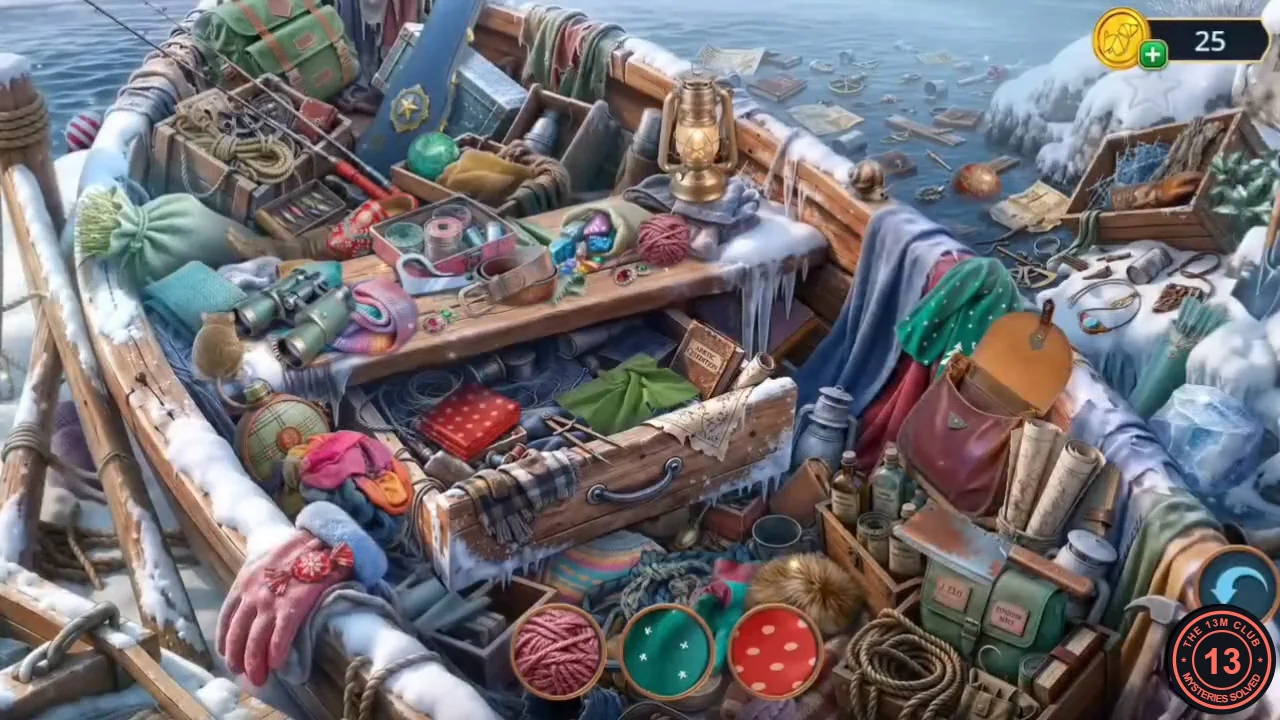
A fragment hidden-object scene: three round slots at the bottom show enlarged, coloured close-ups of part of an object (in our playthrough the first were red yarn, green fabric with white stars and red polka-dot fabric) rather than outlines. Each matched fragment is replaced by a new one.
- For each round slot, find the object in the boat whose colour, pattern or texture matches the enlarged close-up and tap it, until no fragments are left.
- Michael: the guests' belongings are here but there is no sign of them; they may be in the iced-up cabin. Decision: "We'll find them, no matter what it takes." (60 coins, 2 points) or "What if they're already dead?" (free, 0). Michael gives you the CARRIAGE KEY he found among their things.
- On the Mountain Road use the CARRIAGE KEY on the green carriage door. Read the luggage tag: lock combination 4-2-7. Take the LUGGAGE TAG.
- Open the LOST BAG in the inventory and drag the LUGGAGE TAG into its lock; it opens with 4-2-7. Take the GUEST'S WALLET. (The trunk in the carriage needs a different code; it comes later.)CODE4-2-7
- At the Frozen Lake give the GUEST'S WALLET to the husky puppy to start the scent trail.
Puppy scent trail
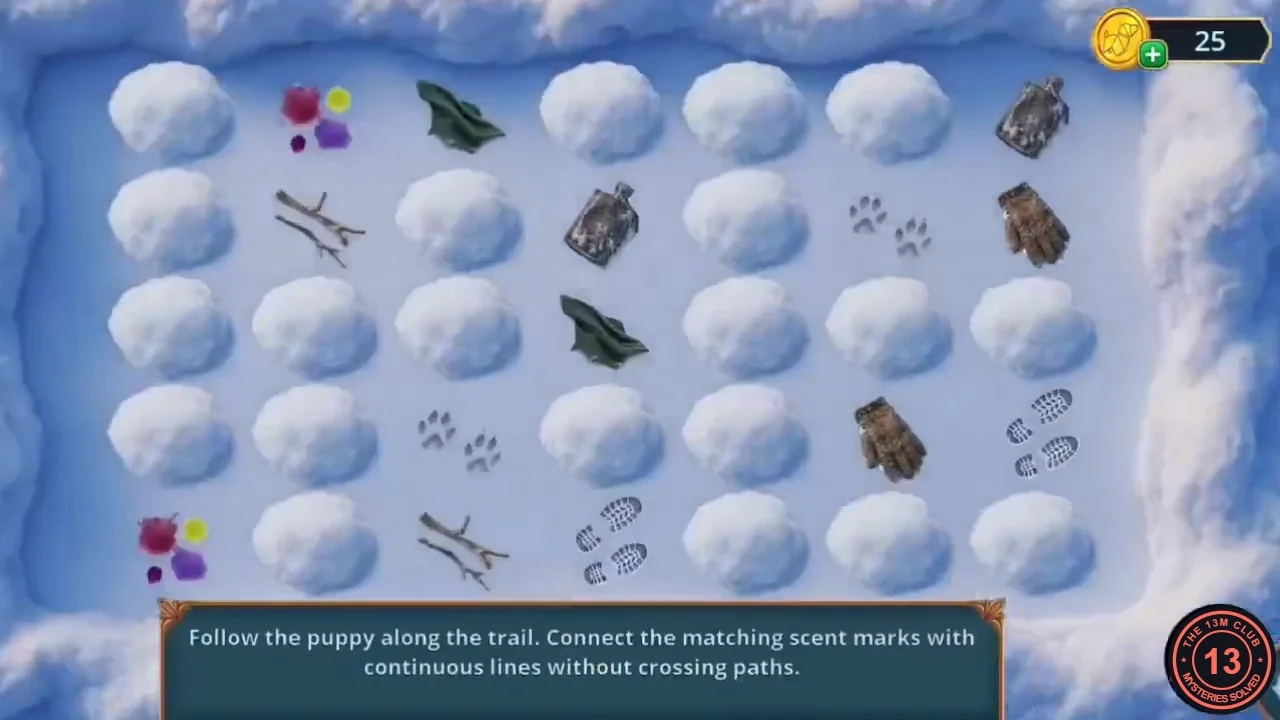
Rule: "Follow the puppy along the trail. Connect the matching scent marks with continuous lines without crossing paths." The grid is 7 columns by 5 rows and every cell is used.
- Draw these paths (row, column; row 1 at the top). Berries: (1,2) → (1,1) → down column 1 → (5,1). Twigs: (2,2) → down to (5,2) → (5,3). Leaf: (1,3) → (2,3) → (3,3) → (3,4). Flask: (1,7) → left along row 1 to (1,4) → (2,4). Paw prints: (2,6) → (2,5) → (3,5) → (4,5) → (4,4) → (4,3). Glove: (2,7) → (3,7) → (3,6) → (4,6). Boot prints: (4,7) → (5,7) → left along row 5 to (5,4).CODEr1 B B L F F F F / r2 B T L F P P G / r3 B T L L P G G / r4 B T P P P G Bo / r5 B T T Bo Bo Bo Bo
- The puppy brings a torn note about a man who claimed the weather would clear. Take the BROKEN WEATHER VANE from the same zoom and the WEATHER FORECAST from the snow beside the boat.
- Open the FOREST MAP in the inventory and drag the WEATHER FORECAST into its slot to make the AVALANCHE MAP.
- In the Hotel Hall place the AVALANCHE MAP on the pin board on the left wall. A hidden-object scene opens.
Pin-board fragments
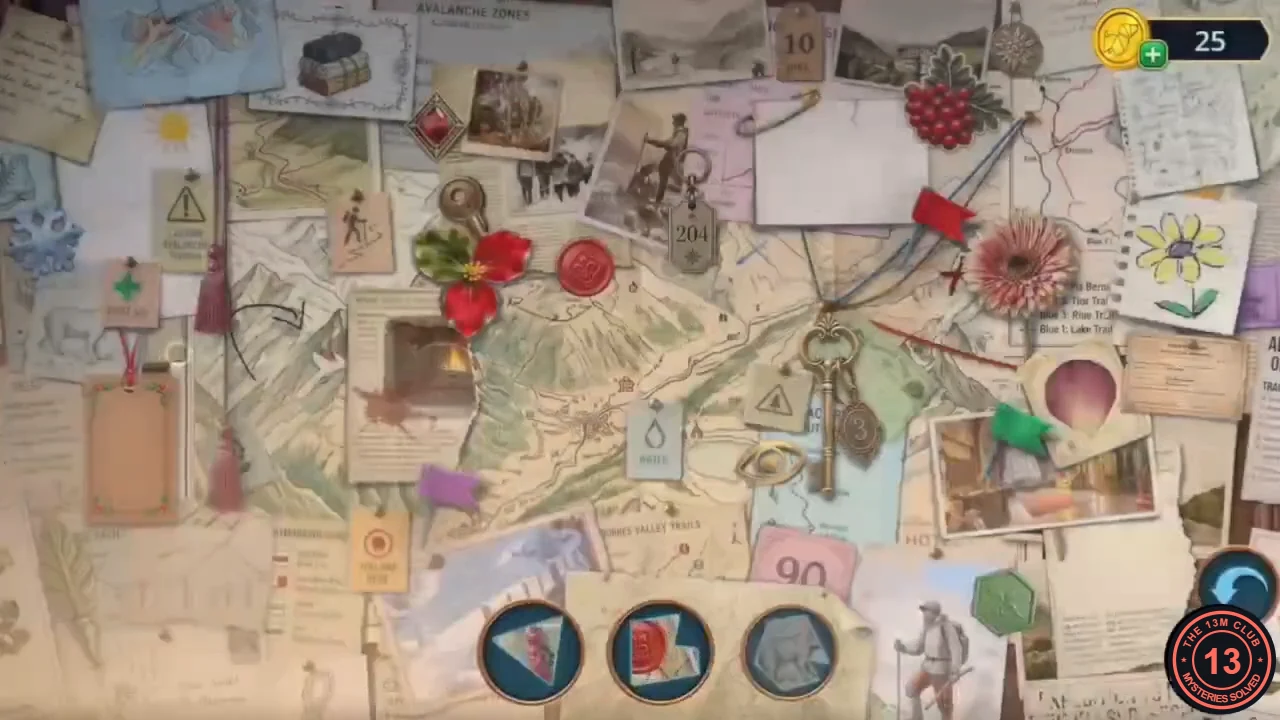
Three round slots show enlarged, coloured close-ups of part of a piece on the board, rather than outlines; tap the paper or photo piece whose colour and pattern match (wax seal, ibex photo, hiker card, rope loop, holly, berries, stars, a gerbera and others).
- Find every piece. The final parachute silhouette is the RESCUE TOKEN.
- Zoom in on the metal tin on the reception desk and place the RESCUE TOKEN in its parachute-shaped recess. Read the card (three short, three long, three short) and take the SOS SIGNAL card.
- Near the Rescue Station zoom in on the signal lamp's control box on the pole at the right and place the SOS SIGNAL card.
Signal lamp slide puzzle
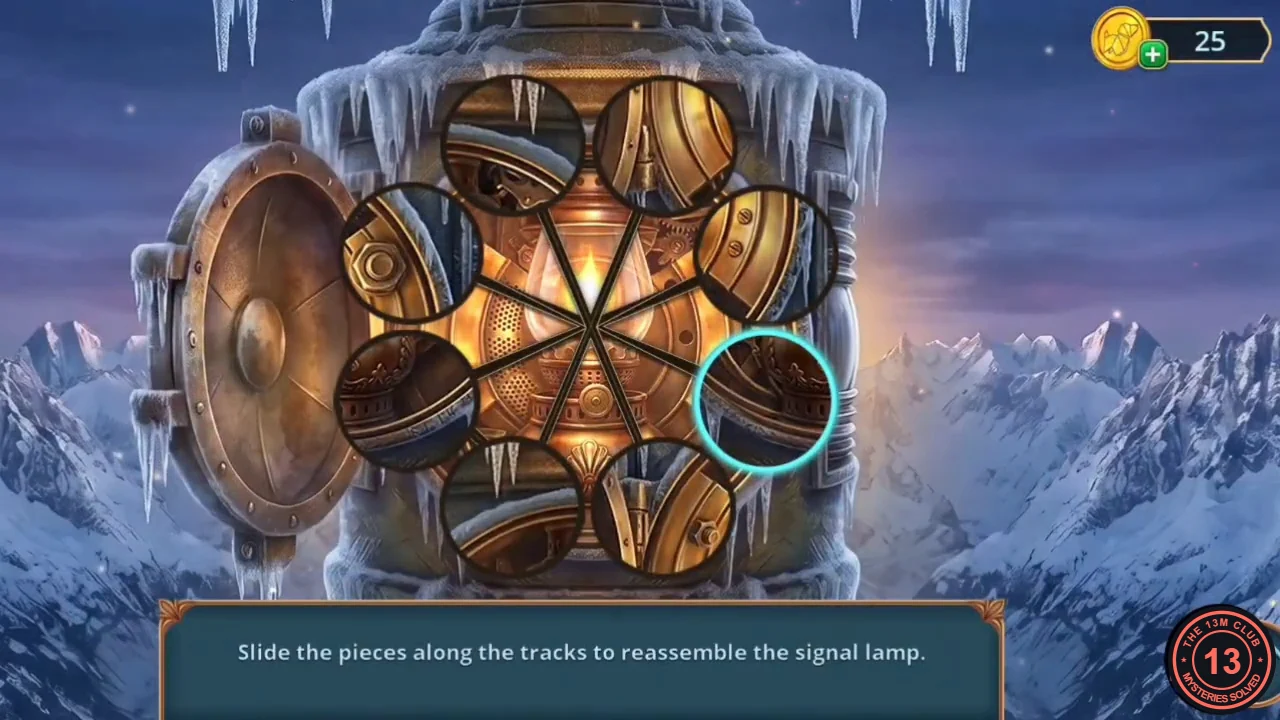
Rule: "Slide the pieces along the tracks to reassemble the signal lamp." Round picture discs sit around the lamp, joined to the centre by straight tracks that form a star. Each disc shows one part of the lamp housing.
- Tap a disc to select it (a blue ring appears), then tap another disc: the two discs slide along the tracks and trade places. In the recording, neighbouring discs and discs directly across the centre were swapped this way. Use the solved image as your target: work around the lamp one position at a time, swapping in the disc whose picture continues the housing there, and leave discs that are already correct alone. The lamp is complete when every disc lines up with its neighbours.
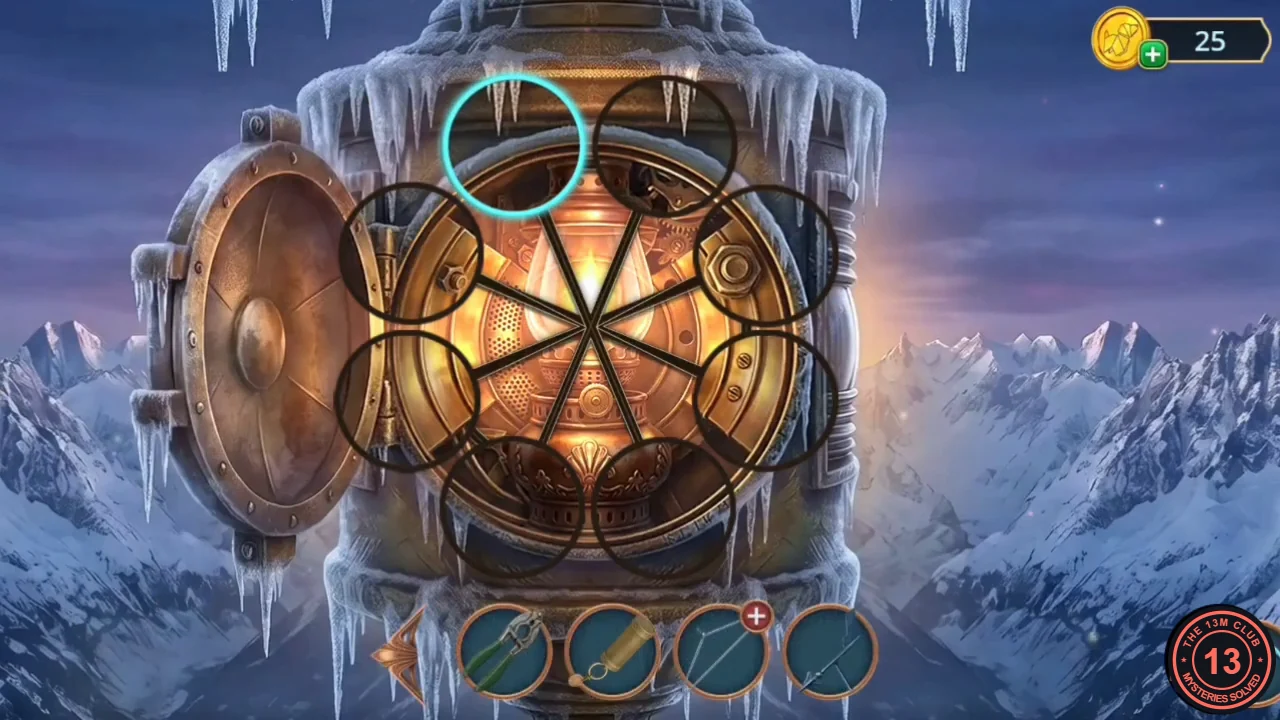
Solved: every piece shows its part of the lamp housing. - Read the note about the SOS signal. Take the COAT HANGER HOOK from the lamp box and use it on the open side-shed doorway to hook out the red HOT WATER VALVE.
- Decision with Michael: "Ask where to go next." (60 coins, 2 points) or "Ask if the signal will help." (free, 0).
- In the Hotel Courtyard put the HOT WATER VALVE on the tap of the frozen fountain by the steps. Take the WOODEN BLOCK from the melted ice. Then pick up the BROKEN CARRIAGE JACK lying in the snow in front of the sled (it has a red "+" badge; you finish it in Chapter 3) and the WOOD-CARVING TOOL SET from the sled seat.
- Open the WOODEN BLOCK in the inventory and use the WOOD-CARVING TOOL SET on it to carve a KING CHESS PIECE.
- In the Hotel Hall place the KING in the chess box to start the chess puzzle.
Knights and rooks
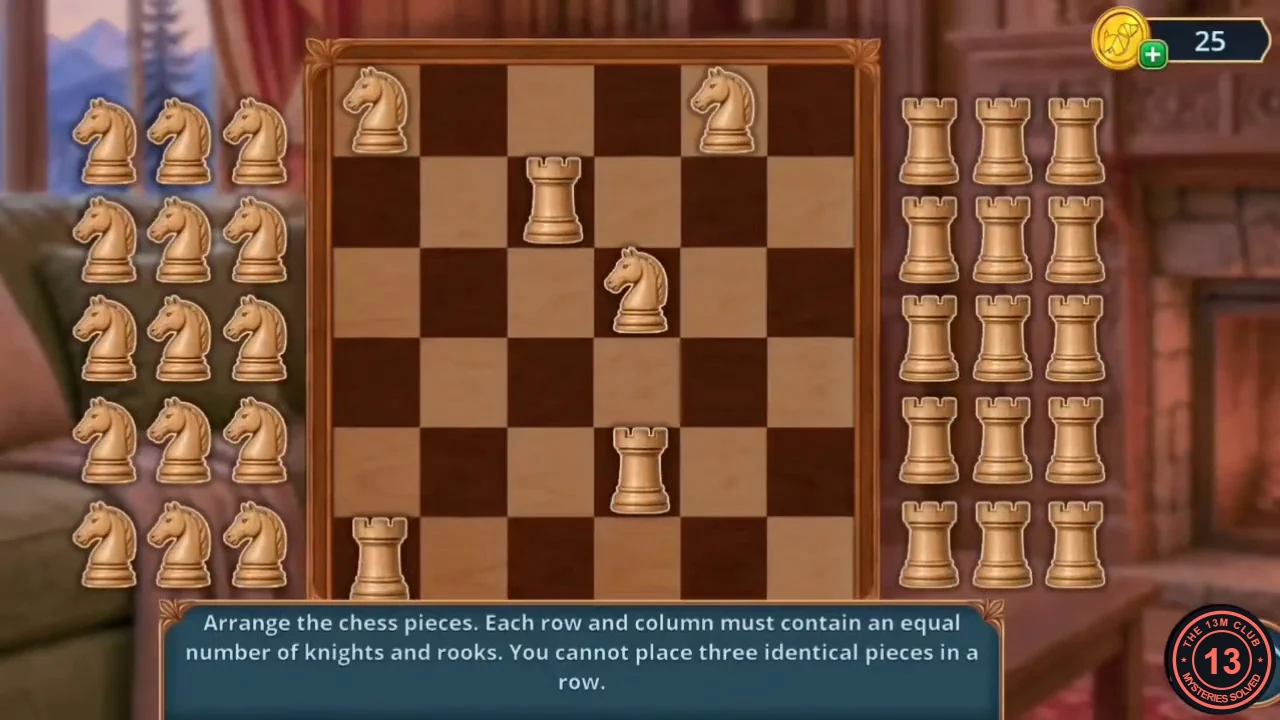
Rule: "Arrange the chess pieces. Each row and column must contain an equal number of knights and rooks. You cannot place three identical pieces in a row." 6×6 board; fixed pieces are knights at r1c1, r1c5 and r3c4 and rooks at r2c3, r5c4 and r6c1.
- Fill the board as follows (N = knight, R = rook; rows top to bottom). Row 1: N R N R N R. Row 2: R N R N R N. Row 3: R N R N N R. Row 4: N R N R R N. Row 5: N R N R N R. Row 6: R N R N R N.CODENRNRNR / RNRNRN / RNRNNR / NRNRRN / NRNRNR / RNRNRN
- Take the STAG BEETLE AMULET from the chess box drawer.
- In the Rescue Station place the STAG BEETLE AMULET in the beetle socket below the window-sill compass. Take the DEVELOPING SOLUTION.
- Open the UNDEVELOPED PHOTO in the inventory and add the DEVELOPING SOLUTION: HUNTER PHOTO.
- In the Winter Forest use the HUNTER PHOTO on the luggage pile on the left to start a spot-the-difference scene.
Campsite differences
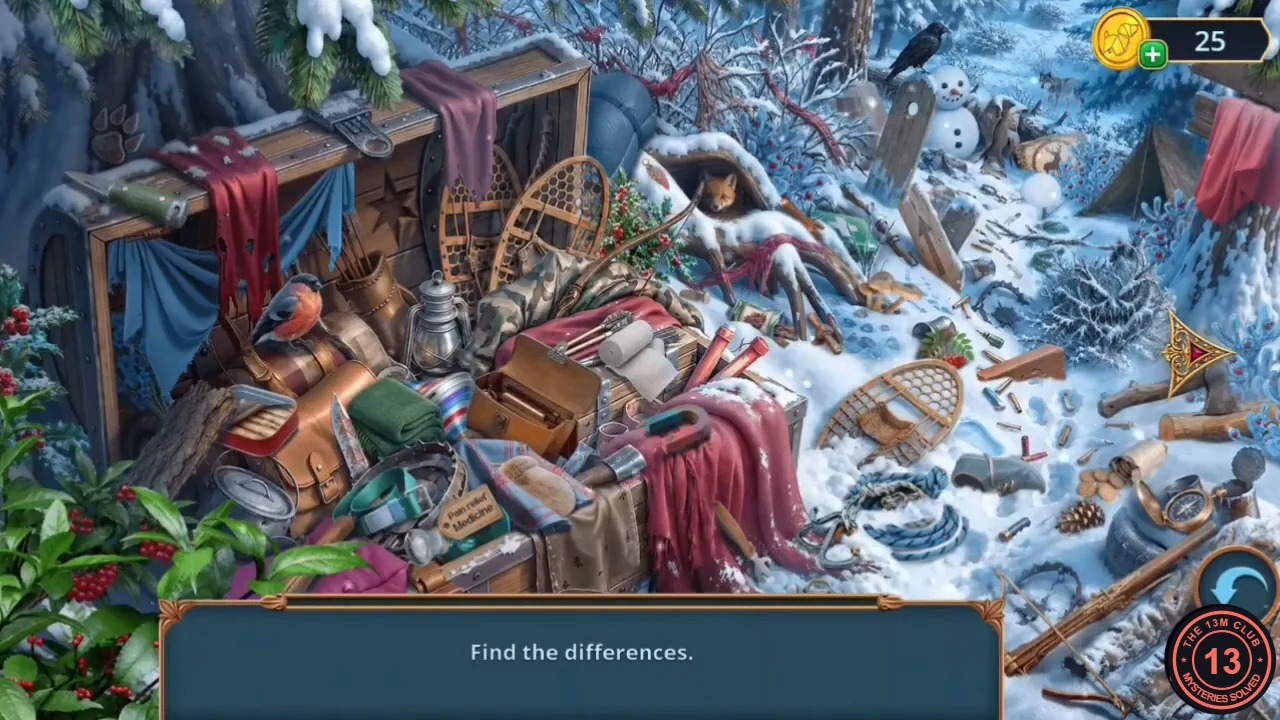
Rule: "Find the differences." Compare the photo with the campsite pile.
- Tap the twelve differences until each one is ticked. Left half: the paw-print mark on the tree trunk left of the trunk lid; the bullfinch perched on the left of the pile; the folded green sweater in the middle; the holly berries in the bottom-left corner. Right half: the fox in the snowy log hollow; the snowman; the small wolf in the background above and right of the snowman; the snowball right of the snowman; the frosted fir bush on the right; the mushrooms at the end of the fallen root; the snow just left of the grey boot (right of the snowshoe); the compass at the bottom right. The solved image shows all twelve ticks. Reward: EXPENSIVE RING.
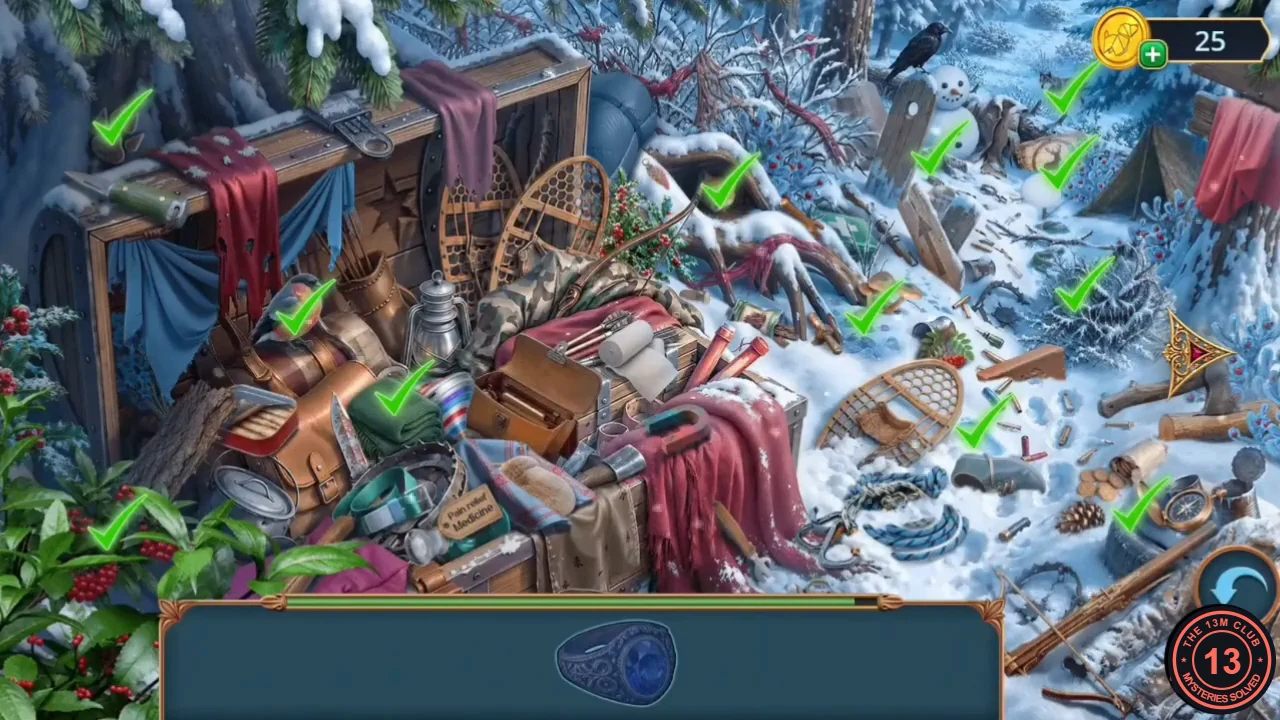
Solved: all twelve differences ticked in our example playthrough; the Expensive Ring is the reward. - At the Mountain Slope place the EXPENSIVE RING on the stone angel's open hand. Take the PAPER CLIP and the SCREW-SHAPED PIN from the chest.
- In the Hotel Courtyard zoom in on the small wooden shed door behind the sled and put the SCREW-SHAPED PIN in the hole as a door ring. The shelf puzzle opens.
Matching storage shelves
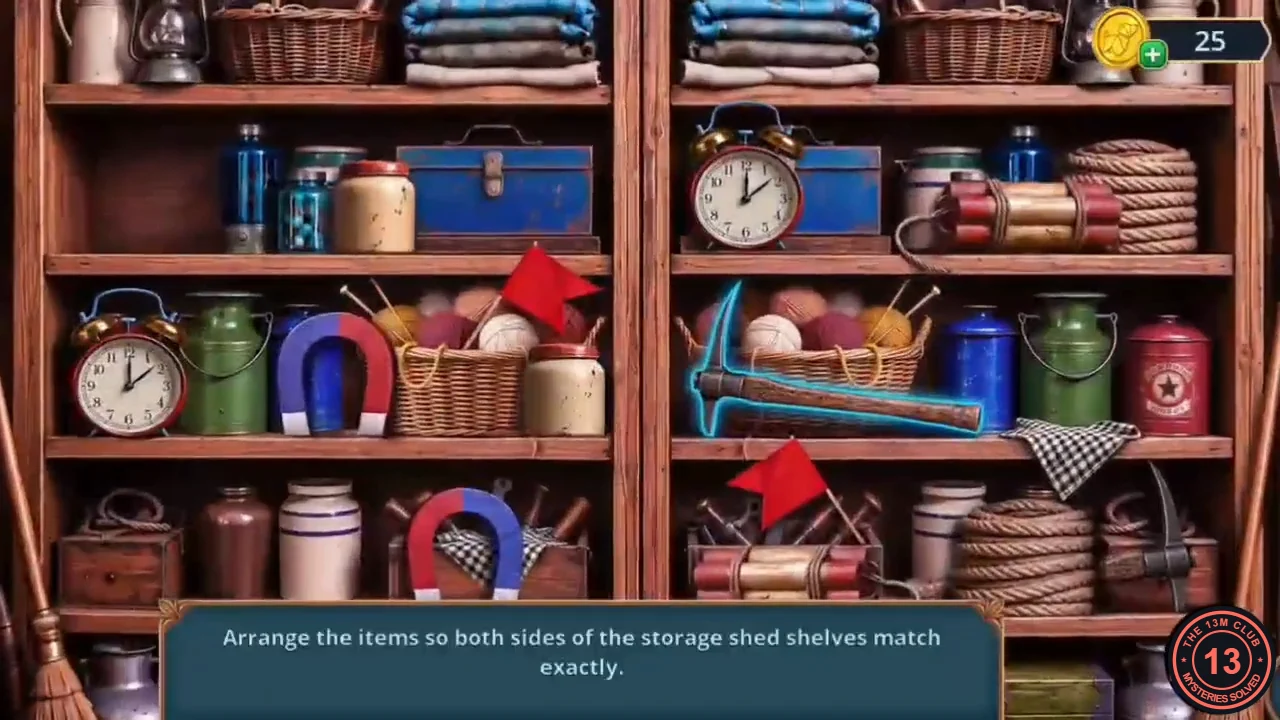
Rule: "Arrange the items so both sides of the storage shed shelves match exactly." In the accepted solution the right unit is a MIRROR image of the left one: each shelf holds the same items in reverse order, so whatever sits at the outer end of the left unit also sits at the outer end of the right unit.
- Drag items between spots until the two units mirror each other. Accepted left unit, from left to right (the right unit holds the same items from right to left): top shelf white jug, lantern, wicker basket, folded blankets; second shelf rope coil, dynamite bundle (blue bottle behind it), cream jar, blue toolbox; third shelf alarm clock (checked cloth hanging below it), green can, horseshoe magnet, yarn basket with a red flag; bottom shelf hammer/pick, brown jug, white striped jar, crate of tools. The solved image shows the matching units.
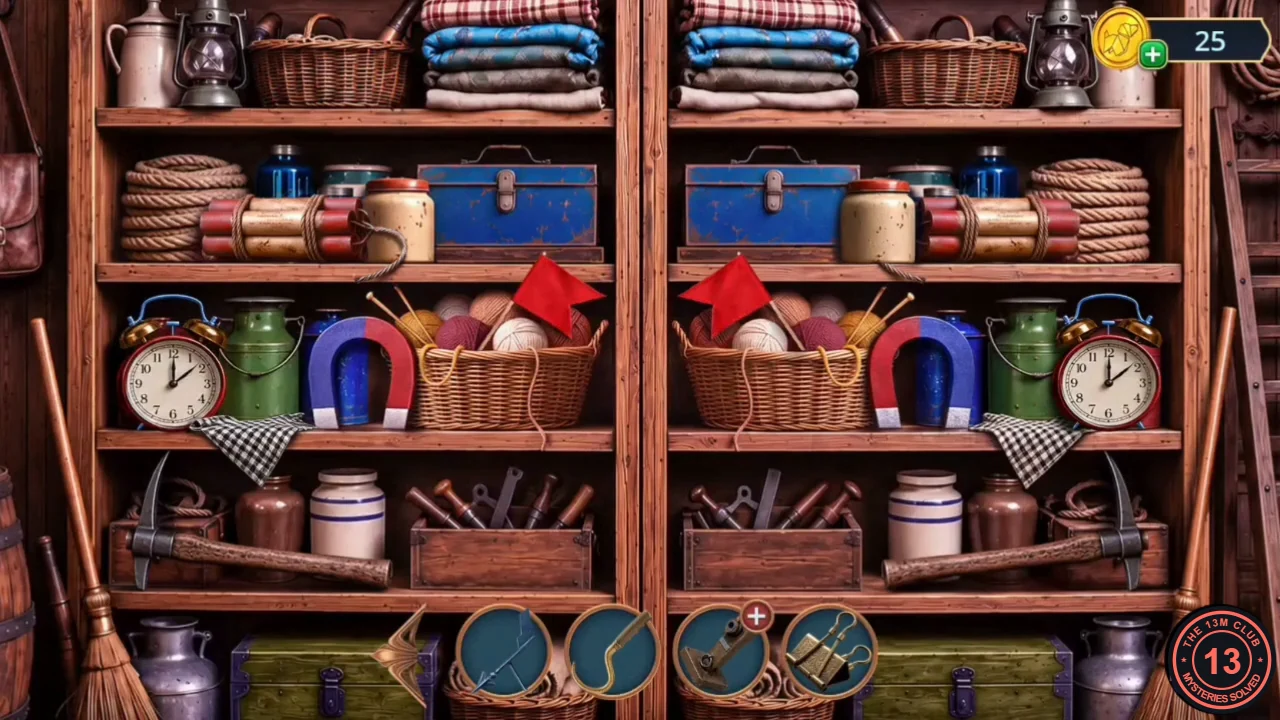
Solved: the right unit mirrors the left unit shelf by shelf. - In the opened shed tap the wooden crate of tools on the floor and take the COAL.
- On the Mountain Road zoom in on the carriage trunk's symbol lock. Use the COAL first, then the PAPER: the rubbing brings out the carved clue beside the lock, 1 = moon, 2 = star, 3 = a diamond on a forked stem. Press the moon (top middle), the star (top right) and the diamond-on-stem symbol (bottom right). Take the PLIERS.CODEmoon, star, bottom-right diamond-on-stem
- Open the IRON HANGER in the inventory and use the PLIERS on it to bend a HOOK.
- At the Frozen Lake zoom in on the well: tie the HOOK to the rope and fit the BROKEN WEATHER VANE into the windlass as a crank. Take the CROWBAR from the bucket. The Hook stays in your inventory.
- Use the CROWBAR on the plank across the fisherman's hut door. A picture puzzle appears on the door.
Fisherman's hut door carving
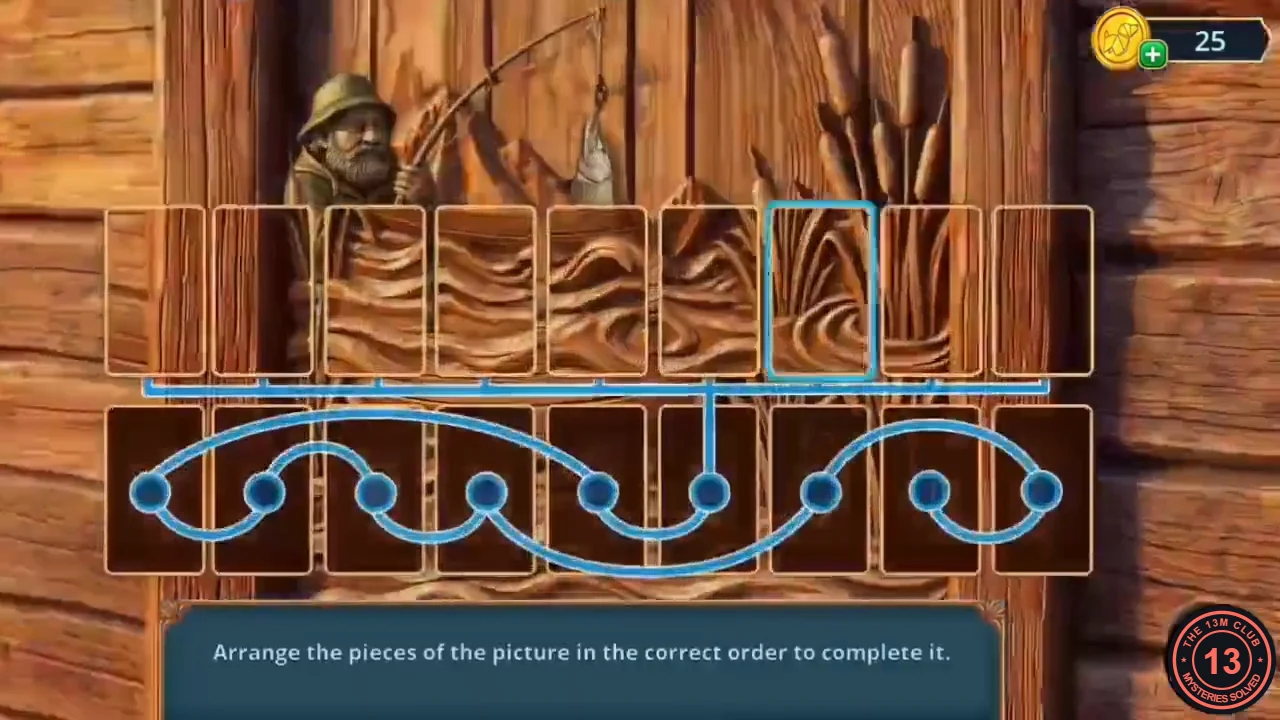
Rule: "Arrange the pieces of the picture in the correct order to complete it." Nine carved strips sit in the top row; tapping them numbers the order in which they drop. After the ninth, they fall one by one and slide along the looping track into the bottom row.
- In our example playthrough the strips were tapped in this order (top slots numbered 1–9 from the left): 8, 9, 7, 4, 3, 2, 1, 5, 6, which gives the numbering 7, 6, 5, 4, 8, 9, 3, 1, 2 across the top row. The bottom row then shows the complete fisherman, waves and reeds. If your strips start in a different arrangement, number them so the pieces land in picture order.CODE8, 9, 7, 4, 3, 2, 1, 5, 6
- The Chapter 2 results show your decision points out of 12 and the 0/4/10 outcome panels. Inside the hut lies a frozen guest holding an Edelweiss Hotel card. Chapter 3 begins.