Mountain Road: clear the signpost
The sled stops at the crash site on the Mountain Road. Eliza needs to find out which way the road goes.
- Tap the edge of the frozen lake on the left to collect an EDELWEISS BROOCH.
- Zoom in on the snow pile with the wire cage. The cage is buried for now; take the red FLAG MARKER (1/3).
- Zoom in on the carriage door (it is locked) and take the WARM BLANKET and the SHOE BRUSH from the footboard.
- Zoom in on the snow-covered signpost and use the SHOE BRUSH on it. The broken sign opens a puzzle.
Assemble the signpost
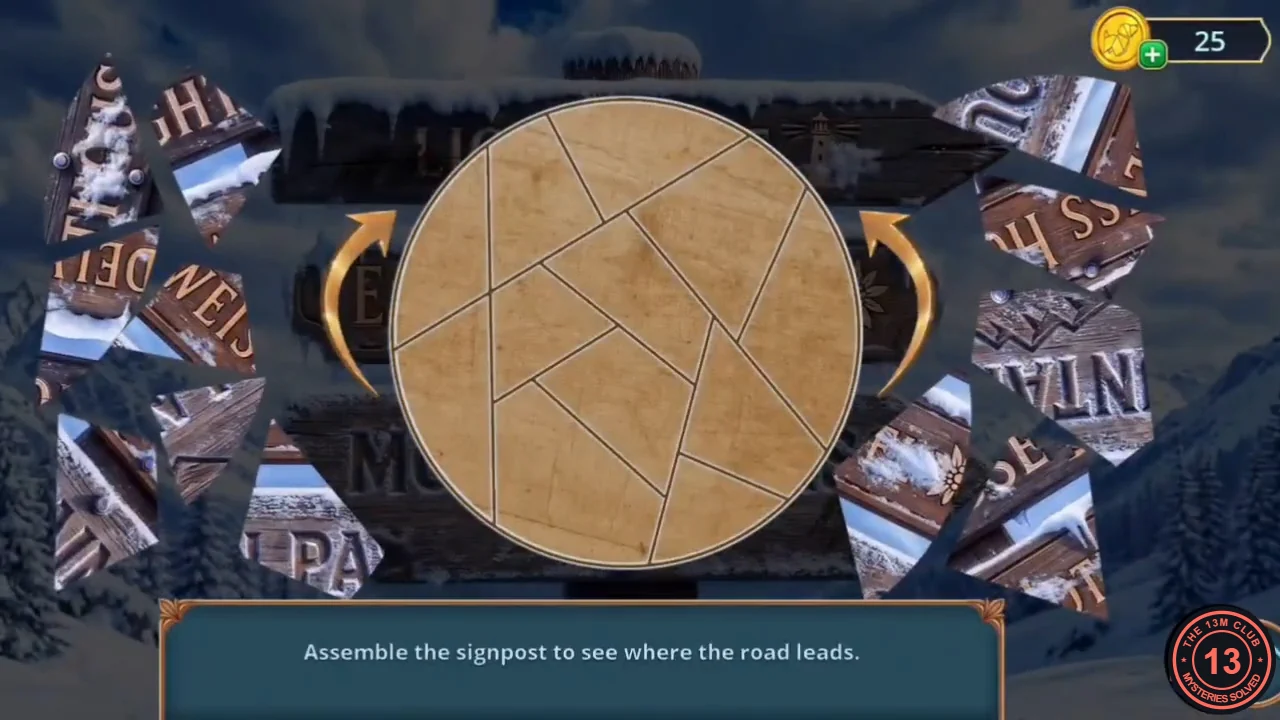
Rule: "Assemble the signpost to see where the road leads." The wooden disc has outline slots; the fragments lie on both sides and the curved arrows rotate the disc.
- Drag each fragment into the slot with the same outline, rotating the disc with the arrows to bring empty slots within reach. When all pieces fit, the signs read LIGHTHOUSE (top), EDELWEISS HOTEL (middle) and MOUNTAIN PASS (bottom).
Rescue Station: clippers, key and the shed
The red station door is locked: "if there is someone inside, we need to get in there immediately."
- Zoom in on the woodpile and stove on the left. Take the HAMMER, an OLD BOARD (1/2) and the CRAMPONS (they have a red "+" badge and need parts later).
- The logs are sealed with dried resin. Use the RESIN SOLVENT from Chapter 1 on them and take the CLIPPERS.
- Return to the Mountain Road and use the CLIPPERS on the wire cage. Take the PIPETTE and the KEY.
- Back near the Rescue Station, use the KEY on the small shed door with the round window on the right to open a hidden-object scene.
Station shed hidden-object scene
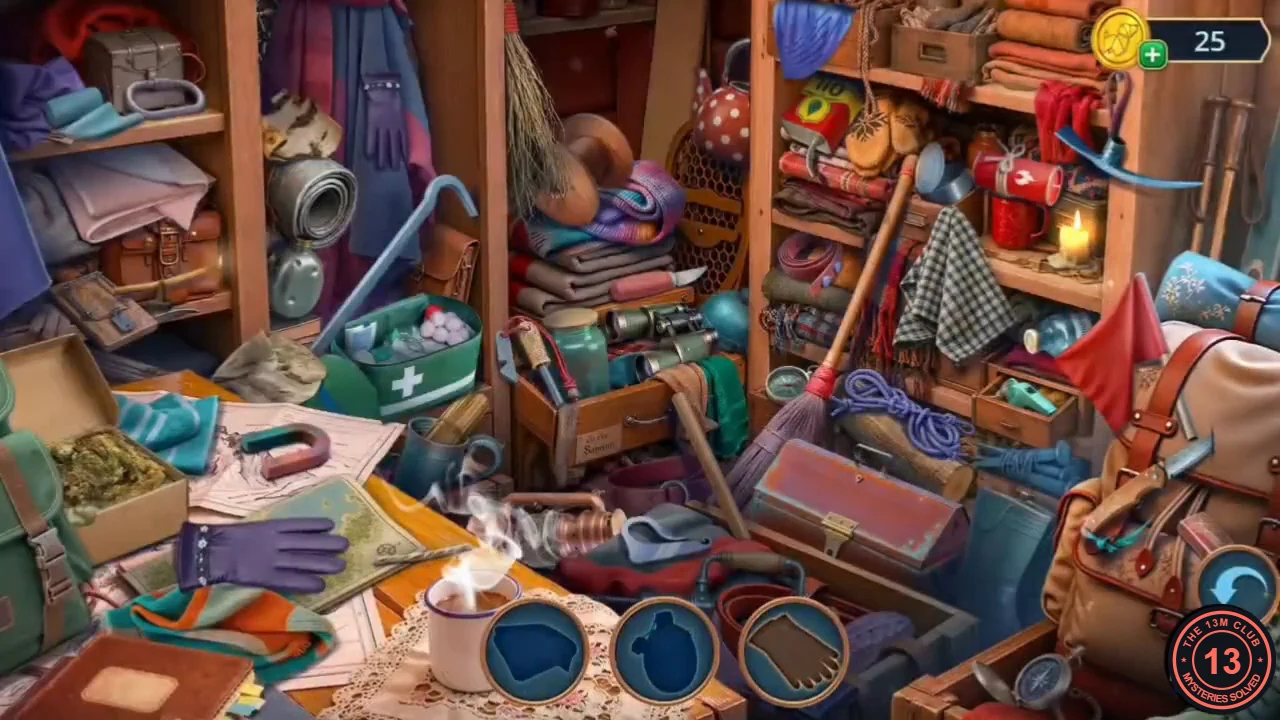
A silhouette scene: three silhouettes are shown at a time and refill as you find them (canteen, rope coil, ice axe, lantern and similar). One item is inside a zoom on the left shelf.
- Find all silhouetted objects. The scene rewards the LOCK PICKS; finishing within two minutes earns TRACKER ("Finish a HOP in two minutes"). A journal note about the Great St Bernard hospice is also found here.
- Use the LOCK PICKS on the red station door and go inside.
Rescue Station: revive Michael Reed
Michael is freezing and barely breathing, and a burst fire extinguisher is spraying in the corner.
- Zoom in on the window sill with the brass barometer and take the BOOT STRAPS.
- Zoom in on Michael. His backpack clasp needs "some kind of a ring": use the RING from Chapter 1 on it. Read his press ID (The Alpine Herald) and take the BLOOD PRESSURE MONITOR WITH CUFF.
- Zoom in on the workbench and wrap the BLOOD PRESSURE CUFF around the burst extinguisher hose (achievement PRESSURE RELIEVED). Take the GLUE and the AMMONIA.
- Collect the EDELWEISS BROOCH on the folded blanket on the stool at the lower left of the room.
- Zoom in on Michael again and fill the two slots with the AMMONIA and the WARM BLANKET to start the smelling-salts puzzle.
Smelling salts vials
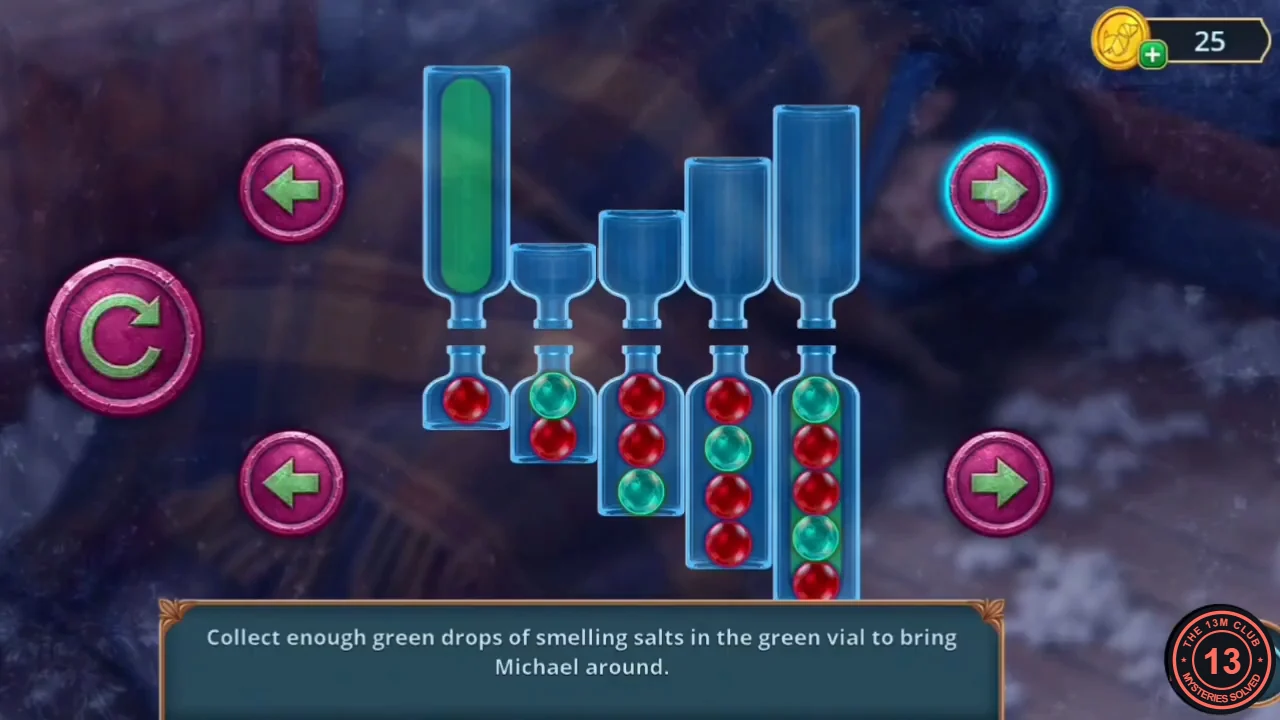
Rule: "Collect enough green drops of smelling salts in the green vial to bring Michael around." The vials sit in a top and a bottom row; arrow pairs shift each row and the round button between the left arrows turns the whole apparatus over (180 degrees) so drops pour between aligned vials.
- Shift the rows so a vial holding green drops lines up above the long green vial, then press the round button to turn the apparatus over and pour. Keep red drops out of the green vial by parking them in other vials first. Repeat until the long green vial holds all the green drops.
- Michael wakes: he is a journalist for The Alpine Herald and lost the guests in the blizzard. You receive the SHOVEL.
Back to the hotel: lantern handle, slider and pinecone weight
Dig a path back to the hotel and collect the sleigh parts and the pinecone clock weight around the hall and courtyard.
- On the Mountain Road use the SHOVEL on the snow pile beside the wire cage to dig a path back to the hotel.
- In the Hotel Hall zoom in on the fireplace and take the SCREWDRIVER and the CARPET BEATER.
- Go to the Hotel Courtyard (Michael joins you). Zoom in on the sleigh and take the WOODEN BLOCK.
- Use the CARPET BEATER on the snowy blanket on the sleigh and take the LANTERN HANDLE. The hint says the sleigh needs a lantern and its cracked runner fixed.
- Zoom in on the snowdrift beside the barrel on the right and take the SLIDER (a runner piece).
- Use the SHOVEL on the same drift: take the PINECONE CLOCK WEIGHT and the yellow FLAG MARKER (2/3) from the plank-door threshold.
- Return to the Hotel Hall and zoom in on the map board on the left wall to open a hidden-object scene.
Avalanche map board
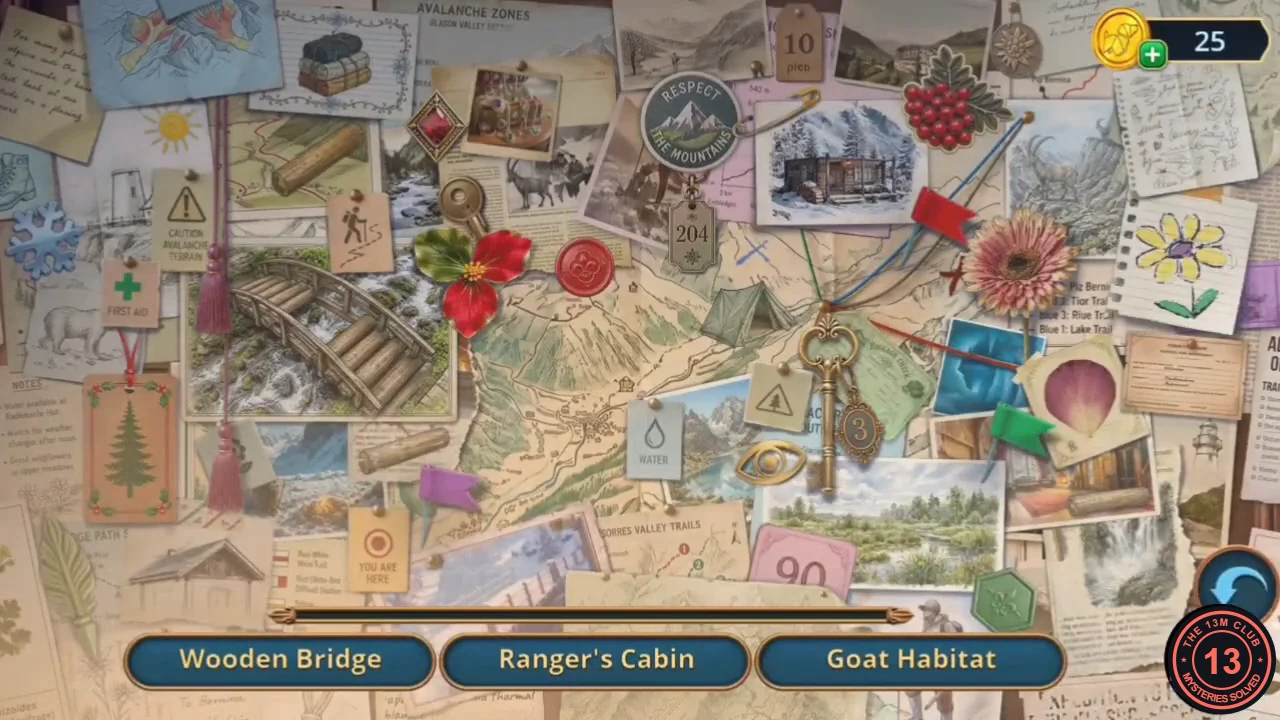
Three named places are shown at a time on the avalanche-zones map (for example Wooden Bridge, Ranger's Cabin, Rescue Station, Rest Stop, Swampy Meadow, Ice Cave, Mountain Lake). Some need a missing piece added: the Ranger's Cabin needs its roof, the Goat Habitat its goat and the Rescue Station its top.
- Find each named place on the board. When Ranger's Cabin is listed, tap the roofless cabin photo near the upper centre (hint: "The little house has no roof."). Then tap the grey roof on the small house sketch at the lower left, below the green fir-tree card. The roof moves onto the cabin and Ranger's Cabin is crossed off.
- When Goat Habitat is listed, tap the rocky mountain sketch at the upper right, just left of the notepad and above the pink gerbera (hint: "Someone should be here."). Then tap the goat in the black-and-white photo of goats upper-left of centre, just below the brown picture with the red diamond. The goat moves into the rocky sketch and Goat Habitat is crossed off.
- When Rescue Station is listed, tap the bare white station tower sketch at the upper left, beside the sun (hint: "The station can't light a path without its top."). Then tap the tiny lantern-top tower drawing at the far right, half-way down, on the torn paper strip below the brown certificate. It flies to the tower and Rescue Station is crossed off.
- Find the remaining named places until the list is empty (the last one in our example playthrough was Swampy Meadow).
- Michael realises this is not the map the group was given: someone handed them a fake map. Decision: "Ask who gave them the map." (60 coins, 2 points) or "Ignore." (free, 0). You then receive a WRENCH and head for the ski slope.
Clock hand, sleigh lantern and the sleigh
Get the clock hand from the cuckoo clock, make an oil-filled sleigh lantern and repair the sleigh.
- In the Rescue Station zoom in on the cuckoo clock. Its little door keeps slamming shut: wedge the WOODEN BLOCK under it and take the CLOCK HAND.
- Zoom in on the window sill and use the HAMMER to pull the nails out of the ski board covering the barometer. The barometer is screwed shut and its needle is missing; leave it for now.
- In the Hotel Courtyard use the PIPETTE on the oil puddle on the sauna porch to get the PIPETTE WITH OIL.
- In the Hotel Hall zoom in on the lantern at reception and add the PIPETTE WITH OIL and the LANTERN HANDLE to get the SLEIGH LANTERN.
- In the Hotel Courtyard zoom in on the sleigh: put the SLEIGH LANTERN on the front post and the SLIDER on the cracked runner.
Sleigh steering
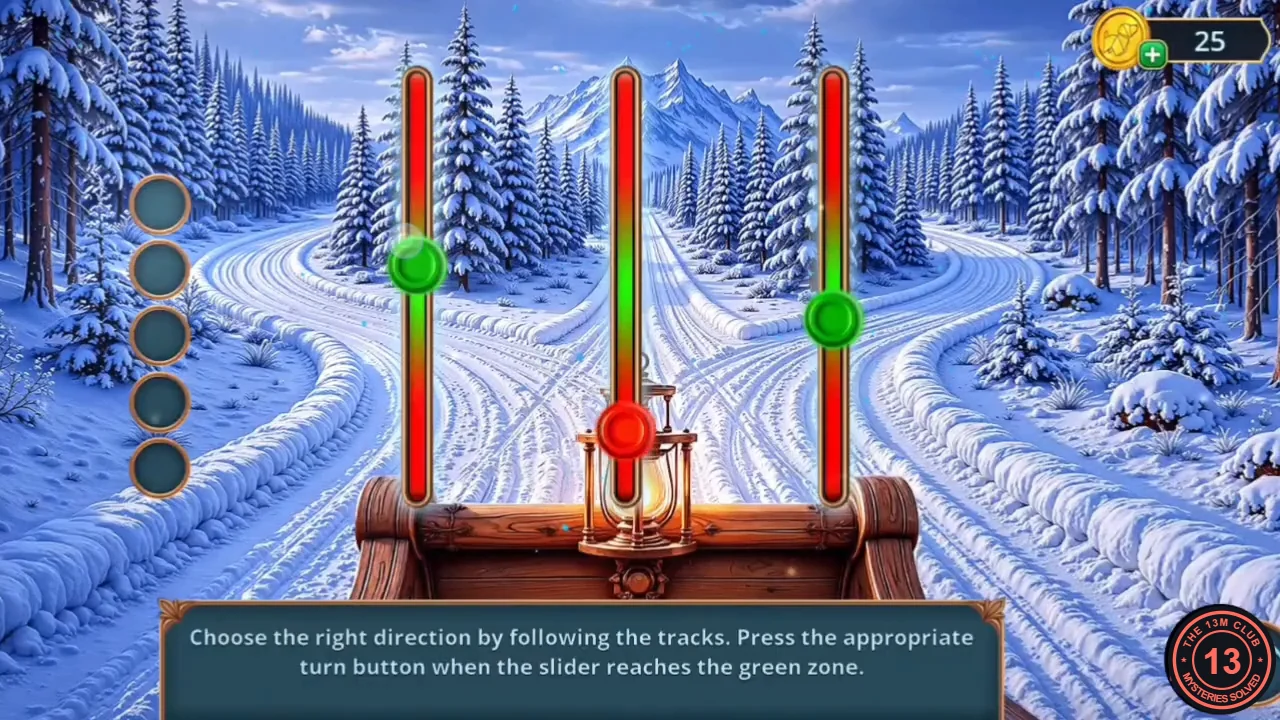
Rule: "Choose the right direction by following the tracks. Press the appropriate turn button when the slider reaches the green zone."
- Tap START. Three vertical gauges stand for turning left, going straight (centre) and turning right; their markers slide up and down and turn green inside the green band. For each turn, first read the tracks on the road ahead to choose the direction, then tap that direction's gauge while its marker is green. A green marker alone does not mean that direction is correct. Each correct turn lights one of the five lamps on the left. In the recorded run the ride ended with three lamps lit, and the game moved on to the Mountain Slope.