Samuel's street and the front door
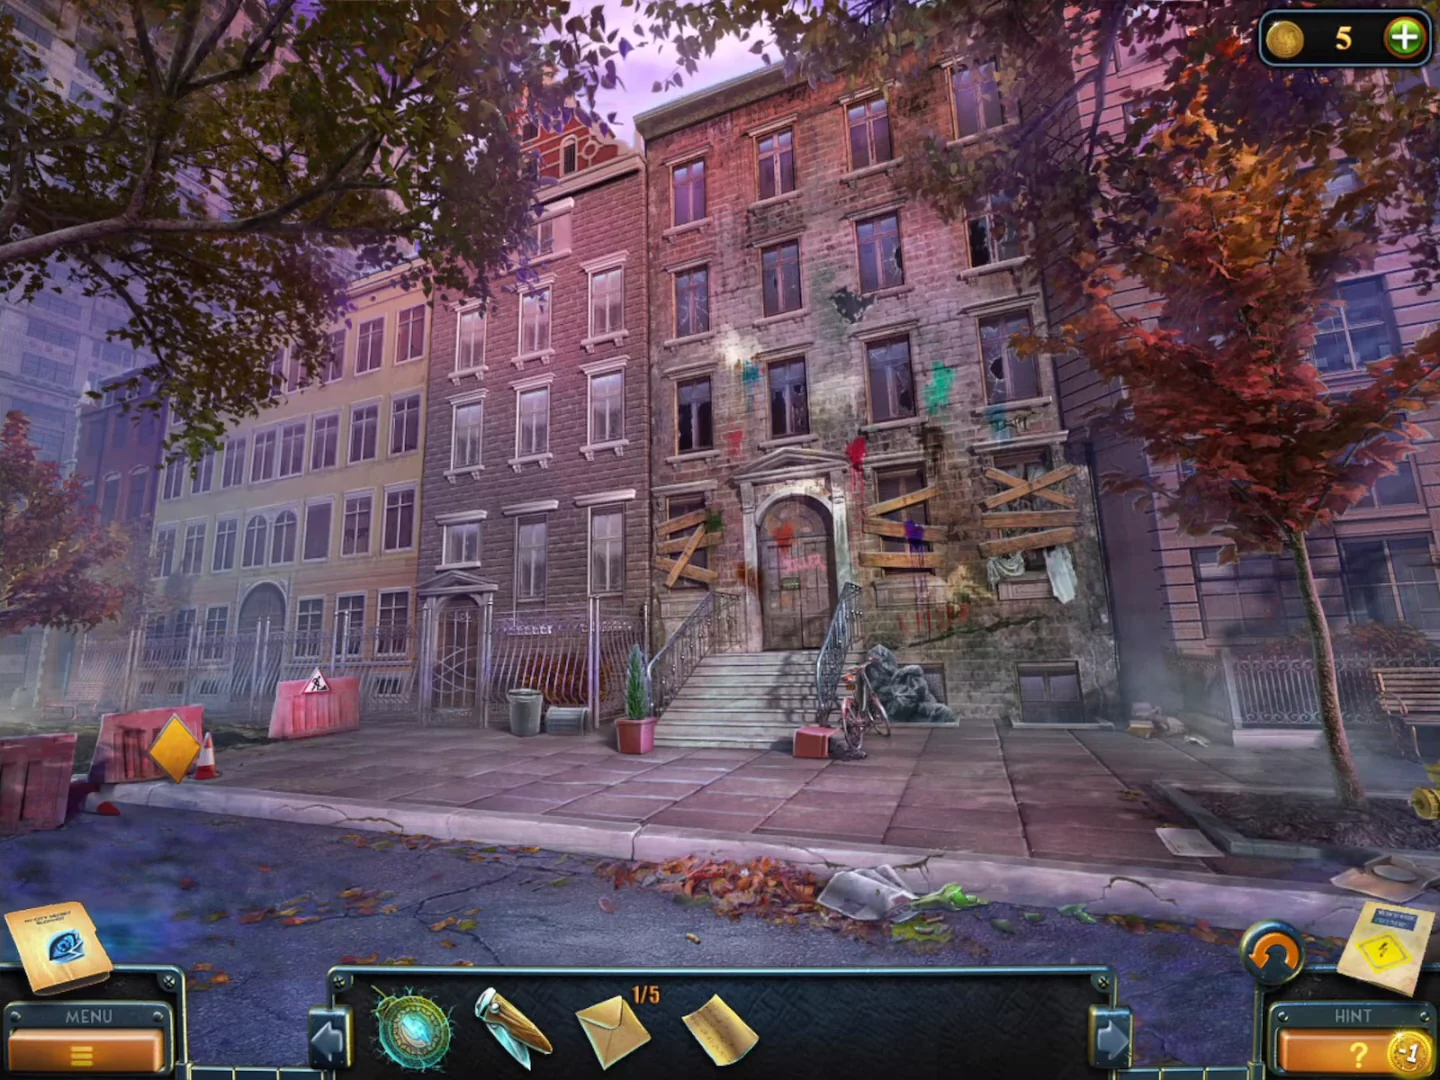
With the tunnel drained, the train takes Laura to the street where the Brodie family lived. Five envelopes with riddles are scattered around this chapter (x/5); keep them for the mannequin shelf in the bedroom.
- With the tunnel drained, the lower-left tunnel entrance in the cavern is no longer lit red. Click that tunnel entrance, open the door of the train waiting there, step into the cab and click the glowing green control panel left of centre on the cab console. Laura pulls the lever and the train takes her to Samuel's street (task "Samuel's House").
- Collect the collection item on the sidewalk at the lower right by the tree and the Beyond object in a ground-floor window of the building left of the steps.
- Open the seat pouch of the bicycle by the steps and take Envelope 1/5 ("This girl with her vinyl collection...").
- Zoom into the planter of pebbles at the lower left. Take the hidden slide left of the bush and the Note from under the stones.
- Zoom into the lock panel on the front door (four rows of four tiles: mountains, trees, clouds, houses) and place the Note. Its sums give 5, 2, 3 and 4. Click, from top to bottom, the mountains with 5 peaks (4th tile), the tree with 2 green tufts (1st tile), the group of 3 clouds (1st tile) and the house with 4 windows (4th tile). The door unlocks.CODE5-2-3-4
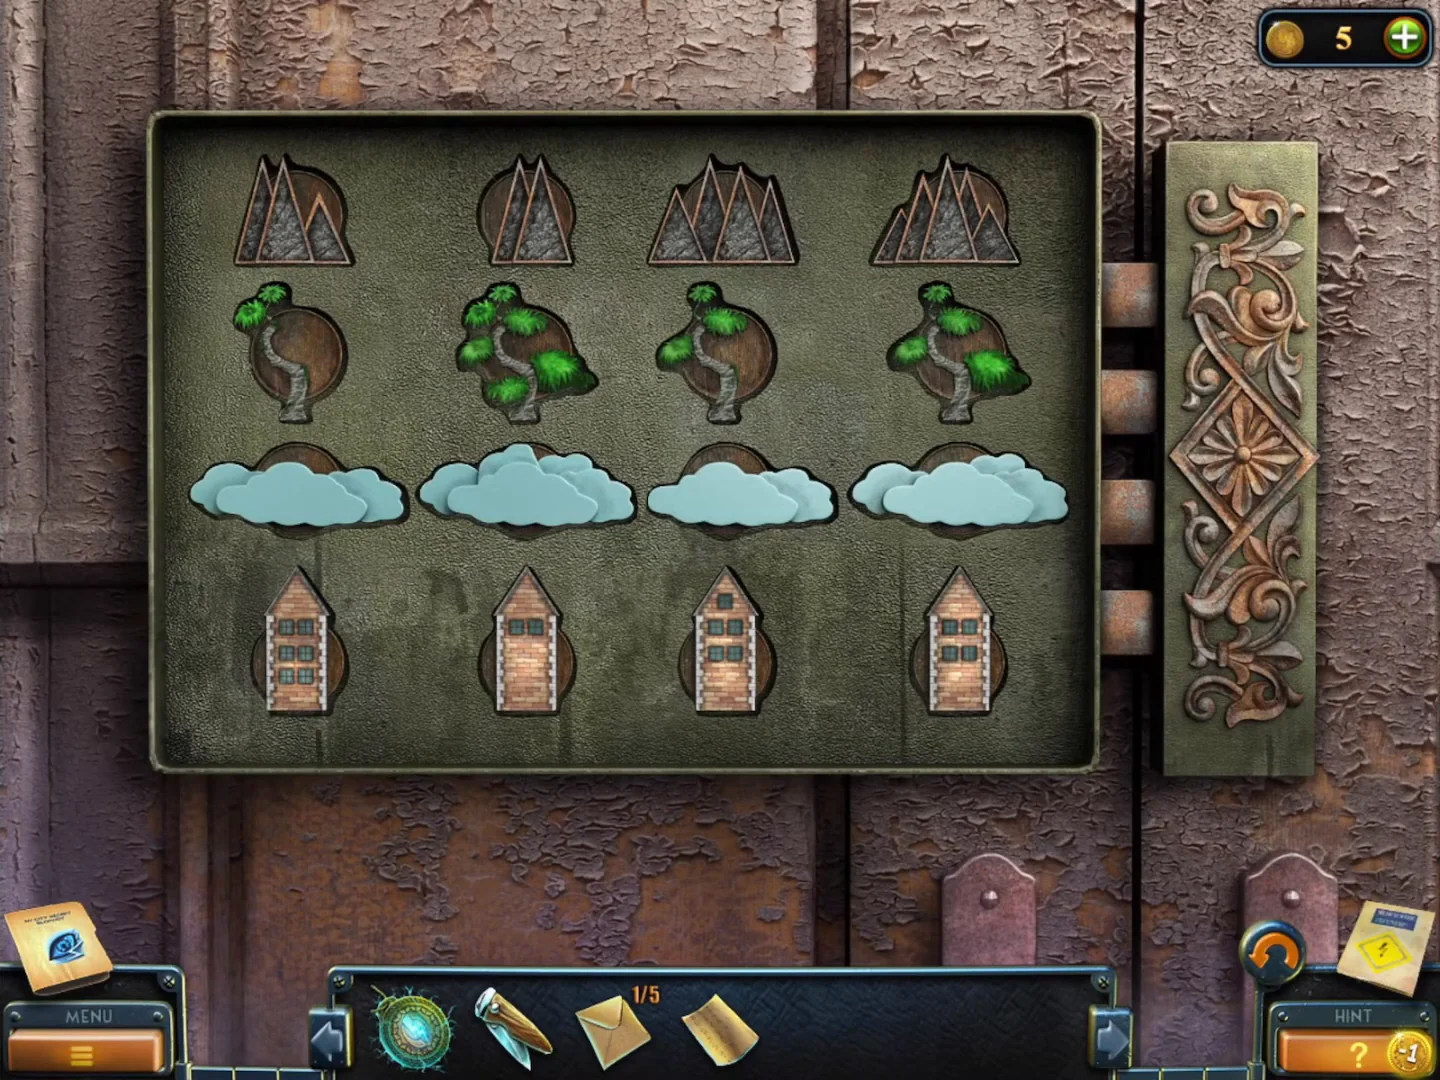
The lock panel on the front door. Rows from top: mountains, trees, clouds, houses. Click mountain 4, tree 1, cloud 1 and house 4.
Hall, bedroom and the bracelet
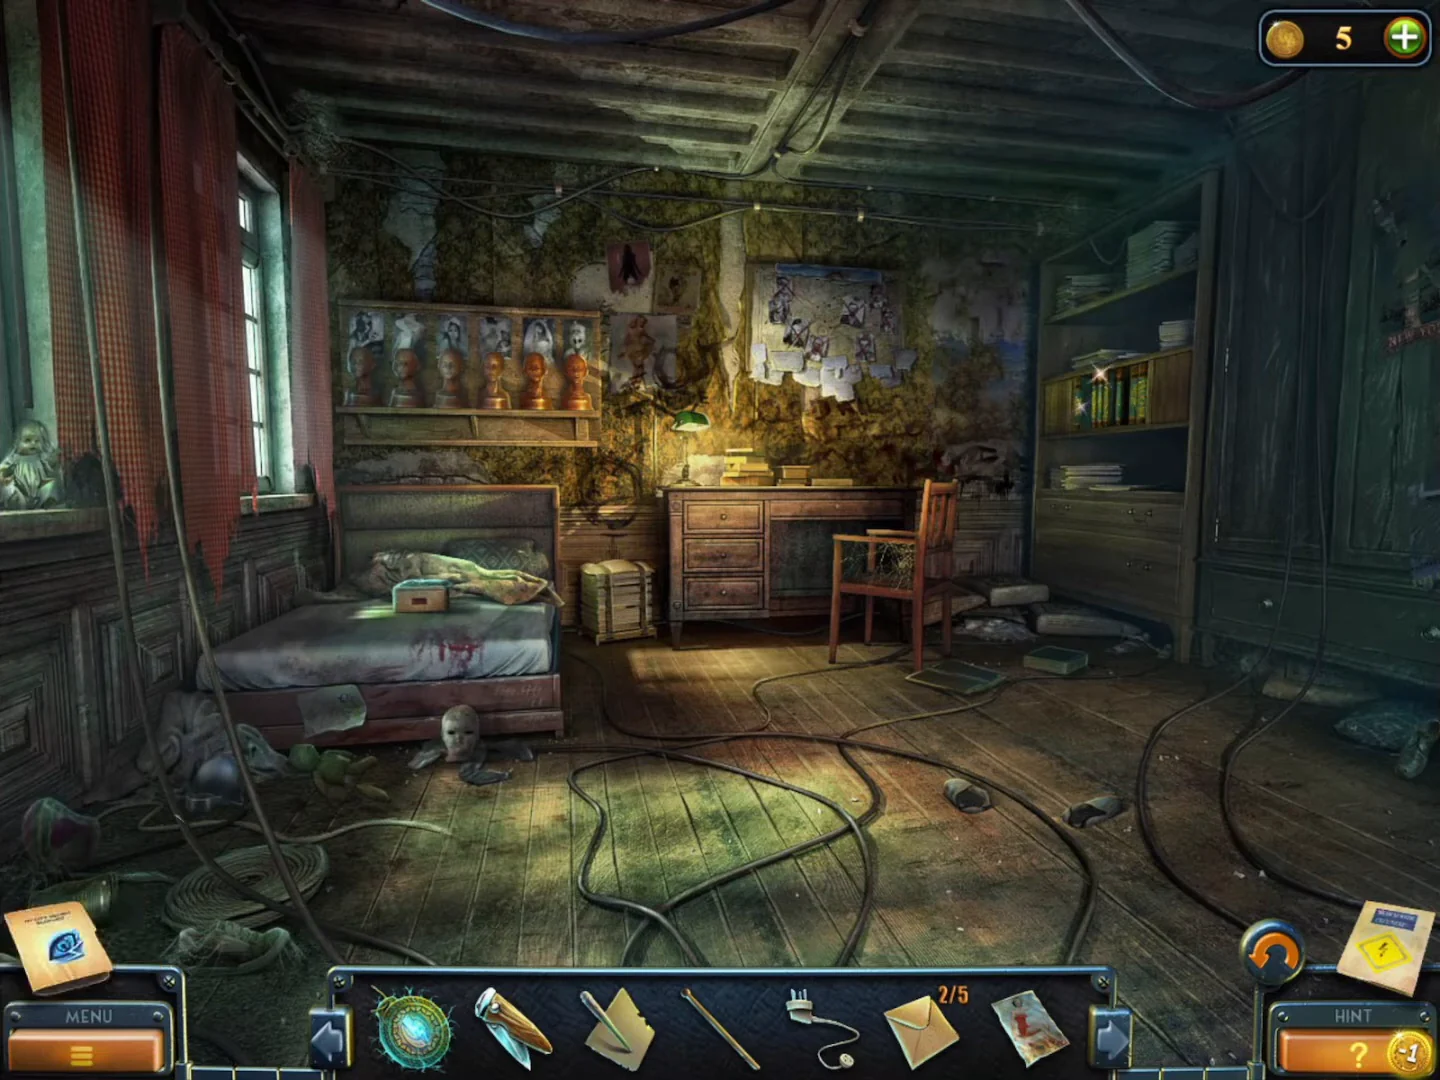
Explore Samuel's hall and bedroom upstairs. Removing a poster reveals a crime board, and Hugo gives Laura a transmitter bracelet.
- In the hall, collect the Beyond object above the doorway on the upper stair landing and the collection item (a helmet) on the lower staircase post.
- At the telephone table by the sofa, take the Pen and paper and the hidden slide in the small photo frame.
- Go upstairs to the bedroom. Collect the collection item (a grey round helmet-like object on the floor at the foot of the bed, beside the bundled cloth) and the Beyond object (a small grey object on the floor at the foot of the chest of drawers, just left of the wardrobe, beside the books).
- Zoom into the bed: the brass box with four keyholes is locked. Take Envelope 2/5 lying on it.
- Take the pin-up Poster from the wall. A crime board is revealed and the task "Killer" is completed. In the cutscene the electric man (Hugo) gives Laura a transmitter bracelet to use near Bishop. The "Power Surge" achievement appears.
Glass doors and the kitchen
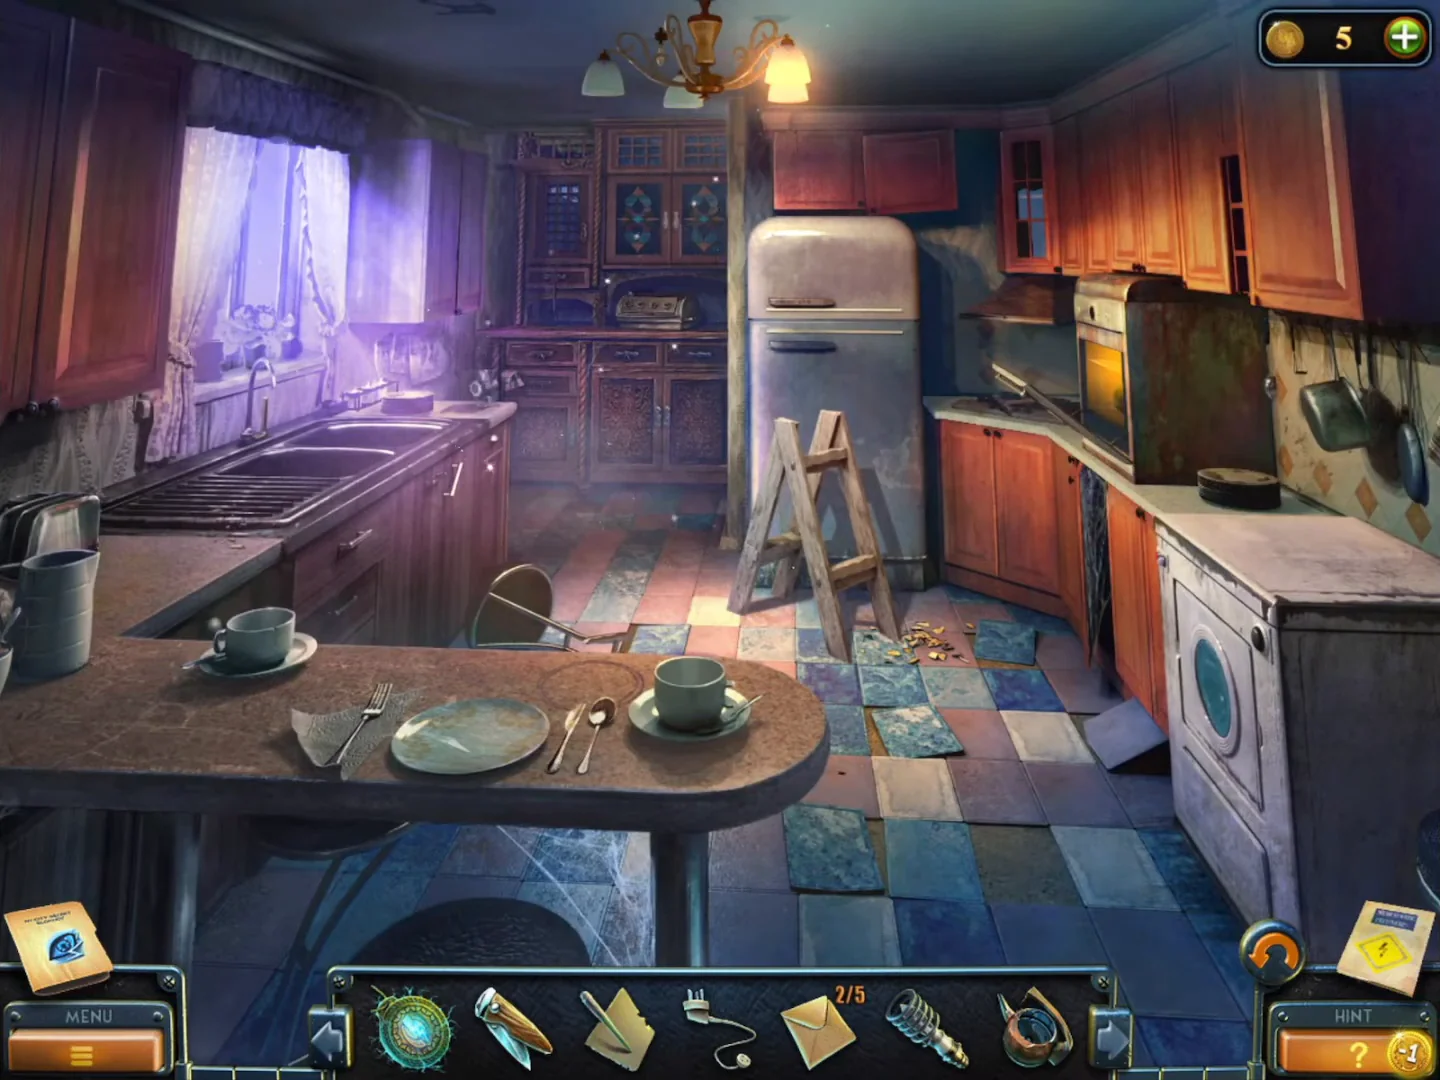
Get the key out of the locked glass doors with the Poster and the Pin, then search the kitchen.
- Take the Pin from the shelf by the telephone in the hall.
- Zoom into the glass double doors. Slide the Poster under the door, push the key out of the lock with the Pin so it drops onto the poster, then pull the poster back and take the Key.
- Unlock the doors with the Key and enter the kitchen.
- Collect the collection item (the lucky-cat figurine on the round table) and the Beyond object under the upper cabinets left of the toaster.
- Zoom into the counter by the toaster and take the Empty kettle ("I must plug the kettle into the socket."). Take the Stepladder from the floor.
Kitchen hutch: croissants and stained glass
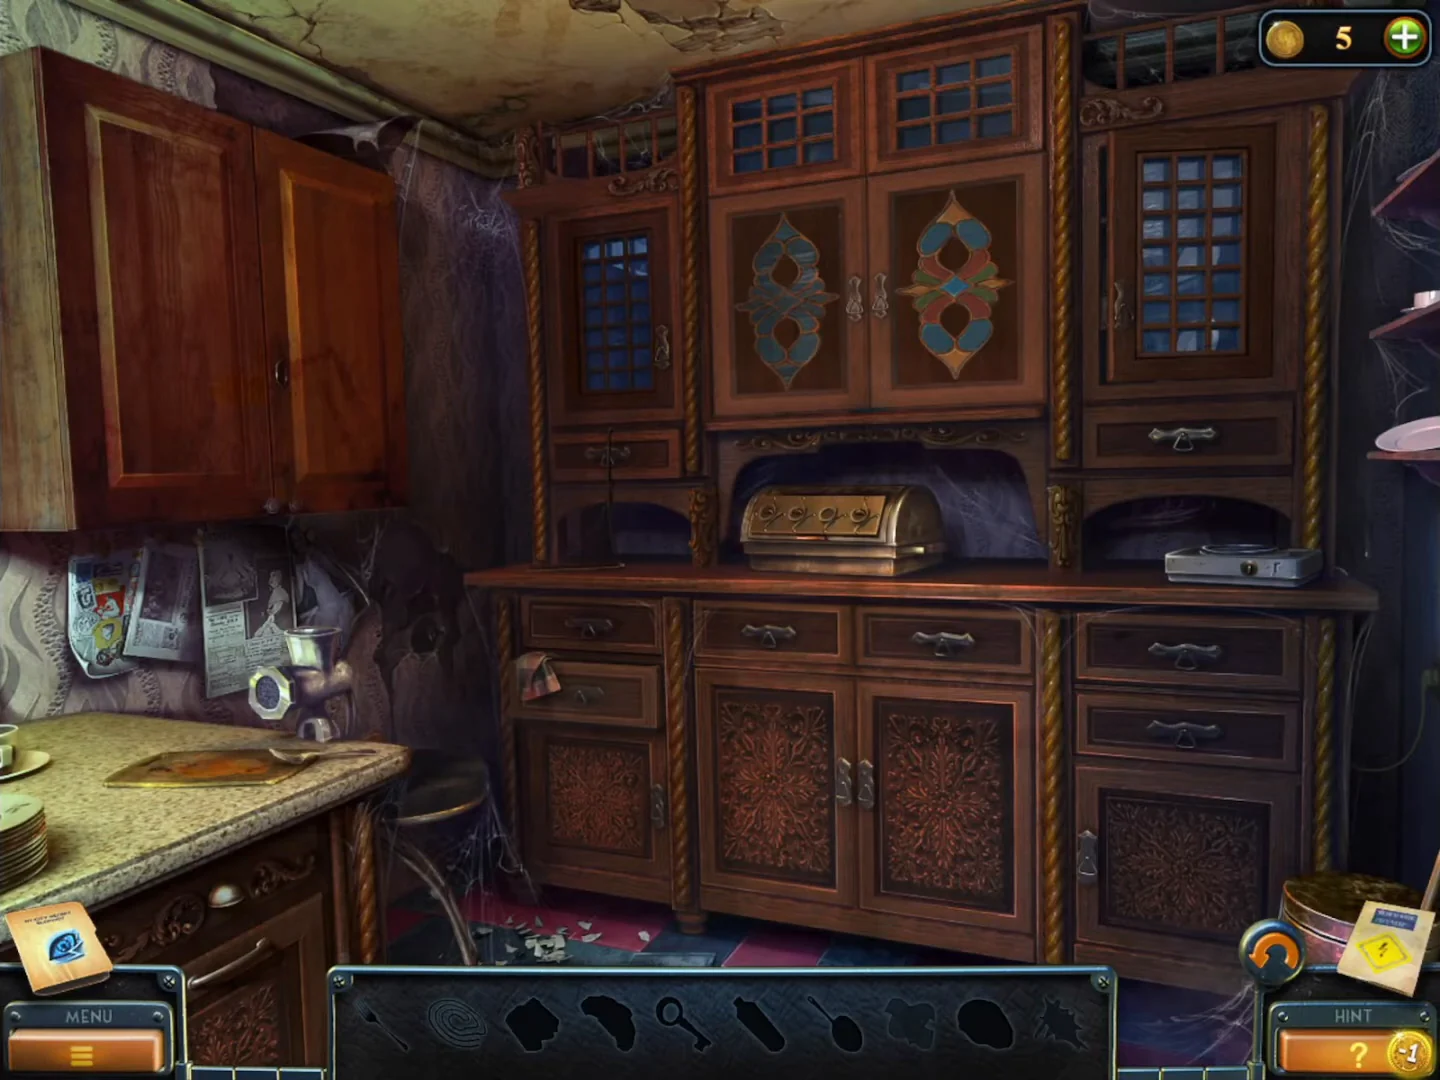
The kitchen hutch is an interactive scene; the bottom bar lists the outlines of the objects to find here (fork, burner coil, rag, croissant, key, dishwashing liquid, frying pan, Figurine in wax and two sets of mosaic parts).
- Zoom into the meat grinder on the cutting board: take the Fork lying beside it, then the Key from inside the grinder hopper. Open the small drawer at the left end of the hutch counter: take the Figurine in wax lying on the plate and the Rag (a folded checked cloth) at the front-left of the drawer. Open the upper-left wall cabinet with the Key and take the Frying pan.
- Take the Burner coil from the small dark niche on the hutch counter, just left of the breadbox. At the hot plate on the right end of the hutch counter, fit the Burner, set the Frying pan on it and put the Figurine in wax in the pan. The plate heats, the wax melts and you can take the Croissant figurine.
- Zoom into the glass cabinet on the right and fish in the water tank on its middle shelf with the Fork. Take the Dishwashing liquid and the Yellow mosaic parts (a yellow leaf-shaped piece) that come out of the tank.
- Clean the dried stain on the cutting board with the Dishwashing liquid and the Rag from the hutch drawer. Four croissant marks appear: 1 humped up, 2 bulging left, 3 bulging right, 4 cupped like a smile.
- Put the Croissant figurine in the empty second slot of the breadbox and rotate the croissants to match the board: 1 hump up, 2 bulge left, 3 bulge right, 4 smile. Take the Red mosaic parts.
- Zoom into the stained-glass doors of the upper cabinet and add the Yellow and Red mosaic parts. Fill the left door so it mirrors the complete right door (blue, orange, red and green pieces). Take the Pitcher.
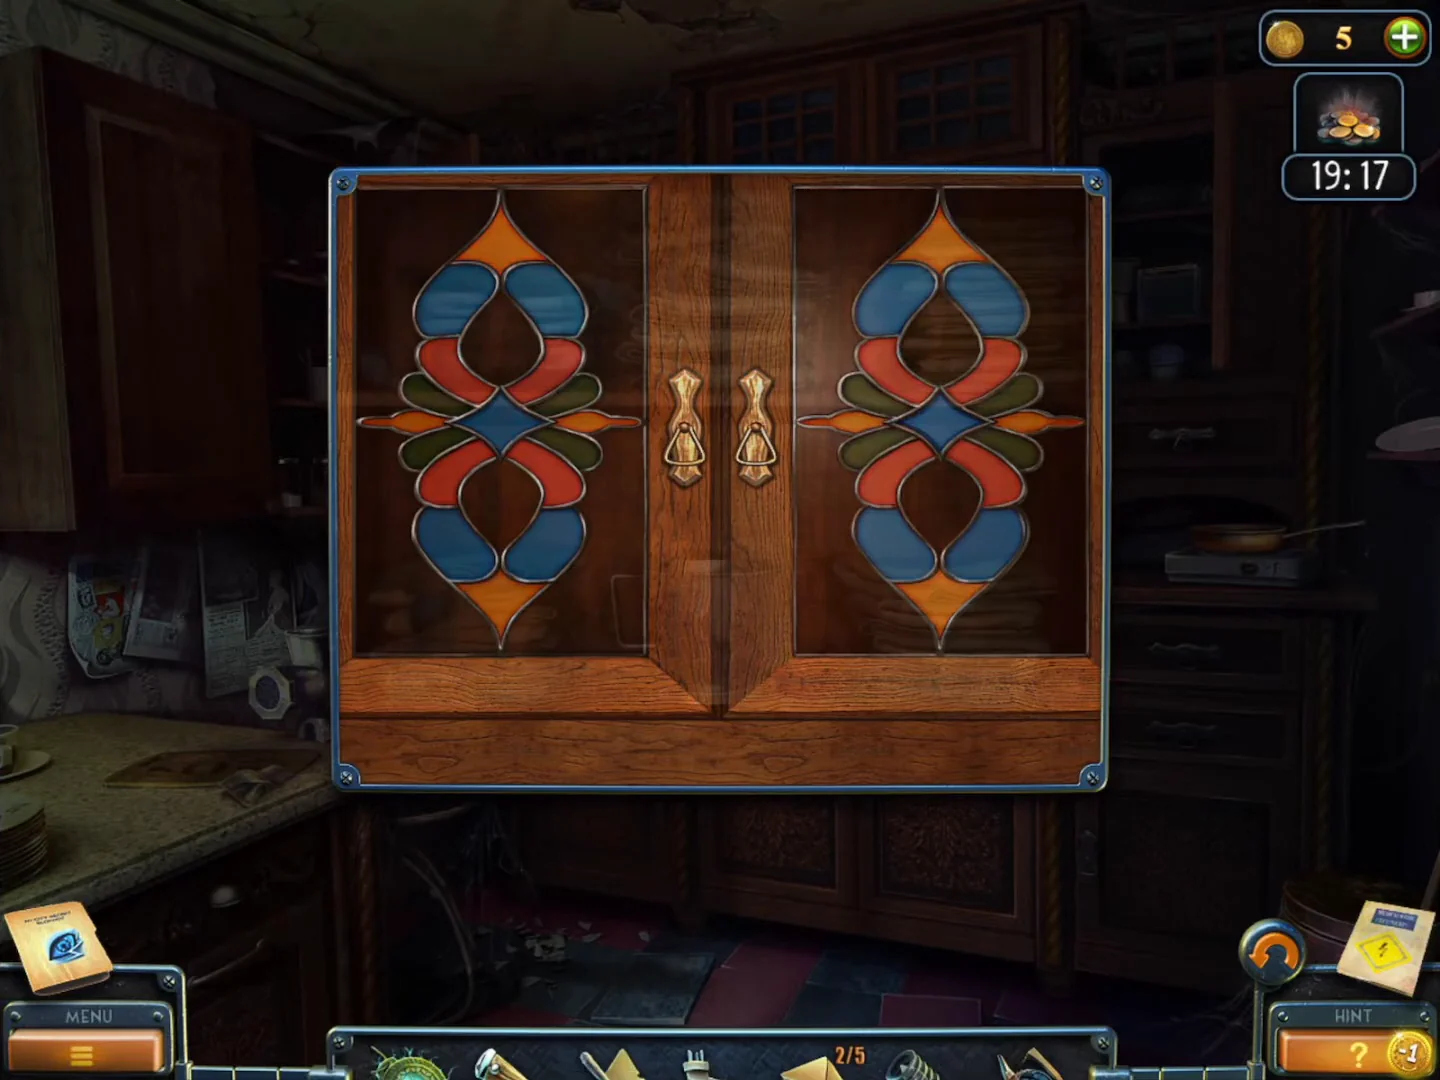
Solved: the left door mirrors the complete right door.
Kettle, washing machine and the freezer
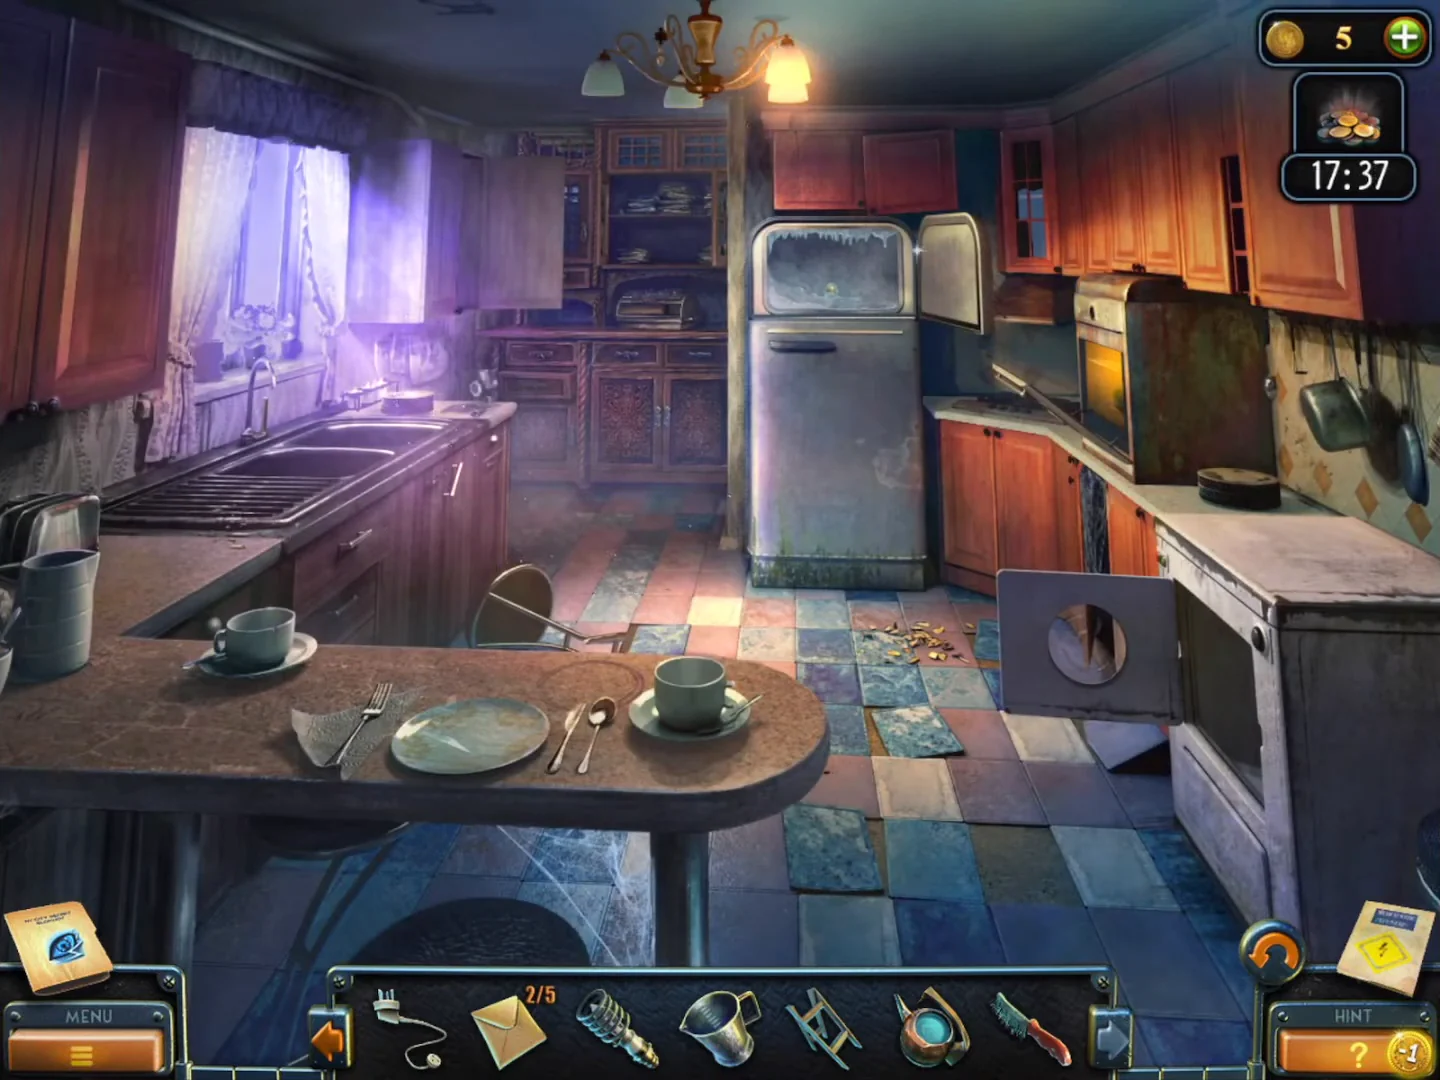
Fill and boil the kettle, start the washing machine and thaw the freezer for the Coin.
- Fill the Empty kettle under the sink tap (turn the yellow handle) and put the Kettle of water on the counter by the toaster.
- Cut the tape over the washing machine's power button with the Jackknife, start it and take the Metal brush from the drum.
- Open the oven left of the washer and read the letter from Hugo's father about the medallion. A flashback cutscene follows. Take the Bulb from the oven.
- Take the Cord from the bedroom floor upstairs.
- Plug the kettle in with the Cord and let it boil. Pour the Kettle of hot water on the iced-up freezer compartment of the fridge and take the Coin.
Strange device and the hall circuit board
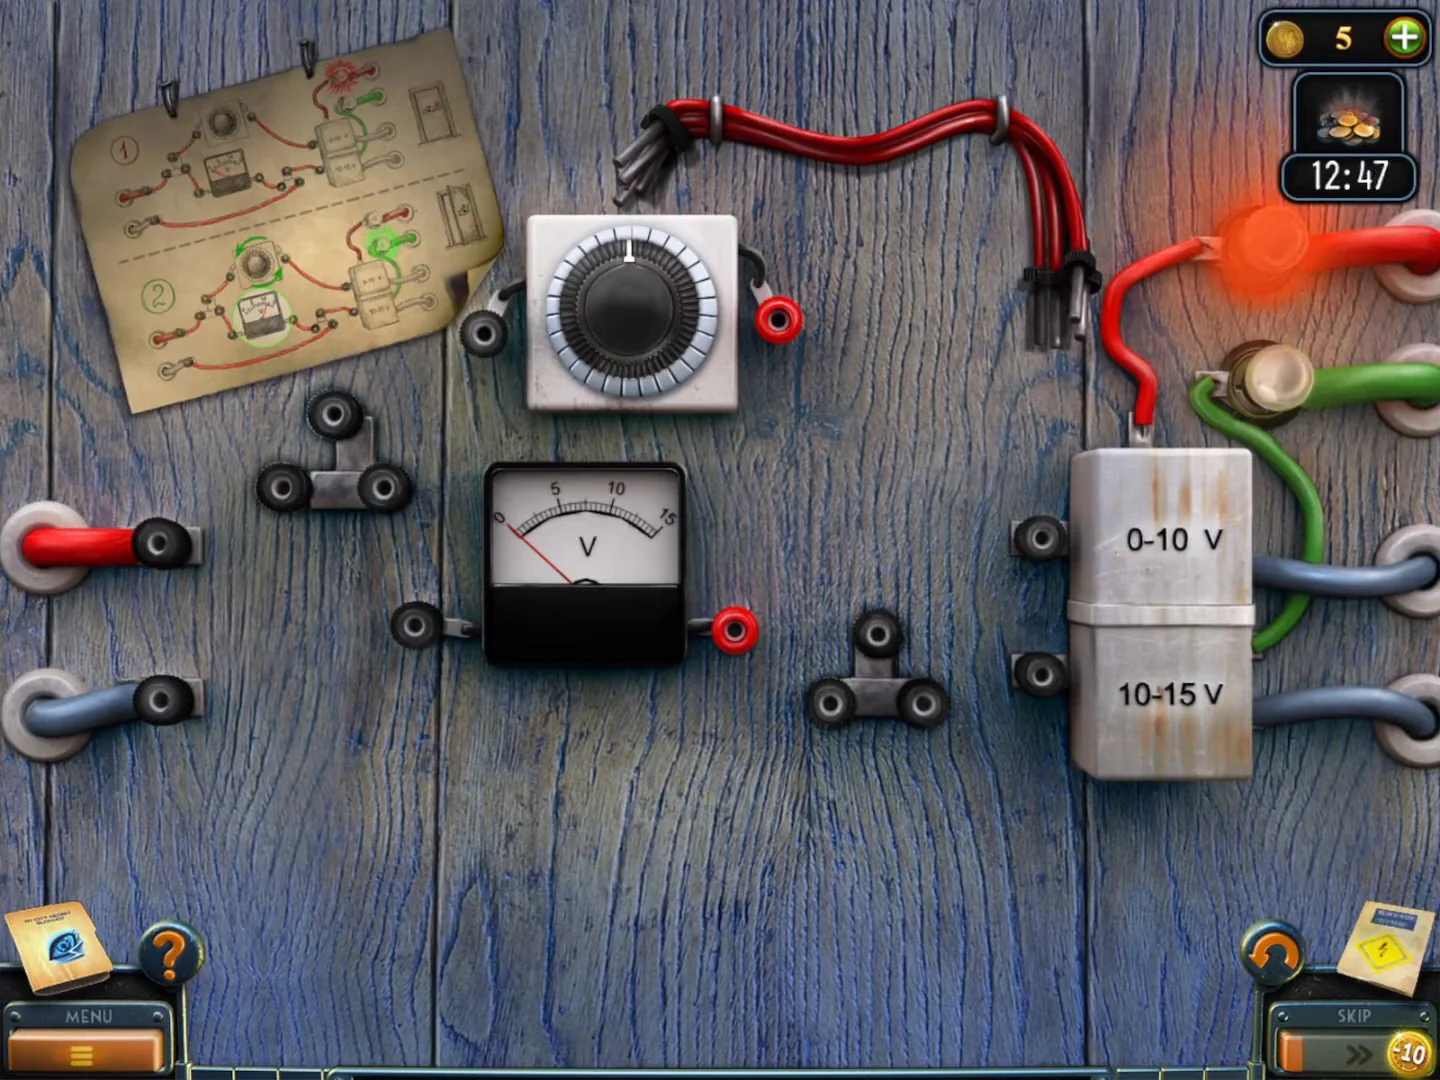
Fit the Bulb on the strange coil device in the substation, copy a circuit diagram from the roof pipe and rewire the hall circuit board.
- Use the map to go to the substation control room with the coil machine and screw the Bulb into its top socket. A flashback shows Hugo's father building the device. The task "Broken Device" is completed. Take the Switch (multicoloured button knob) from the device.
- Go back up to the substation roof (the rooftop with the water tank, the small brick door hut and the big bent rusty pipe), scrub the rusty pipe with the Metal brush to expose an engraved circuit diagram and copy it with the Pen and paper.
- In the hall, zoom into the small wall box left of the double doors, fit the Switch into the empty centre of the blue dial and place the Note. Wire it like the diagram: left red cable to the upper T-junction; upper T-junction to the dial's left terminal and to the voltmeter's left terminal; dial's right terminal to "0-10 V"; voltmeter's right terminal to the lower T-junction; lower-left blue cable to the lower T-junction; lower T-junction to "10-15 V".
- Turn the dial until the voltmeter needle sits in the 10-15 V range (about 13-14 V). The lamp turns green and the "Physics Expert" achievement appears; the small door under the staircase opens.
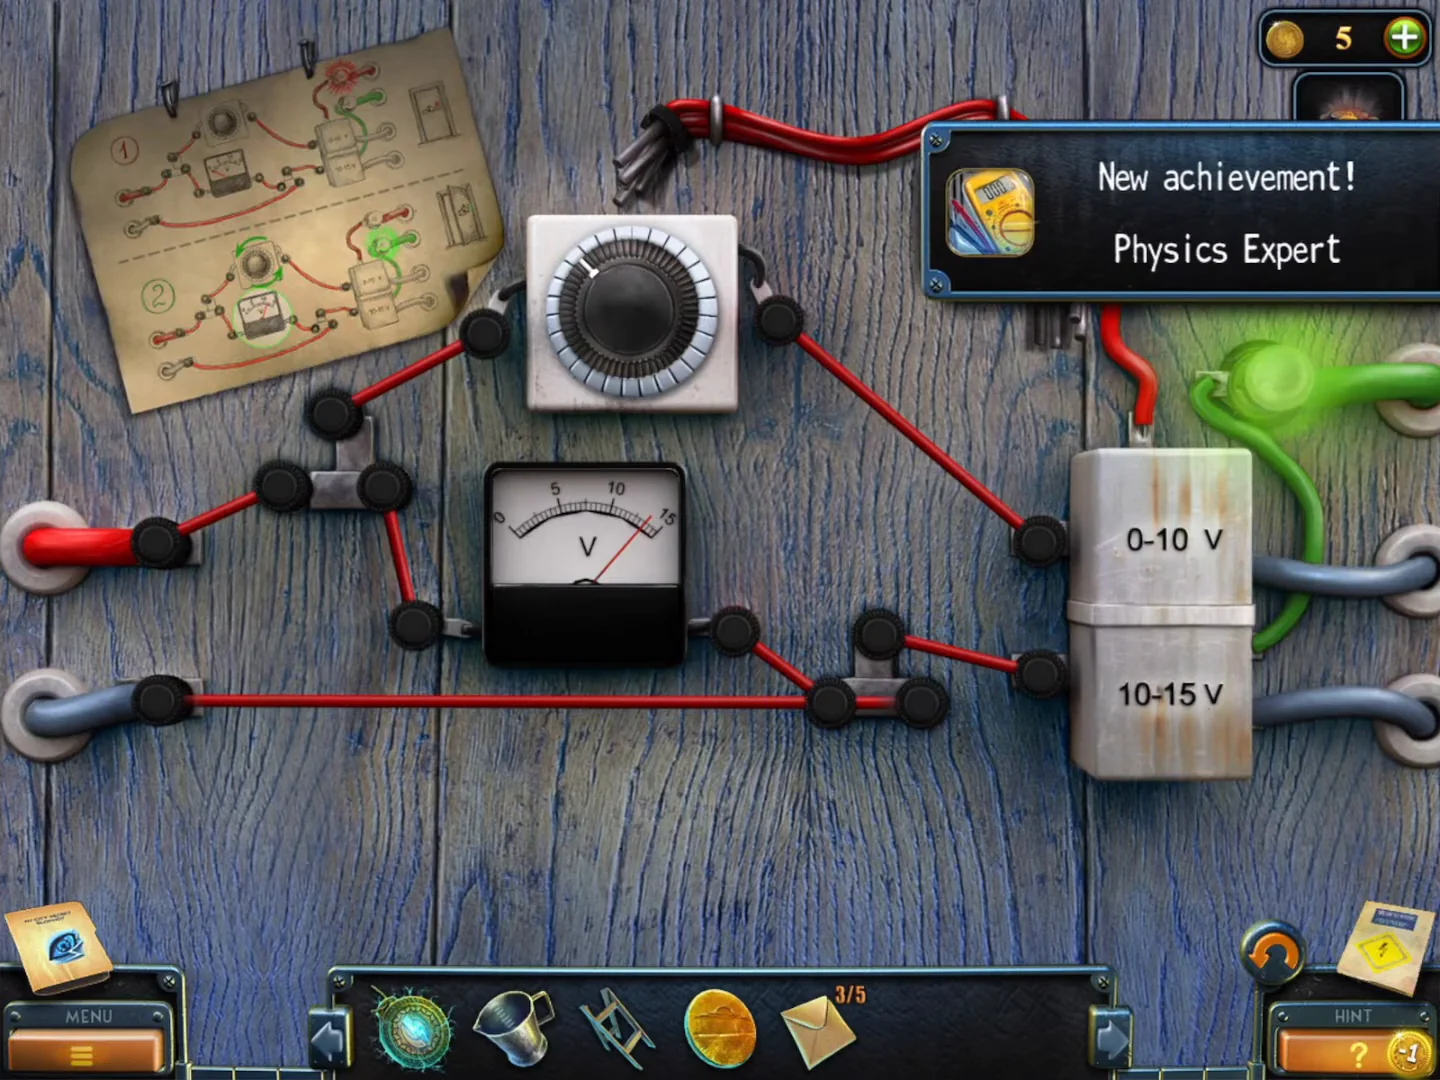
Solved: the circuit matches the diagram, the lamp is green and the "Physics Expert" achievement appears.
Basement lab: boots and corkscrew
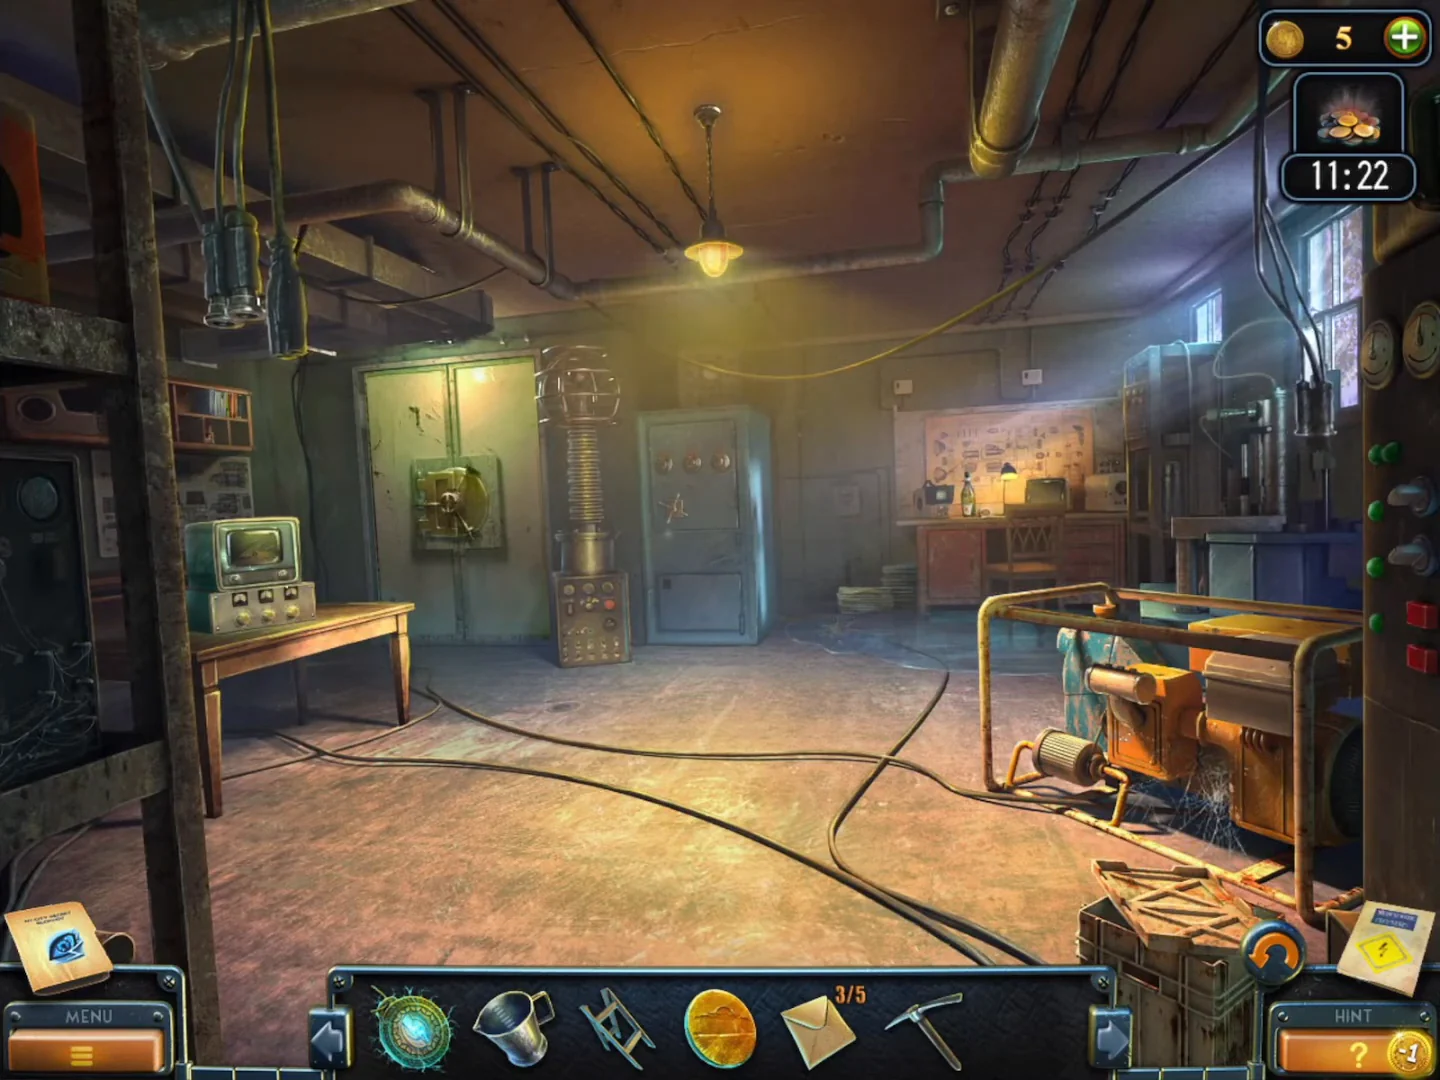
In Samuel's basement lab and the tunnel cavern, collect the Rubber boots and the Corkscrew.
- In Samuel's basement lab, take the Pickaxe leaning against the left leg of the table with the green radio.
- Go to the tunnel cavern and break the ice in the bucket on the walkway with the Pickaxe. Take the Rubber boots.
- Back in the basement lab, use the Rubber boots on the puddle of water on the floor between the orange generator and the vault, where the electric cables lie. The boots leave the inventory. Do this before collecting the items and the Corkscrew below.
- Collect the two items at the drill press on the right: the collection item is the small brass stand with leaf-shaped legs on the drill-press table, and the Beyond object is the small dark cylinder standing at the left side of the drill press.
- Take the Corkscrew from the desk at the back right (by the champagne bottle) and the hidden slide on the floor by the lower-left corner of the vault.
Wine goblets and the brass box
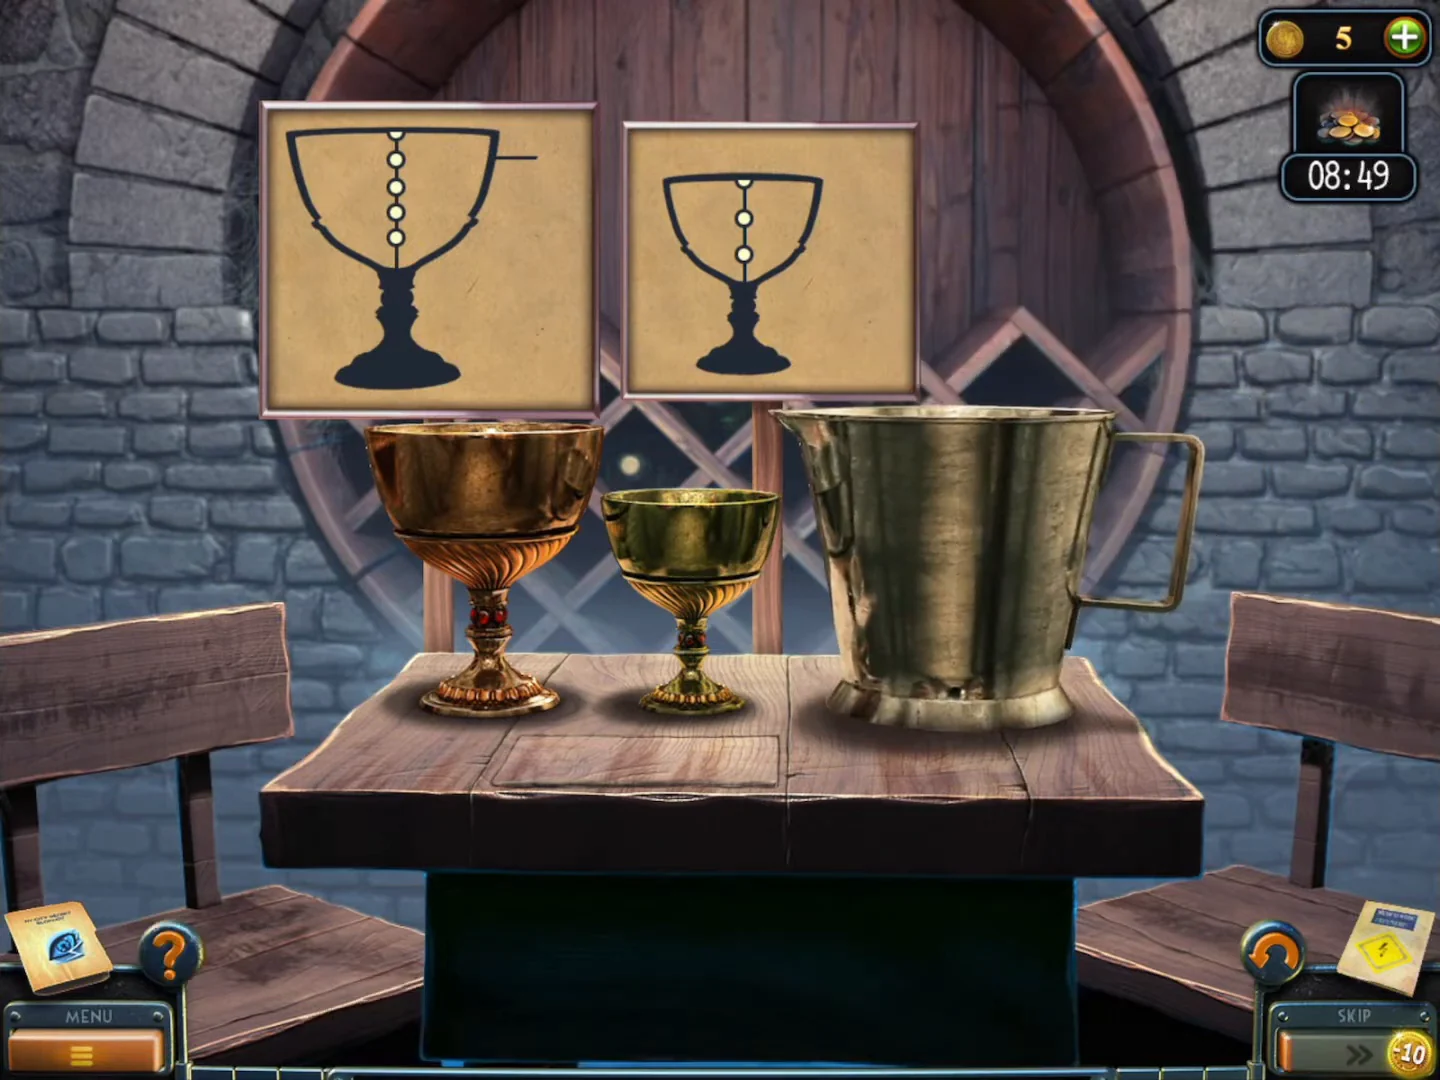
Get exactly four measures of wine into the big goblet in the cellar for the Lockpick set, then pick the brass box on the bed.
- In the wine cellar, put the Pitcher under the lower bung of the big barrel and pull the plug with the Corkscrew. Take the Pitcher of wine.
- Zoom into the table at the back and place the Pitcher of wine. Get exactly four measures in the big goblet (it holds 5, the small one holds 3): fill the big goblet from the pitcher; pour big into small; pour the small goblet back into the pitcher; pour big into small (small now holds 2); fill the big goblet from the pitcher; pour big into small until the small one is full. The big goblet now holds 4.
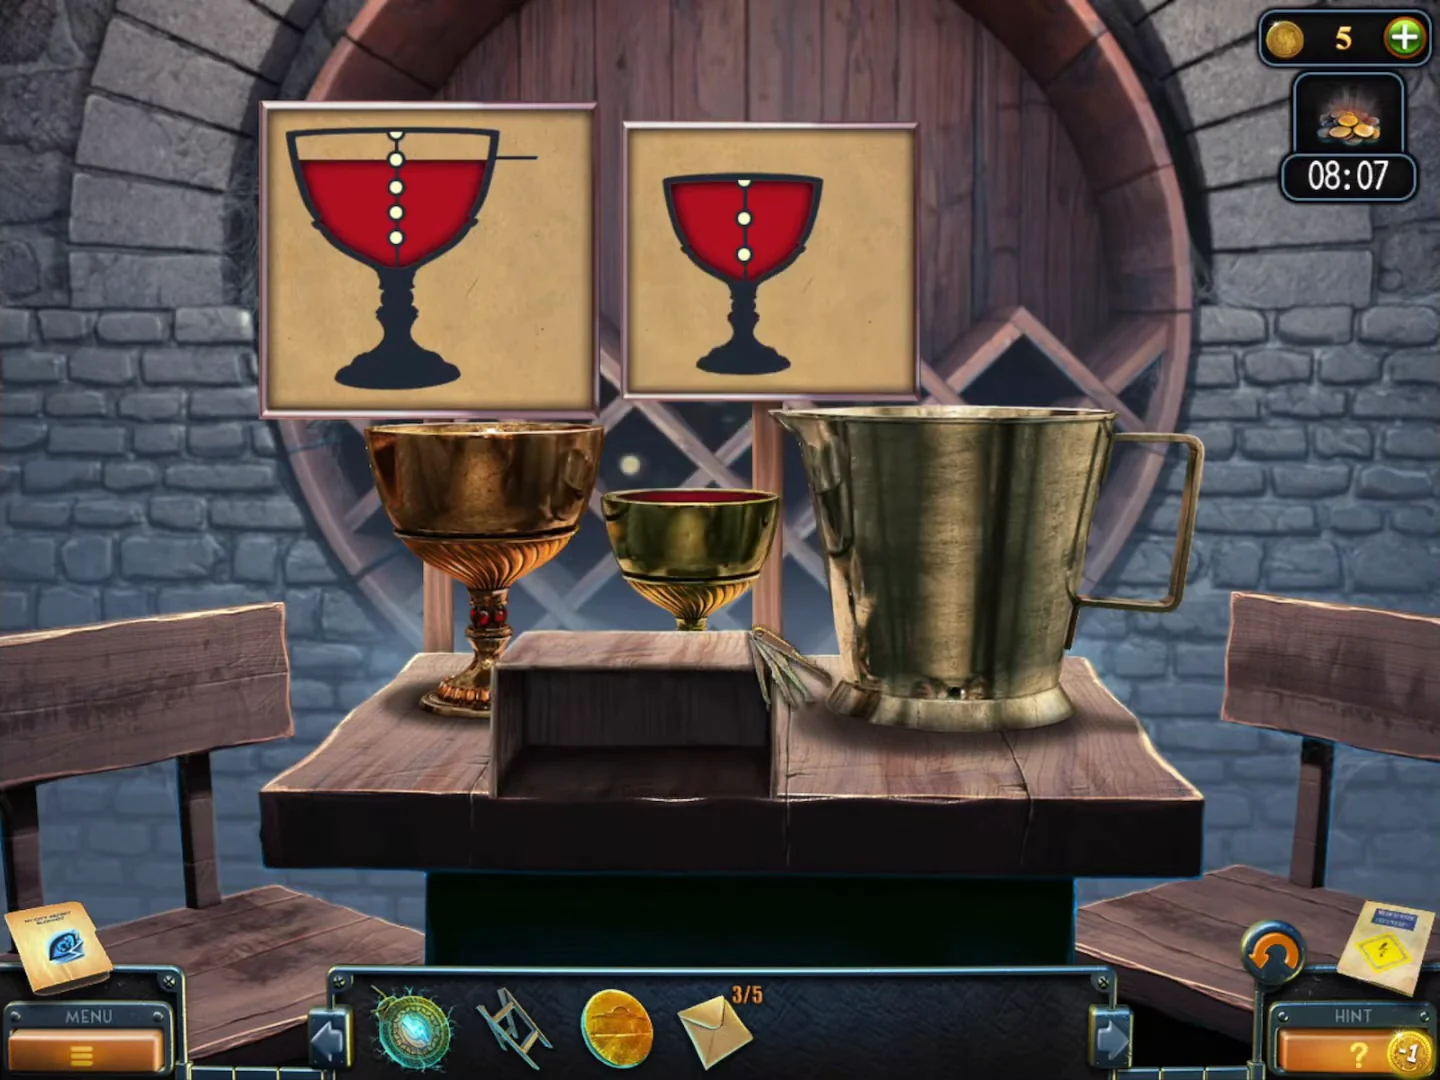
Solved: the big goblet holds exactly four measures. - Take the Lockpick set from the drawer under the table.
- In the bedroom, use the Lockpick set on the brass box on the bed. Numbering the four picks left to right, put pick 4 (long and hooked) in the top-right keyhole, pick 3 in the bottom-right, pick 2 in the top-left and pick 1 in the bottom-left; each tip matches the shape of its keyhole.
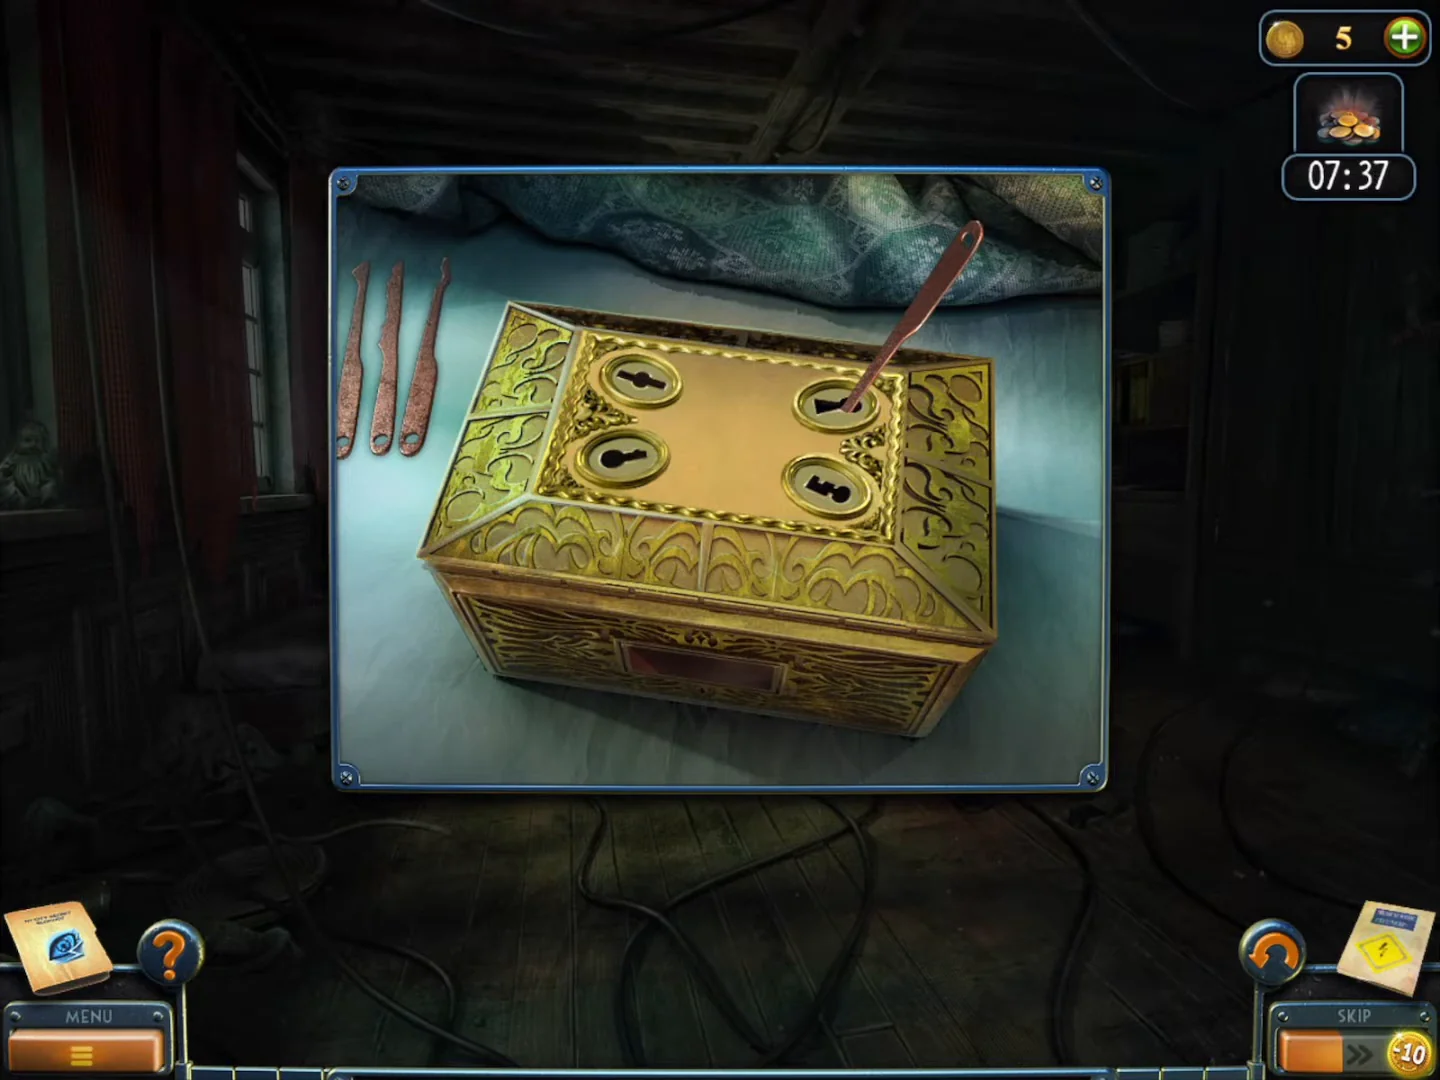
The brass box on the bed. Each pick goes into the keyhole that matches the shape of its tip. - Take the Note (oscilloscope sketch) from the box.
Oscilloscope, wall clock and Bishop's envelope
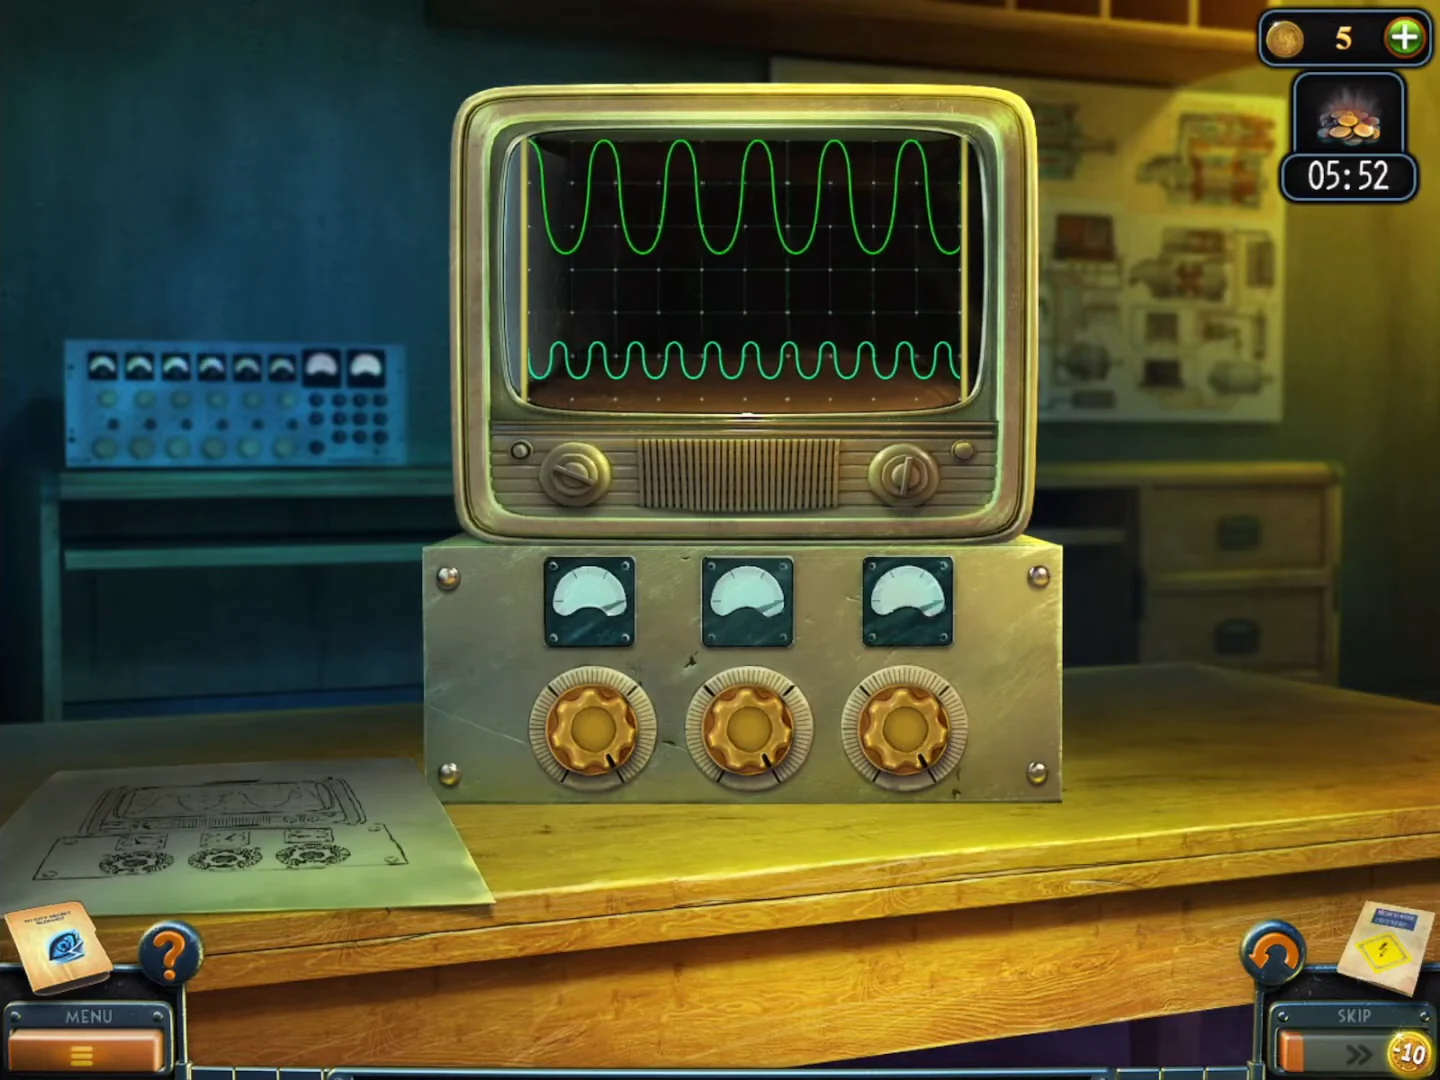
Tune the oscilloscope in the basement lab, set the hall wall clock to 1:50 and collect Bishop's envelope.
- In the basement lab, place the Note on the green oscilloscope on the left table. Each knob clicks between four positions; set the left knob to upper left, the middle knob to upper right and the right knob to lower left (the stars on the note).
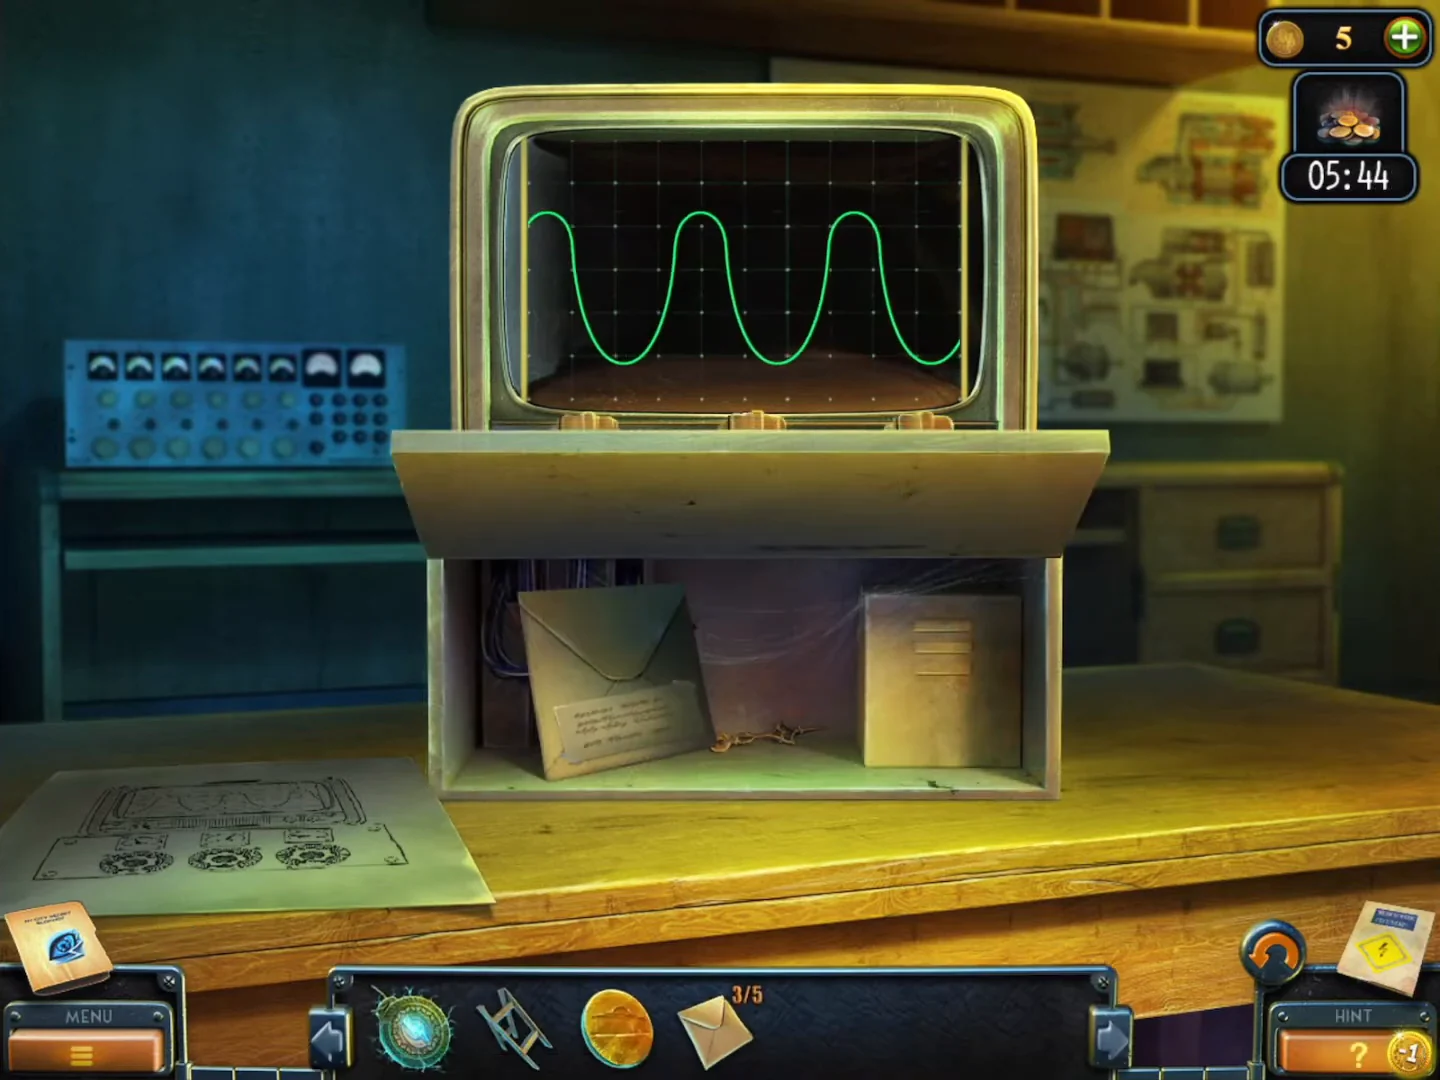
Solved: the compartment under the screen opens with Envelope 3/5 and the clock hand. - Take Envelope 3/5 and the Hand of a clock from the panel under the screen.
- In the hall, place the Stepladder under the wall clock (upper right of the staircase). Attach the Hand of a clock, set the short hand to II and the long hand to X (1:50). The clock face swings open: take Envelope 4/5.CODE1:50
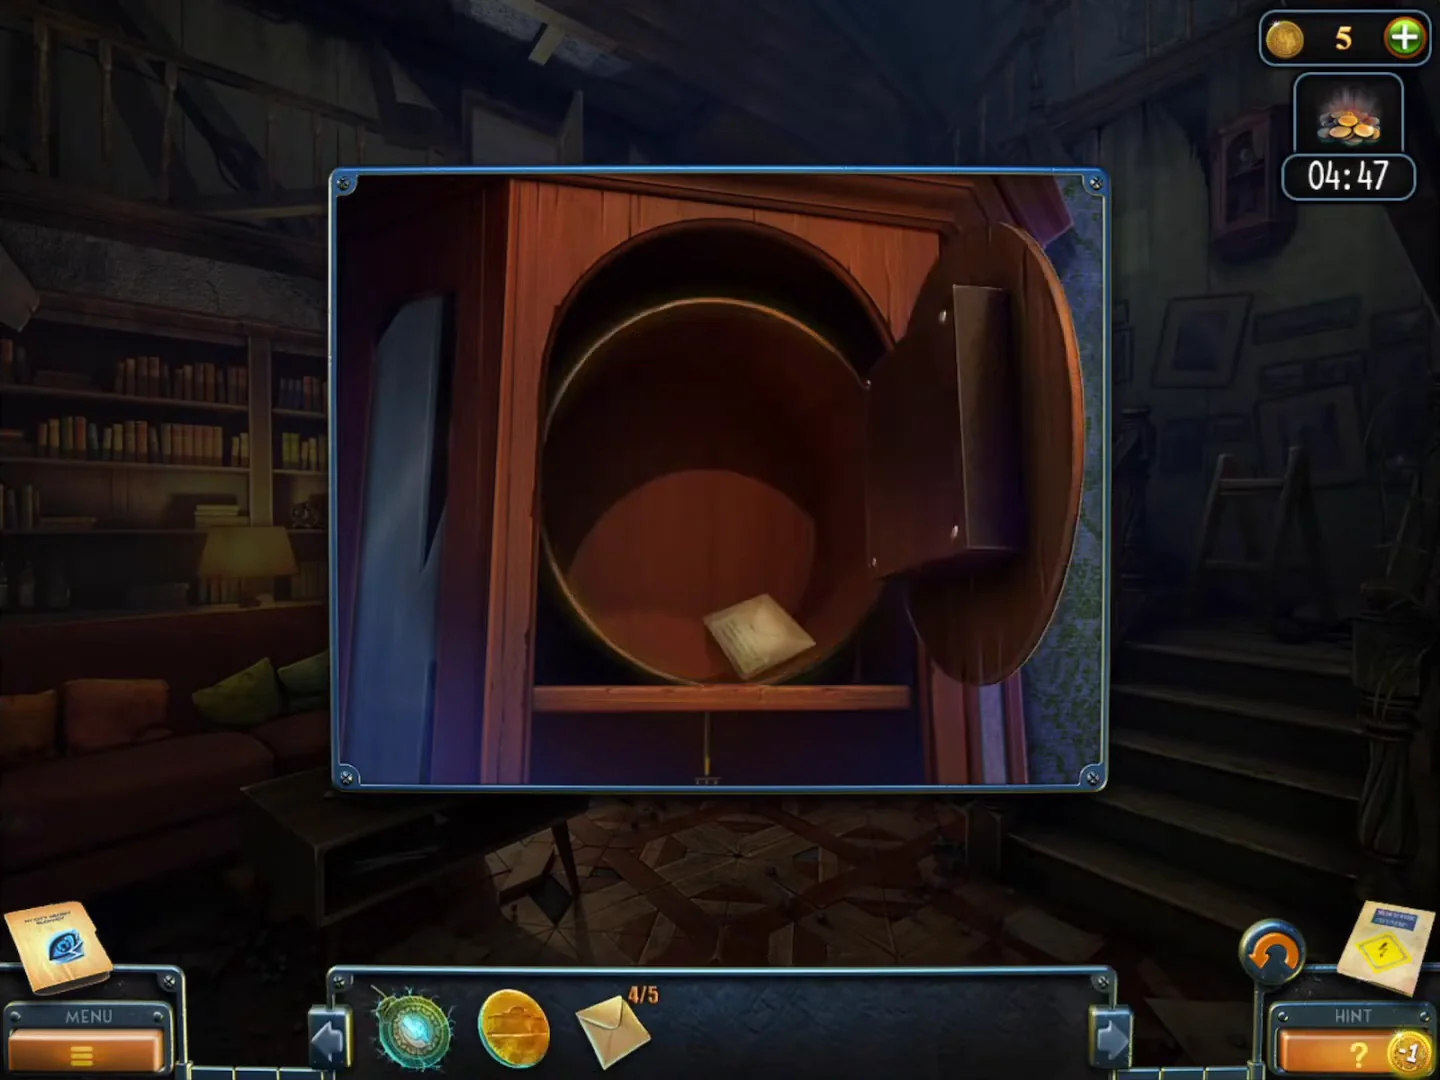
With the hands at 1:50 the clock face swings open. Take Envelope 4/5. - Use the map to go to the HQ hall and talk to Bishop. He gives you Envelope 5/5, a clue from Hugo's case file.
Mannequin shelf
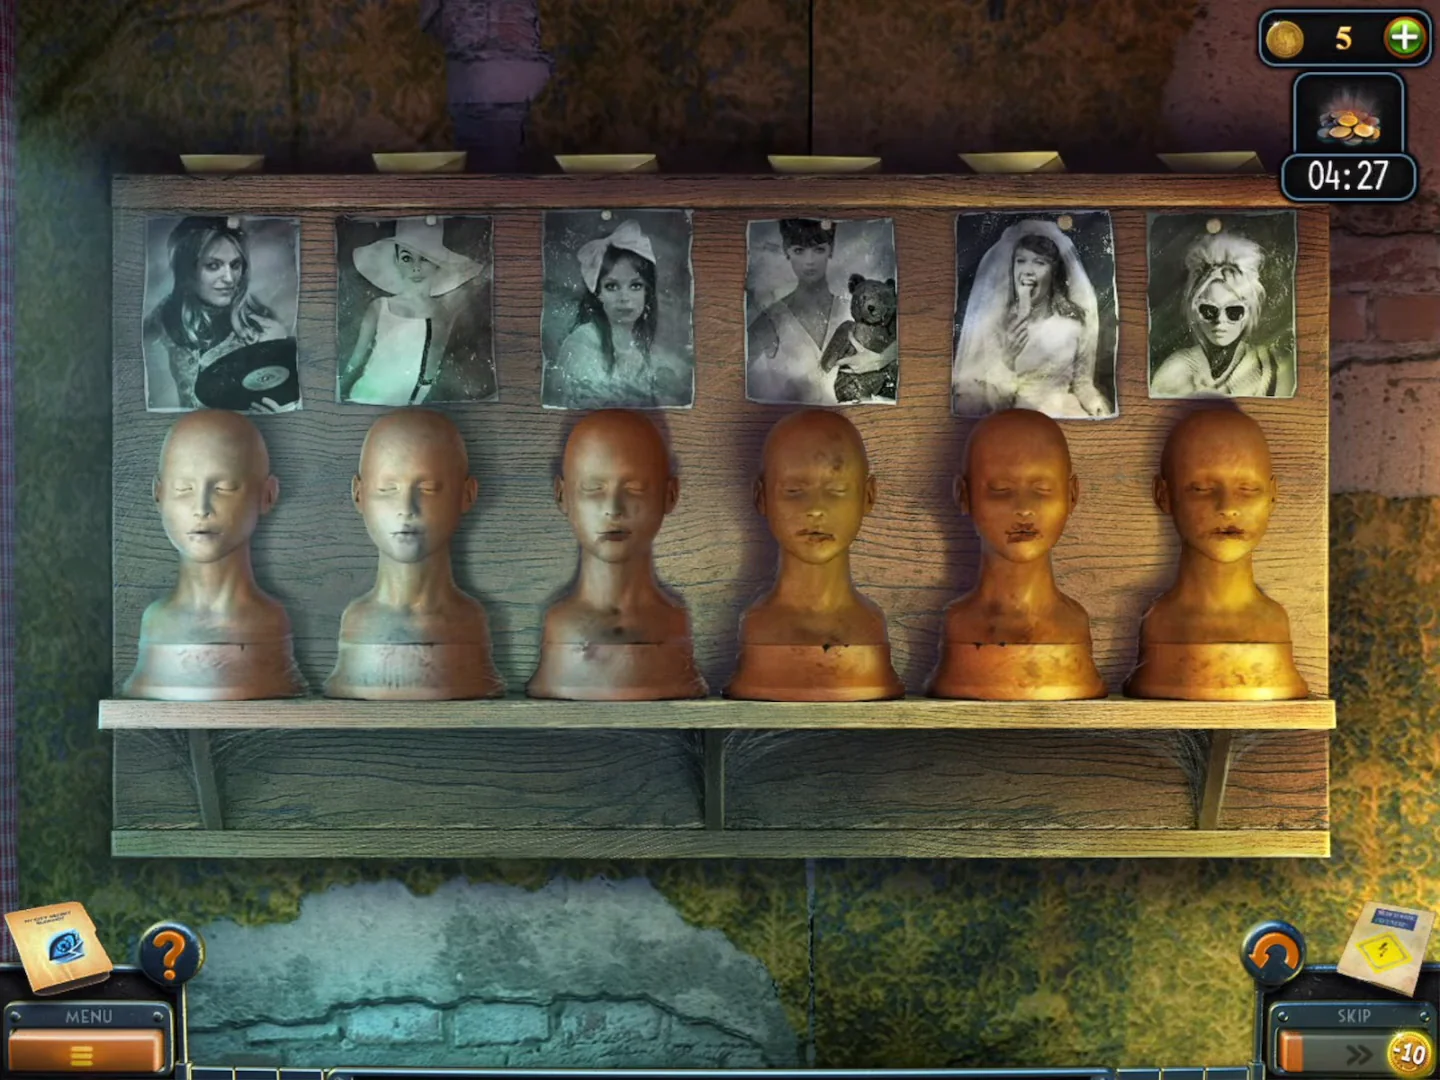
The bedroom wall shelf shows six photos over six bald mannequin heads. From left to right: a woman with a vinyl record, a woman in a floppy white hat, a girl with a hair bow, a girl with a teddy bear, a bride and a woman in sunglasses.
- Use the Envelopes on the shelf. Each opens with a riddle and an accessory; put the accessory on the head under the matching photo: teddy riddle - large silver oval dangling earrings on head 4; vinyl riddle - gold drop earrings on head 1; bride riddle ("He never said his oath to the bride...") - dark pearl necklace on head 5; glasses riddle - small rectangular dangling earrings on head 6; bows riddle - gold hair ornament on head 3; floppy-hat riddle - gold necklace with a heart pendant on head 2.
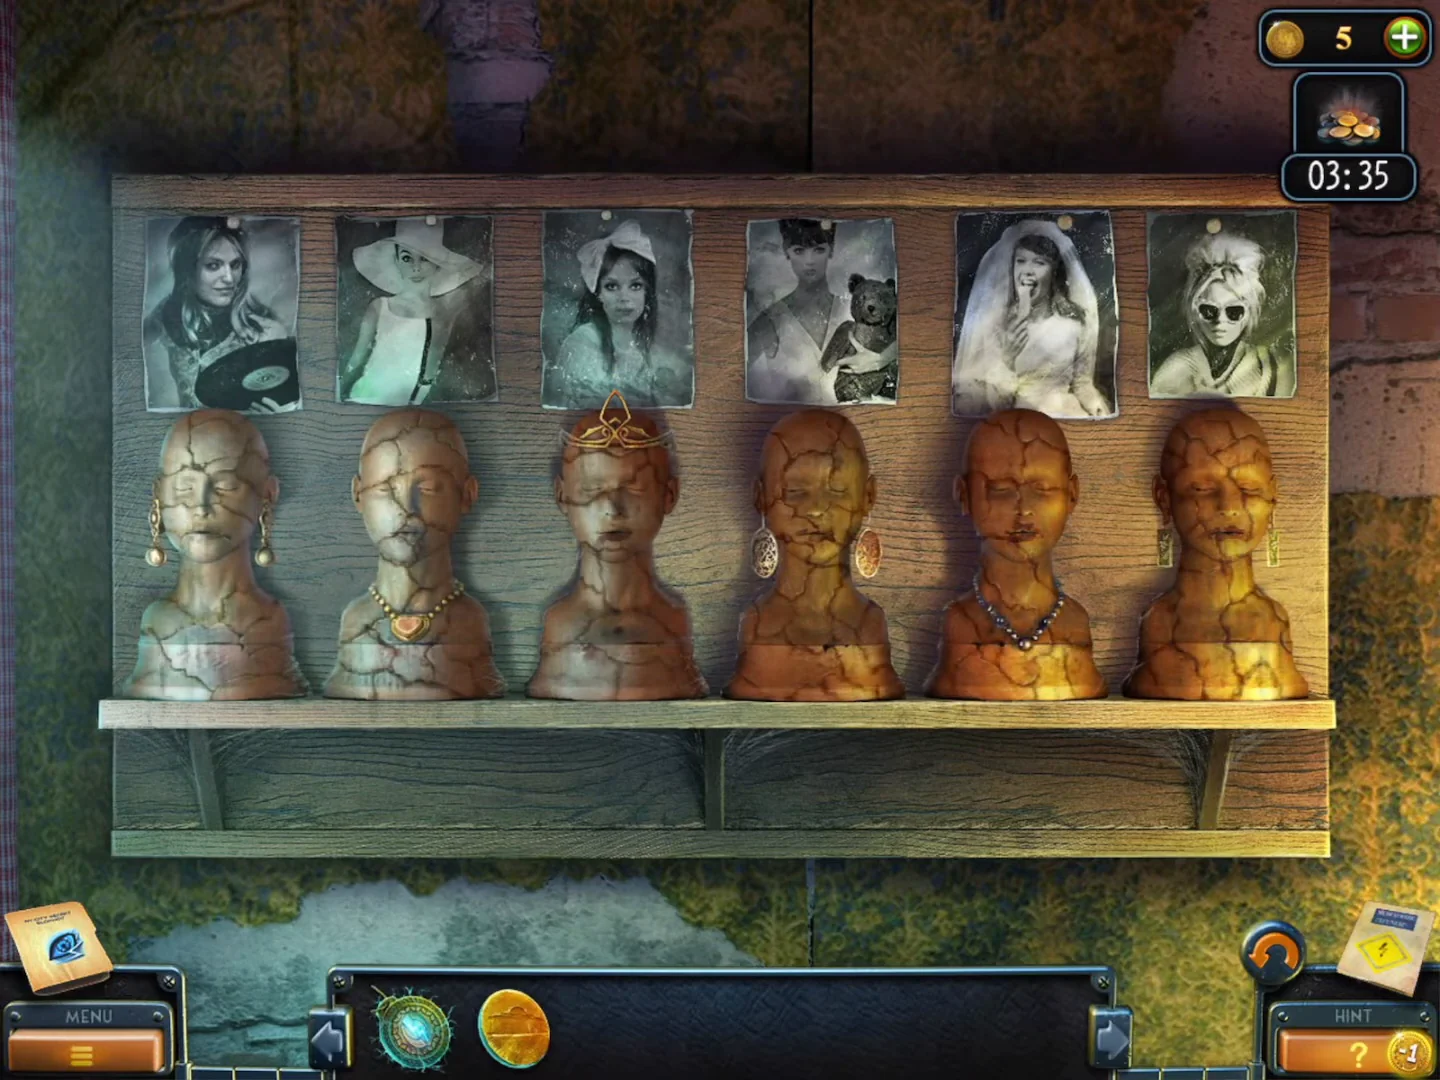
Every head wears its accessory; a moment later the heads crumble to dust. - The heads crumble to dust. Take the Turning mechanism.
Samuel's inner lab
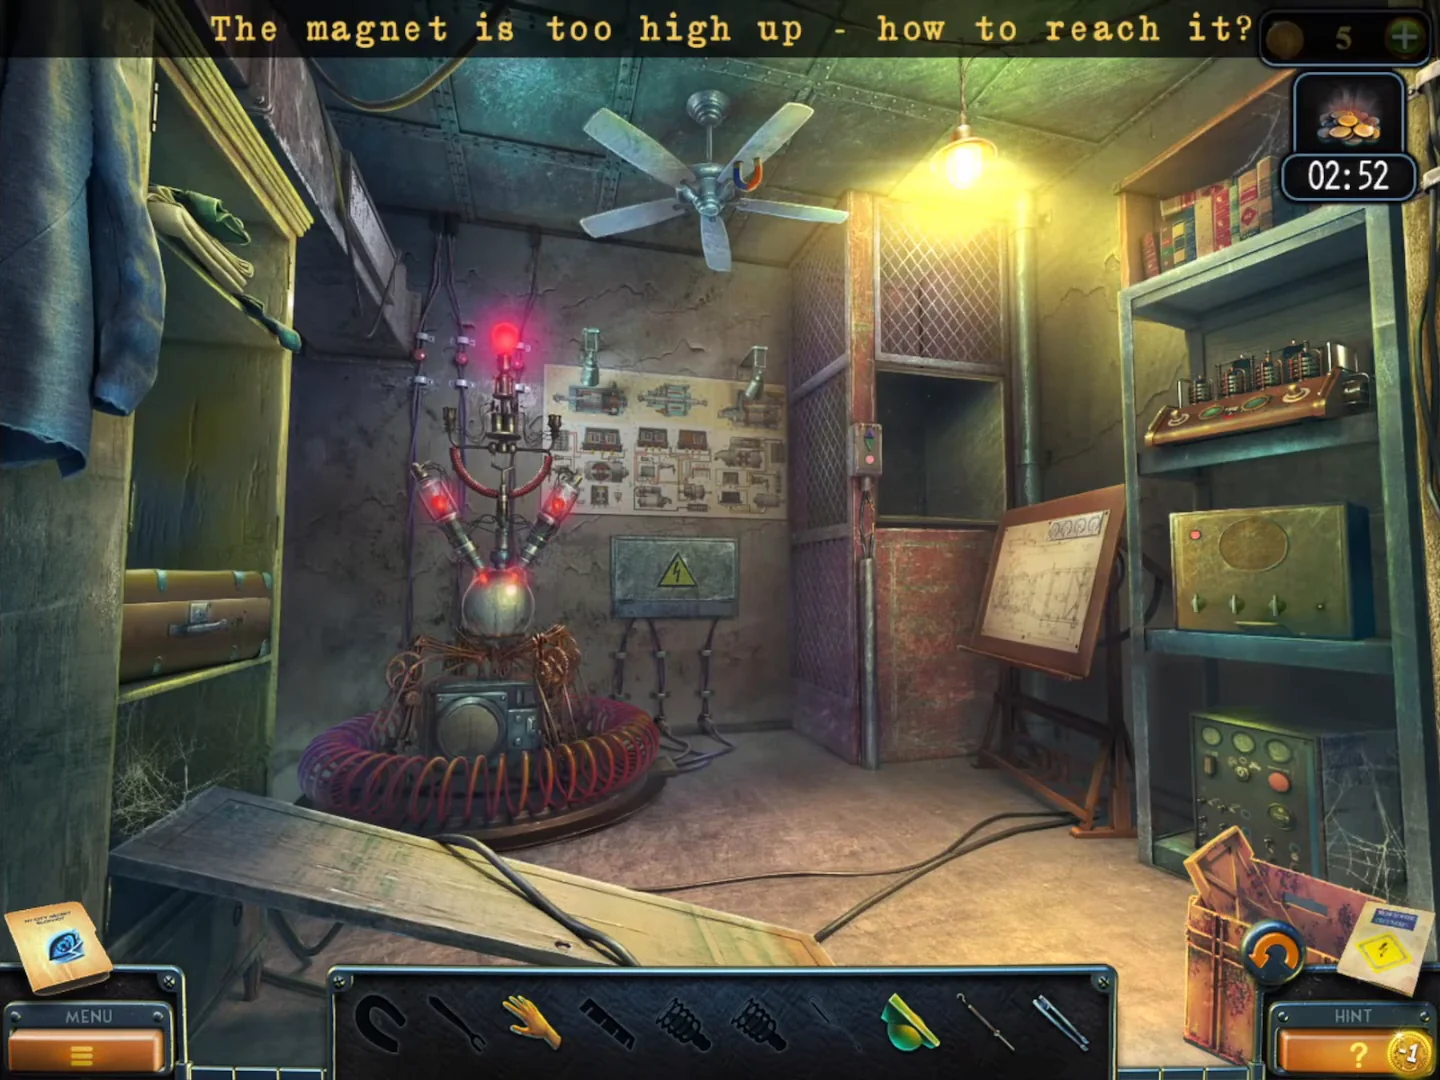
The inner lab behind the vault is an interactive scene; the bar lists Magnet, Tie with magnet, Safety gloves, Diagram card, two Device parts, Paper clip, Switch, Hook on long stick and Tweezers.
- In the basement lab, fit the Turning mechanism on the round hub of the big green vault door. The door opens to the inner lab.
- Take the Hook on long stick (against the wall left of the dumbwaiter), the Tweezers (on top of the suitcase on the left shelf), and from the drafting board on the right the Paper clip and the Diagram card. Take the Safety gloves from the floor of the dumbwaiter car. Zoom into the big device in the middle of the room ("The device is missing some parts.") and take the green-and-yellow Switch from its centre.
- Use the Hook on long stick on the spinning ceiling fan; the Magnet falls off a blade. Pick it up.
- Open the suitcase with the Paper clip and attach the Magnet to the tie inside to get the Tie with magnet.
- Zoom into the panel on the right shelf, put the Switch from the central device in the empty fourth socket and place the Diagram card. Turn each knob onto its red mark: knob 1 upper left (about 10:30), knob 2 upper right (about 1:30), knob 3 lower left (about 7:30), knob 4 left (9:00). Take the Device part from the round hatch.
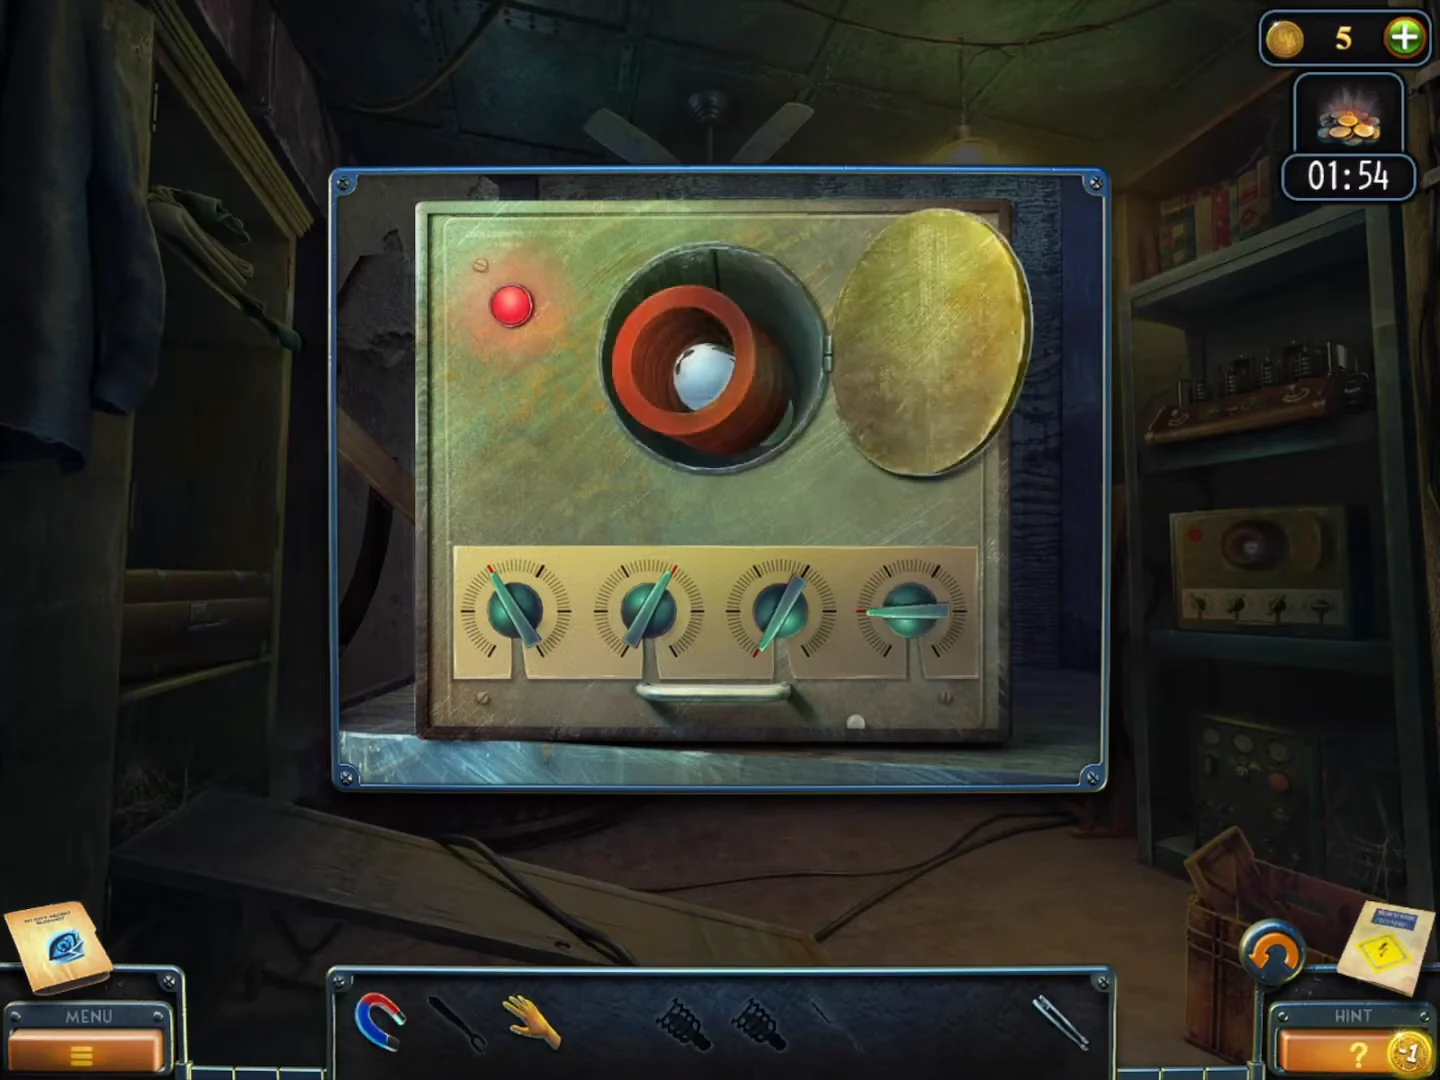
Solved: with all four knobs on their marks the round hatch opens. Take the Device part. - Reconnect the loose wires in the dumbwaiter control box with the Safety gloves. The car rises; fish the second Device part out of the shaft with the Tie with magnet.
- Put both Device parts in the sockets on top of the device. Take Samuel's photo from the compartment; the task "An Heir to Tesla" is added.
Picture wall and the wine-cellar bottle rack
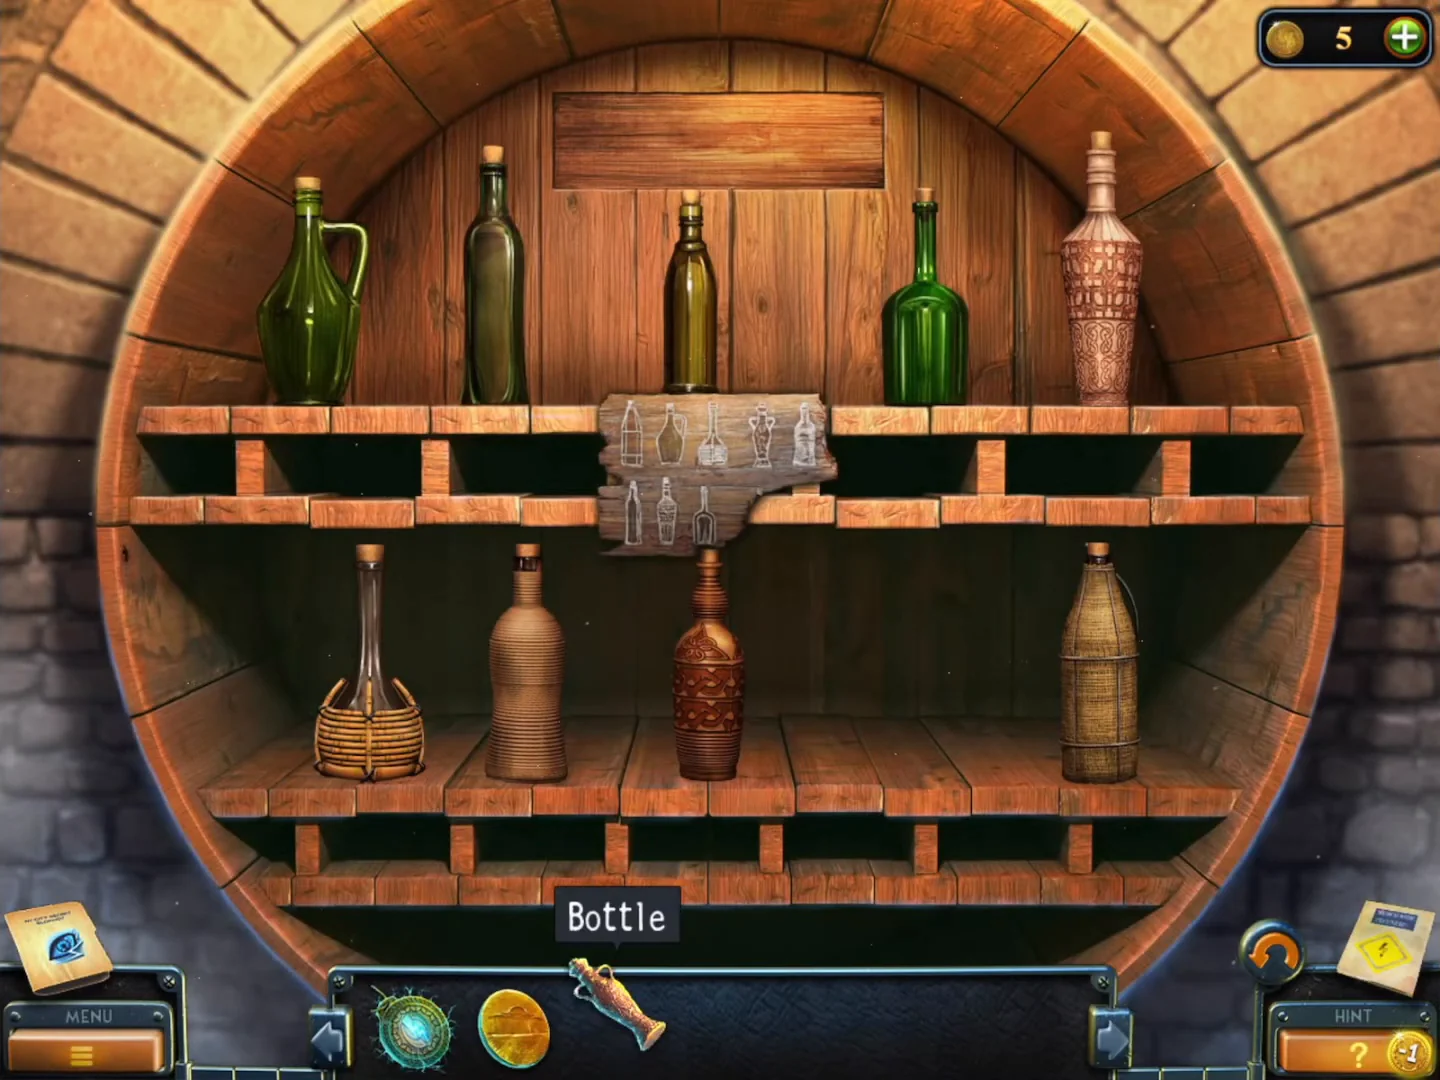
Samuel's photo completes the picture wall and gives you a Bottle. Bishop hands over a key card, and the cellar bottle rack holds the Hand switch.
- In Samuel's hall, put Samuel's photo in the empty spot on the picture wall by the staircase. Take the Bottle from the niche and read the journal page about Tesla's experiments.
- At the HQ, Bishop gives you a key card for the tunnel network: take the Punch card.
- In the wine cellar, go to the round barrel bottle rack at the far end and put the Bottle in the empty bottom-row slot. Swap bottles until they match the outlines on the sign. Top row, left to right: wicker-wrapped tall bottle, green jug with handle, wicker decanter with long neck, carved two-handled amphora, ribbed clay bottle. Bottom row: slim dark-green bottle, carved clay bottle, wide green bottle, olive-glass bottle, round carved clay bottle.
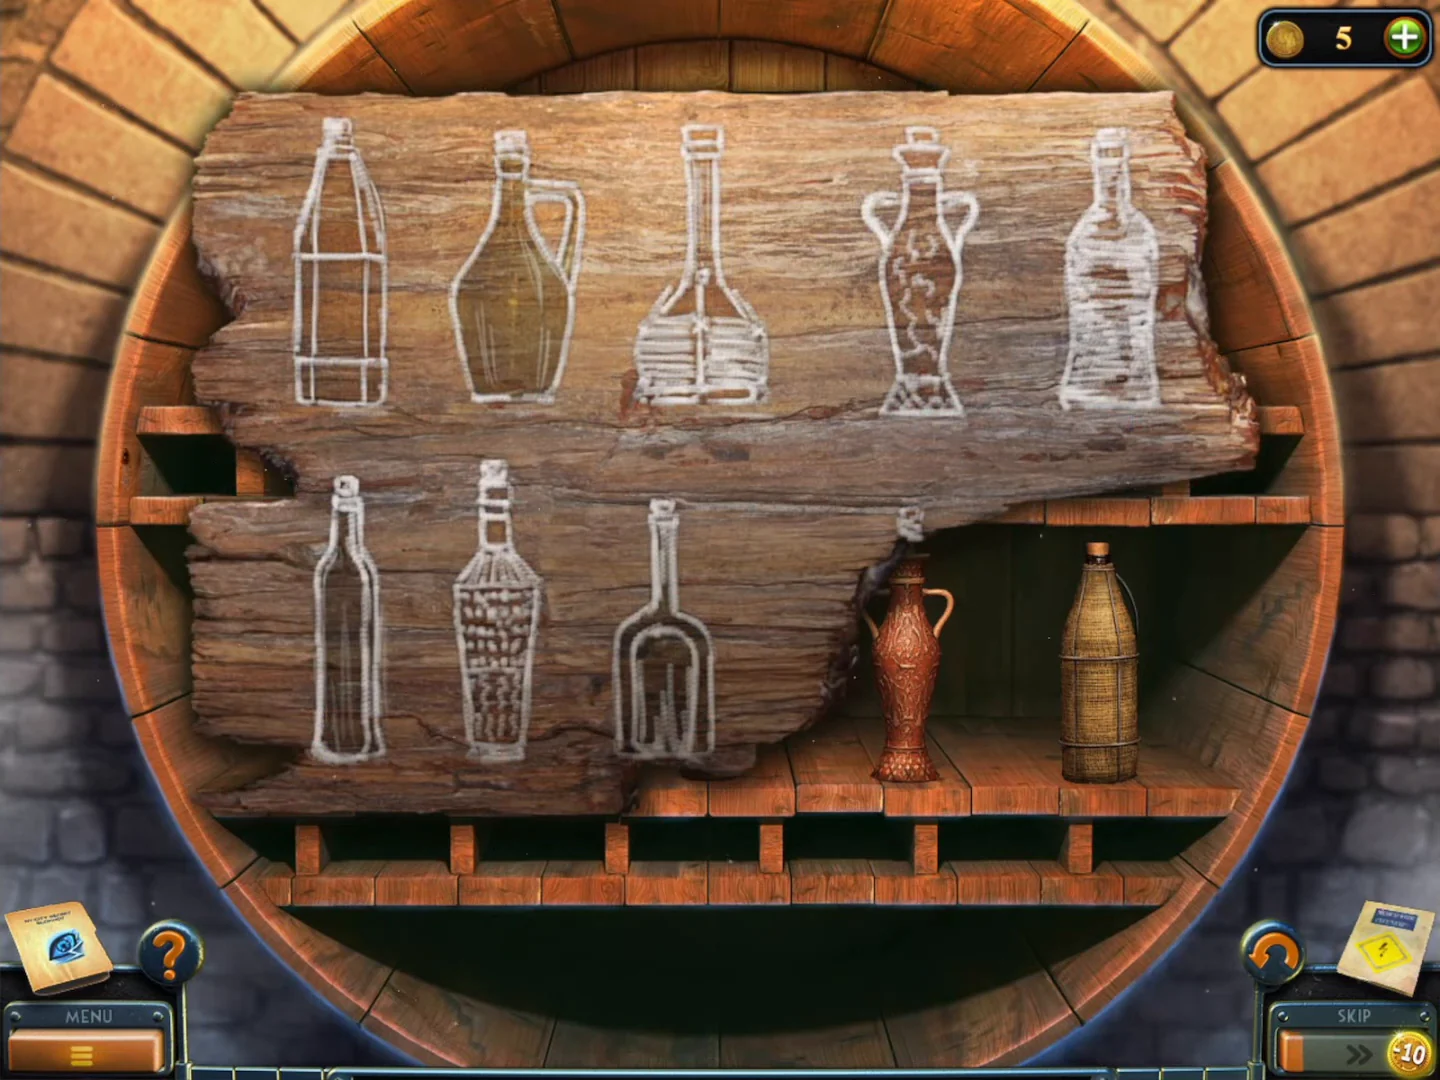
The sign shows the outlines of the bottles in their correct places. 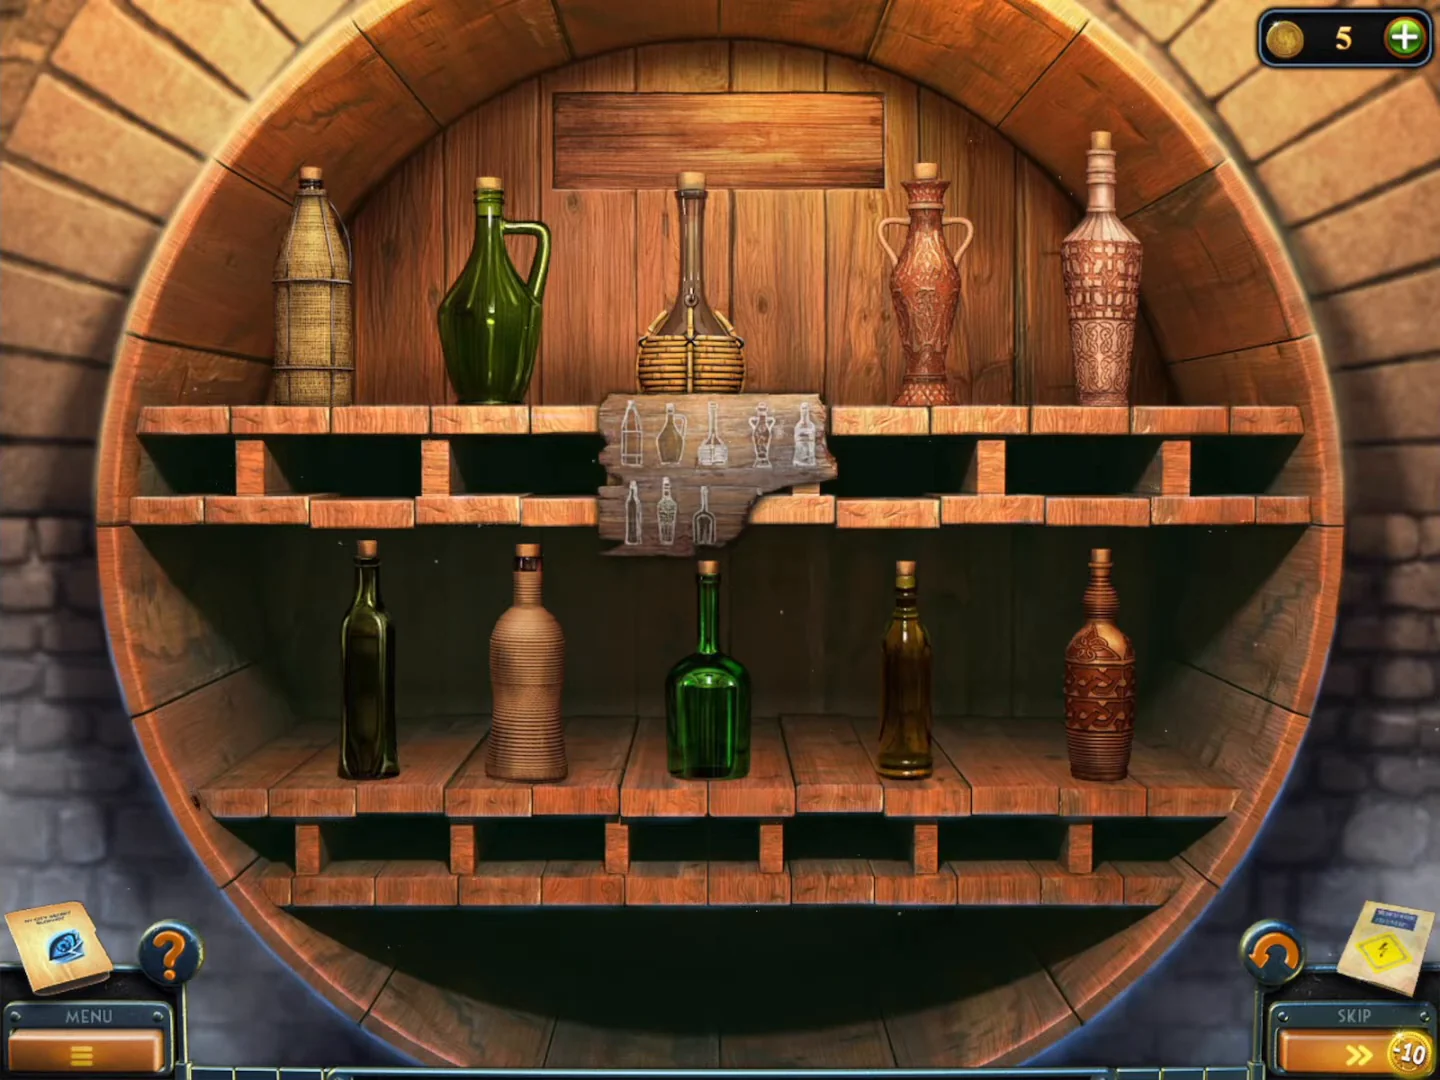
Solved: every bottle matches its outline on the sign. - Read the journal page about Frederic of the Montmorency family and take the Hand switch.