Achievement plan
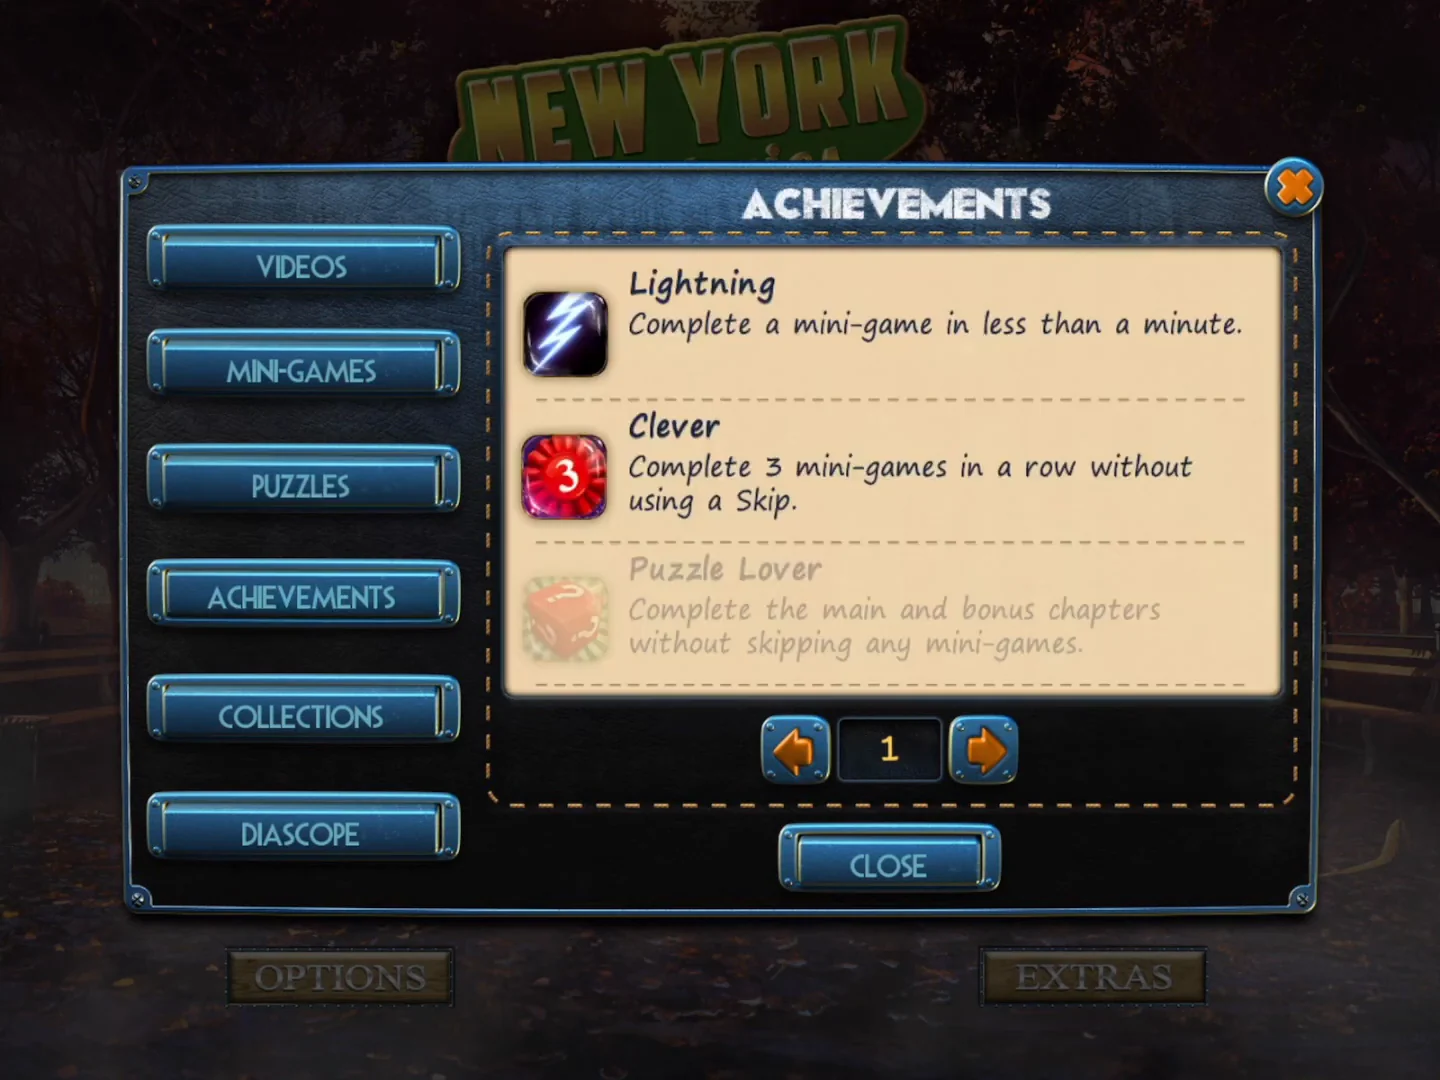
The game has 22 achievements, listed with their conditions under Extras > Achievements on the main menu. Most come naturally from the walkthrough, but several depend on how you play the whole game, so read this plan before you start.
- Whole-game achievements (decide before starting, because one slip loses them for that playthrough): "Expert" - its description says to complete the main story on the Hard difficulty level. In both mobile playthroughs checked for this guide, no difficulty choice appeared when the main game was started from PLAY, and Expert was awarded on the main menu right after the main ending. So in this edition Expert appears to come from simply finishing the main story; no separate Hard setting was seen, and the OPTIONS screen was not shown in those playthroughs; "Guardian of Light" - complete the main story and the bonus chapter without using a hint; "Persistent" - complete both without using a hint in any Hidden Objects Puzzle; "Puzzle Lover" - complete both without skipping any mini-game; "Story Lover" - complete both without skipping any dialogue or cutscene. The PLAY menu has a START OVER button for the main game and for the bonus chapter, which erases that mode's progress; whether a restart gives these achievements another chance was not confirmed.
- Collection achievements: "Prisoner" (all the weights, a set of 7), "Souvenir Lover" (all the towers, a set of 8), "Lucky" (all the cats, a set of 9), "Traveler" (all the statues, a set of 11) and "Master of Details" (all 35 ghost objects, called Beyond objects in this guide, which morph when you look at them). Every collection item and Beyond object is pointed out where it appears in the walkthrough.
- Story achievements: "Power Surge" (speak with the electrical specter) and "Physics Expert" (complete the mini-game with the nodes, the hall wiring panel in Samuel's house) come with the walkthrough.
- Mini-game achievements: "Lightning" - finish any mini-game in less than one minute; "Clever" - complete three mini-games in a row without Skip; "Diligent" - complete a mini-game after more than five minutes in it (for example, open the bird-track puzzle and take your time before finishing it); "Erudite" - finish the matching-pictures puzzle on the souvenir shop shelf (chapter 1) without any extra clicks; "Architect" - complete the street model in the archive in less than three minutes; "Terminal Velocity" - finish the figurine vault in Tesla's laboratory in less than two minutes.
- Hidden Objects Puzzle achievements: "Sniper" - find 3 items within 3 seconds; "Thorough" - complete a Hidden Objects Puzzle without making any additional clicks (tap only the items you need); "Supersonic" - complete a Hidden Objects Puzzle in less than two minutes (the short storeroom search in chapter 1 is a good chance). In the bonus chapter, "Thrifty" needs all locker pairs found in fewer than 34 clicks.
Central Park crime scene
After the opening flashback (a 1950 prison execution, then "5 years later") you arrive at the police-taped path in Central Park. Two kinds of optional collectibles appear throughout the game: collection items (small glowing objects, counted in sets) and Beyond objects (morphing objects, 35 in total). Hidden slides are a third collectible; all 20 unlock the slides mini-game.
- At the crime scene, pick up the collection item (a small card on the stone wall in the lower-left corner) and the Beyond object (a morphing object on the pavement left of the path, by the police tape).
- Go forward to the hot dog cart and talk to the officer. You receive the case file and the task "Crime Scene" is added to the journal.
- Collect the Beyond object on the far bench behind the cart (upper right) and the collection item on the left end of the right-hand bench.
- Zoom into the overturned trash bin, knock it over and open the newspaper to take the Razor blade.
- Zoom into the cart umbrella and unhook the Wire from its lower edge.
- In the same umbrella close-up, use the Razor blade on the stitched patch on the canvas to get a Fish figurine fragment.
- Open the Wire in the inventory and click it to bend it into a Lock pick.
- Zoom into the glass food lid on the cart, open it with the Lock pick and take the Tongs.
- Return to the crime scene, zoom into the crack in the path and use the Tongs to pull out the second Fish figurine fragment.
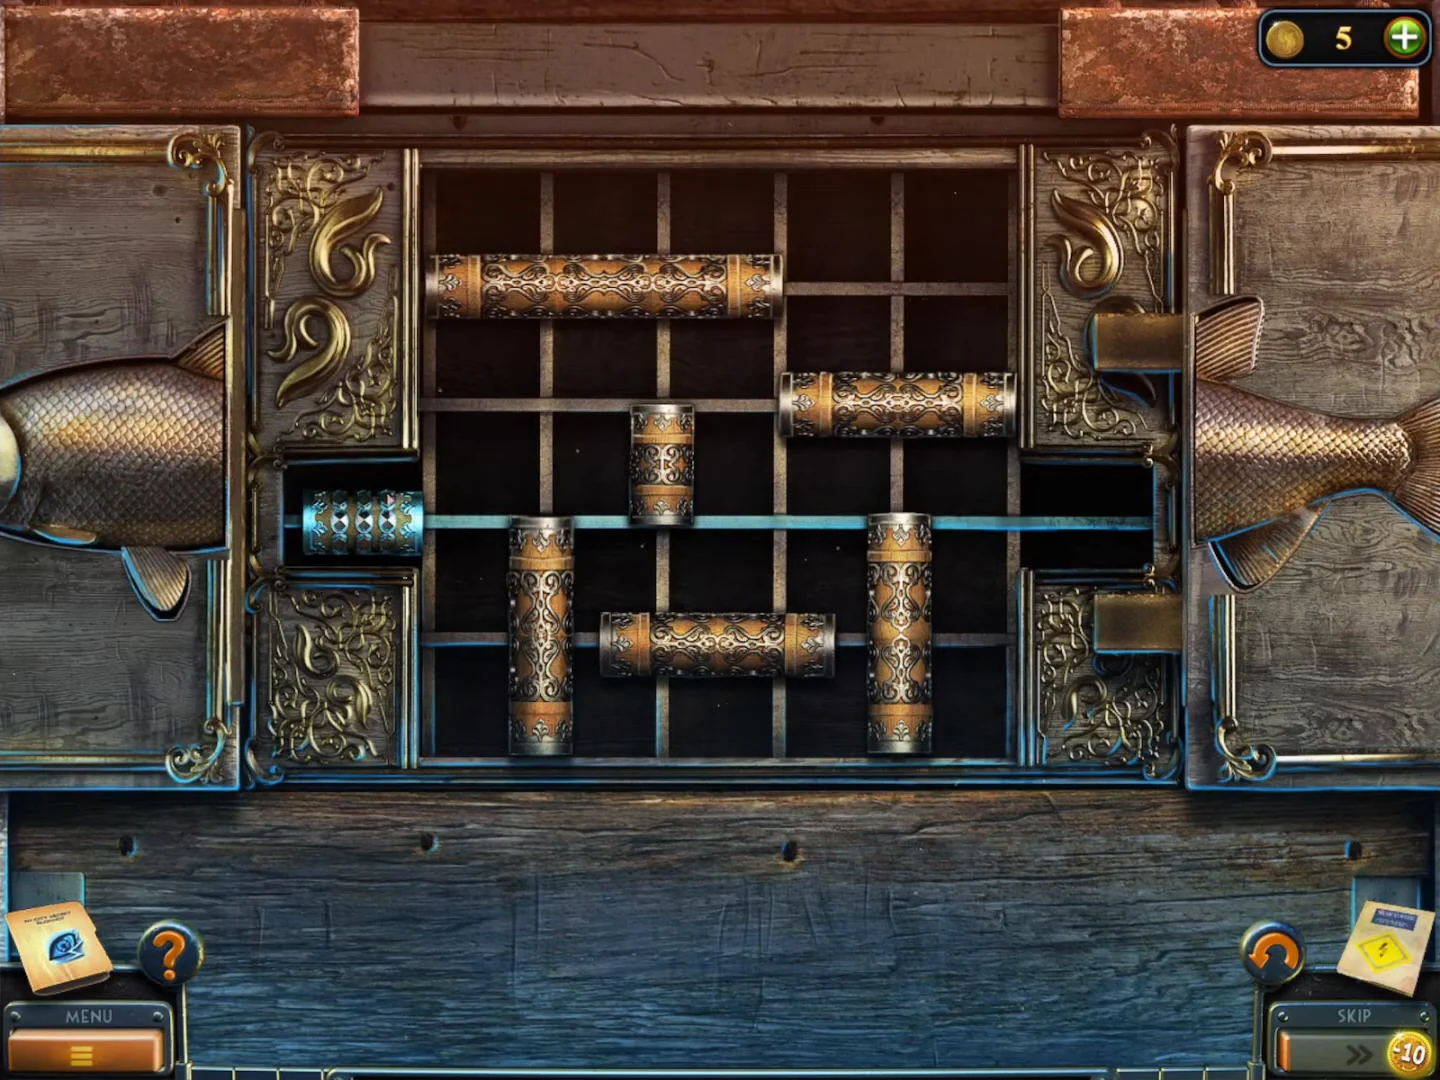
- Zoom into the box by the rowboat at the water's edge (left). Place both fish fragments in the fish-shaped indentation to start a sliding-rod lock. Slide the rods along their own axes to clear the central rail, then slide the bolt from the left into the right-hand slot. Finishing a mini-game in less than one minute earns the "Lightning" achievement, and this short lock is an easy chance for it (it appeared here in the example playthrough).
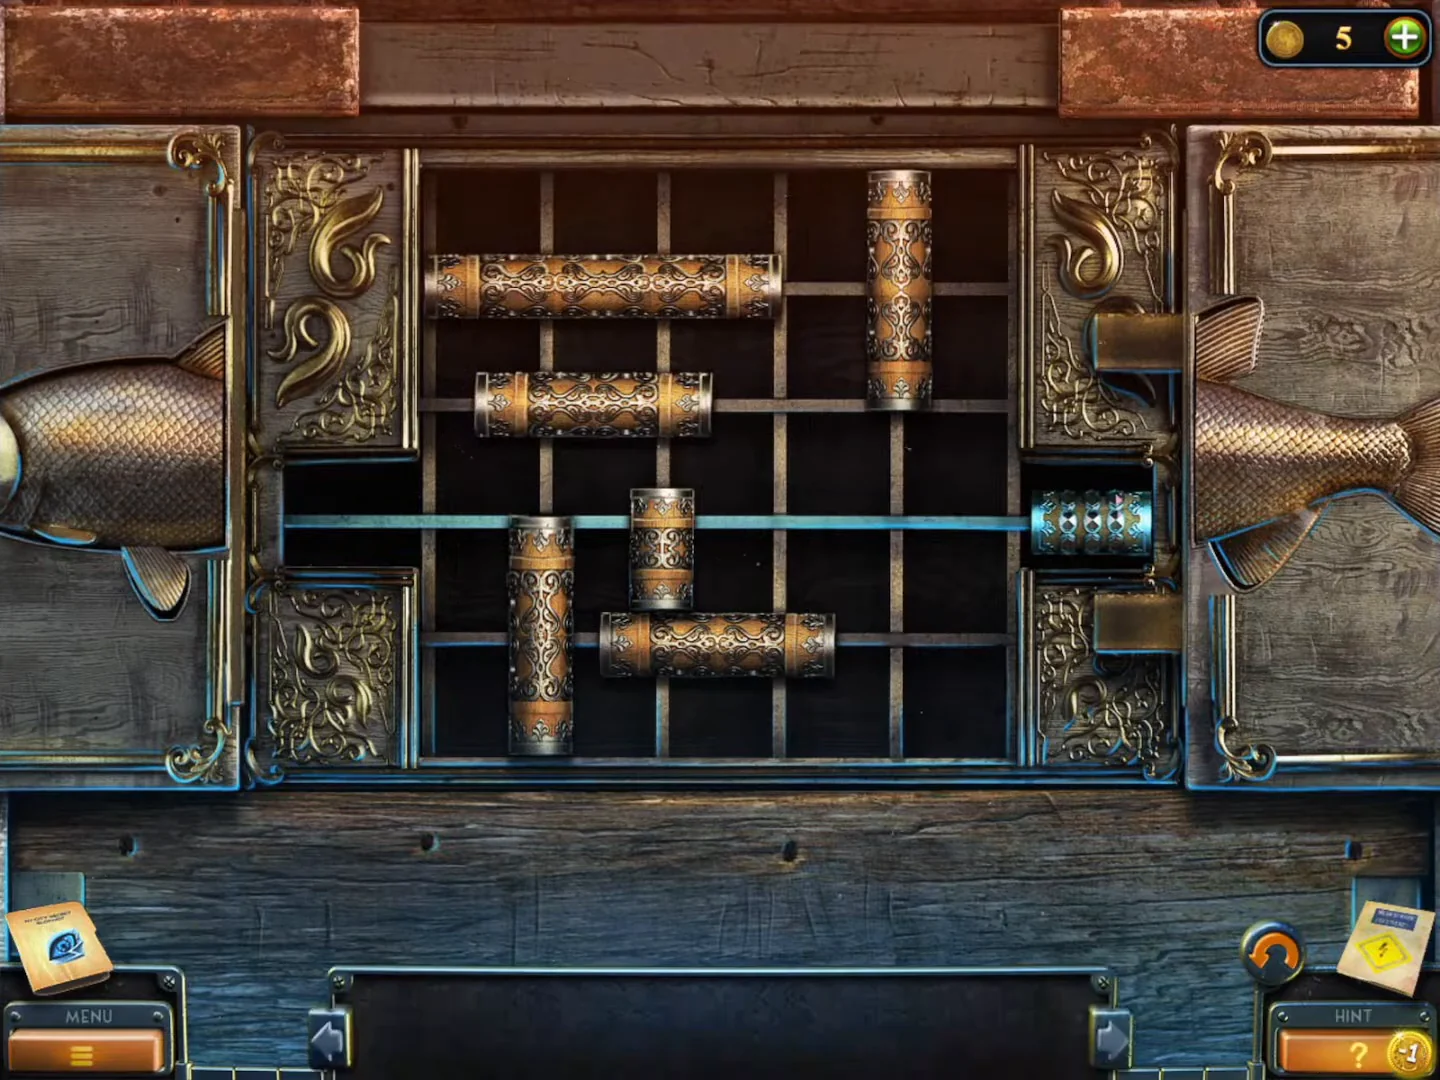
Solved: the bolt has slid along the central rail into the right-hand slot. - Take the Oilcan from the open box.
- Zoom into the leaf pile by the stone post next to the right bench, brush the leaves away to reveal a briefcase and use the Oilcan on its latch. Read the letter (Frederick Davis to Henry Tyler, 23 72nd St) and the photo of two police officers.
- A cutscene follows (a fatal electrocution at Henry Tyler's house). Laura then drives to the souvenir shop that hides the White Stone HQ entrance.
Souvenir shop and the eagle shelf
The task "Bishop" starts in the souvenir shop.
- Collect the Beyond object (a small brown object on the top shelf of the left-hand shelving, just left of the cowboy hats) and the collection item: a small white figurine on the floor at the foot of the left-hand shelf, beside the drums.
- Zoom into the postcards on the counter and move them aside to find an Eagle figurine.
- Zoom into the floor hatch and take the second Eagle figurine.
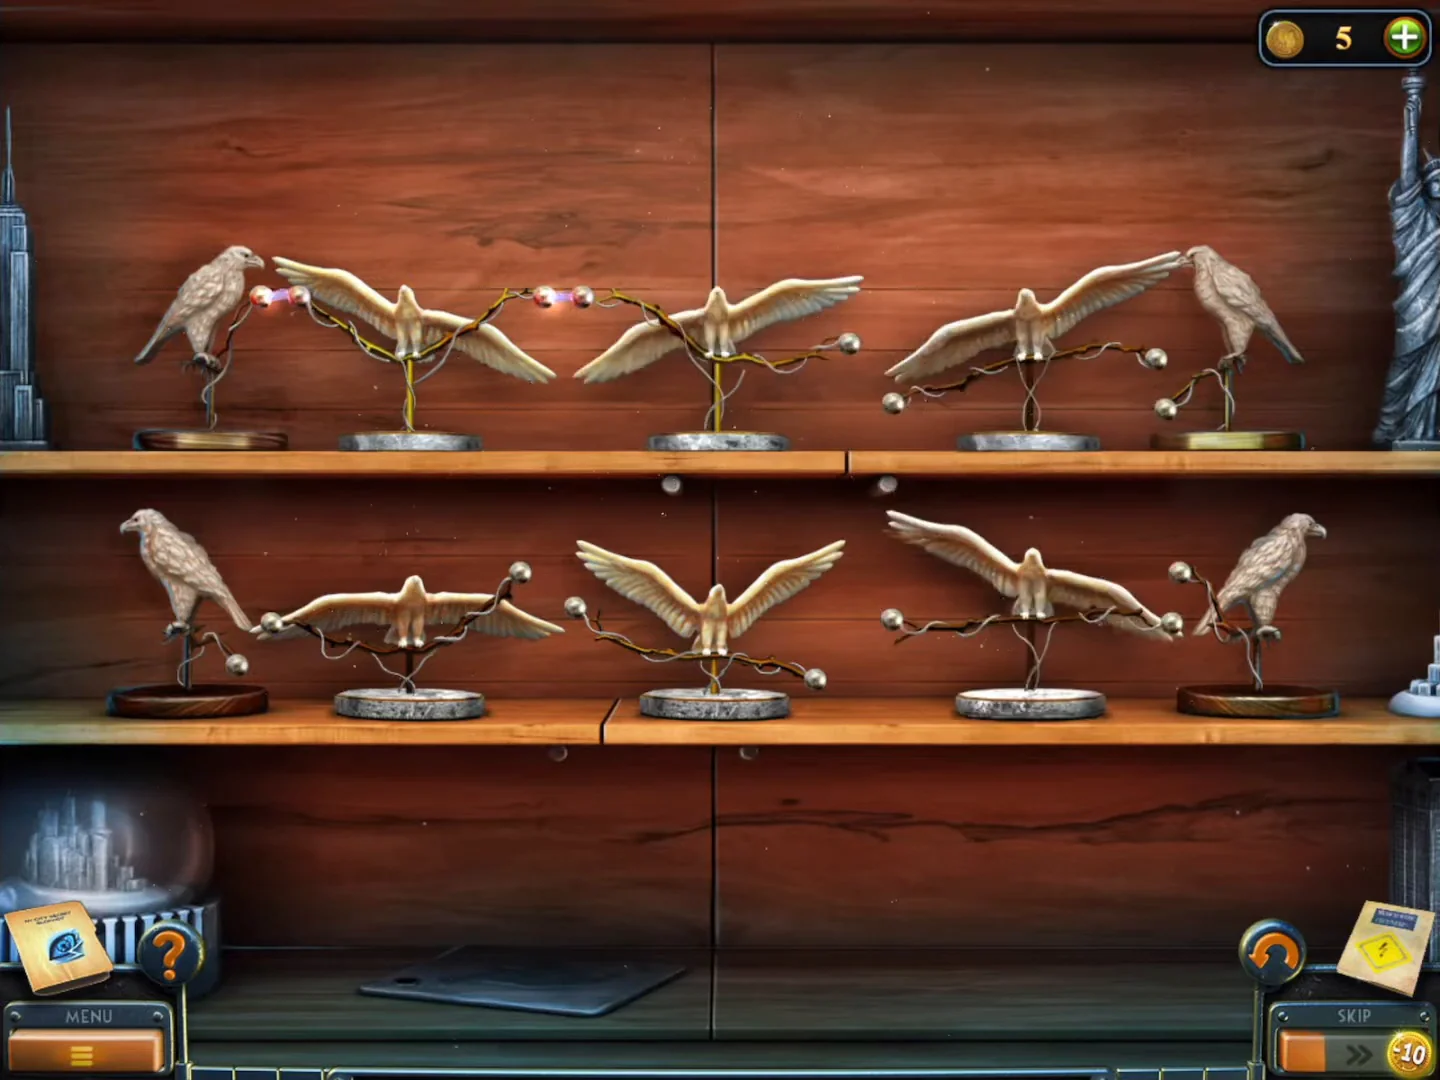
- Zoom into the wall shelf of eagles and place both Eagle figurines on the empty stands. Then rearrange the spread-wing eagles so their wire-ball contacts form an unbroken chain between the perched eagles at each end of both shelves.
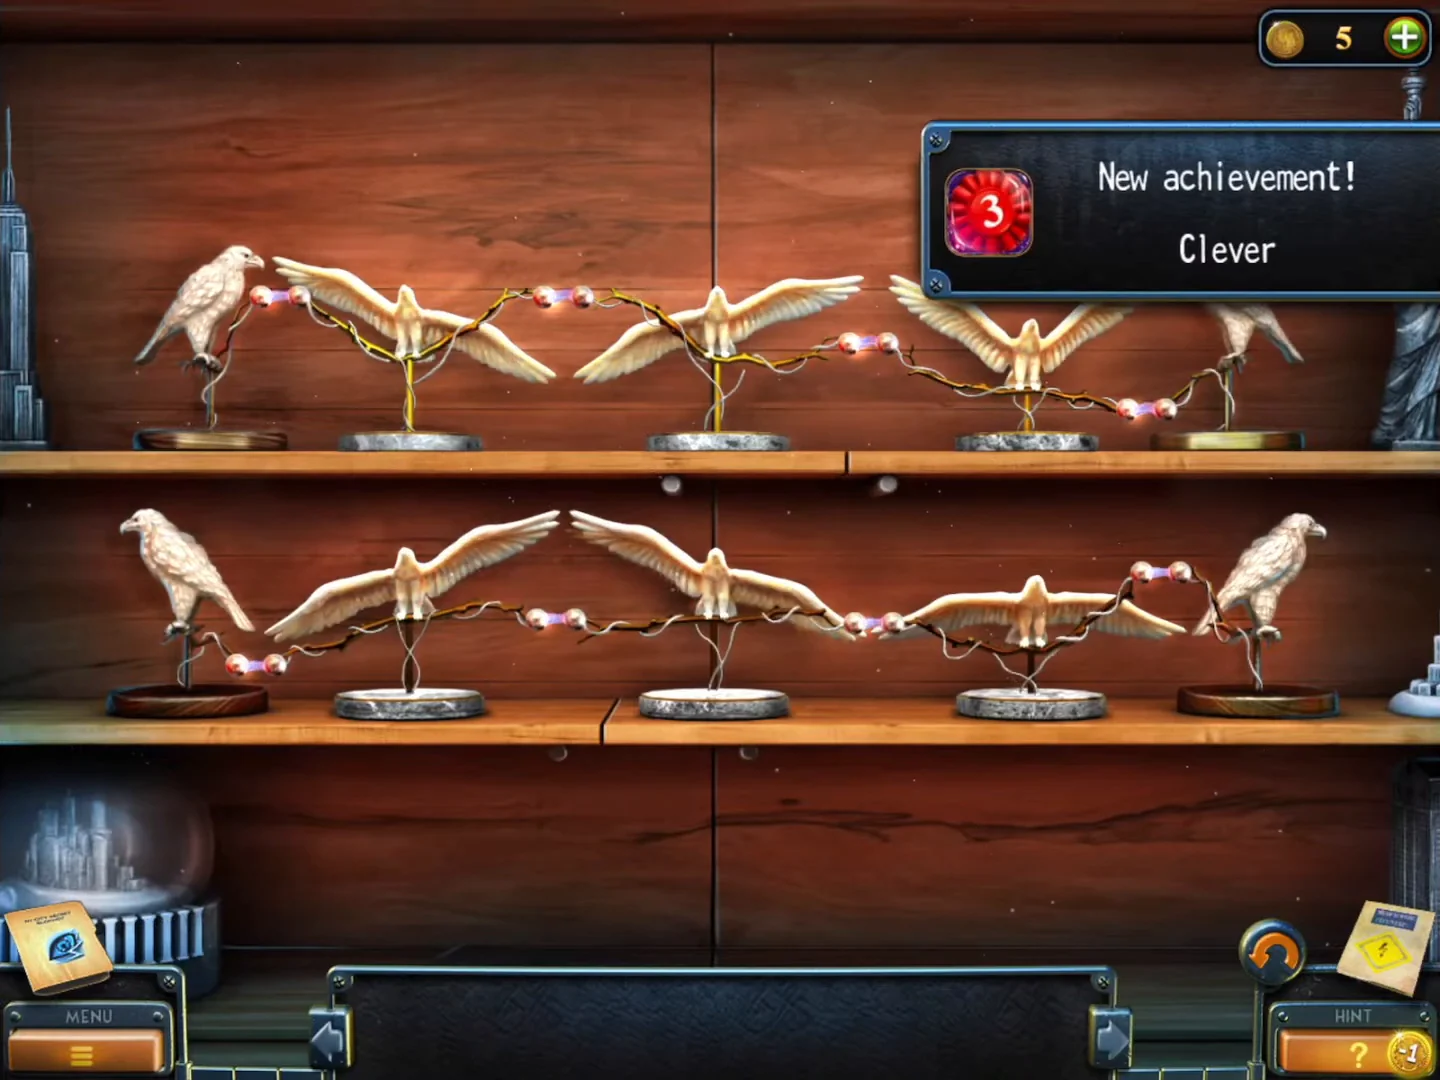
Solved: on both shelves the glowing wire-ball contacts link the perched eagle on the left to the one on the right. The "Clever" achievement popped up at this moment in this playthrough. - Take the String and the Eagle key from the opened compartment.
Counter bunting
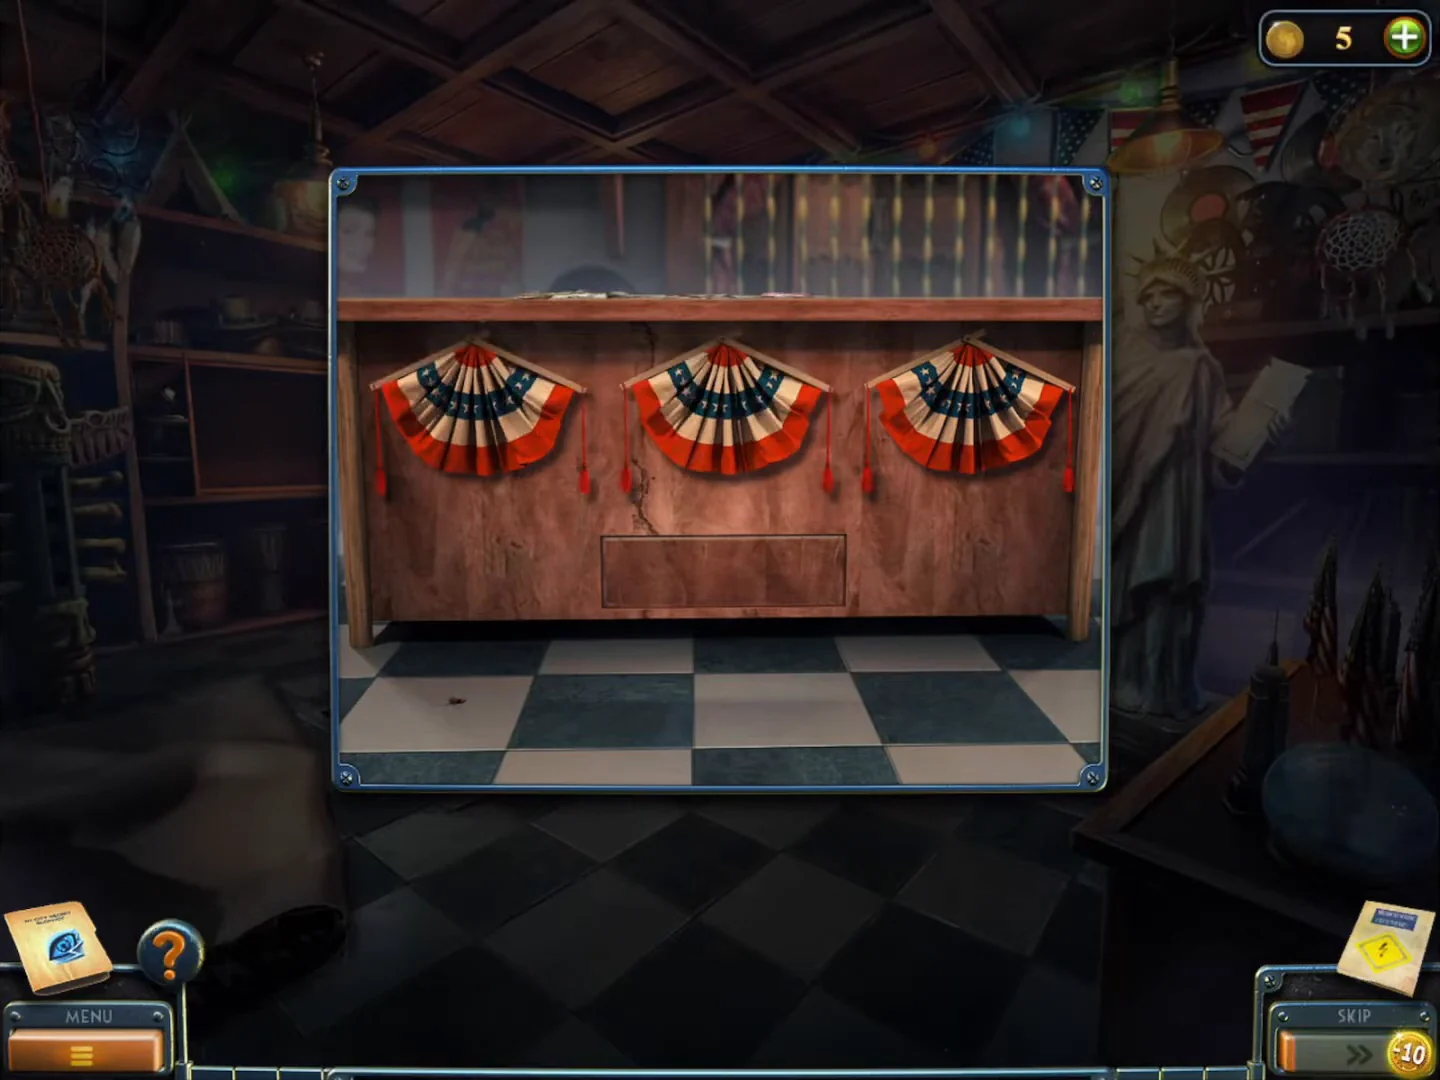
The drawer in the front of the shop counter is locked by the three bunting fans. Adding the String turns them into a small mini-game.
- Zoom into the front of the shop counter and use the String on the bunting. The three red, white and blue fans now change shape when clicked. Each click moves a fan to its next shape, in a loop: a flat half-circle hanging from a straight rod, then an angled fan hanging from a tilted frame, then a narrow fold, then back to the flat half-circle. The starting shapes can differ: in one checked playthrough all three started as flat half-circles, in the other all three started as angled fans.
- Click the fans until the LEFT fan is a narrow fold, the MIDDLE fan is a flat half-circle on its straight rod and the RIGHT fan is an angled fan on its tilted frame. From all flat half-circles: click the left fan twice and the right fan once. From all angled fans: click the left fan once and the middle fan twice. The drawer below opens as soon as all three shapes are right.
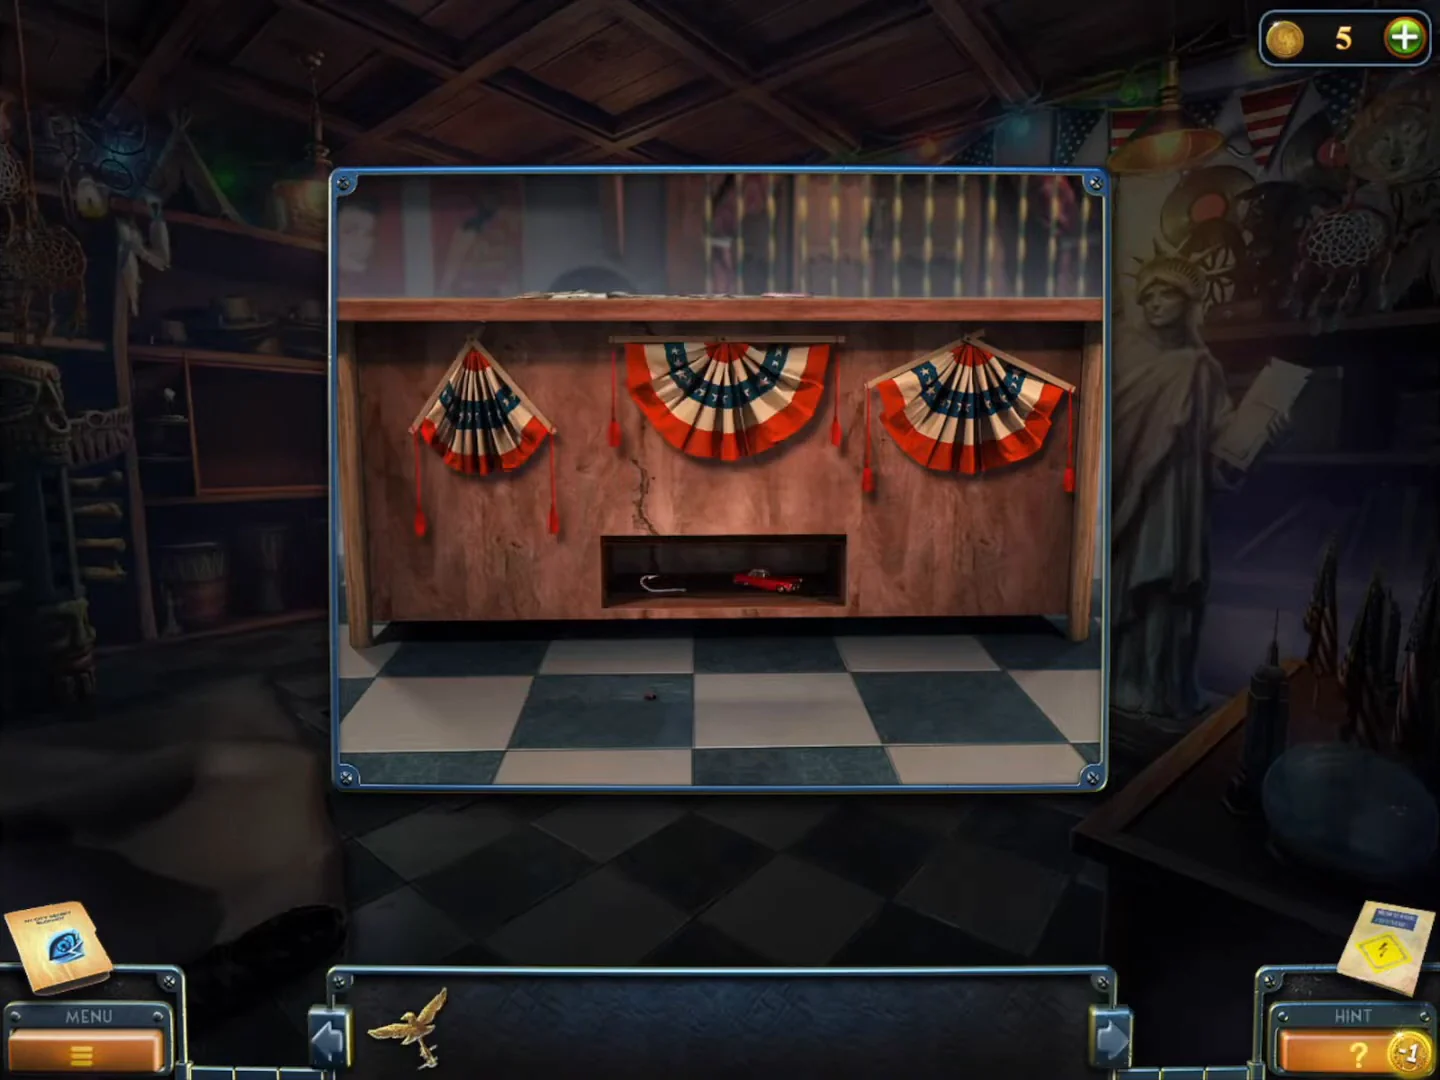
Solved: left fan narrow fold, middle fan flat half-circle on its straight rod, right fan angled on its tilted frame. The drawer is open with the Hook and the red Toy car inside. - Take the red Toy car and the Hook from the open drawer. The "Clever" achievement is for completing three mini-games in a row without pressing Skip. If you have not skipped any, it appears around this point (right after the eagle shelf or right after this drawer, depending on your order).
- Use the Eagle key on the floor hatch and climb down.
Storage cage and the dark storeroom
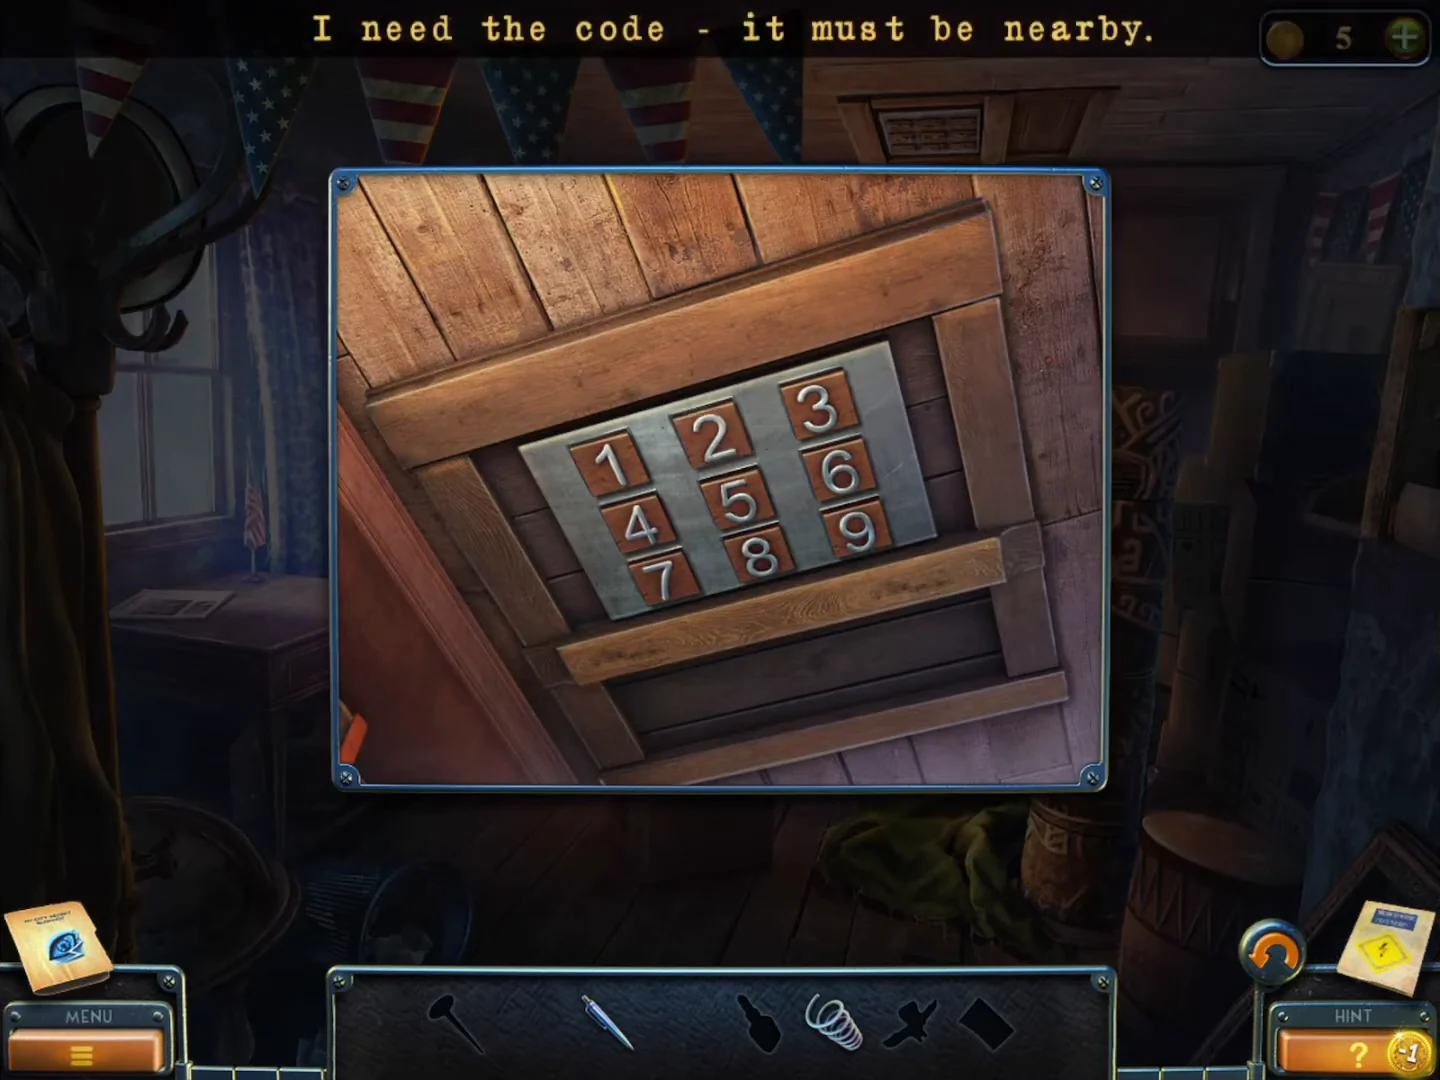
Below the shop is a caged storage area with an elevator, and a dark storeroom beside it.
- Collect the Beyond object (a small grey box on the floor at the foot of the right-hand cage mesh; it briefly morphs into a light bulb) and the collection item: a miniature streetcar on the right wall mesh.
- Zoom into the stacked wooden crates and take the Nails lying on the lower crate.
- Pull the 1954 poster away from the left mesh and take the Razor and the green Toy car from the recess behind it.
- Climb back up to the shop and zoom into the wooden doors whose handles are tied together with cord. Cut the cord with the Razor; the doors open into a dark storeroom.
- In the storeroom, zoom into the table by the window and take the Knife (box cutter) next to the newspaper.
- Zoom into the taped cardboard box on the floor, cut the tape with the Knife and take the Box of matches. Then take the Lantern from the right-hand side of the room.
- Put the Lantern on the round table and light it with the Box of matches. Take the Winding key revealed on the table.
- Zoom into the bottle shelf and take the Pen behind the large blue bottle.
- Use the Winding key on the cuckoo clock; the bird pops out. Take the Spring.
- Zoom into the toy robot on the paper in the bookshelf corner. Insert the Spring, then put the Pen in the robot's arm. The robot draws a line; take the Note with the drawing.
- Zoom into the 3x3 keypad on the ceiling hatch and place the Note. Press the keys along the drawn line: 1-5-2-3-6-9-8-4-7. The hatch opens; take the Suction cup.CODE1-5-2-3-6-9-8-4-7
- Open the knobless desk drawer with the Suction cup and take the Glue.
Wooden eagle and the totem pole
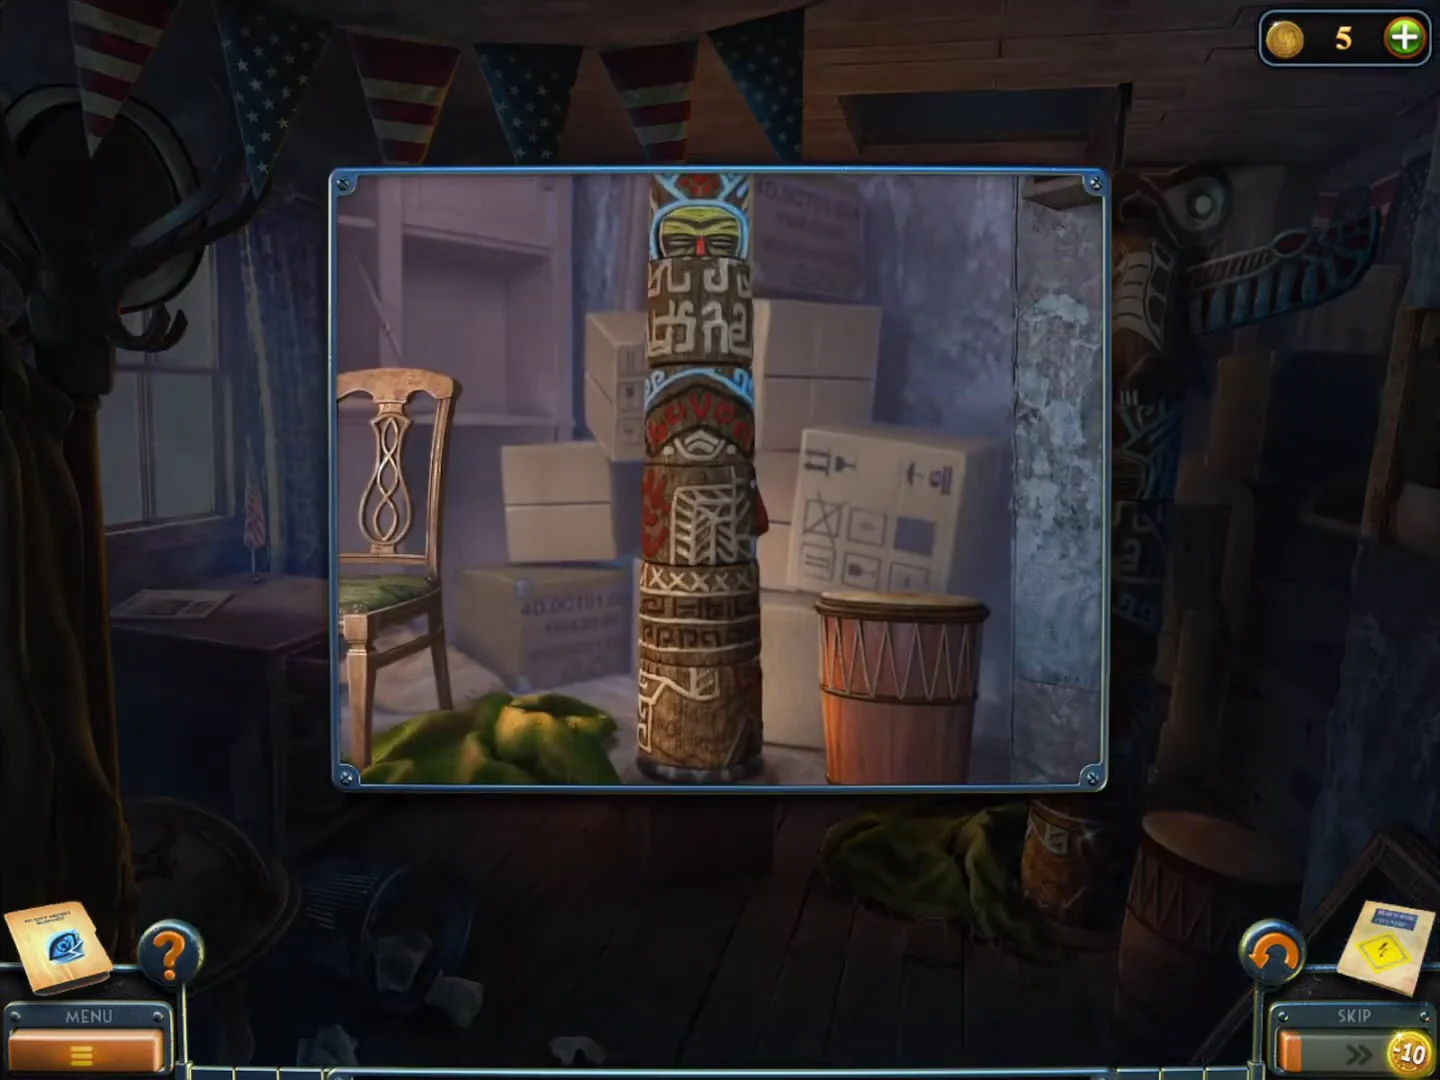
Rebuild the carved bird and use it to wake the totem pole.
- Zoom into the figurine pieces on the round table (body, head and two wings). Use the Glue, then click each piece so it snaps into place. Take the finished Eagle figurine. This completes the storeroom Hidden Objects Puzzle (its silhouette bar empties). If you finish it in less than two minutes after first entering the storeroom, the "Supersonic" achievement appears; follow the storeroom steps above in order without exploring to stay inside the limit.
- Place the Eagle figurine on top of the totem pole on the right. Click the totem segments to rotate them until one coherent face forms: yellow and red mask at the top, the blue band with eyes below it, the red nose with the blue mouth, and the red mouth face at the bottom.
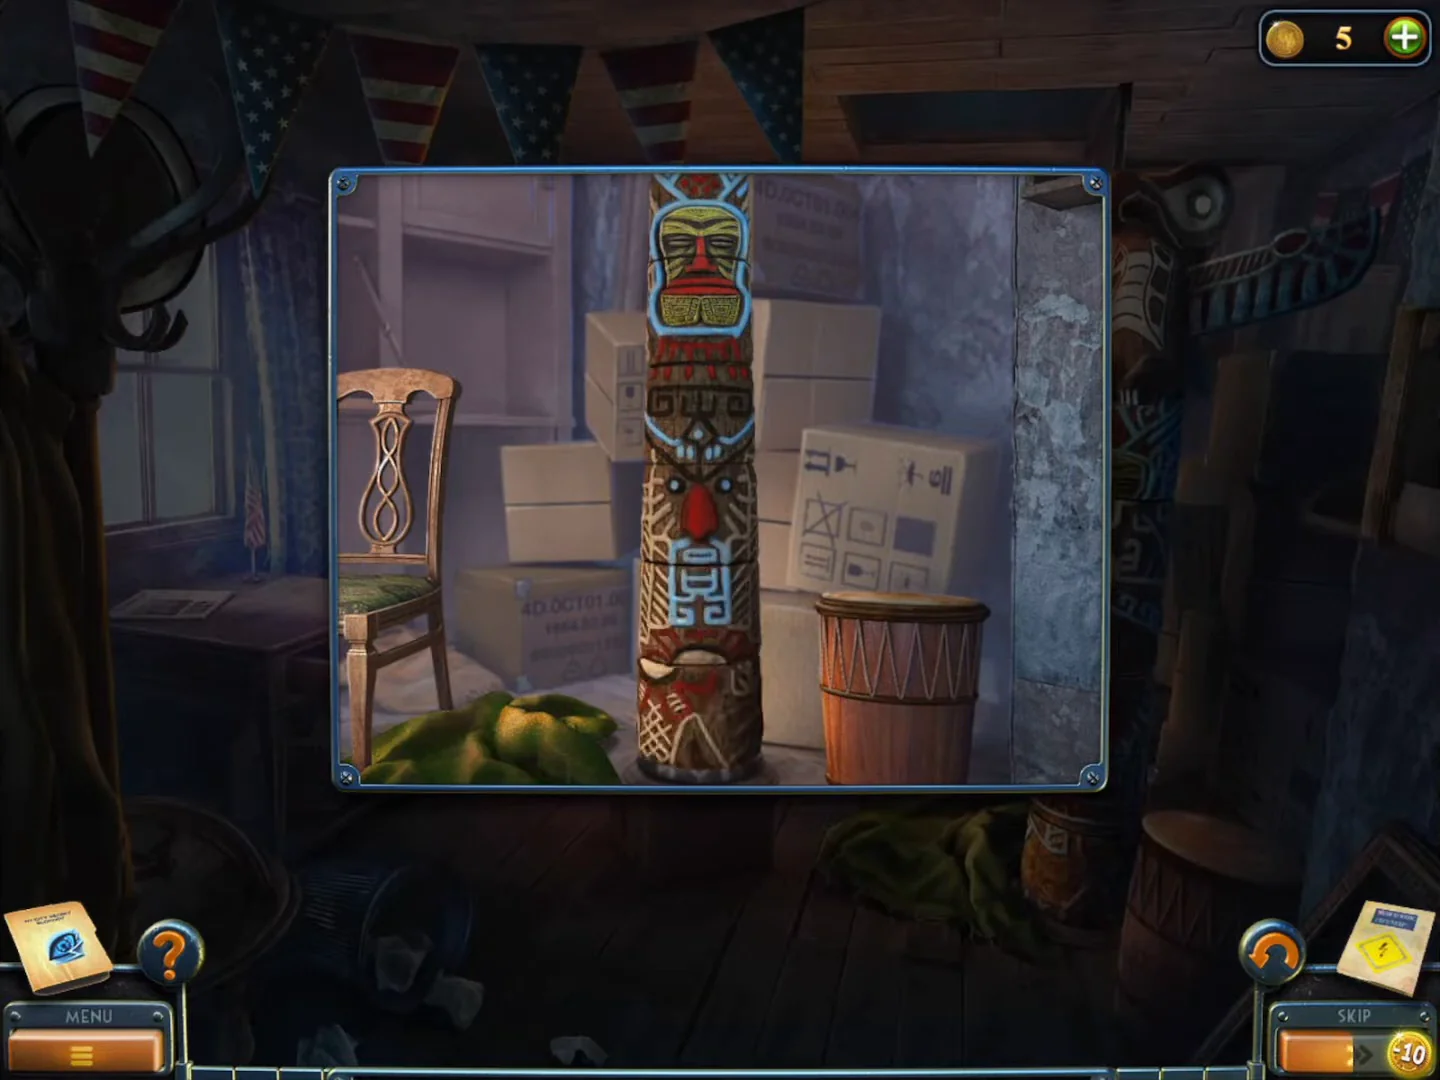
Solved: the segments form a single face from the mask at the top to the red mouth at the bottom. - Take the Key card from the totem.
- Go back up to the shop and down the hatch to the cage. Put the Key card in the elevator call box (the lamp turns green) and ride the elevator down. Walk through the tunnel into the White Stone HQ hall and talk to Bishop.
White Stone HQ and the matching paintings
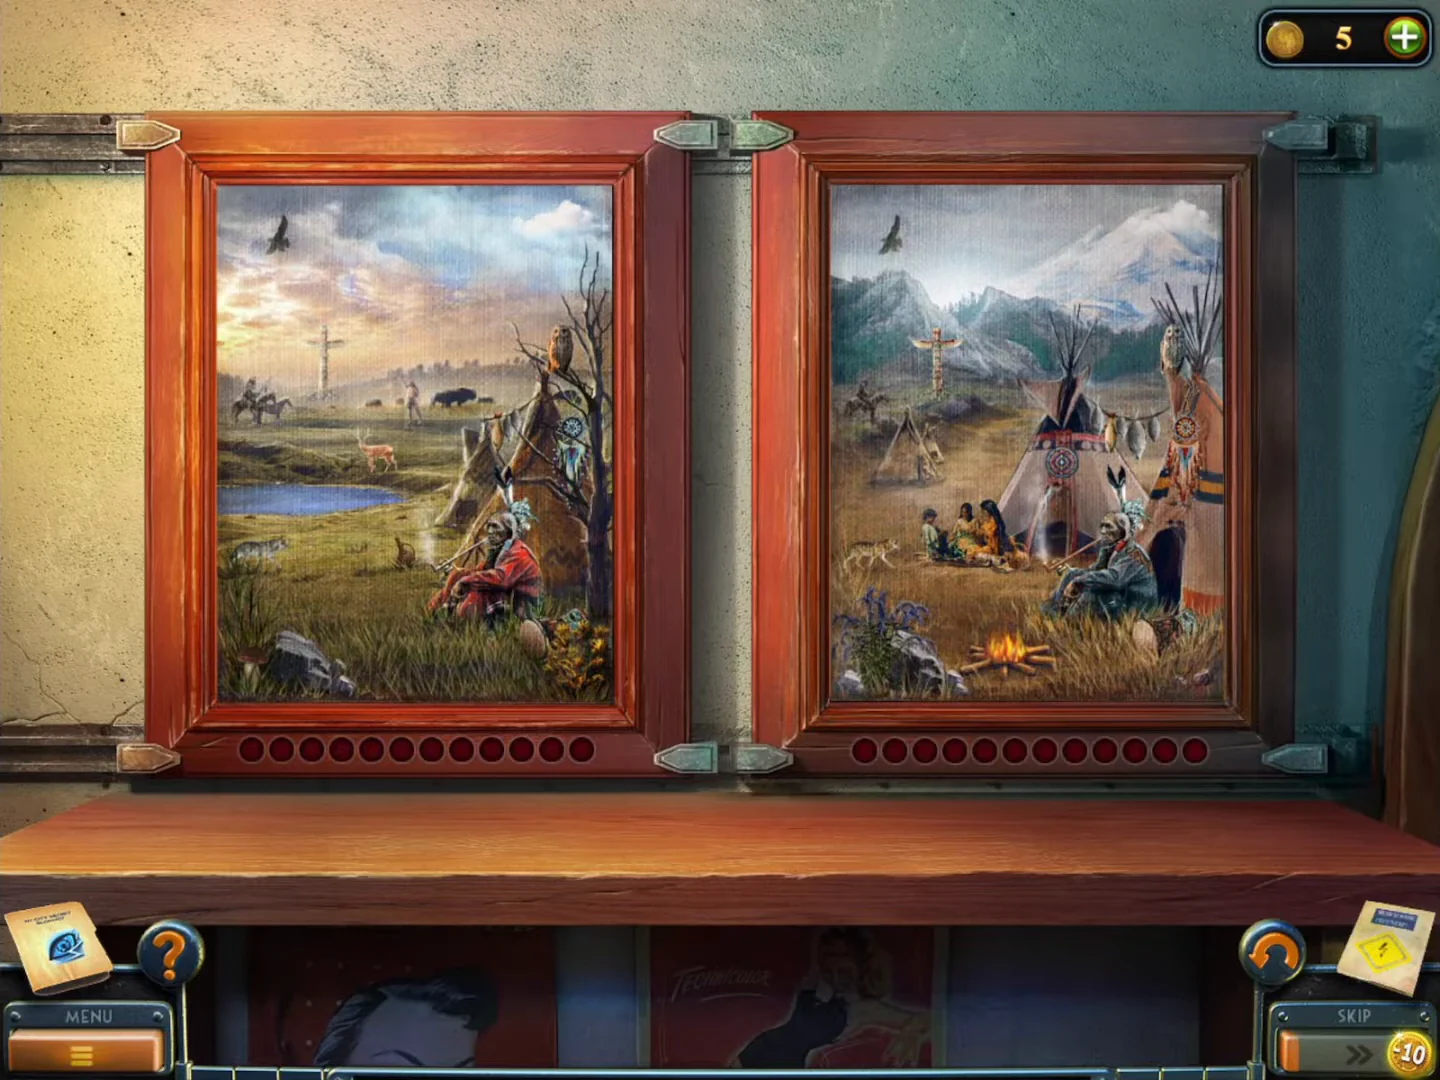
Bishop has lost his memory. He hands you a business card holder and points you to his study.
- Collect the collection item on the upper-left edge of the ceiling arch above the left wardrobe, and the Beyond object on the lower-right floor, right of the sunken armchair area.
- Open the Business card holder in the inventory to get the Pass (Laura James, Level 3 clearance).
- Zoom into the framed painting on the right brick wall. Take the Picture, then the Money from the niche behind it.
- Travel to the souvenir shop and zoom into the teal wall shelf with an empty frame. Place the Picture to start a find-the-differences puzzle in reverse: mark the 12 objects that appear in both paintings - eagle in the sky, cloud, totem pole, rider on horseback, owl, dreamcatcher, feather ornament, jug, wolf, smoking chief, boulder and drum. For the "Erudite" achievement (finish the pictures mini-game without extra clicks), tap only these 12 shared objects and nothing else.
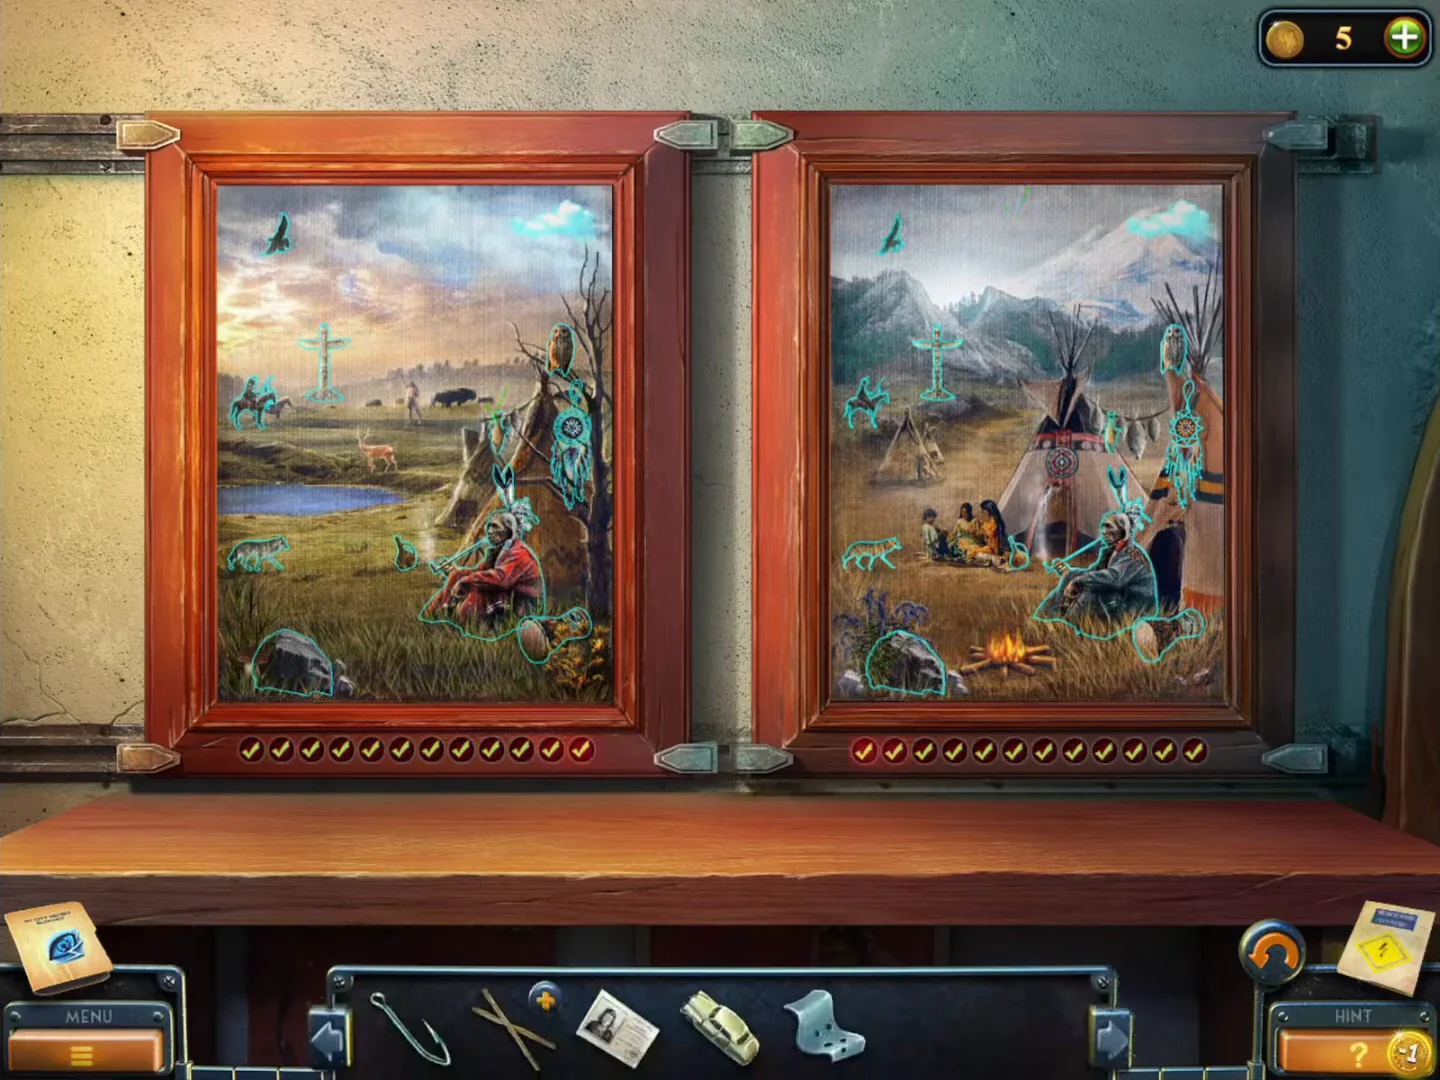
Completed: all 12 shared objects are outlined and both counters below the frames are full. - Take the Fishing line and the yellow Toy car from the niche, then combine the Hook with the Fishing line in the inventory.
Bishop's office and the punch card
Travel back to the HQ and enter Bishop's office (aquarium room).
- Collect the Beyond object on the left bookshelf (middle left) and the collection item near the centre, at the left end of the aquarium.
- Zoom into the glass panel above the aquarium (below the bookshelf) and take the Toy car standing there.
- Hidden slide 1/20: click the slide at the lower right of the aquarium frame. A "Slides found" counter appears.
- Lower the Hook on fishing line into the aquarium and fish out the Key.
- Unlock the desk drawer with the Key. Take the Stencil from the drawer seam and the Hammer inside.
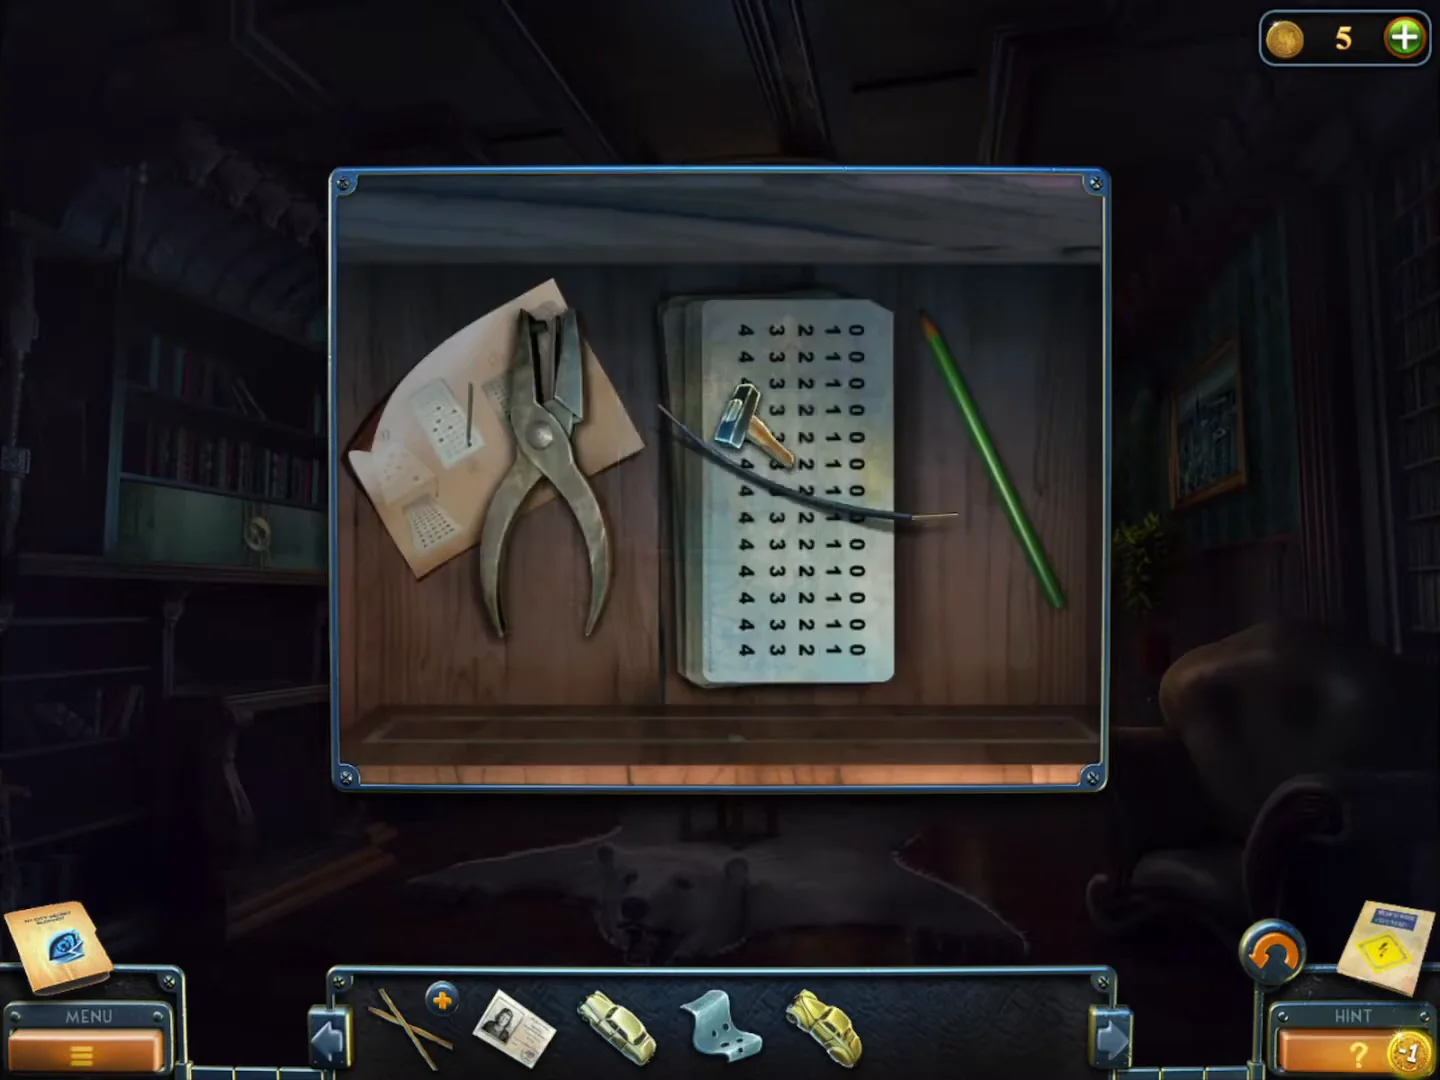
- Zoom into the open drawer with the numbered card, green pencil and hole punch. Take the loose Wire lying across the card (it is under the Hammer you just took); keep it for the lava lamp later. Lay the Stencil on the card, shade the holes with the pencil and punch each marked spot to get the Punch card.
Secret tunnel and the ladder
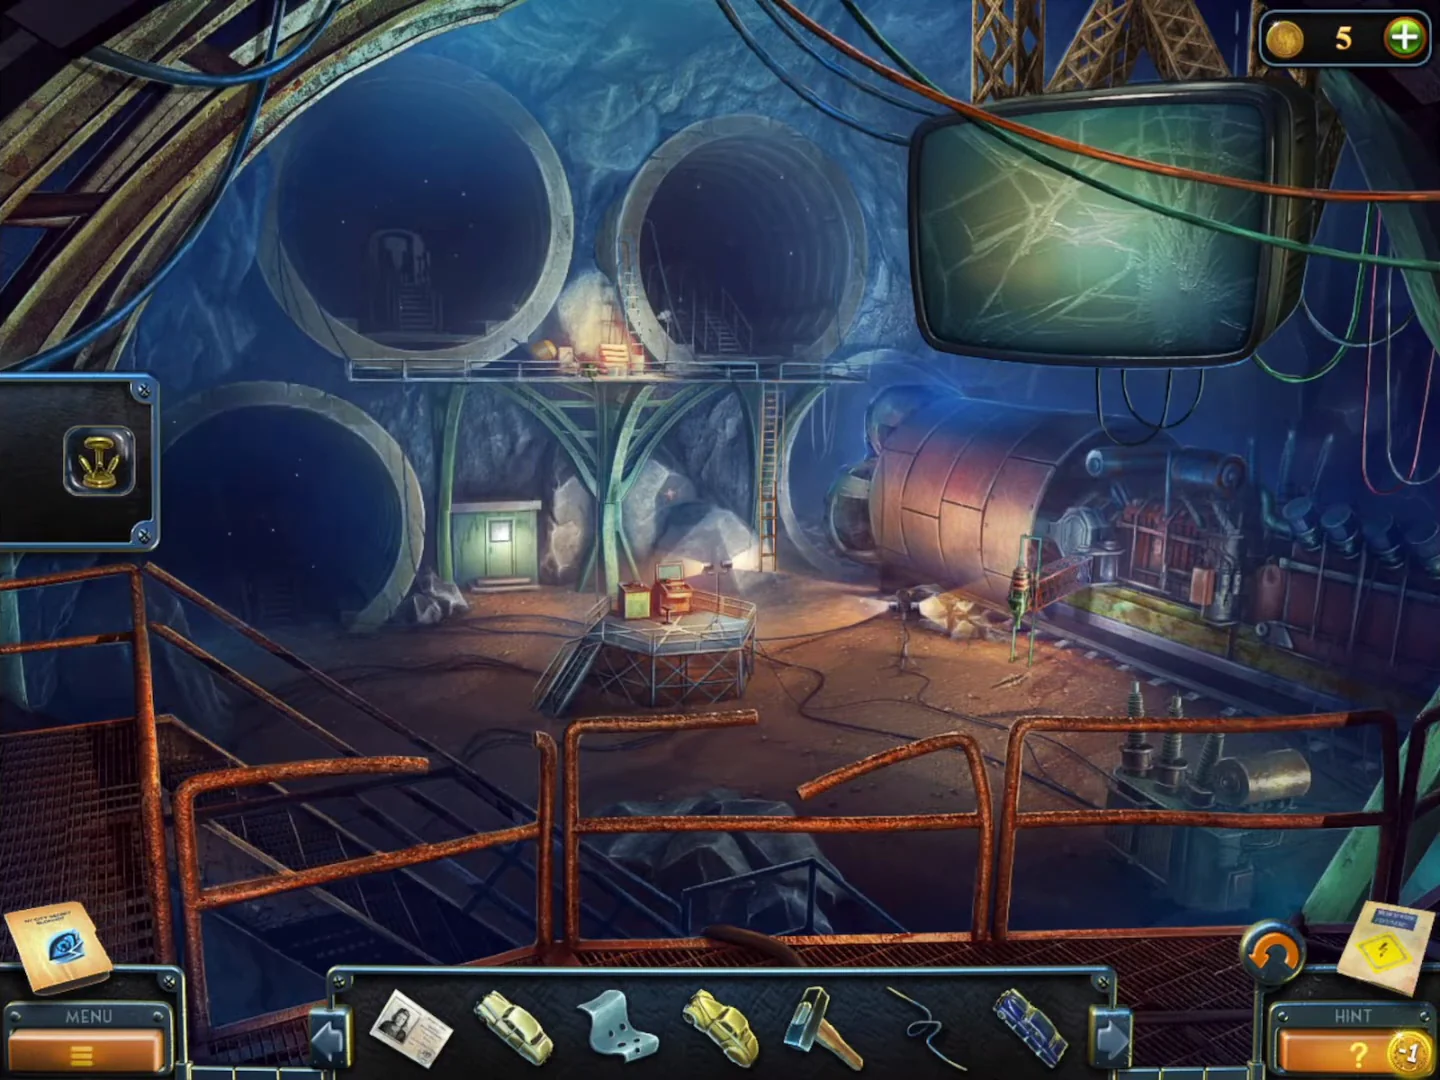
Go through the HQ hall into the drilling cavern with the round tunnel tubes.
- Collect the Beyond object (a small brown canister on the side of the train engine at the right) and the collection item (a brass stand with leaf-shaped legs on the walkway between the stair railings at the lower left).
- Zoom into the control console desk and take the Toy car lying on it.
- Insert the Punch card into the console slot; the upper-left tube lights up.
- Take the Short planks from the rubble by the walkway support and the Long planks leaning on the green booth door on the lower walkway.
- Open the Long planks in the inventory. Add the Short planks as rungs, then the Nails, then use the Hammer on each nail to make the Ladder.
- Place the Ladder on the broken cage ladder in the upper area. Zoom into the boots and bucket on the walkway and take the Toy car there (the iced bucket is needed later), then open the train cab door and press the green button on the cab console.