Infirmary and power for the substation
The skeleton in the dark substation holds the key to the prison infirmary. A new collection set (x of 9) starts in the infirmary.
- In the dark substation, zoom into the skeleton and take the Med Station key from its chest. Take the Pipe as well.
- Go to the cellblock and open the ground-floor door marked with a green cross using the Med Station key.
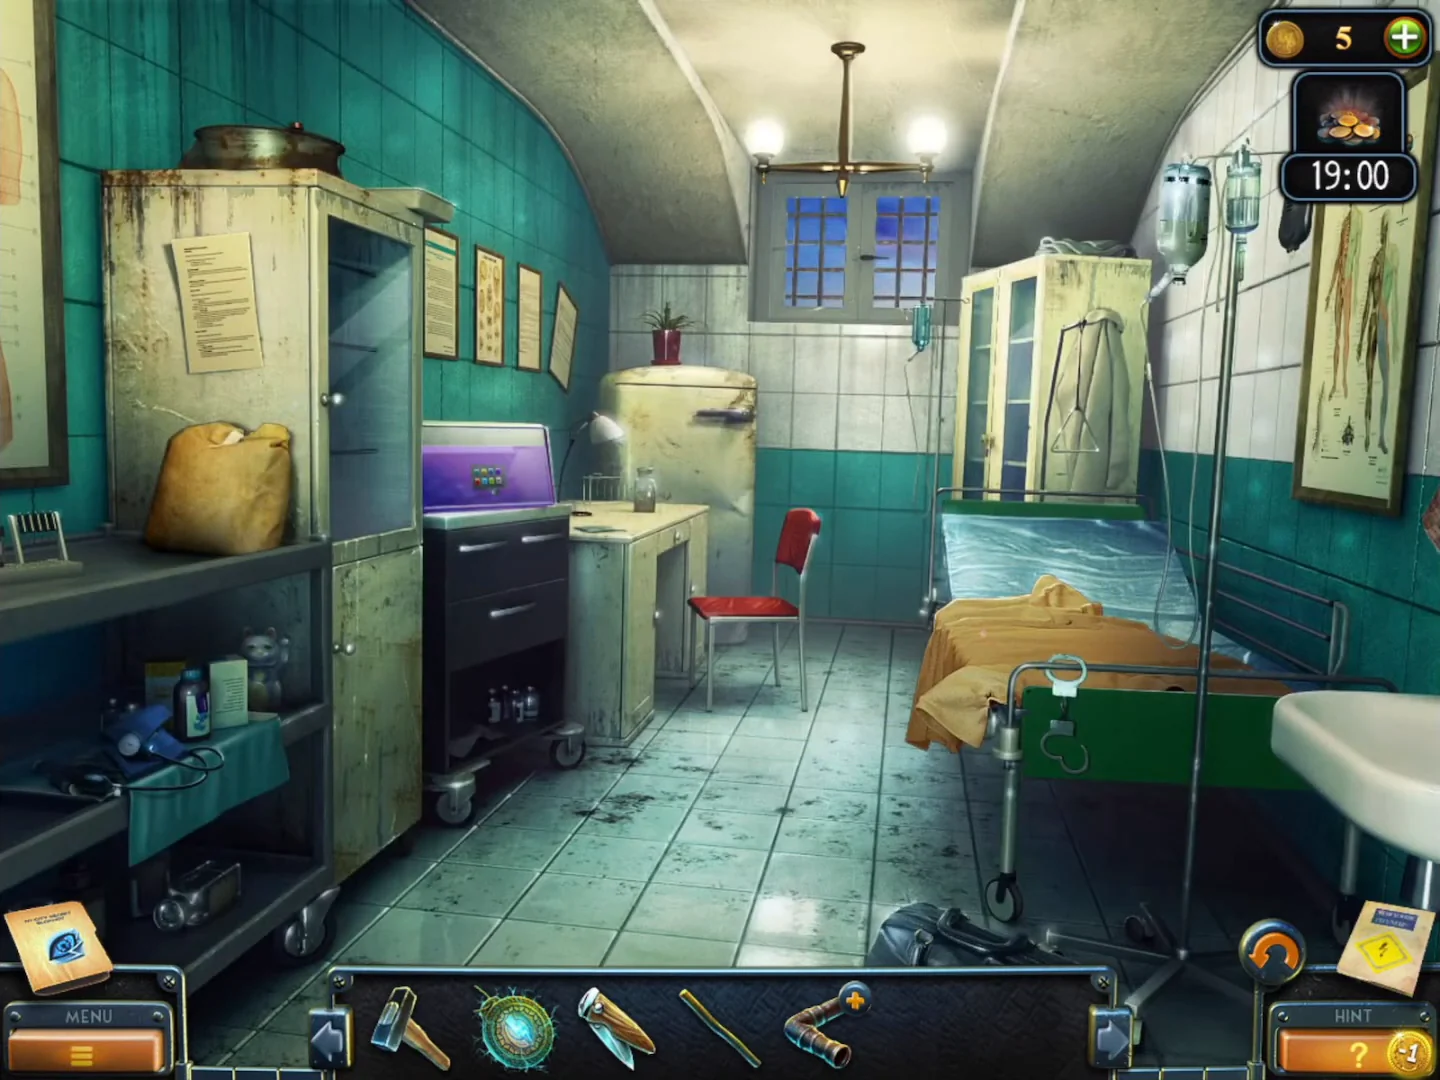
- Collect the Beyond object on the right wall below the anatomy chart (beside the drip stand) and the collection item on the lower shelf of the left cabinet.
- Zoom into the hospital bed mattress. Click the hidden slide, then cut the seam with the Jackknife and take the Wire.
- Search the paper bag of fruit on the left counter and take the Nail.
- In the inventory, combine the Pipe, the Stick and the Wire to make the Pipe and stick.
- In the substation, zoom into the overhead breaker lever at the upper left and pull it down with the Pipe and stick. The lights come on and the task "Broken Device" is added.
- Collect the Beyond object and the collection item at the right end of the main control console.
Substation side room
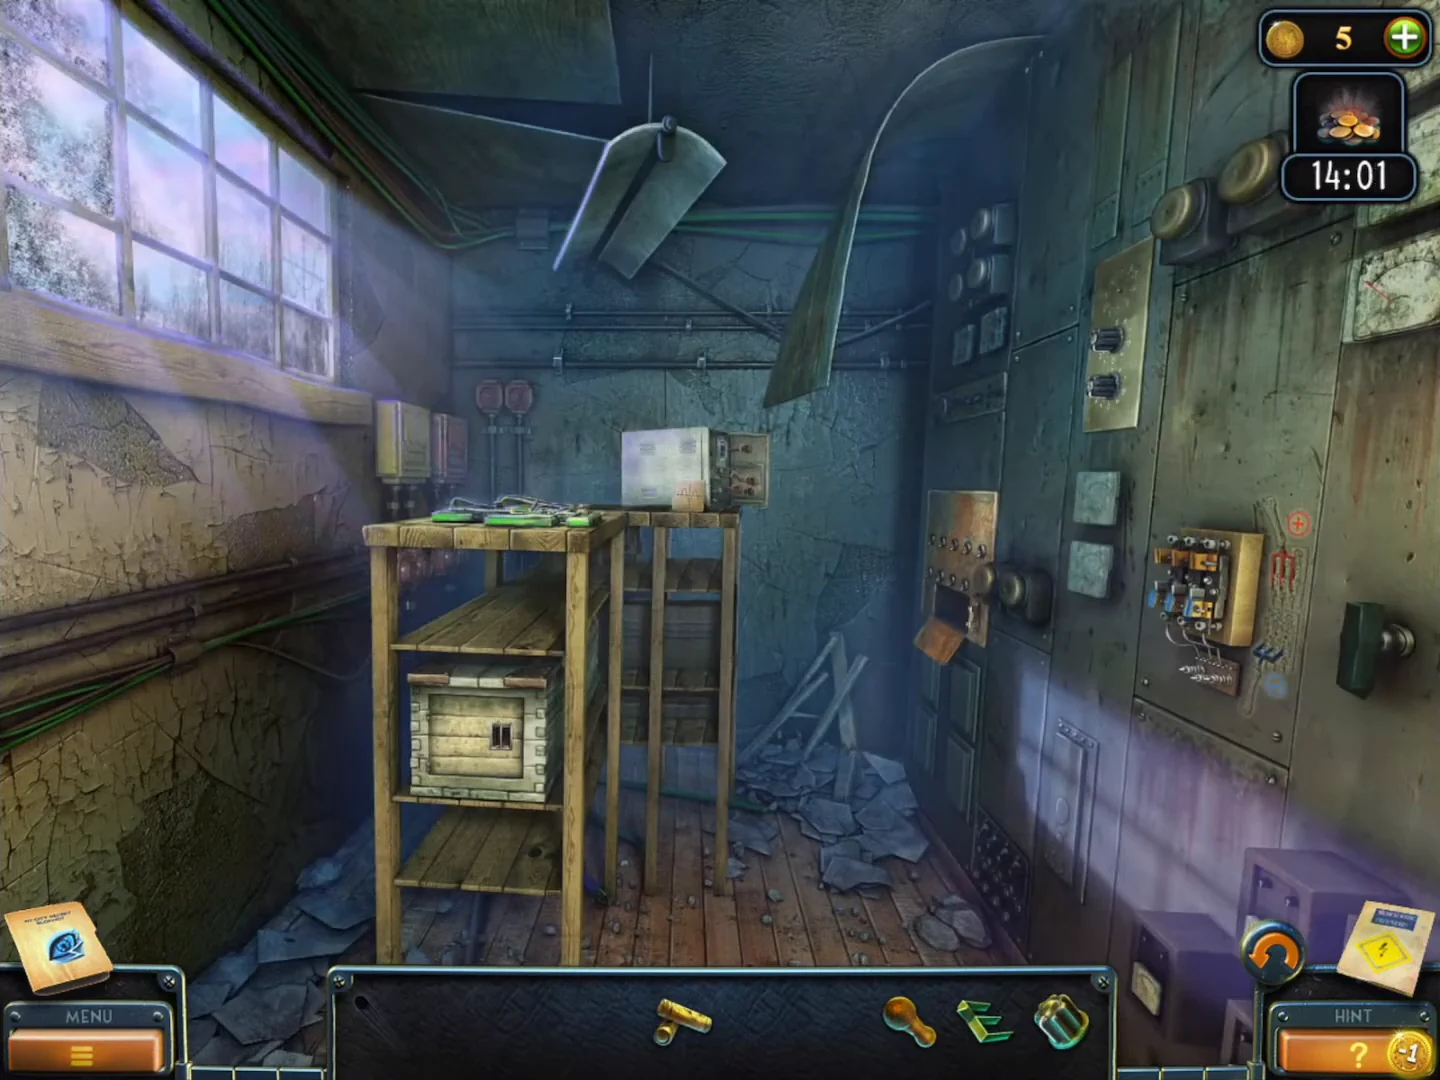
The side room is an interactive scene: the inventory bar is replaced by ten outlines, and only the objects found in this room can be used here. They are the Rag, Wooden handle, Glass fuse, Wire, Insulating tape, oscillograph screen, Metal lever, Batteries, knob and Bulb. Most are found as the room's puzzles open.
- Enter the side room. Take the Rag lying on the left windowsill and the Wooden handle (an orange handle) on the middle shelf of the workbench. Zoom into the top of the workbench and take the Glass fuse and the green Wire lying beside the circuit board. The "Sniper" achievement is for finding 3 items within 3 seconds in a Hidden Objects Puzzle: take the Wooden handle, then open the bench top and immediately take the Glass fuse and the Wire to earn it here.
- Zoom into the frosted window. Take the Insulating tape (a blue roll) from the sill, then wipe the glass with the Rag. A sine-wave drawing appears: it is the clue for the oscillograph.
- Zoom into the lever panel (two rows of five levers) and put the Glass fuse in the empty fuse holder at its lower right. The task reads "Move all levers in the correct order." Counting levers left to right, pull Top 4, Bottom 2, Top 1, Bottom 3, Top 2, Bottom 4, Bottom 5, Top 3, Top 5, Bottom 1.CODET4 B2 T1 B3 T2 B4 B5 T3 T5 B1
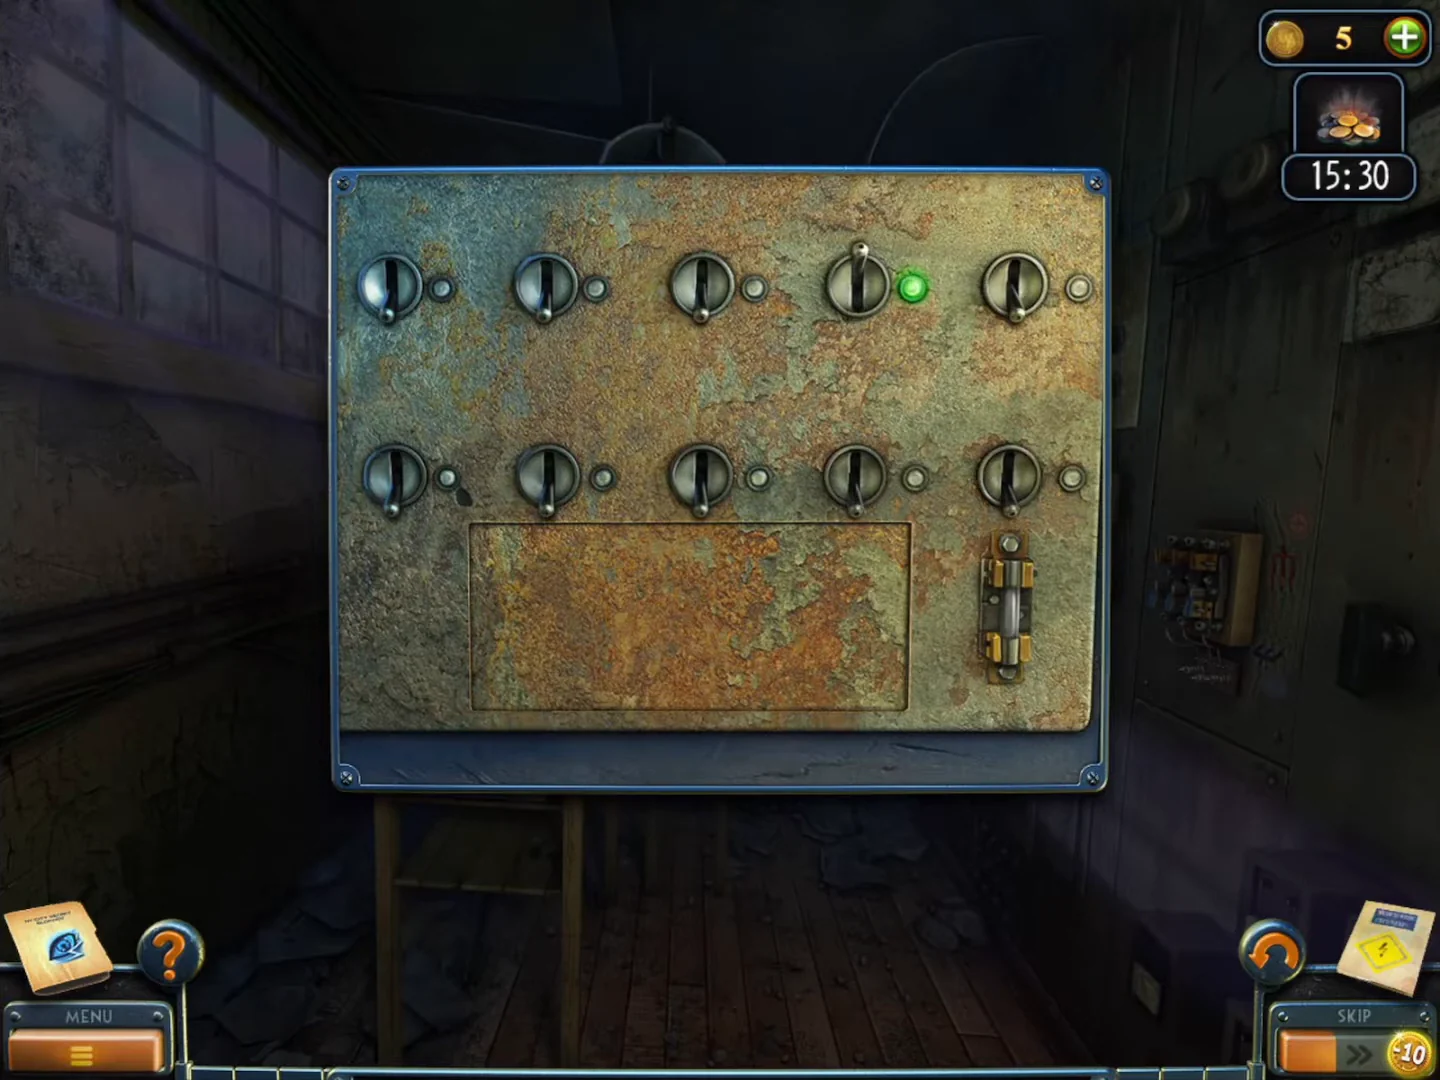
The lever panel with the Glass fuse fitted at the lower right and the first lever (Top 4) already pulled: each correct pull lights the lamp beside it. The compartment opens in the rusty plate below the levers. - Take the oscillograph screen (a square glass plate) and the Metal lever (a forked metal piece) from the compartment that opens below the levers.
- Zoom into the knife switch on the right wall. Fit the Metal lever on the switch, attach the Wooden handle to it and pull the switch up.
- Zoom into the oscillograph on the workbench. Connect the Wire to the right terminals, wrap the joint with Insulating tape and fit the oscillograph screen.
- Turn the two knobs until the green trace matches the drawing from the window (two tall peaks). Take the Batteries and the knob from the cabinet that opens below.
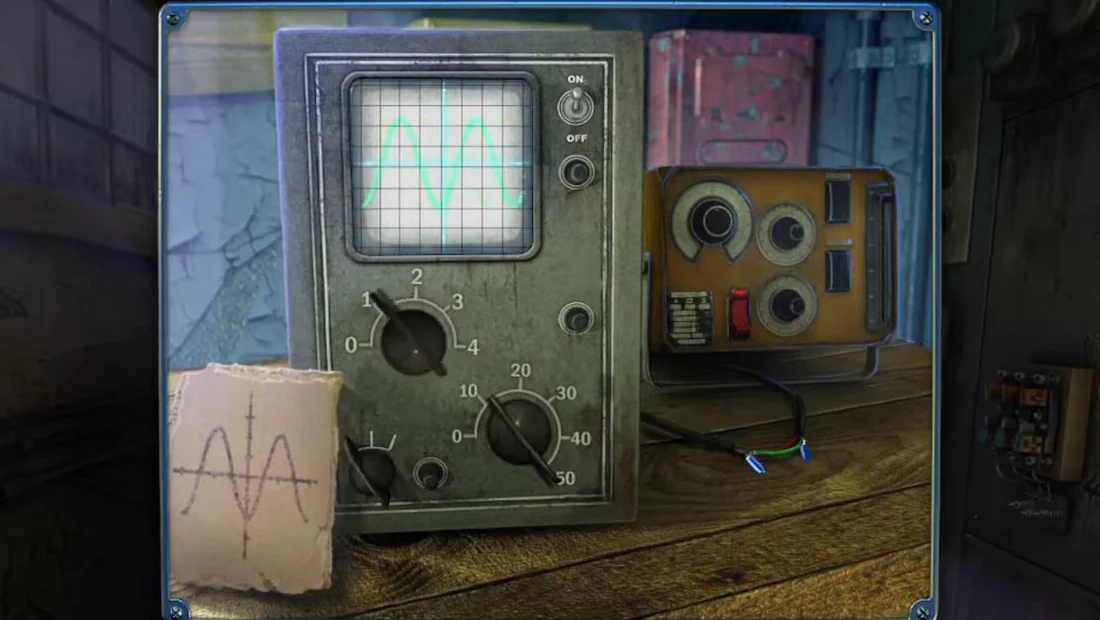
Matched: the trace shows the same two tall peaks as the drawing from the window. - Put the Batteries in the slot of the wooden box on the bench shelf and take the Bulb.
- Screw the Bulb into the ceiling lamp above the bench. The lit wall shows 3 / 5 / 8.CODE358
- Zoom into the dial panel behind the bench, fit the missing knob on the top dial and set the dials to 3 (top), 5 (middle) and 8 (bottom). Take the Switch.CODE358
- In the substation control room, put the Switch in the empty slot at the lower right of the meter console and flip it. Take the Rubber gloves and the Chandelier part, and read Samuel Brodie's personnel note. The task "Skeleton" is completed.
Chandelier and the lava lamp
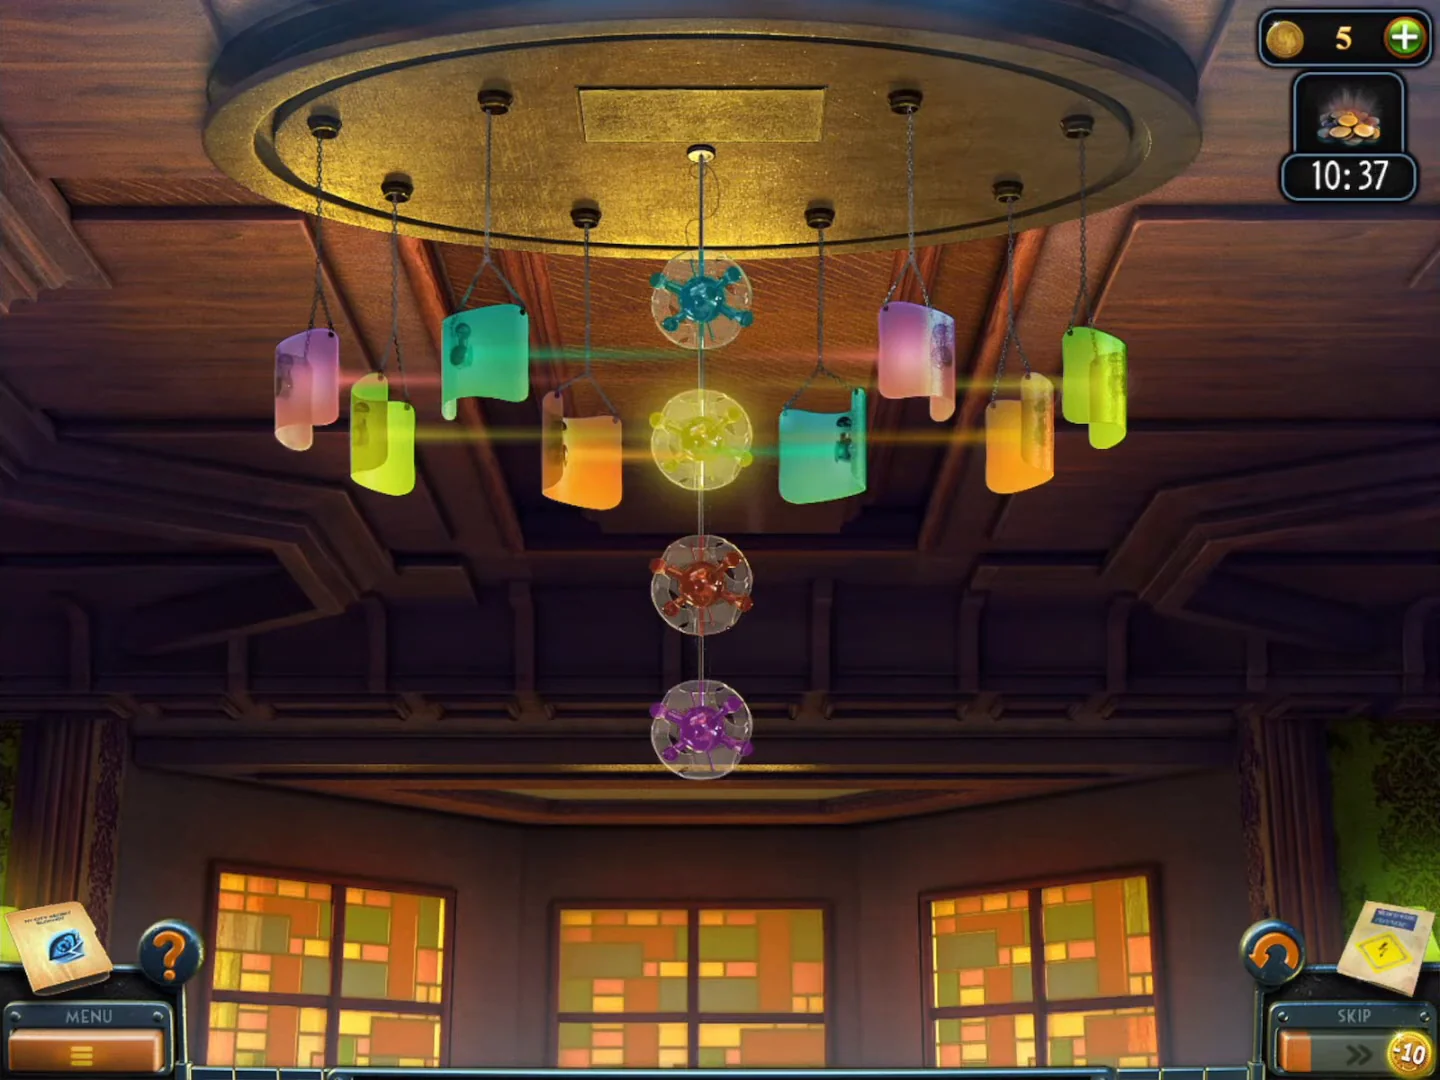
Use the Chandelier part on the study chandelier to get the Magnetic key. Then talk to Bishop about the flooded tunnel route and power up the lava lamp.
- Go to the study at White Stone HQ (the aquarium room). Click the small stool beside the aquarium to move it under the chandelier.
- Zoom into the chandelier and attach the Chandelier part. Four coloured discs hang on the central chain (teal at the top, then yellow, orange, pink at the bottom) with eight coloured shades, two of each colour. Raise or lower the shades so both shades of each colour hang level with the disc of the same colour.
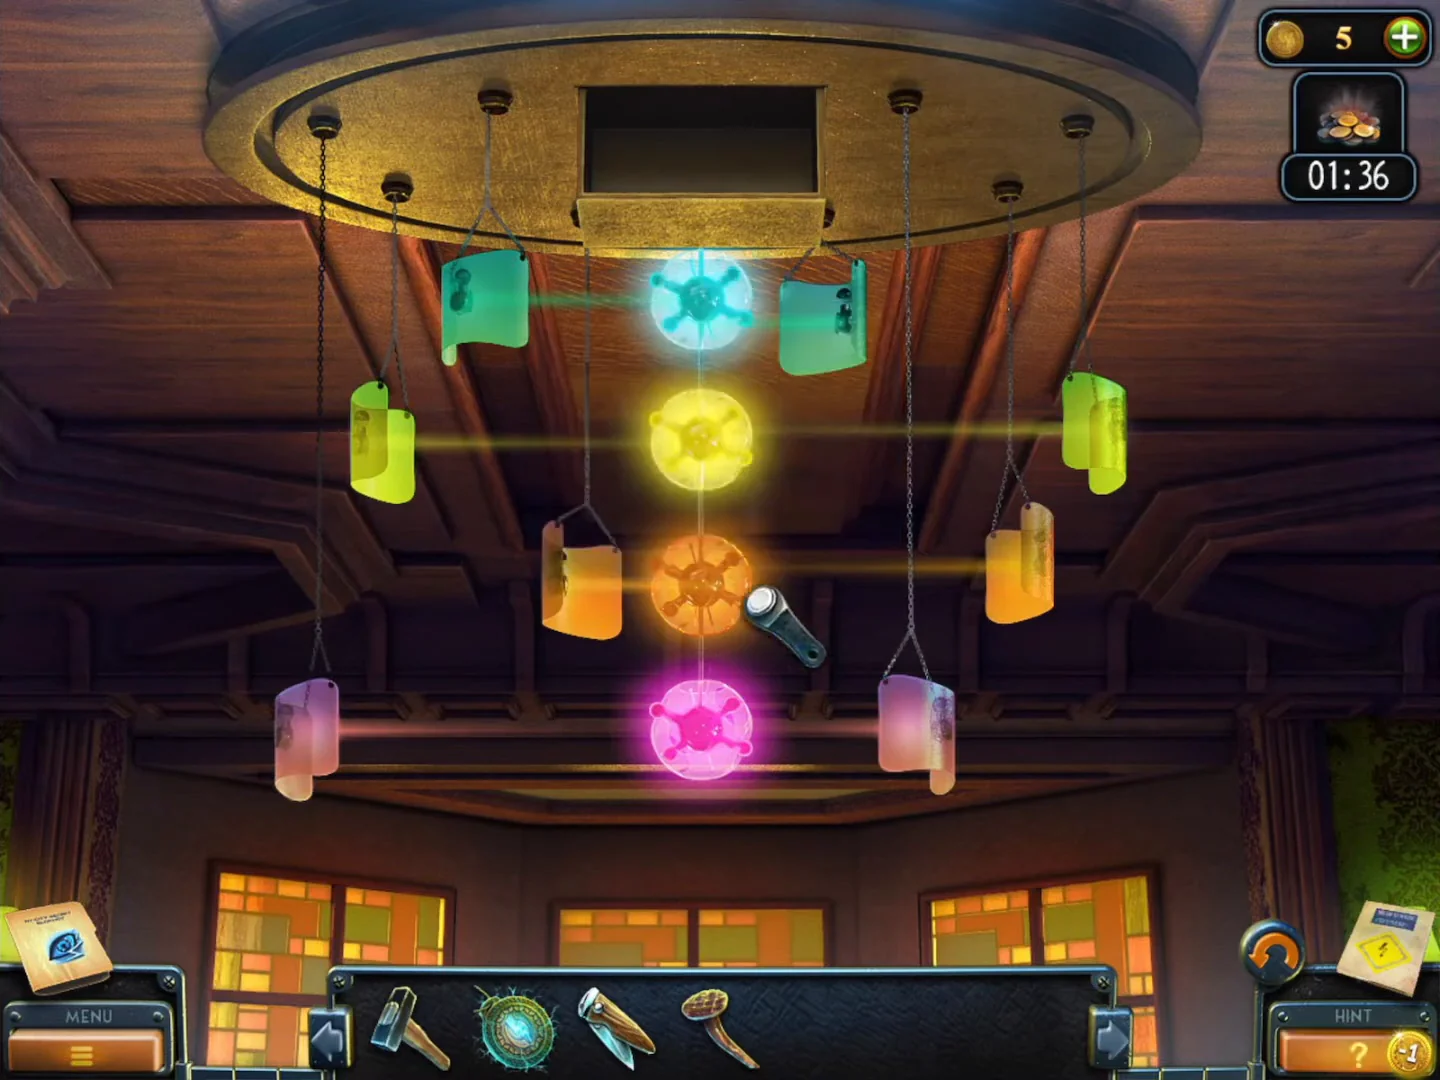
Solved: both shades of each colour hang level with the disc of that colour, all four discs light up and the Magnetic key drops out. - Take the Magnetic key from the ceiling compartment that opens.
- Talk to Bishop in the HQ hall. He has the Brodie family's address, but the tunnel route there is flooded: the pumps must be repaired. You receive a Punch card and the task "Flooded Tunnel".
- Zoom into the glass lava-lamp tube on the right side of the hall. Connect the floor socket to the base with the Wire from the HQ desk drawer and press the base switch wearing the Rubber gloves. As the spheres rise, six white arrows show on the glass: RIGHT, LEFT, DOWN, DOWN, RIGHT, UP. Remember them for the arrow cabinet in the subway corridor.
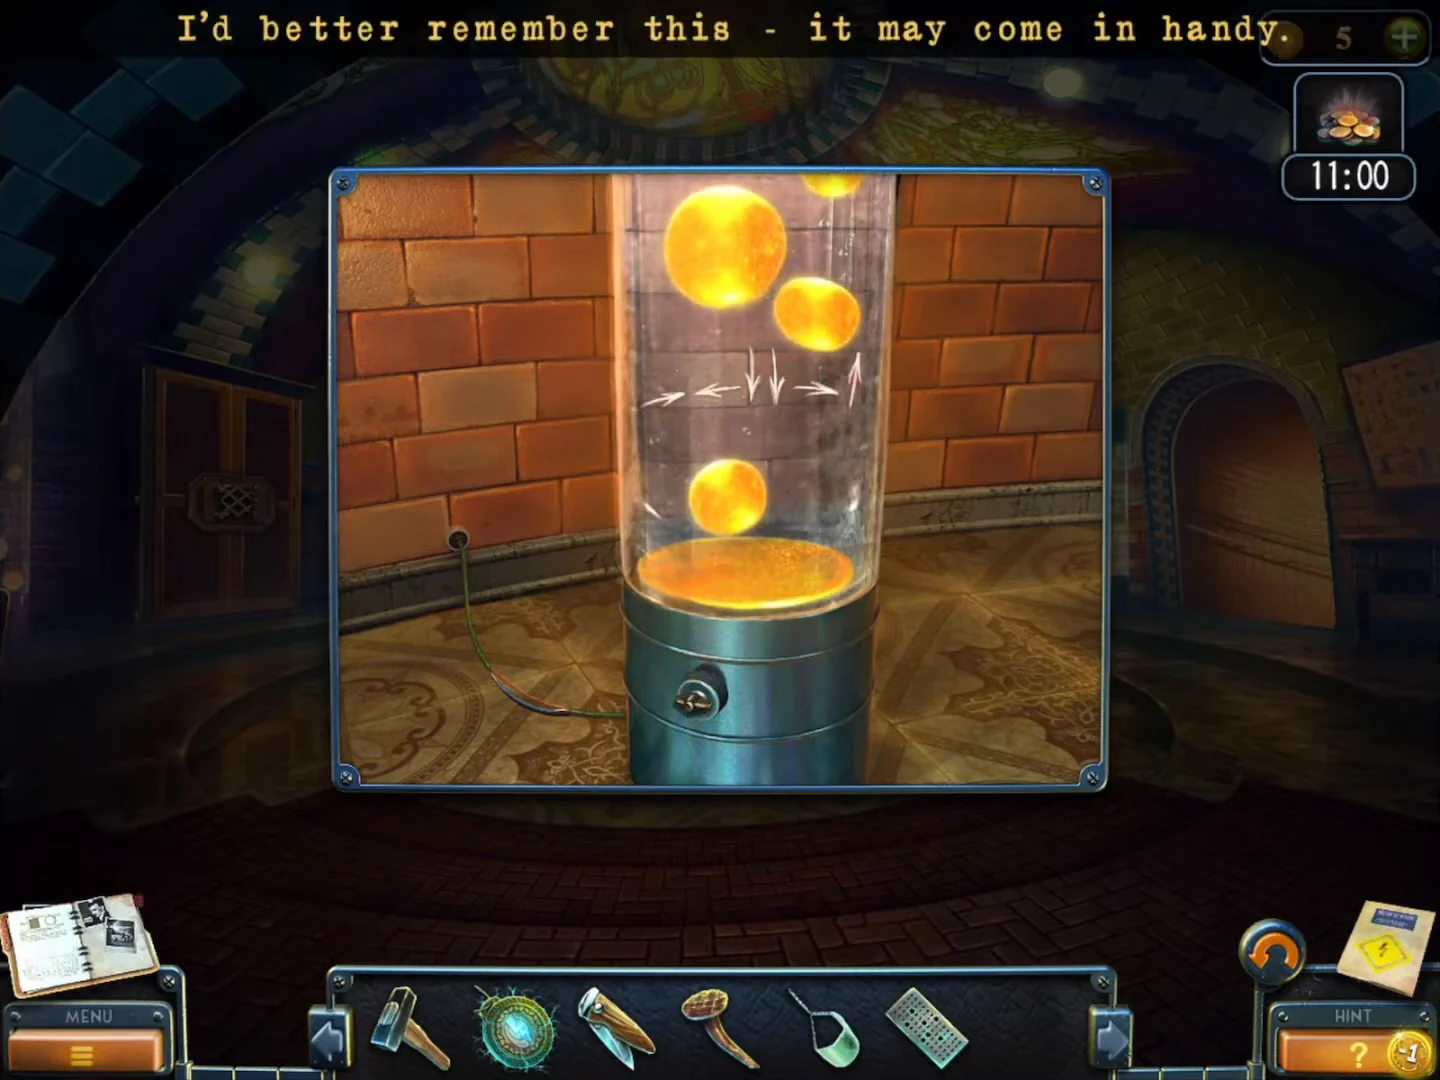
The lava lamp running: the arrows on the glass read RIGHT, LEFT, DOWN, DOWN, RIGHT, UP (the arrow-cabinet code).
Subway corridor and the bird-track doors
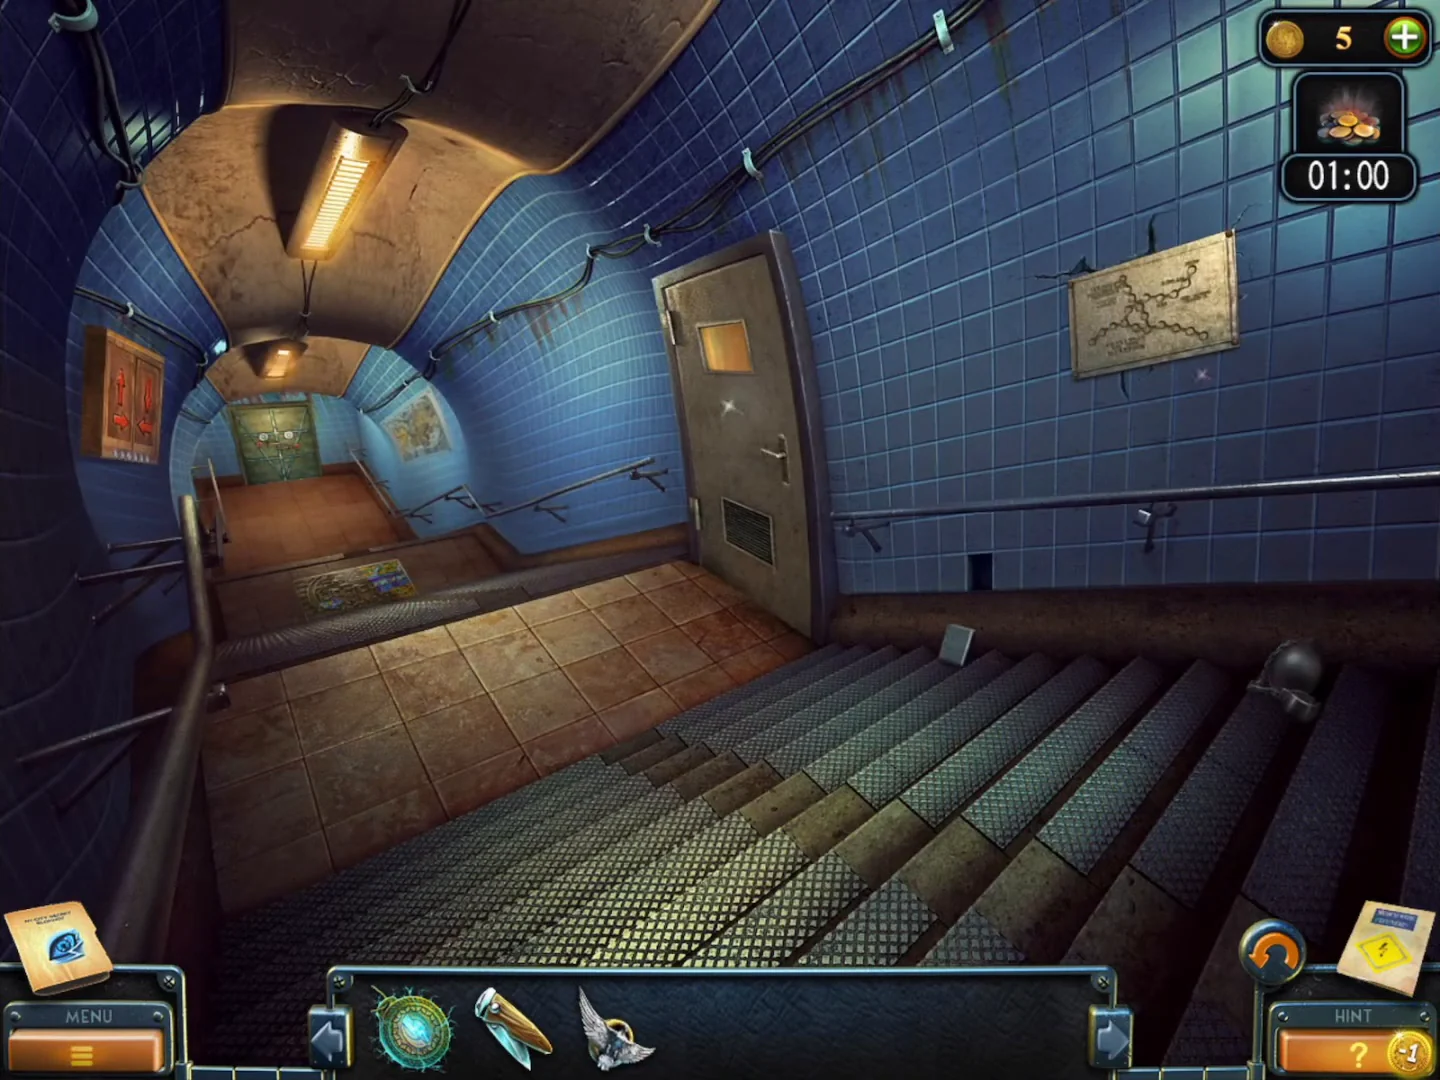
The Magnetic key opens a subway stair corridor. Two wall puzzles there give you the Key and the Protective suit.
- In the tunnel cavern, zoom into the control console on the walkway and insert the Punch card from Bishop into the green slot below the button rows. The screen now marks the lower-left tunnel route with a red water sign and that tunnel entrance lights up red: the route to the Brodie house is set, but it is flooded until the pumps are repaired.
- In the tunnel cavern, use the Magnetic key on the green metal door lock. The lamp turns green and the door opens onto a subway stair corridor.
- Collect the collection item on the steps at the lower right and the Beyond object on the poster at the far end of the left tunnel wall.
- Zoom into the wall cabinet with two doors and press the arrows RIGHT, LEFT, DOWN, DOWN, RIGHT, UP. Each correct press lights a lamp; the left door opens.CODERIGHT LEFT DOWN DOWN RIGHT UP
- Take the hidden slide and the Green pebbles from the cabinet shelf.
- Zoom into the marked tile on the right stairwell wall and break it with the Nail and the Hammer. Take the Pigeon figurine.
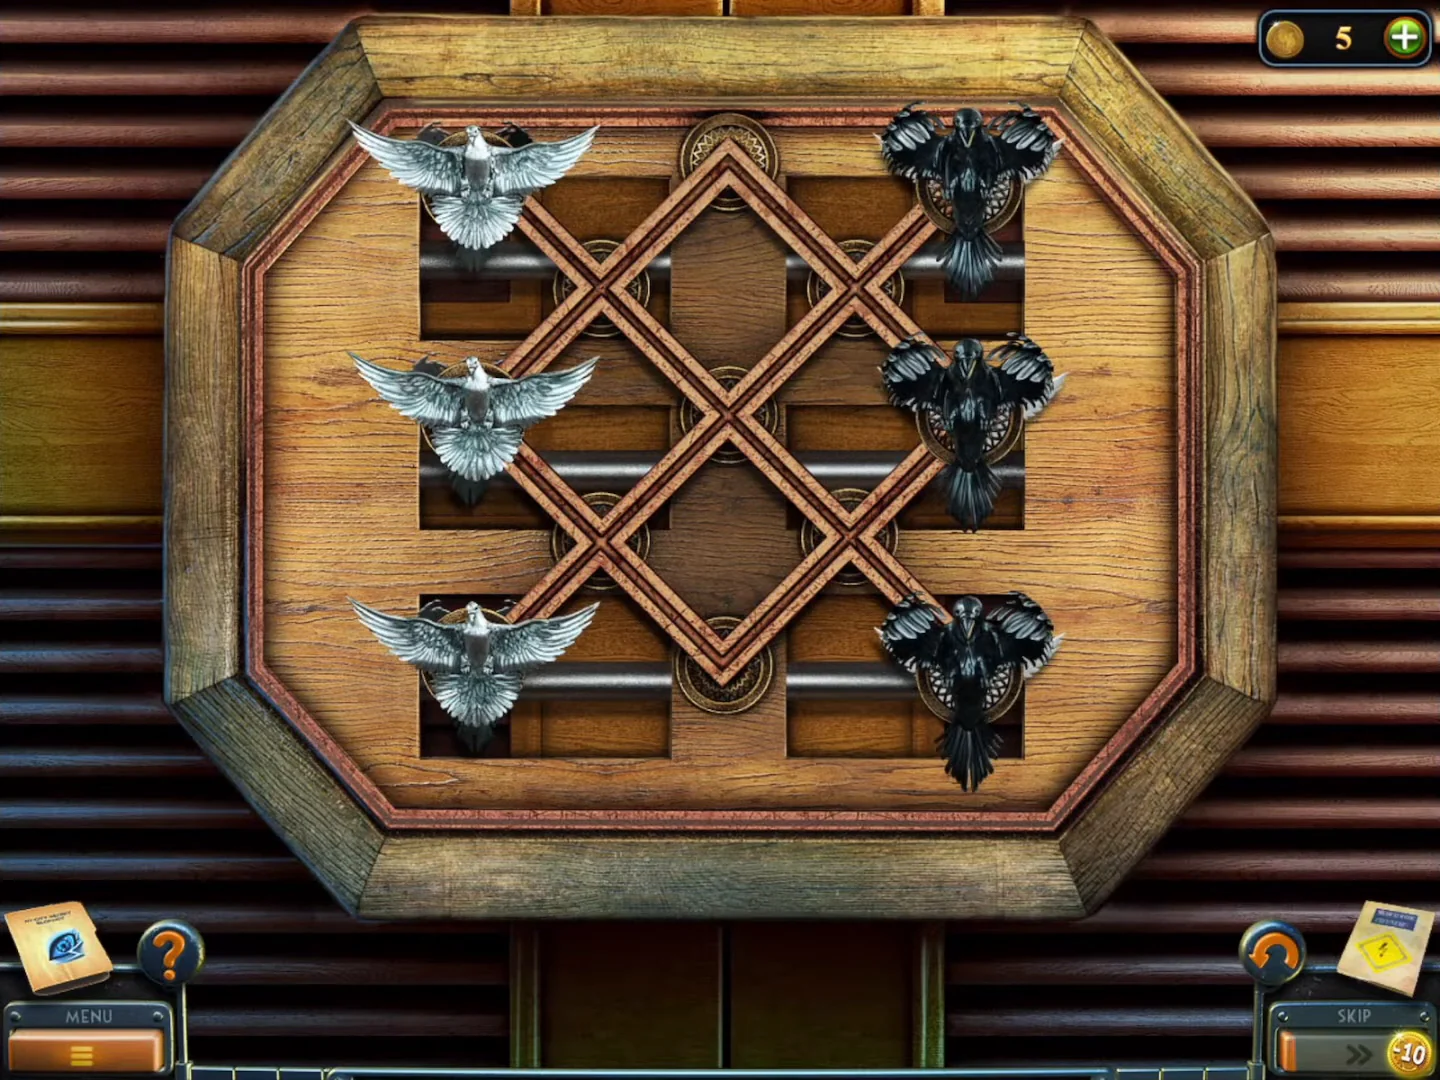
The bird-track doors in the HQ hall: white pigeons on the left, black crows on the right. - In the HQ hall, zoom into the wooden double doors on the left wall and place the Pigeon figurine on the empty middle stand of the left column. Three white pigeons now sit in the left column and three black crows in the right column. Apart from these six spots there are three free spots: top centre, bottom centre and the middle, where the two long diagonals cross. Four brass rings sit where the tracks cross between them. Click a bird, then click a free spot it can reach along the tracks through empty spots; every move below hops over one empty ring. Goal: crows in the left column, pigeons in the right. A 12-move solution (left/right column spots numbered 1 top, 2 middle, 3 bottom): pigeon left 1 to middle; pigeon left 2 to top centre; crow right 2 to bottom centre; pigeon top centre to right 2; crow right 1 to top centre; crow top centre to left 1; crow bottom centre to left 2; pigeon left 3 to bottom centre; pigeon middle to right 1; crow right 3 to middle; pigeon bottom centre to right 3; crow middle to left 3.
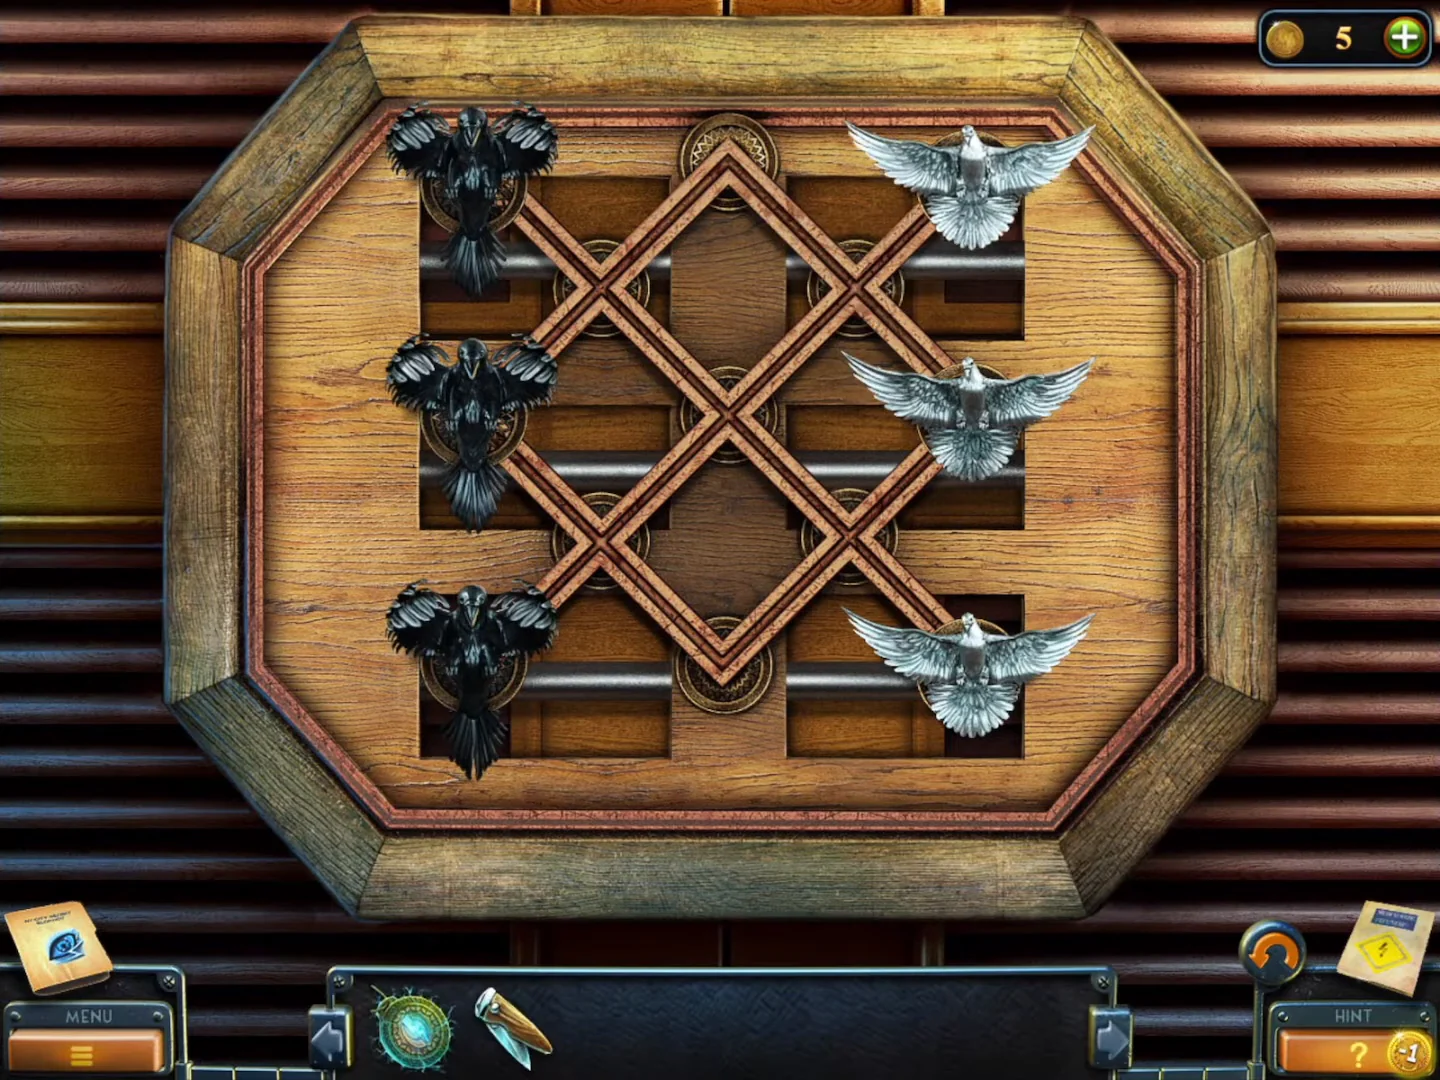
Solved: the crows and pigeons have swapped columns. - Behind the doors, take the hidden slide (on a shelf upright), the Key and the Protective suit.
HQ storage room
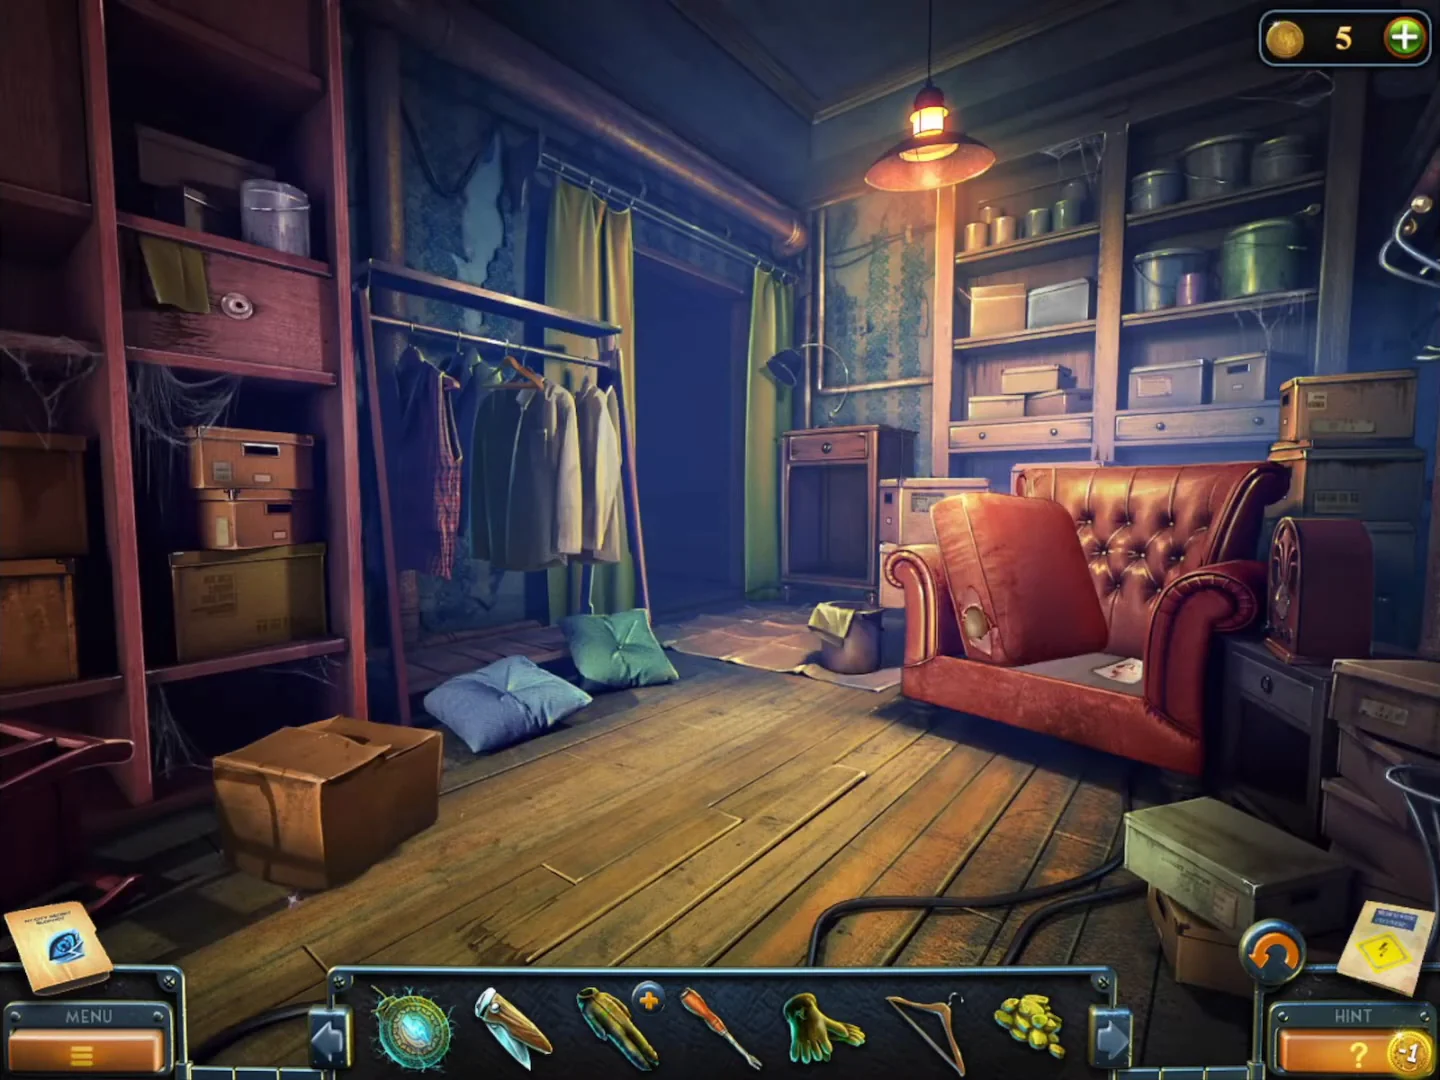
The Key opens the storage room in the HQ hall, which holds the Gas mask and several useful tools.
- Unlock the door on the right side of the HQ hall with the Key and enter the storage room.
- Collect the Beyond object at the left end of the top shelf on the back shelving and the collection item at the right edge of the shelving, behind the sofa's right arm.
- Search the coat rack: take the Yellow pebbles from a jacket pocket and the Hanger.
- Lift the cushion of the red sofa and take the Nail puller.
- Zoom into the gap under the low cabinet. Take the protective Gloves lying on the right (they are not the Rubber gloves from the substation), then drag out the Knob with the Hanger.
- Fit the Knob on the drawer of the red cabinet on the left and open it. Take the Gas mask and the hidden slide.
Metro poster and the floor mosaic
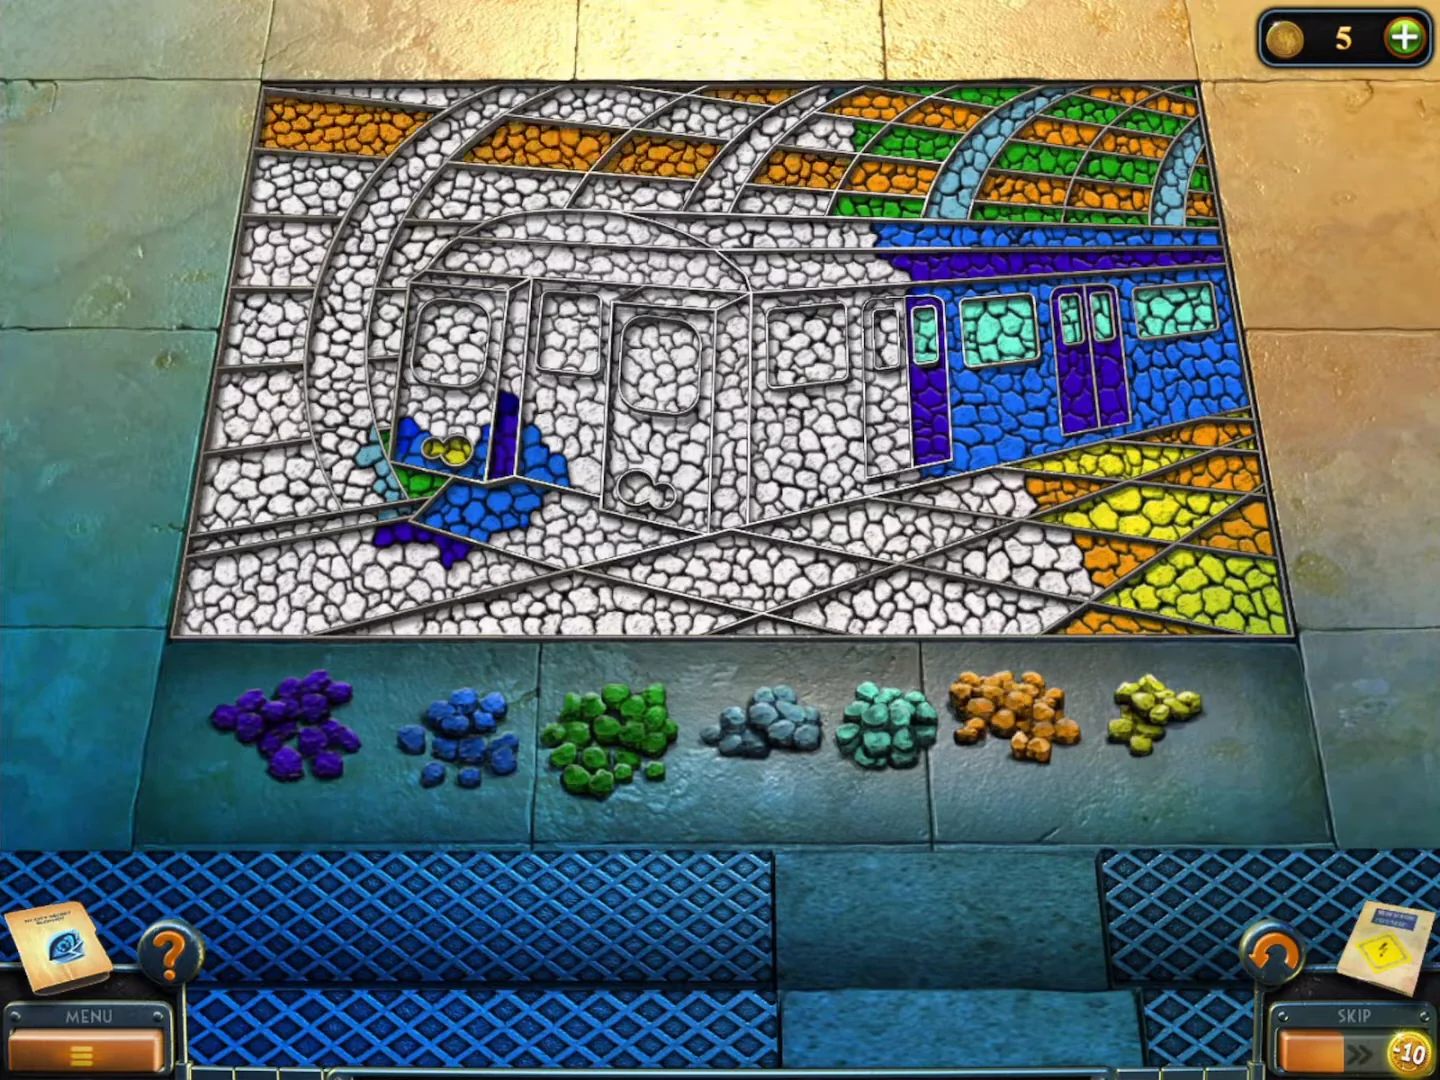
The Nail puller frees the metro poster in the subway corridor. Completing the floor mosaic gives the Boots for the Hazmat suit.
- In the subway corridor, pull the four corner nails out of the metro-map poster with the Nail puller. Take the Lightbulb and the Diagram from the hole behind it.
- Open the Protective suit from the inventory and add the Gloves and the Gas mask to it. Laura still needs special boots.
- Zoom into the floor mosaic at the bottom of the stairs and put the Green and Yellow pebbles in the empty trays.
- Fill each uncoloured area of the subway-train picture with the pebble colour that matches its surroundings: blue train body, purple door panels, teal windows, grey-blue tunnel arch, orange and green side stripes, and yellow, orange and purple on the platform.
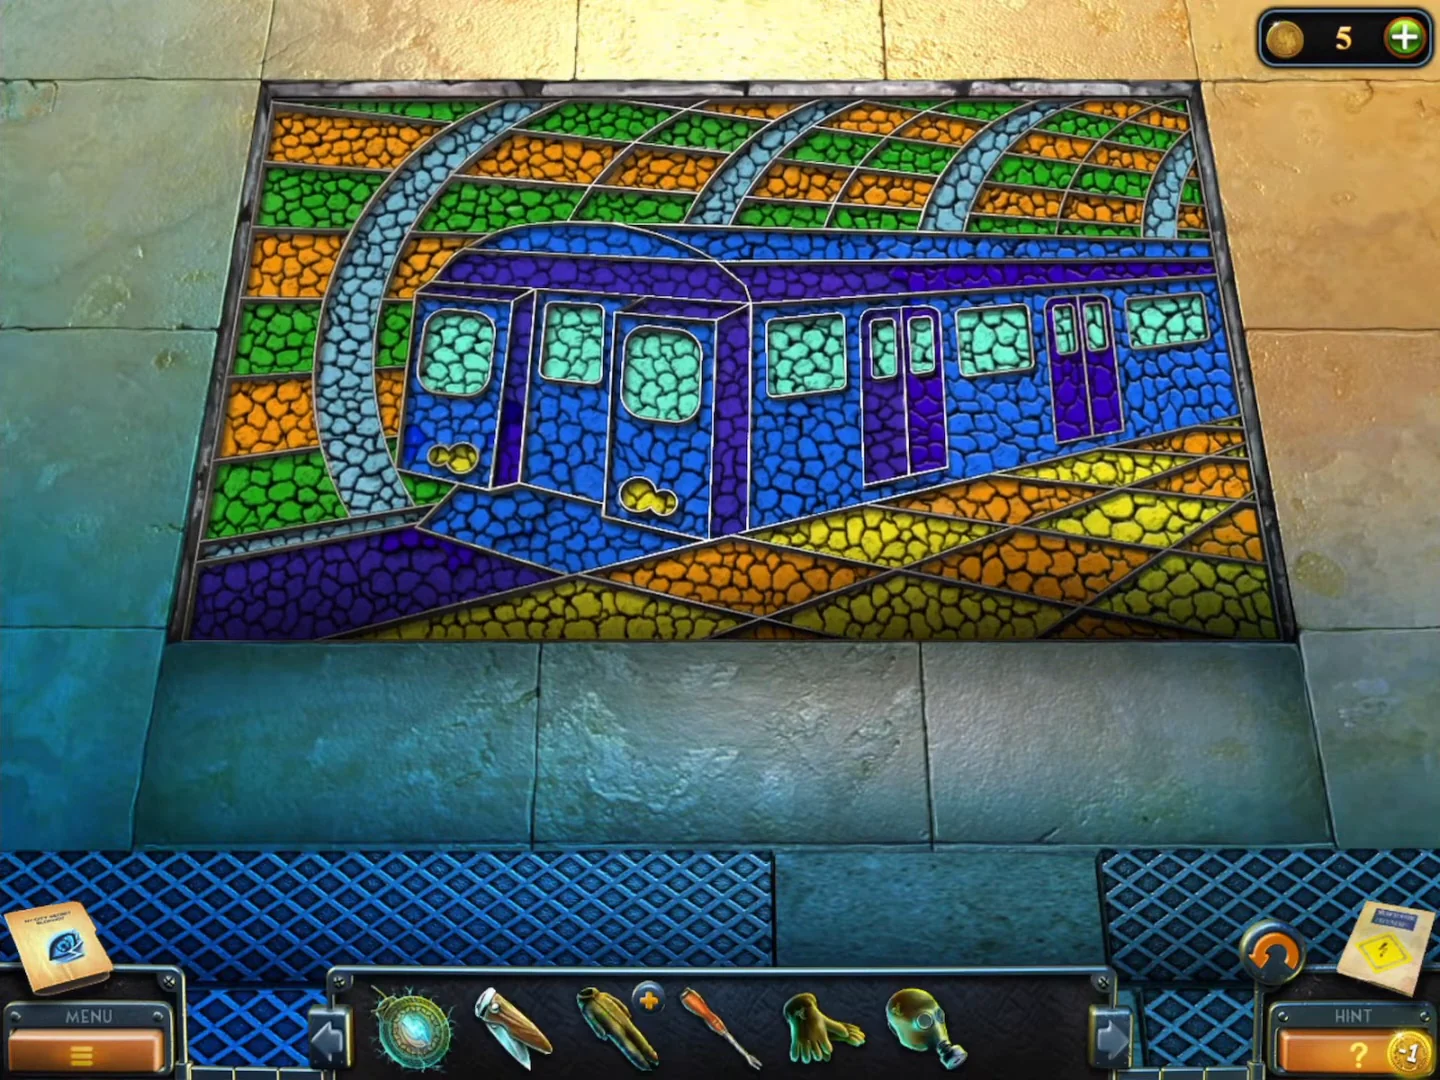
Completed: every area of the train picture is coloured. - Take the Boots from the floor cache and add them to the Protective suit to complete the Hazmat suit.
Boiler room and the washroom
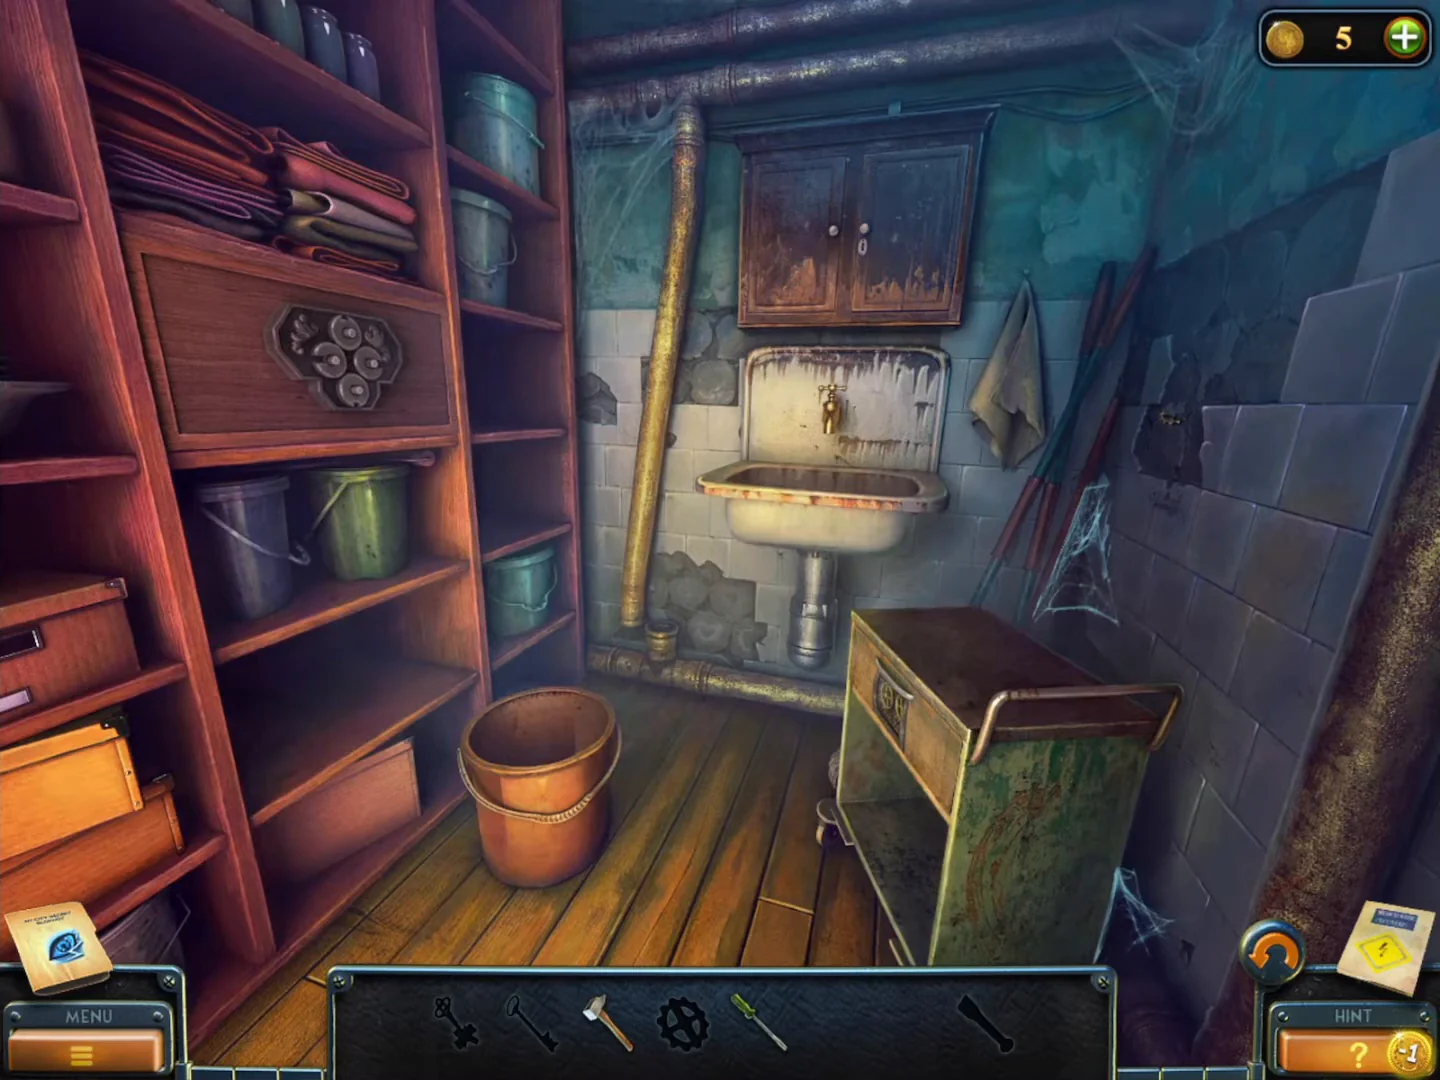
Wearing the Hazmat suit, enter the boiler room. Then clear the HQ washroom for the Drill bit and the Shovel.
- Open the metal "BOILER ROOM" door in the subway corridor while wearing the Hazmat suit.
- Take the green Knob from the pipe fixture and fit it on the fan unit dial. The hot valve cannot be turned yet: "I need a tool."
- In the HQ storage room, screw the Lightbulb into the lamp by the sofa. The back area (the washroom) becomes accessible.
- The washroom is a silhouette scene: only items found in this room can be used here. Take the Hammer (lower left shelf), the yellow Rag from the bucket in the foreground and the Dissolvent (on the green cart). Zoom into the pipe under the sink and take the green Screwdriver lying beside the pipe and the Dirty gear from the open pipe end.
- Zoom into the sink, spray the rusted tap with the Dissolvent and wipe it with the Rag. Clean the Dirty gear under the running tap.
- Unscrew the bolts of the drain grate with the Screwdriver and take the Key.
- Open the wall cabinet above the sink with the Key and take the Chisel. Break the cracked wall tiles with the Chisel and the Hammer to get a second Gear.
- Place both Gears in the gear lock on the green cart's drawer and take the red ornate Key.
- Open the four-lobed lock on the red shelf unit on the left with the ornate Key and take the Drill bit.
- Back in the boiler room, pick up the Shovel.
Monkey wrench and the welding patch
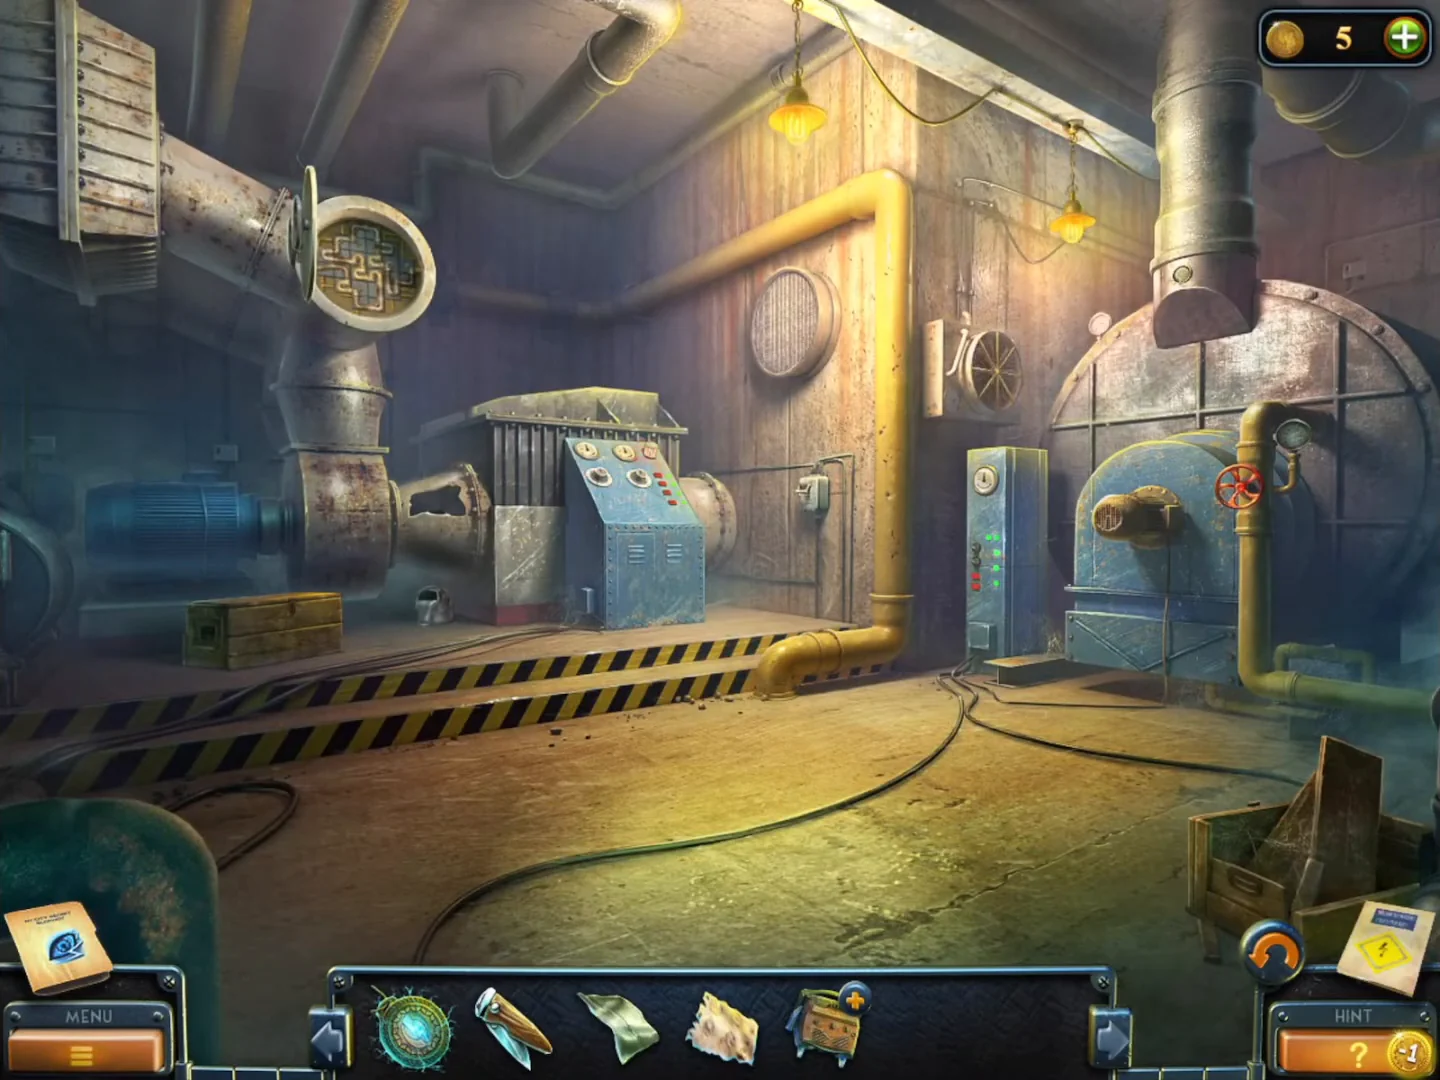
Dig up the Monkey wrench, cool down the boiler room and weld the ruptured duct shut.
- In the tunnel cavern, fit the Drill bit on the drill rig to drill a hole, then dig it out with the Shovel and take the Monkey wrench.
- In the boiler room, turn the hot yellow valve with the Monkey wrench. The pressure drops and the steam clears.
- Collect the collection item on the floor at the far left by the crate and the Beyond object on the left wall by the blue motor.
- Zoom into the welding mask at the lower centre. Take the Welding device parts, the Piece of metal, the round metal Knob inside the hole in the duct and the hidden slide on the small plate right of the vent hole.
- Assemble the Welding device parts (cable, torch and electrode) in the inventory.
- Zoom into the ruptured duct, cover the hole with the Piece of metal and weld along the seams with the Welding device.
Dial door, wine cellar, pipes and the gauge panel
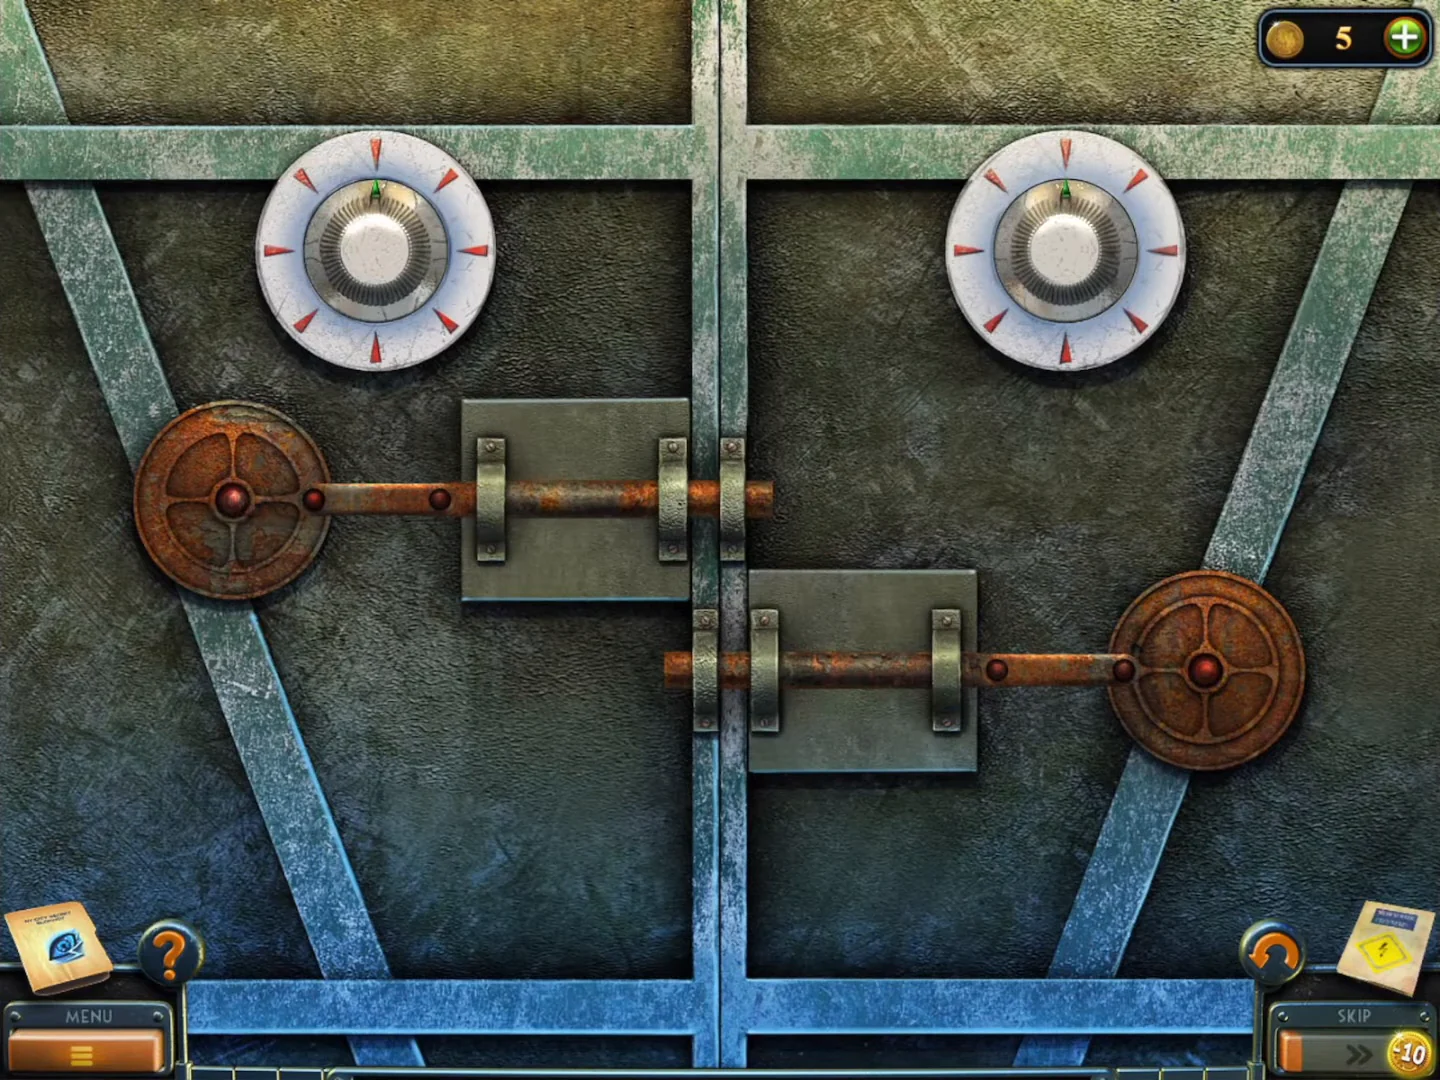
Open the steel dial door and explore the wine cellar behind it, then solve the boiler-room pipe puzzle and the gauge panel.
- In the subway corridor, use the round Knob from the boiler room on the steel door at the far end to complete its dial mechanism, then zoom into the door with two white dials and two crank-driven bolts. Turn each dial until its green mark points at the right red marker: the left dial at the lower-left marker (about 8 o'clock) and the right dial at the right-hand marker (3 o'clock). Both bolts pull back and the door opens.
- Go through the door and down into the wine cellar. Take the Insect repellent on the left near the wine racks.
- Collect the Beyond object (a small wooden keg on the rope line at the upper right, just right of the hanging lantern and above the red cloths) and the collection item (a bowler hat) on the floor left of the barrel.
- In the HQ storage room, spray the bugs on the cardboard box (front left) with the Insect repellent and take the Handwheel.
- In the boiler room, fit the Handwheel in the empty socket on the round hatch of the left tank and turn it. Inside is a pipe puzzle: click a pipe tile to rotate it a quarter turn (tiles do not change places). Turn the tiles until one continuous pipe runs between the brass pipe end on the left edge (lower) and the brass pipe end on the right edge (higher). The finished pipe winds through the whole cross-shaped board, using the top two tiles, the central S-bends, the bottom two tiles and the U-bend on the right; compare the solved board image.
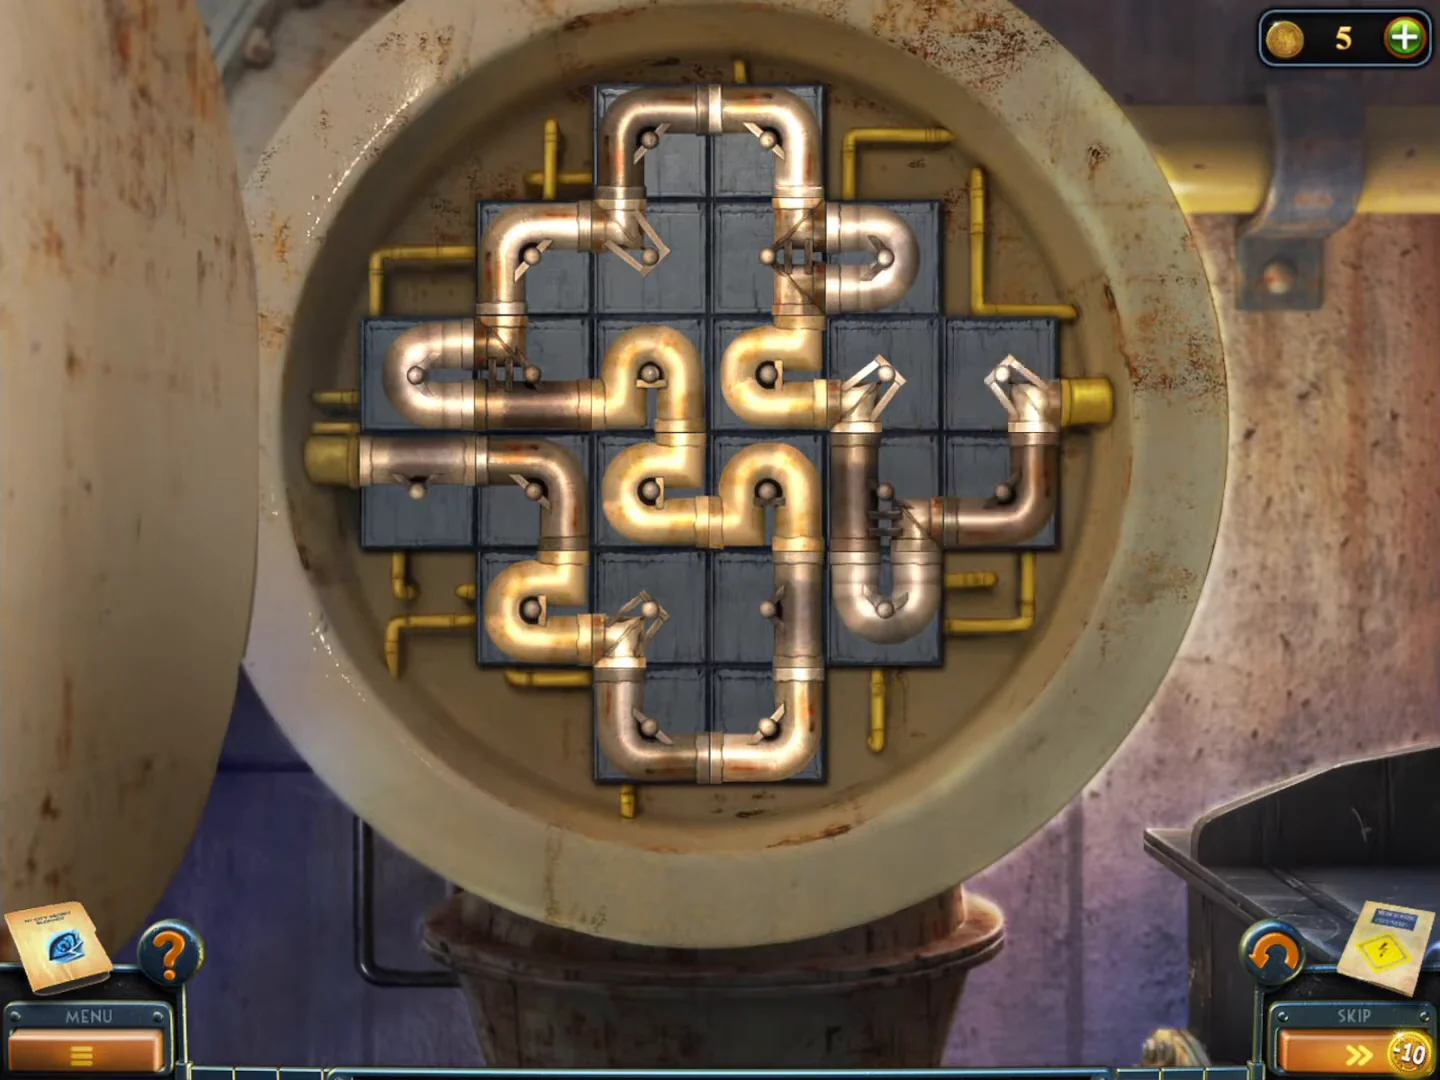
Solved pipe puzzle: one continuous pipe from the brass end on the left to the brass end on the right. - Zoom into the gauge panel and place the Diagram. Turn the left knob to about 7 o'clock and the right knob to 3 o'clock so both gauges match the diagram, then press the red buttons in the order 2nd, 4th, 1st, 3rd (counting from the top).CODEButtons 2-4-1-3
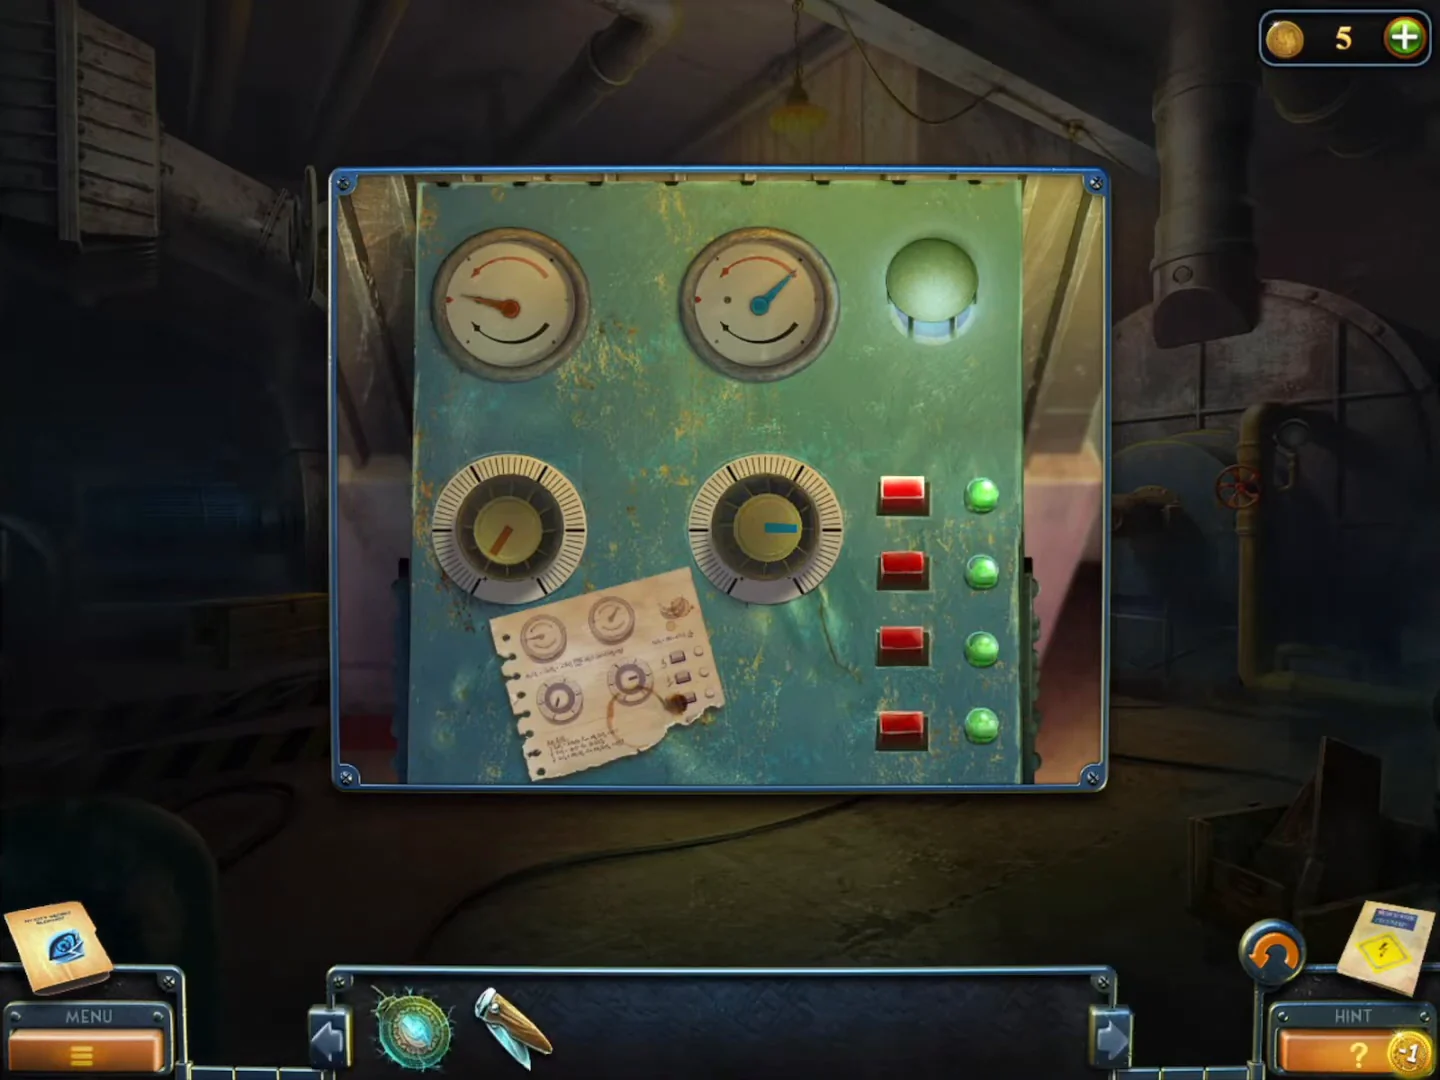
The gauge panel set to match the diagram, with all four lamps green.