Prison yard and cellblock
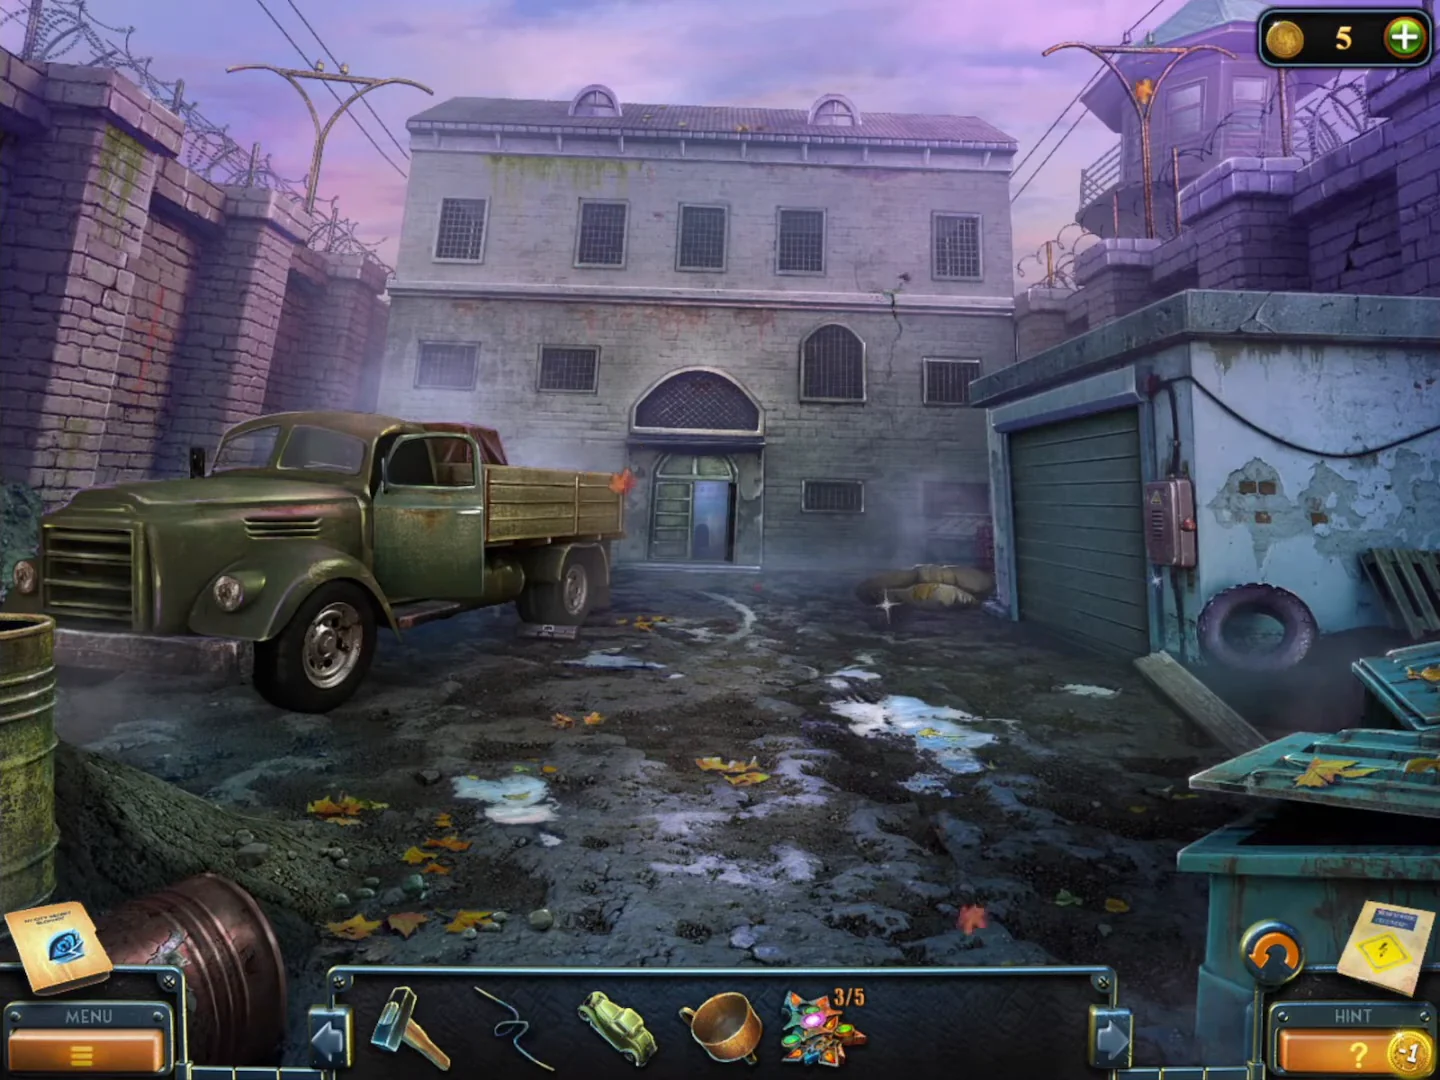
The train ride ends under the old Sing Sing prison yard. A guard tells Laura the inmates have been moved and lets her look around. A new collection set (x of 7) starts here.
- Climb through the yard hatch, select the Pass (from the business card holder) in the inventory and give it to the guard. He lets you through.
- Collect the collection item on the building facade above the entrance and the Beyond object in the debris at the lower right.
- Zoom into the electrical box beside the garage door and take Star-shaped ornament 1/5.
- Zoom into the sandbags at the lower left. Take the hidden slide, Star-shaped ornament 2/5 and the Funnel.
- Zoom into the truck cab and take the toy car above the steering column. The key is in the ignition, but the fuel tank is empty.
- Enter the cellblock. Collect the collection item at the base of the left stairs and the Beyond object on the upper railing.
- Zoom into the ground-floor cell and take the Rag and Star-shaped ornament 3/5 from inside the bars.
- Back in the yard, zoom into the smeared side of the truck by the fuel tank and wipe it with the Rag to reveal the number 3197.
- In the cellblock, zoom into the steel door with a keypad (ground floor, right) and enter 3197, then press Enter.CODE3197
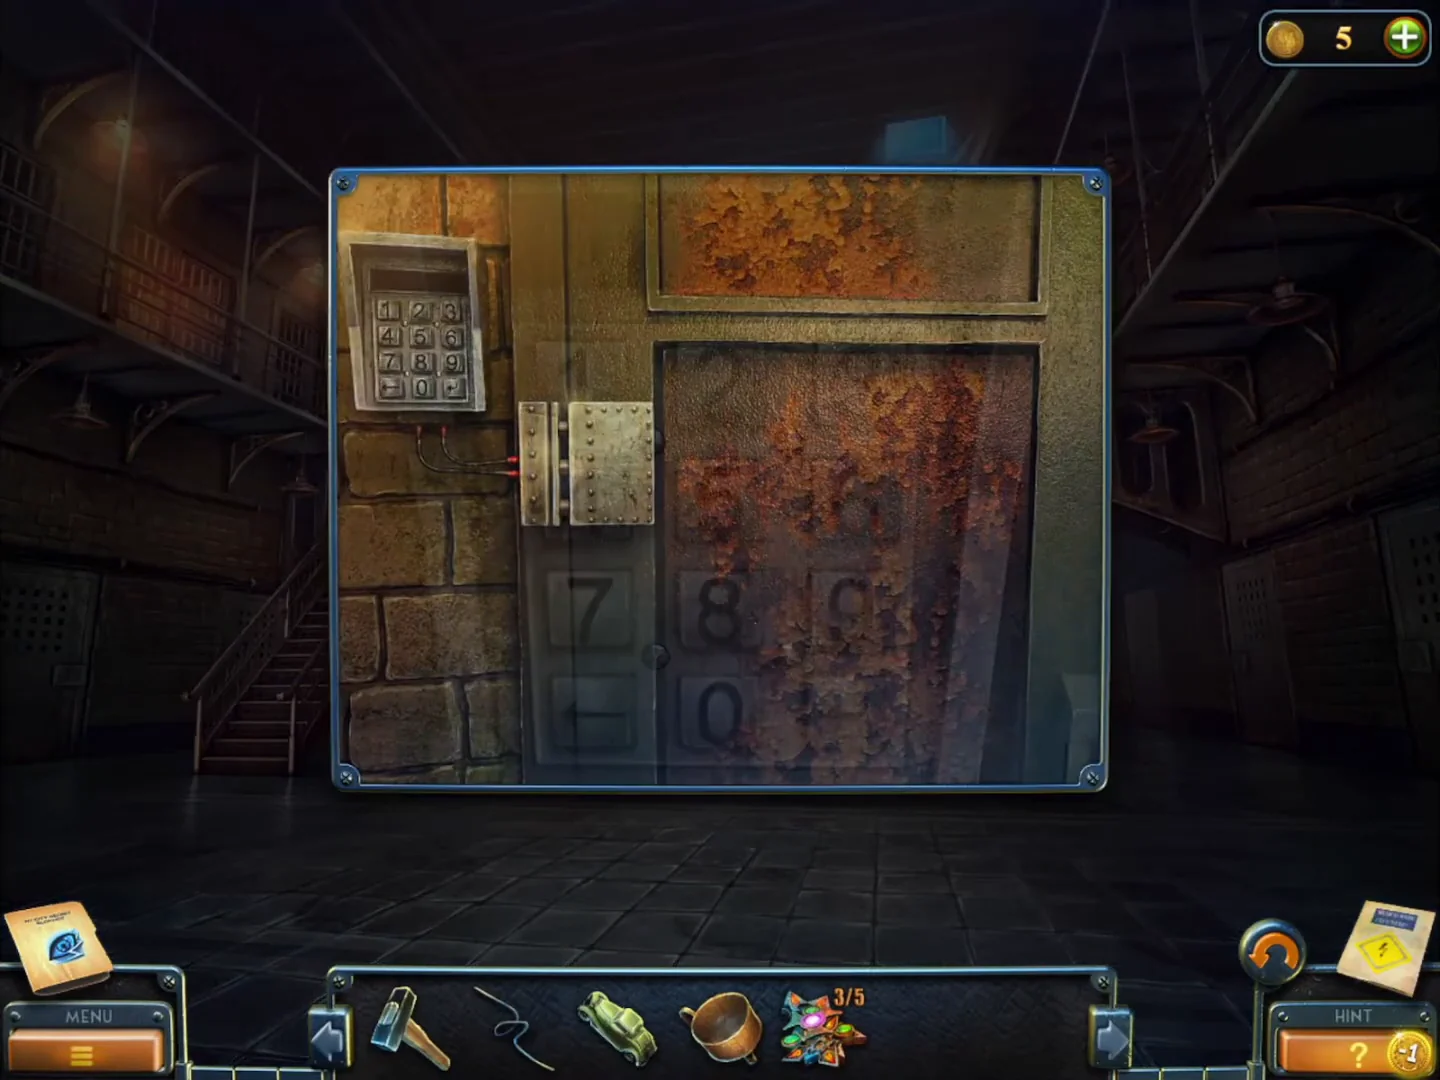
The keypad on the steel door in the cellblock. Enter 3197 and press Enter.
Archive and the street diorama
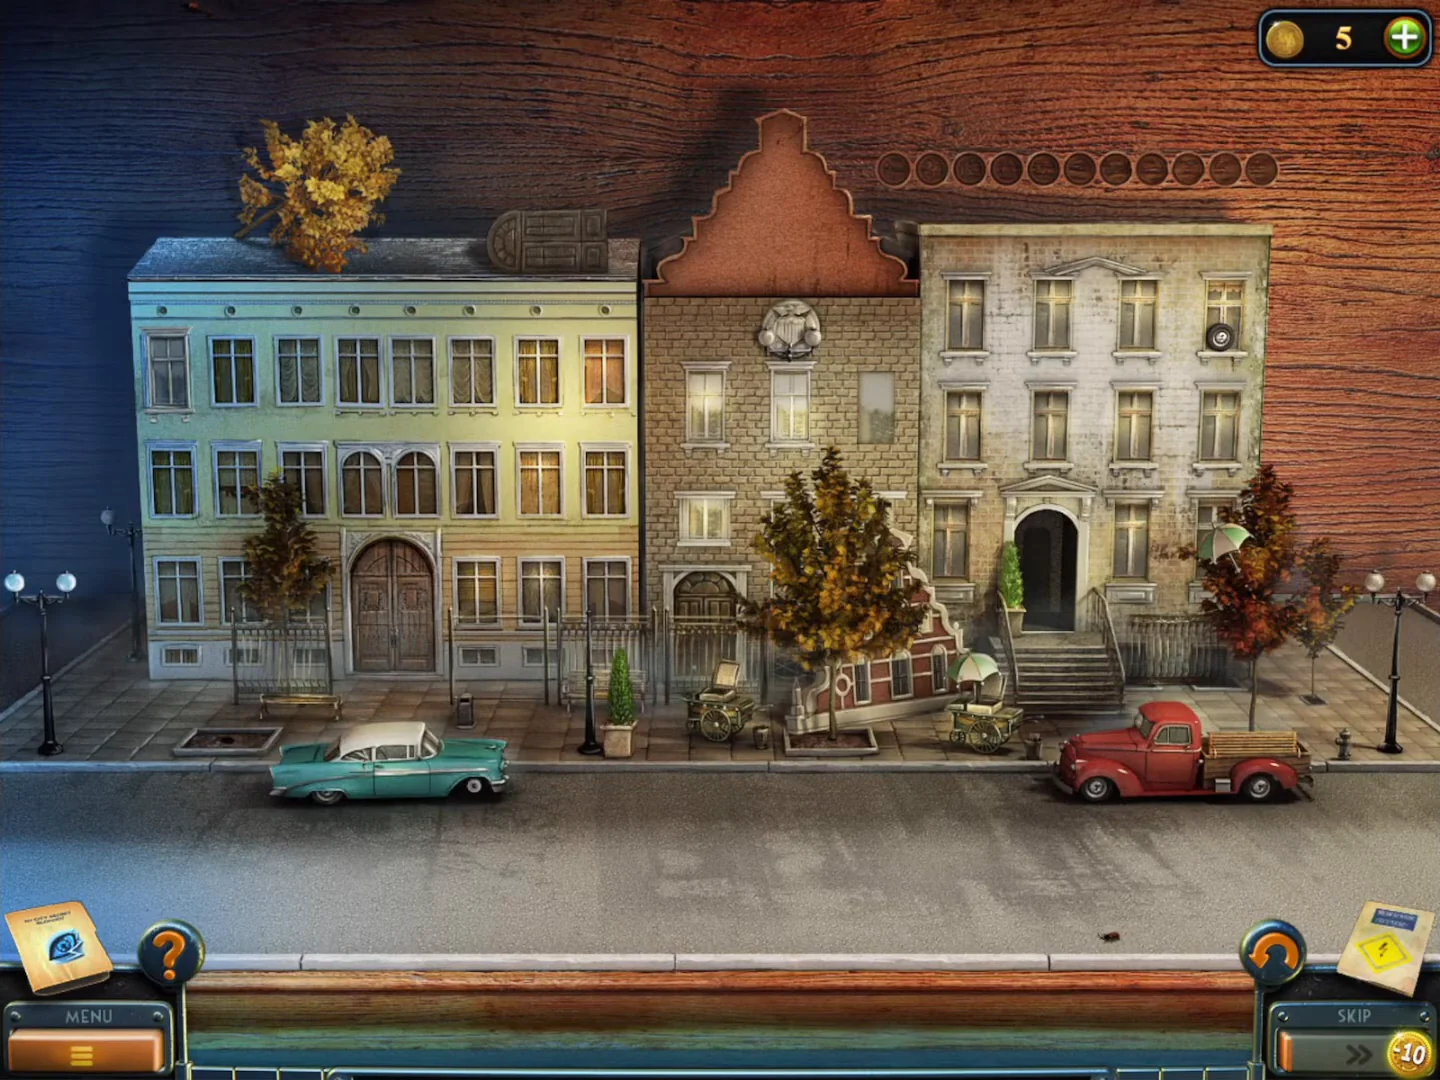
The prison archive holds Henry Tyler's file. A glass panel in Bishop's office turns into a street diorama puzzle.
- In the archive, collect the collection item on top of the pink pigeonhole cabinet (centre left) and the Beyond object on the upper-right filing cabinets.
- Open the filing drawer: read Henry Tyler's file and take the Iron apple. The task "Archives" is added.
- Take the Push broom lying by the round table in the middle of the room.
- Use the map to go to Bishop's office. Place the Iron apple in the round socket of the glass panel above the aquarium. The panel becomes a street diorama.
- Click each object that is out of place; it moves into position and one chevron lights. The 11 fixes are: the yellow tree on the left roof goes to the left planter; the door panel on the left roof goes into the right building's empty archway; the stepped gable on the pavement goes onto the centre roof; the loose window goes into the empty pink slot of the centre building; the tyre on the right building's top-right window is removed; the parasol in the red tree goes onto the left food cart; the potted shrub goes beside the right building's door; the lamp head goes onto the lamp post; the centre rosette is straightened; the bench lying in the red truck's bed goes onto the pavement in front of the centre fence, beside the lamp post; and the railing piece in front of the right building's basement (right of the steps) fills the gap in the fence in front of the left building. Completing the model in less than three minutes earns the "Architect" achievement, so read this list first and then make the fixes without pausing.
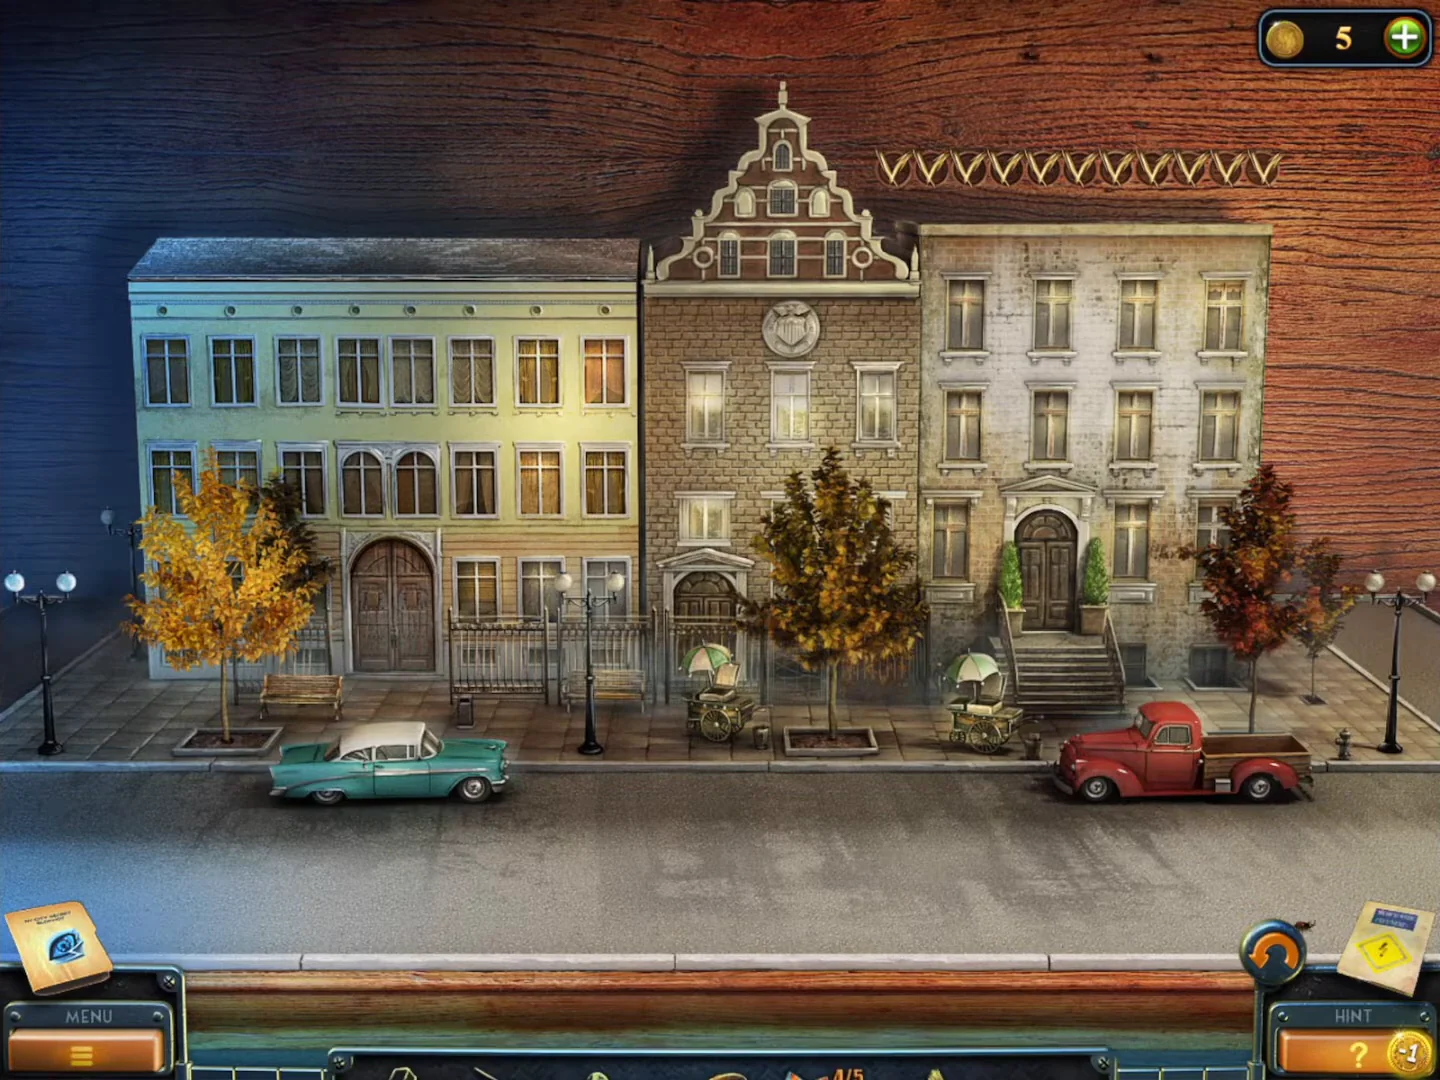
Solved: the last fix (the bench in front of the centre fence) is in place and all eleven chevrons at the top right are lit. - Take the Empty film reel and the Eagle figurine from the bookshelf compartment that opens.
- Return to the archive and place the Eagle figurine in the eagle-shaped recess of the box on the desk. Take the Lever handle and the Tape.
- Drag the torn photo pieces on the desk together and fix them with the Tape. The photo shows Frederick Davis, Henry Tyler and Bishop, and the number 462.CODE462
Prison garage
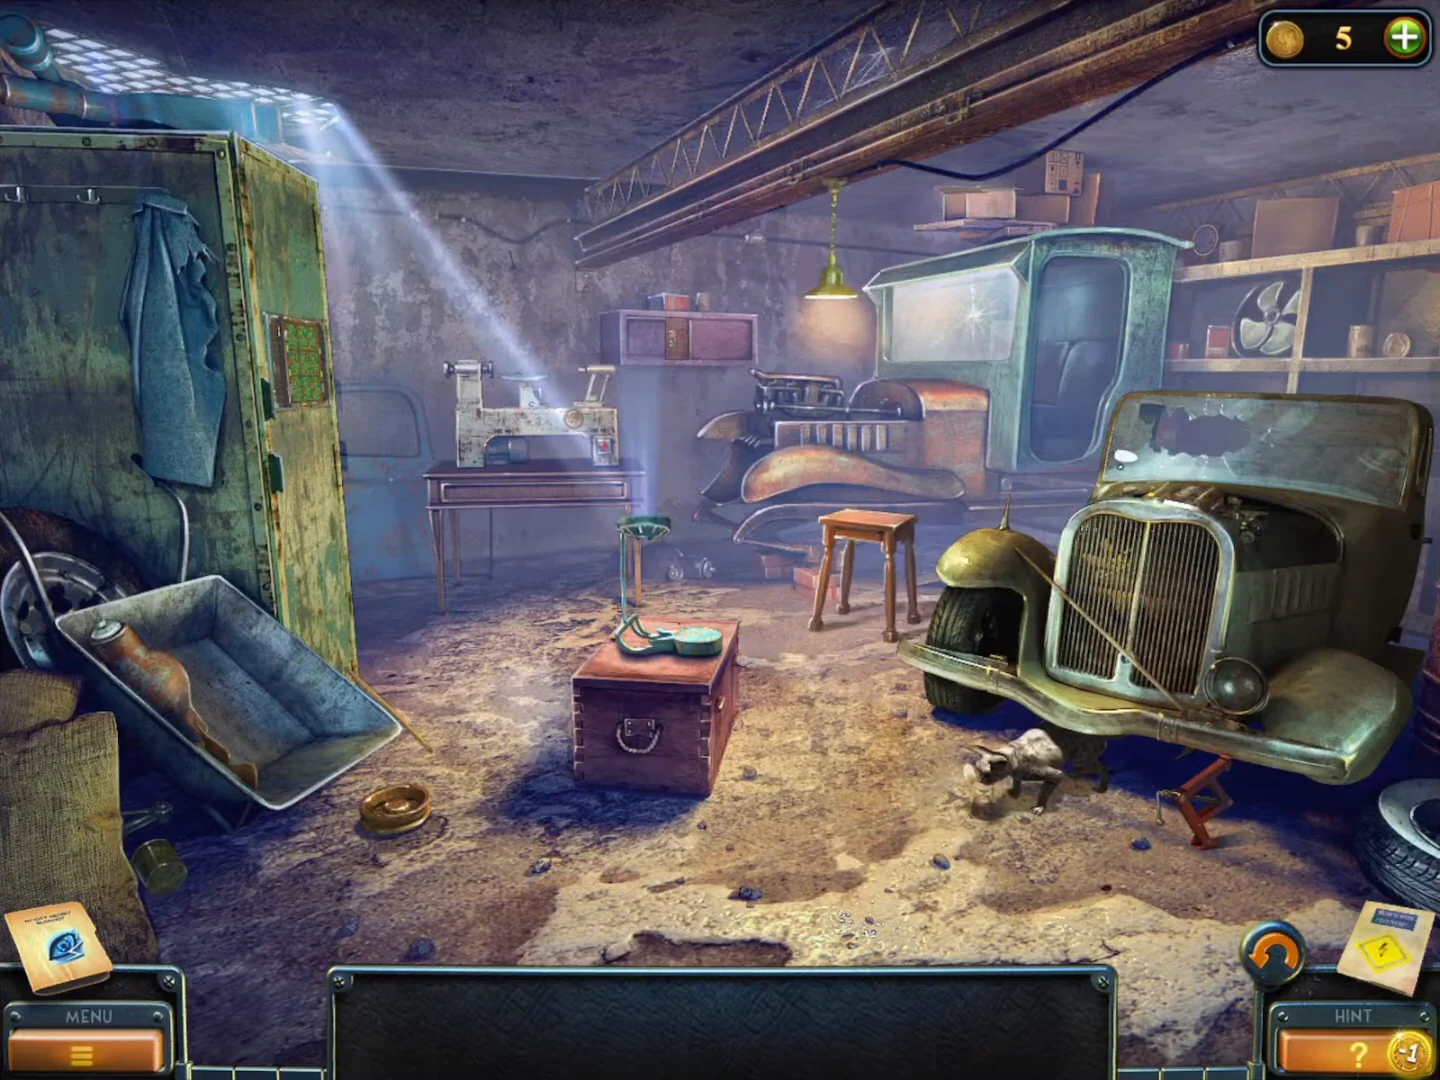
The garage is an interactive scene: the bar at the bottom shows the outlines of the objects to collect or use here.
- In the yard, zoom into the electrical box to the right of the garage door, attach the Lever handle and pull it. The garage door opens.
- Zoom into the wheelbarrow at the lower left, move the planks and take the Jack.
- Look under the front bumper of the car: a cat is hiding there ("Can I use some cat food to lure the cat out?"). Take the Handwheel from the floor.
- Put the Handwheel on the lathe at the back left and turn it. The wooden leg is finished and the Stool is assembled; take it.
- Place the Stool in the centre aisle and climb up to the box on the rafters to get the Cat food can.
- Take the Can opener from the top of the cabinet at the back right.
- Under the car bumper, use the Jack, put the Cat food on the floor and open it with the Can opener. The cat comes out to eat; take the Key it was hiding.
- Open the sliding doors of the back-right cabinet with the Key and take the Screwdriver.
- Take the Rag: the blue cloth hanging on the green locker on the left wall of the garage. This garage Rag is one of the objects in the bar at the bottom.
- Zoom into the side mirror on the car's front fender. Unscrew it with the Screwdriver, wipe it with the garage Rag and take the Mirror.
- Place the Mirror on the empty stand on the box in the centre. It reflects sunlight onto the green locker on the left wall, revealing a circuit-board panel.
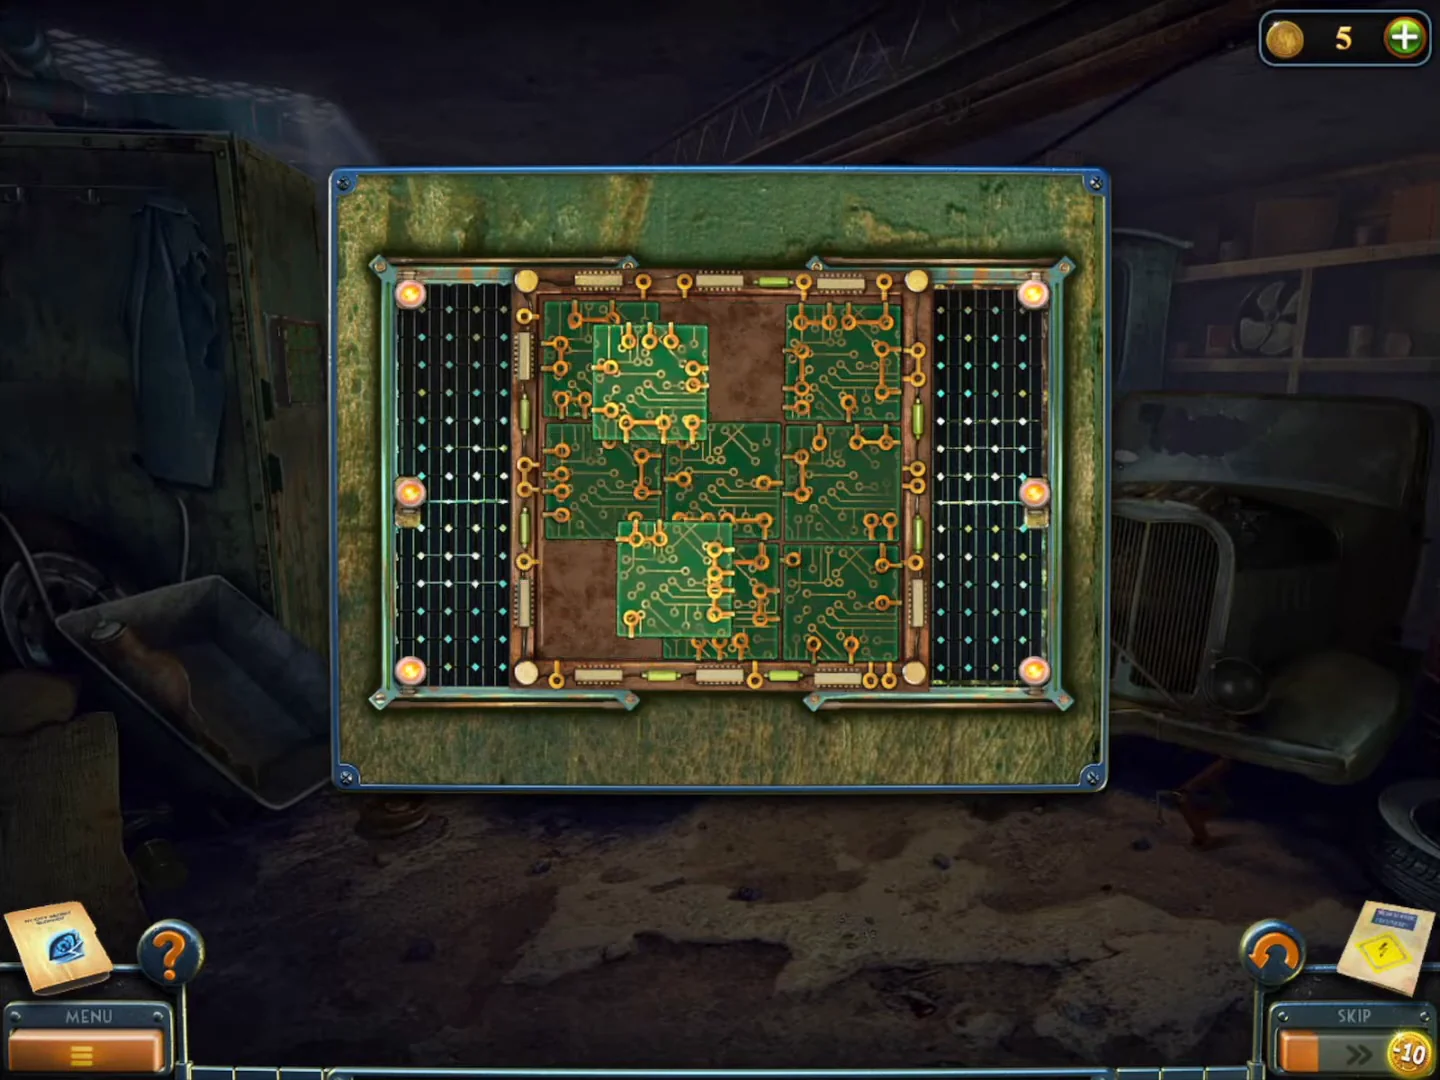
The circuit-board panel revealed on the green locker. Swap tiles two at a time. - Circuit board puzzle: select two tiles to swap them. Keep swapping until every copper trace joins up with the edge connectors and the corner lamps turn green.
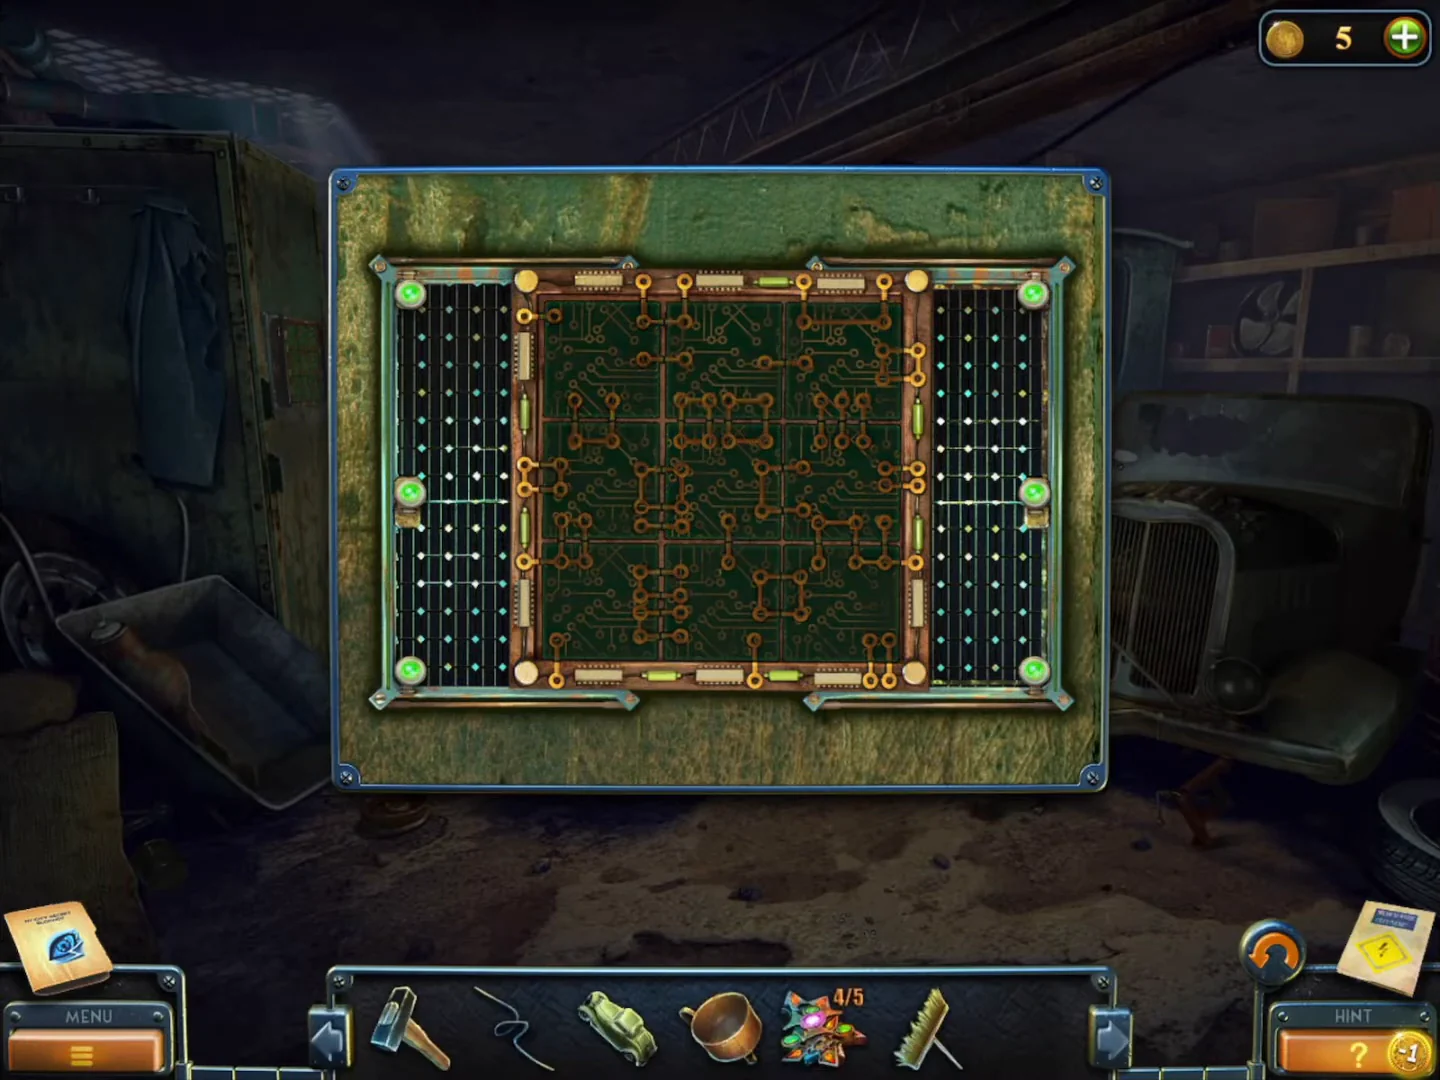
Solved: all traces join up with the edge connectors and the lamps around the frame are green. - Take the Jerry can from the compartment behind the board.
Truck, briefcase and the star vault
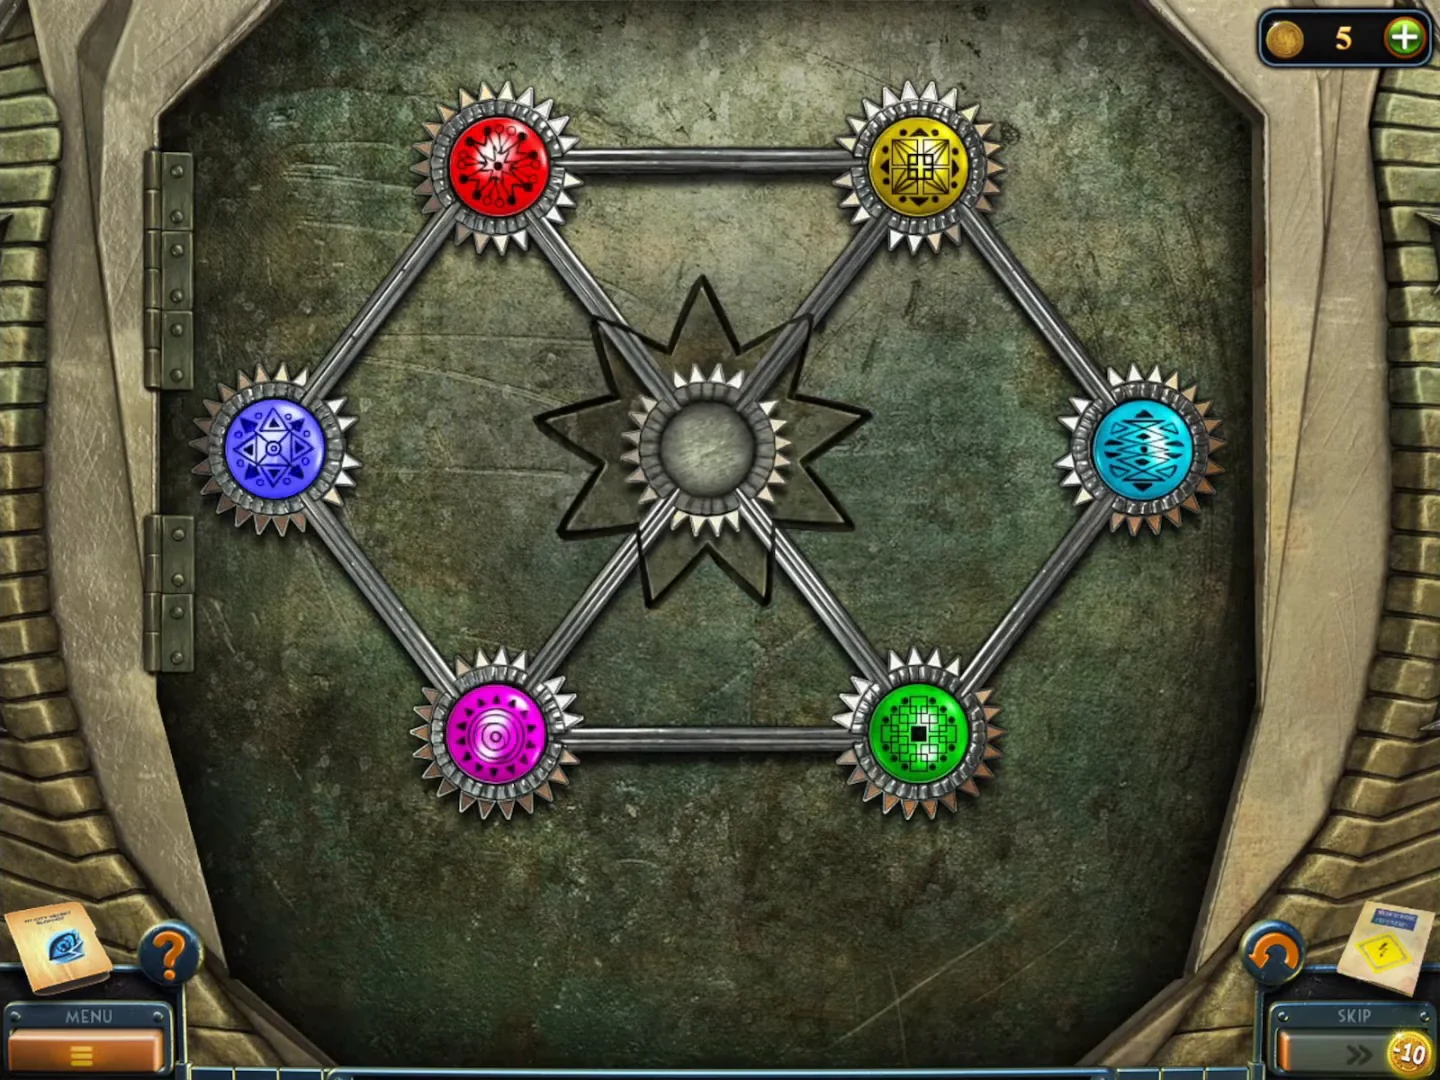
Fuel the truck to uncover a briefcase, then finish the star and open the archive vault.
- In the yard, put the Funnel in the truck's fuel filler and pour in the Jerry can. Laura drives the truck forward, revealing a pink briefcase where it stood.
- Zoom into the briefcase and set its three wheels to 4-6-2 (the number on the archive photo). Take the Flashlight lying inside (it has no batteries yet) and Star-shaped ornament 4/5.CODE462
- Go to the archive. On the projector cart in front of the screen, take Star-shaped ornament 5/5 and the hidden slide.
- In the inventory, attach the four coloured arms to the body to make the Star.
- Zoom into the vault door on the archive's left wall and put the Star in the centre socket. Six coloured chips sit on a hexagon of sockets around an empty centre. The six outer sockets are joined in a ring, and the centre is joined only to the four corner sockets (top left, top right, bottom right, bottom left), not to the left and right sockets. Click a chip that is joined by a line to the empty socket and it slides into it; an empty socket shows a faint version of the colour that belongs there. Start: top left red, top right yellow, right cyan, bottom right green, bottom left magenta, left blue. Goal: every chip on the socket opposite its start, with the centre empty (top left green, top right magenta, right blue, bottom right red, bottom left yellow, left cyan). 17 clicks: (1) red into the centre. Then go round the ring anticlockwise, always clicking the chip just clockwise of the gap: (2) yellow, (3) cyan, (4) green, (5) magenta, (6) blue, (7) yellow, (8) cyan, (9) green, (10) magenta, (11) blue, (12) yellow, (13) cyan, (14) green, (15) magenta, (16) blue. The gap is now at the bottom right, so (17) click red in the centre to move it there.
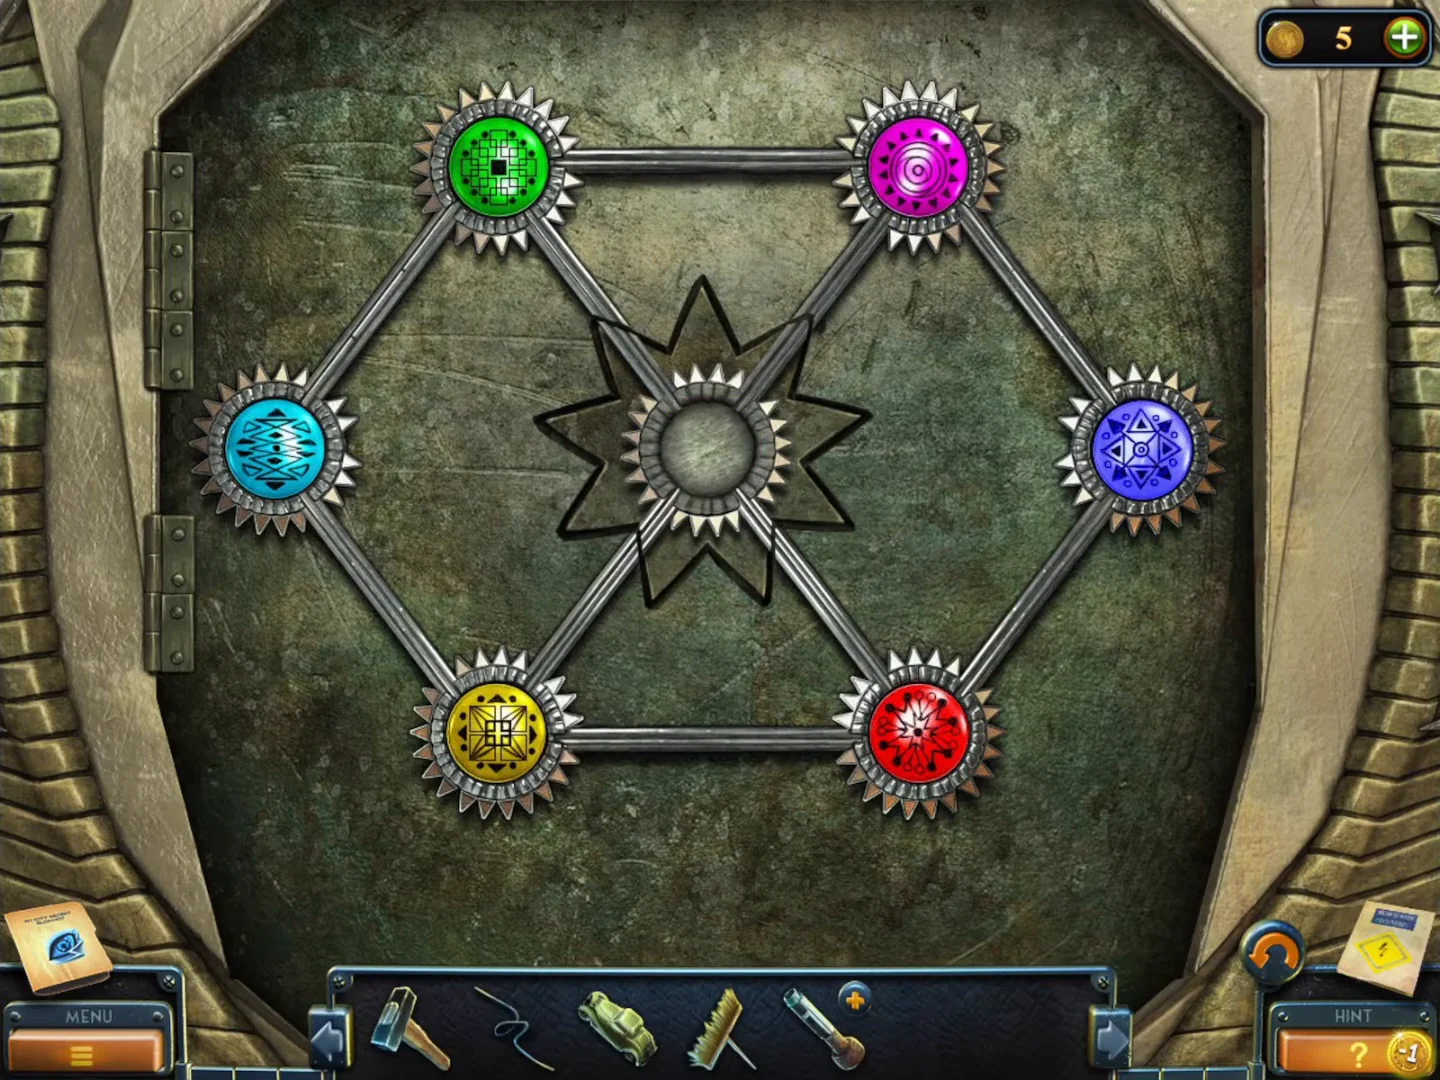
Solved: green top left, magenta top right, cyan left, blue right, yellow bottom left, red bottom right. - Inside the vault, read the case file on prisoner Hugo Bradly (new task "The Condemned") and take the Loaded film reel.
- Put the Empty film reel and the Loaded film reel on the archive projector. The film shows an execution and ends by projecting a route diagram on the screen.
- Take the Blowtorch part from the top shelf of the open vault.
Sphere route panel and the flashlight
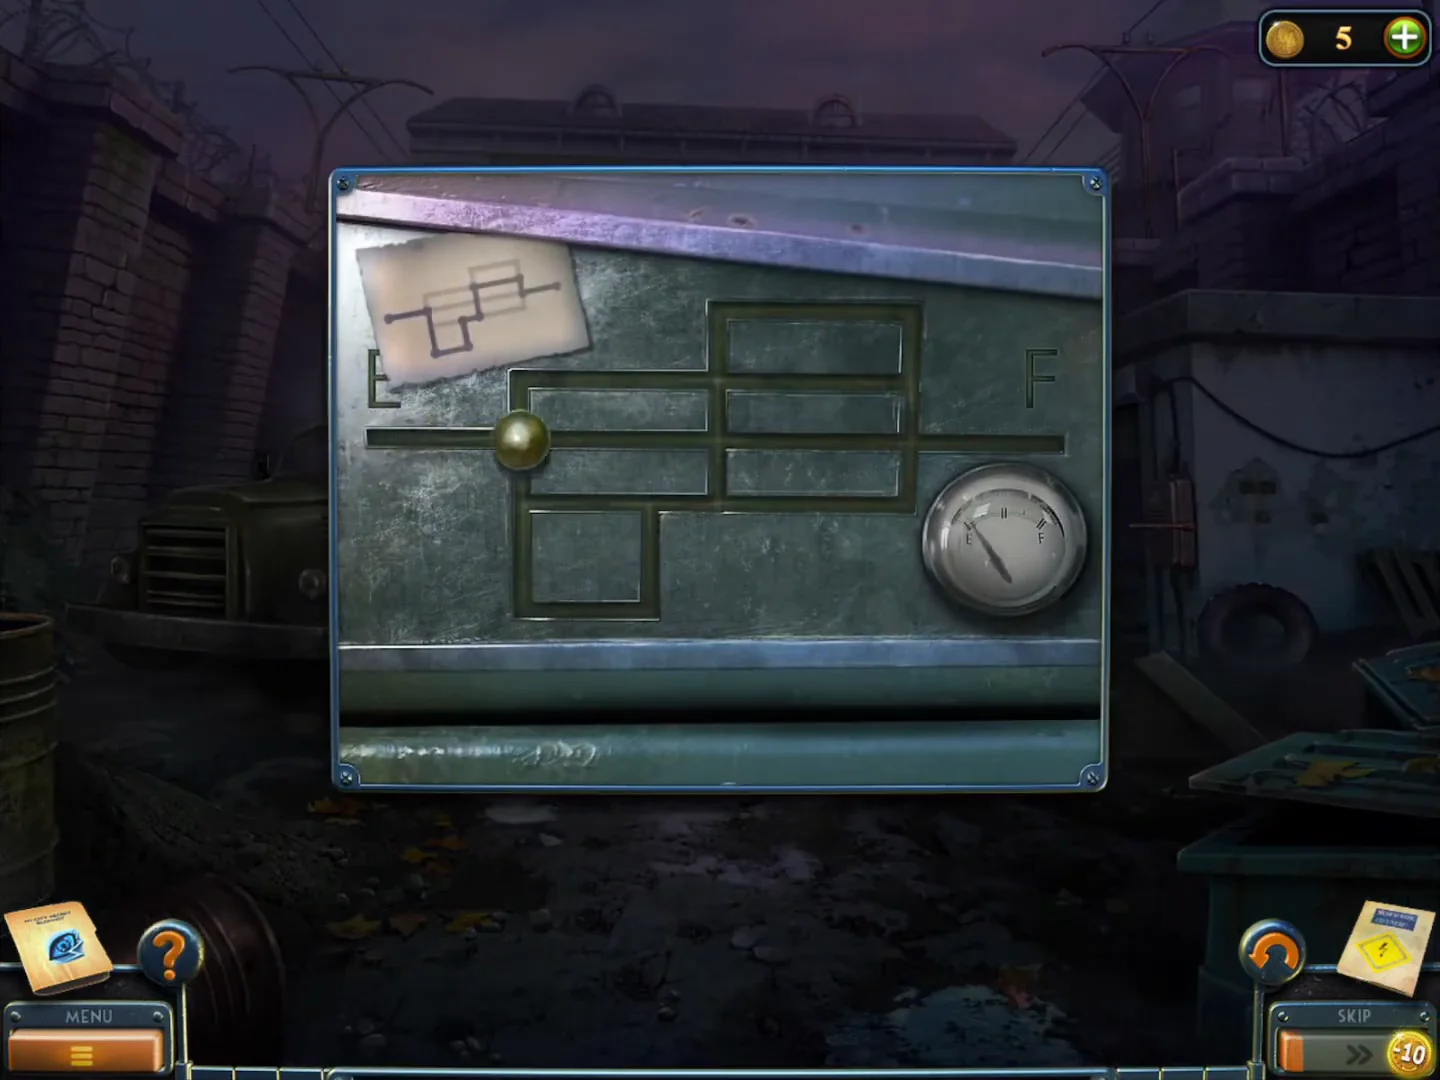
Open the sphere route panel in the prison yard for a Screwdriver, then power up the flashlight with Batteries from an old radio.
- Go to the prison yard and zoom into the wall panel on the right ("Move the sphere along the correct route"). Follow the projected diagram (also printed on the sticker at the top left), turning at each junction: from E go right to the first junction, down the left side of the small lower box to its bottom corner, right along its bottom, up its right side to the next horizontal line, right along that line to the central vertical, up the central vertical straight across the E-F line to the line above it, right along that line to the right-hand vertical, down to the E-F line and right into F.
- Take the Screwdriver from the opened panel.
- In the cellblock, push the Push broom through the bars of the ground-floor cell to drag out the radio.
- Open the radio with the Screwdriver and take the Batteries.
- The Flashlight from the briefcase opens in a close-up: unscrew the cap, insert the Batteries and close it to get a working Flashlight.
Execution chamber
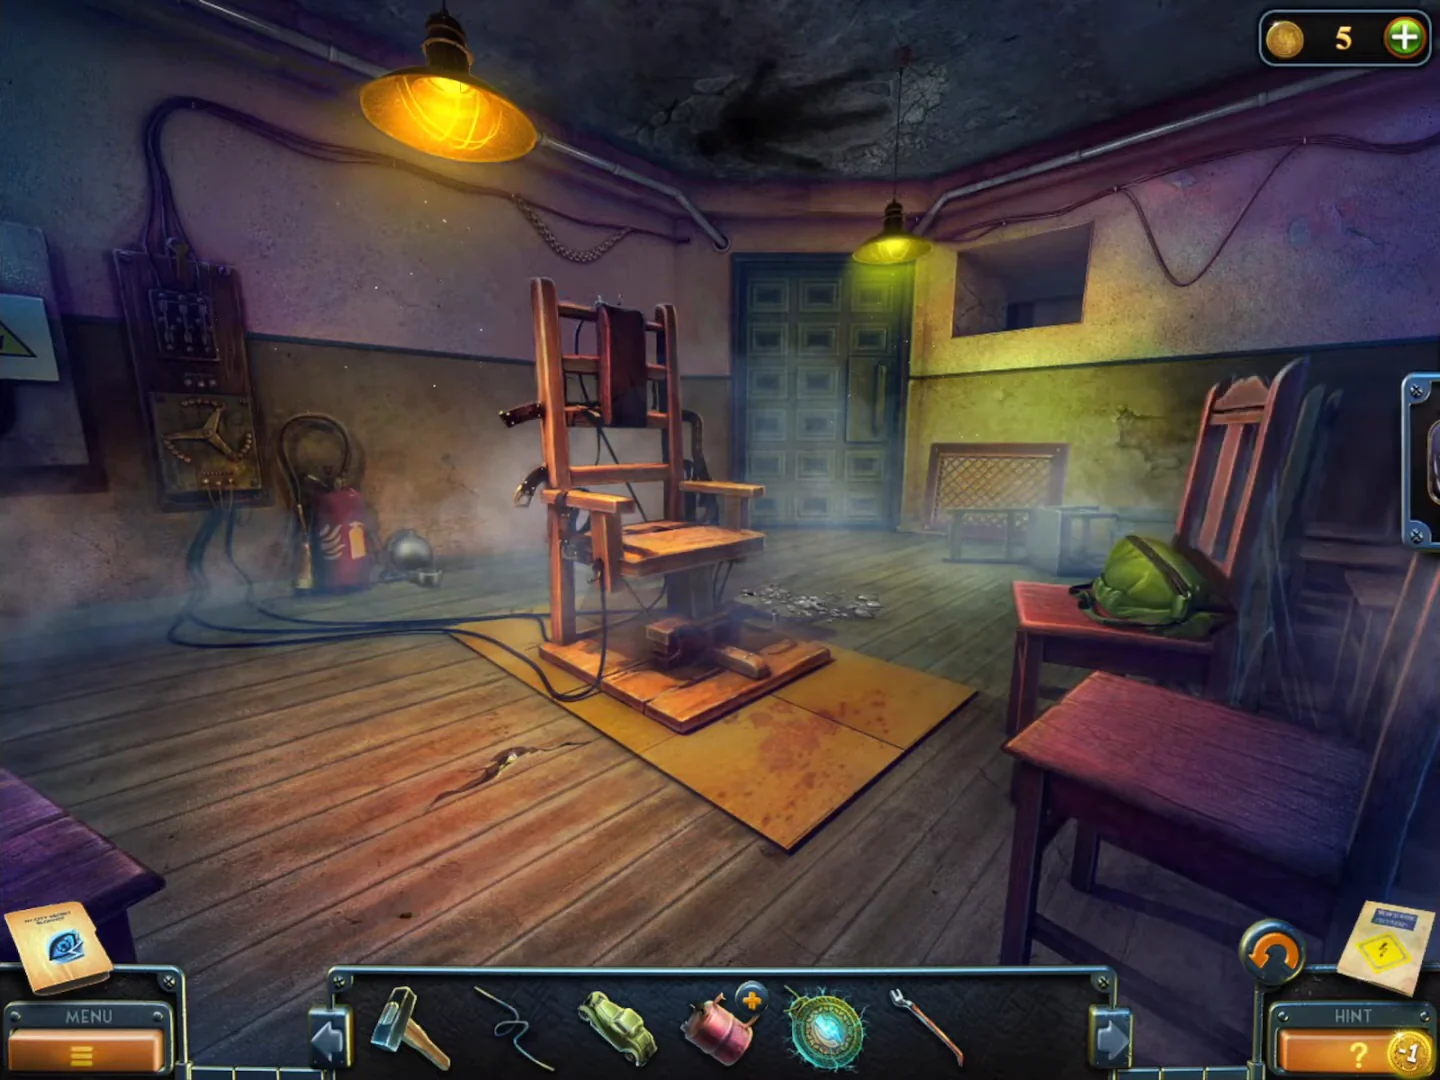
The Flashlight lights the way into the prison's old execution chamber. The Crowbar found there opens a crate in the storage cage.
- Zoom into the dark rear archway on the cellblock ground floor and use the Flashlight. Follow the lit corridor through the wooden door. In the cutscene Laura finds a swinging medallion and keeps it.
- Collect the Beyond object (a small ring hanging on the wall above left of the electric chair, by the cable) and the collection item (a grey helmet-like object on the floor by the red fire extinguisher).
- Zoom into the vent grate high on the right wall, remove its four screws with the Screwdriver and take the Crowbar. Click the hidden slide in the niche.
- Use the map to go to the storage cage. Pry the lid off the wooden crate on the left with the Crowbar and take the Torch.
- Go to the souvenir shop and put the Torch in the raised hand of the Statue of Liberty figurine on the counter. Take the Bar from the tablet that opens.
String clocks in Bishop's office
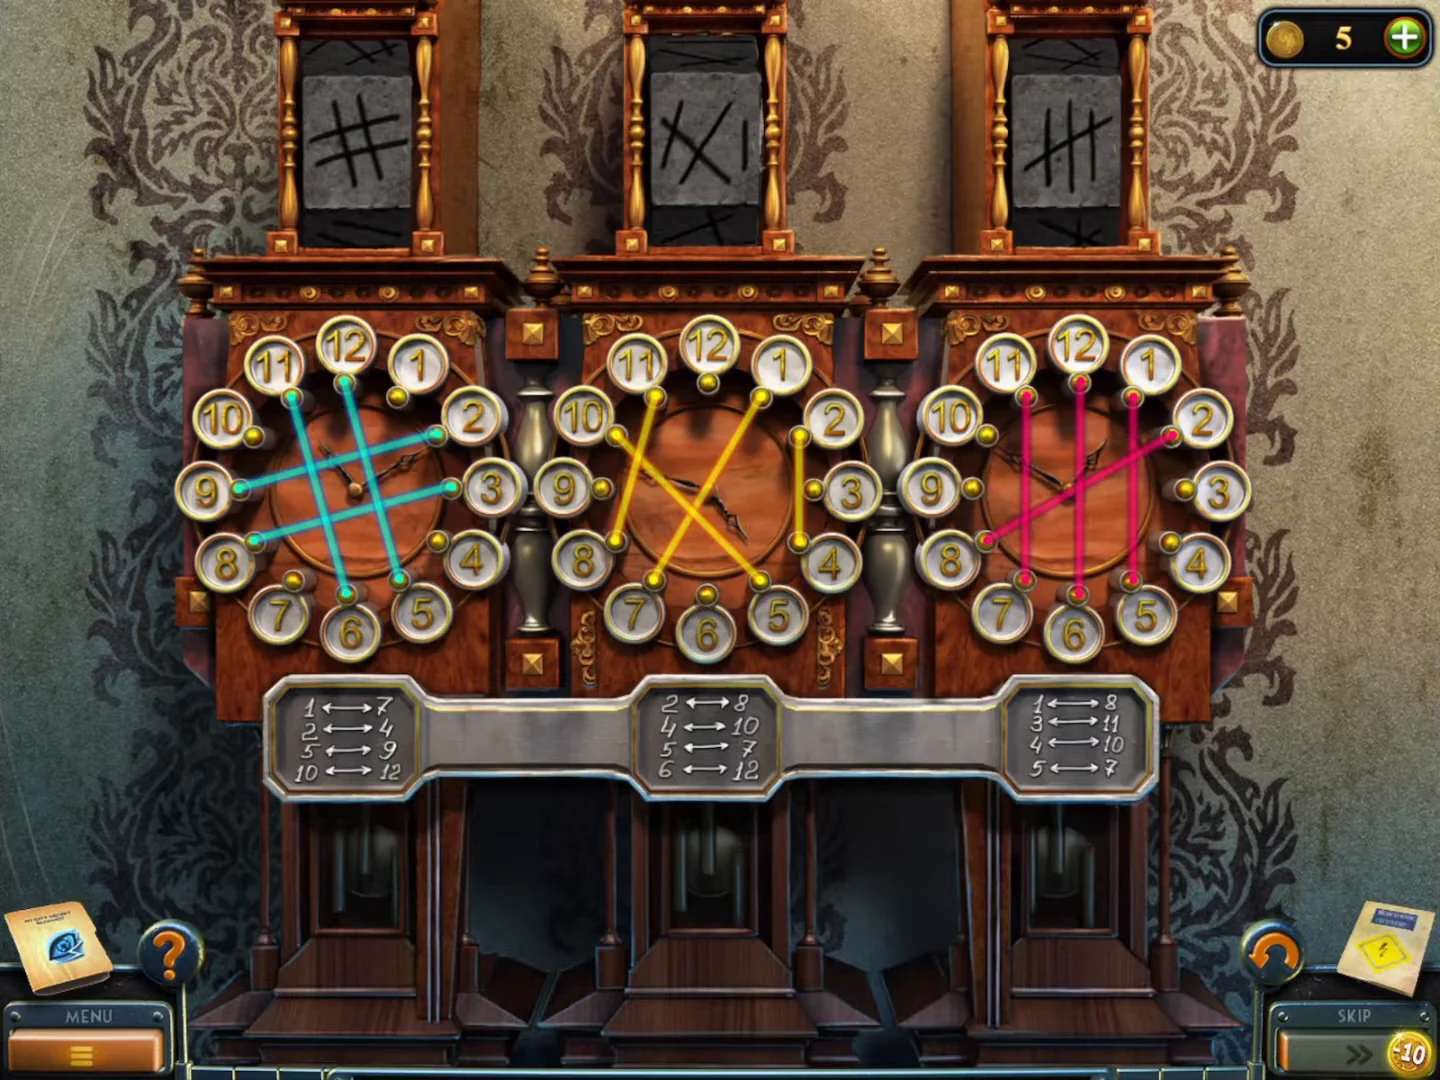
The Bar from the souvenir shop starts the three-clock string puzzle in Bishop's office.
- Go to Bishop's office and zoom into the device with three clock faces on the right wall. Put the Bar in the lower slot to start the puzzle.
- Each clock face has pins 1-12 and coloured cords; the plate below lists the pins to join. Left (cyan): 1-7, 2-4, 5-9, 10-12. Middle (yellow): 2-8, 4-10, 5-7, 6-12. Right (pink): 1-8, 3-11, 4-10, 5-7. Each finished clock flips its slate.CODEL 1-7 2-4 5-9 10-12 | M 2-8 4-10 5-7 6-12 | R 1-8 3-11 4-10 5-7
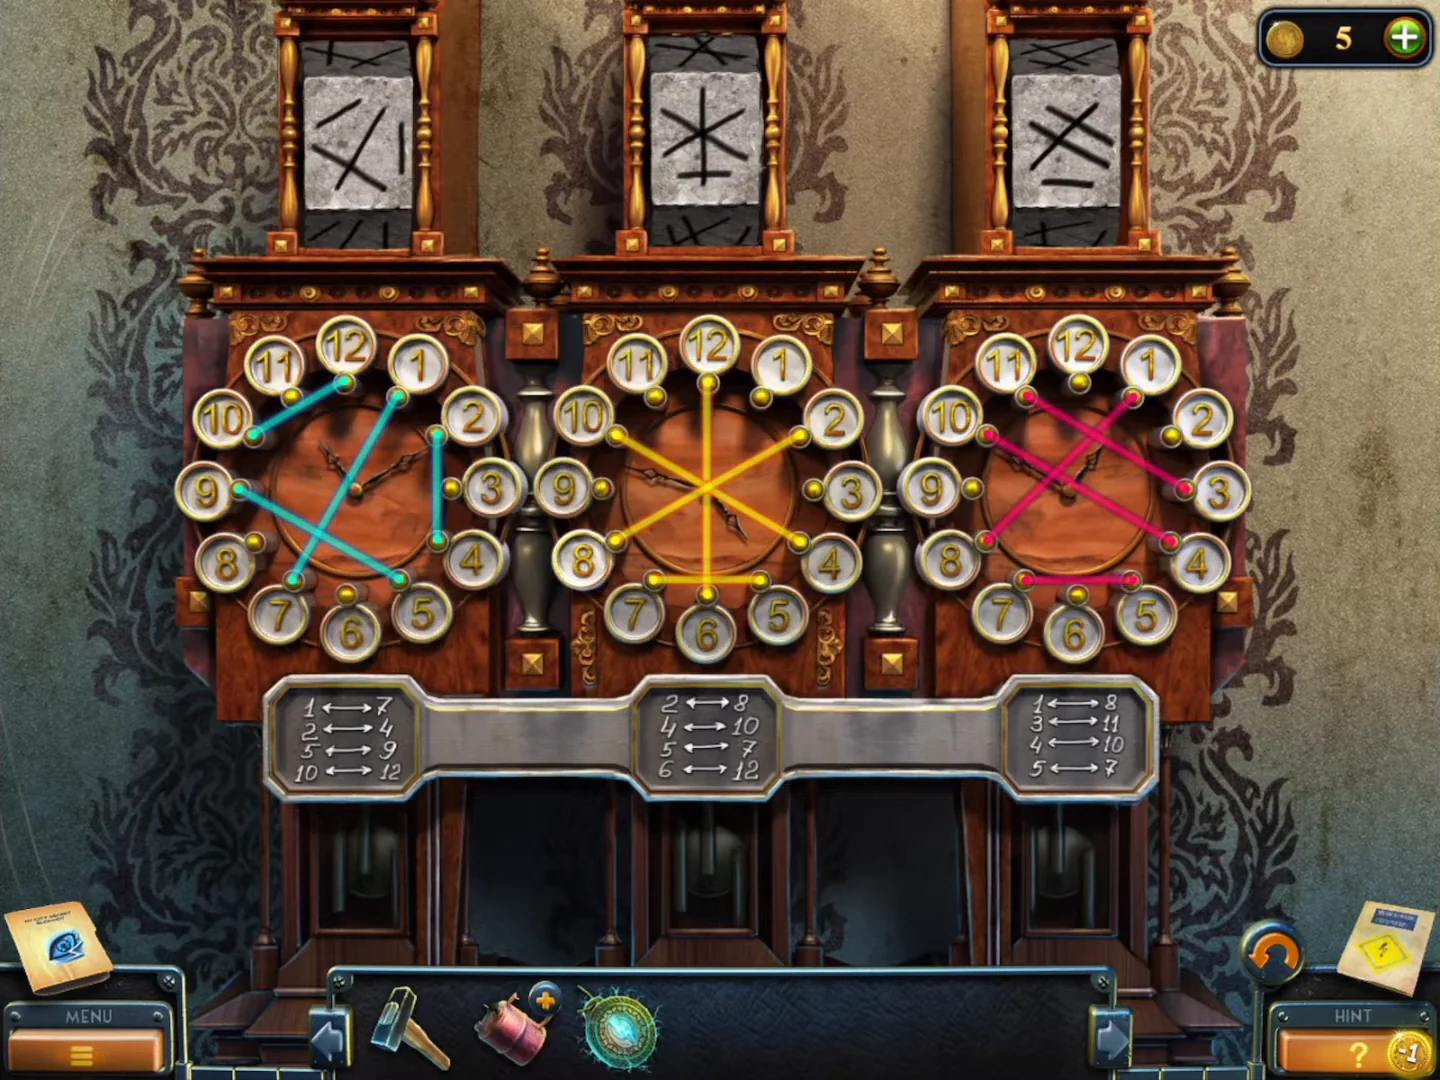
Solved: every clock matches its listed pin pairs and all three slates above have flipped. - Take the Magnet and the second Blowtorch part from the compartments.
Jackknife, grappling hook and the substation roof
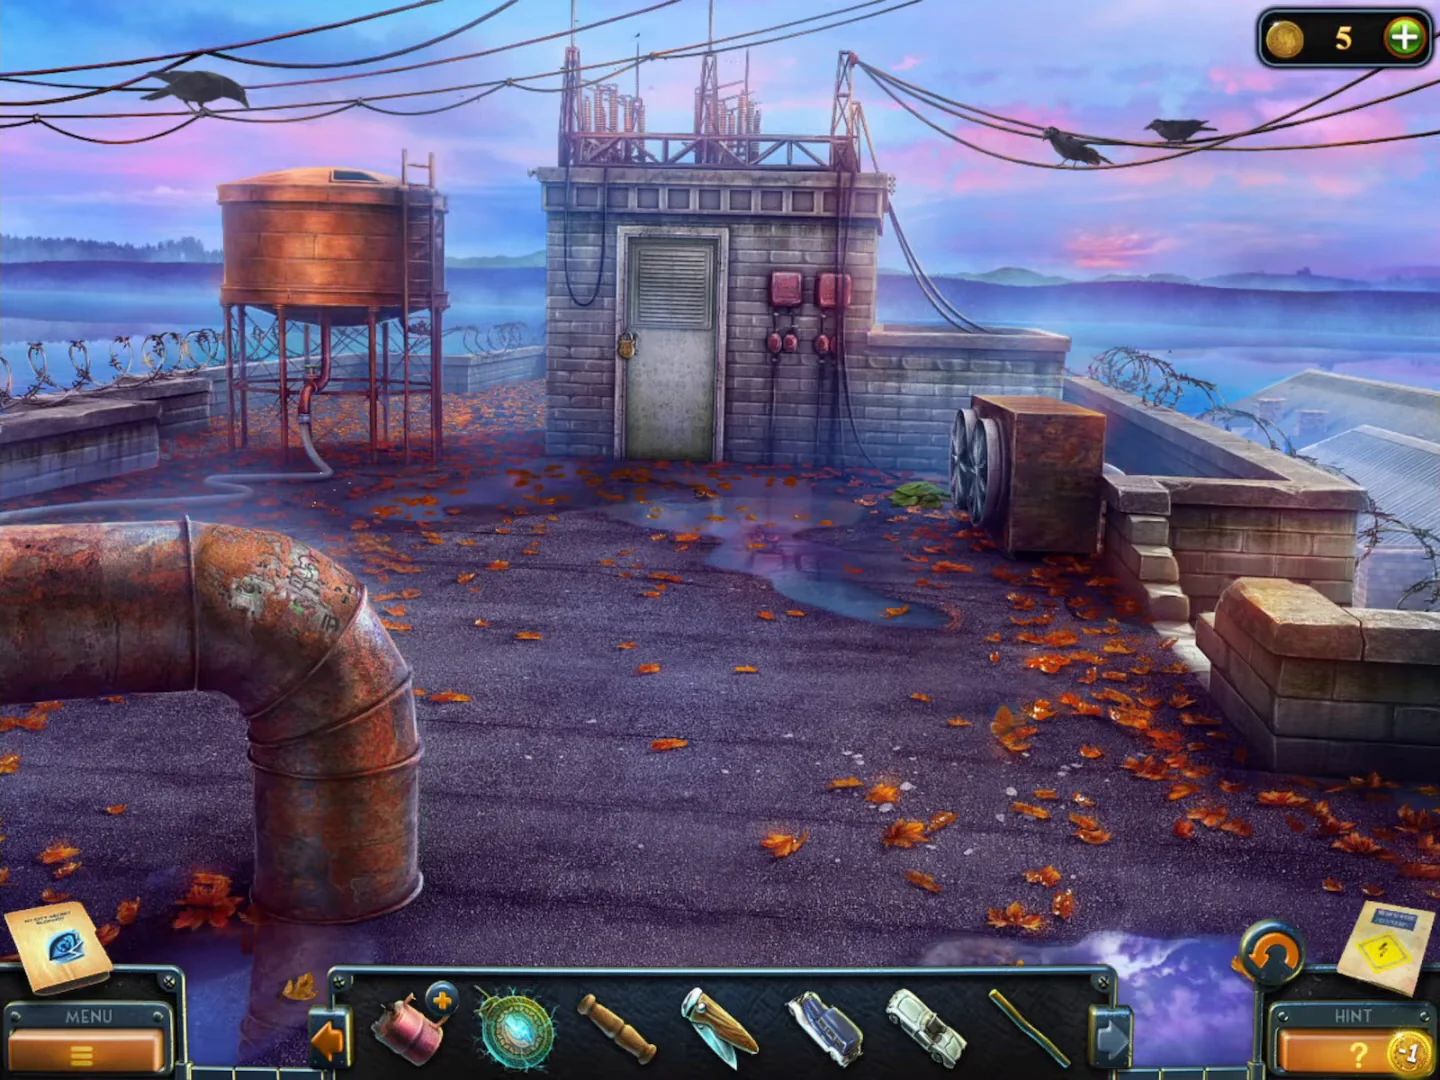
Collect the tools you need to reach the roof of the abandoned substation, then free the Toy car there.
- In the execution chamber, zoom into the crack in the centre of the floor and use the Magnet to pull out a Zipper pull tab.
- Zoom into the green bag on the right-hand chair, attach the Zipper pull tab and open it. Take the Jackknife.
- In the prison yard, cut open the burlap sacks on the left with the Jackknife and take the Grappling hook.
- In the cellblock, zoom into the ceiling skylight and use the Grappling hook to climb onto the roof of the abandoned substation (new task "Abandoned Substation").
- Collect the Beyond object among the leaves right of centre and the collection item in the leaves at the foot of the low wall at the lower right.
- Open the hatch of the water tank on the left and take the Stone.
- Zoom behind the right parapet and throw the Stone at the handwheel stuck up the corrugated roof. It slides down; take the Handwheel.
- Fit the Handwheel on the pipe valve behind the mesh under the water tank and turn it to stop the steam. Take the Stick from the tank opening.
- Zoom into the fan unit on the right, jam the right fan with the Stick and take the Toy car. Take the Stick back.
Toy car display and the blowtorch
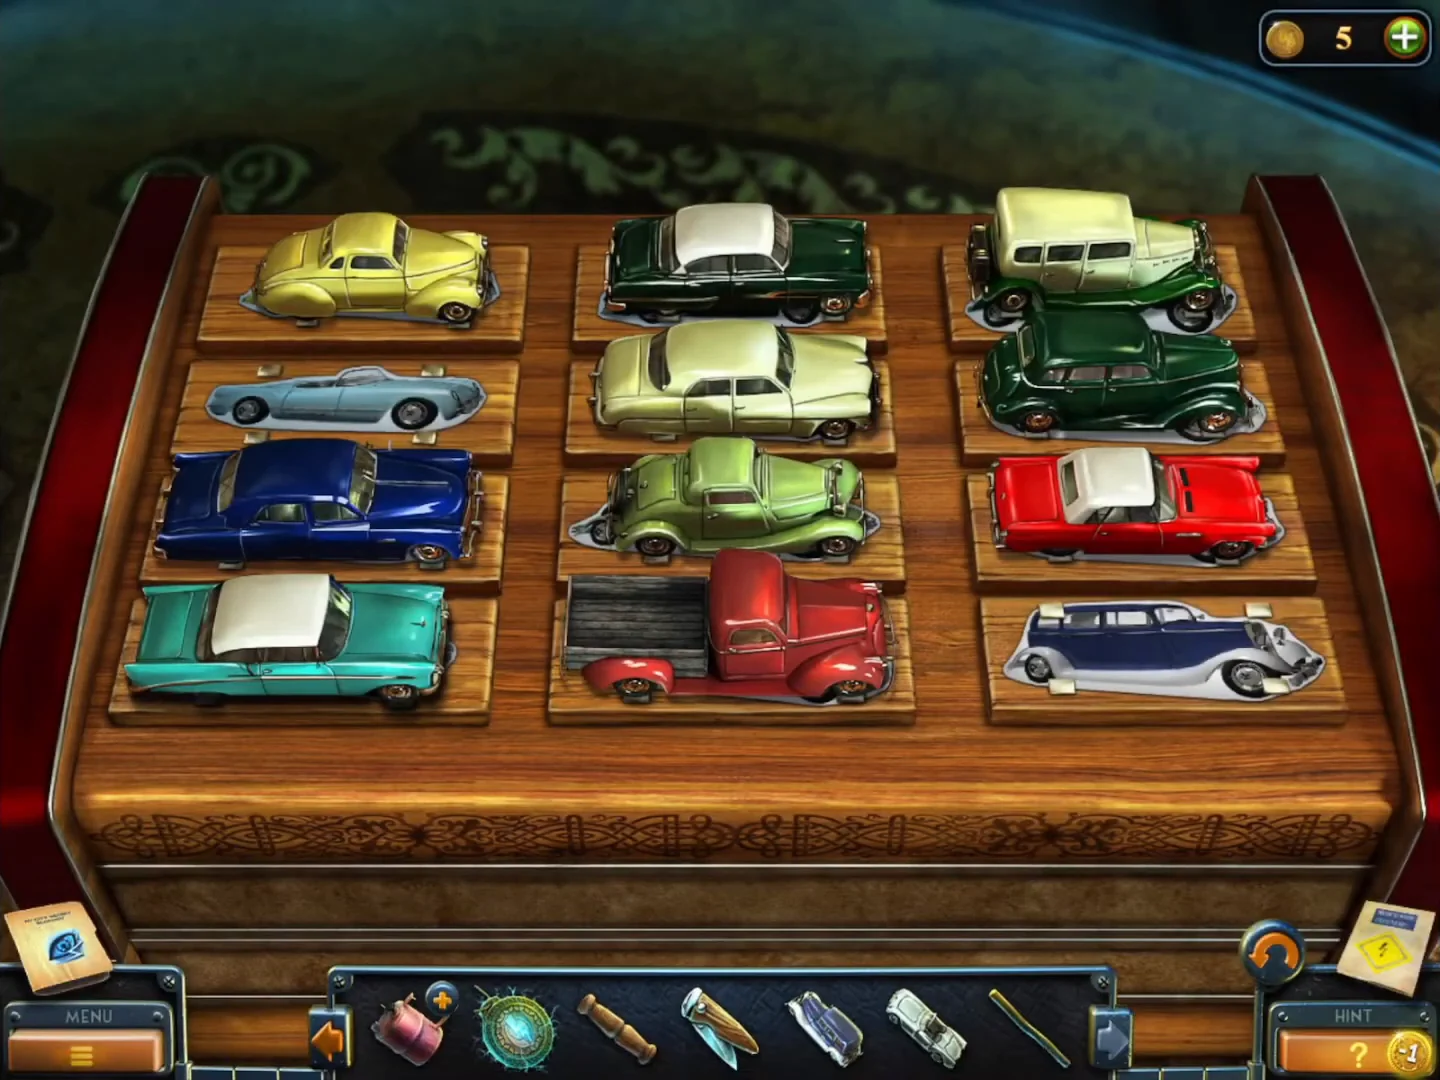
Complete the toy car display at White Stone HQ, assemble the Blowtorch and cut your way into the substation.
- Go to the White Stone HQ hall and talk to Bishop about the missing prisoner.
- Zoom into the toy car display on the round table (12 plaques in 3 columns and 4 rows). Put each toy car on the plaque whose printed outline matches its shape and colour, swapping cars where needed. This uses all the toy cars collected so far.
- Take the third Blowtorch part (the nozzle) from under the lid. Open the Blowtorch tank in the inventory and add the other two Blowtorch parts (from the archive vault and the clock cabinet) to make the Blowtorch.
- Return to the rooftop and heat the substation door's padlock with the Blowtorch, then strike it with the Hammer to break it. Inside, Laura finds a skeleton holding a key. The task "Abandoned Substation" is completed and "Skeleton" is added.