Bookcase butterfly lock
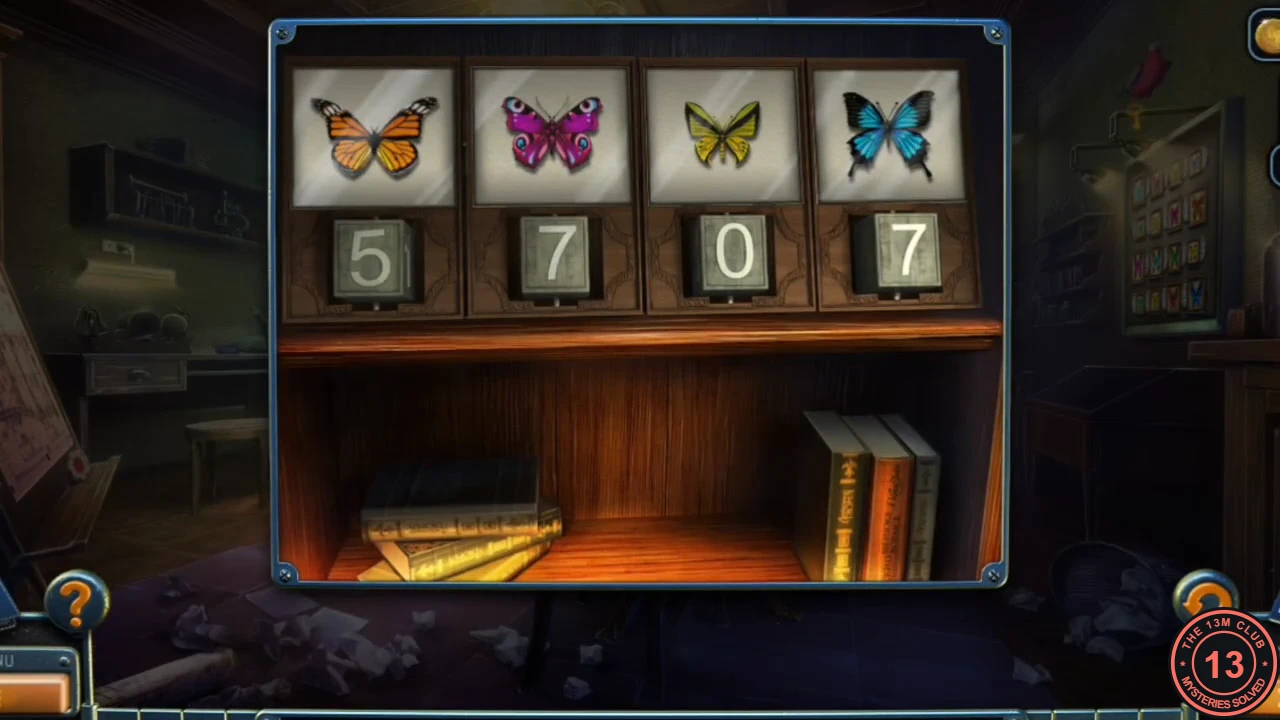
The office bookcase, left of the birdcage, has a lock with four butterfly dials.
- Set the dials to each butterfly's number from the collection: 3, 8, 6, 9.
- The bookcase slides aside and reveals a secret passage to a laboratory.
The secret laboratory
Gather what you can in the laboratory and the office.
- In the laboratory, take the MOP from the floor in front of the fridge and the GLASS CUTTER from the yellow-lit counter on the left. Open the small blue cage on the floor at the lower right and take the GRAIN.
- Jam the wall fan at the top left with the PIPE, remove its grate and take the VALVE and LIGHT BULB 4/6.
- In the office, put the GRAIN on the birdcage table. The parrot flies in; take the KEY. Unlock the lamp desk drawer with it and take the TAPE and the CHALK.
Chalkboard figure
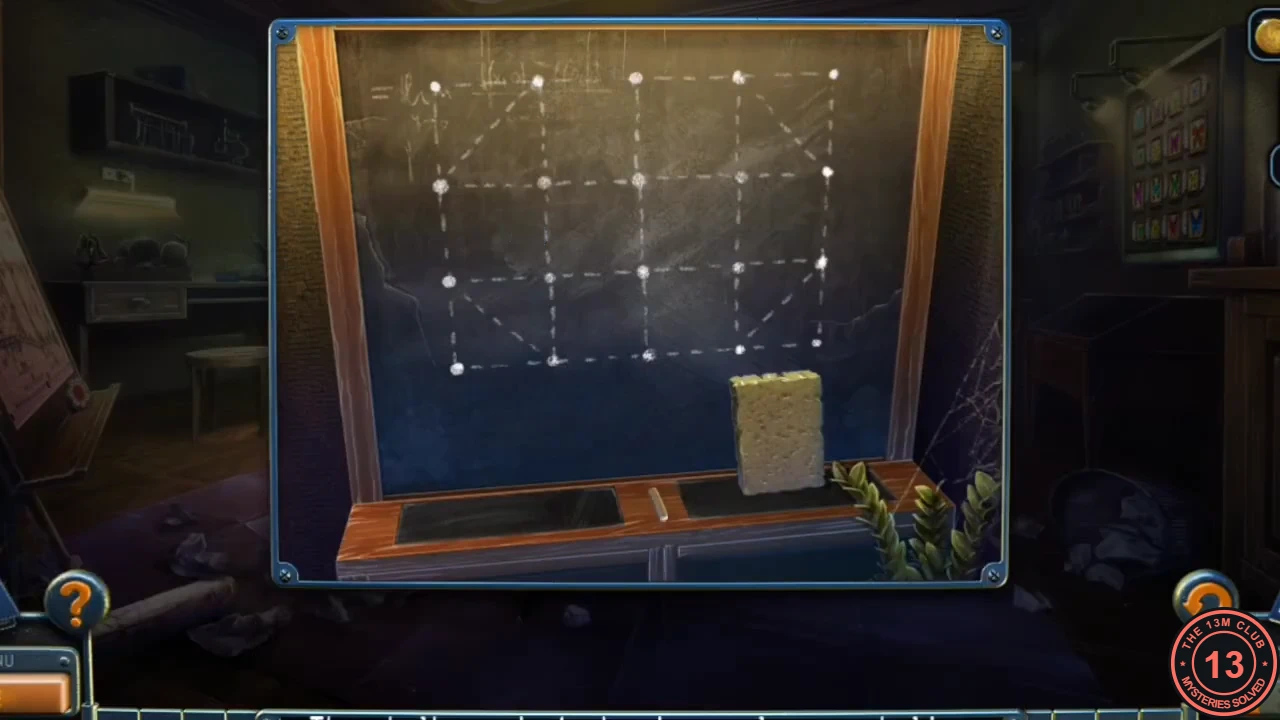
A chalkboard on the office's back wall shows a dashed, house-like figure: a grid of squares with triangles at both top corners and diagonals in the bottom row.
- Use the CHALK on the chalkboard.
- Trace every dashed line in one continuous stroke without going over any line twice. If you get stuck, start again from a point where an odd number of lines meet.
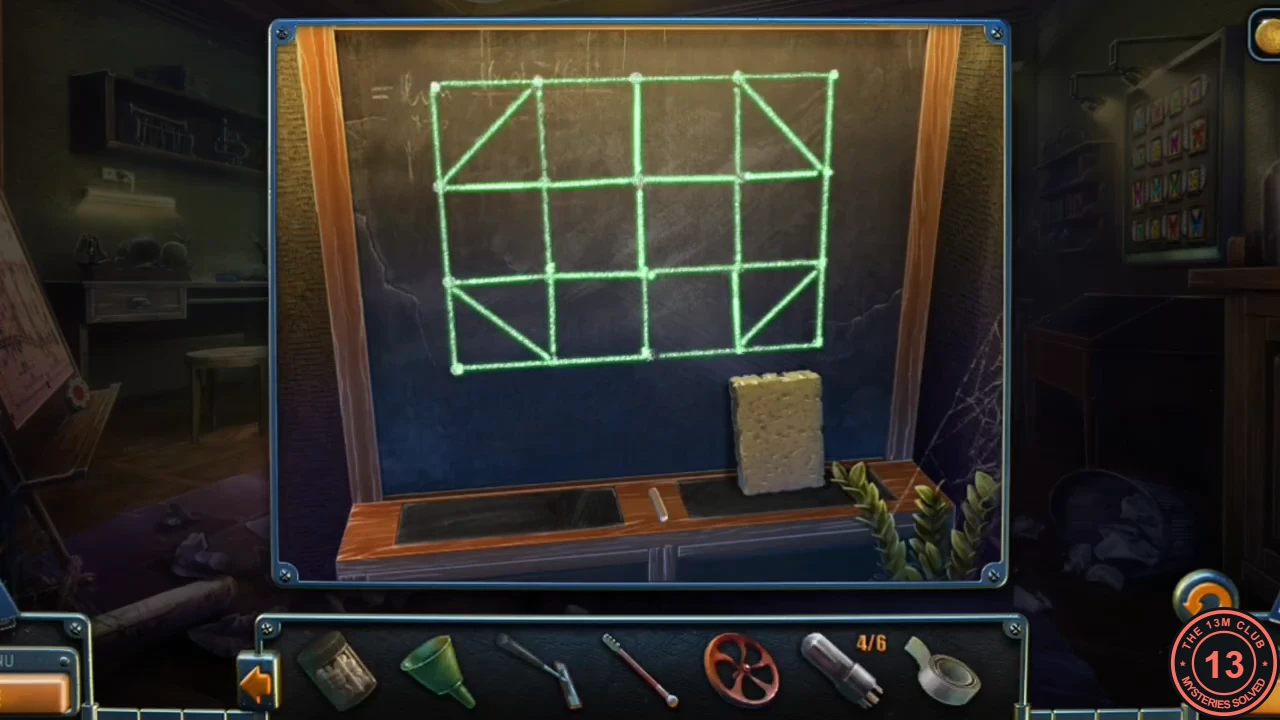
The finished chalk figure glows green when solved. - A niche opens beside the framed painting. It holds a lidded box with a line puzzle, which can't be solved yet, and the POWDER. Take the POWDER.
- In the upstairs corridor, cut the window pane with the GLASS CUTTER and take LIGHT BULB 5/6.
Torn diagram on the foyer table
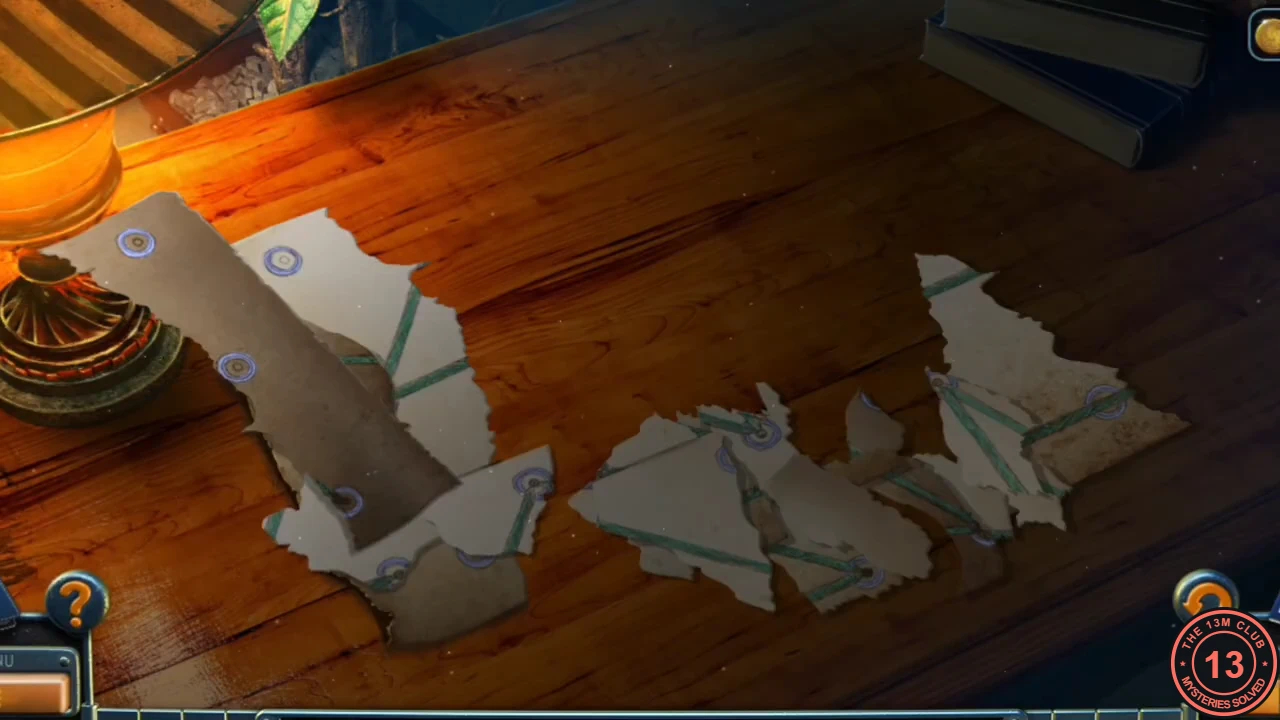
Torn pieces of a diagram lie scattered on the lamp table beside the foyer armchair.
- Drag and turn the torn pieces onto the sheet until the green diagram of dots and lines is complete.
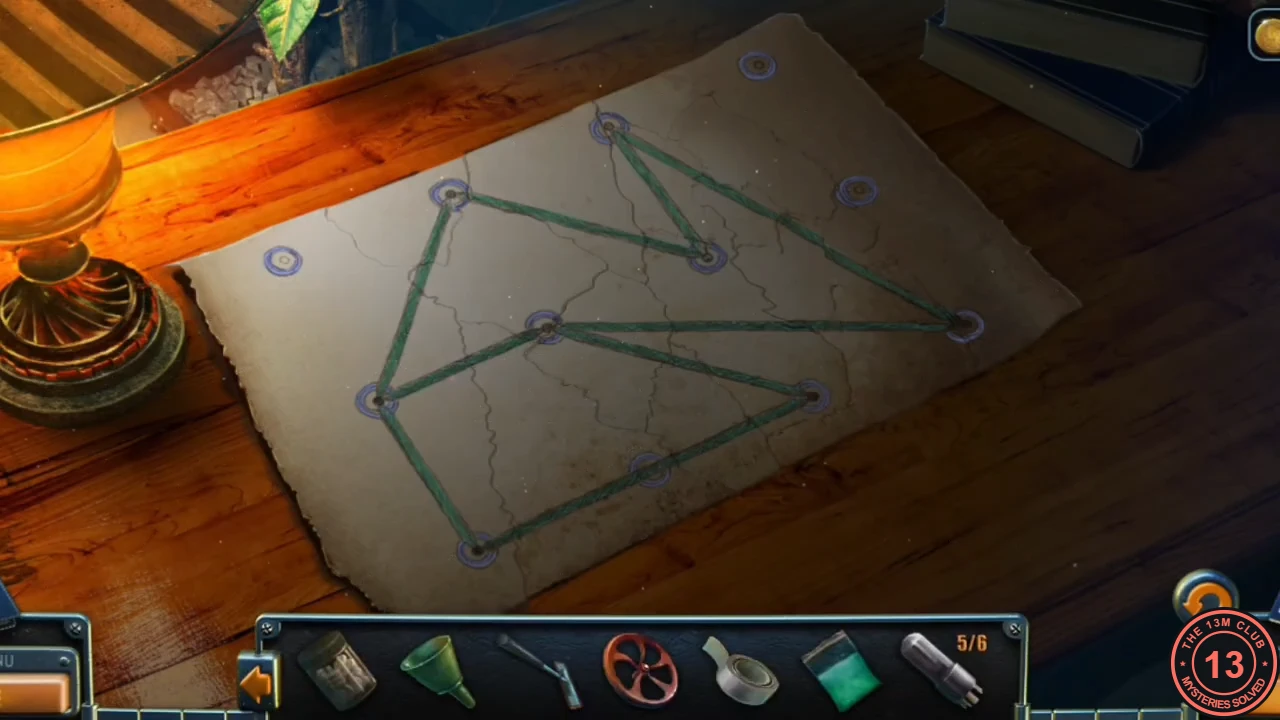
The completed torn diagram before taping. - Laura says she needs to fix the pieces together. Use the TAPE on the diagram and take the TAPED DIAGRAM.
The flooded storage-room floor
Reveal the second drawing in the storage room.
- In the storage room, Laura can shut off the water but needs a valve. Put the VALVE on the pipe on the left wall, then tap the valve to turn it and stop the water.
- Use the MOP on the puddle. A blue line drawing appears on the floor tiles; remember it for later.
Green and blue line box
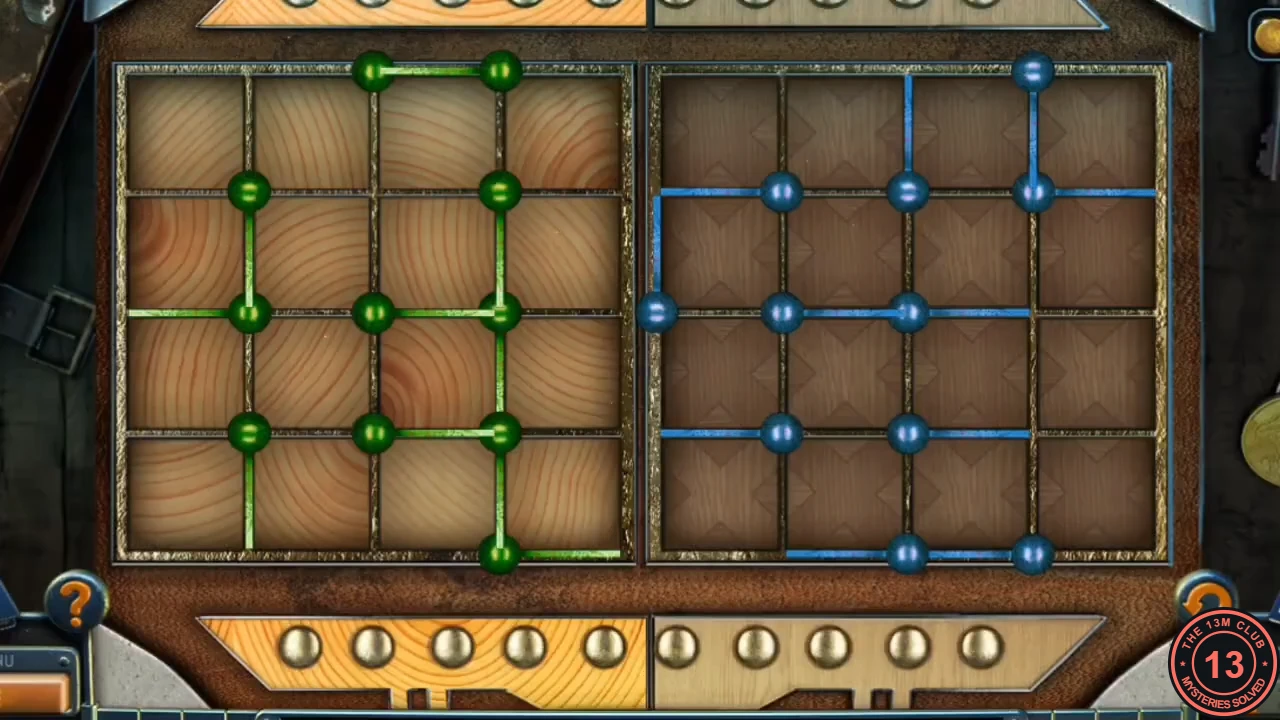
The lidded box in the office niche has two 5x5 boards of pegs: green on the left, blue on the right. Each line pivots on one peg.
- Tap a line to swing it around its pivot peg, which is marked by a ring. Make the green board match the drawing from the foyer window sill and the blue board match the drawing on the storage-room floor.
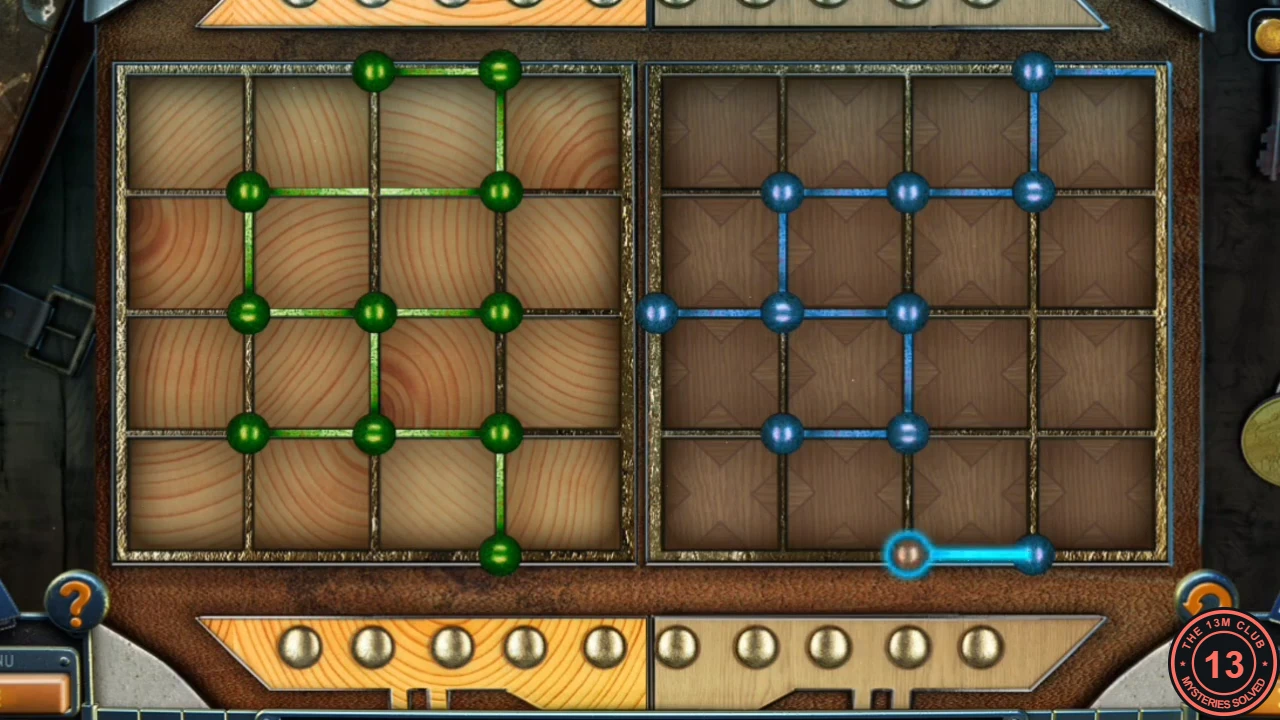
Solved line box: green board left, blue board right. - In the finished green figure, counting columns and rows from the top left, there is a short line at the top from the 3rd to the 4th peg. It runs down to the second row, along that row to the 2nd column, down to the third row, across the third row to the 4th column, with a stub down from its 3rd peg to the fourth row. The fourth row is joined from the 2nd to the 4th column, and the 4th column continues to the bottom.
- In the finished blue figure, a line runs from the 4th peg of the top row to the right edge, the 4th column runs down from that peg to the second row, and the second row runs from the 4th column to the 2nd. The 2nd column drops to the third row, and the third row runs from the left edge to the 3rd column. The 3rd column then runs all the way down through the fourth row to the bottom row, with a short branch on the fourth row back to the 2nd column. On the bottom row, a line joins the 3rd and 4th pegs.
- The box opens: take the RUNE.
Fridge door lines
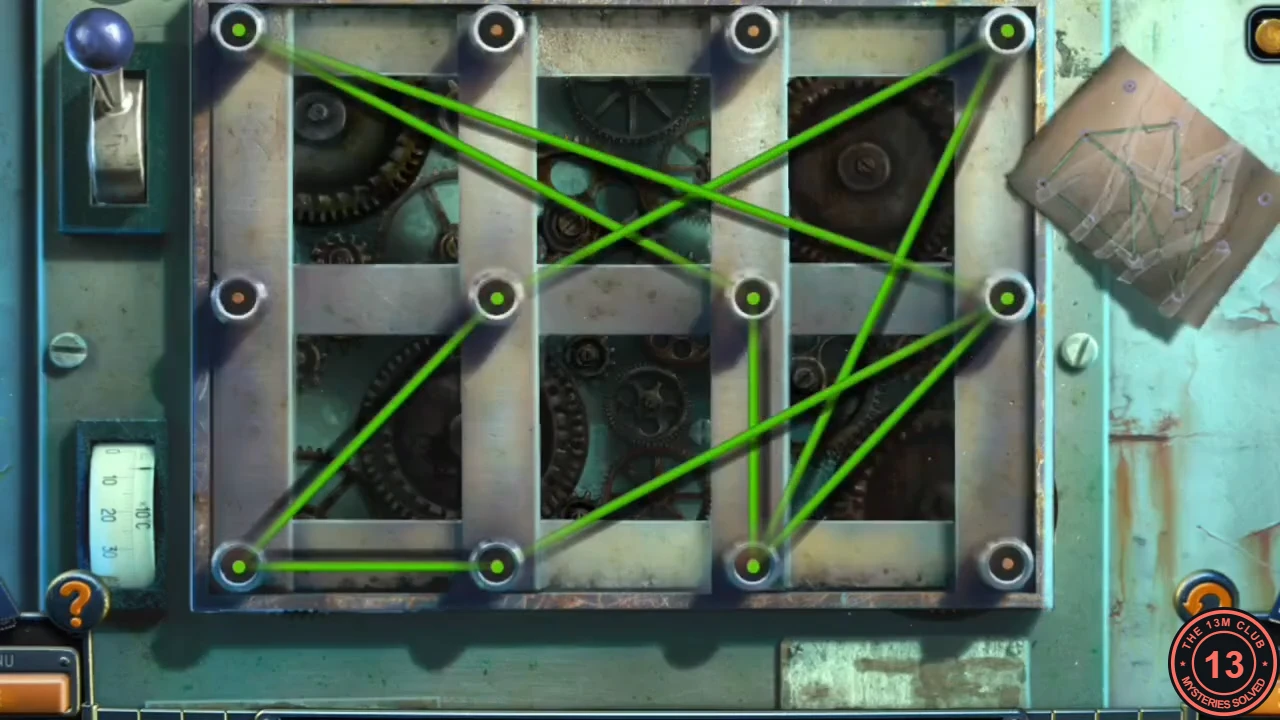
The laboratory fridge is locked by twelve pegs, four across and three down, joined by green elastic lines.
- Put the TAPED DIAGRAM on the fridge door.
- Drag the ends of the lines between pegs to copy the diagram. Name the columns A to D from left to right and the rows 1 to 3 from top to bottom. The finished lines are B1-A2, B1-C2, C1-C2, C1-D3, A2-B2, A2-A3, B2-C3, B2-D3 and A3-C3.
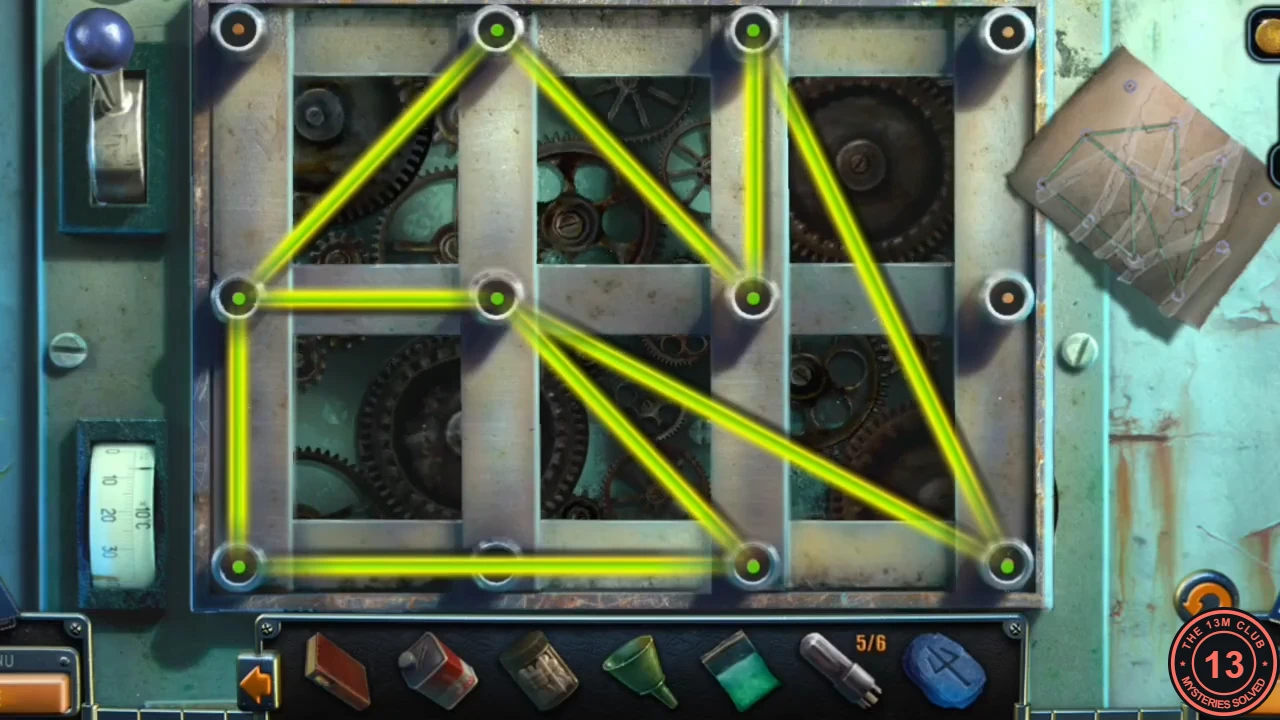
Solved fridge lines. - The fridge opens. Take LIGHT BULB 6/6 and the FIXING AGENT.
Invisible-ink developer
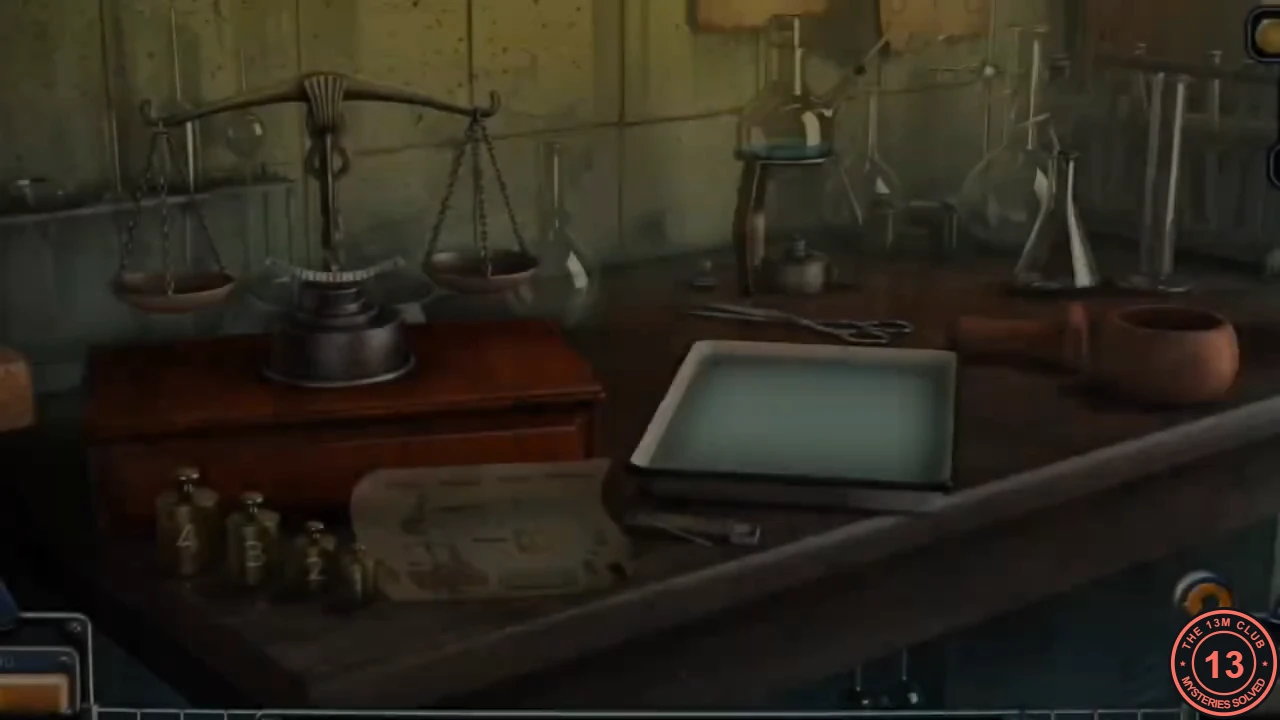
The yellow-lit counter in the laboratory holds a scale, a mortar, a tray, a burner and a recipe titled "A developer for invisible ink". Follow the arrows on the recipe.
- Put the TABLETS, the POWDER and the FIXING AGENT on the table. Tap the recipe to read it.
- The four brass weights stand on the table and both pans start empty. Place the "3" weight on the right pan of the scale, then tap the tablet jar again and again to add tablets to the left pan until the scale balances.
- Tip the tablets into the mortar and grind them with the pestle, then pour the result into the tray. The liquid turns purple.
- Laura won't tear the powder packet open by hand because the powder would spill. Cut it with the scissors on the table and pour the powder into the flask on the stand.
- Light the burner under the flask with the match on the table. Then take the small glass stopper from the table left of the burner and close the neck of the round flask with it. When the liquid has run into the small conical flask, pour it into the tray, which turns pink.
- Open the FIXING AGENT and pour it into the tray. The liquid turns green: take the DEVELOPER.
Light-bulb safe
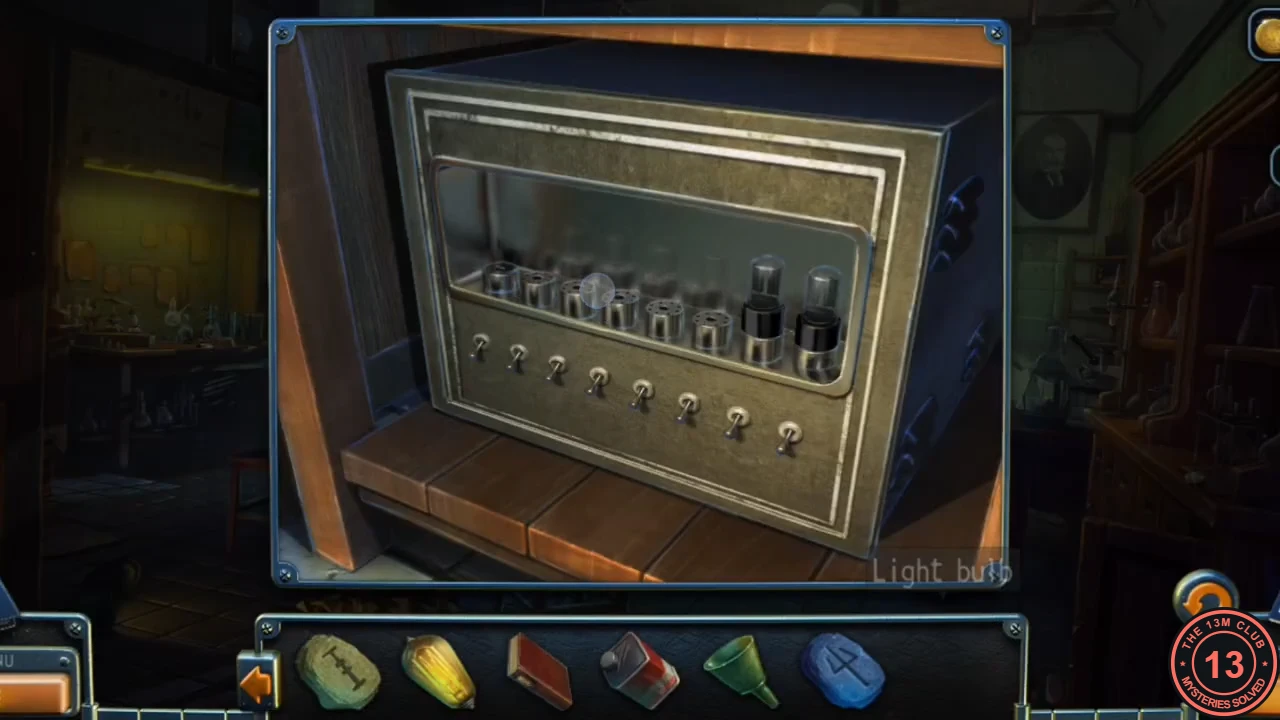
A blank sheet of paper on the laboratory counter has writing in invisible ink. It leads to a safe in the laboratory with eight bulb sockets and eight switches.
- Look at the paper on the laboratory counter: something is written in invisible ink. Put the DEVELOPER on the counter and lay the paper in it. A note appears with a drawing of eight switches and the words "...I have hidden them in my safe".
- Open the safe on the low wooden bench in the laboratory and put the six LIGHT BULBS in the empty sockets.
- Set the switches as the note shows: from left to right, switches 2, 3, 5 and 8 up and switches 1, 4, 6 and 7 down. Bulbs 2, 3, 5 and 8 light up and the safe opens.
- Watch the cutscene about how the documents reached Tom. Then take the BOOK from the safe. A new task, "Dirty Laundry", begins.