The dock under the bridge
Past the gate, a gangster's motorboat is moored below the promenade and an armed guard watches the yacht's gangway.
- Take the BOARD leaning against the car on the dock, then open the crate on the right and take the BASEBALL BAT.
- Go to the promenade and open the motorboat close-up. Lay the BOARD as a gangplank and step aboard.
The motorboat
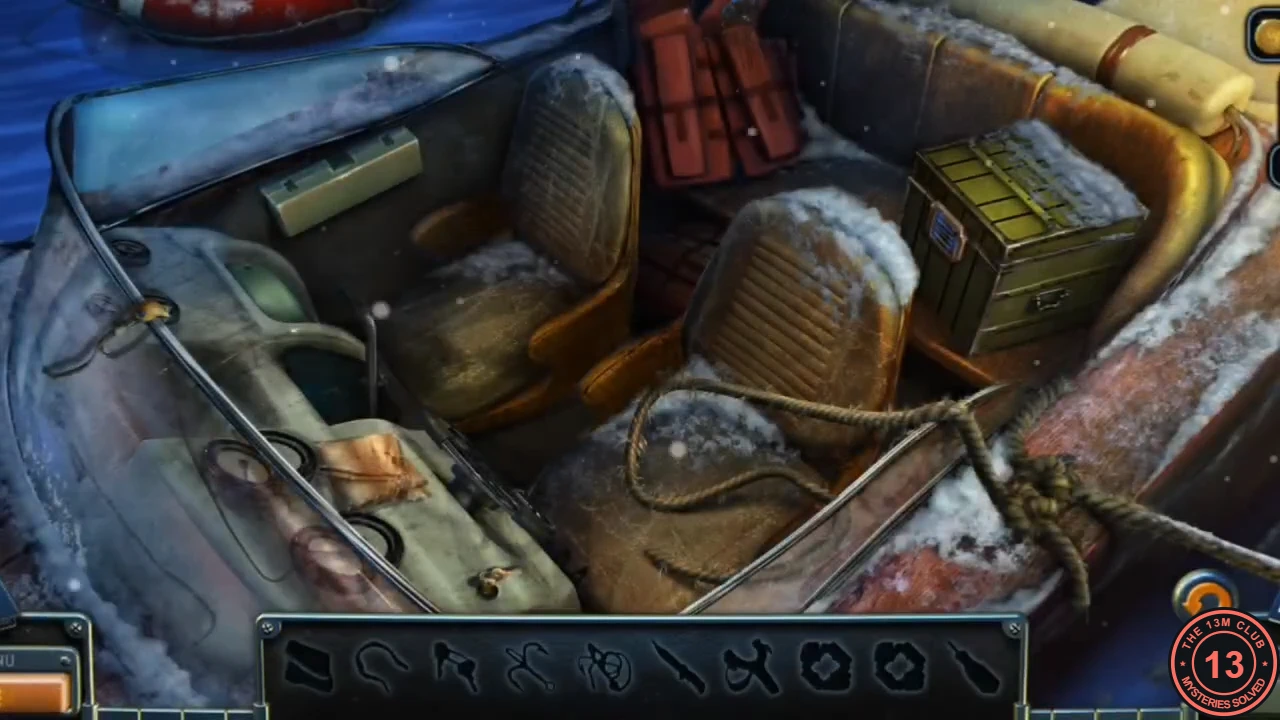
An interactive hidden-object scene. The bar at the bottom shows ten silhouettes; several items are hidden behind other actions, and the chest at the back is the final goal.
- Take the KEY beside the steering column. Use it on the toolbox on the bow seat to get the KNIFE and the first LOCK PIECE.
- Take the ELASTIC from the edge of the hull left of the windshield and the small HOOK from the red life jacket at the back.
- Cut the ROPE by the right seat with the KNIFE and tie it to the HOOK. Use it to pull the floating life ring aboard; it shows the first symbol.
- Tip the left seat cushion forward to find a board with the second symbol and the SCREWDRIVER. Use the SCREWDRIVER on the bolt of the lower-left dashboard panel to get the second LOCK PIECE.
- Take the CLOTH from the dashboard and wipe the snow off the life jacket to reveal the third symbol. Then place both LOCK PIECES on the chest at the back to open its frame lock (next section).
Motorboat chest frames
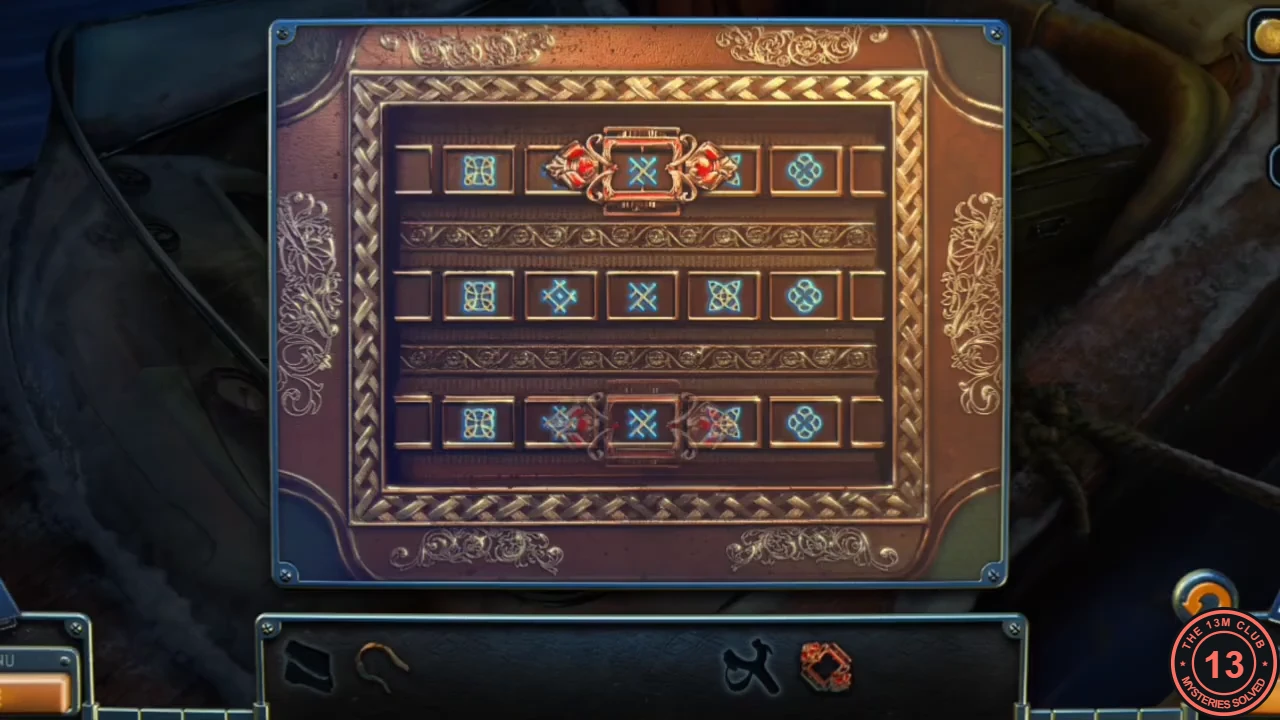
The chest lock has three rows of symbol tiles with a sliding frame in each row: "Rearrange the frames to place them on the right symbols." The three symbols found around the boat are the clue.
- With both LOCK PIECES in place, slide the top frame onto the 1st tile (square lattice), the middle frame onto the 5th tile (four-lobed knot) and the bottom frame onto the 2nd tile (diamond cross with arrows). The chest opens.
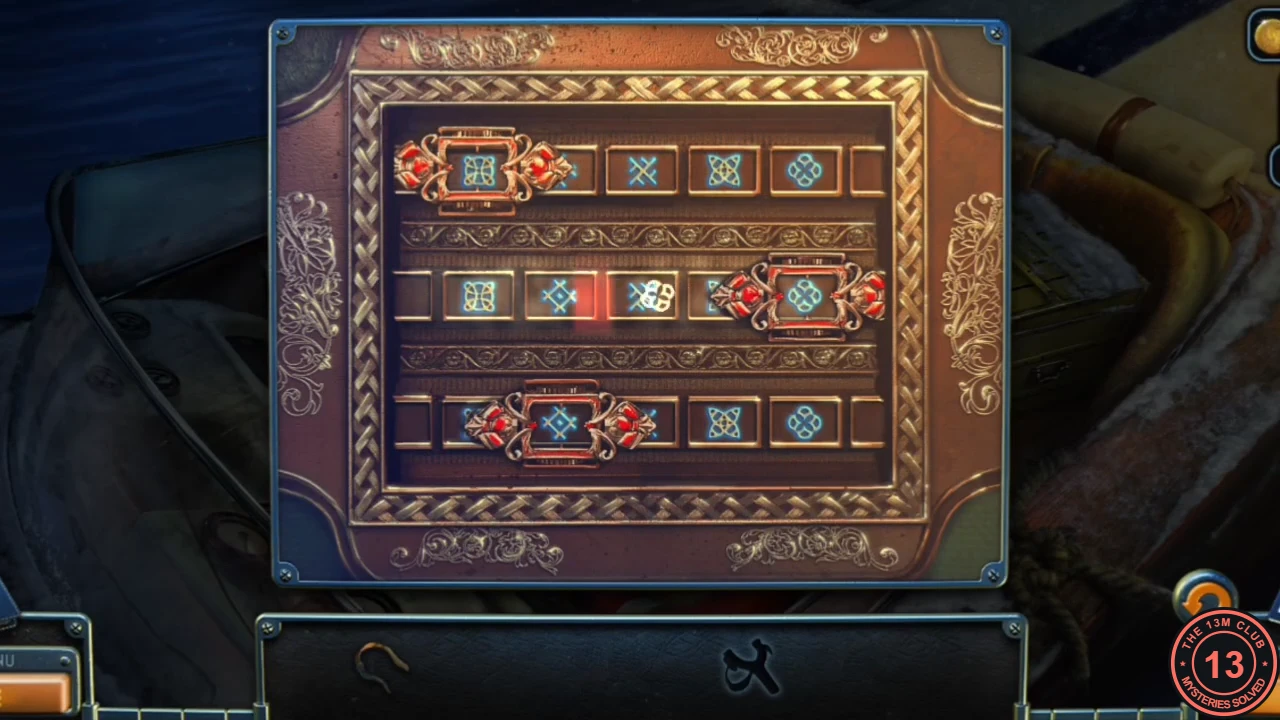
Solved chest lock: frames on tiles 1, 5 and 2. - Inside the opened chest lies a slingshot frame. Add the ELASTIC to it to finish the SLINGSHOT; the scene ends.
Binoculars and the rifle
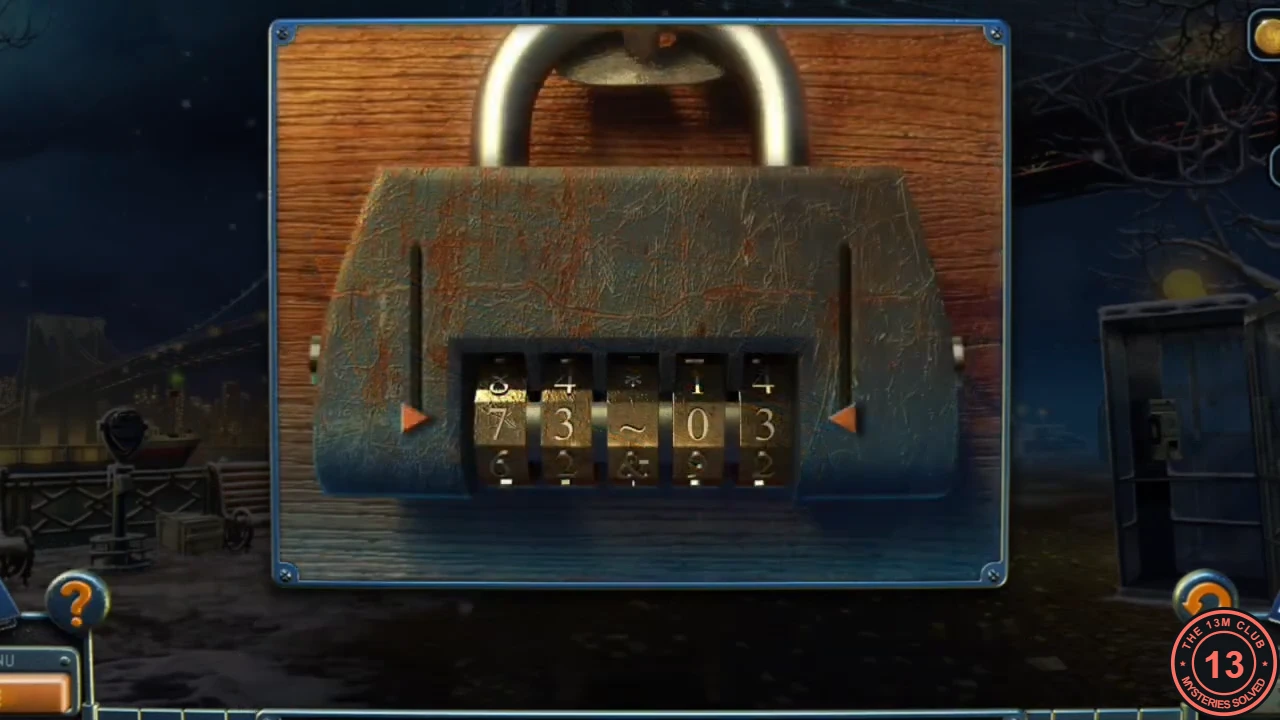
The crate on the promenade cart still has its combination lock from Chapter 2. The combination is painted on a ship out in the harbour.
- Smash the coin box of the telephone booth with the BASEBALL BAT to get a COIN.
- Put the COIN in the coin-operated binoculars on the left and look at the ship: its number reads 92/47.
- Look at the crate's lock. It has five wheels: four number wheels and a symbol wheel in the middle. Set them to 9 2 / 4 7 (the middle wheel to the slash). Read the note and take the TRANQUILIZER RIFLE.CODE92/47
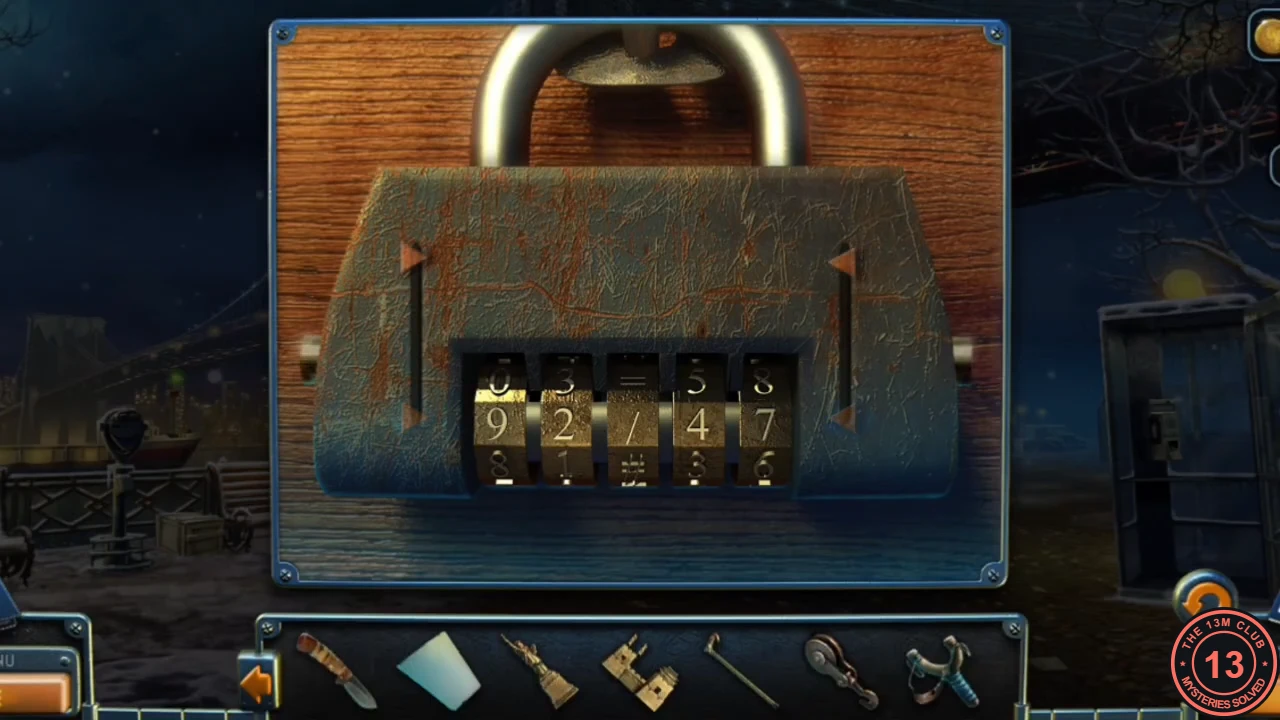
Crate lock set to 9 2 / 4 7. - Take the SLICE OF PIZZA from the pizza box on the right of the dock, then shoot the guard at the top of the gangway with the TRANQUILIZER RIFLE. Climb aboard.
The yacht deck and the gangster's car
The deck has a table with a locked picture box, and the gangster's car is parked on the dock below.
- Search the sleeping guard for the CAR KEY. At the table take the CHOPSTICKS; the box on the table is locked for now and the newspaper mentions a fifth incident with butterflies.
- Unlock the car on the dock with the CAR KEY. Take the MAGNET and the LIGHT BULB, and the HAMMER from the glovebox.
- Break open the crate at the lower left of the dock with the HAMMER to get a BOTTLE OF LIQUOR.
- On the deck, use the MAGNET on the crack in the planks to pull out the EGYPTIAN PYRAMIDS FIGURINE.
- Enter the cabin corridor and take the BROOM leaning on the left wall. A dog guards the corridor: open the door on the left, put the SLICE OF PIZZA inside the room, wait for the dog to run in after it, then close the door.
- Screw the LIGHT BULB into the wall lamp on the right. Use the CHOPSTICKS to pull a page out of the vent above it: sea creatures numbered 1 shark, 2 octopus, 3 lionfish, 4 crab, 5 starfish.
- On the deck wall panel with nine sea-creature buttons, press shark, octopus, lionfish, crab, starfish. The door at the top of the stairs opens to the wheelhouse.
Wheelhouse desk
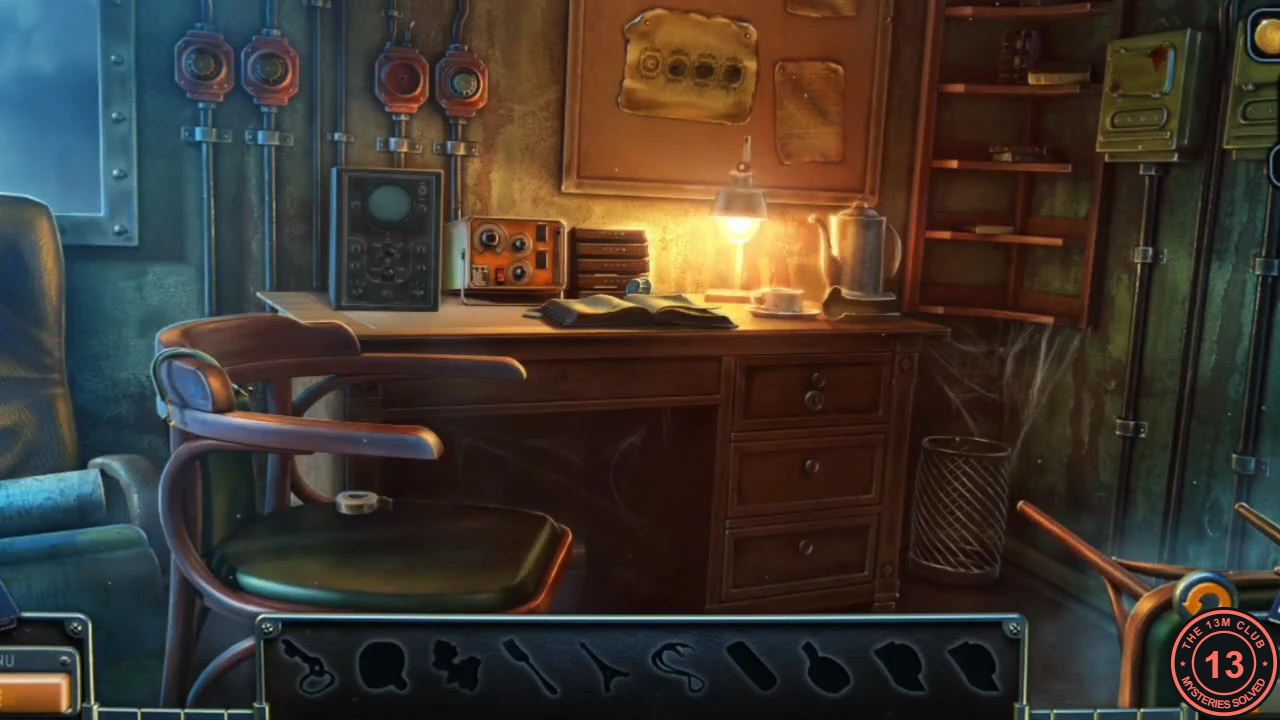
An interactive hidden-object scene around the wheelhouse desk. It contains two small puzzles of its own: the pipe dials and the oscilloscope.
- Take the TORN PAGE from the wastebasket right of the desk and the WIRE from the left chair arm. Put the page on the logbook, then take the ERASER and the SWITCH DIAL lying by the book.
- Take the FORK by the saucer near the lamp and kettle.
- On the pipe panel at the upper left, put the SWITCH DIAL on the empty third socket and connect the orange pipes with the WIRE.
- Rub the ERASER over the paper pinned above the desk to show four dial directions. Turn the pipe dials to match: 1st right (3 o'clock), 2nd up, 3rd up-right, 4th up-left. The oscilloscope powers on.
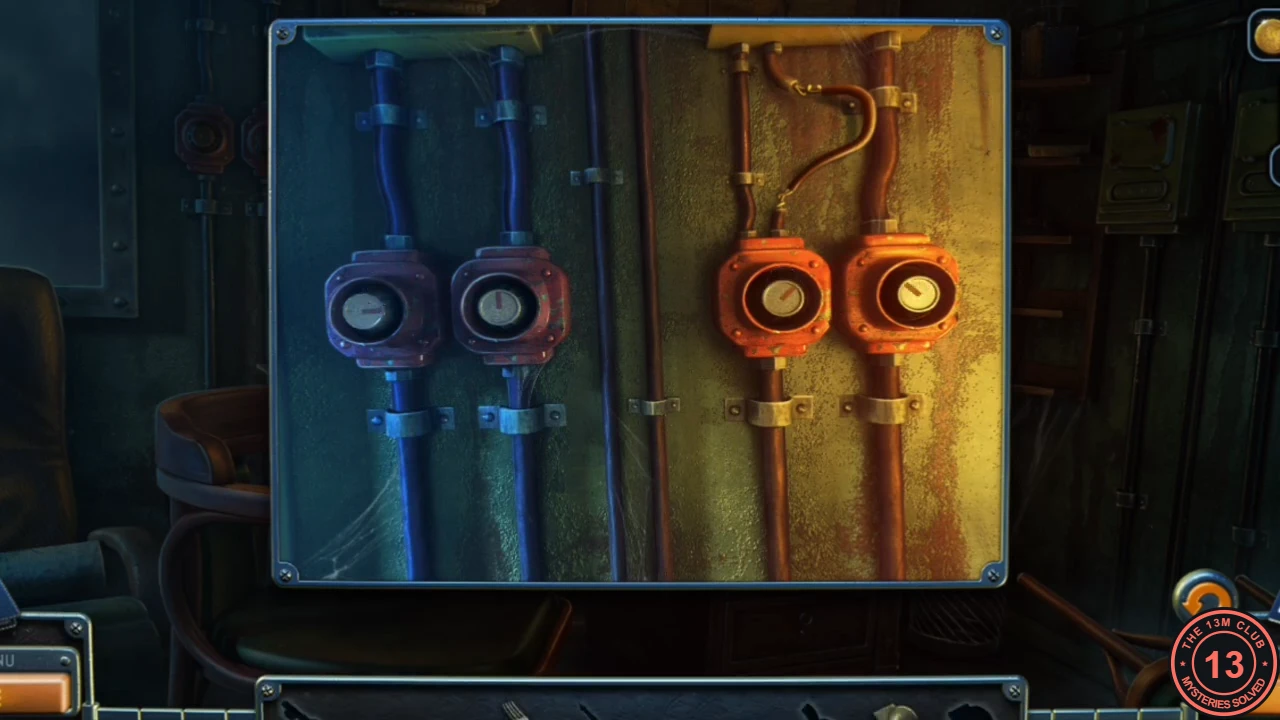
Pipe dials set: right, up, up-right, up-left. - Pry the plate of the yellow box on the right wall with the FORK to get the CONTROL DIAL, and put it on the oscilloscope.
- Take the TAPE from the chair seat and tape the torn logbook diagram together. It shows the oscilloscope setting: top dial 5, middle dial 30, bottom-left lever tilted right, bottom-right lever straight up. Set the oscilloscope to match; the line goes flat.
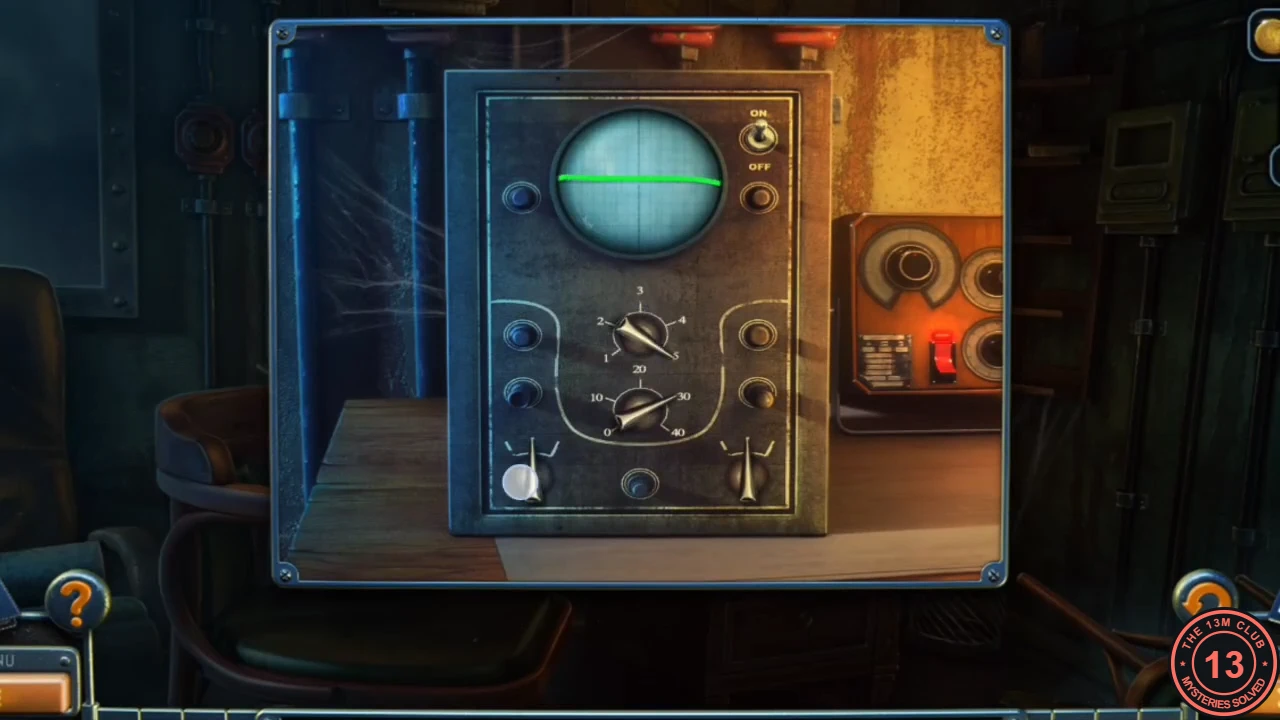
Oscilloscope set correctly: the line goes flat. - Take the KEY from inside the oscilloscope and open the desk drawer with it to get the EIFFEL TOWER FIGURINE.
Picture box on the deck
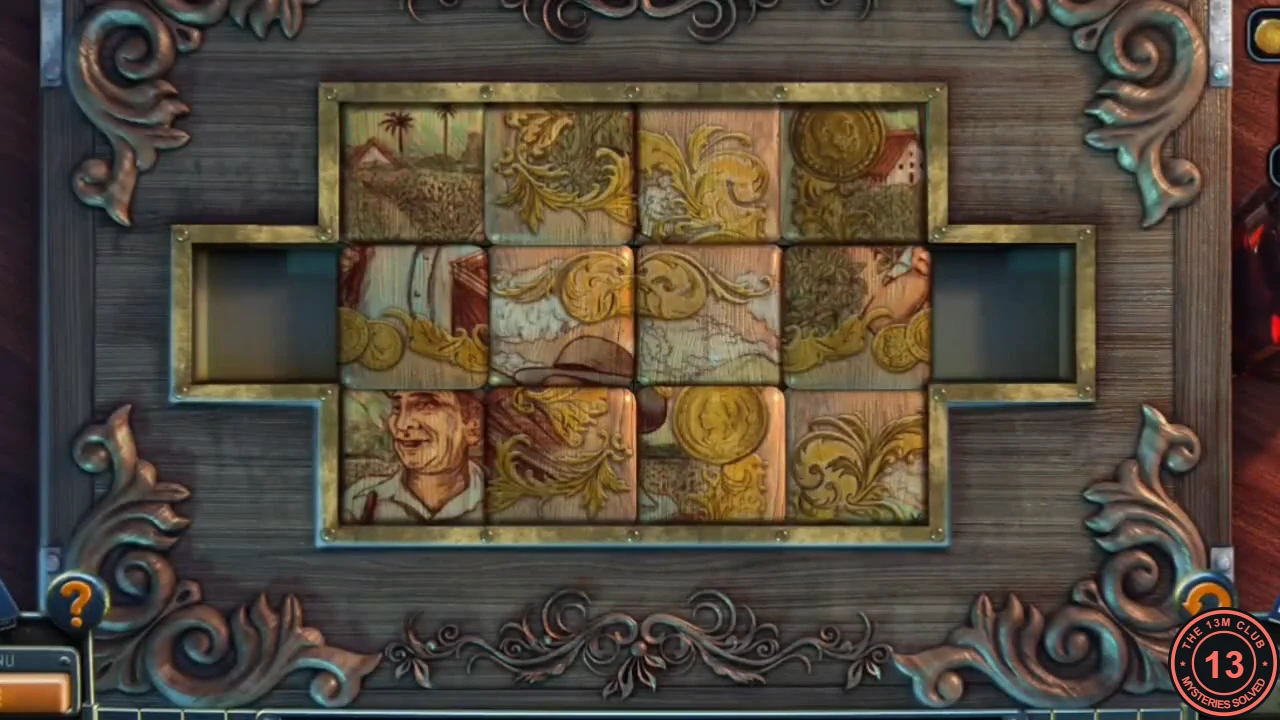
The box on the deck table is a sliding-tile picture with two empty spaces.
- In the wheelhouse, sweep the cobweb off the radar screen with the BROOM to find the MOSAIC PIECES.
- Put the MOSAIC PIECES into the box on the deck table and slide the tiles until the picture is complete: a smiling man in a cap, a village with palm trees on the left and gold coins on the right. Your tiles may start in a different order from the recording, so there is no fixed move list; finish the top row first, then work downwards. A cigar compartment opens: take the KREMLIN FIGURINE lying on the cigars.
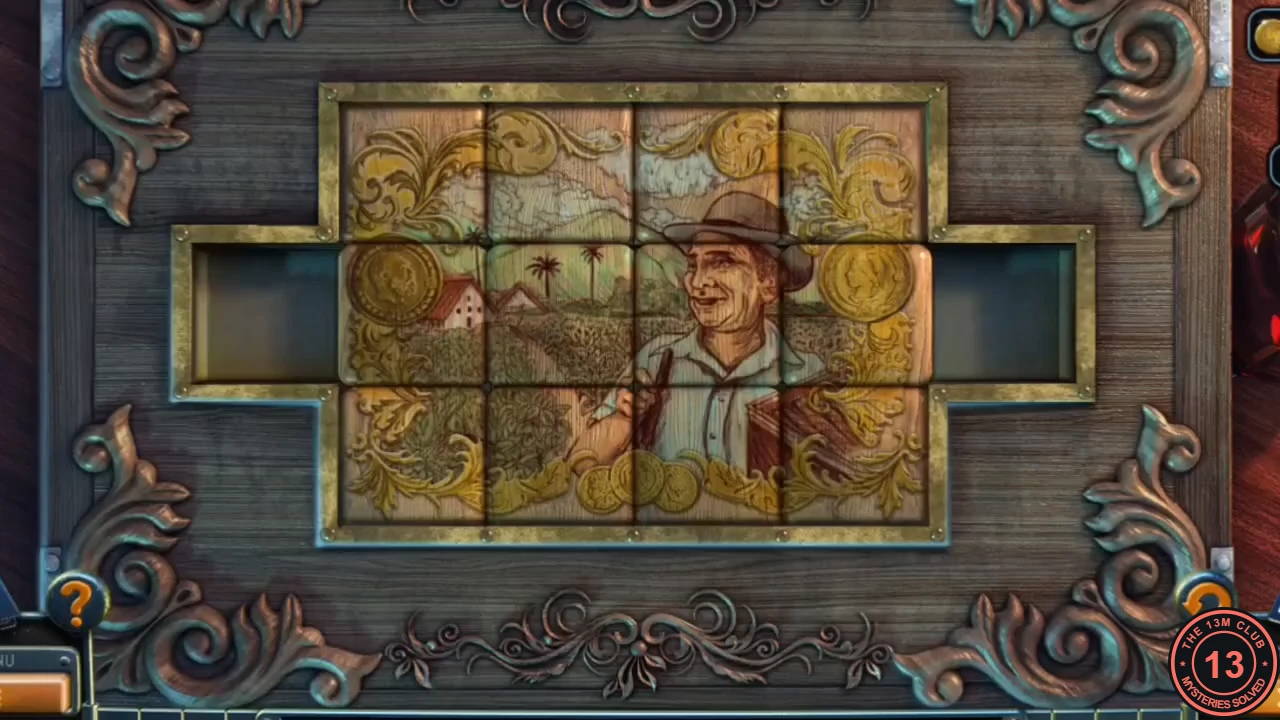
Target picture for the deck box (your starting tiles may differ).
The last two figurines
Back in the tunnels under the city, two more figurines are out of reach.
- At the barred tunnel gate, shoot the object on the beam with the SLINGSHOT. A FIGURINE falls down; it cannot be placed on the shelf yet.
- On the cavern bridge, hook the round pipe grille with the CANE to get the CHRIST THE REDEEMER FIGURINE.
World map shelf
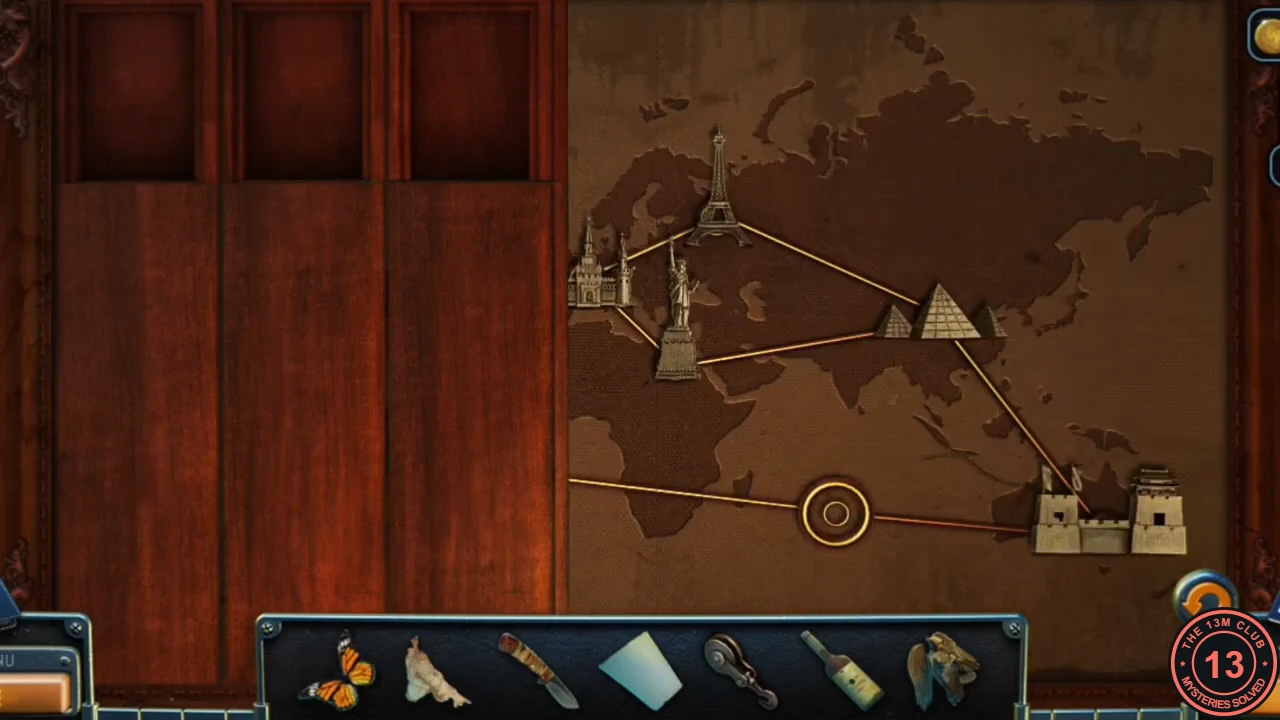
The shelf above the study desk holds seven landmark figurines on a map. Each landmark must travel to its own country along the lines; one ring stays empty.
- In the study, place the CHRIST THE REDEEMER, EIFFEL TOWER, EGYPTIAN PYRAMIDS, KREMLIN, STATUE OF LIBERTY, GREAT WALL OF CHINA and SYDNEY OPERA HOUSE figurines on the shelf.
- Move figurines one at a time into the empty ring along the connecting lines until North America holds the Statue of Liberty, South America Christ the Redeemer, France the Eiffel Tower, Russia the Kremlin, Egypt the Pyramids, China the Great Wall and Australia the Sydney Opera House. The ring in the Indian Ocean stays empty. The map slides aside to reveal an archive compartment: take the LEVER and the SCRAP OF PAPER, and read the note and Lucas Bishop's file.
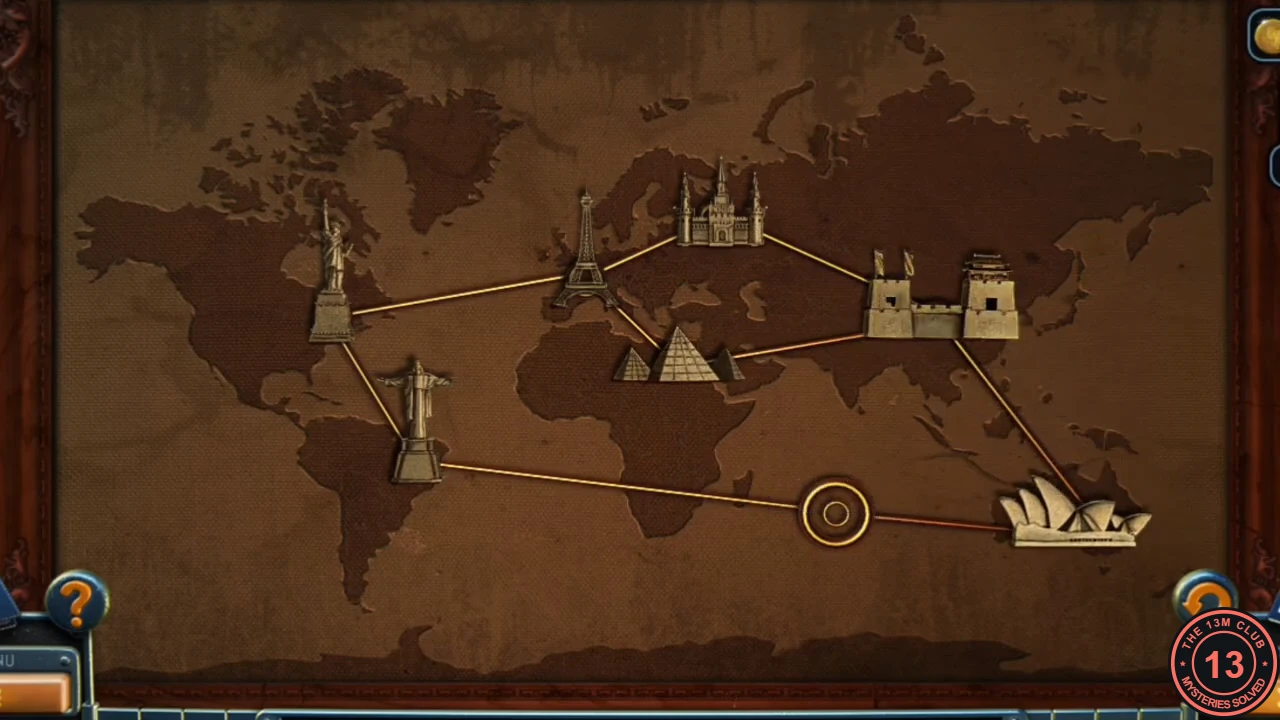
Solved world map: every landmark in its country.
The gangster's cabin
The bunch of keys for the locked cabin lies under a crate on the yacht deck.
- On the deck, hang the HOOK from the pier truck on the rope net around the crate, then put the LEVER on the crane control box. The crane lifts the crate; take the BUNCH OF KEYS.
- Open the door at the end of the cabin corridor with the BUNCH OF KEYS. In the cutscene the gangster is found gassed, with a butterfly beside him.
- In the cabin take the PICTURE OF SHIP from the photo wall, the MAST from the table by the teapot and the BUTTERFLY from the moss tray on the desk.
Ship model sails
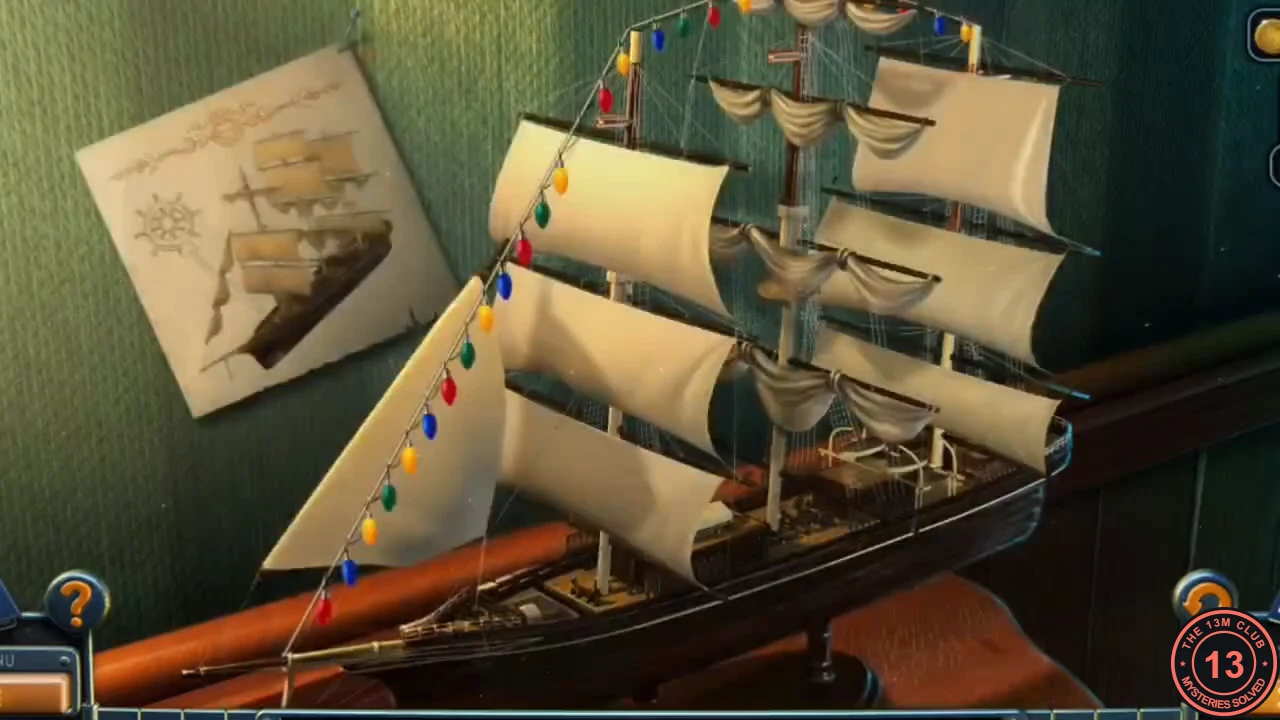
The ship model in the corridor is missing a mast. Tap sails to furl or set them until the model matches the picture of the ship.
- Put the MAST on the model and pin the PICTURE OF SHIP beside it.
- Set the sails as in the picture: front mast - the two lower sails set, the top sail and the jib furled; middle mast - only the top sail set; rear mast - the top and bottom sails set, the middle one furled. Take the SHIP'S WHEEL.
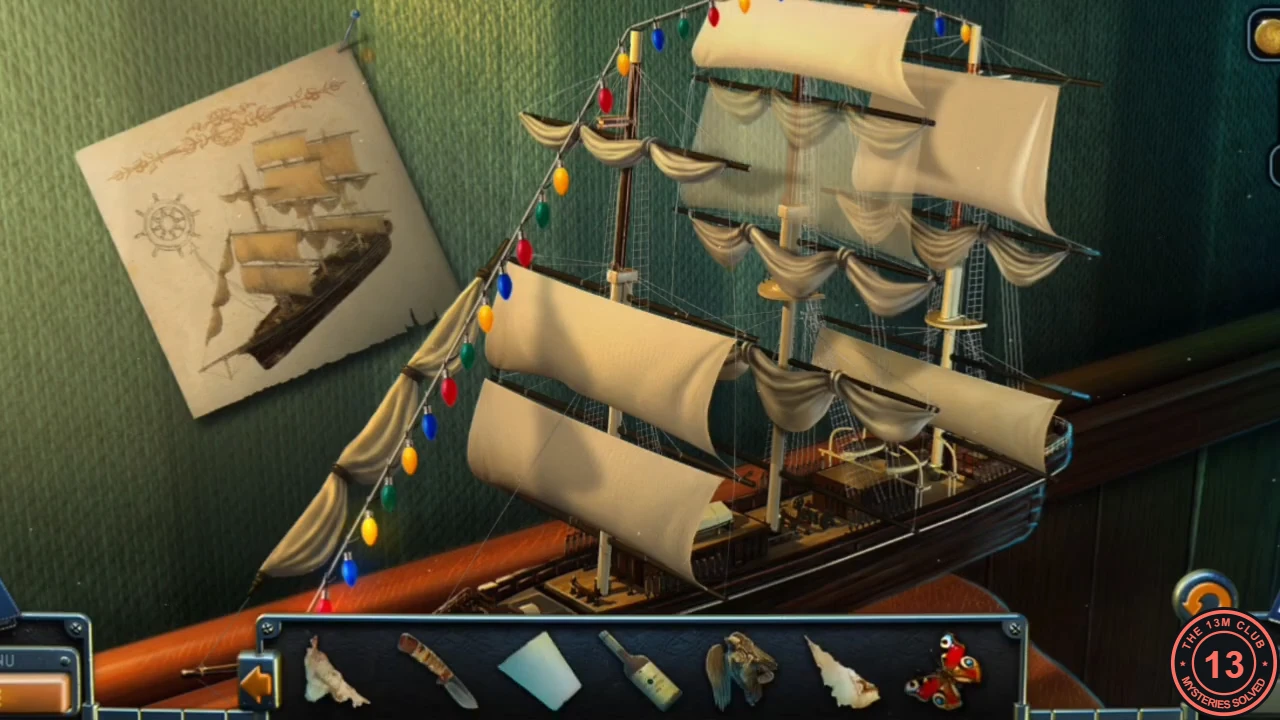
Solved sails, matching the pinned picture.
The record and the crystal
Finish on the yacht, then report back to Lucas in the vault.
- In the wheelhouse, put the SHIP'S WHEEL in the empty right socket of the lower cabinet. The wheels turn and the doors open; read the note to Frankie, then take the HAMMER and the RECORD.
- Return to the vault and talk to Lucas about the turquoise fog on the Hudson bank. New task: "The Fog".
- Put the RECORD on the record player in the vault hall and turn the crank. A drawer opens: take the CRYSTAL.
- In the underground hub insert the new PUNCHED CARD in the console, open the rail car and press the controls to travel on.