Food-truck kitchen
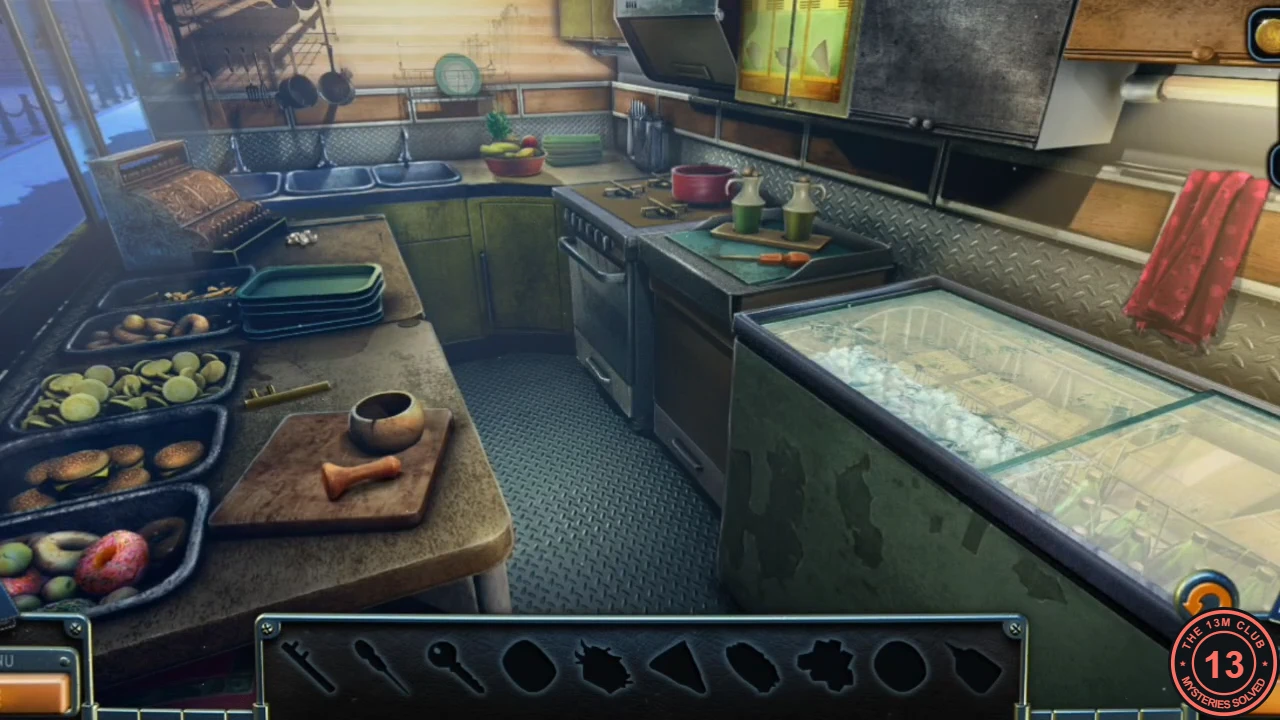
Chapter 6 opens inside a food truck parked outside the university. This is an interactive hidden-object scene: the bar shows ten silhouettes and the GLUE is the final reward.
- Move the kiwi in the fruit bowl and take the BUTTON. Take the broken HANDLE lying on the counter left of the cutting board and the BRADAWL with the orange handle from the green chopping board by the stove.
- Move the red towel on the right wall and take the KEY from its hook.
- Something is under the fryer lid, but its handle is broken. Put the HANDLE on the lid, lift it and take the FRIES picture piece.
- Look at the cash register: take the SUGAR CUBES. The register is missing a button. Put the SUGAR CUBES in the mortar on the cutting board and grind them into POWDERED SUGAR.
- Put the BUTTON on the register, then dust the keys with the POWDERED SUGAR. Fingerprints show on 3, 4 and #. Press 3, 4, # to open the drawer and take the SANDWICH picture piece.
- Unlock the freezer with the KEY. The ice must be broken: chip it with the BRADAWL and take the PIZZA picture piece.
- Put the three pieces in the lit menu cabinet above: SANDWICH on the left, FRIES in the centre, PIZZA on the right. The cabinet opens: take the GLUE.
A pass for the university
Laura needs a pass to get into the university building.
- On the street outside the food truck, take the GAS CAN from the bench. Look at the ID card of Joanna Stone on the bench, remove her photo and spread the GLUE on the blank space. Laura now needs a photo of herself.
- Use the map to travel to Lucas's study. Open the file on the typewriter desk and take Laura's PHOTO. Travel back to the university street.
- Put the PHOTO on the ID card to make the PASSCARD. Use it at the button beside the door on the right and go into the foyer.
- Talk to the woman in the armchair. She takes Laura for Miss Stone.
- At the window on the left of the foyer there is a smeared paint stain on the sill. Pour the BOTTLE OF LIQUOR over it. A green line drawing appears; remember it for later.
- Cut the armchair cushion with the KNIFE and take the TABLETS. Then go up the stairs to the upstairs corridor.
The lounge
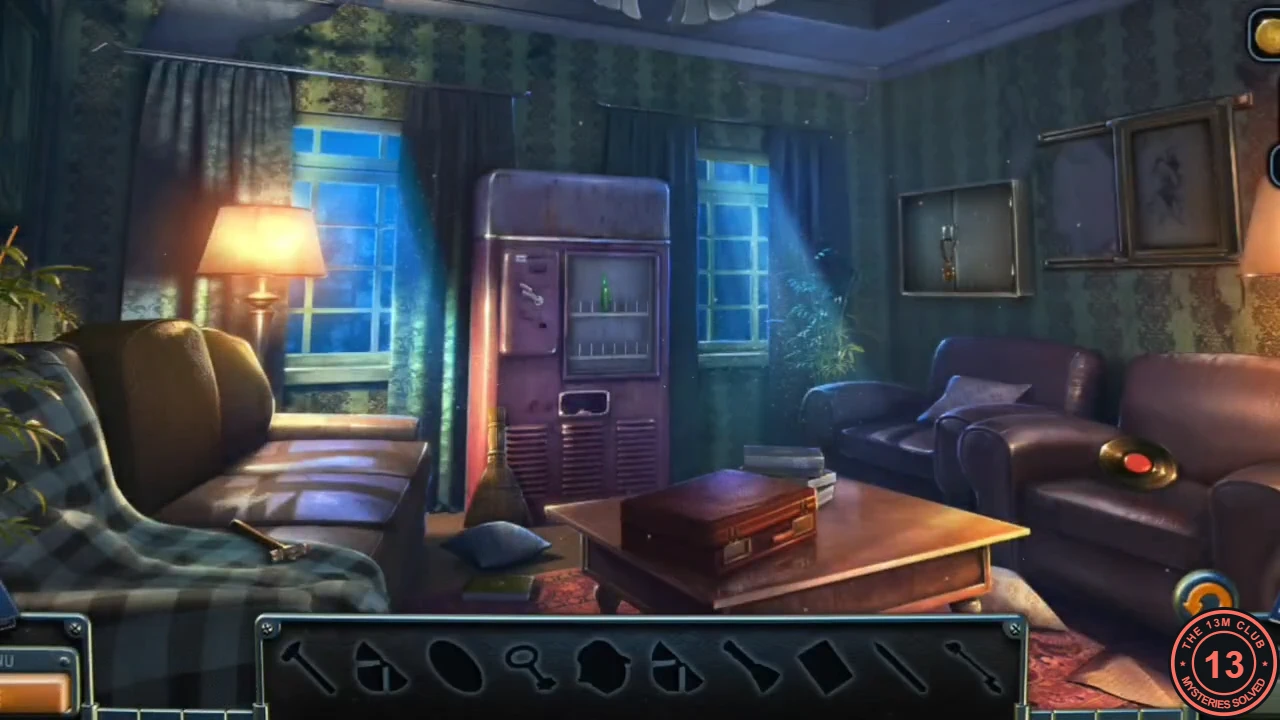
The first door in the upstairs corridor leads to a lounge with a pink vending machine, a gramophone and a chained cabinet. This is another interactive hidden-object scene; the FIRE HOSE is the final reward.
- Take the HAMMER from the blanket on the plaid sofa on the left and the BROOM leaning against the vending machine.
- Something is caught in the cobweb in the upper corner. Sweep it with the BROOM and take the TONEARM. Take the RECORD from the right armchair.
- There is something behind the glass of the vending machine. Break the glass with the HAMMER and take the DIAGRAM and a LOCK PIECE.
- Put the RECORD, the DIAGRAM and the TONEARM on the gramophone. Set it as the diagram shows: tonearm on the record, both knobs turned so their orange dots point up-left, slider pushed almost to the top, and the 3rd and 6th of the six green buttons pressed. A compartment opens: take the second LOCK PIECE.
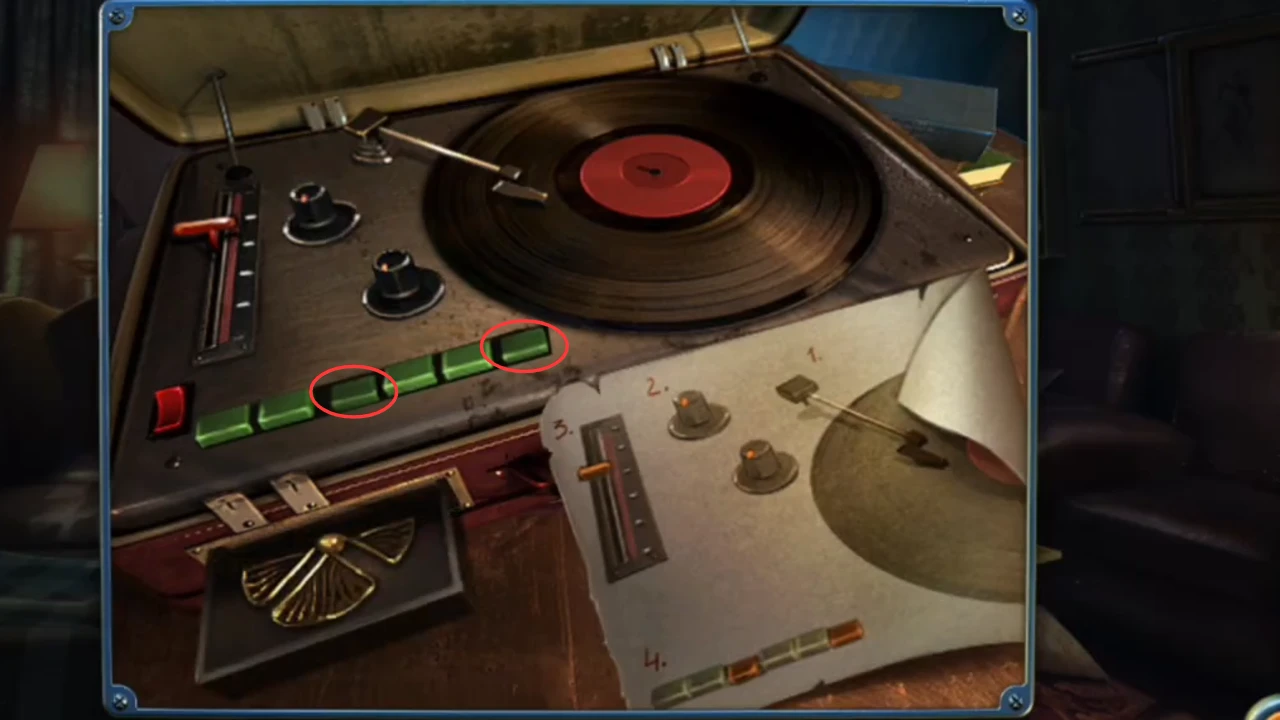
Gramophone set to match the diagram (pressed buttons circled); the compartment opens with the second lock piece. - The safe on the back of the armchair needs a special key. Use the two LOCK PIECES on it and take the PENCIL.
- Shade the framed flower sketch with the PENCIL. The frame slides aside: take the KEY. Unlock the padlock on the chained cabinet with it and take the FIRE HOSE.
The manhole
Collect the first LIGHT BULB and get a floating box out of the manhole in the street.
- In the upstairs corridor, search the potted plant by the lounge door and take LIGHT BULB 1/6.
- Go down to the foyer and through the door under the stairs into the storage room. Take the BOAT HOOK and the PIPE.
- In the street, take the side cap off the fire hydrant on the left and attach the FIRE HOSE.
- Laura can't lift the manhole cover by hand. Lift it with the BOAT HOOK. Something is floating down in the shaft: put the hose into the manhole so the water lifts the box up, then cut it open with the KNIFE and take the BUTTERFLY and the BLOCK.
Sliding-block cabinet
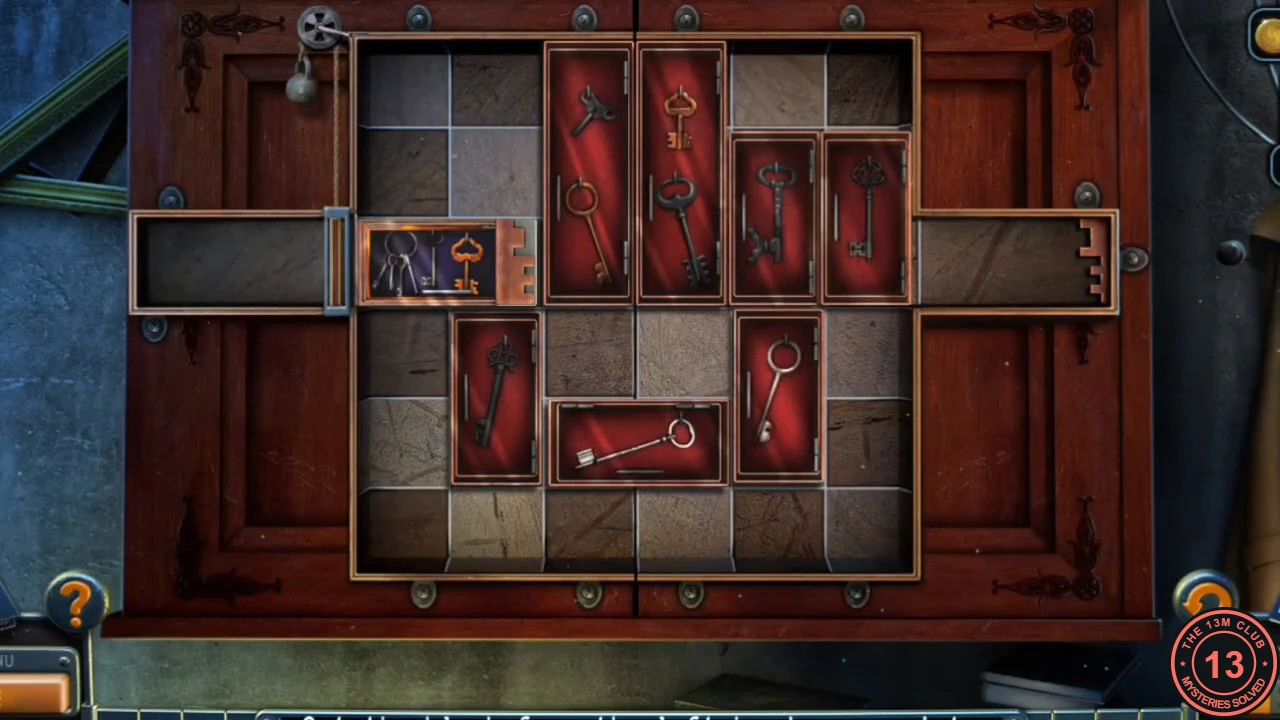
The red wall cabinet in the upper right of the storage room holds a sliding-block puzzle.
- Put the BLOCK in the cabinet. It becomes the orange key block on the left.
- Slide the red blocks out of the way until the orange block can slide all the way out through the exit on the right. The blocks may need a different sequence of moves in your game; clear the row in front of the orange block one block at a time.
- The cabinet opens onto a key board. Take the brass KEY on tag 9.
The locked office
The brass key opens the locked door in the upstairs corridor.
- In the upstairs corridor, unlock the door with the KEY and go into the office. A ghost appears and says "You will find what you seek here...".
- Take the FLOORPLATE, the hexagonal tile on the floor, and the FUNNEL from the lamp desk on the left.
- At the mantel clock on the back right, take the FLASHLIGHT in front of it. The clock is missing a figurine. Put the angel FIGURINE on the left of the clock. The clock opens: take the MEDALLION and LIGHT BULB 2/6.
- In the upstairs corridor, put the MEDALLION on the urn pedestal on the right and take LIGHT BULB 3/6.
Hexagon floor
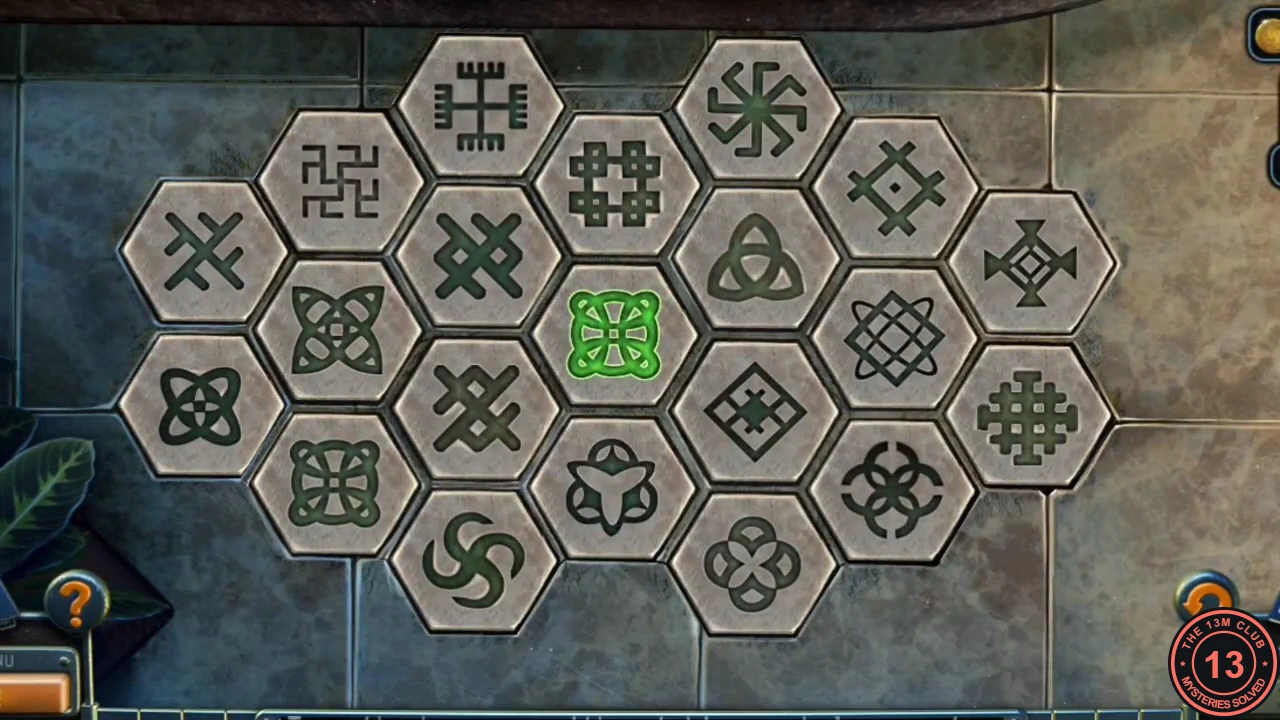
The foyer floor is a mosaic of hexagonal tiles with symbols, with one tile missing in the centre.
- Put the FLOORPLATE in the empty hexagon in the centre of the foyer floor.
- Tap pairs of tiles with matching symbols to light them. Keep going until every tile is lit.
- The floor opens. Take the MALLET and a second MEDALLION. This also unlocks the "Erudite" achievement.
Two more butterflies
Collect the last two butterflies in the storage room.
- In the storage room, light the hole in the brick wall on the left with the FLASHLIGHT, break the bricks with the MALLET and take the green BUTTERFLY.
- Pull the sheet off the hooded statue. Put the MEDALLION on its chest; the book in its hands opens. Take the purple BUTTERFLY.
Butterfly collection
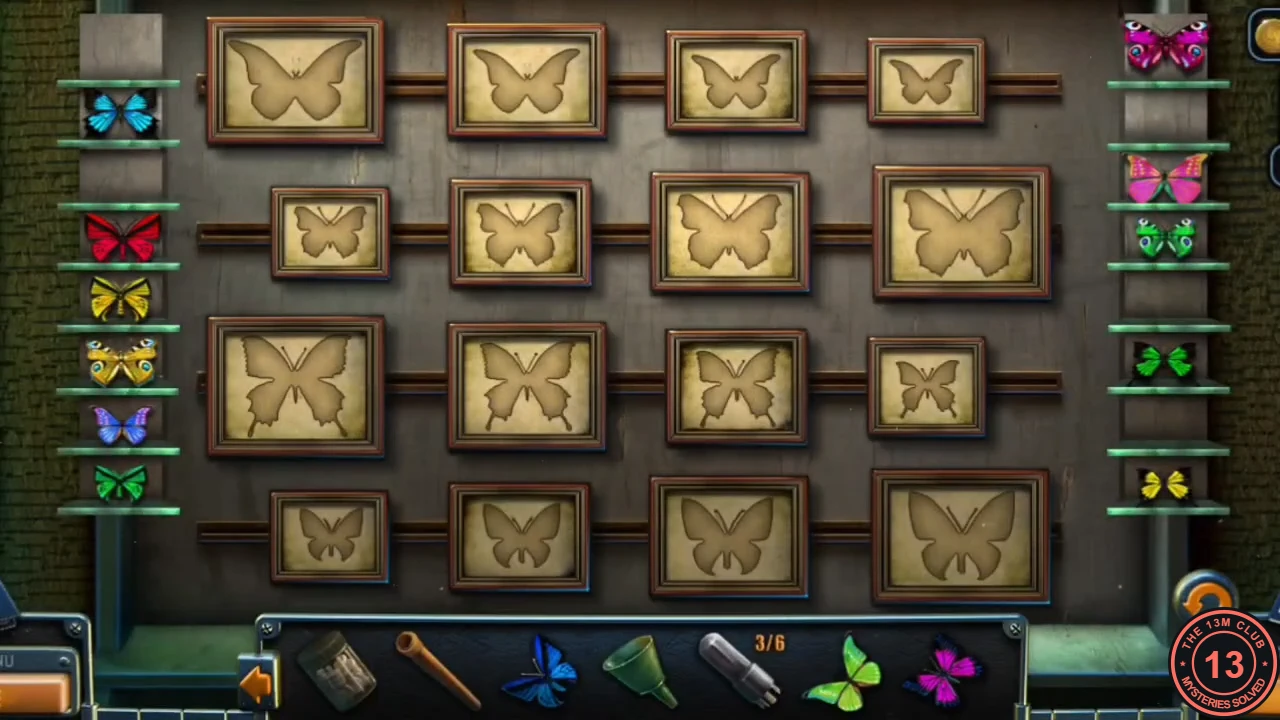
A framed butterfly collection on the right wall of the office has empty outlines, plus pegs on the side for the butterflies Laura has collected.
- Put all five BUTTERFLIES from the inventory on the empty pegs beside the frame.
- Drag each of the 16 butterflies into the outline that matches its exact size and wing shape.
- Numbers 1 to 16 appear beside the butterflies. Note the numbers for these four: orange monarch 3, magenta peacock 8, yellow swallowtail 6, blue swallowtail 9.
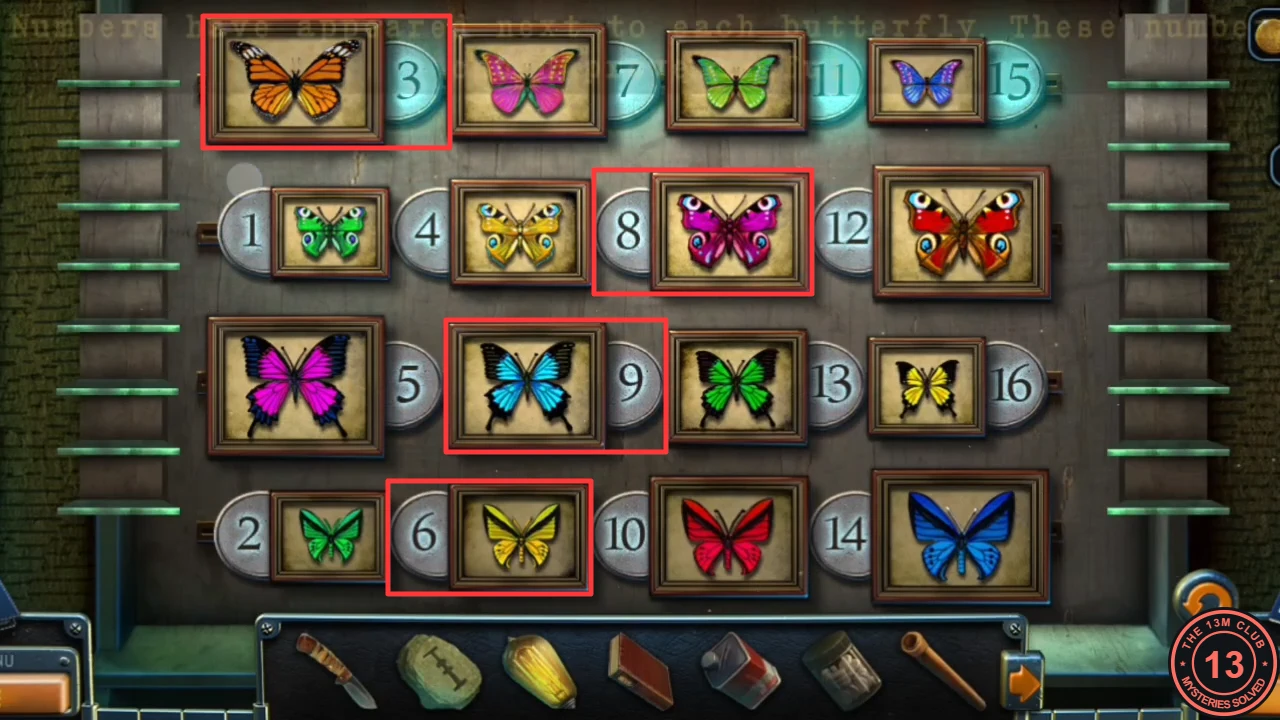
The four butterflies used by the bookcase lock: 3, 8, 9 and 6.