Museum entrance
Laura arrives at the museum steps after Mr. Bishop's call. The door is locked and the doorbell is broken.
- Open the red handbag on the steps and take the SCISSORS. The brochure inside shows the museum's mask collection.
- Use the SCISSORS on the broken lamp on the right railing to cut off a piece of WIRE.
- Place the WIRE on the doorbell beside the door, press the button, then enter the museum hall.
Dinosaur hall and the guard
Mr. Bishop explains that a mafia boss vanished here. Collect the first clue and find the night guard.
- Talk to Mr. Bishop. Your task becomes investigating the scene of the disappearance.
- Pick up the TWEEZERS on the floor beside the toppled urn at the base of the T. rex skeleton.
- Use the TWEEZERS on the crack in the floor to pull out a BUTTERFLY.
- Go through the rear archway into the corridor, then enter the lit doorway and talk to the security guard. He leaves on his rounds and lets you look around.
- Look at the guard's desk. The note reads "15082 - to turn off the alarm system"; it is not needed to open anything in this chapter. Then open the workbench for the hidden-object scene.CODE15082
Guard's workbench
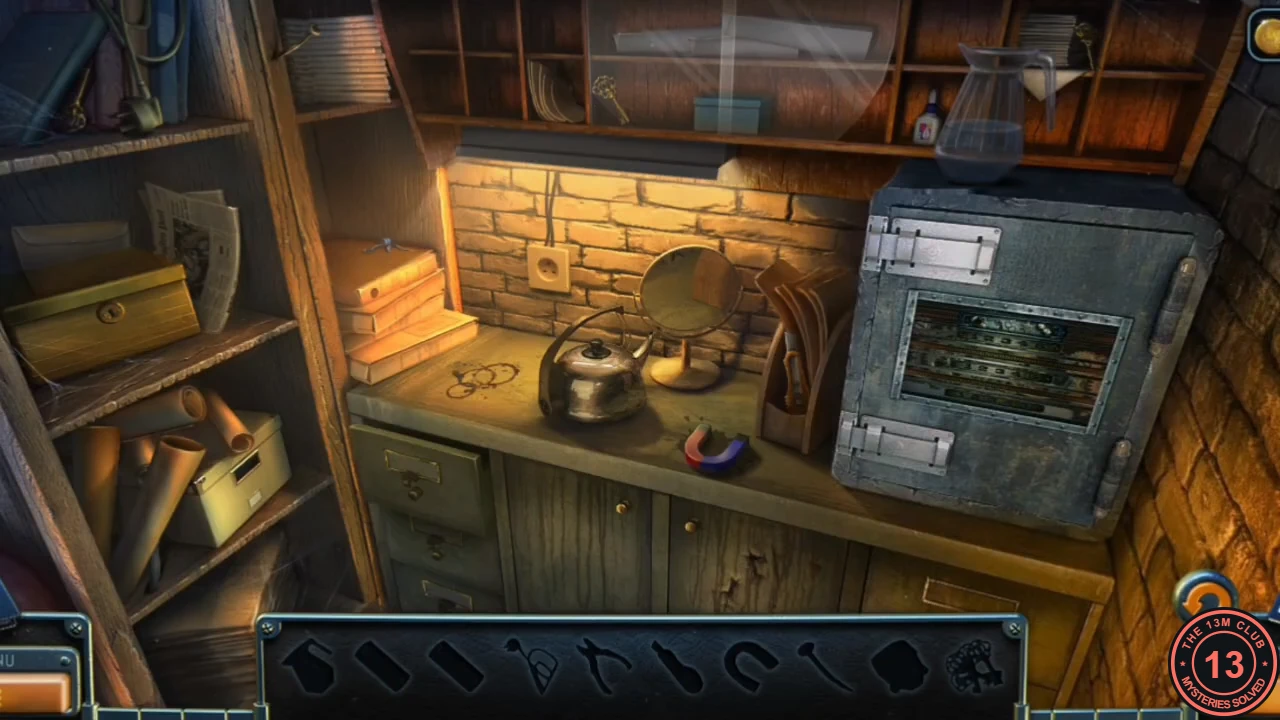
This is an interactive hidden-object scene. The bar shows silhouettes of the items still needed: a jug, two plates, an electrical cord, pincers, a box-cutter, a magnet, a nail, four keys and finally the mask. Some items must be freed with other items first.
- Take the ELECTRICAL CORD hanging over the books on the upper-left bookshelf and the JUG OF WATER from the top-right area above the safe.
- Take the BOX-CUTTER from the letter rack to the right of the mirror and use it on the twine around the folder on the left shelf. Key 1 of 4 drops out.
- Take the MAGNET from the desk and use it on the small glass case in the top pigeonholes to draw out key 2 without breaking the glass.
- Take the PINCERS from the open crate on the lower-left shelf and use them on the nail in the left shelf upright to get the NAIL.
- Take key 3 hanging beside the books on the left bookshelf and key 4 next to the paper stack in the top-right pigeonhole.
- Open the small locked box on the left shelf. Of the four keys, the third from the left fits. Take the PLATE inside.
- Open the left desk drawer, move the papers and use the NAIL to pry up the board. Take the second PLATE.
- Place both PLATES in the safe on the right. It needs three symbol plates arranged in a certain order; continue with the safe puzzle below.
Workbench safe
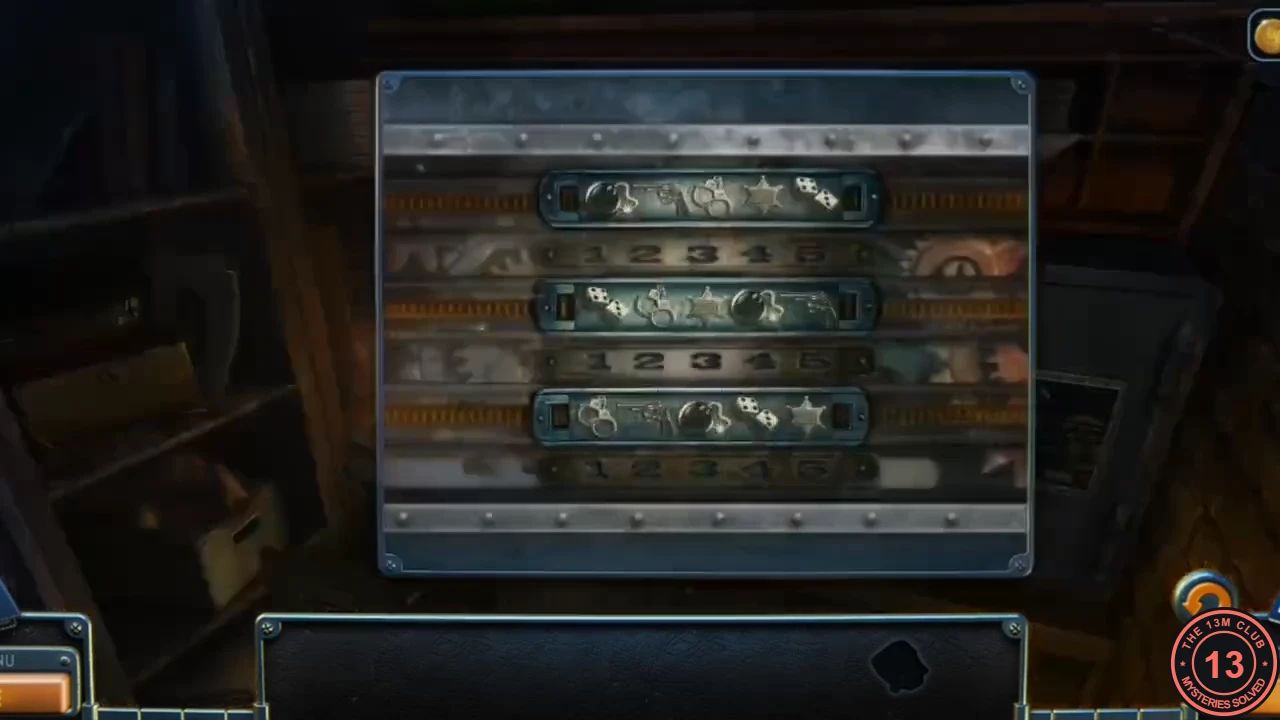
The hidden clue is on the steamed-up mirror. Each row of the safe must show one symbol above a specific number.
- Use the ELECTRICAL CORD on the kettle, then pour in the JUG OF WATER. The steam reveals a note on the mirror: dice 2, star 4, revolver 1.
- Slide the rows so the dice sits over 2 in the top row, the star over 4 in the middle row and the revolver over 1 in the bottom row.CODEDice 2, Star 4, Revolver 1
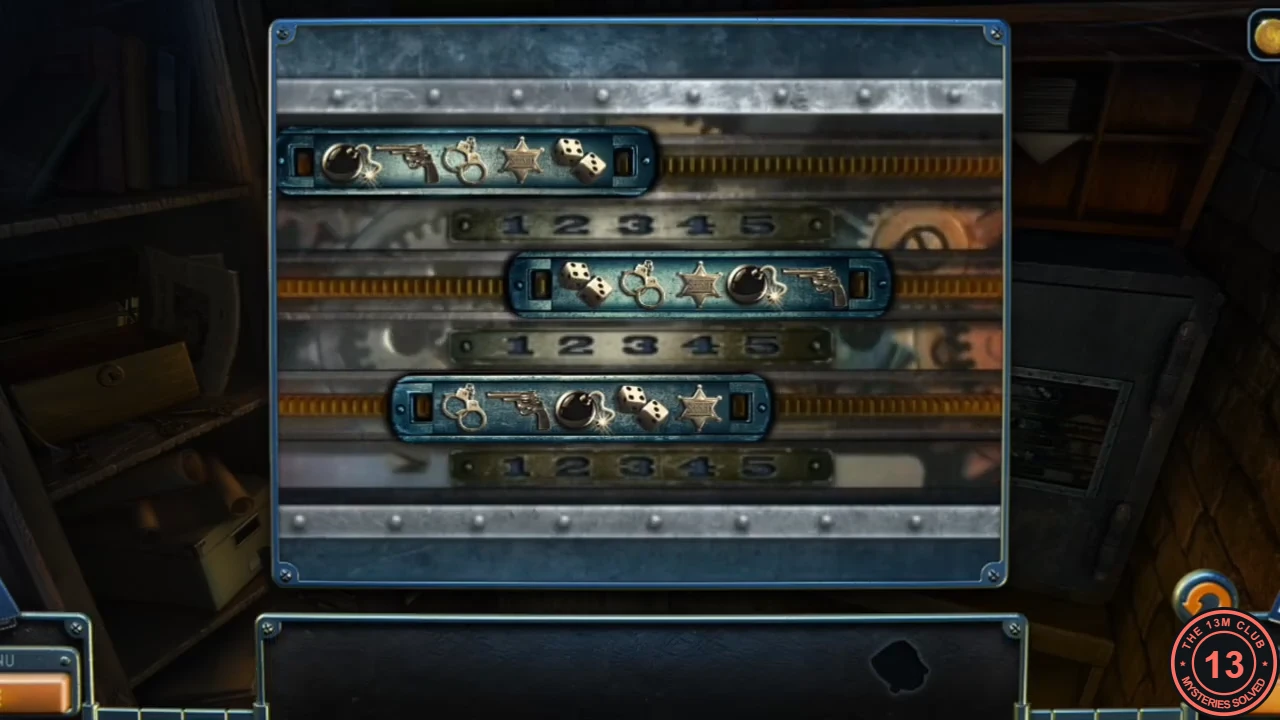
Solved safe: dice over 2, star over 4, revolver over 1. - Take the MASK from the open safe. This finishes the hidden-object scene.
Battery and flashlight
Still in the guard room, gather the tools needed for the corridor box and the dark passage.
- Zoom into the floor near the flashlight and take the RAZOR BLADE.
- Use the RAZOR BLADE on the taped box and take the BRUSH.
- Open the newspaper on the desk and take the KEY.
- Go back to the corridor. Unlock the green box on the wall with the KEY, sweep away the cobwebs with the BRUSH and take the BATTERY and the SCRAP OF PAPER. Keep the scrap; it is used much later.
- Return to the guard room. Open the flashlight on the floor, remove the dead battery, insert the new BATTERY, replace the cap and take the FLASHLIGHT.
Mask cabinet
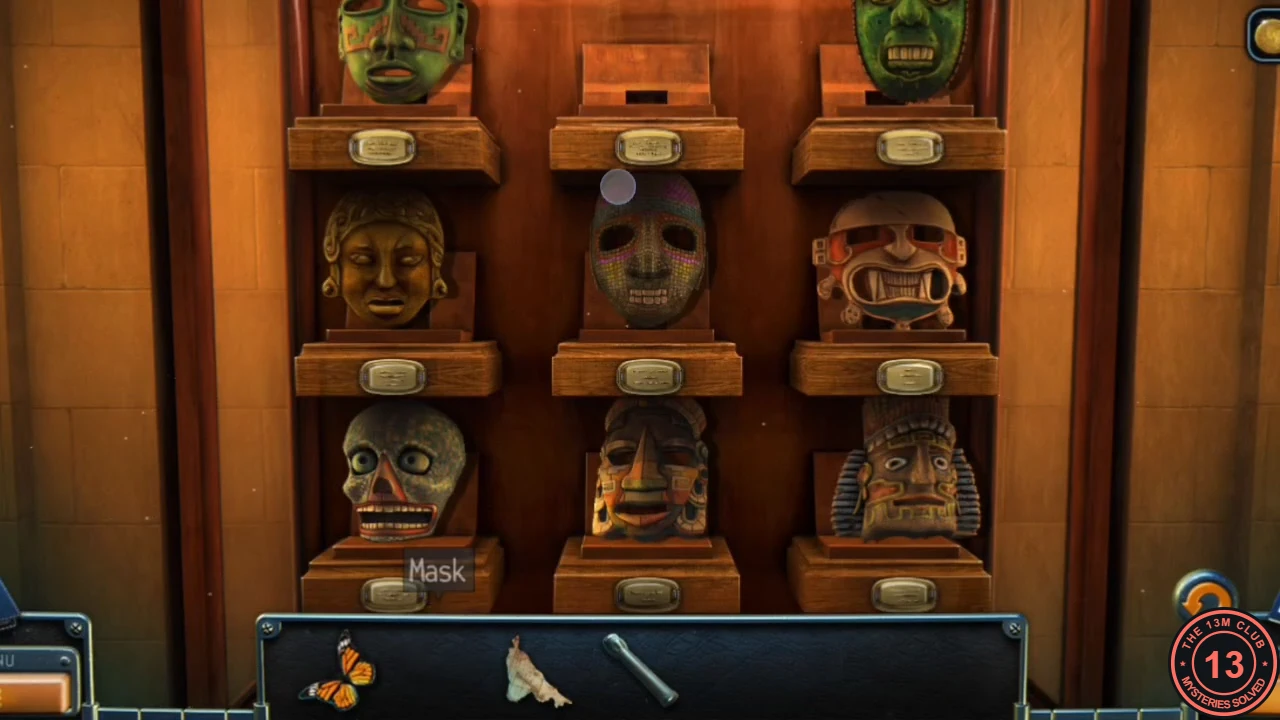
The display cabinet in the corridor is missing one mask. The plaques under the shelves show which mask belongs in each position.
- In the corridor, open the mask cabinet on the right and place the MASK on the empty top-middle stand.
- Swap masks two at a time until each matches the silhouette on its plaque. Solved layout, left to right - top: striped-crown mask, dark mask with purple pattern, tall dark totem; middle: green painted face, green jade mask, dark skull; bottom: gold mask with wide headdress, gold face with ear discs, beige-and-red fanged mask.
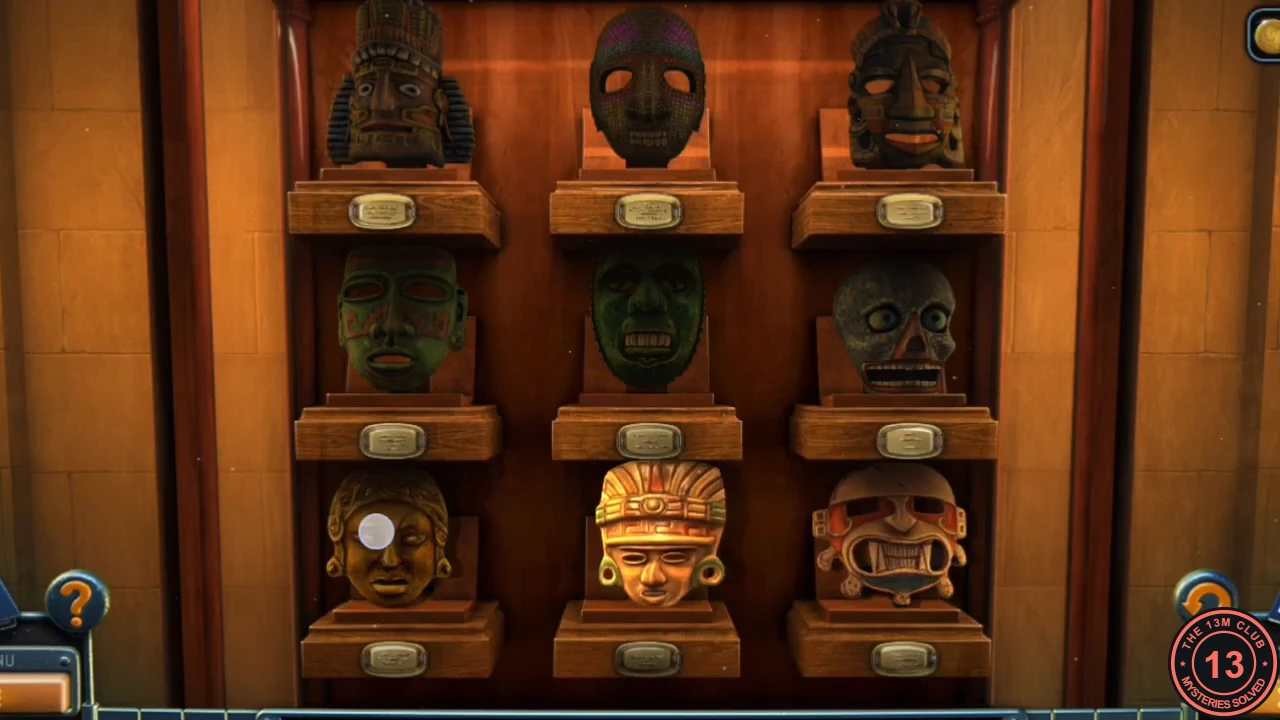
Solved mask cabinet, just before it slides aside.
The secret passage
Behind the cabinet is a dark opening that the kidnapper may have used.
- Examine the opening. Laura needs a light.
- Open the fire-hose cabinet on the right wall of the corridor.
- Use the FLASHLIGHT on the opening. Laura climbs down into the shaft and the chapter ends.