Seven moon figurines in Bishop's study
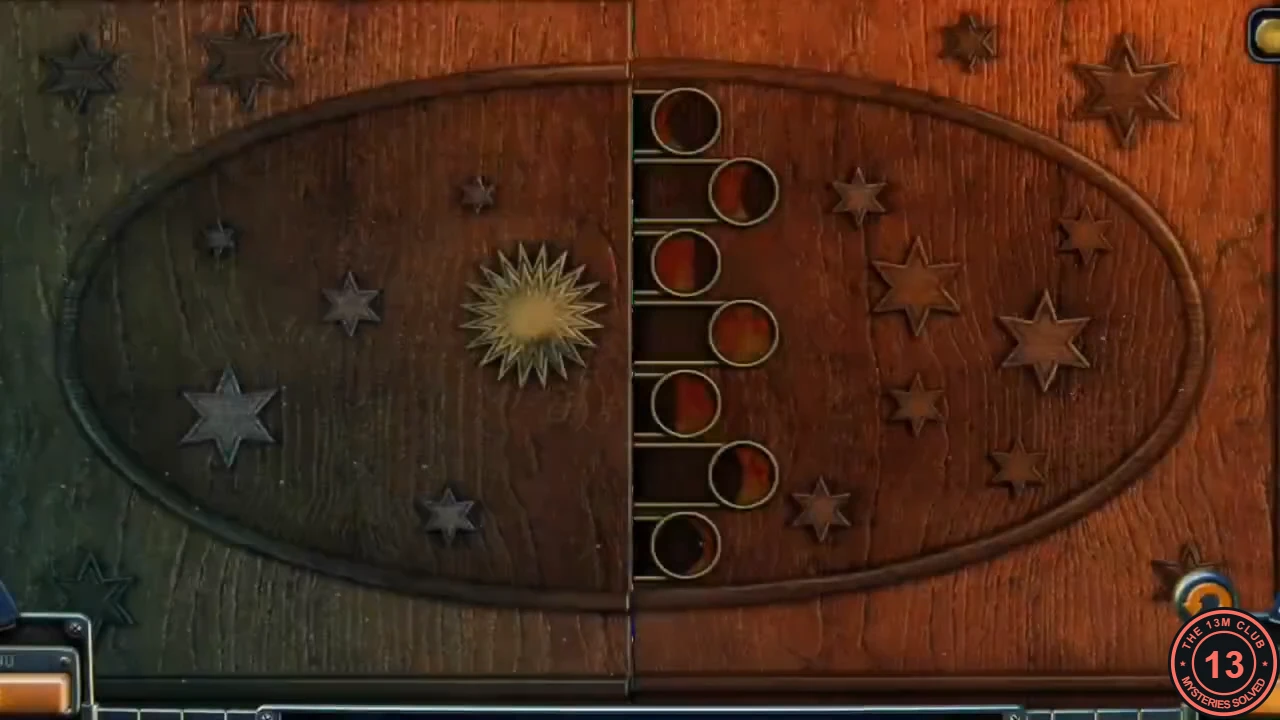
The angel statue in the loft hides the last moon figurine. The cabinet in Bishop's desk has seven slots, one for each phase of the moon.
- In the church loft, look at the angel statue's chest. Place the STONE FLOWER in the flower-shaped hollow and take the MOON FIGURINE from the compartment that opens. You now have seven.
- Use the map to go to Bishop's study and look at the cabinet in the desk. Each figurine fits only its own slot; a wrong slot gives 'This item can't be used here'. From top to bottom: new moon (all dark); thin crescent lit on the left; left half lit; full moon; lit except a thin dark sliver on the left; right half lit; thin crescent lit on the right.
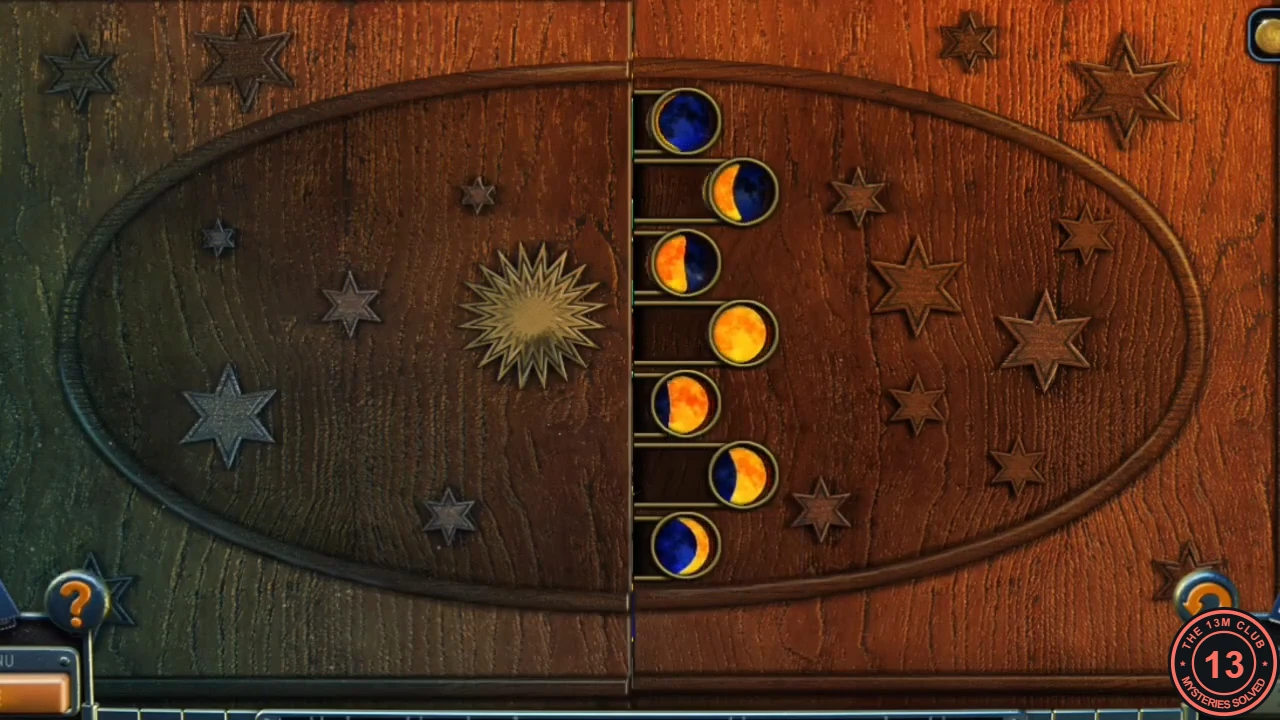
Moon figurines in their slots, top to bottom.
The moon-phase dial
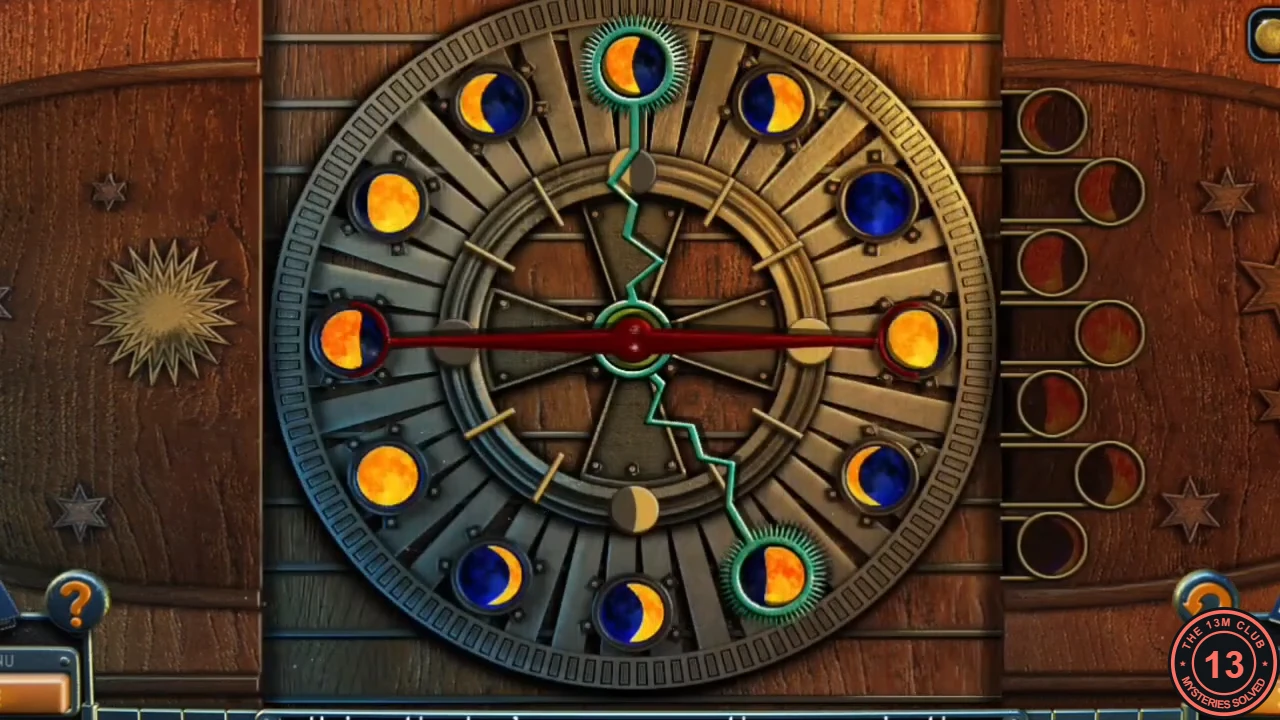
Behind the cabinet doors is a round dial of 12 moon-phase discs. A red bar joins two opposite discs and a green zigzag joins two discs five places apart.
- Drag an end of the red bar or the green zigzag to aim it at different discs. Tap a disc at the end of a connector to swap the two discs it joins. Arrange the phases in order round the dial. Solved layout, clockwise from 9 o'clock: 9 new moon; 10 thin crescent lit on the left; 11 larger left crescent; 12 left half lit; 1 left-lit gibbous; 2 nearly full with a dark sliver on the right; 3 full moon; 4 nearly full with a dark sliver on the left; 5 right-lit gibbous; 6 right half lit; 7 right crescent; 8 thin right crescent.
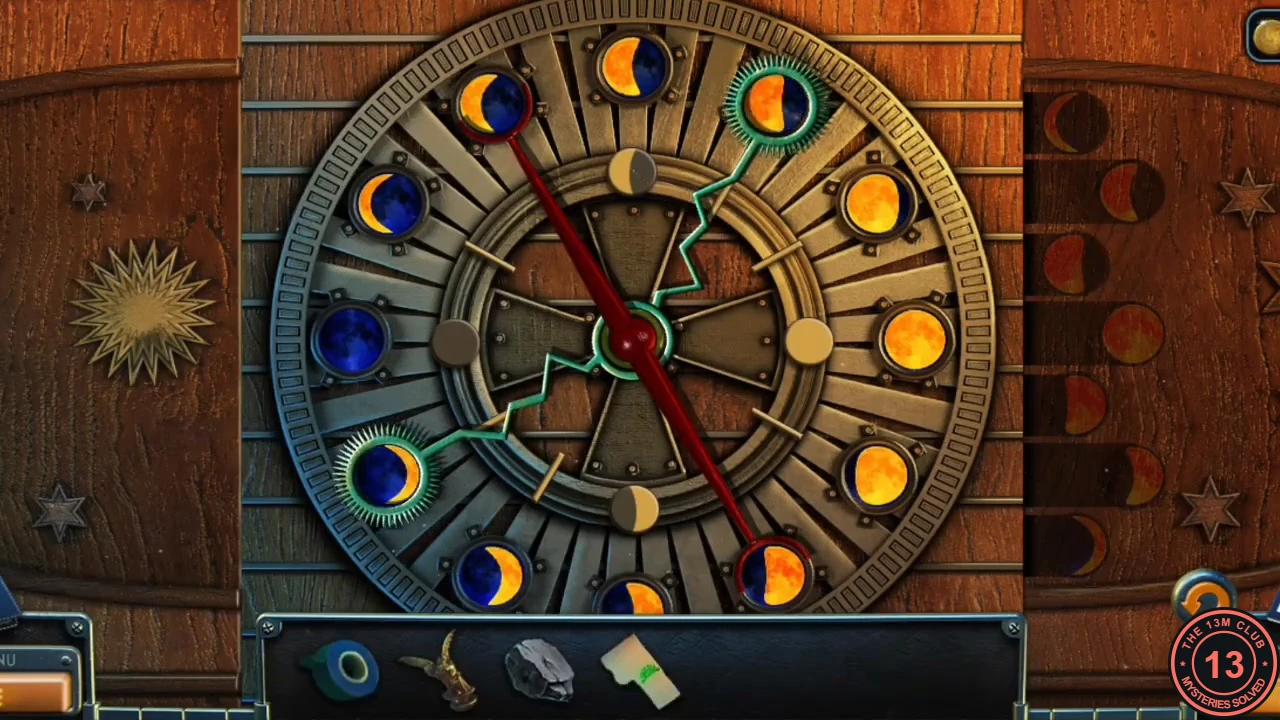
Solved moon-phase dial.
The secret warehouse: repairing the wires
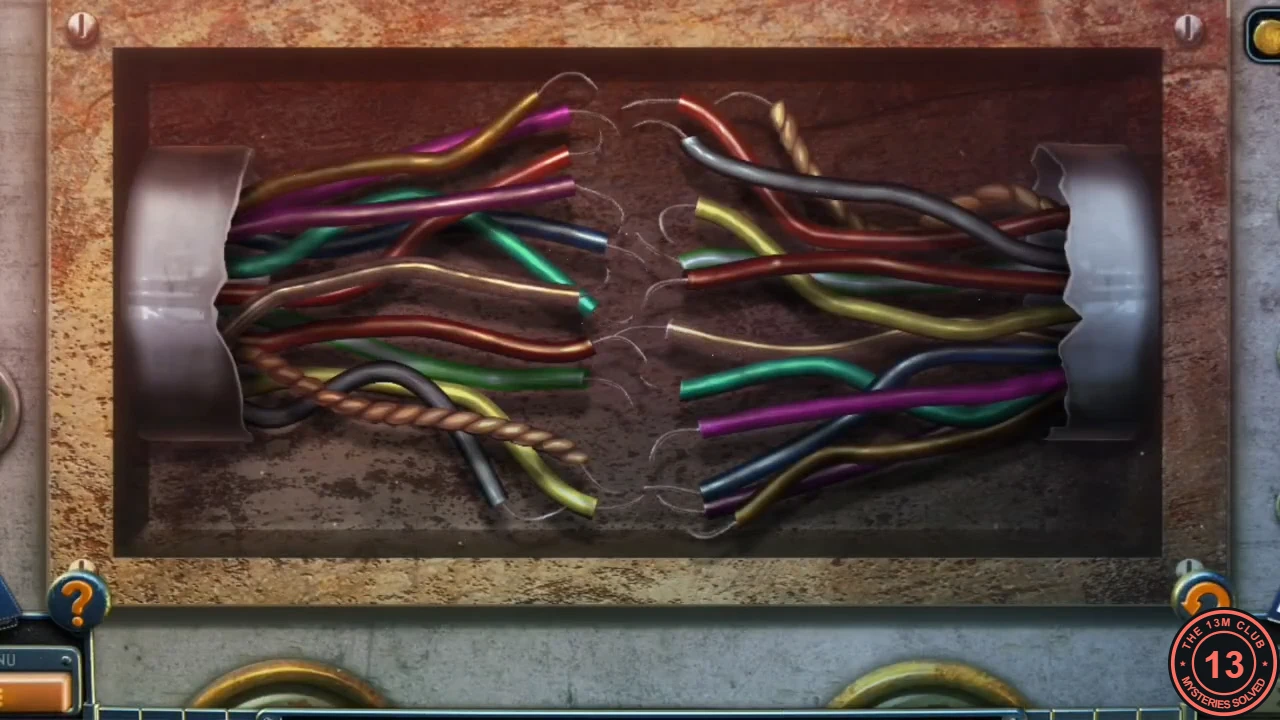
Solving the dial opens the bookcase in the study. A hidden passage leads to a dark control platform above a warehouse.
- Go through the open bookcase on the right of the study to the warehouse platform. Take the LONG RULER lying on the chair seat at the desk on the left.
- Look at the red wiring panel in the middle of the control console on the right and put the ELECTRICAL TAPE on it.
- Drag each loose wire end across and join it to the end with the same colour and pattern on the other side; each join is taped automatically. Move other wires aside where they get in the way. When every wire is joined, the panel is repaired.
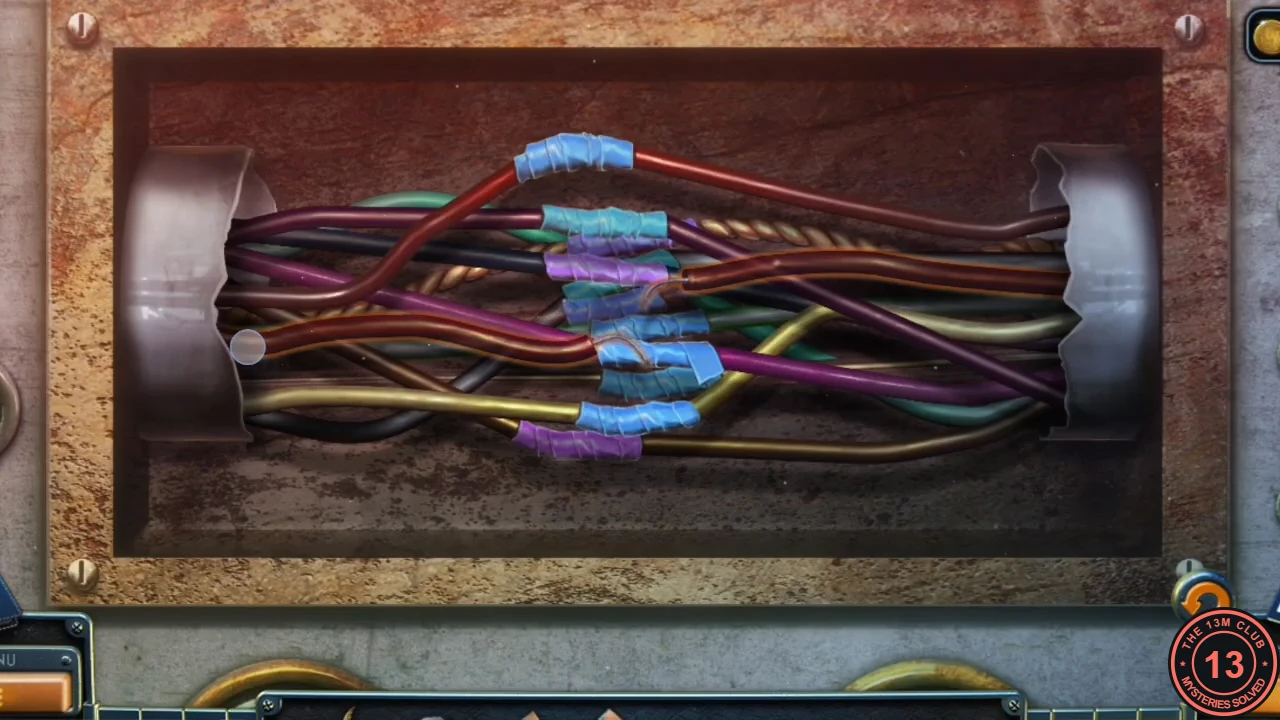
Repaired wiring panel.
Warehouse lights and the bell
With the wiring fixed, the warehouse console can be switched on, and the bell on the far shore hides mosaic pieces.
- Look at the lever box on the left side of the console and pull the left lever. The warehouse lights come on.
- Go to the far shore and up to the bell platform. Tap the lower part of the bell to look into the gap under its rim, then poke under it with the LONG RULER and take the MOSAIC PIECES.
The pier mailbox mosaic
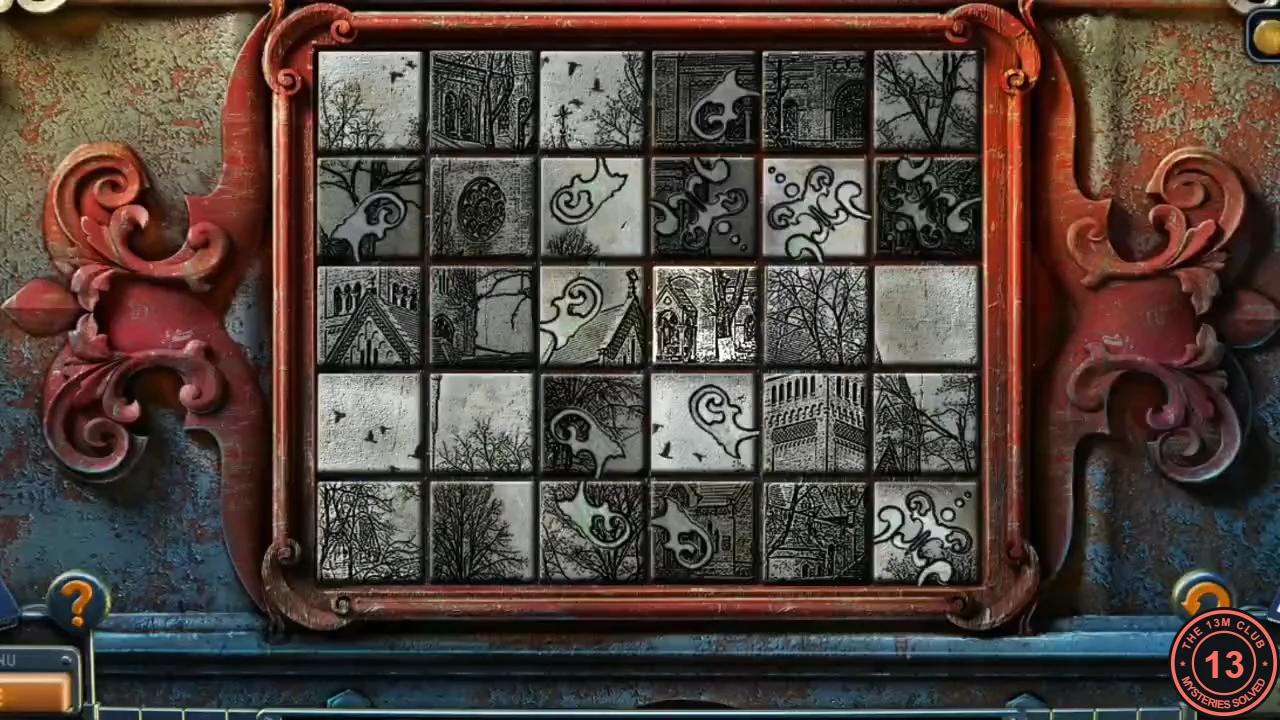
The mailbox on the lakefront pier has a 6 by 5 picture made of shuffled tiles.
- Return to the lakefront and look at the mailbox on the post by the pier rail. The MOSAIC PIECES fill the gaps.
- Tap two tiles to swap them. A tile in its correct place darkens and locks. Keep swapping until every tile is locked and the picture of the church and its scroll border is whole.
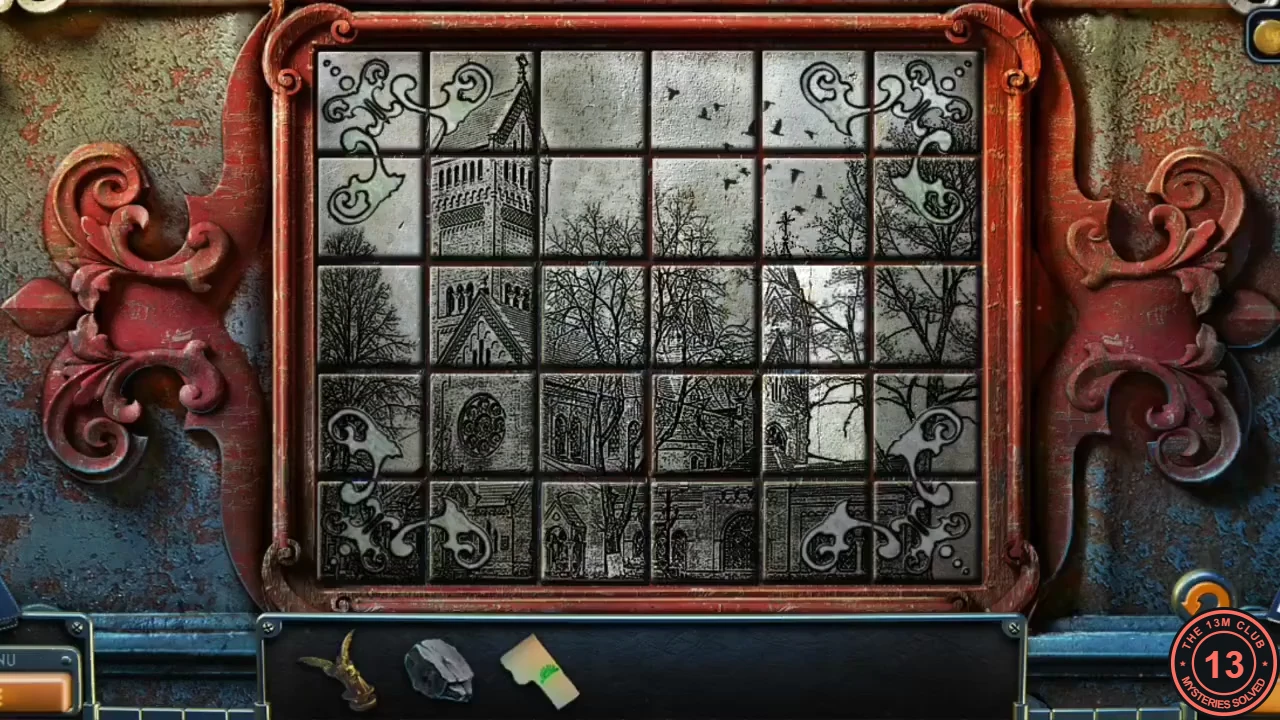
Target picture for the mailbox mosaic (start tiles are shuffled). - The mailbox opens. Take the TELESCOPE and the FILM, and read Sam Fisher's letter to his brother Tom: the mines were sealed, and the cache in the organ should be cleared out.
The film countdown and the number board
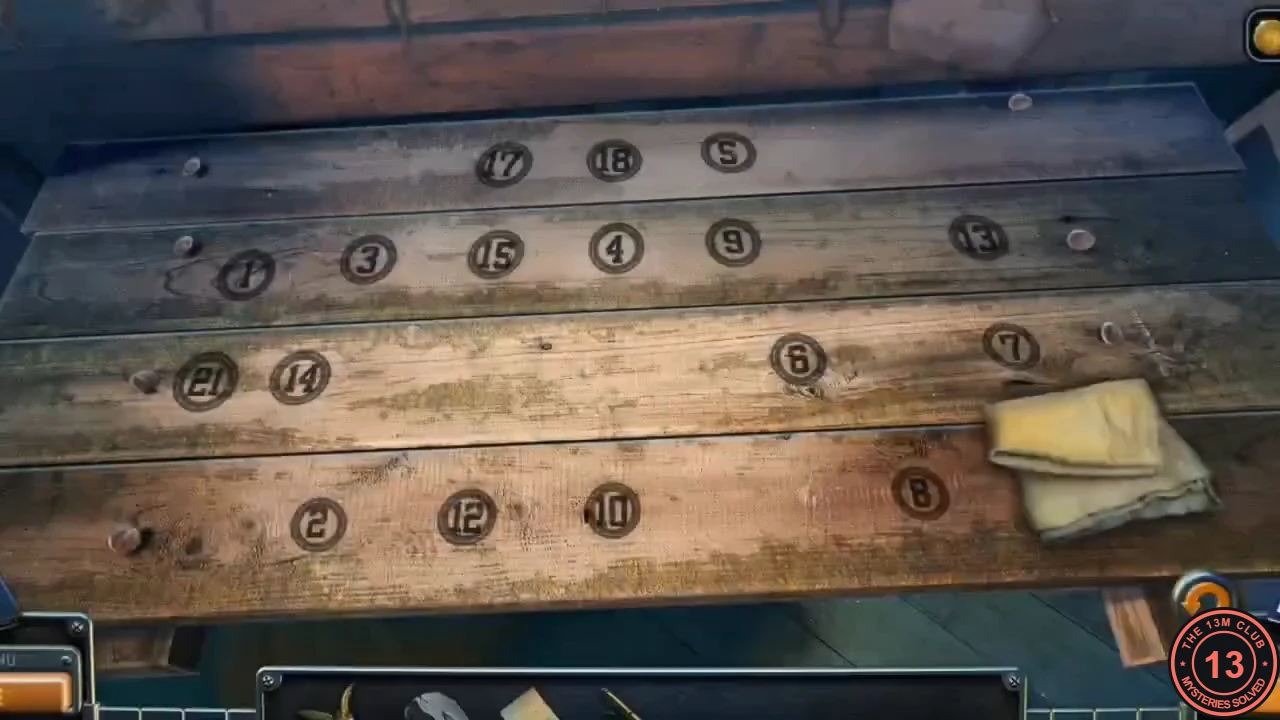
The projector in the meeting hall still works. Its film shows the order for the number board on the bell platform.
- Go to the meeting hall and put the FILM on the old projector on the left. Watch the countdown: 3, 2, 4, 9, 5, 7, 8, 10, 3.
- Go to the bell platform and look at the number board on the bench. Place the PIECE OF COAL. Draw lines with it in this order: 3, 2, 4, 9, 5, 7, 8, 10 and back to 3. The lines form a fish.
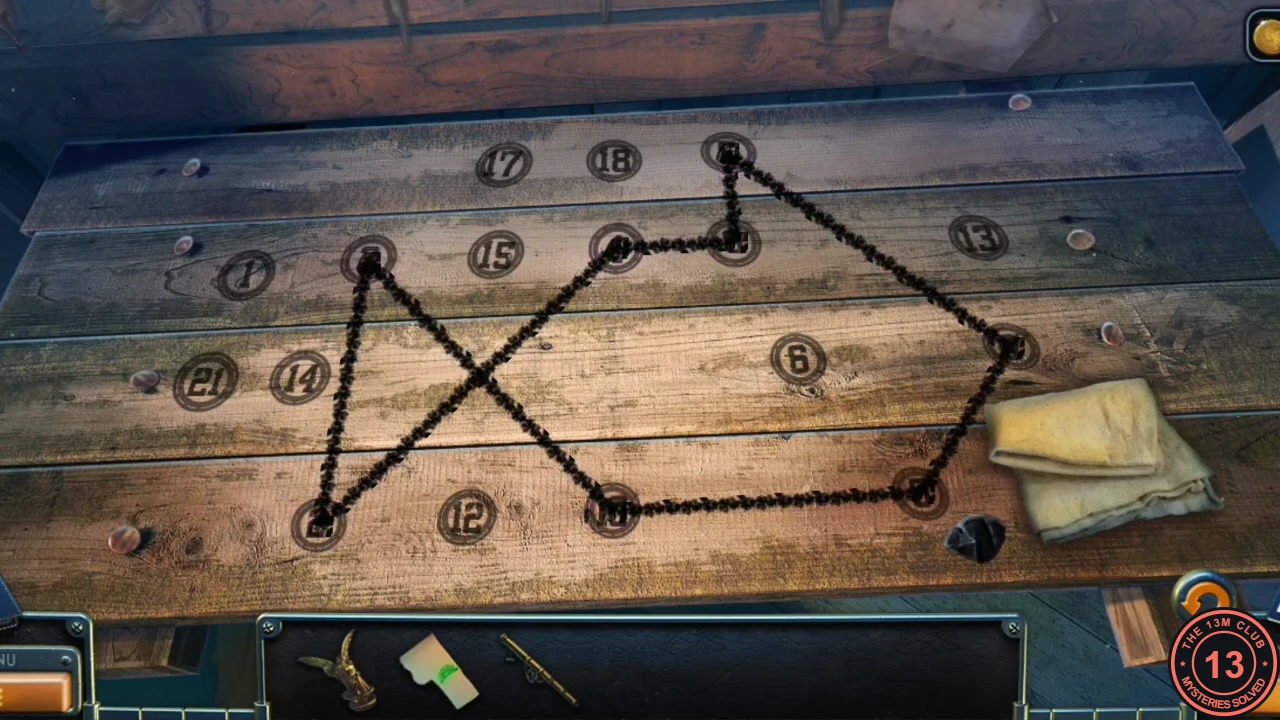
The finished coal drawing forms a fish. - A sheet of paper drops over the drawing. Rub it with the coal to get the DIAGRAM of the fish.
The fish grid in the shack floor
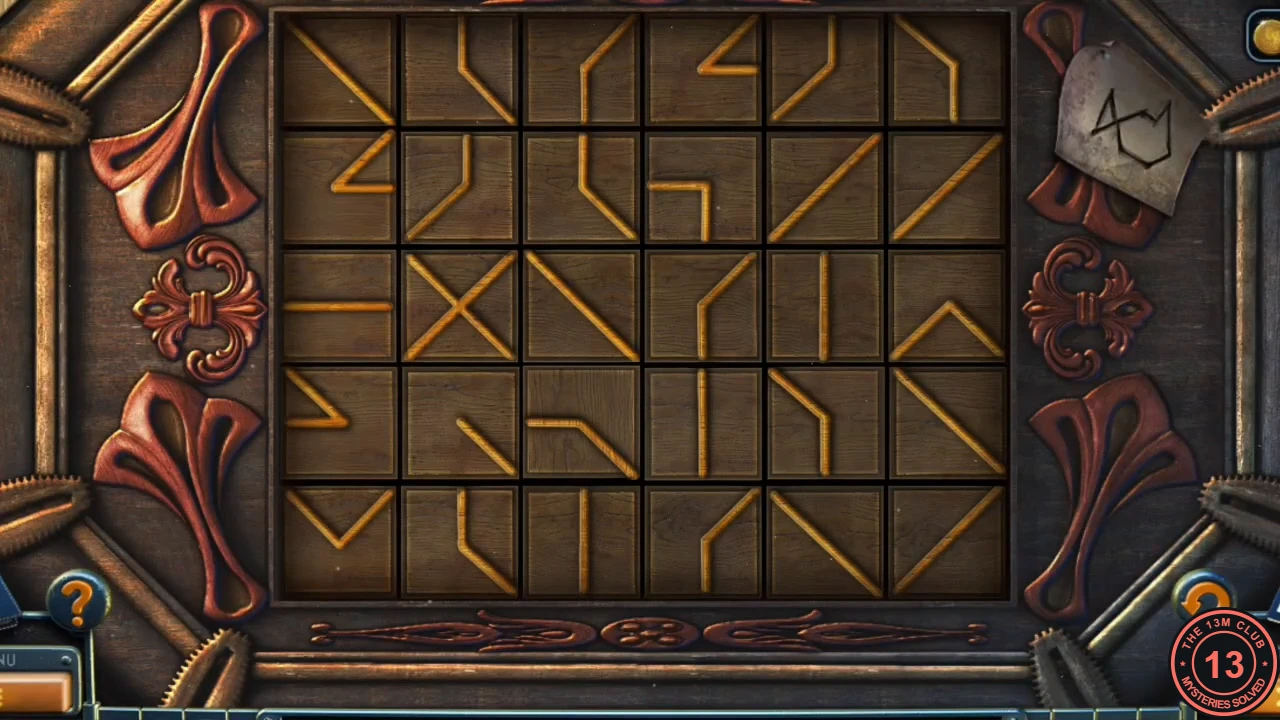
A hatch in the shack's dining-room floor has a grid of line tiles.
- Go to the shack dining room. Look at the floor hatch to the right of the table, in front of the right-hand cabinet, and place the DIAGRAM. It stays pinned at the top right as a guide.
- Tap tiles in the 6 by 5 grid to rotate them until the lines form the closed fish outline from the diagram: crossed tail on the left, body with a notched top and a pointed nose on the right. Take the RING.
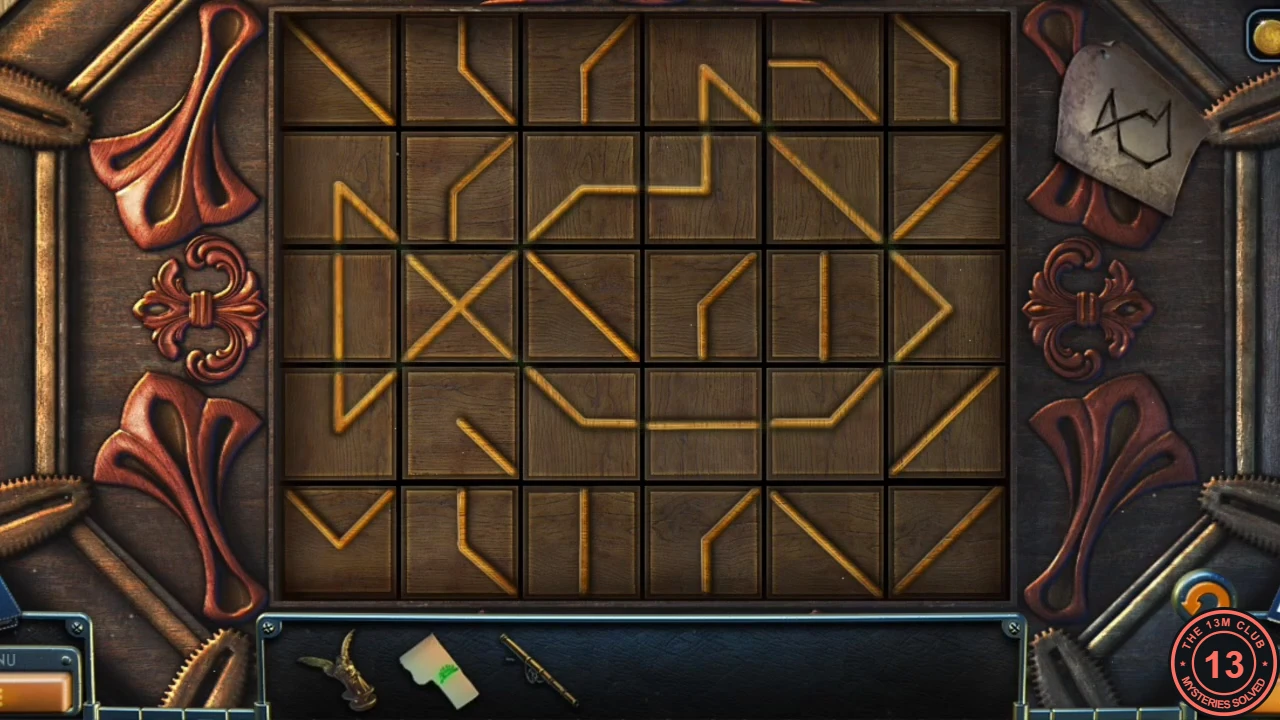
Solved fish grid.
The rose box in the warehouse
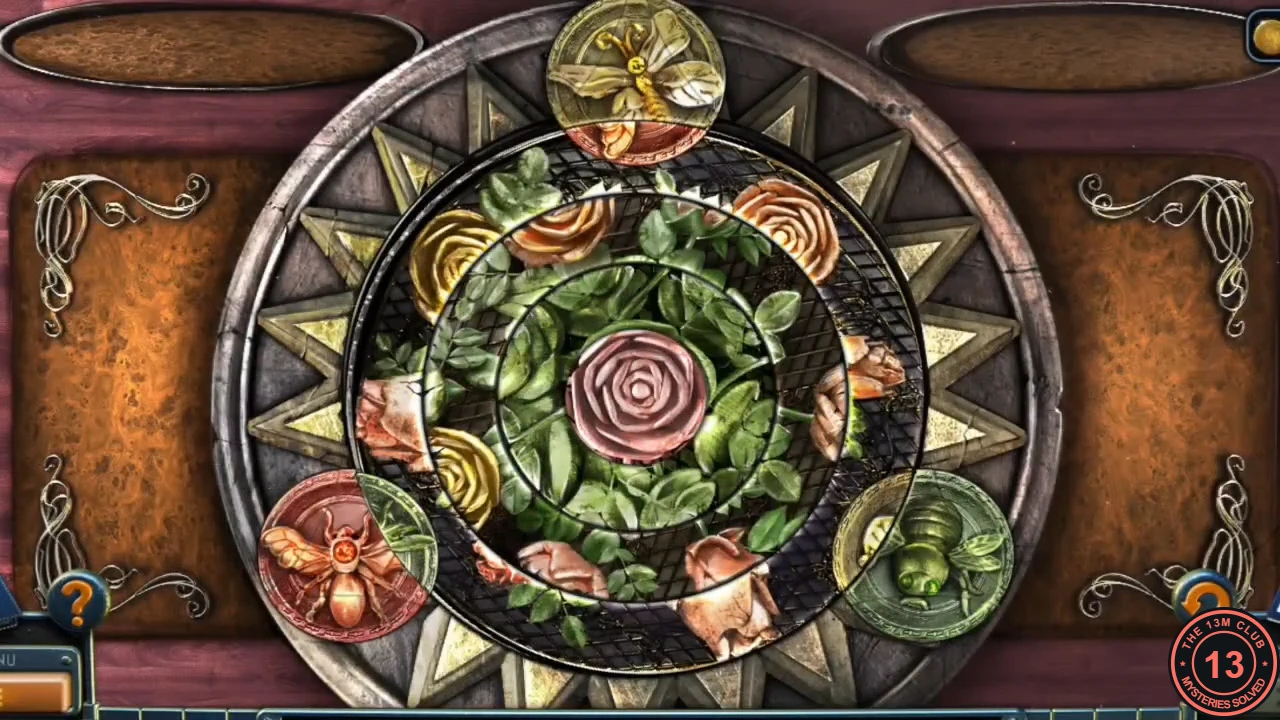
The decorated box on the warehouse desk has a rose dial. The telescope on the tripod shows a clue for the meeting hall.
- Use the map to go to the warehouse platform. Look at the box on the desk and put the RING into the round slot on its lid.
- Put the TELESCOPE on the tripod and look through it. It shows an angel figure standing face on with both wings spread wide. Laura has seen figures like this in the meeting hall and that they can be turned. Remember this pose.
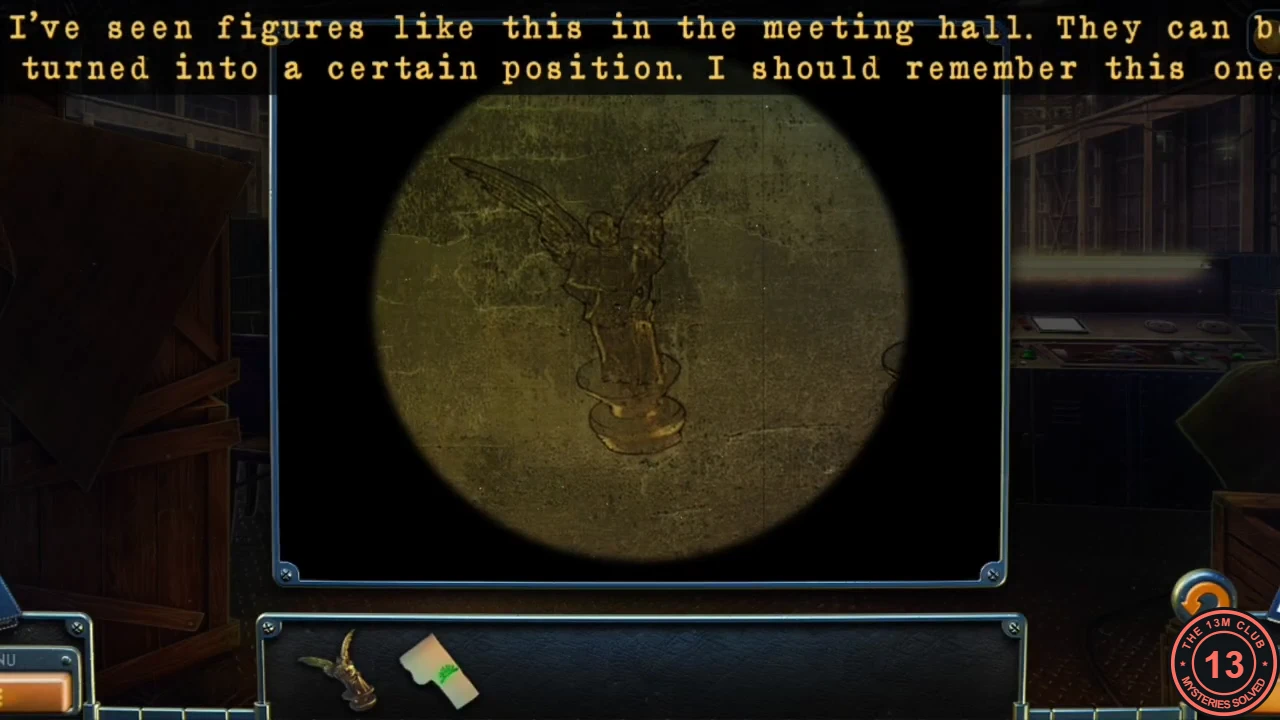
The telescope clue: the angel's pose to copy. - Look at the box again. Three insect medallions sit on the rim: a yellow butterfly at the top, a red wasp at the lower left and a green beetle at the lower right. At the start they are split across the turning rings. Turn the rings until each medallion is whole in its own colour.
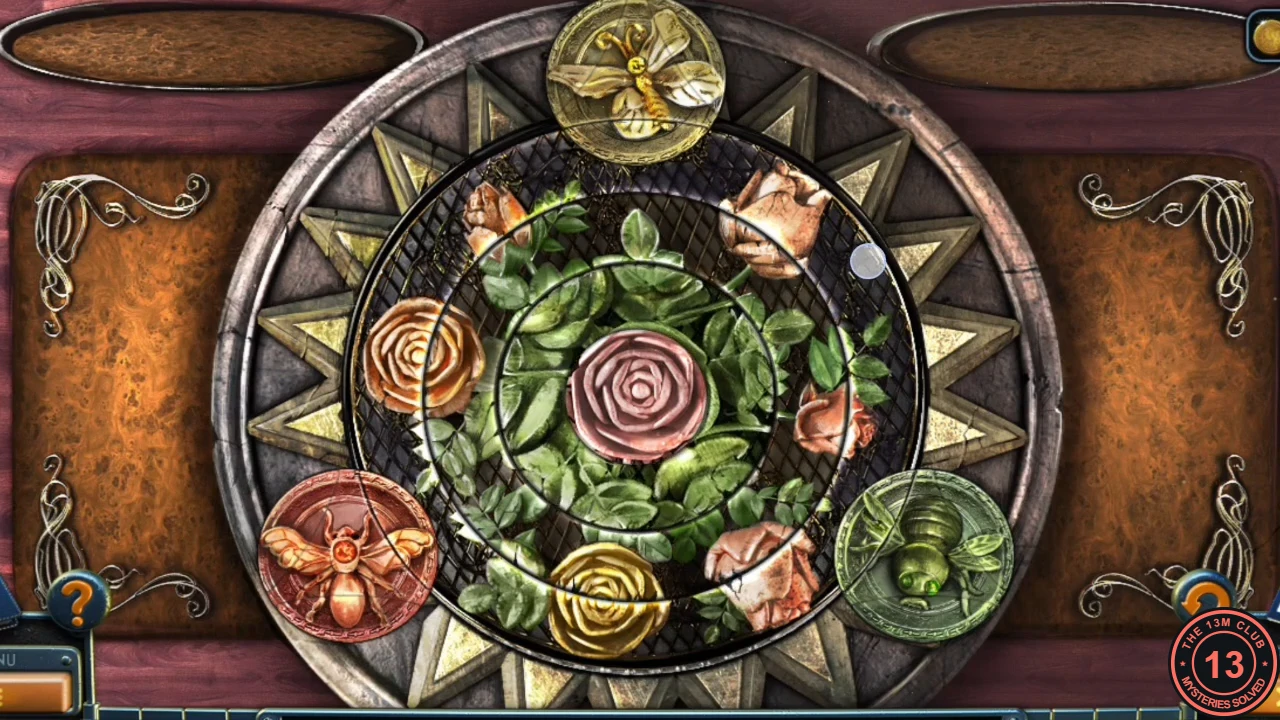
Solved rose dial: each medallion whole. - The box opens. Take the second PAGE WITH SYMBOL.
The angel figures on the lectern
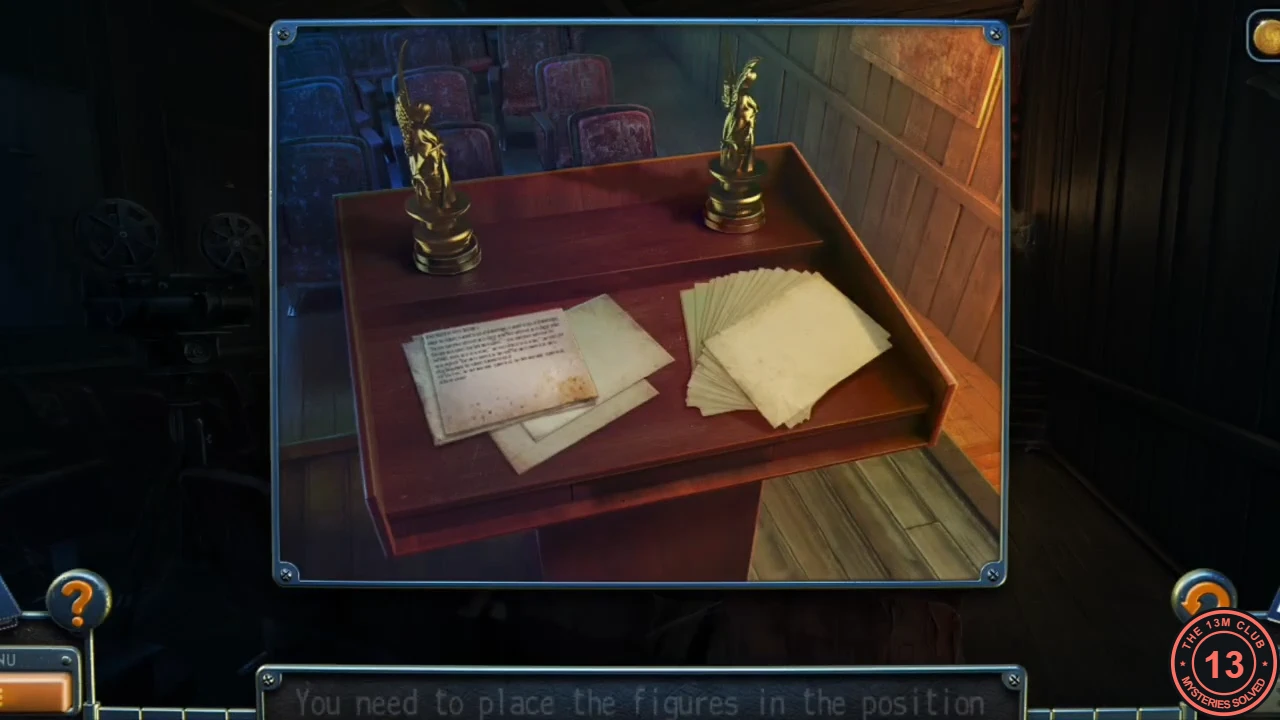
The lectern in the meeting hall has two bases for angel figures. One is empty.
- Go to the meeting hall and look at the lectern left of the stage. Put the ANGEL FIGURINE on the empty base on the right.
- Tap each angel to turn it. Turn both until they stand like the angel in the telescope: facing you with both wings spread out to the sides. A drawer opens; take the KEYS (loose organ keys marked with coloured symbols).
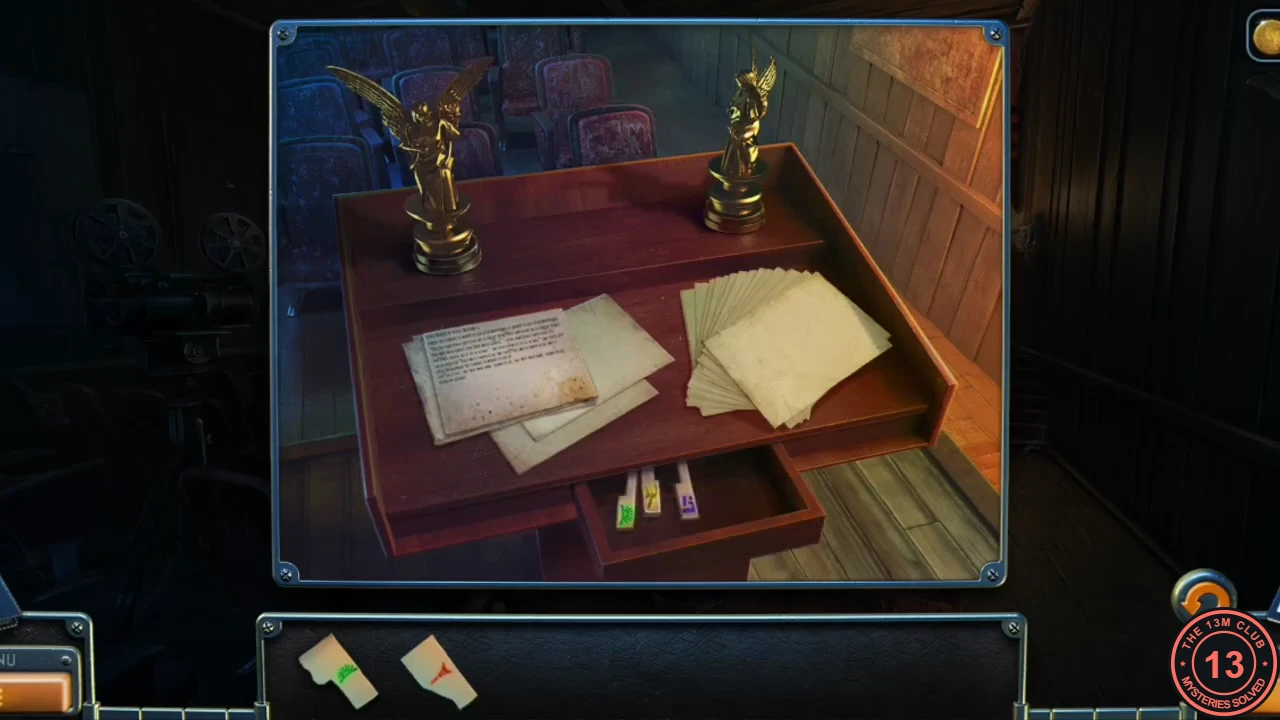
Both angels in the telescope pose; the drawer opens.
The church organ
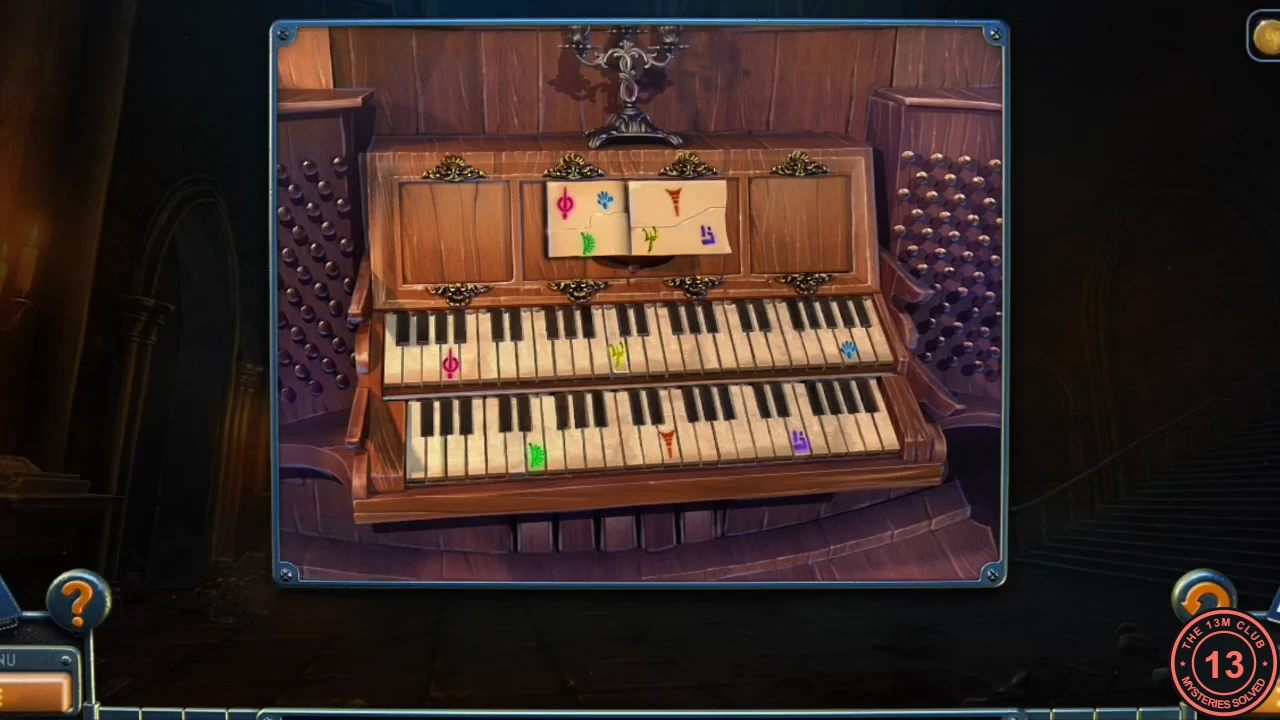
The organ at the far end of the church nave hides the cache with the first-aid kit. Its keyboard and sheet music are incomplete.
- Travel to the far shore and enter the church. Look at the organ at the far end of the nave. Fit the KEYS into the gaps in the keyboard and place both PAGES WITH SYMBOL on the music stand.
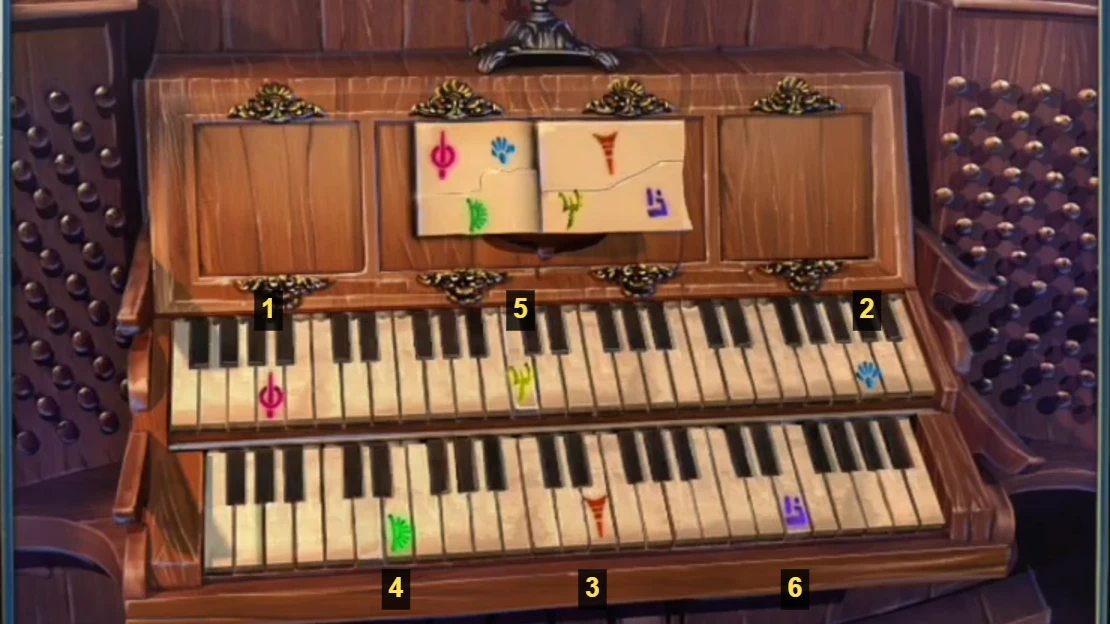
Play the marked keys in the numbered order. - The sheet music shows six coloured symbols, and six keys carry the same symbols. Play them in reading order: first the top symbols of both pages from left to right, then the bottom ones. That is pink circle-and-line, blue hand, red funnel, green fan, yellow trident, purple bracket.
- A panel in the organ opens. Open the first-aid case and take the VACCINE.
Saving Bishop
Laura has the antidote. All that is left is to get it to Bishop.
- Travel back to Bishop's foyer: in the footage Laura goes back through the meeting hall and the cathedral square to the tram and up through the tunnel. Tap Bishop and use the VACCINE on him. The final cutscene plays and Bishop recovers.
- A message confirms that the bonus chapter is completed, and the game returns to the main menu.