The boiler room and the boat
Behind the church door is a boiler room, but a jet of steam blocks the way for now.
- In the boiler room, take the RAKE leaning by the bench. Look at the sack on the floor, cut it open with the KNIFE and take the PIECE OF COAL. The steam cannot be shut off yet.
- Go to the lakefront. Look at the winch post left of the pier, fit the HANDLE and turn it. The boat is lowered into the water. Look at the boat and take the OIL can.
- Enter the shack and look at its back door. Oil the stuck bolt with the OIL, slide the bolt and go through to the kitchen.
The shack kitchen
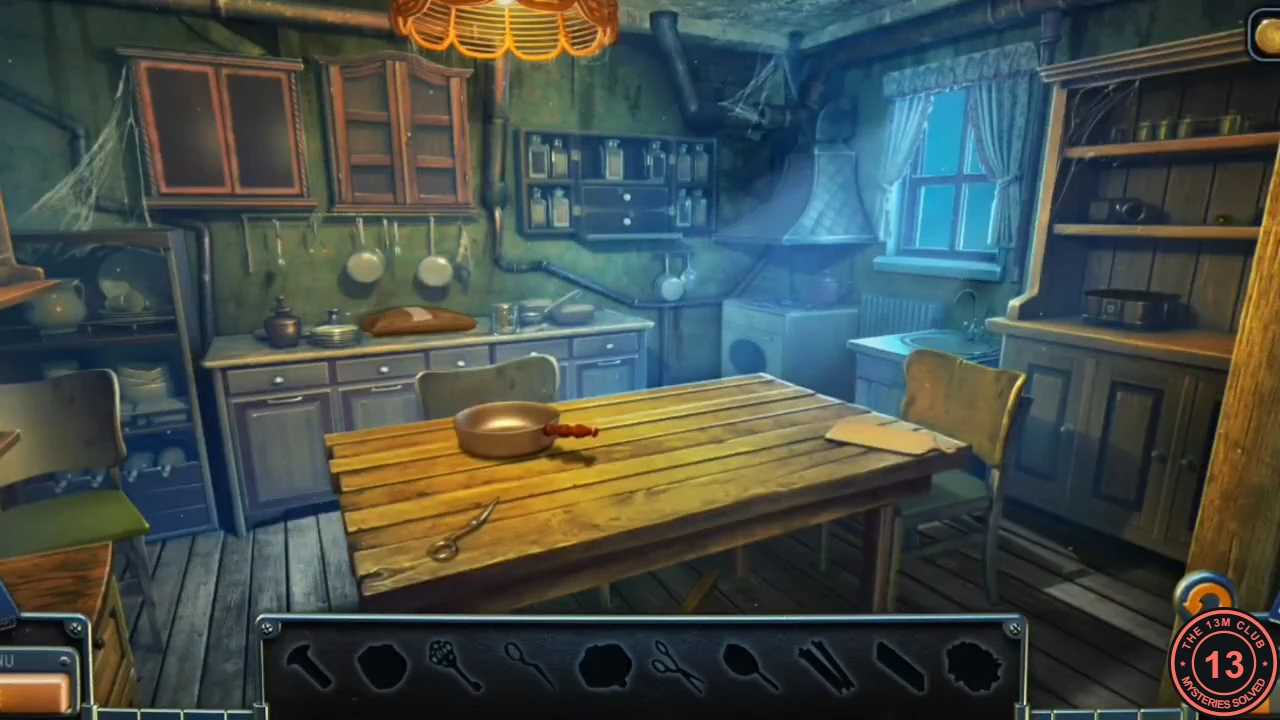
Another interactive hidden-object scene. The bar shows the items to collect. The reward is a pouch of GRAIN.
- Note the broken SCISSORS on the table. Look at the open shelf of the right dresser and take the BOLT and the green HOTPLATE DIAL. Look at the stove and take the SCISSOR HALF from the floor beside it.
- Put the SCISSOR HALF and the BOLT on the scissors on the table to repair them. Take the SCISSORS.
- Look at the bag on the counter at the back left. Cut it open with the SCISSORS and take the OBJECT IN AMBER. Take the MATCHES lying on the counter.
- Look at the stove. Fit the HOTPLATE DIAL into the empty fourth knob position. Open the upper-left wall cabinet and take the MATCHBOX.
- Use the MATCHES with the MATCHBOX on the stove to light the burner. Laura says she needs a frying pan.
- Take the FRYING PAN from the table and put it on the lit burner. Put the OBJECT IN AMBER in the pan; the amber melts and leaves a KEY.
- Open the jewellery box on the right dresser shelf with the KEY and take the GRAIN. The scene closes.
Catching the parrot
A white parrot sits at the top of the gate arch. The old man would like some company.
- Go to the gate. Scatter the GRAIN on the pavement at the lower right, in front of the red booth. The parrot flies down. Use the BIRDCAGE on it to get the PARROT IN A CAGE.
- Go to the lakefront and give the PARROT IN A CAGE to the old man. He thanks Laura and hands over the CAT DISK.
The main church door: two creature wheels
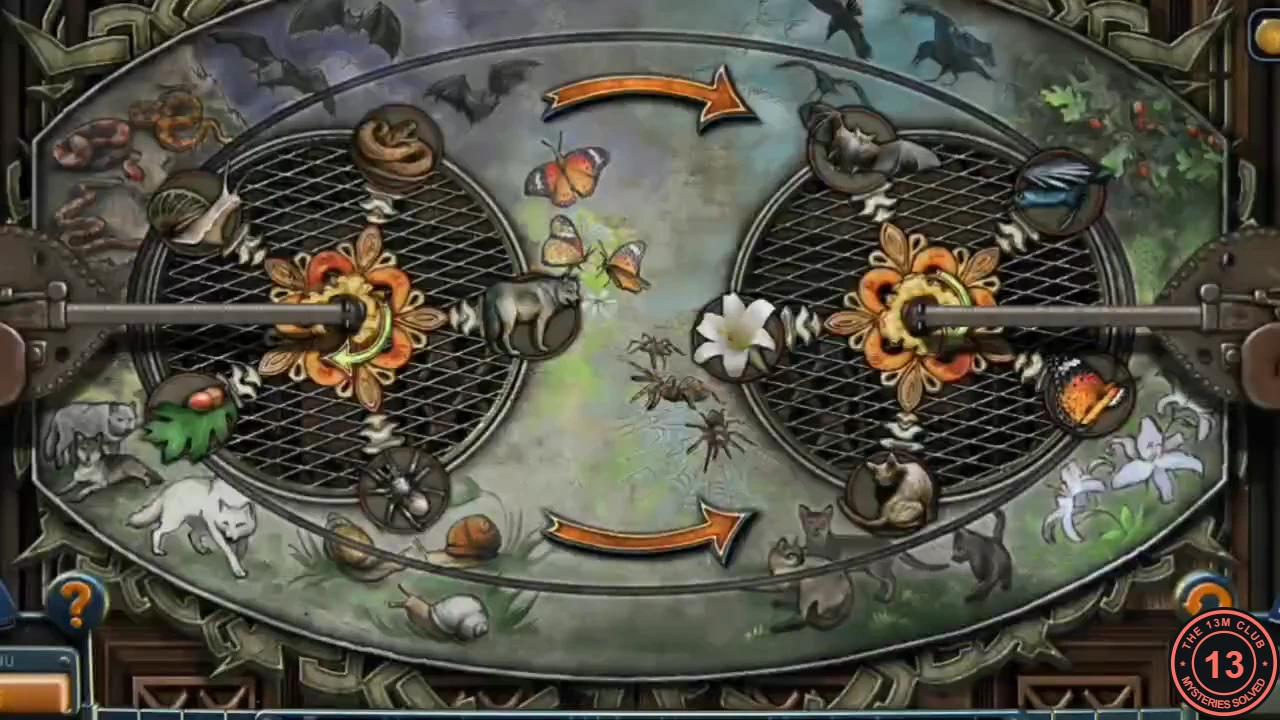
The plate on the church's main (centre) door has two grated wheels. Each wheel holds five creature or plant pieces, and pictures around the plate show where each one belongs.
- At the cathedral square, look at the plate on the church's main door and place the CAT DISK in the empty slot.
- Tap the centre of a wheel to turn it. Tap an orange arrow to pass the pieces between the two wheels. Put each piece next to its matching background picture. Solved layout: left wheel - bat at the top, snake upper left, butterfly on the right, wolf lower left, snail at the bottom; right wheel - blue bird at the top, beetle on a leaf upper right, spider on the left, lily lower right, cat at the bottom. The door opens.
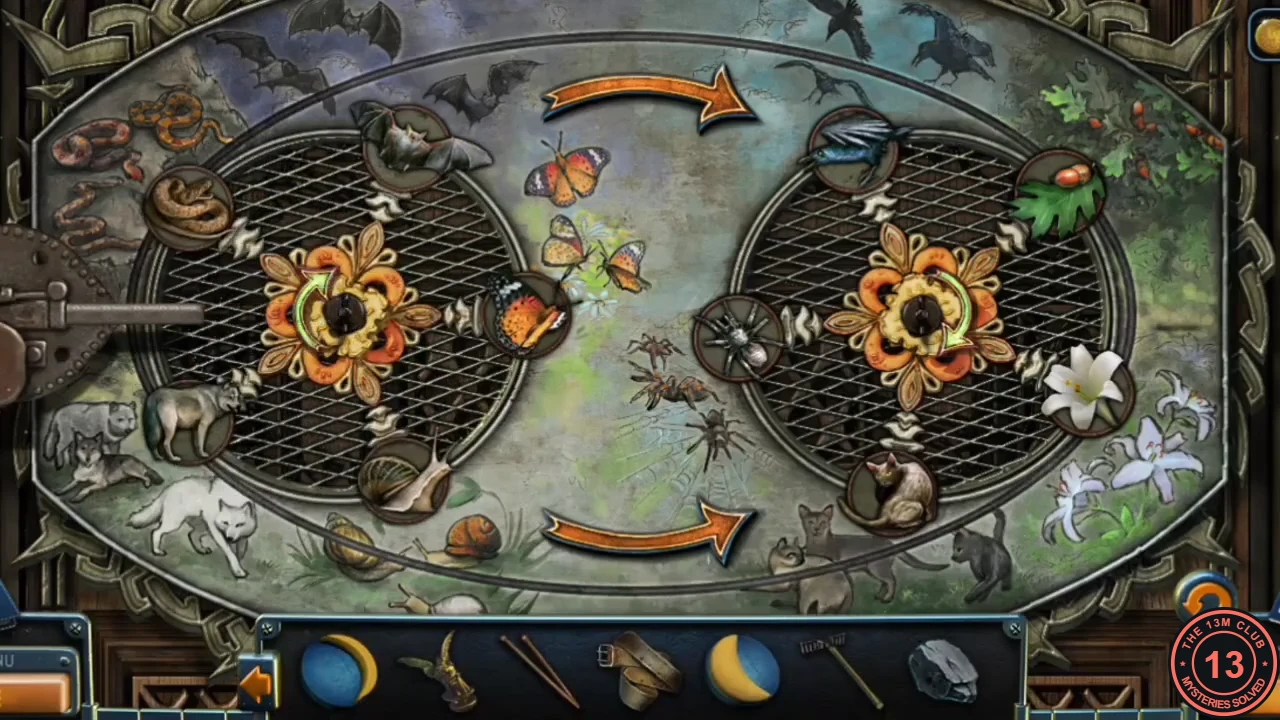
Solved creature wheels.
The meeting hall
The main door leads to the meeting hall: rows of seats, red curtains, a rolled-up screen over the stage and an old projector. Task The Meeting Hall is completed.
- Take the PICTURE from the right wall. Look at the lectern left of the stage and take the MOON FIGURINE lying on the papers.
- Look at the hole in the floor of the right aisle. Fish out the MOON FIGURINE with the KNITTING NEEDLES.
- Look at the rolled-up screen over the stage. Pull it down with the RAKE and take the VALVE (handwheel) at its foot.
Shutting off the steam and rowing across
With the steam stopped, the boiler room holds the oars for the boat, but the stack will collapse if they are pulled out.
- In the boiler room, fit the VALVE on the bare steam-pipe stem and turn it. The steam stops.
- Tap the OARS leaning on the left wall beside the furnace. If Laura takes them, the stack will fall; she needs something to hold it up.
- Take the rusty BARREL on the lakefront pier beside the lamp post, and the green BARREL in front of the church steps on the cathedral square.
- In the boiler room, put both barrels next to the oars. After the second one, the stack is held up; take the OARS.
- At the lakefront, look at the boat and place the OARS in it. Laura rows to the far shore. Tap the glowing mine entrance on the left.
The mine
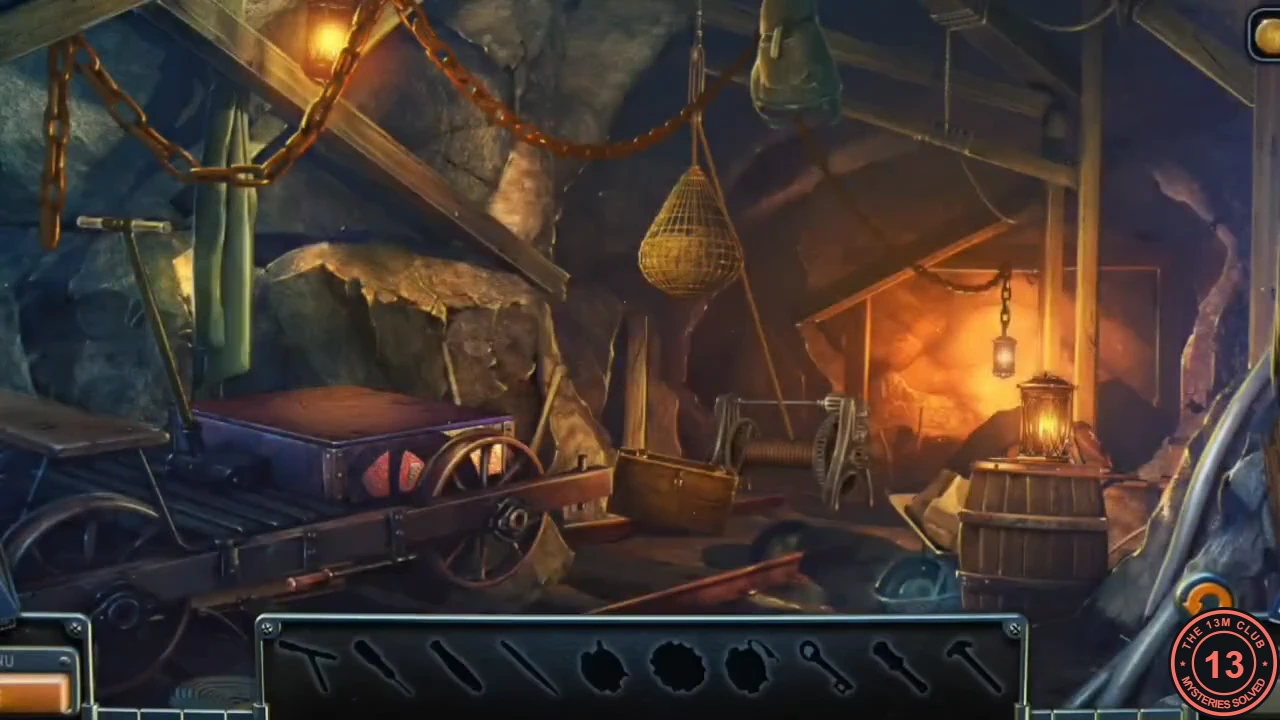
An interactive hidden-object scene in the mine. Several bar items must be freed or assembled. The reward is a HAMMER.
- Take the LEVER lying on the rail in front of the mine cart. Look at the barrel with the lantern on the right and take the KEY and the SCREWDRIVER. The knife blade there has no handle yet.
- Open the mine-cart lid with the KEY. Take the red KNIFE HANDLE from the coal by the torn sack. Fit it to the blade on the barrel to make a KNIFE.
- Look at the T-handled pole at the far left. Loosen its clamp nut with the SCREWDRIVER and take the T-HANDLED POLE. Use it to knock down the green rucksack hanging at the top centre.
- The winch in the centre is missing a cogwheel. Look at the net among the rocks at the bottom, cut it with the KNIFE and take the EMPTY OILCAN. Look at the fallen rucksack and take the COGWHEEL.
- Fit the COGWHEEL and the LEVER on the winch. Fill the EMPTY OILCAN under the dripping axle of the mine cart's front wheel, then oil the winch with the OILCAN. The hanging net basket comes down.
- Look at the basket and take the HAMMER from the floor. The scene closes.
The tar barrel and the zip line
Back on the far shore, the church loft can be reached by riding a cable from the bell-tower platform.
- On the far shore, smash the tar barrel in front of the church with the HAMMER and take the OBJECT IN TAR. Go forward to the bell-tower platform and put the BELT over the cable pulley. Laura rides it into the church loft.
- In the loft, take the ROPE from the floor in the centre.
The loft floor tiles
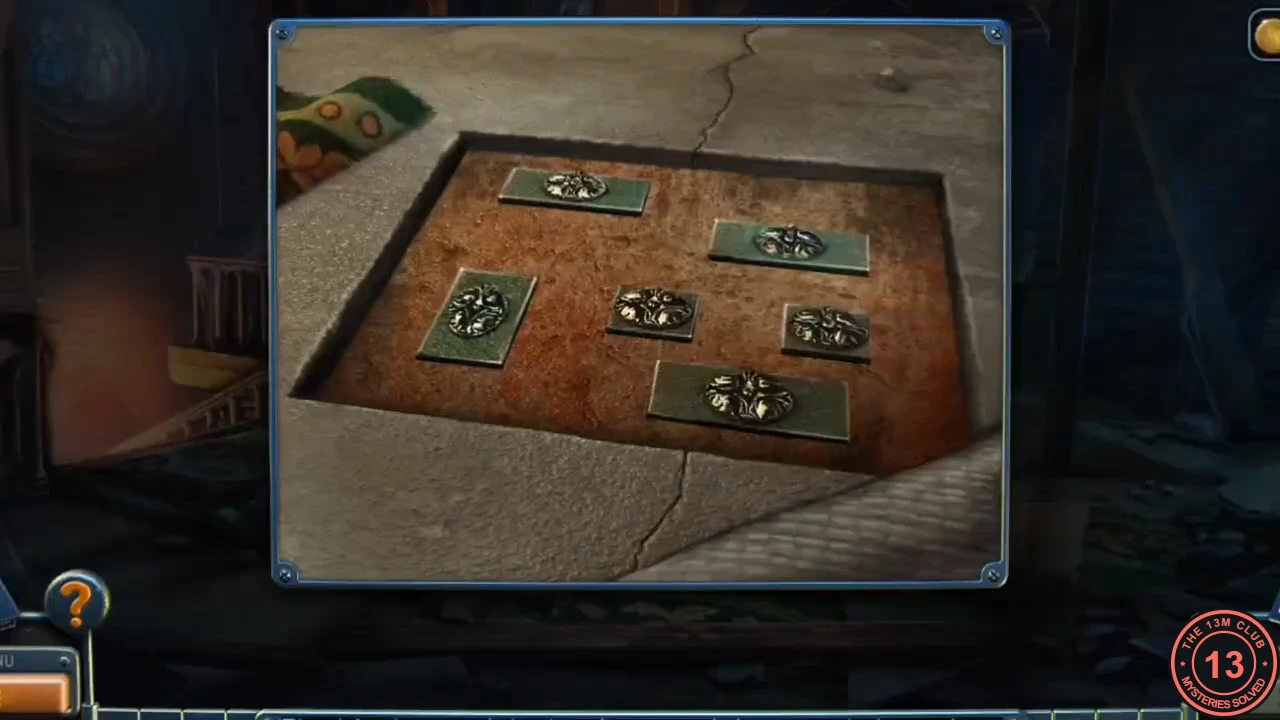
Under the rug on the right of the loft is a slab of six green tiles with bronze rosettes.
- Lift the rug on the right to show the tiles. Tap a tile to press it into the floor. Order observed in the solving run: the small centre tile, the bottom tile, the left tile, the small right tile, the top tile, the top-right tile. In the footage, an earlier tap on the left tile did not stay down, so follow this order.
- The slab opens. Take the full-moon FIGURINE from the yellow cloth.
The nave relief door: matching symbols
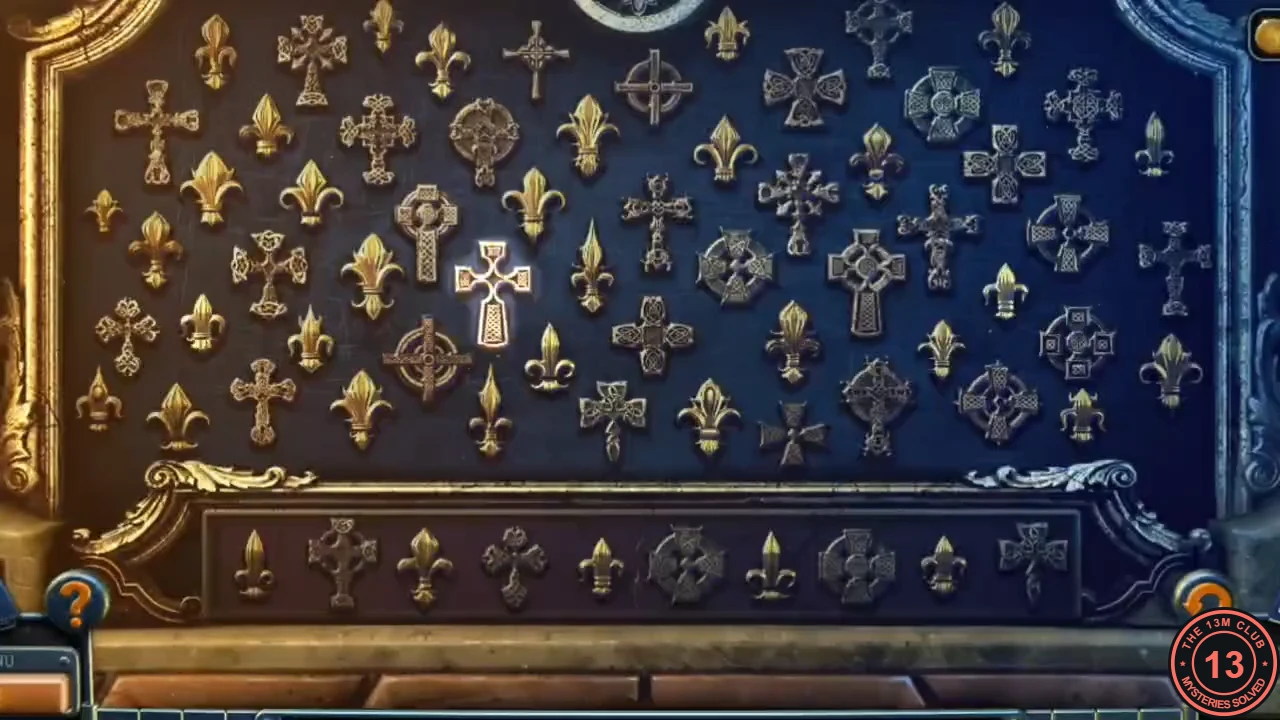
The relief door in the nave has a large grid of crosses and fleurs-de-lis, with a slot for a tablet along the bottom.
- Look at the relief door in the nave and fit the STONE TABLET into the slot along the bottom. The tablet shows 10 symbols.
- Find each tablet symbol in the big grid and tap the exact match. Found symbols glow blue. When all 10 glow, the puzzle is complete.
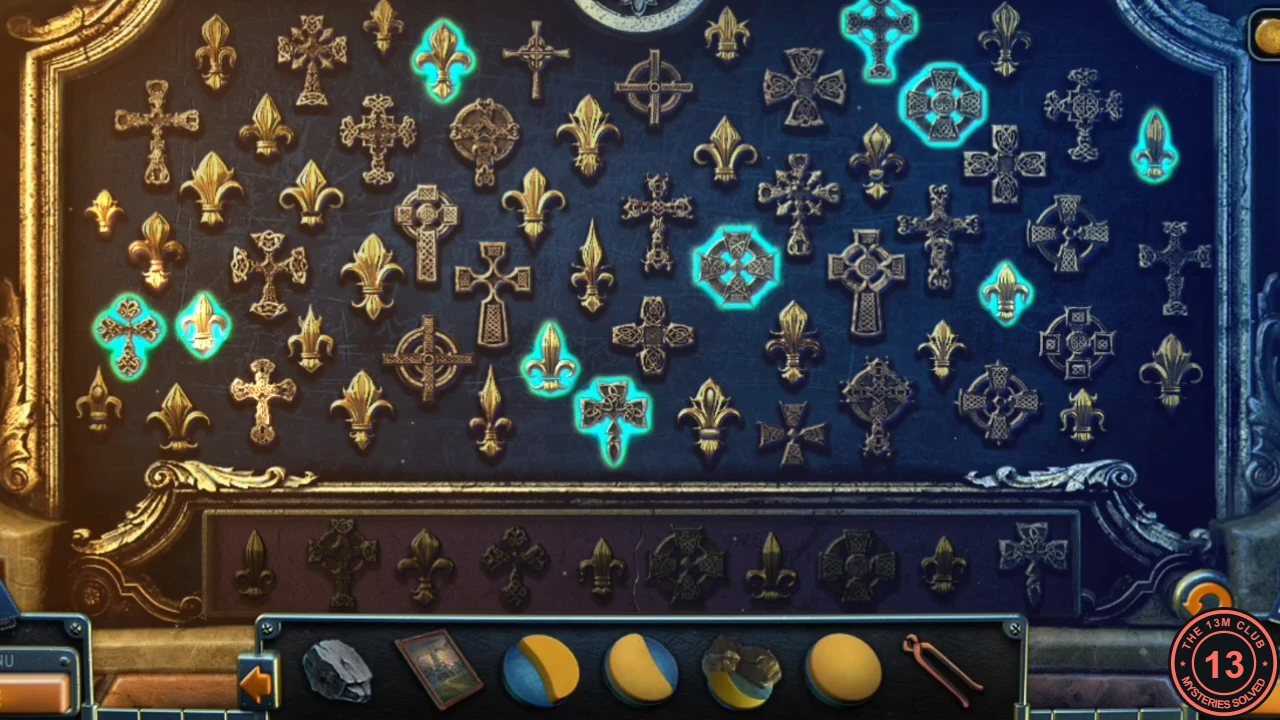
All ten tablet symbols found and glowing.
Candle wax, the clock and the furnace
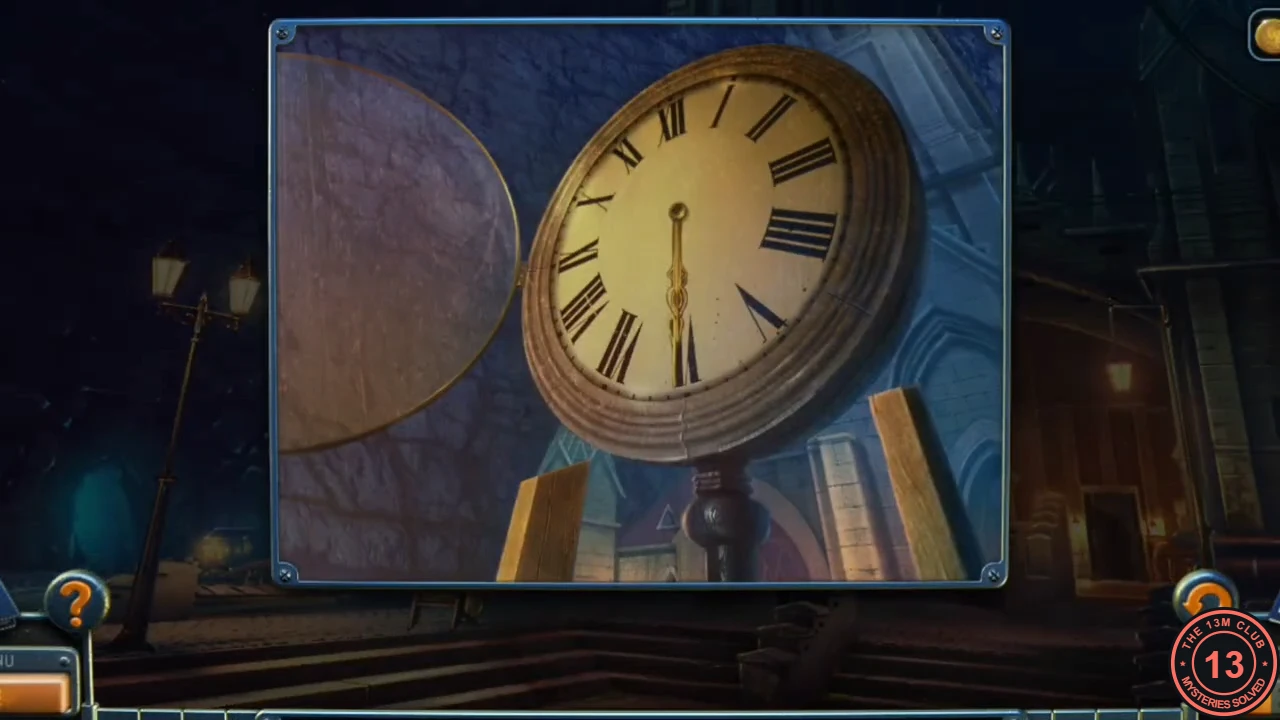
A number board, a wax clue and the cathedral clock lead to the next piece of sheet music. The furnace frees a moon figurine.
- On the bell-tower platform, the bench on the right is a board of scattered numbers. Laura needs something like chalk to connect them; come back later.
- Look at the candle stubs on the left railing of the platform. Scrape off the wax with the KNIFE to reveal the carved time 3:40.
- Go to the cathedral square and look at the clock. Set it to 3:40: hour hand just before IV, minute hand on VIII. A compartment opens under the dial; take the PAGE WITH SYMBOL.
- In the boiler room, look at the furnace. Put the OBJECT IN TAR on the coals to burn off the tar, then pull it out with the PLIERS. It is cooled automatically: take the MOON FIGURINE.
The shack painting: find the repetitions
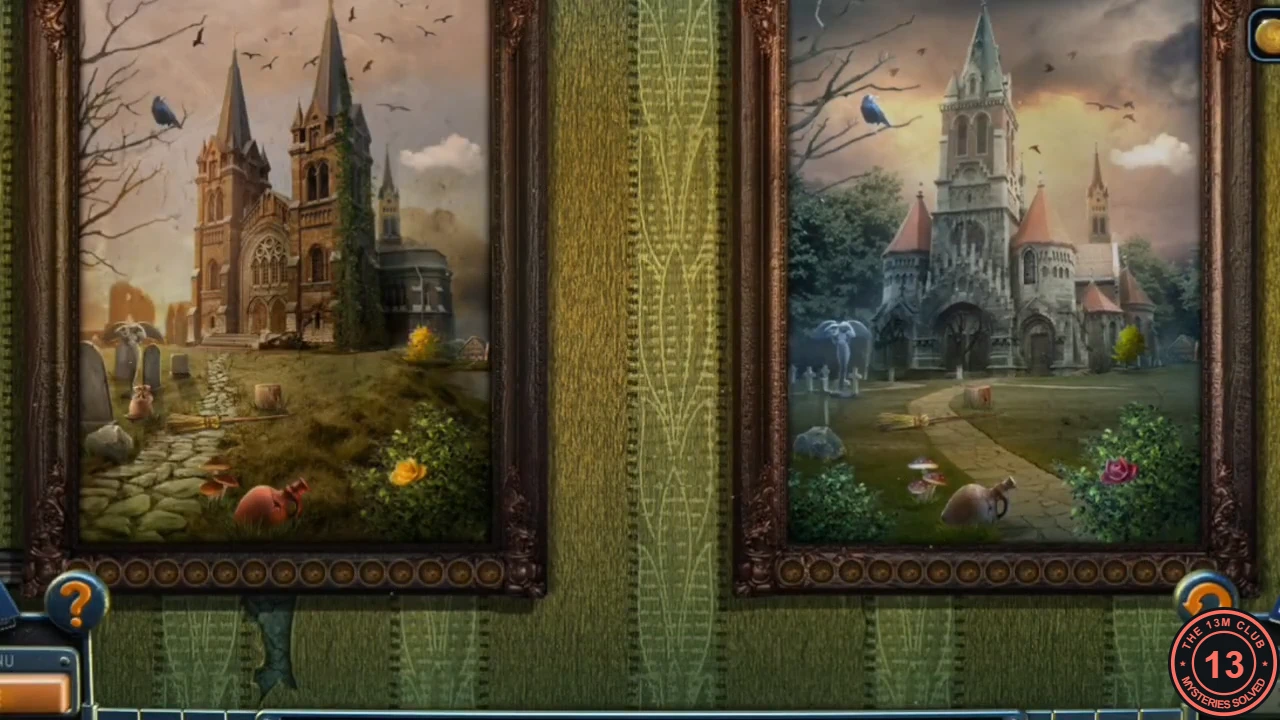
Beside the church painting in the shack, the wallpaper is torn where another picture used to hang.
- In the shack dining room, look at the torn wallpaper beside the wall painting and hang the PICTURE from the meeting hall on the empty spot.
- Find all the repetitions on the pictures: tap each object that appears in both paintings, such as the blue bird, the broom, the jug, the mushrooms and the rose bush. The row of 15 markers under the frames ticks off each find. When all are outlined, a niche opens in the wall; take the STONE FLOWER.
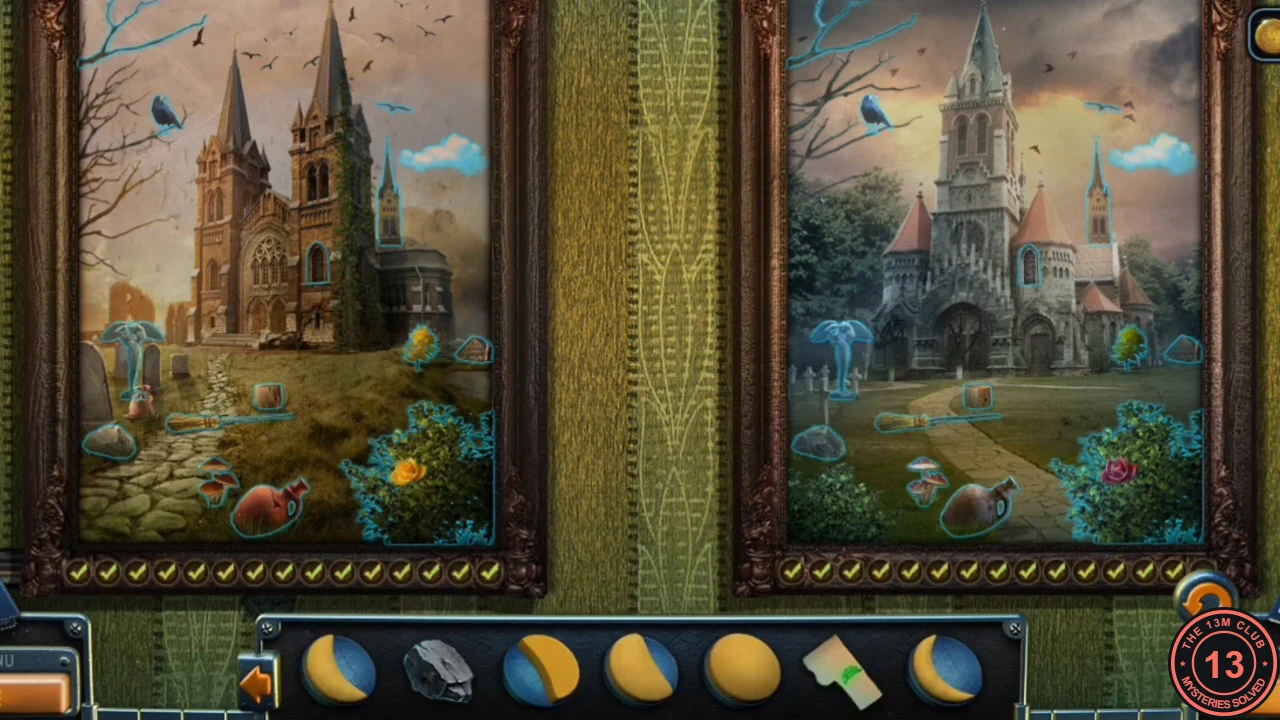
All repetitions found in both paintings.