Bishop's call and the bridge tunnel
The bonus chapter opens after the main game. Choose Bonus Chapter in the main menu. Bishop calls Laura to the old tram bridge, and he is soon poisoned by spores. The antidote is in a first-aid kit somewhere in the underground city.
- At the bridge, go forward into the tunnel with the scaffold. Open the box at the lower left and take the ELECTRICAL TAPE and the FLASHLIGHT. A padlocked compartment stays shut for now.
- A cutscene plays: Bishop breathes in poisonous spores and collapses. Laura must find the antidote in the underground city.
- In Bishop's foyer, tap Bishop on the floor and take the KEY from him. Pick up the dog's BOWL near the dog.
- Go back down to the tunnel. Open the padlock on the lower-left box with the KEY and take the SAW. Look at the scaffold and cut a board off with the SAW to get a PLANK.
- Go down to the bridge and look at the control cabin. Lay the PLANK across the gap. On the console inside, take the KNIFE and the CROWBAR. The lever slot on the console is empty.
- Look at the stone walkway of the bridge. Pry up the tiles with the CROWBAR and take the MOON FIGURINE. Five hexagons under the tiles show a sequence: the 2nd, 3rd and 5th carry symbols, the 1st and 4th are blank. Remember it.
The dog and the tram lever
Back at Bishop's house, the dog is lying on the item Laura needs. Feed it to make it move.
- Return to the foyer. New task: An Antidote. Look at the parcel on the small tea table at the lower left, cut the twine with the KNIFE and take the ANGEL FIGURINE.
- Go to Bishop's study. At the base of the desk is a bag of dog food. Open it with the KNIFE and fill the BOWL to get a BOWL WITH FOOD.
- Back in the foyer, place the BOWL WITH FOOD on the floor to the right of the stairs. The dog leaves its cushion. Look at the cushion and take the LEVER and the KNITTING NEEDLES.
- Go down to the bridge. Put the LEVER into the empty slot on the cabin console and pull it. The tram carries Laura to the underground city gate.
The hooded statue at the city gate
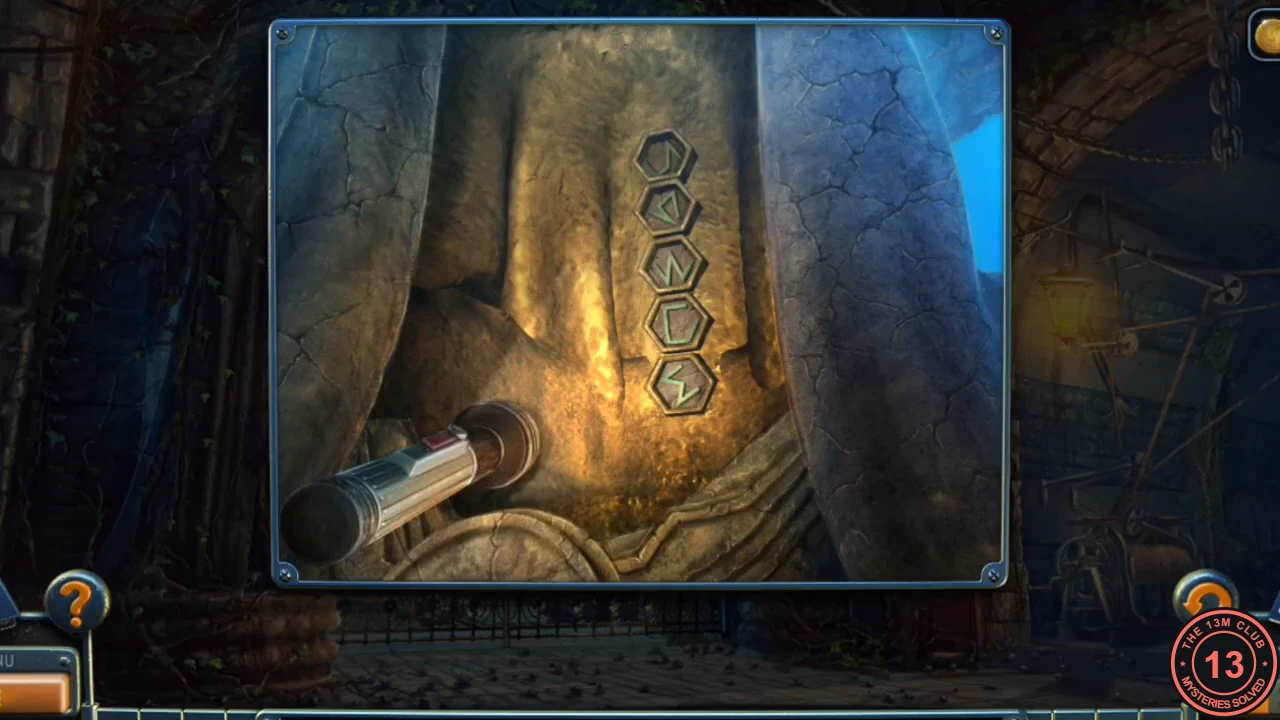
A dark hooded statue stands left of the gate. Light it to reveal five hexagons, then press the ones shown in the walkway clue.
- Use the FLASHLIGHT on the hooded statue to the left of the gate. Five hexagons with runes light up.
- Press only the hexagons that carry a symbol in the walkway clue: the 2nd (triangle shape), the 3rd (N shape) and the 5th (sigma shape). Leave the 1st and 4th unpressed. The gate opens.
The cathedral square and the lakefront
Through the gate is the cathedral square of the underground city. An old man rocks in his chair by the lake.
- Walk through the cathedral square to the lakefront. Talk to the old man in the rocking chair. New task: The Meeting Hall. Note the lit window of the shack and the farmyard beyond.
The farmyard
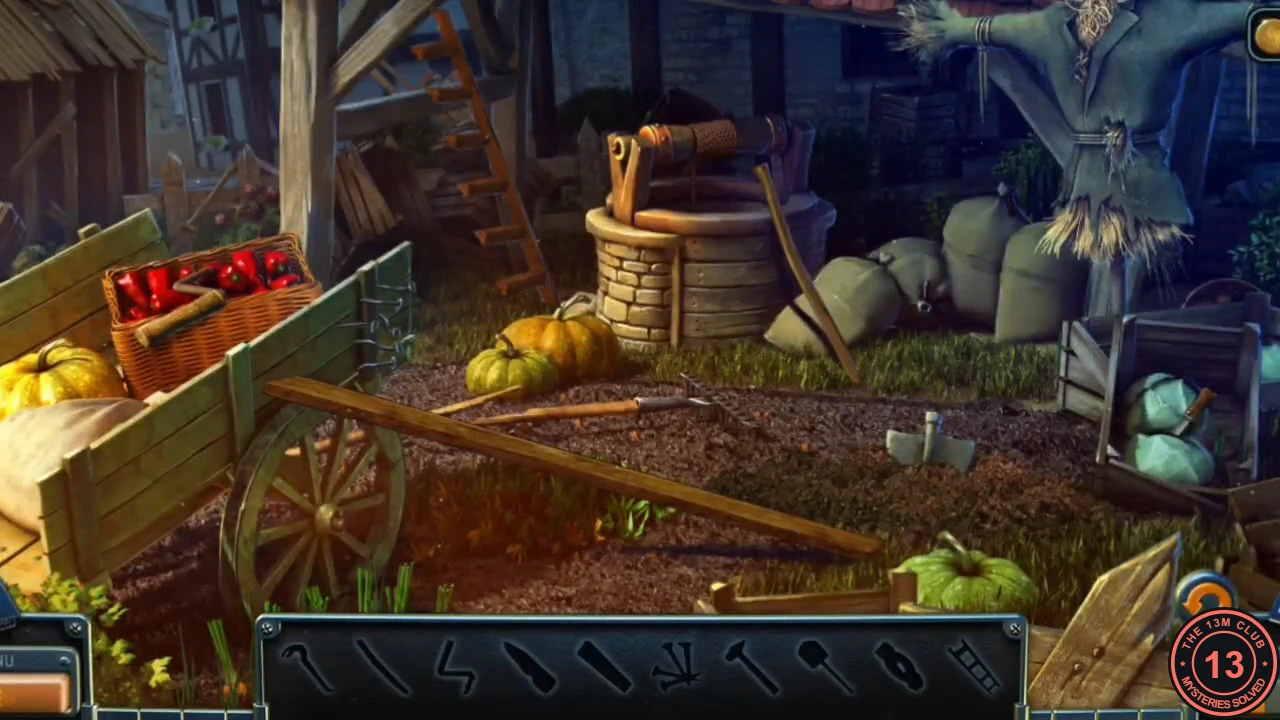
This is an interactive hidden-object scene. The bar shows the objects to find; several of them must be built or freed first. The final reward is the LADDER.
- Take the STICK leaning on the right side of the well. Take the CRANK HANDLE lying on the red-pepper basket in the cart.
- Look at the well: the chain has no handle. Fit the CRANK HANDLE and turn it. The bucket comes up; take the HAMMER HEAD from its rim.
- Take the PLANK leaning against the cart wheel and the KNIFE with the orange handle by the right-hand crate of blue cabbages.
- Look at the scarecrow's chest. Cut the rope with the KNIFE and take the green CROWBAR from the straw.
- Look at the front corner of the cart. The nails cannot be pulled by hand; pull them with the CROWBAR to get the NAILS.
- Look at the ladder with the broken rung, upper left by the barn. Place the PLANK and the NAILS on it. The stick will not hammer them in.
- Take the SPADE stuck in the middle of the yard. Dig the loose dirt patch at the lower middle with it. Fit the HAMMER HEAD to the handle you dig up to make a HAMMER.
- Use the HAMMER on the ladder to nail the new rung, then take the LADDER. The scene closes.
The shack and the clock
The lit shack on the lakefront has a locked window. Inside are useful items and a clue for the next puzzle.
- At the lakefront, look at the lit shack window. Push the KNIFE through the crack to lift the catch, then go inside.
- Take the WRENCH from the cobwebs under the small cabinet on the right by the door, and the BIRDCAGE from the table. Lift the cushion of the left chair and take the KEY.
- Open the sideboard drawer on the left with the KEY and take the BELT. Look at the wall on the left: next to a church painting is a round disc design. Remember it.
- Go to the cathedral square. Set the LADDER under the clock left of the church, look at the clock and take the MOON FIGURINE from its hand.
- Go to the gate. Use the WRENCH on the gear machine on the right and take the HANDLE.
The lion-crest dial
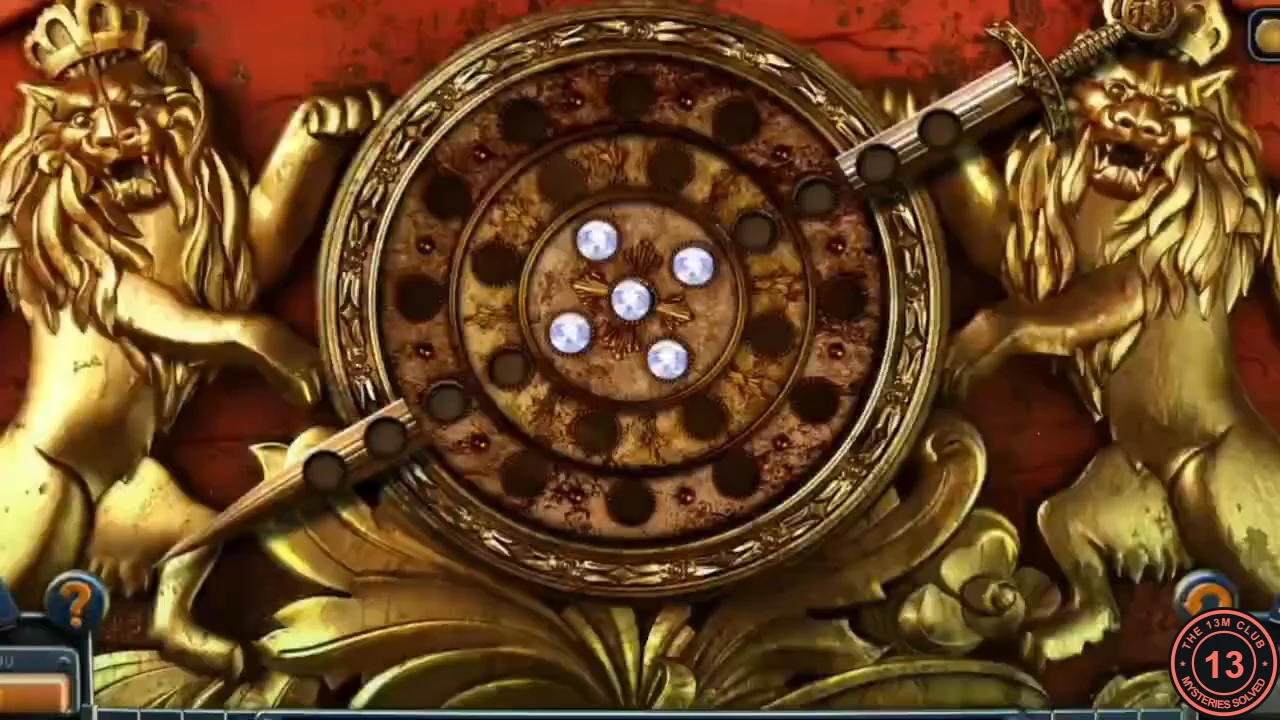
The red booth with a lion crest stands to the right of the gate. Its dial has a centre hole, three rings and a diagonal sword groove, all carrying marbles.
- Tap the red lion-crest booth right of the gate to open the dial.
- Recreate the disc design from the shack wall: marbles in the centre, in the middle ring at upper left and lower right, and in the outer ring at upper right and lower left (both outer marbles lie on the sword line). Tap a ring to turn it one step. Tap the sword to slide it one step along its groove, carrying the marbles on its line with it; watch which way it moves.
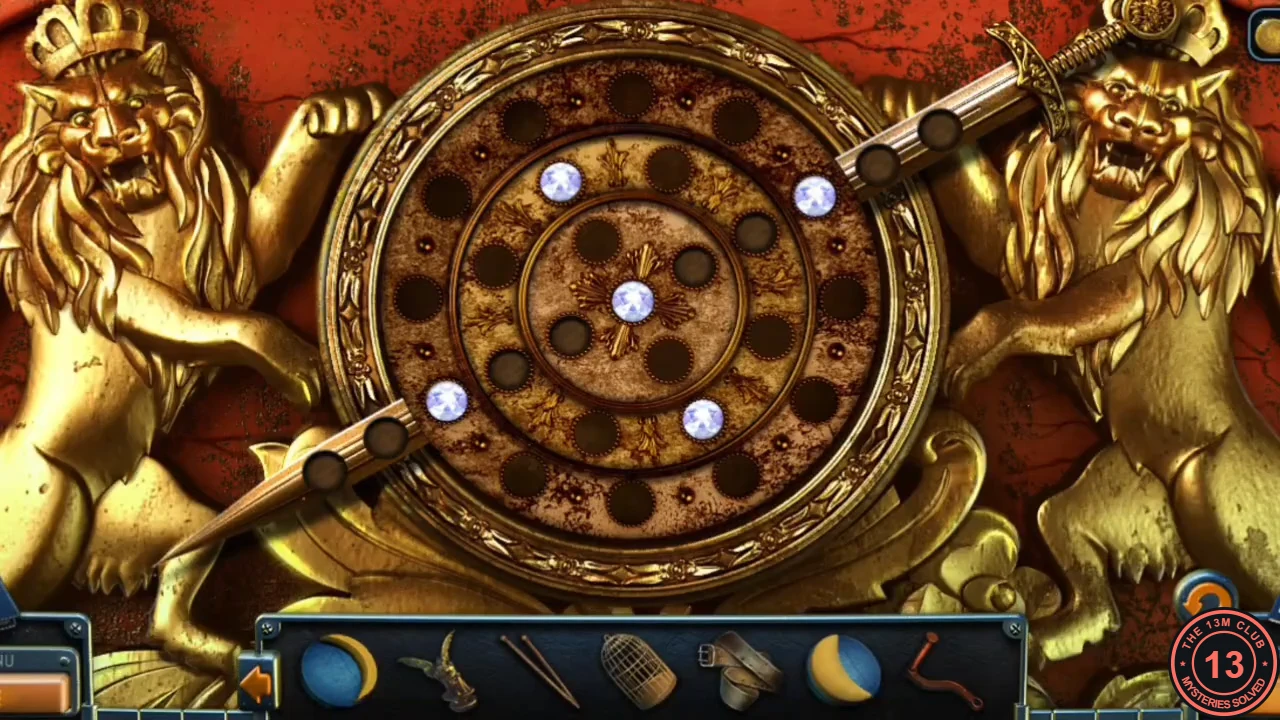
Solved lion-crest dial. - The booth drawer opens. Read the LETTER: Tom Laurence hid his belongings and a first-aid kit in the same place as before. Take the FIRE SYMBOL.
The church door: element rings
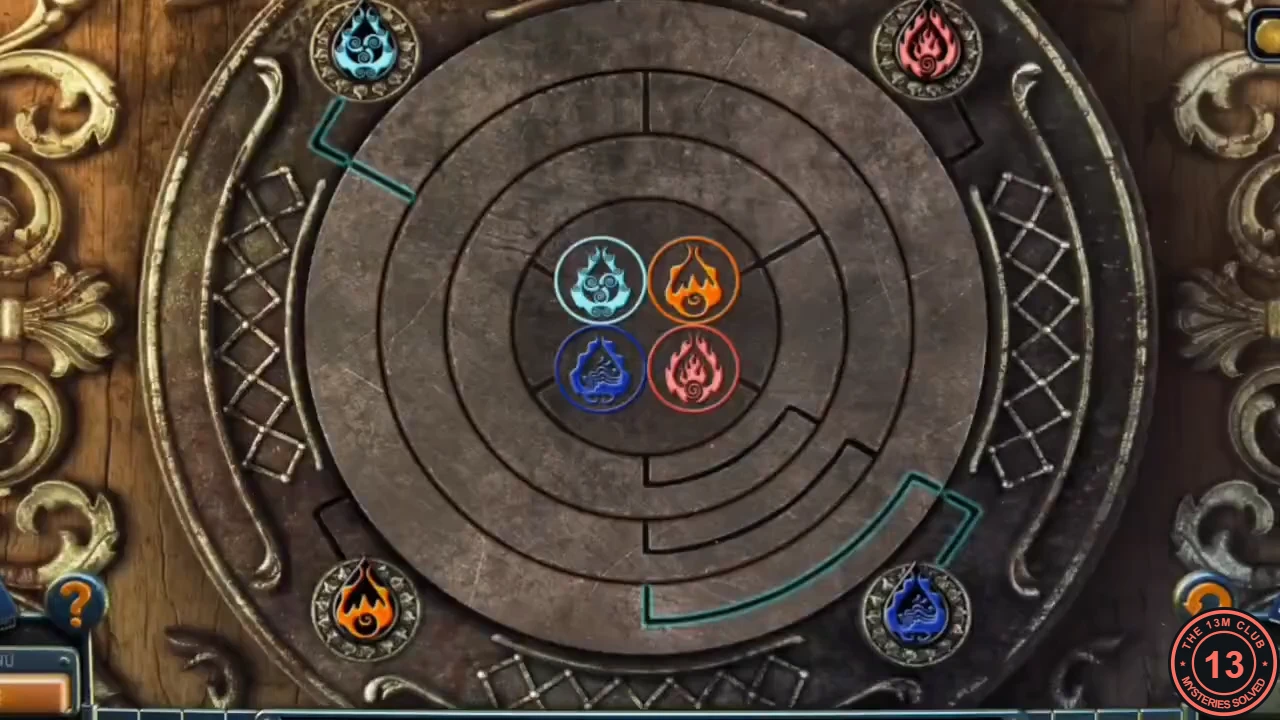
The lock of the church's right-hand door shows four corner element symbols and four centre symbols, linked by grooves in turning rings.
- At the cathedral square, look at the lock of the church door at the top of the steps on the right and place the FIRE SYMBOL.
- Tap a ring to turn it one step. The glowing groove shows how far each corner symbol's path reaches. Turn the rings until all four corner paths run unbroken to the centre and all four centre symbols glow. The door opens.
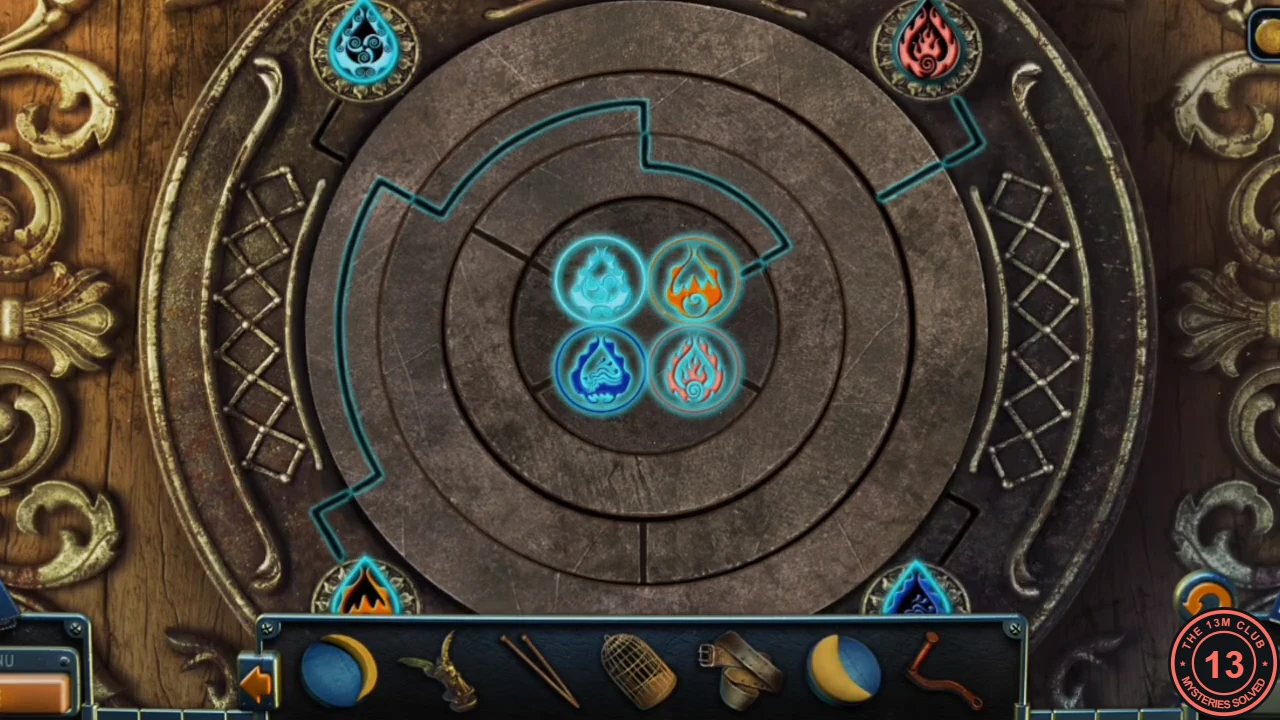
Solved element rings: all four paths reach the centre.