Hospital Room
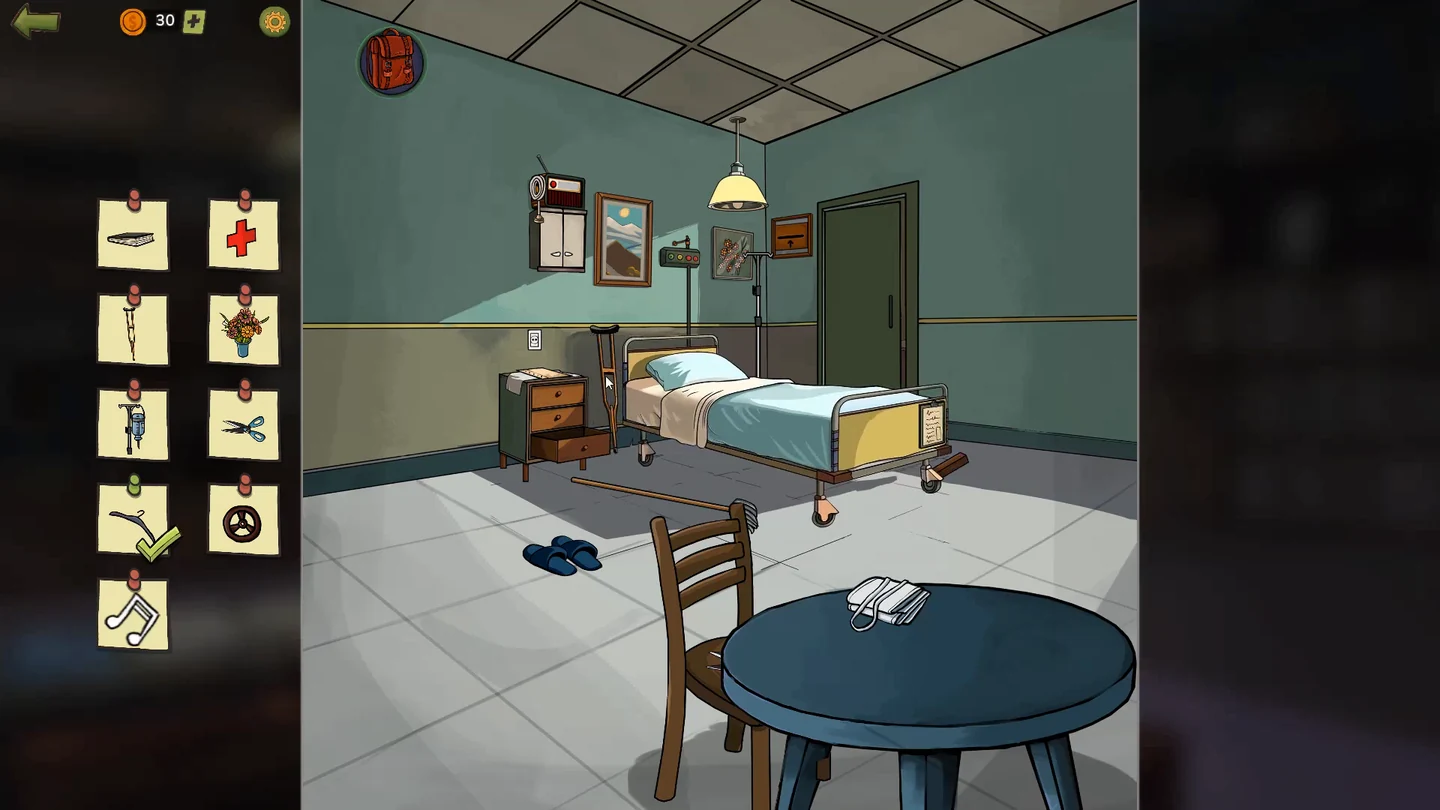
A week after the escape, Margaret wakes in hospital. Find: black book, red cross, crutch, bouquet, IV drip, scissors, hanger, valve and music note.
- Swipe the pillow aside for the black book and the clipboard on the bed's end for the red cross. Open the bottom drawer of the side table, fit the wheel inside to the bed's wooden leg, swipe the bed aside and take the crutch. Open both doors of the cabinet above the side table and hang the IV bag on the stand by the bed, then tap the IV drip to collect it. Swipe the chair up for the scissors and keep them. Take the hanger on the edge of the bed.
- Swipe the mop from under the bed, push it against the ceiling panel above the bed and take the valve that drops; keep it. Swipe the radio's wire down twice and press its red button three times. A white music note appears above the radio: tap it to collect it.
- Tap the paper on the side table and fill the 4×4 grid so every row, column and 2×2 box holds 1 to 4. Solution, row by row: 1 2 4 3 / 3 4 2 1 / 4 1 3 2 / 2 3 1 4. The solved puzzle turns into a letter: drop it in the mailbox left of the door. The nurse comes in with flowers; tap the bouquet.CODE1243 3421 4132 2314
- With the list complete, the nurse asks you to take your temperature, the important clue. Tap the thermometer and shake the phone until the reading drops to normal. Agent Stanley then visits and Margaret is discharged.
Amanda's Backyard
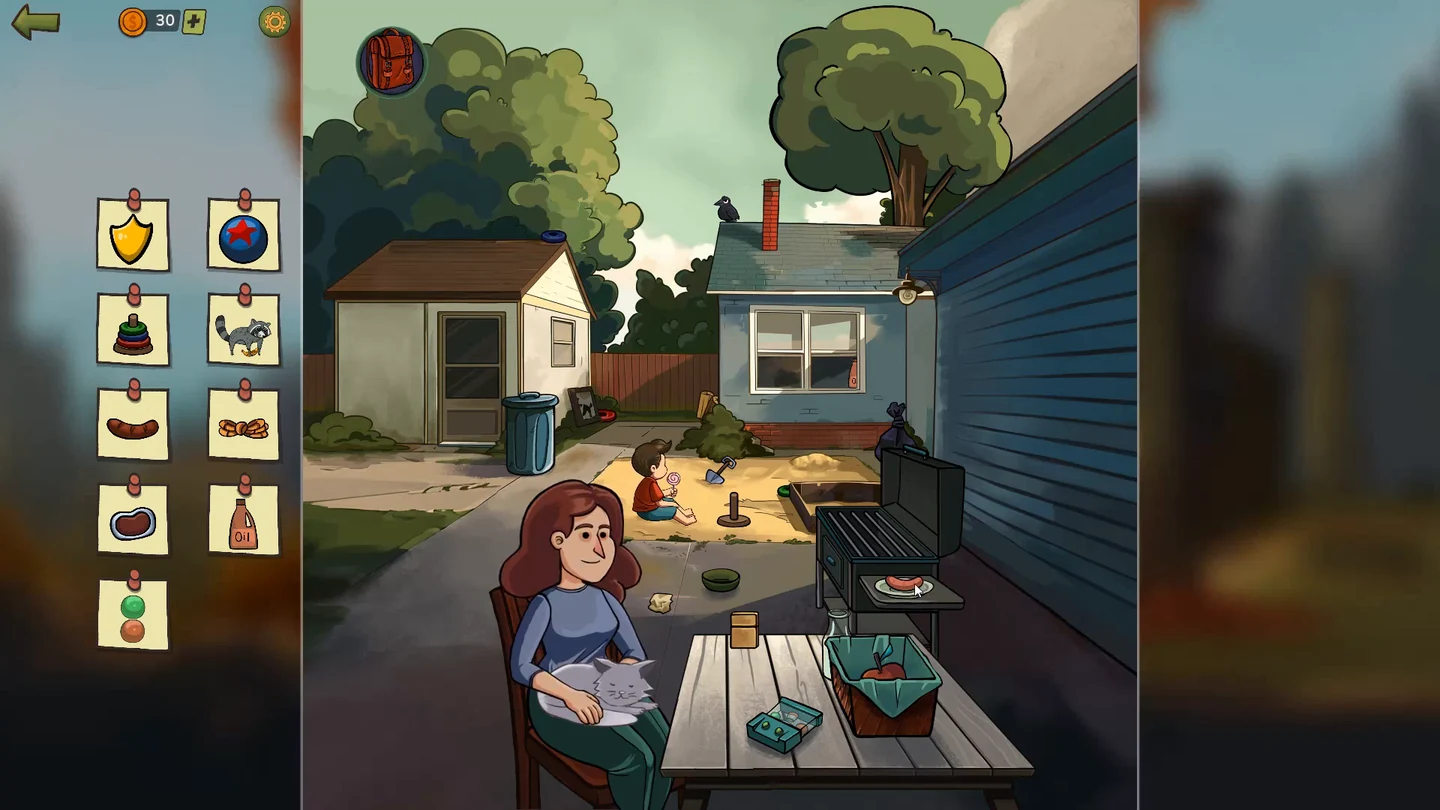
Find: sheriff badge, ball, stacking rings, raccoon, cooked sausage, rope, belt buckle, oil bottle and the two balls.
- Swipe the hat behind the bush aside and give it to the boy for his badge. Dig the sand mound above the sandbox with the small shovel for the ball. Put the red ring (behind the left house), the blue ring (on its roof) and the green ring (behind the sandbox) on the wooden base, then tap the assembled stacking-ring toy to collect it. Lift the bin lid and drop the black rubbish bag in, then tap the raccoon that appears in the bin to collect it. Tap the tree on the right until the rope drops, then tap the fallen rope to collect it; keep it for the Lake House. Swipe the oil bottle by the window into view and take it; keep it for later.
- Put the sausage, the crumpled paper and the chopped wood by the blue house on the grill. Tap the lighter on the table, swipe its lid up, swipe the wheel down to light it and drag it to the grill; take the cooked sausage. Swipe the milk bottle behind the basket on the table into the cat's green bowl; when the cat leaves Amanda's lap, take her belt buckle.
- Tap the teal toy on the table. Both balls must end up in the same central basket, the red ball first and the green ball on top of it. Press the right button repeatedly to blow the red ball into the basket, then press the left button to lift the green ball in after it. Tap the red-and-green ball pair that appears to collect it.
- With the list complete, tap the book on the table, the important clue. Amanda talks about the science-fiction novel she is reading, and Margaret decides to write her own at the family lake house.
Lake House
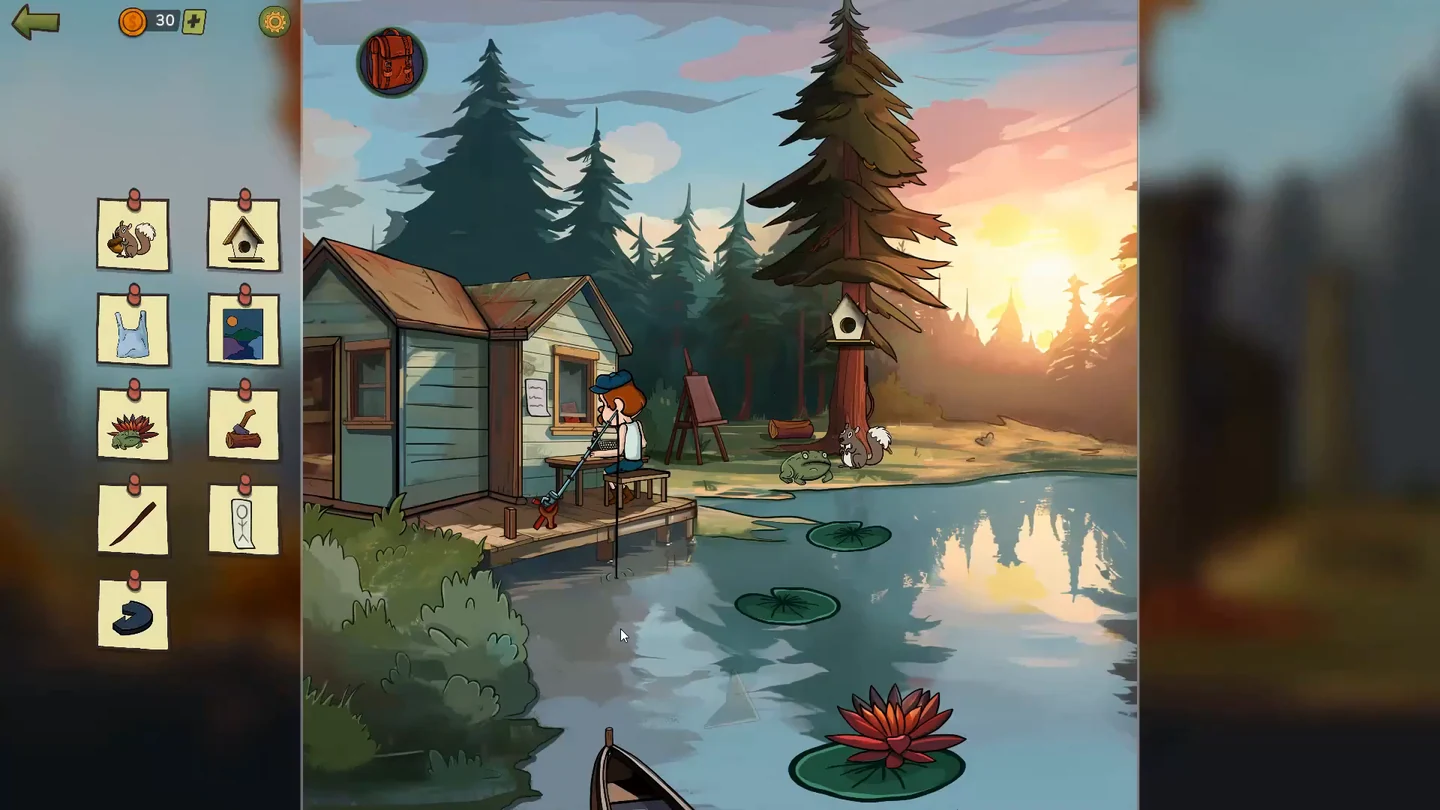
Find: squirrel with acorn, birdhouse, plastic bag, painting, frog, axe in a log, stick, stick figure and the blue piece.
- Swipe up the pine branches and tap the acorn until it drops to the squirrel, then tap the squirrel holding the acorn to collect it. Swipe the axe above the shack into view and drive it into the log by the tree, then tap the axe in the log to collect it. Swipe the birdhouse roof up out of the water and fit it to the birdhouse, then tap the repaired birdhouse to collect it. Tap the frog whenever a moving lily pad comes close, hopping it across to the lily at the lower right, then tap the frog there to collect it. Take the stick in the tree and keep it. Swipe the scribbled note on the shack wall down to reveal the stick figure, then tap the stick figure to collect it.
- Open the backpack, tie the rope to the end of the boat and pull it towards the shack, then swipe the green bag in the boat up and take the blue piece; keep it.
- Tap the fishing rod. The hook swings over the water; tap again when it points at the white plastic bag with no fish in the way. The bag comes up hanging from the rod: tap it to collect it.
- Swipe the paper holder behind the tree aside, open it twice and put the paper on the easel. Tap the easel and paint each area, using the painting's card on the list as the colour reference: an orange sun, dark green hills, purple land on the left and light-blue land on the right, a muted blue sky and a dark navy-blue river. The two blues are different shades, so pick the darker one for the river. When the painting is accepted, tap the finished painting to collect it.
- The repairman returns the typewriter, the important clue. Margaret's full name is on her red passport, visible through the shack window. Type MARGARET GARCIA on the author line at the bottom of the page.CODEMARGARET GARCIA
Bookstore
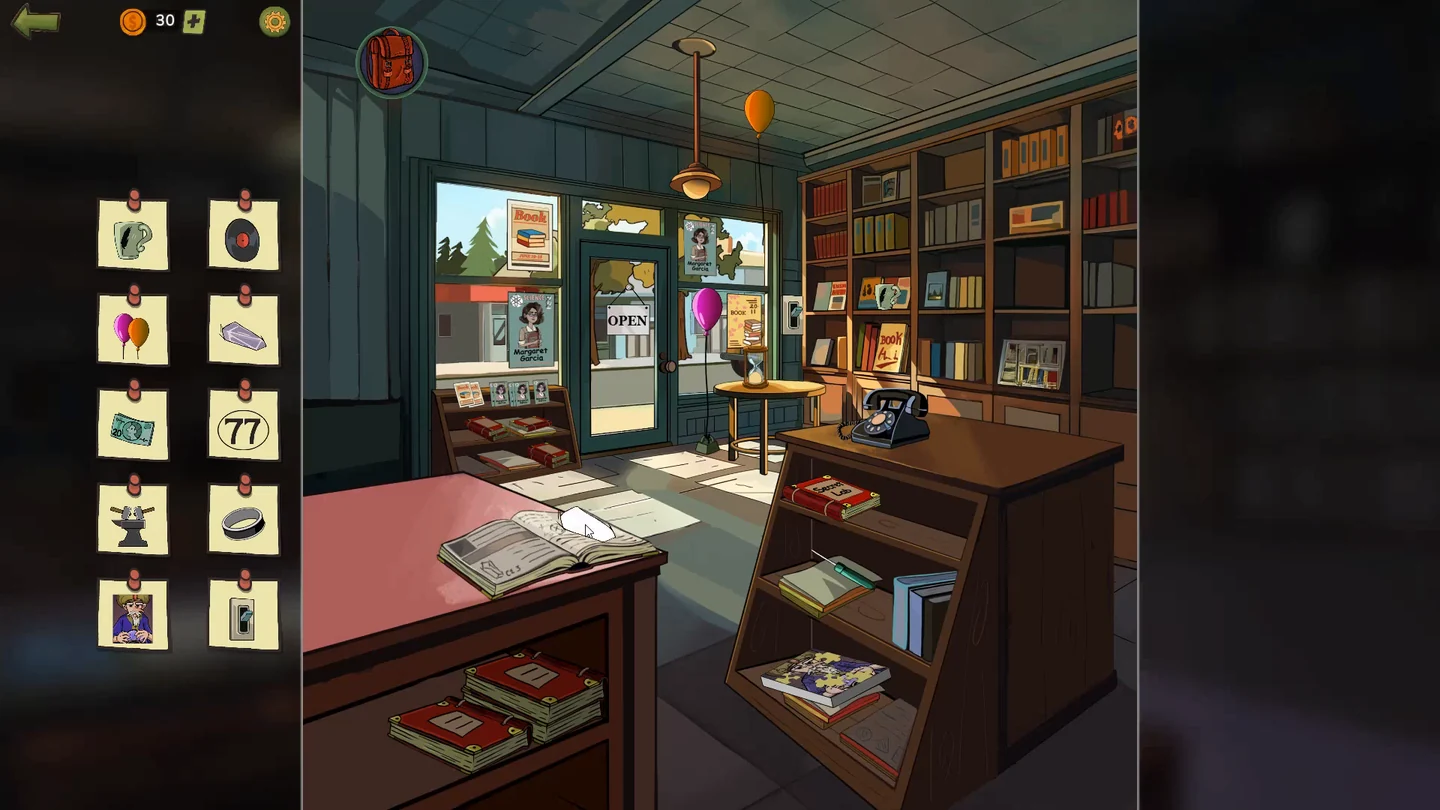
Find: mug with feather, record, balloons, crystal, $20 bill, the number 77, anvil, black ring, fortune-teller picture and the switch.
- Take the mug on the right-hand shelf (middle column, third row) and swipe the dark yellow books in the row above twice for the record. Cut the pink balloon's string with the scissors from the backpack so it floats up level with the orange one, then tap the two balloons together to collect their card. Tap the Secret Lab book on the pink table, swipe its pages left three times and take the crystal. Swipe the sign on the door so a customer comes in, give him the Secret Lab book and take his $20 bill. Tap the 77 on a passing taxi door.
- Tap the yellow book marked BOOK (right shelf, middle column, bottom row): swipe the left arrow tag right and the right arrow tag left to lower both hammers, then swipe the bottom gear left twice and take the anvil. Tap the hourglass on the table by the door and turn it over for the black ring. Take the switch on the wall between the right window and the shelf; keep it.
- Assemble the jigsaw on the bottom row of the telephone shelf. Place the corners first; a piece turns dark grey when it is in its correct spot. The finished picture shows a turbaned fortune teller with a crystal ball.
- With the list complete, answer the ringing black telephone, the important clue. A threatening call follows and Margaret heads home.
Margaret's Bedroom
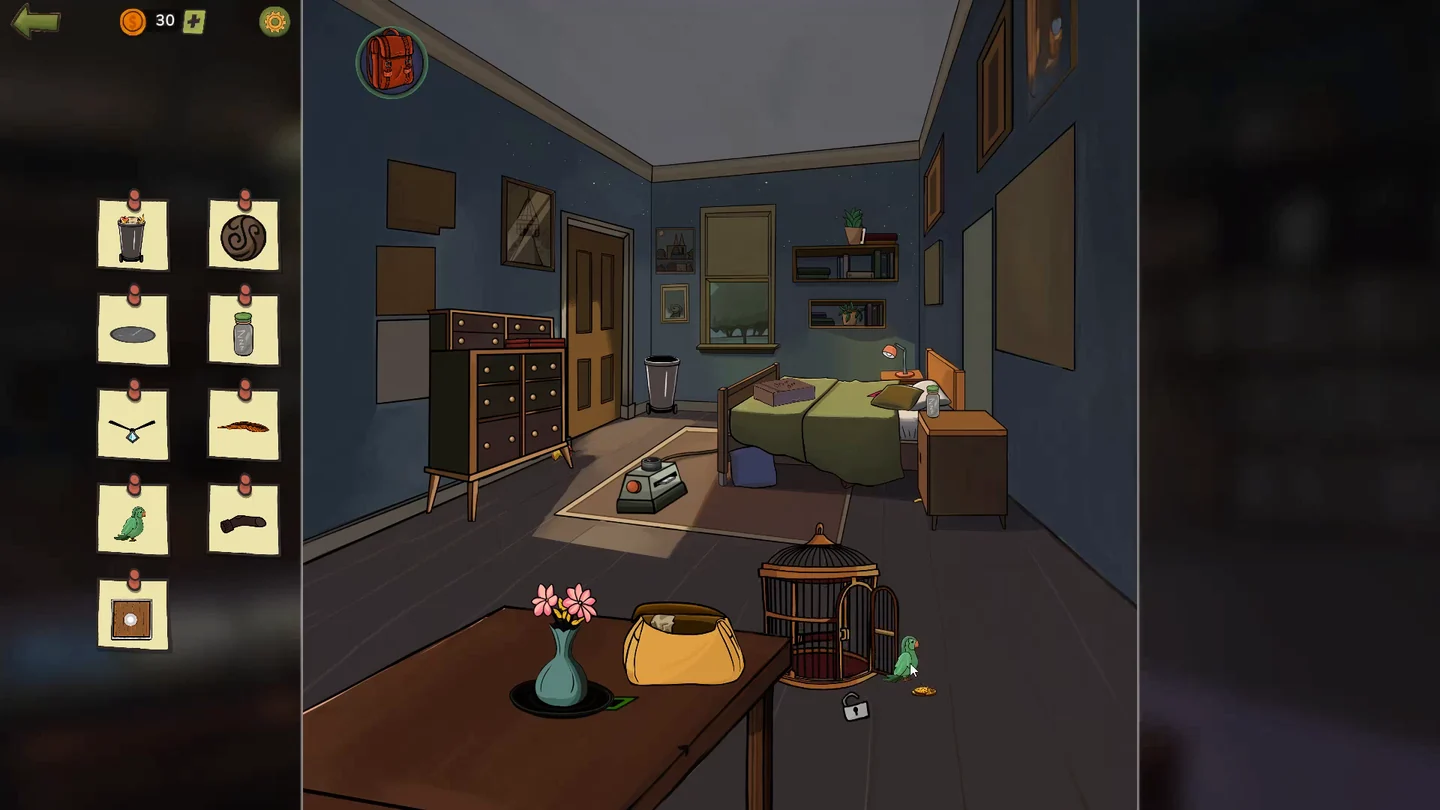
Find: trash can, circle emblem, clock shadow, sleeping pills, diamond necklace, orange feather, parrot, sock and the wooden block.
- Fill the trash can right of the door with the banana peel from under the side table, the apple core from under the dresser and the crumpled paper from the yellow bag on the table, then tap the full trash can to collect it. Tap the framed picture on the wall to the upper right of the door to open it and tap the circular spiral emblem in its upper-left corner. Tap the projector on the floor, swipe the plant on the top-right shelf aside, put the white slide in the tray and press the red button; tap the clock shadow on the ceiling. Take the sleeping pills on the bedside table and keep them. Swipe the green blanket up for the sock.
- Tap the dresser. Open the red box and the upper-left drawer, fit the blue piece from the backpack to the red piece in the drawer to open a hidden compartment, and put the diamond from it in the necklace. Tap the repaired necklace to collect it. Take the key from the bottom-right drawer and open the green middle-left drawer for the orange feather. With the yellow bag open, use its silver key on the birdcage padlock, open the door and give the parrot the yellow cracker from the floor. When the bird comes out of the cage, tap it to collect it.
- Tap the box on the bed twice to open the sliding-block puzzle. Slide the wooden blocks until the large block can move down through the opening at the bottom. This takes many moves: clear the small blocks out of the column under the large block first, then shift the long blocks sideways to make room. When the large block drops out, tap it to collect it.
- With the list complete, answer the knock at the door, the important clue. Two orderlies take Margaret away to a mental hospital.
Mental Hospital Common Room
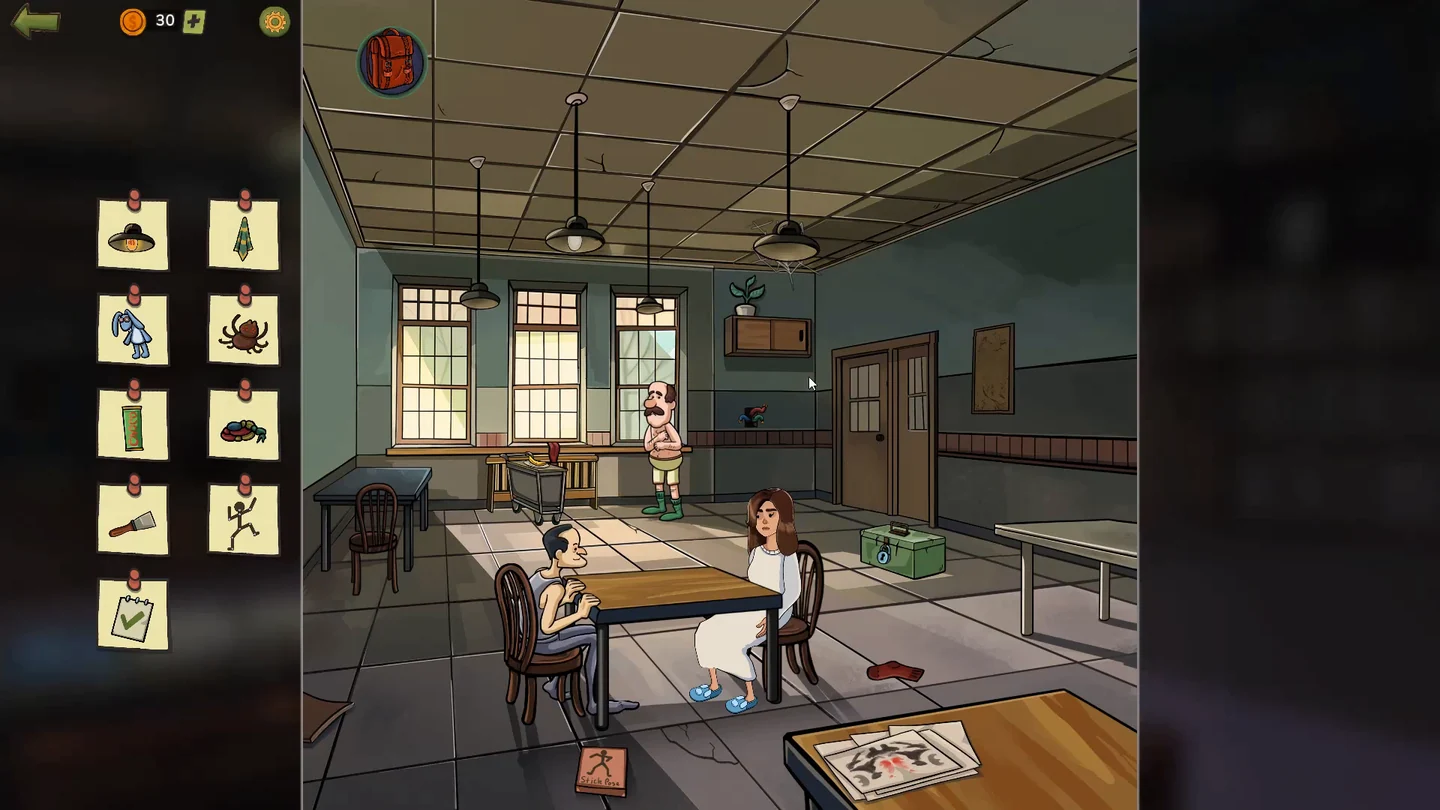
Find: ceiling light, handkerchief, blue bunny, spider, chocolate bar, scarf rope, chisel, stick figure and the check mark.
- Fit the switch from the backpack onto the bare wires on the wall and take the lit ceiling light. Swipe the food card on the table down; the man takes the banana and pulls out a handkerchief; tap the handkerchief to collect it. Open the wooden shelf by the door and give the purple blanket to the shivering man, then tap the blue bunny he lets go of. Swing the corner ceiling light and tap the spider while it sways. Tap the door to call the guard, swipe the cracked floor tile aside and give him the cash, then tap the chocolate bar he hands over. Open the left window and swipe it down twice to reel in the scarf rope, then tap the rope to collect it. Swipe the green box up five times and take the chisel; keep it.
- Tap the inkblot cards at the lower right. The note says to find two identical pictures: compare the nine blots closely and tap the two that match exactly. Take the check mark.
- Tap the brown box next to the man at the table. Tap the joints to bend the limbs until the figure matches the stick-figure card on the list. Seen from your side of the screen, the finished pose has the left upper arm out to the side with the forearm pointing straight up, and the right arm reaching diagonally up and out. The left thigh points down and to the left with the shin straight down, and the right knee is raised with the shin angled down to the right, as if leaping. Then tap the finished stick figure to collect it.
- With the list complete, tap the dominoes on the table, the important clue. Line them up in one column so touching ends show the same number. One working line, top to bottom: 3|2, 2|4, 4|1, 1|blank, blank|3, 3|5, 5|4, 4|6, 6|1. Then talk to the patient Linda.
Hospital Courtyard
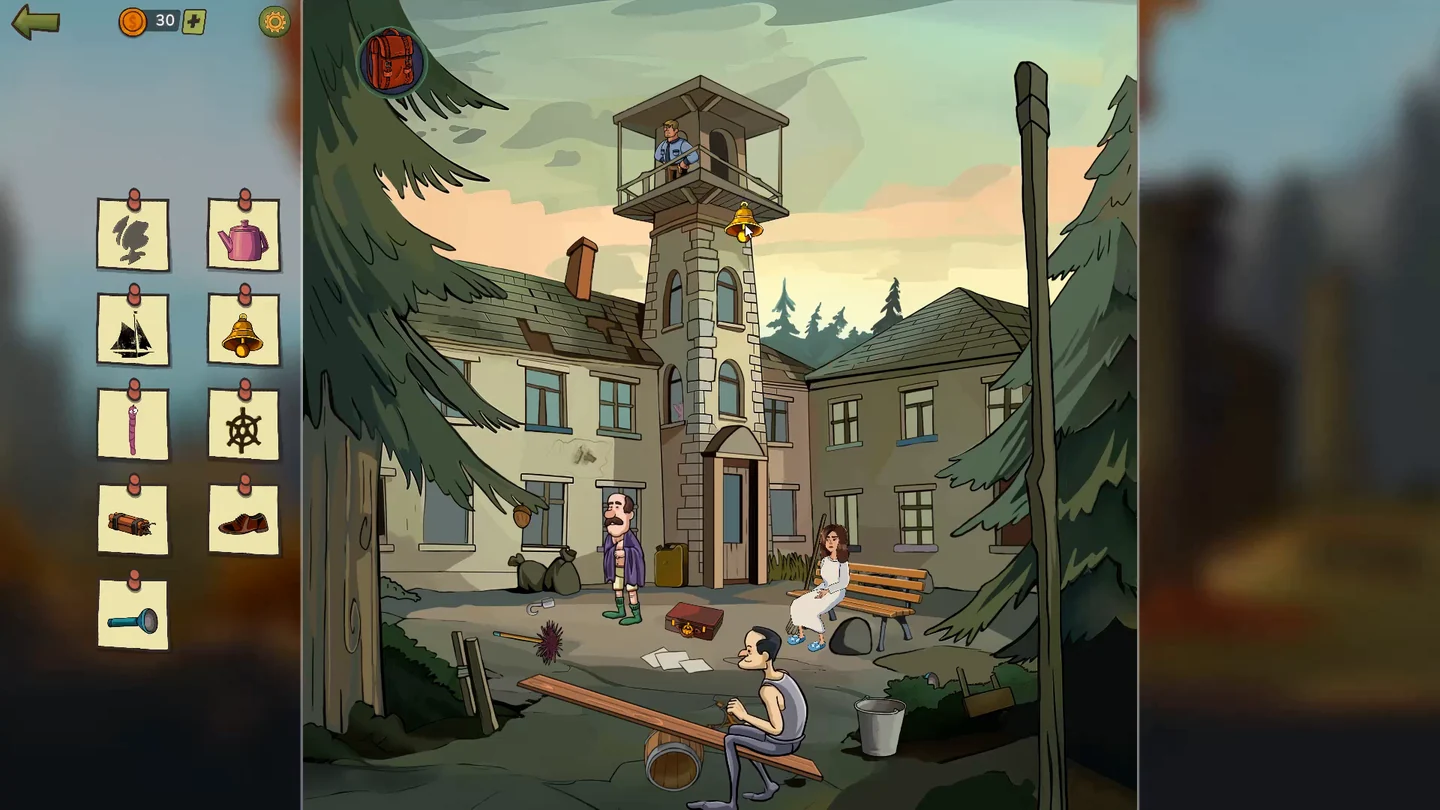
Find: soot cloud, pink kettle, black ship, bell, worm, ship's wheel, dynamite, shoe and flashlight.
- Drag the chimney brush above the seesaw to the brown chimney and tap the soot. Use the chisel from the backpack on the wall between the four windows of the left building, then tap the black ship revealed in the opened wall to collect it. Drag the clapper from the right-hand roof into the bell on the watchtower, then tap the restored bell to collect it. Put the large boulder right of the woman on the empty seesaw seat and swipe the worm out of its hole, then tap the worm to collect it. Swipe the three tiles under the guard aside, tap the letter and take the ship's wheel. Swipe the blue flashlight out of the bushes at the lower right and keep it.
- Fit the stick from the backpack to the hook below the rubbish bags to make a hooked stick. Tap the tower window opposite the kettle to open it, drag the hooked stick from the backpack into that window, then hook the kettle out by swiping left, then right, and tap the pink kettle to collect it. Drag the acorn from the left tree to the man on the seesaw; he fires it at the guard, who drops a shoe behind the man in the purple blanket; tap the shoe to collect it.
- Open the brown suitcase. Count the panes in the windows with coloured sills; the sill colours give the digit order. The code is 436. Take the dynamite.CODE436
- With the list complete, a patient attacks Linda, the important clue. When he is in view, drag the metal bucket at the lower right onto him. Margaret helps Linda back to her room.
Linda's Room
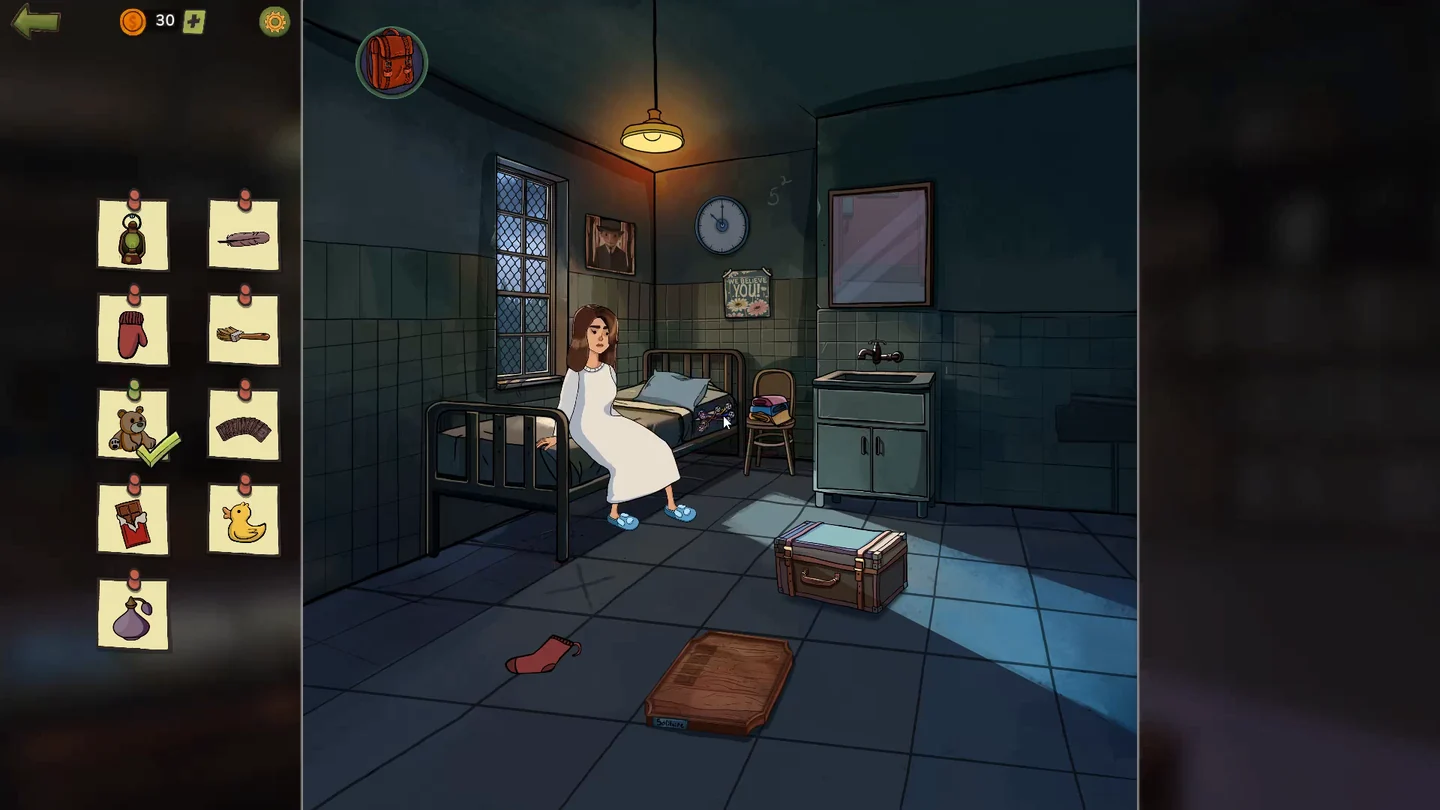
Linda offers to swap places so Margaret can escape. Find: lantern, feather, red mitten, paintbrush, teddy bear, playing cards, chocolate bar, rubber duck and perfume.
- Swipe the mirror above the sink up for the lantern. Swipe Linda's blanket down and swipe her pillow up three times for the feather. Turn on the tap for the rubber duck. Swipe the broom from behind the wall by the sink, push it under the bed and pull out the teddy bear.
- Tap the stitched hole in the side of the mattress. Remove the threads by tapping the buttons at both ends, always taking a thread that lies on top of the others first. A pair of scissors drops; cut Linda's hair to match Margaret's, and she gives you the chocolate bar.
- Swipe the red sock at the lower left right three times to turn it into yarn and put it in Linda's lap. Swipe the trunk's two buckles up, open it and swipe out its contents; give Linda the knitting needles and take the red mitten she knits. Take the paintbrush from the trunk and keep it.
- Tap the clock. The numbers beside it give 5 × 2 = 10 and 5² = 25. Set the hands to 10:25 (short hand on 10, long hand on 5) and take the perfume behind the clock.CODE10:25
- Open the left cabinet door under the sink, put the cards on the board on the floor and play Klondike solitaire: build four piles from Ace to King by suit, stacking cards in the main area in descending order with alternating colours. The starting deal varies, so there is no fixed move list. It is a long game. Turn over hidden cards whenever you can, move Aces up straight away and keep a free column for a King. Restart if you get stuck. Take the playing cards when you win.
- With the list complete, swipe the sink up twice and drag it onto the metal mesh over the window, the important clue, to break it.