GHOST TRAIN
Train Station
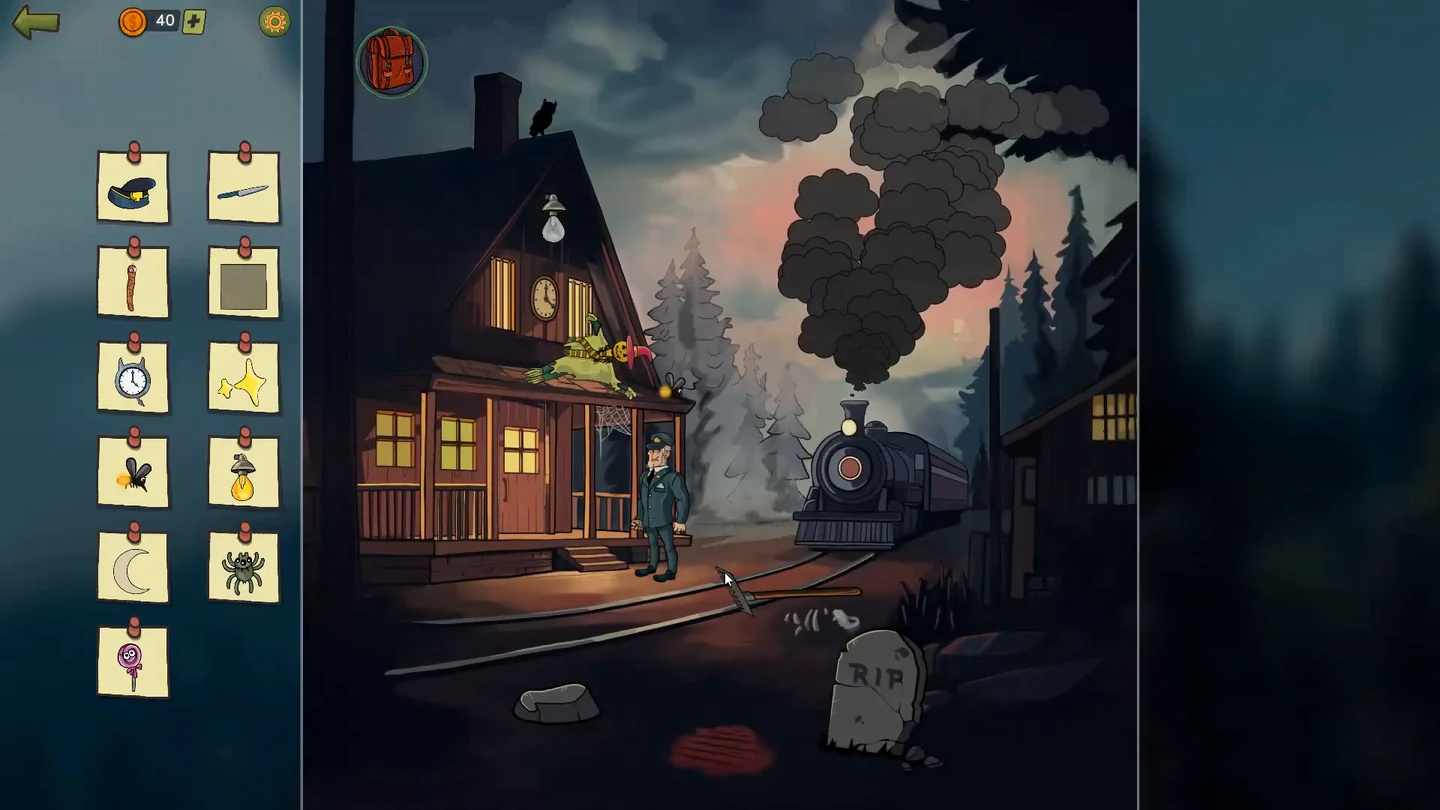
Ghost Train is a separate Halloween quest set in Arctown in 1933, played as Sheriff Jones. Start it from Quests on the main menu. Find every item on the list; it covers the platform and the waiting room.
- Open Quests from the main menu and press Play on Ghost Train. This opens the list of Ghost Train stages: select Train Station to start the prologue.
- On the platform, tap the scarecrow lying on the porch roof so it tumbles down onto the platform. Tap the glowing winged insect at the right end of the porch roof to collect it. Tap the hole beside the low grey stone, left of the R.I.P. gravestone, until the worm rises out of it, then tap the worm itself to collect it. Drag the long-handled tool lying across the rails onto the red dirt pile near the gravestone. It digs the pile away and uncovers a purple-handled tool: take it. The man standing on the platform drops his dark conductor's cap: pick it up from the ground just to his right. Tap the front of the locomotive, open its round hatch and pull the lever inside down. Tap the clock on the station gable and take both of its hands; keep them for the waiting-room clock. When the locomotive's smoke clears from the sky, a crescent moon shows: tap it. Then go through the station door.
- In the waiting room, help Sam find the four counterfeit banknotes among the eight on the counter: the $100 note with Washington, the $10 note reading United Kingdom of America, the $1 note with Franklin and the $25 note. As a thank-you, Sam hands over a lollipop at the counter; keep it for the children at the Sheriff's house. Then step outside and tap the lit bulb hanging on the station gable to collect it. Go back into the waiting room and tap the spider on the lower-left pane of the window behind the counter, on the left side of the rear wall.
- Still in the waiting room, tap the gap in the wall between the left windows. Four loose tiles lie on the sill: drag them into the gap and turn them until they fill it as one square, then take the plate. The clock on the waiting-room wall has no hands: drag the two clock hands from the station gable onto it to complete the clock card. Open the crate on the left and take out its bottles. Give the old woman on the bench the blue-capped milk bottle with the black-and-white cow pattern, then tap the stars that sparkle above her. Pull the grey cloth off the crate on the right: a slender silver blade with a blue handle lies by the bananas: take it.
- Mark comes to the station only after every card on the station list is checked off, including any cards these steps do not cover. When the list clears, the important-clue prompt appears. Step out onto the platform and talk to Mark, the railway security officer. He shows a blurry photo of the ghost train.
GHOST TRAIN
Holiday
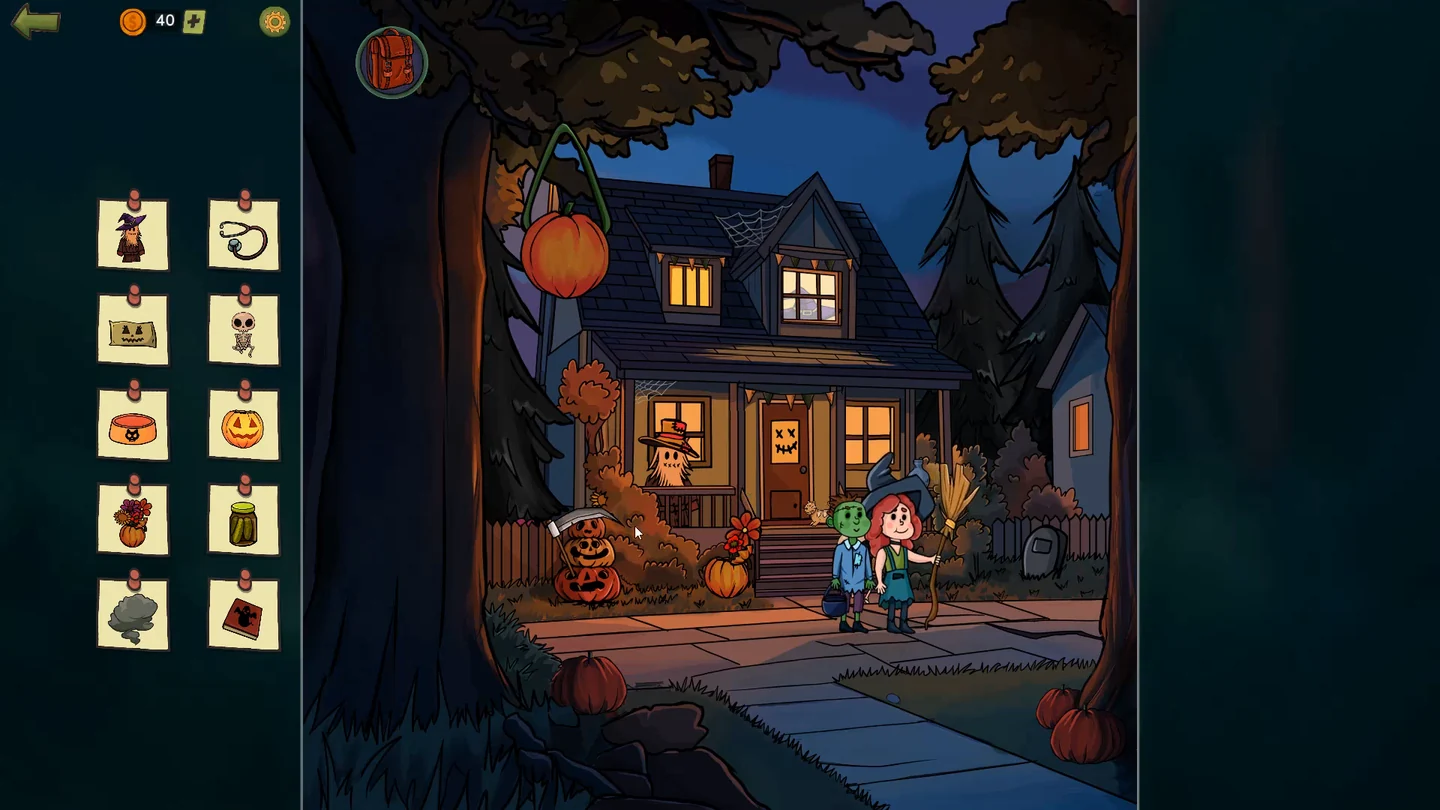
Halloween at the Sheriff's house. Find every item on the list, on the porch and in the living room.
- Take the witch's hat from the scarecrow on the porch. Give the lollipop from the backpack to the two trick-or-treaters and take the skeleton toy they leave on the path.
- Inside, tap the paper bat in the garland and the old book on the stairs, and tap the orange cat bowl on the floor. Take the lit candle from the right end of the fireplace mantel, beside the small standing picture. Outside, drag the candle from the backpack onto the jack-o'-lantern hanging from the tree, then tap the glowing pumpkin to collect it. The house holds more list items that are not covered here, and the spiderweb puzzle below comes only once the whole list is complete.
- The Sheriff's son asks for help with his spiderweb puzzle. The instruction reads: get to every loot, start with number 1 and end with number 7. Draw one path along the threads from node 1, passing every caught bug and sweet, and finish on node 7.
GHOST TRAIN
Robbery
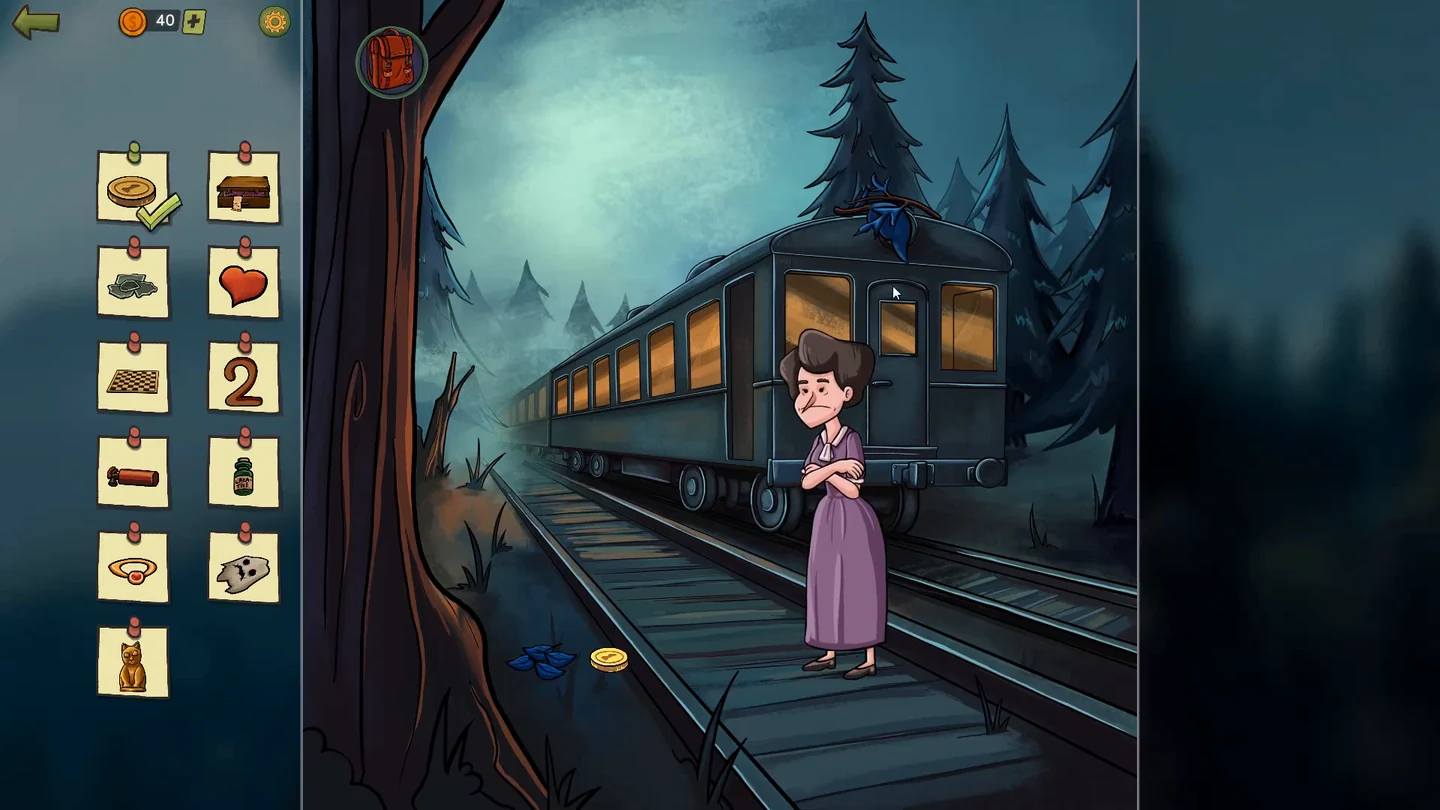
The gold train stands in the forest. Find every item on the list, outside and inside the carriage.
- Tap the blue paper on the tracks to find the horseshoe and tap the painted 2 above the carriage door. Inside, a red stick of dynamite is tucked under the front green seat on the right. Drag it out from under the seat into the aisle, then tap it to collect it. Separately, tap the closed suitcase in the aisle to open it: it has to be packed before you can take it. Put the purple shoe, the gloves, the hat and the remaining matching clothes into the suitcase; it closes when it is fully packed, so tap the packed suitcase to collect it. Swipe the orange scarf draped over the front-left seat down until it lies flat, then tap it to put it in the backpack; it is needed outside later. Then go through the door at the far end.
- Tap the broken chessboard on the floor in front of the guard. Drag the checkered pieces into the 8×8 frame so the black-and-white pattern alternates everywhere.
- The safe in the guard's compartment, against the right wall, needs a stethoscope. This guide does not cover where the stethoscope is picked up. If you carry one, tap the safe and attach the stethoscope to the round point beside the dial. Turn the dial slowly and listen: each time it reaches a correct number, one of the four lamps below lights green. When all four are lit, the upper compartment of the safe swings open, with an orange cat figure inside.
- If you opened the safe, tap the orange cat figure in its upper compartment to check off its card. Outside, drag the orange scarf from the carriage seat onto the upset woman by the tracks, then tap the heart that appears above her. When every card on the Robbery list is checked off, including any cards these steps do not cover, the important-clue prompt appears and the story moves on to the guard's confrontation.
GHOST TRAIN
The Office
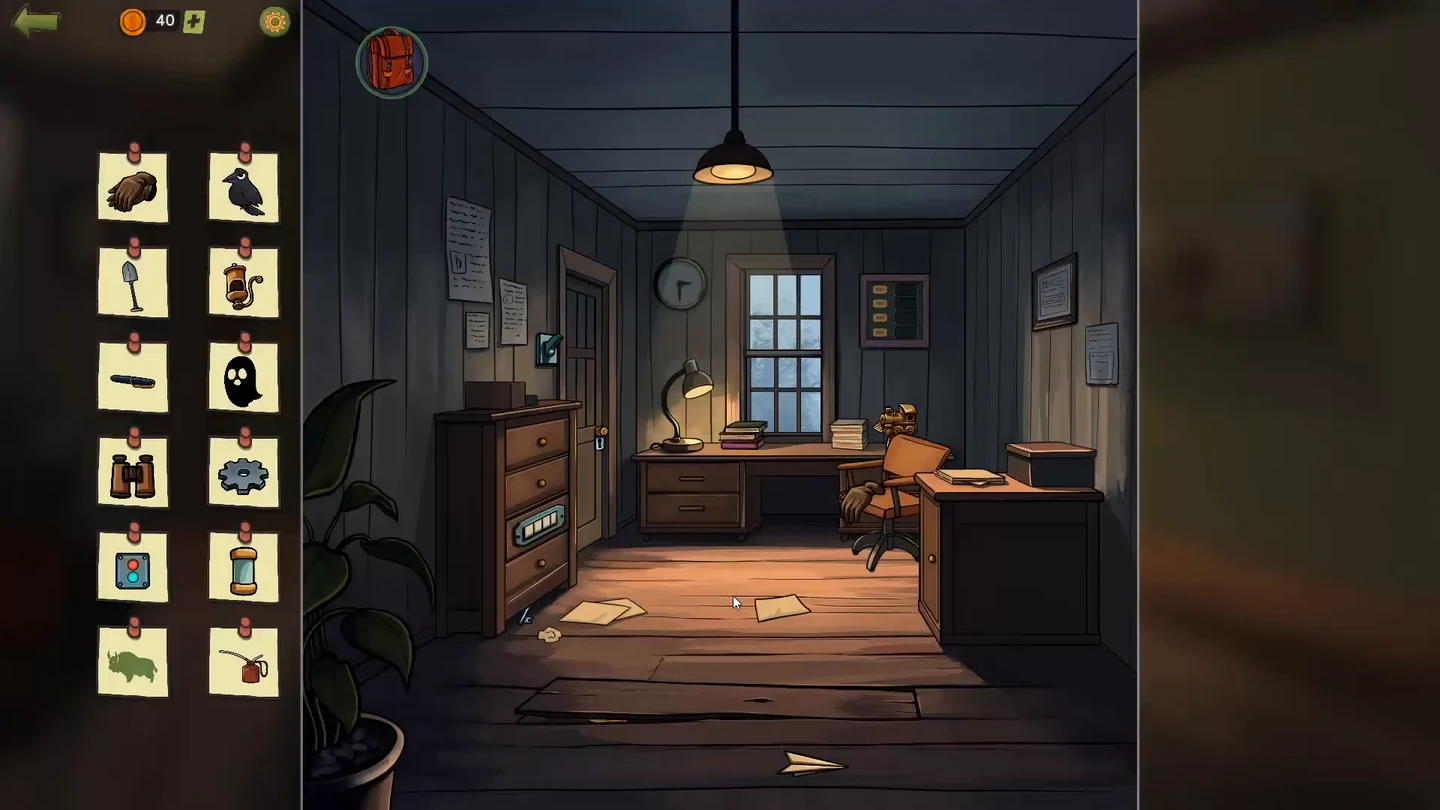
The railway company office and its archive. Find every item on the list.
- Tap the framed picture on the right wall. Drag the four locomotive cards into the year slots from oldest to newest: 1804 the simplest engine with one big flywheel, 1812 the engine with tall upright cylinders, 1860 the classic engine with a funnel chimney and cowcatcher, and 1923 the large modern locomotive. A wall niche opens: take the pair of brown binoculars inside. Take the small gold toy train from the desk as well.
- Tap the pigeon for the feather. Open the back door, flip the light switch by the doorway and go into the archive. Open the bottom-left drawer for the paper ghost and the red box on the back counter for the glass bottle.
- Set the Austin, Salem and New York clocks on the archive wall. The office wall clock shows 3:30 local Arctown time, and the time-zone map gives the offsets: Arctown MDT 0, Salem PDT −1, Austin CDT +1, New York EDT +2. Set Austin to 4:30, Salem to 2:30 and New York to 5:30; each long hand points straight down to 6.CODEAustin 4:30, Salem 2:30, New York 5:30
- Tap the toy railway in the archive. The board starts with gaps in the track, and the loose track pieces that fill them already lie on the board. Move and turn those pieces until they close the gaps, completing the left loop and the right-hand curve, and connecting the red train's approach at the top left and the blue train's approach at the bottom right to the track. Press the START button at the top right. The red train sets off from the top left and the blue train from the bottom right, and each must reach the station of its own colour without a crash. In a working run, the right-hand green switch is tapped first, just before the blue train reaches that junction, so it turns onto the middle line. Then, as the trains come round towards the left, the lower-left green switch is tapped: the blue train climbs the centre line to the blue station and the red train runs down to the red station. If they collide, start again and adjust your timing.
- The rest of the office search starts only after every card on the office and archive list is checked off, including any cards these steps do not cover; the pickups above alone are not enough. When the list clears, the important-clue prompt appears. Open the middle desk drawer in the office for the folder and take the ultraviolet torch. Switch the archive light off with the switch by the doorway, go back in and sweep the UV beam over the walls and furniture to reveal four glowing marks: a triangle, a diamond with a dot in it, a T and a 5.
- Tap the four-wheel lock on the filing cabinet and set it to triangle, diamond with a dot, T, 5. Read the top-secret letter inside.CODE△ ◈ T 5
GHOST TRAIN
The Final Reveal
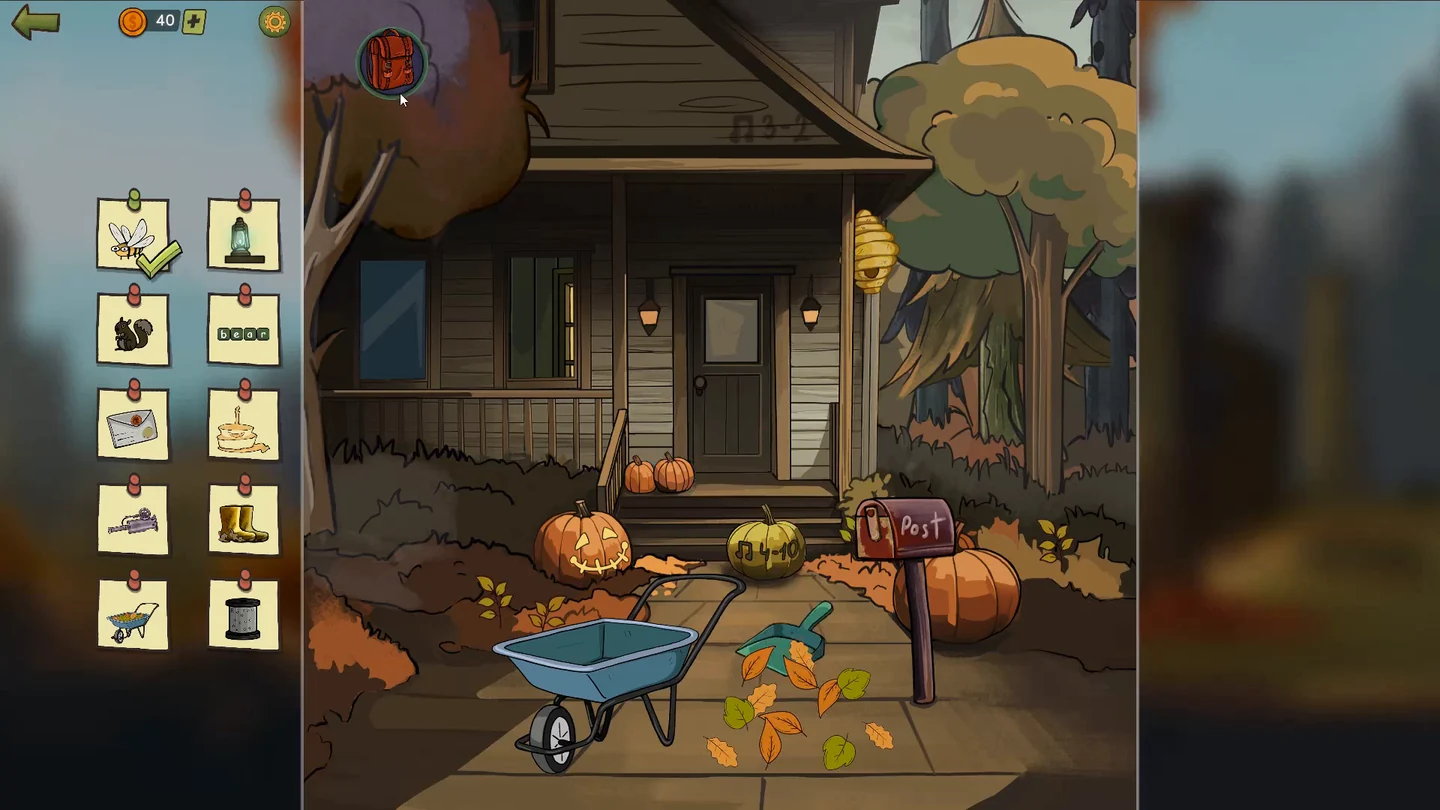
Find every item on the list at Mark's house: front yard, living room and backyard.
- Tap the porch lantern and the candle in the window, and tap the squirrel each time it appears. Open the POST mailbox and take the envelope. Knock on the door and go in.
- Go out through the back door. Take the axe lying in the purple flower bed at the left end of the back fence and drag it straight onto the padlocked shed door: the lock breaks off and the shed opens. Then a smoke machine rolls out: unroll its blue cable and take the boots hanging in the shed doorway.
- Play the organ in the living room. Its keys are numbered 1 to 10, and the soldier portrait on the wall marks the melody's first note as key 5. Press 5, 7, 2, 10. A wrong melody shows Not the right melody! and you can simply start again. When the siren rises out of the organ, tap the jar to take it.CODE5-7-2-10
- In the backyard, tap the wooden fence on the left and slide its planks up and down until the painted birthday cake lines up.
- In the front yard, take the green scoop lying in the leaves by the mailbox and use it to scoop the leaves into the blue wheelbarrow; when the wheelbarrow is full, tap it to check off its card. Then tap the wooden box on the living-room floor. Sixteen letter tiles sit round its edge, and the wheel in the middle has one notch that can carry a single tile: turn the wheel to pick up a tile, move it and drop it into the empty space. Spell BEAR in the first four spaces of the top row. The rest of the story starts only when every card on the list is checked off, including any cards this guide does not cover; then the important-clue prompt appears. Go out to the backyard and slide the low green slatted cover in front of the shed to the left to expose a patch of dirt. The gold is dug up with a shovel, and this guide does not cover where the shovel is picked up. If you carry it, drag it from the backpack onto the exposed dirt patch and keep digging to uncover the chest of stolen gold. Mark then confronts the Sheriff in the backyard: drag the smaller carved pumpkin from the base of the tree on the left onto Mark's head to stop him. The quest ends with THE END.CODEBEAR