Abandoned House Yard
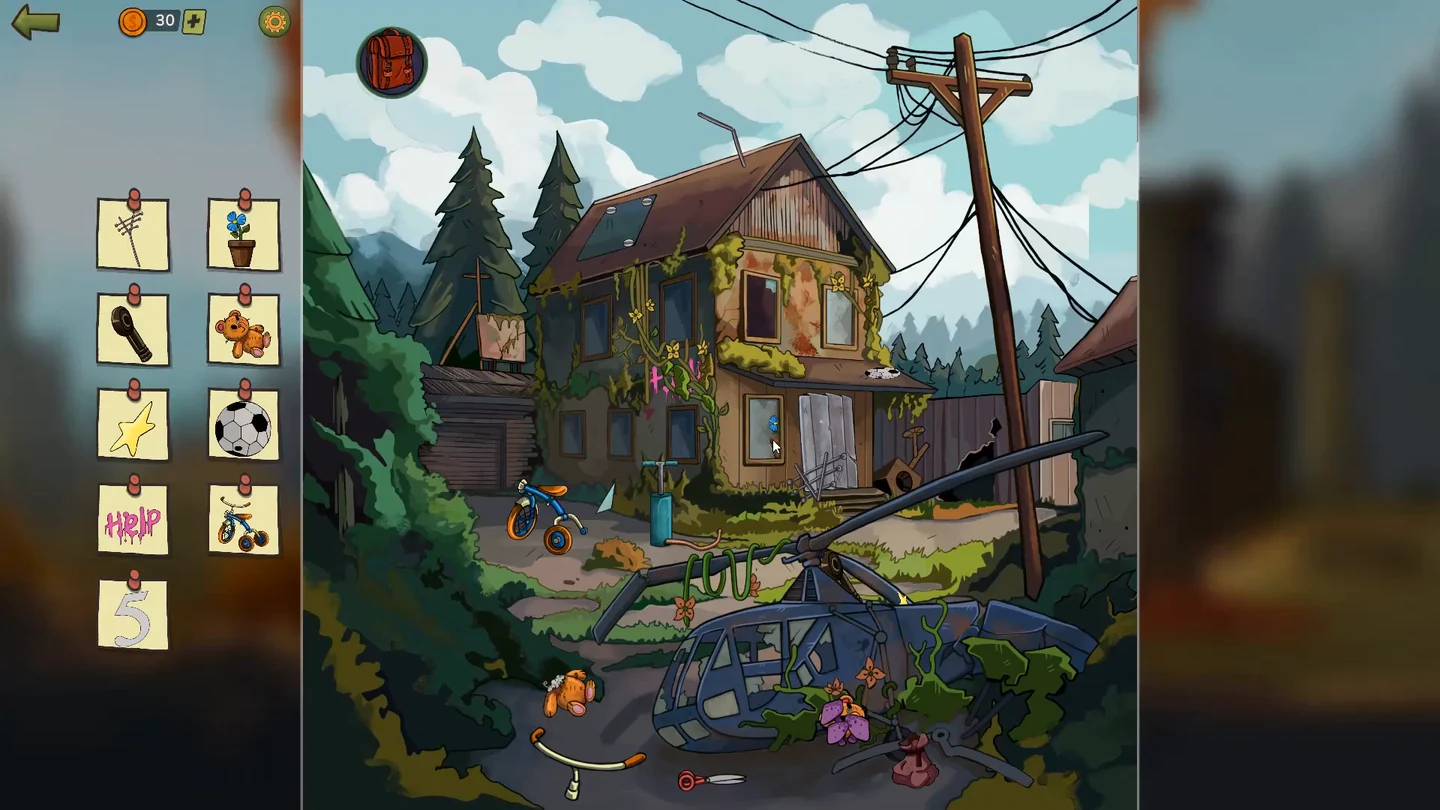
Margaret arrives in a ruined parallel town. Find: antenna, flower pot, robot arm, teddy bear, star, soccer ball, the HELP letters, tricycle and the number 5.
- Swipe the bent antenna on the roof straight, drag the antenna piece from by the front door onto it, then tap the complete antenna. Swipe the blue flower pot at the window into view and tap it. Take the robot arm by the base of the broken helicopter's rotor and keep it for later. Swipe the three purple mushrooms by the helicopter aside, join the bear's head to its body and take the teddy bear. Swipe the lowered rotor blade up and tap the yellow star it reveals.
- Drag the flat soccer ball from the porch roof to the blue air pump and tap the pump to inflate it, then tap the inflated ball to collect it. Drag the scissors lying by the helicopter onto the vines on the side wall and take the pink HELP letters. Open the backpack and use the green screwdriver on the blue roof panel, swipe the panel aside, then add the wheel and the handlebars from left of the helicopter to the tricycle and take it.
- Drag the triangular glass shard lying left of the air pump to the broken window to start the puzzle. Fit the glass pieces back into the frame; the repaired pane shows a large 5. Tap it.
- With the list complete, tap the front entrance of the house, the important clue, to go inside.
Abandoned House Living Room
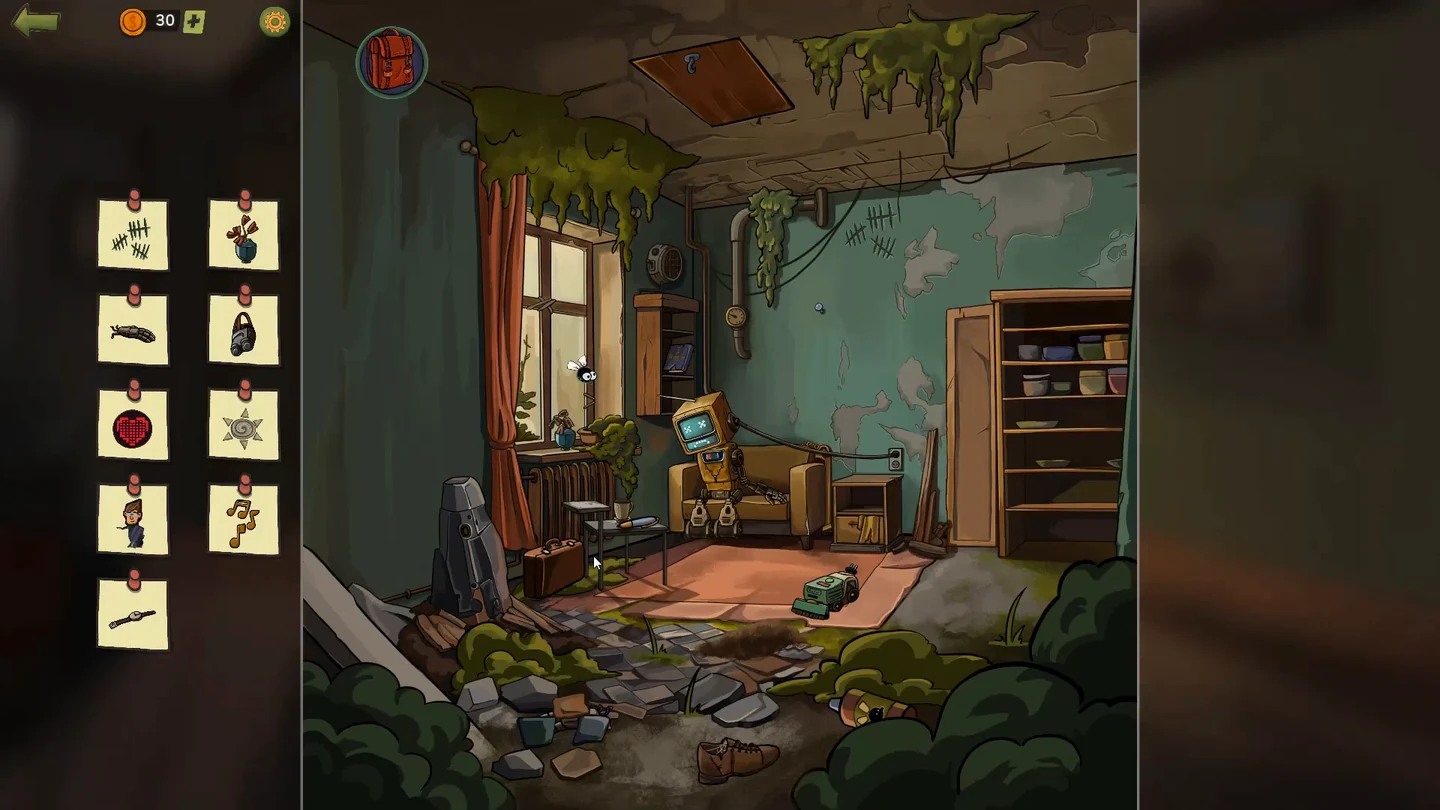
Find: tally marks, red flowers, robot hand, goggles, heart, sun symbol, man in glasses, music notes and wristwatch.
- Tap the tally marks high on the wall at the upper right. Drag the bug spray from the lower right onto the bug next to the flowers on the window sill, then take the revived flowers. Swipe away the three stones at the lower left and take the robot hand; keep it for Seb's repair. Swipe the suitcase under the window open, drag the rope inside it to the ceiling hatch and pull it down for the goggles.
- Tap the light-blue pen on the table to look closer: the little robot toy is inside it. While it is open, physically tilt your phone or tablet so the little robot rolls to the boy and takes his flower, then tilt the device the other way so the robot rolls back and gives the flower to the girl; take the heart. Open the side-table drawer and take out the newspaper. Open it and tap the sun in the sky of the photograph on the left page. Swipe up the portrait behind the couch, hang it on the nail and tap the man in glasses who appears in it to collect him. Switch on the round radio above the shelf and tap the music notes that come out to collect them. Plug the green vacuum cleaner into the wall socket, swipe it over the dirt by the rug and back, and take the wristwatch.
- Tap the yellow robot, Seb, to talk. Offer to fix his arm; he takes you down to the garage.
Garage
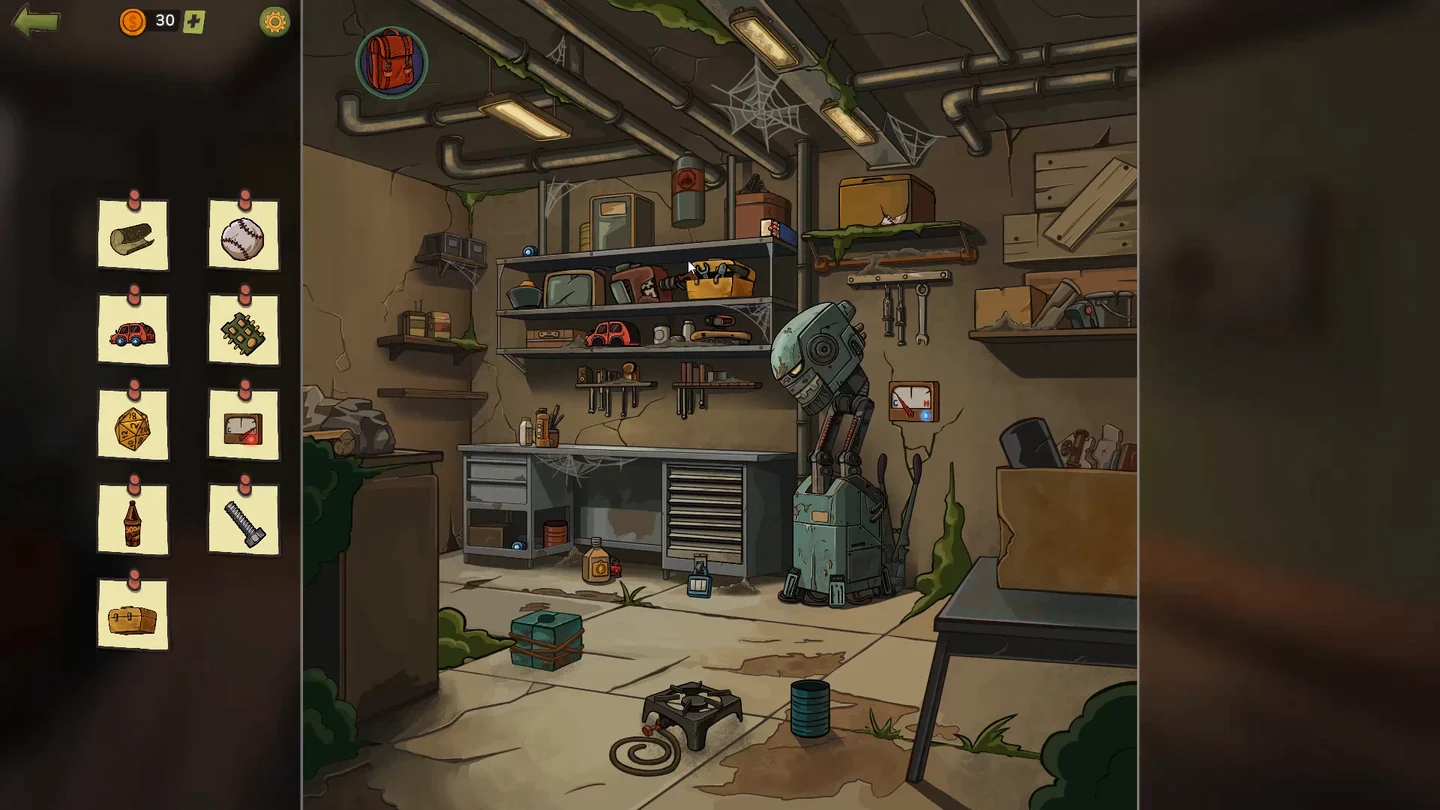
Find: sandpaper, baseball, toy car, microchip, dice, thermometer, brown bottle, screw and the toolbox.
- Swipe the three objects at the left end of the table aside and take the sandpaper; keep it for the tram. Swipe the cracked yellow box on the upper-right shelf open and swipe its contents out until the baseball comes out, then tap the baseball to collect it. Fit the two blue wheels (top of the shelf and lower right of the table) and the red back door (behind the yellow bottle under the table) to the toy car, then tap the finished red car to collect it. Swipe the robot's head open for the microchip. Slide the tin can on the top shelf left and look inside for the screw.
- Drag the propane tank, the grey pan and the matches from the metal shelf to the stove on the floor. Pour the pan into the teal dice mould, tap the mould to expose the die, then tap the die itself to collect it. Once the stove is lit, the thermometer beside the robot starts beeping; tap it. Swipe the bolt cutters from the robot's base, cut the lock on the table hatch, swipe the hatch up and take the brown bottle.
- Tap the yellow toolbox on the shelf and pack all the tools into its tray without overlapping. One arrangement that works (see the picture): in the upper-left compartment, the small spanner across the top with the round gauge and the tape measure on the left and the pliers on the right. In the right-hand column, the L-shaped key stands upright on the left, the hammer lies diagonally in the upper-right corner and the long spanner runs diagonally below it. Across the bottom half, the square stands on its end at the left edge with the ruler lying flat above the saw, the saw sits along the bottom with the screwdriver beneath its blade, and the pencil lies flat just above the saw on the right. When the last tool fits, take the toolbox.
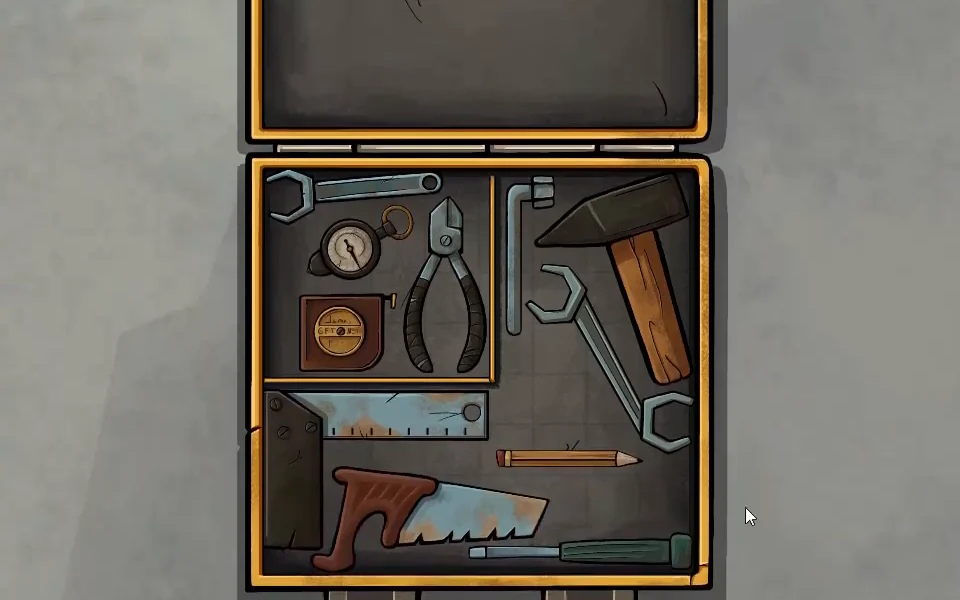
One working tray arrangement: small tools in the upper-left compartment, hammer and spanners on the right, saw, square, ruler, pencil and screwdriver along the bottom. - Tap Seb, the important clue. Open the backpack and attach the robot arm at his shoulder, then add the lower arm and the robot hand. Fit the triangular bit onto the drill, place the triangular screw at the base of the arm and tighten it with the drill.
Bathroom
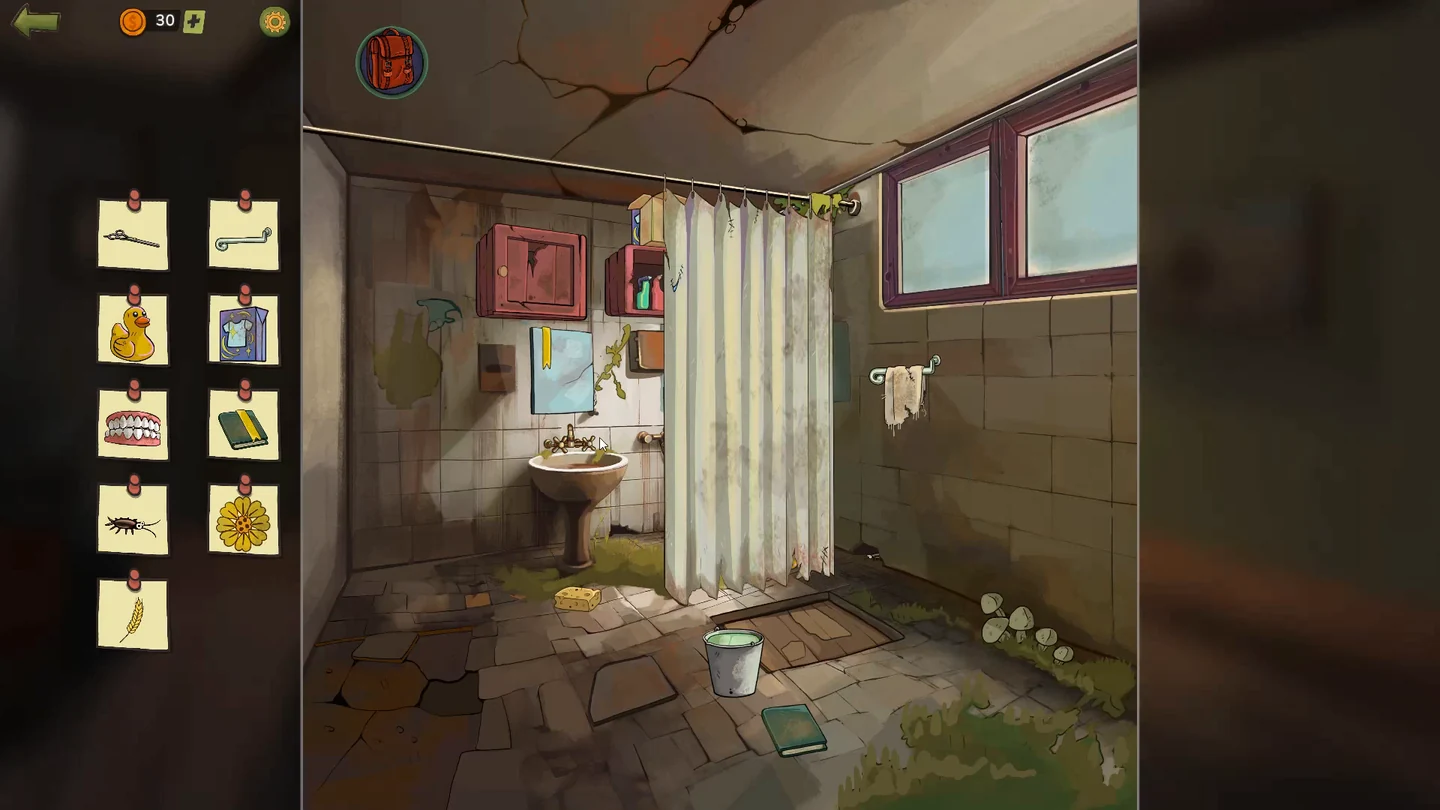
Find: scissors, towel rail, rubber duck, detergent, dentures, green journal, cockroach, yellow flower and ear of wheat.
- Swipe the loose floor tile next to the water bucket aside for the scissors. Swipe the towel under the window down twice for the towel rail. Swipe the cardboard box on the red shelf aside for the detergent and open the red cabinet above the sink for the dentures. Drag the yellow ribbon from the mirror onto the journal on the floor and take the journal.
- Open the brown box right of the mirror and pull the blue lever to turn on the water feed, slide the shower curtain left and turn the shower valve to wash the rubber duck, then take it. Slide the curtain right and tap the cockroach when it runs between the two wall holes. Slide the curtain left again to expose the brown stain on the glass, dip the sponge from the floor in the bucket and wipe the stain, then tap the yellow flower that appears to collect it.
- Tap the red shelf in the shower and rearrange the bottles. The order that frees the ear of wheat, from left to right: blue bottle, squat green bottle, purple bottle, pink bottle, plunger, green spray bottle, teal jug. Take the wheat.
- With the list complete, tap the window, the important clue, to open it. Margaret spots the power plant and decides to repair the old tram.
Tram Station
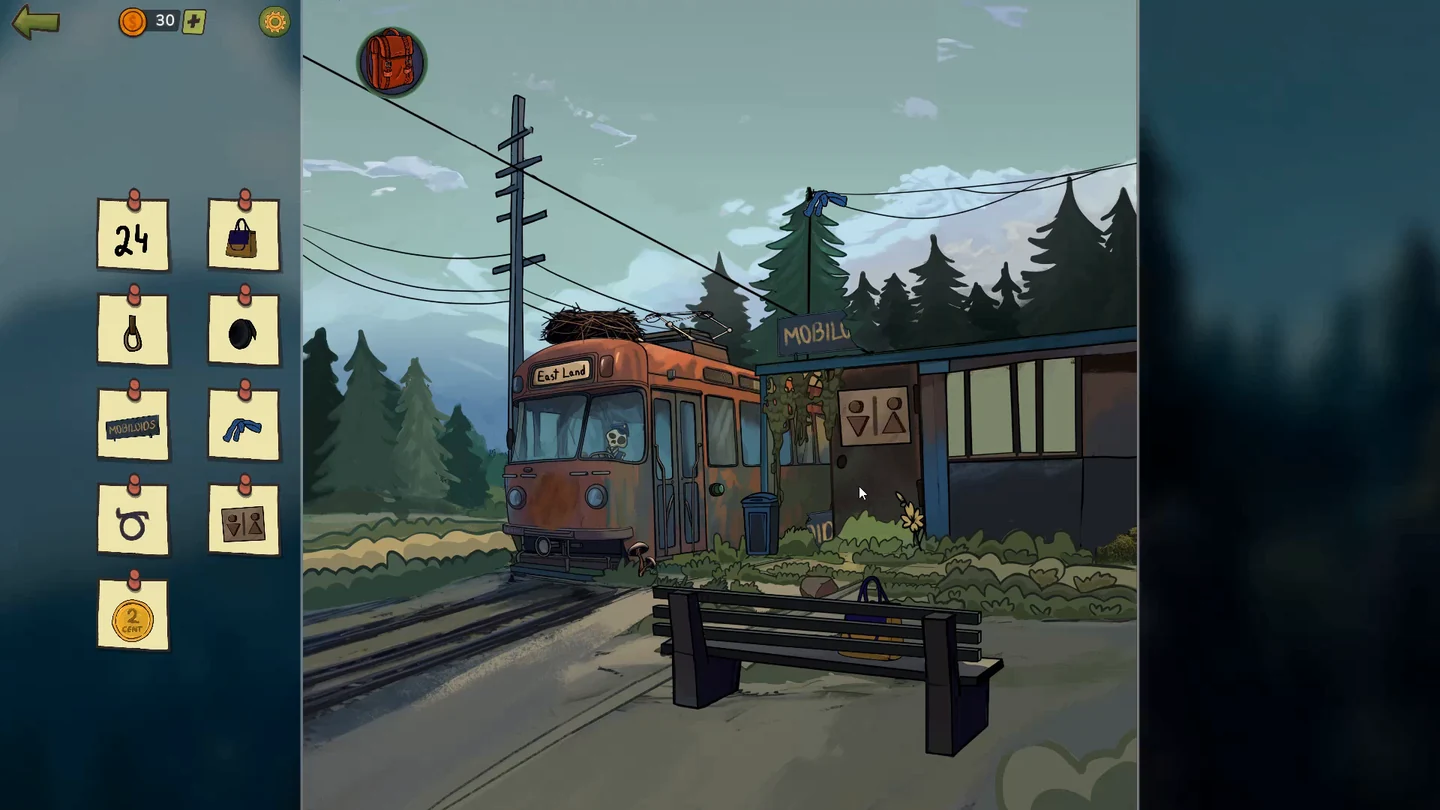
Find: the 24 route number, handbag, hanging strap, side mirror, MOBILOIDS sign, blue scarf, 2 CENT coin, washroom sign and the circle symbol.
- Swipe the tram's destination sign down and tap the 24. Swipe the handbag along the bench three times until it falls off, then take it. Drag the rock above the bench to the tram window right of the doors for the hanging strap. Swipe the left side mirror out, then tap the mirror to collect it. Swipe the missing sign piece from behind the wall right of the blue bin, fit it to the MOBILOIDS sign and tap the completed sign to collect it. Take the blue scarf on the wire above the washroom. Drag the two brown triangles (one by the bench, one at the base of the tram's pole) onto the washroom sign, then tap the completed washroom sign to collect it.
- Tap the bird's nest on the tram roof. Remove matching pairs of buttons, swiping the yellow leaves aside to see what is under them, until the 2 CENT coin at the bottom is free. Keep the coin.
- Open the backpack and rub the sandpaper on the panel between the tram's headlights to uncover the circle symbol, then tap the circle to collect it.
- Swipe the pantograph on the tram roof upward until it touches the overhead line, then, once the headlights come on, press the small green button just to the right of the tram doors to open them.
Inside the Tram
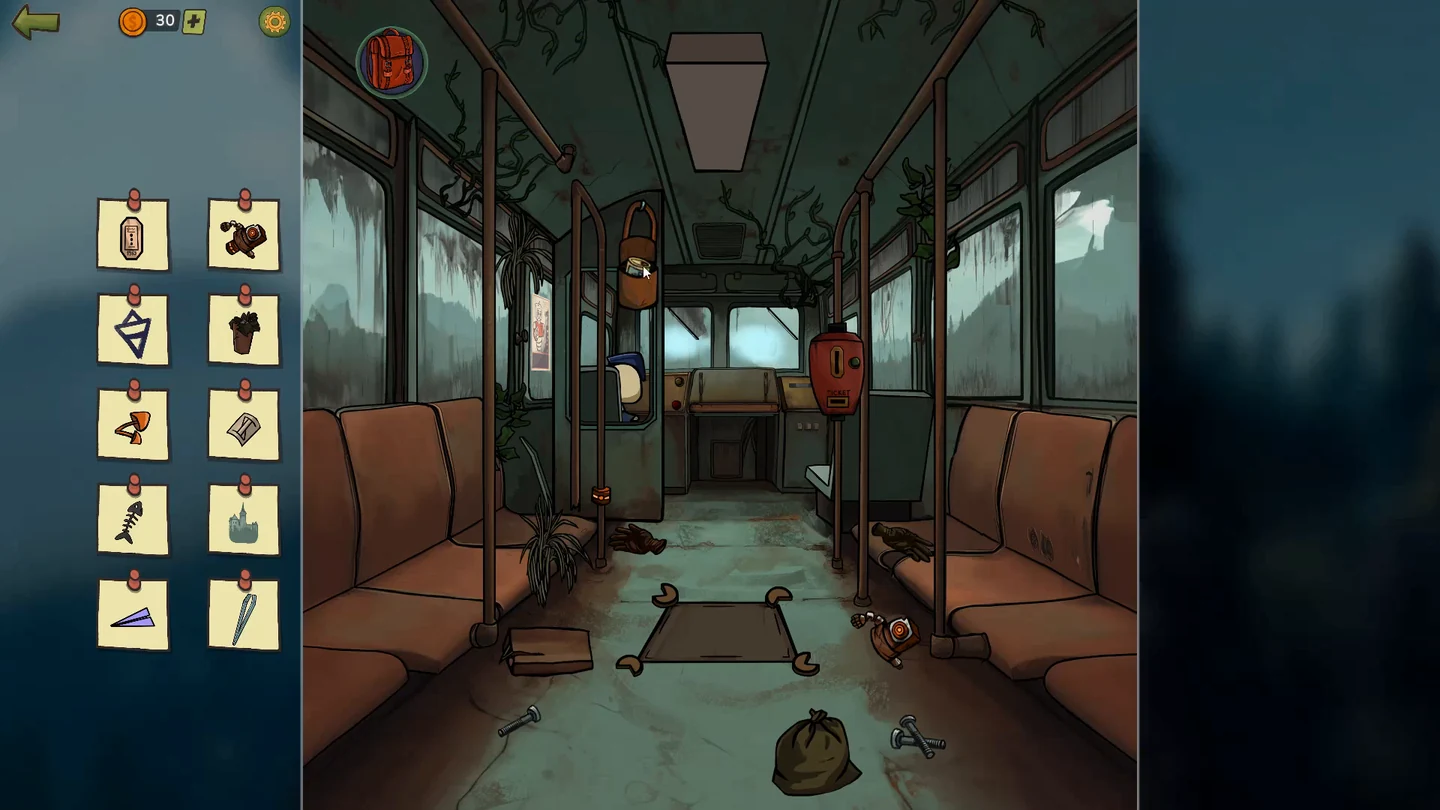
Find: tram ticket, small robot, triangle symbol, potted plant, orange mushroom, bottle label, fish bones, towers, paper plane and tweezers.
- Swipe the front-right seat to turn it and take the potted plant. Tap the poster on the left window and the triangle on the robot's chest. Swipe the conductor's skeleton so it falls and take the mushroom from its skull. Open the satchel behind the driver's seat, open the tin can inside and take the fish bones. Free the brown-orange robot part from the left-hand bars (swipe it up three times, left once, down twice), fit it to the small robot on the floor and take the robot.
- Turn the four round dials on the floor hatch until every corner lines up with the hatch, then swipe the hatch down. Take the tweezers and keep them, then turn the bottle over and take its label.
- Move to the front of the tram. The red button runs the wipers so you can tap the towers on the right windshield; the green button switches on the lights. Back in the aisle, drag the crowbar from the left benches to the ceiling lightbox to open it, swipe the purple paper plane inside it upwards and tap it.
- Put the 2 CENT coin into the ticket machine, press the button next to the coin slot and take the ticket it dispenses.
- Tap the map in the middle of the tram, the important clue, and rotate the track pieces until one continuous line joins the tram to the power plant. Tap the map once more to set off.
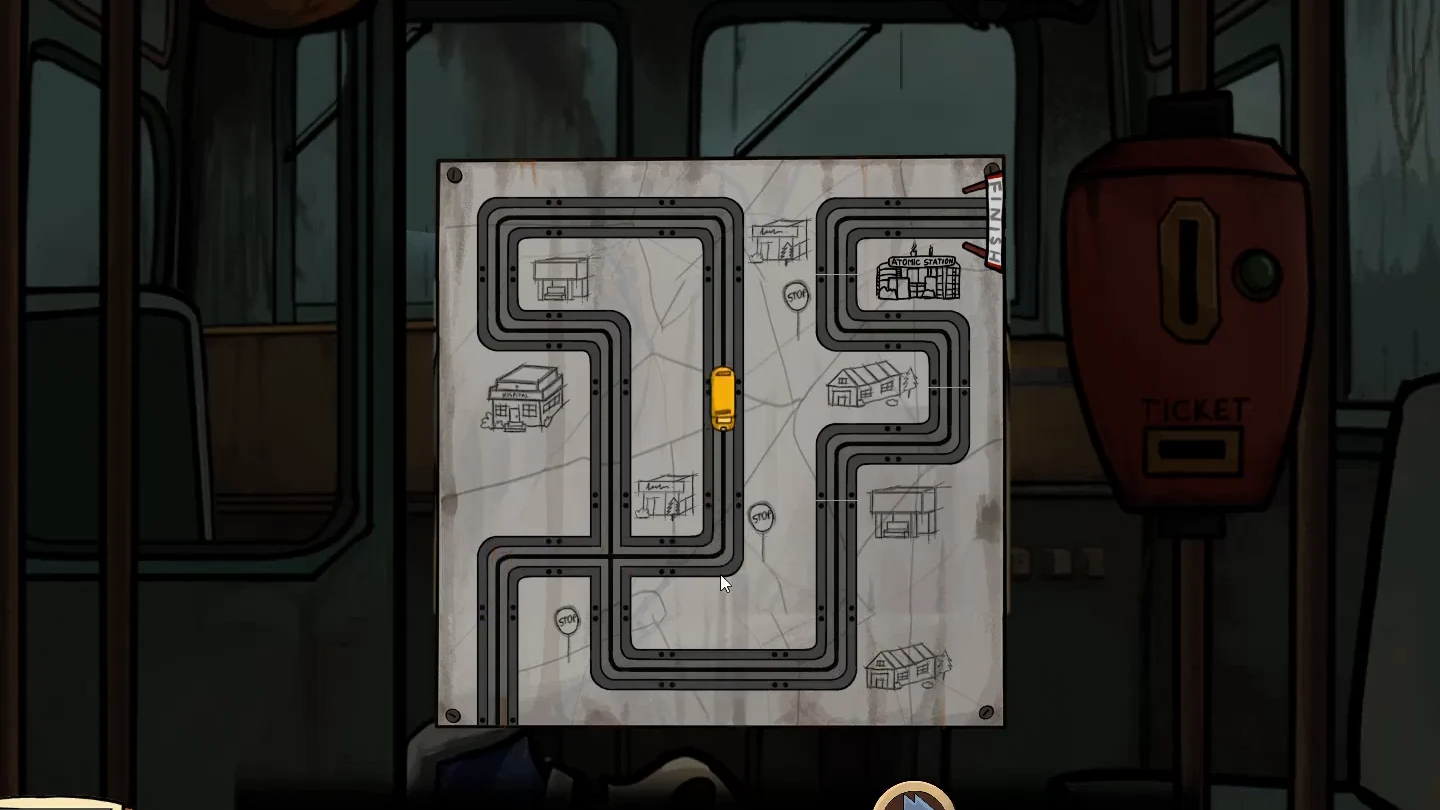
Completed route board: one continuous track leads from the tram to the power plant.
Electric Station Gate
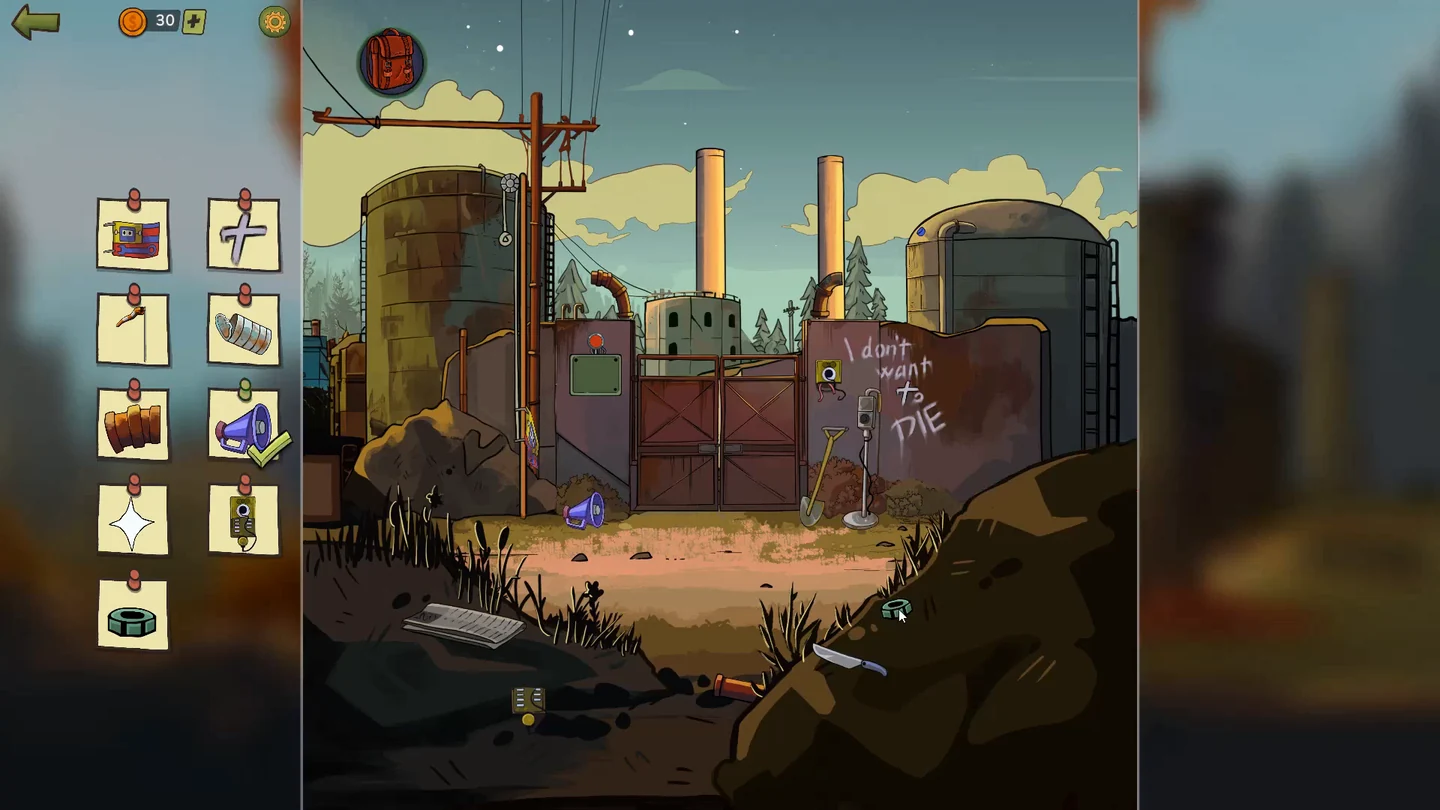
Find: robot flag, the letter t, windsock, metal can, copper pipe, megaphone, sparkle, intercom and green nut.
- Swipe the pulley on the flagpole by the blue motorcycle down to raise the robot flag, then tap the raised flag to collect it. Tap the t of "to" in the graffiti. Swipe up where the robot climbs the ladder on the left, drag the ladder to the right-hand dome and take the windsock the robot hangs there. Drag the engine at the bottom of the screen to the motorcycle so it rides off, and take the purple megaphone behind it.
- Drag the metal detector from right of the graffiti over the ground until it beeps and marks an X, then dig the X with the shovel for the metal can. Swipe the two pipe ends above the gate to face each other, pull the pipe from behind the lower-right rock and fit it between them; take the copper pipe. Fit the missing piece from the lower left to the green intercom right of the gate, then tap the repaired intercom to collect it. Take the green nut on the lower-right rock beside the knife, and tap the sparkle when it appears above the two pipes.
- Tap the green panel left of the gate. Fit batteries into both slots so that each slot is filled end to end. The light turns green when both are complete.
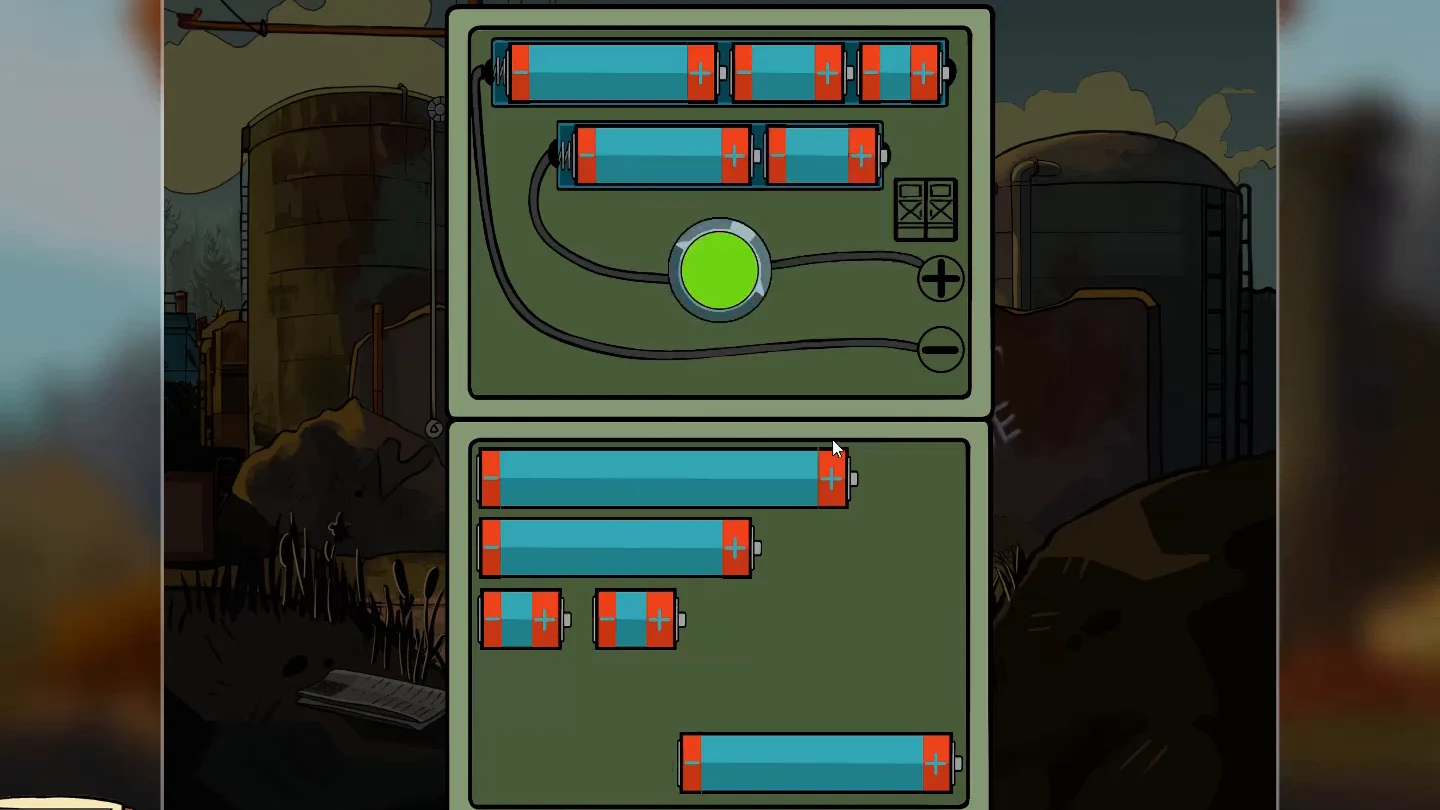
Completed battery box: both rows are filled and the light is green. - Seb arrives. The guard robot will only let you in with permission from Doug, the mayor, so travel to Doug's office.
Doug's Office
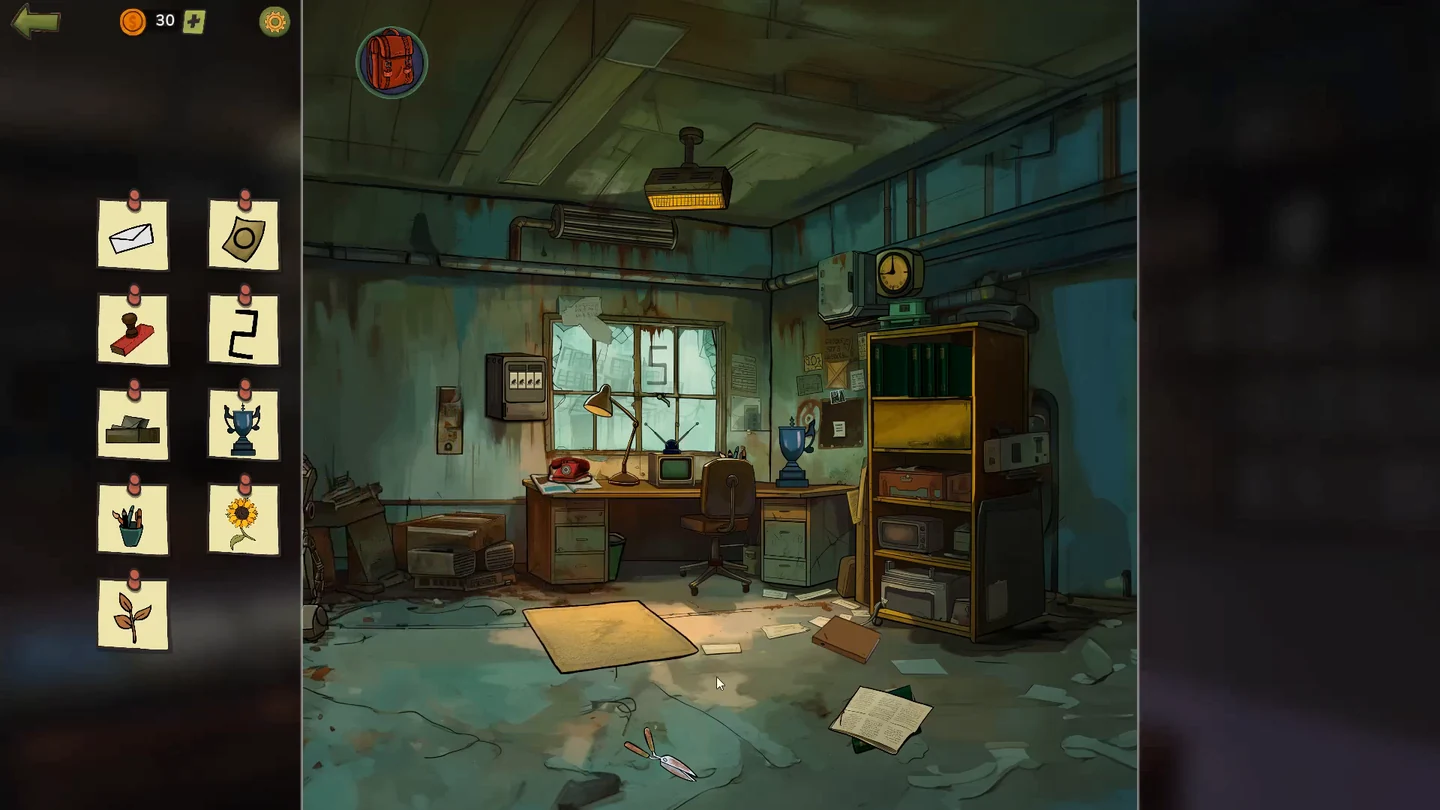
After Doug and Seb leave, find: envelope, paper with a circle, red stamp, the number 2, box of letters, trophy, pen holder, sunflower and leafy branch.
- Tap the safe left of the window. Swipe the four pictures up or down until they read, from left to right: ape, Neanderthal, human, robot. Take the red stamp from the open safe.
- Tap the television and turn its antennas until the picture is clear, then take the envelope from the man's hand.
- Open the phone book next to the red telephone and dial the bearded man's number, 468. A delivery robot brings a parcel: swipe it open and take the sunflower.CODE468
- Swipe the newspaper on the floor aside and put the green book under it on the top shelf of the bookcase. Sort the green books by the dots on their spines, one dot to five: Walter Tevis, Douglas Adams, Isaac Asimov, John Sladek, Arthur Clarke. Take the box of letters from the compartment that opens below.
- Swipe the ceiling lamp aside for the paper with a circle. Swipe up the window marked 5 and tap the 2 on its other side. Open the box above the trophy, use the glue on the trophy and fit the handle from the middle-left desk drawer, then take it. Swipe the chair down for the green pen holder. Swipe the green bin under the desk aside, swipe the branch up, swipe the yellow rug up, drag the orange leaf from the yellow book onto the branch and take it.
- When Doug returns, open the backpack and drag the oil can onto his rusty shoulder. He hands over the Reactor Key; keep it in the backpack, because it is needed for the hatch in the Reactor Room. The story then moves on to the Electric Station's control room.
Reactor Control Room
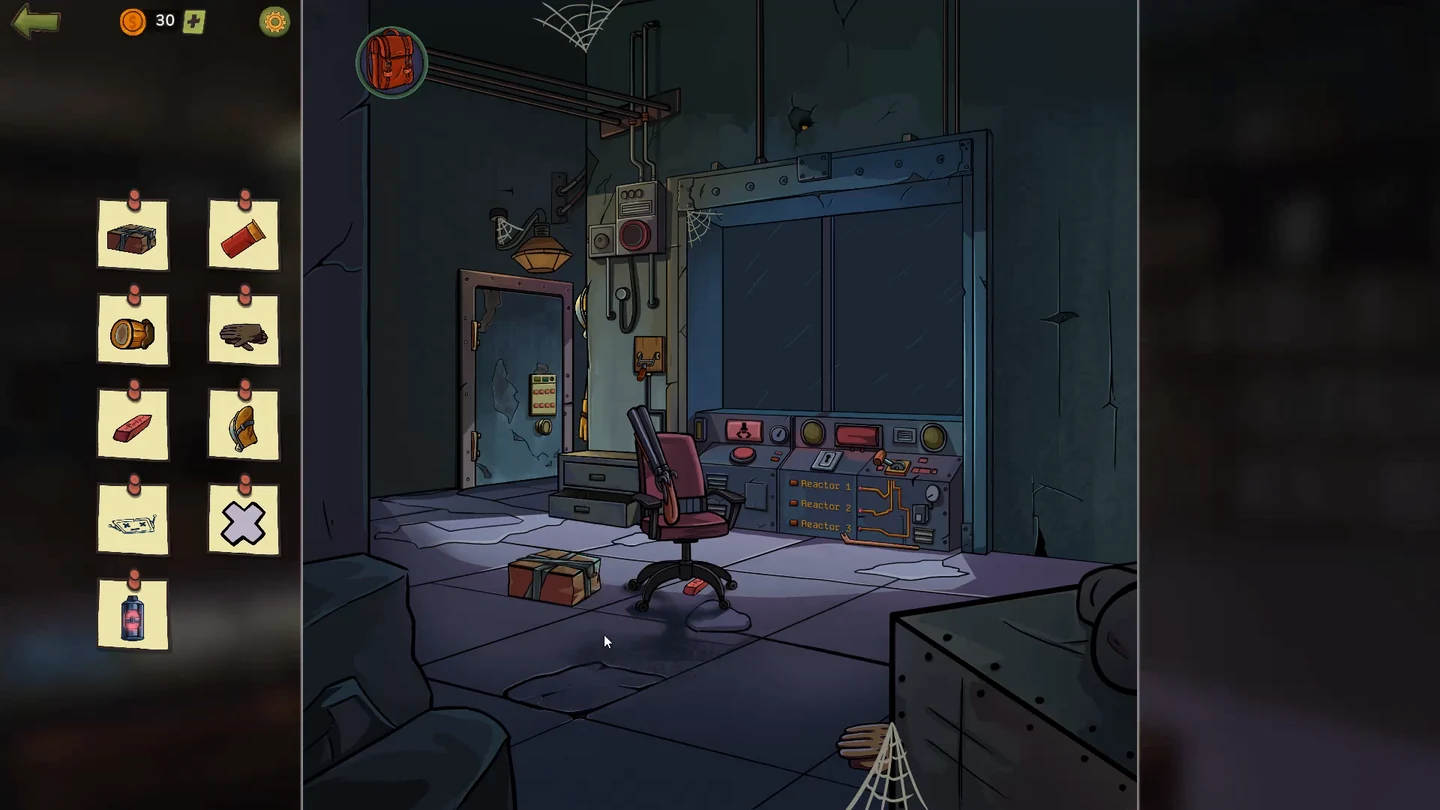
Find: brown package, red shell casing, gold piece, gloves, eraser, hazmat helmet, robot head drawing, the X symbol and a battery.
- Tap the open cardboard box left of the red chair to close it, tape it with the packing tape from left of the glass wall, then cut the tape with the cutter from the bottom drawer and take the package. Tap the shotgun, swipe its barrel down and swipe the red casing out, then tap the casing to collect it. Swipe the gloves out from behind the box at the lower right and tap them. Swipe the eraser out from under the red chair and tap it. Swipe the hazmat suit behind the wall next to the drawers aside and tap the helmet behind it.
- Swipe the loose floor tile towards the upper left and drag the small key under it into the keyhole just above the panel with the Reactor labels. The console powers up and the shutter over the window opens. Take the robot head drawing on the ceiling behind the glass, then swipe the red-handled lever right twice and tap the X that appears on the red screen. Separately, open the backpack and use the tweezers on the hole in the wall above the windows; in the close-up, drag the tweezers to the gold piece twice to pull it out, then tap the gold piece held in the tips of the tweezers to collect it.
- Once the shutter is open, work the claw behind the glass: pull up the lever left of the window to start the claw moving, press the red button when it stops over the left slot to grab the battery, then press it again when it stops over the right slot to drop it. Take the battery.
- Tap the lock panel on the large metal door. Watch which lights flash, repeat the sequence by tapping them and press Check. The sequence changes each time; press Replay to see it again.
Reactor Room
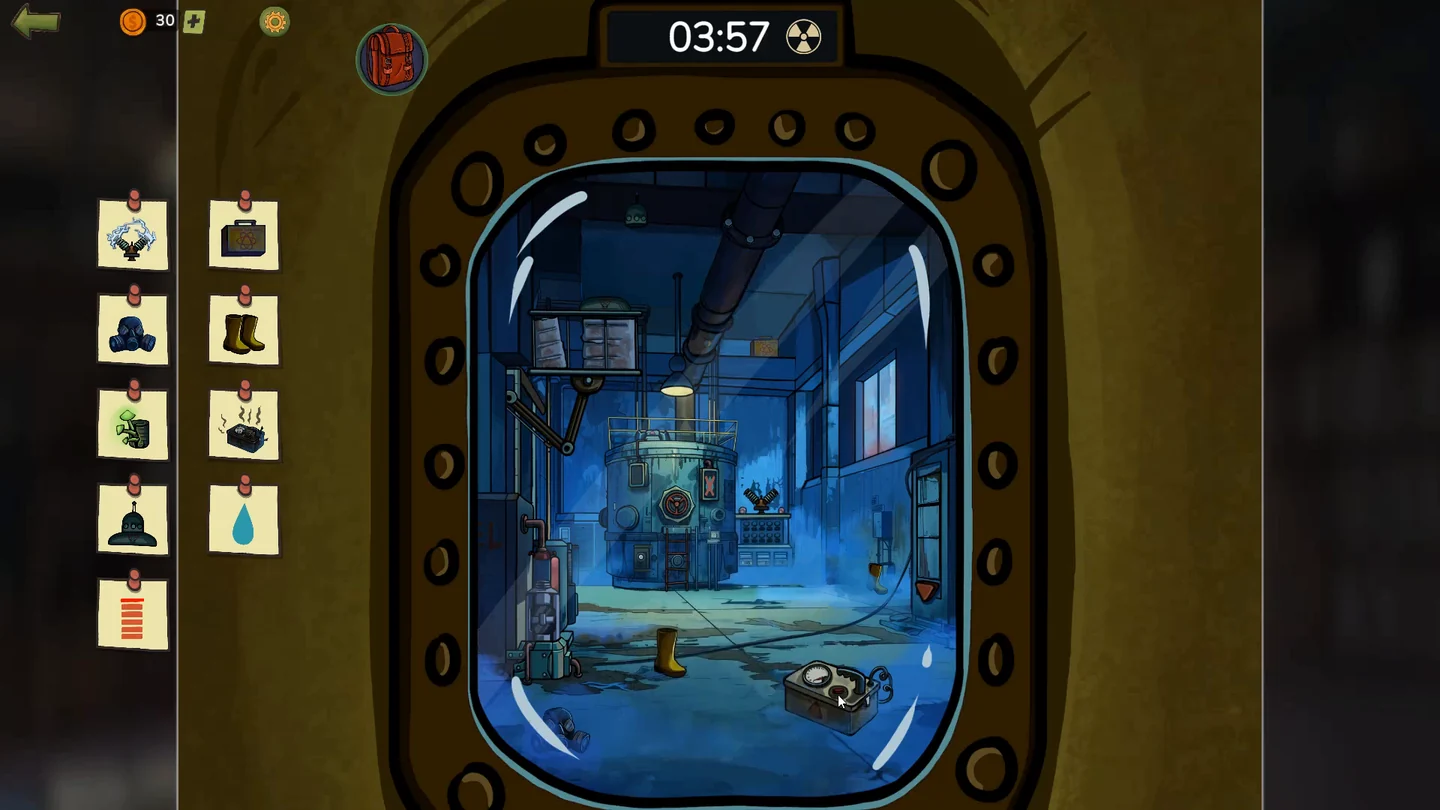
You have four minutes in the radiation suit. Find: electric coils, metal case, gas mask, boots, glowing mushrooms, overheated machine, UFO, water droplet and red bars.
- Take the metal case right of the steaming pipe and the gas mask at the lower left. Drag the boot by the dumbwaiter to the boot in the middle of the floor, then tap the joined pair of yellow boots to collect them. Press the orange triangle under the dumbwaiter: it opens on glowing mushrooms, so tap them. Press the triangle again, take the red wrench that appears and use it on the steaming pipe, then tap the water droplet on the reactor's right screen. Swipe the crane at the upper left up and right, then tap the UFO it reveals.
- Swipe the knob of the machine at the lower right up and tap it once it breaks down. Swipe down the machine with the empty battery on the left to charge it, then drag the battery into the slot on top of the reactor and tap the red bars on its left screen.
- Tap the machine right of the reactor for the coils. Each dial has three lights (1 2 3 on the left, 4 5 6 on the right). The button 12 switches lights 1 and 2, 34 switches 3 and 4, 15 switches 1 and 5, and each round button turns its dial one step so every light moves one place to the right, the last one wrapping to the first. From all lights off, press 12, 15, the left round button, 12, 34, the right round button, 34. All six lights glow; take the coils.
- With the list complete, the important clue is the round hatch that opens on the reactor: open the backpack and drag the Reactor Key from Doug onto the hatch. The reactor restarts before the timer runs out and Margaret returns to the town.