The first beach and the fisherman's hut
Host Maxim sends your pair to a tropical island to find the sacred elephant figurine of the Sapientists. Choose any pair of contestants; the route is the same. The interactive tutorial is optional. Morphing objects change shape while you watch; tap one when it changes to collect it.
- On the first beach, tap the morphing shell in the sand just left of centre (morphing object 1 of 12).
- Open the shipwreck debris at the top of the beach. Take the knife stuck in the box and tap the small cow figurine on the sand (cow figurine 1 of 6).
- Open the basket of shells at the bottom of the beach and pry the shells open with the knife until you have the bolts and an amulet.
- Move the nets at the far end of the beach and walk on to the fisherman's hut. Talk to the fisherman; he gives you the key to the trunk on his boat. While here, tap the morphing object in this scene (morphing object 2 of 12).
- Open the trunk on the boat with the key. Each gold block shows a number of blue dots: it moves one square per dot and must finish on a pink plate exactly when its dots are used up. Drag the four blocks square by square until each one sits on a pink plate.
- Read the manuscript in the trunk and tap the drawing of a musician on it (musician 1 of 6). Take the handle and the nippers.
- Cut the wire on the hut door with the nippers and look inside. Take the shovel on the left and the pungi (a snake charmer's flute, pungi 1 of 5) from the back corner behind the hammock. The bells on the right are used later.
- Outside, open the left side of the hut. Dig away the sand with the shovel, open the gate and cut the net with the knife to free the glass eye. The carved box with the star sign here is the dolphin mini-game (see Bonus mini-games).
- Back on the first beach, dig in the sand at the lower left with the shovel. A chest appears; take the blade lying on it. The chest itself is locked for now.
- Open the blade in your inventory. Add the handle, then the bolts, and tighten the bolts with the knife to make a machete.
- Put the glass eye into the empty socket at the top of the stone face on the right of the beach. Clear the board by tapping pairs of identical symbols; a flipped tile sometimes shows a new symbol that also needs a partner. When the board is empty, three groups of purple dots appear on the face. Remember them for the bells in the hut.
- Cut the vines on the left of the beach, above the old well, with the machete and go through to the jungle path.
Jungle path, the lake and the beach chest
The jungle path leads to a lake with a small building on an island. A crocodile blocks the way to the village for now.
- On the jungle path, take the pungi from the tree on the left of the path (pungi 2 of 5). Cut down the pack hanging from ropes at the top left with the knife, open it and take the recipe book and the casket.
- Tap the morphing reeds on the right (morphing object 3 of 12). Open the round stone pillar on the right of the path and tap the cow figurine in the leaves beside it (cow 2 of 6); the stone lid is too heavy to lift yet.
- Follow the path to the lake. Move the pile of rocks at the bottom left and take the dolphin figurine (dolphin 1 of 5). Open the round fire pit on the shore and tap the ashes to find a key.
- Still at the lake, tap the cow figurine on the left bank near the house (cow 3 of 6) and the morphing arch on the building in the middle of the lake (morphing object 4 of 12).
- Return to the first beach and open the chest you dug up with the key. Take the pry bar and the forceps.
- At the fisherman's hut, use the forceps on the pot boiling over the fire to take a piece of fish.
- On the jungle path, lever the lid off the round stone pillar with the pry bar. Take the decoration and the stone head from inside.
- At the lake, give the fish to the crocodile on the left. It moves away; take the path on the left into the village.
Nisha, the forge and the spice drawers
Nisha asks you to clear the blocked water pool while she fetches the village elder. The forge sits off the left side of the street.
- Talk to Nisha. Tap the morphing drum in front of the house on the far right (morphing object 5 of 12), then open the water pool on the right and take the dry manure from beside it.
- Enter the forge area on the left. Move the small pile of straw on the ground near the tree stump to find a worm (worm 1 of 5), take the rope from the stump, and tap the morphing flowers at the bottom left (morphing object 6 of 12). Look at the locked cabinet of glass tubes above the workbench and the chicken cage; both need keys later.
- Open the spice drawers on the right of the forge and read the recipe book. Close the eight drawers in the order your recipe lists the spices; the order can differ between games. In one game it was star anise, cinnamon sticks, red pepper, sesame, black pepper, turmeric, cumin, paprika, while another game's recipe began cumin, turmeric, paprika. A large drawer opens; take the part of the mosaic.
The well, the house and the water taps
The old well on the first beach and the house at the end of the village street hold the next clues.
- On the first beach, tie the rope to the old well and climb down. Take the bucket, then tap the soil beside the skeleton's hand to uncover a key. Look at the drawing of pulleys on the wall and the groups of scratched lines; both are clues for later.
- In the village, bail the stagnant water out of the pool with the bucket and take the valve from the bottom.
- Open the door of the house on the far right of the street and go in. Take the banana from the fruit bowl, take the flask from the bag hanging on the left wall, tap the morphing leaf on the red rug on the left (morphing object 7 of 12) and tap the small musician statue on top of the wooden cabinet on the right (musician 2 of 6). Remove the decorative tile on the side of the step below the red rug for dolphin 2 of 5, and take the pungi that forms the back right leg of the low table on the left (pungi 3 of 5).
- Note the clues in the house: the green cushion on the bed shows cows, and the pillow inside the wooden cabinet on the right shows tigers. Count each animal for the secret room later; the numbers can differ between games (three cows and one tiger in one game, two cows and three tigers in another). The gold box on the floor needs a detail first.
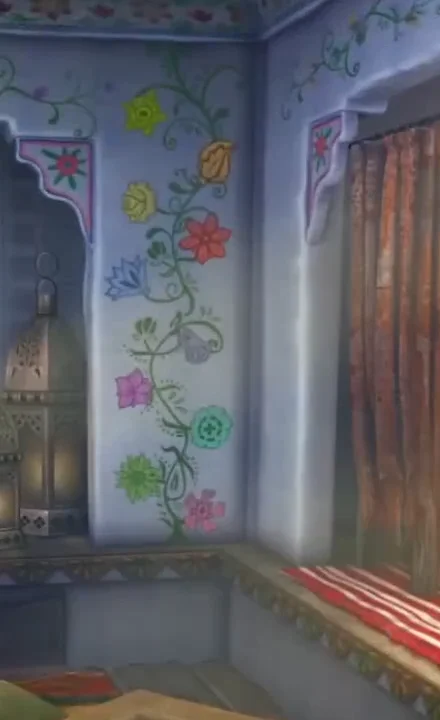
- Open the doors at the back left of the house and put the valve on the top centre tap of the fountain. Open the ten taps in the order of the flowers painted on the vine on the wall beside the door, from the bottom flower to the top. In the checked game that was pink, green, teal, magenta, violet, blue, red, yellow, orange, yellow-green; follow the flowers on your own vine. Water runs; take the brush from the basin.
The monkey, the bells and the gold box
The purple dots on the stone face mark three of the bells in the fisherman's hut.
- On the jungle path, give the banana to the monkey in the tree above the path. It drops a weight; take it.
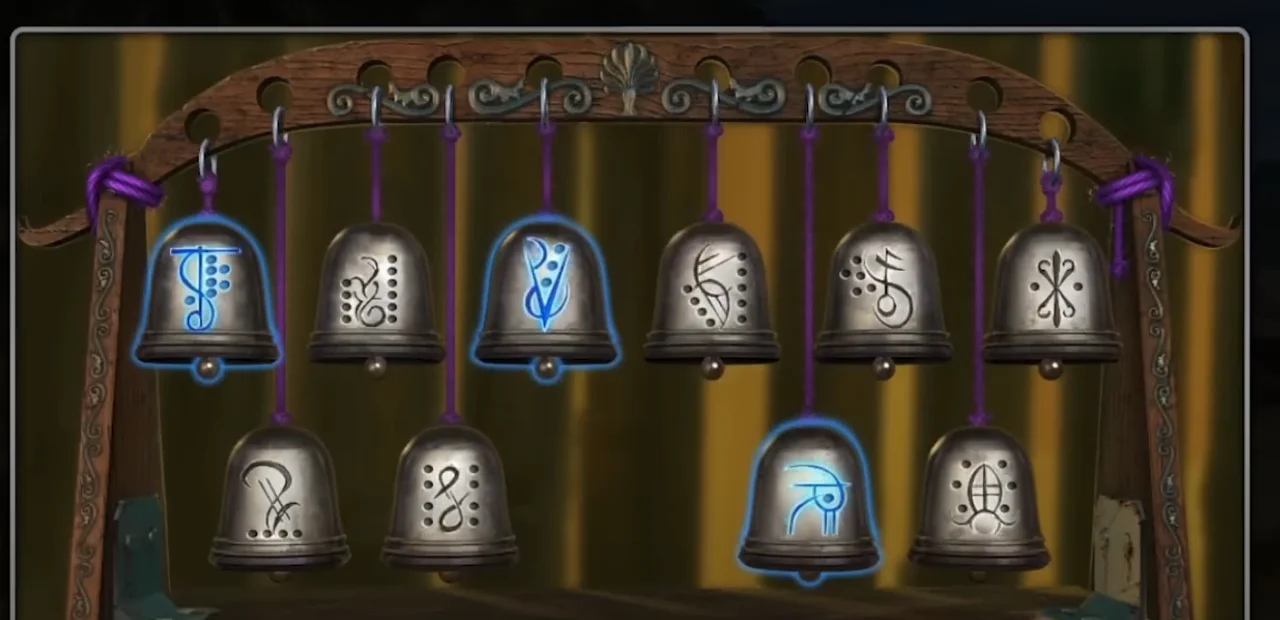
- In the fisherman's hut, play the bells. Each dot group on the stone face matches the marks on one bell; tap those three bells. Which bells they are can differ between games: in one game they were the first and third bells of the top row and the third bell of the bottom row, in another the third, fifth and sixth bells of the top row. A drawer opens; take the detail.
- In the house, put the detail on the gold box to open its lid. Tap a gem to turn the four squares around it. Gather the squares into the four corners so that each corner matches the colour painted on that corner of the box. Finish within the 100-move counter to win a star. The board is a 6 by 6 grid and each corner colour fills a 3 by 3 block. The start is a long rearrangement, so here is an approach rather than every move: complete the two top blocks first, then finish the two bottom blocks using only the two lowest rows of gems, which do not touch the top three rows of squares. Four turns of the same gem bring its squares back, so any wrong turn can be undone. When the box opens, take the second stone head from inside it.
The square column and the island building
The square column on the lake shore raises stepping stones to the island building.
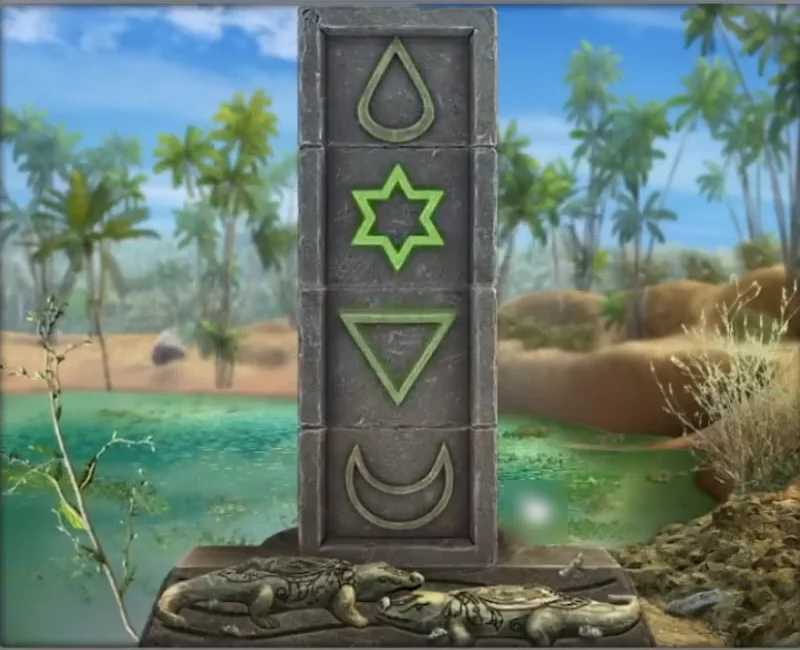
- At the lake, put both heads on the crocodile carvings at the base of the square column on the bottom right. Turn the four sections so that, from top to bottom, they show the symbols on the banner hanging at the top right of the first beach. The order can differ between games: in one game it was drop, star, triangle pointing down, crescent, in another crescent, star, drop, triangle pointing down. Stepping stones rise across the lake.
- Cross to the island and open the catch on the building door. Use the arrows to rotate the frame and slide the six coloured flowers until each flower stands next to the matching symbol on the silver bars. The door opens.
- Inside, look at the cushions on the seat on the left: the green cushion shows rhinos; count them (two in one game). Cut open the cushion with the slit using the knife and take the bird figurine. Open the lattice lamp to the right (its handle breaks; use the knife) and take the oil. Tap the musician on the round relief on the ceiling (musician 3 of 6), the morphing shape in the lattice of the middle left window (morphing object 8 of 12) and look inside one of the hanging lanterns left of the ladder for dolphin 3 of 5.
- Move the cloth in the middle of the floor, open the floor mosaic and add the part of the mosaic. Each lotus slides in the chosen direction until something stops it. Slide all eight lotuses into the eight hollows. Water runs into the fountain; take the ruby from the basin.
The sand tubes and the north gate
The key from the well opens the glass-tube cabinet in the forge.
- If you have not already, dig up the key beside the skeleton's hand at the bottom of the well. In the forge, use it on the cabinet above the workbench. Pour sand between the tubes until each tube holds one colour only; use the reset button if you get stuck. Take the brush and the solvent recipe.
- Scrub the blocked drain of the village pool with the brush. Nisha returns: the elder says an abandoned temple lies to the north across a broken bridge. She gives you the second weight.
- At the large gate at the end of the street, put the two weights in the side openings. Pull the bars out one at a time, taking first the bars that nothing else is blocking.
- Open the panel in the middle of the gate. Pull the chains to move the seven bells; some chains move more than one bell. Bring every bell level with the green line. The gate opens.
The small totem and the pulley maze
The rope bridge to the temple is broken. Maxim's labyrinth hides the eight pulleys needed to repair it.
- On the bridge path, tap the morphing fruit in the bowl by the small totem (morphing object 9 of 12), move the pile of leaves on the path left of the totem for worm 2 of 5, clear the plants on the far left to find a musician statue (musician 4 of 6) and take the pungi at the bottom of the tree in the centre (pungi 4 of 5).
- Put the bird figurine on top of the small totem. Move the pins around the wheel until the blue rays between them cover every scratched line in the centre. Take the lens.
- Cut open the sack on the right of the path with the knife and take the pick.
- Tap the cliff on the right to enter the labyrinth. Search every clearing for the eight pulleys: knock them down with sticks, move rocks and vines, and check nests and holes. Their positions change from game to game, so check each area until the counter reaches 8.
- At the fisherman's hut, break the rock on the left with the pick and take the handle stuck in it.
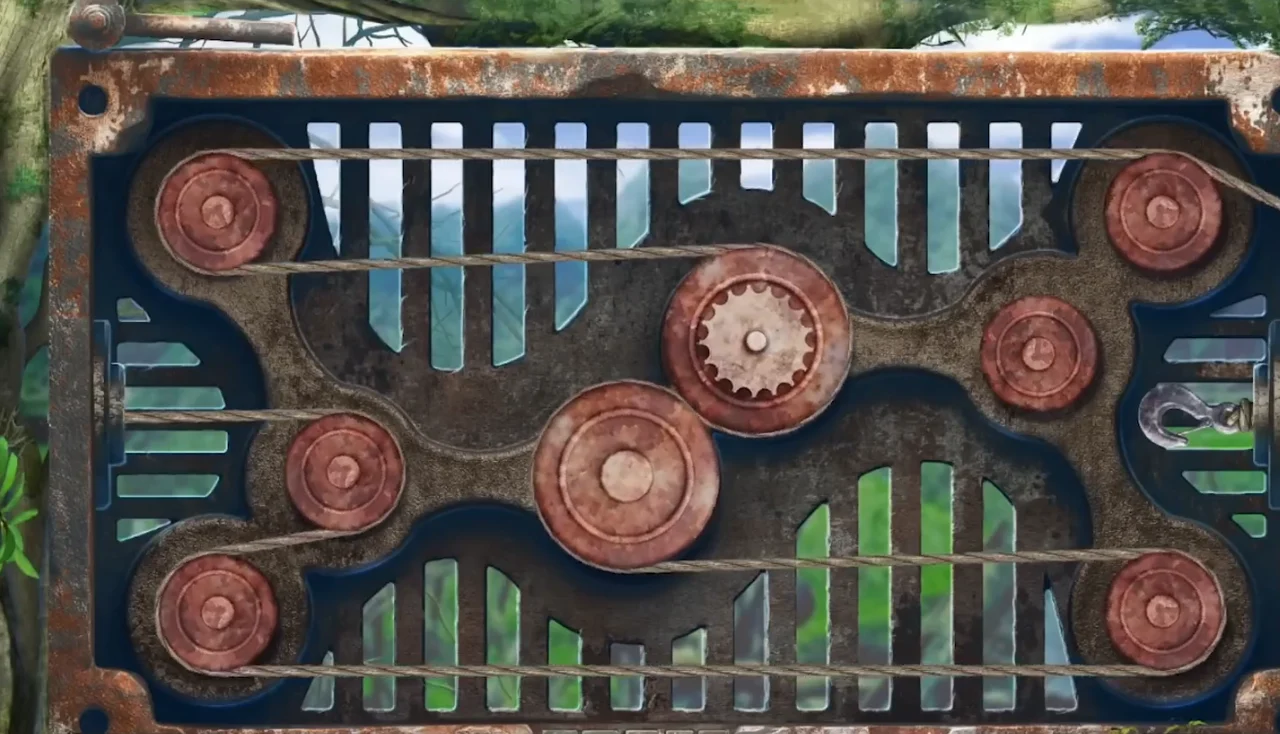
- Back on the bridge path, fit the handle to the right side of the rusty mechanism at the top left and open its panel. Place the two large and six small pulleys on the matching spindles, then wind the rope from the left around them as shown in the drawing at the bottom of the well (see the picture). Turn the handle to raise the bridge and cross.