The Cave Alcove and the Lotus Slot
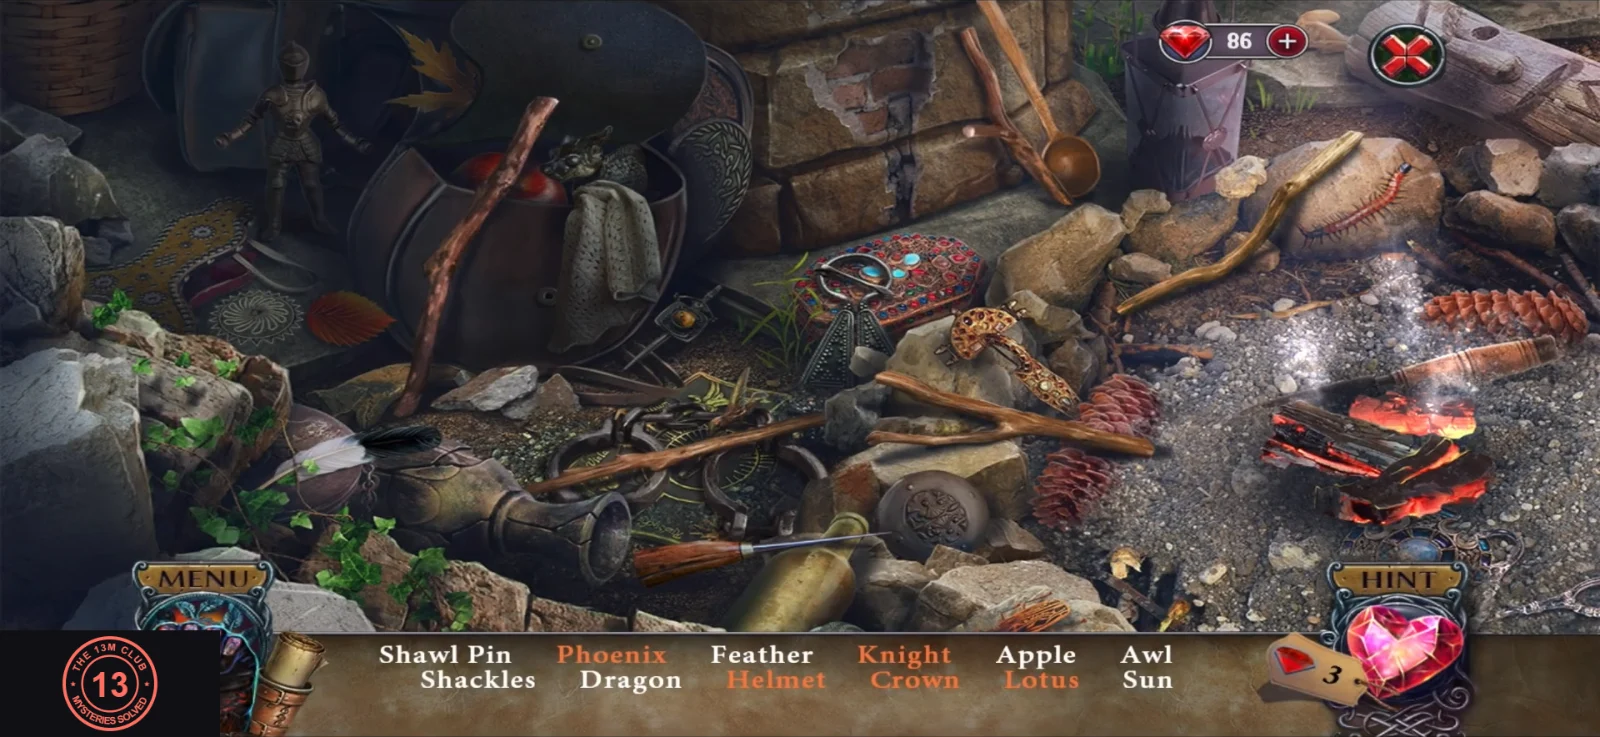
With the map in hand, search the cave alcove once more and complete the flower-shaped slot.
- Search the alcove again: Shawl Pin, Phoenix, Feather, Knight, Apple, Awl, Shackles, Dragon, Helmet, Crown, Lotus, Sun. You get SILVER PETAL 2/2.
- The petals alone don't fit the flower slot ("That's not right."). Give the BRACER to the left knight ("looks like this knight lost a part of his armor") so he releases the FLOWER. Put the flower and both petals in the slot to form a lotus. The magician's apprentice appears ("The Baroness is killing people to restore limbs and the artifact is the legacy of a demon!"), and you get two star pieces that combine into a purple RELIC. Keep it. Then zoom into the star-shaped slot and take the paper there (the RELIC stays in your inventory). It shows two heart crests, one of them crossed out ("This looks familiar. I've seen it somewhere..."). Keep it: it is the other half of the magician's instructions.
The Mine Prison and the Water Goblets
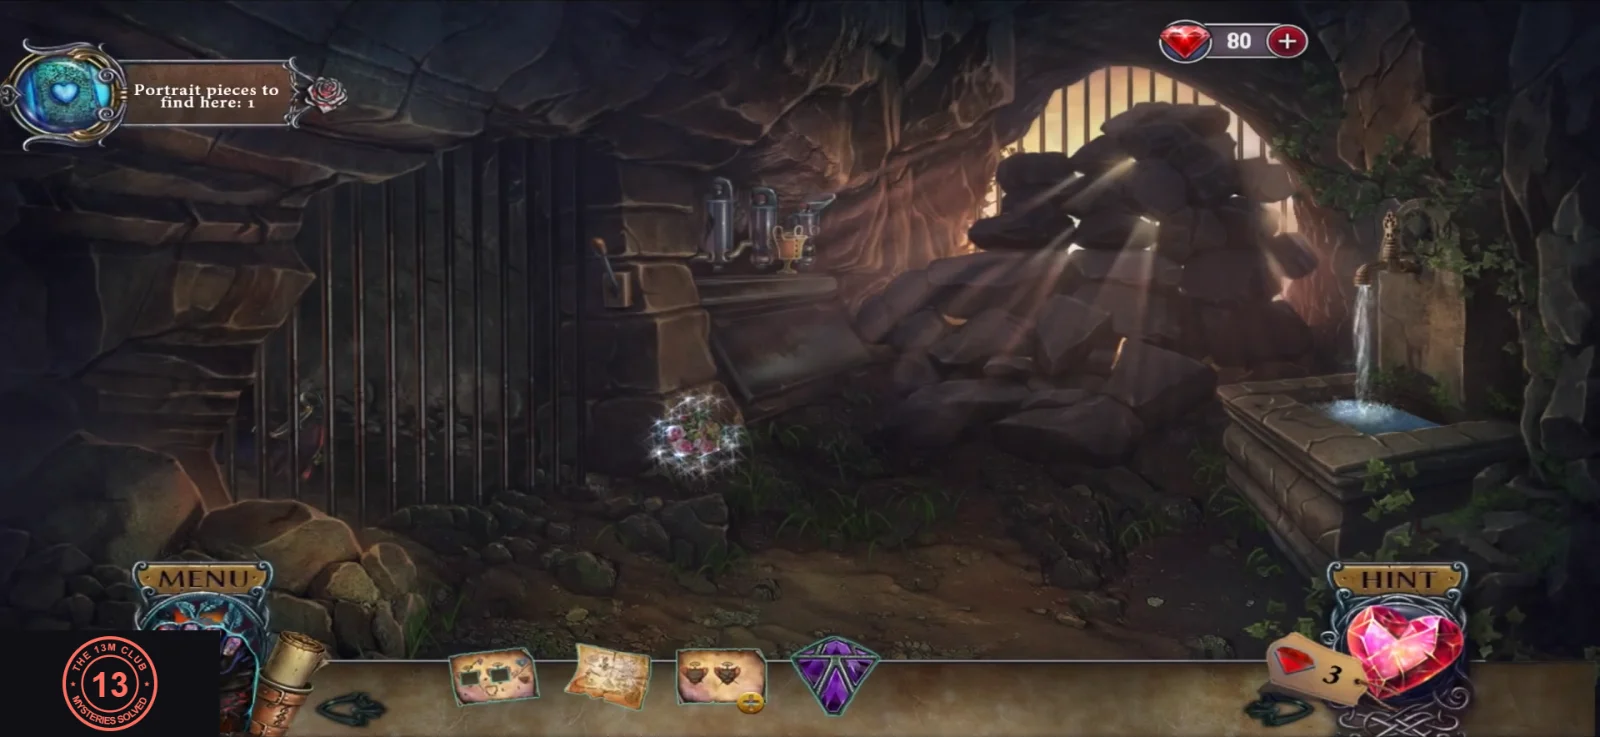
A caged prisoner lies dead ("He didn't survive that trap on the mountain road."). Three marked glass bulbs need water to blow open the gate. The portrait piece is just right of the cell bars, at mid-height in front of the rock.
- Collect the portrait piece beside the cell bars and the STONE GOBLET. Use the goblet at the spring ("A water source? And still intact.") to start the puzzle.
The Water Goblets
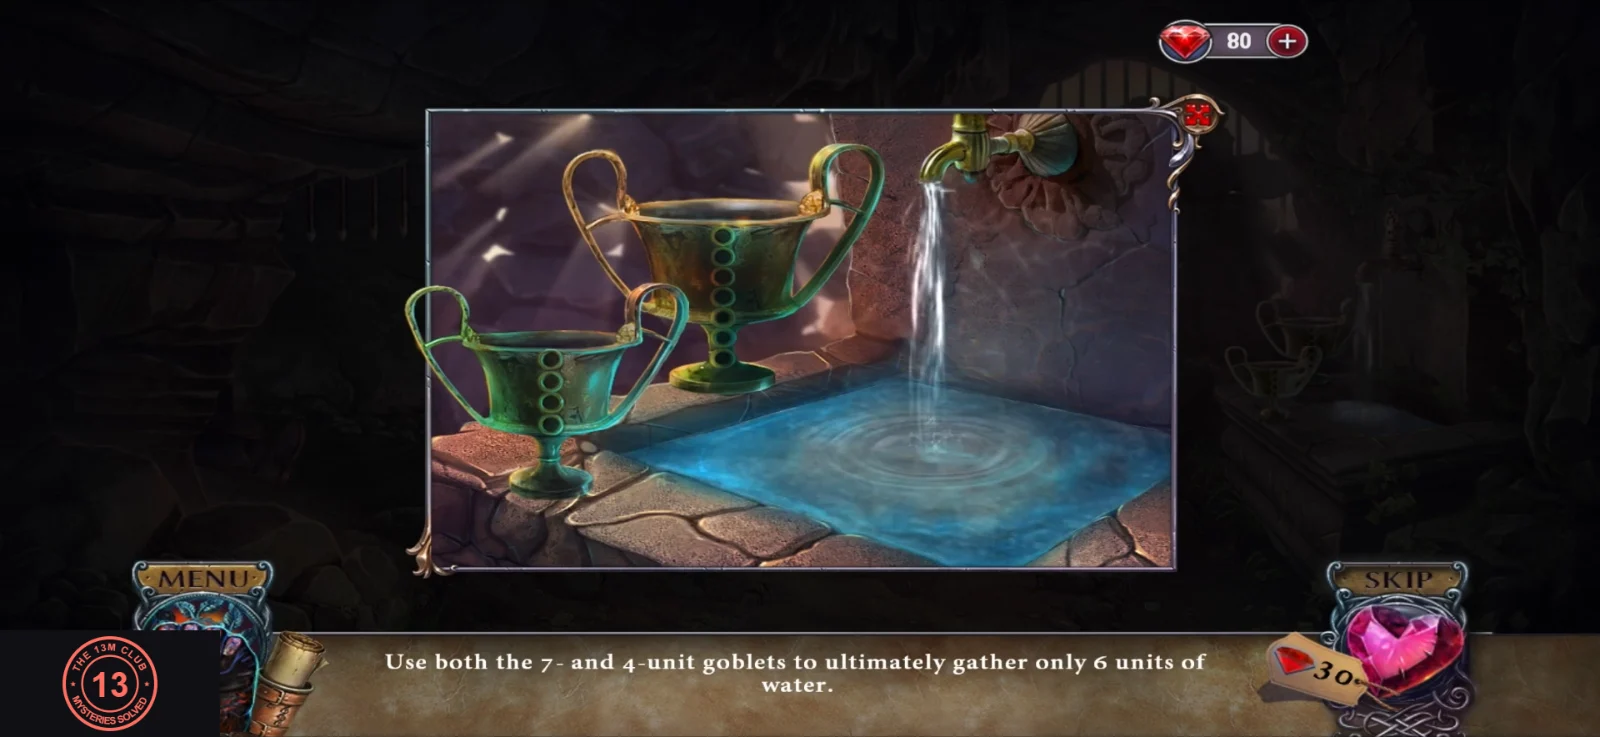
The spring fills two goblets, one holding 7 units and one holding 4. The bulbs need exactly 6 units.
- "Use both the 7- and 4-unit goblets to ultimately gather only 6 units of water." Fill the 7-unit goblet, pour it into the 4-unit goblet, empty the 4. Pour the remaining 3 into the 4. Fill the 7 again and top up the 4 (one unit). Exactly 6 units remain in the 7-unit goblet.
- Pour the water into the three bulbs. The blast opens the gate. In the cutscenes the Baroness is done with the magician ("I don't need you anymore, magician.") and gives Conrad a key: "Get to the stables and ready the horses and the carriage." New objective: escape from the mansion. Keep the CARRIAGE KEY.
The Baroness's Study
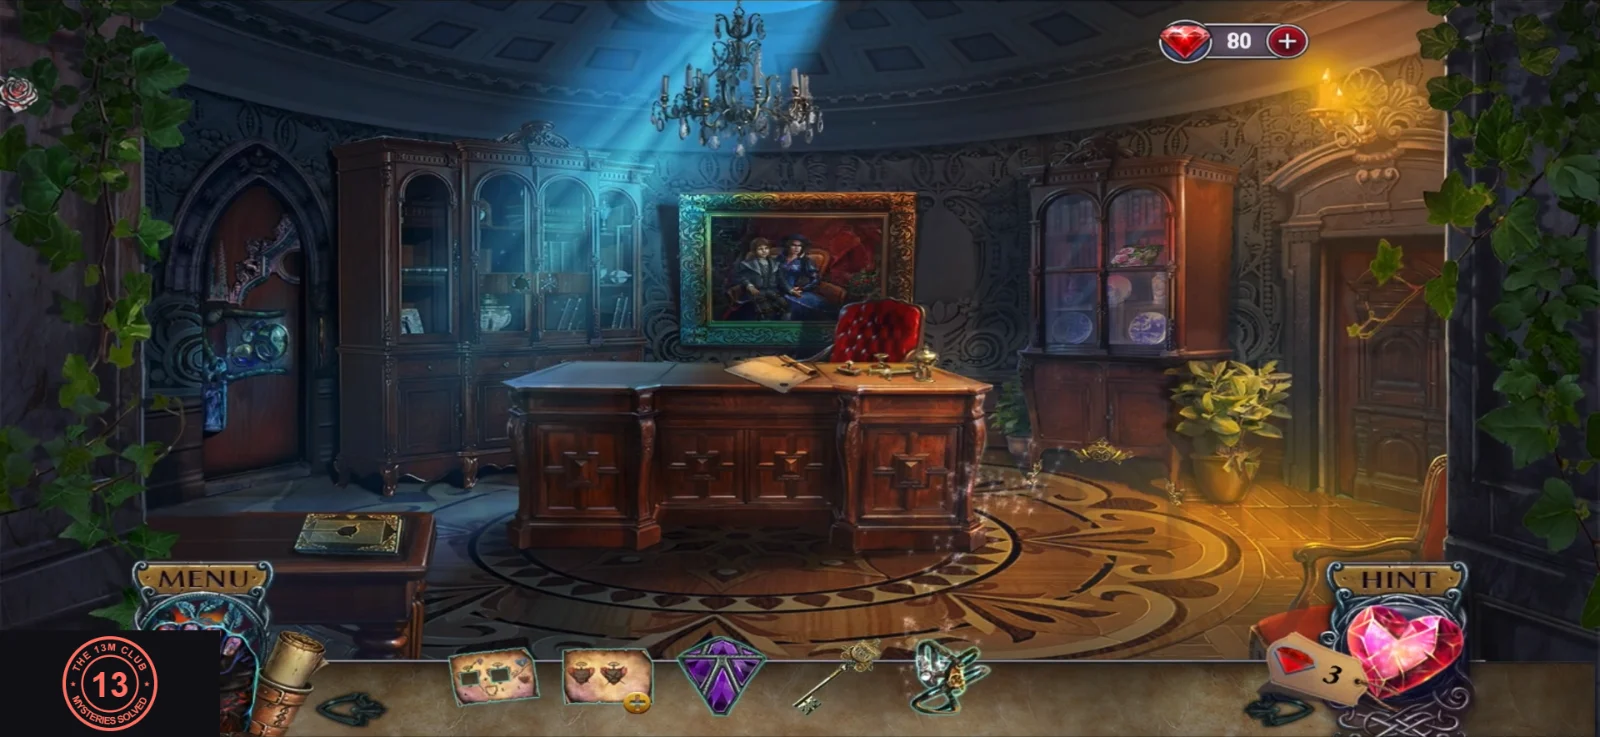
The study has a book-shaped recess ("Interesting shape. I swear, I've seen it somewhere."), a snake lock with lenses ("This could be a tricky lock.") and a painting behind the desk. The portrait piece is on the glass doors of the tall cabinet to the right of the painting.
- Collect the portrait piece from the cabinet's glass doors and pick up the items on the floor and desk, including the snake EMBLEM. Swing the painting behind the desk aside and smash the barred compartment with the stone-hand power. Take the ROPE and the star-shaped CONTAINER ("I have to cut it open."). Keep the container for later.
- The EMBLEM does not fit the snake lock ("I should try something else."). Put it in the left recess of the door ornaments instead to open a hidden-object scene: Crowned Head, Elephants, Envelope, Magnet, Watch, Pipe, Wine Glass, Magnifier, Letter C, Inkwell, Knife, Owl. You get the MAGNET.
The Snake Lock Ball Channel
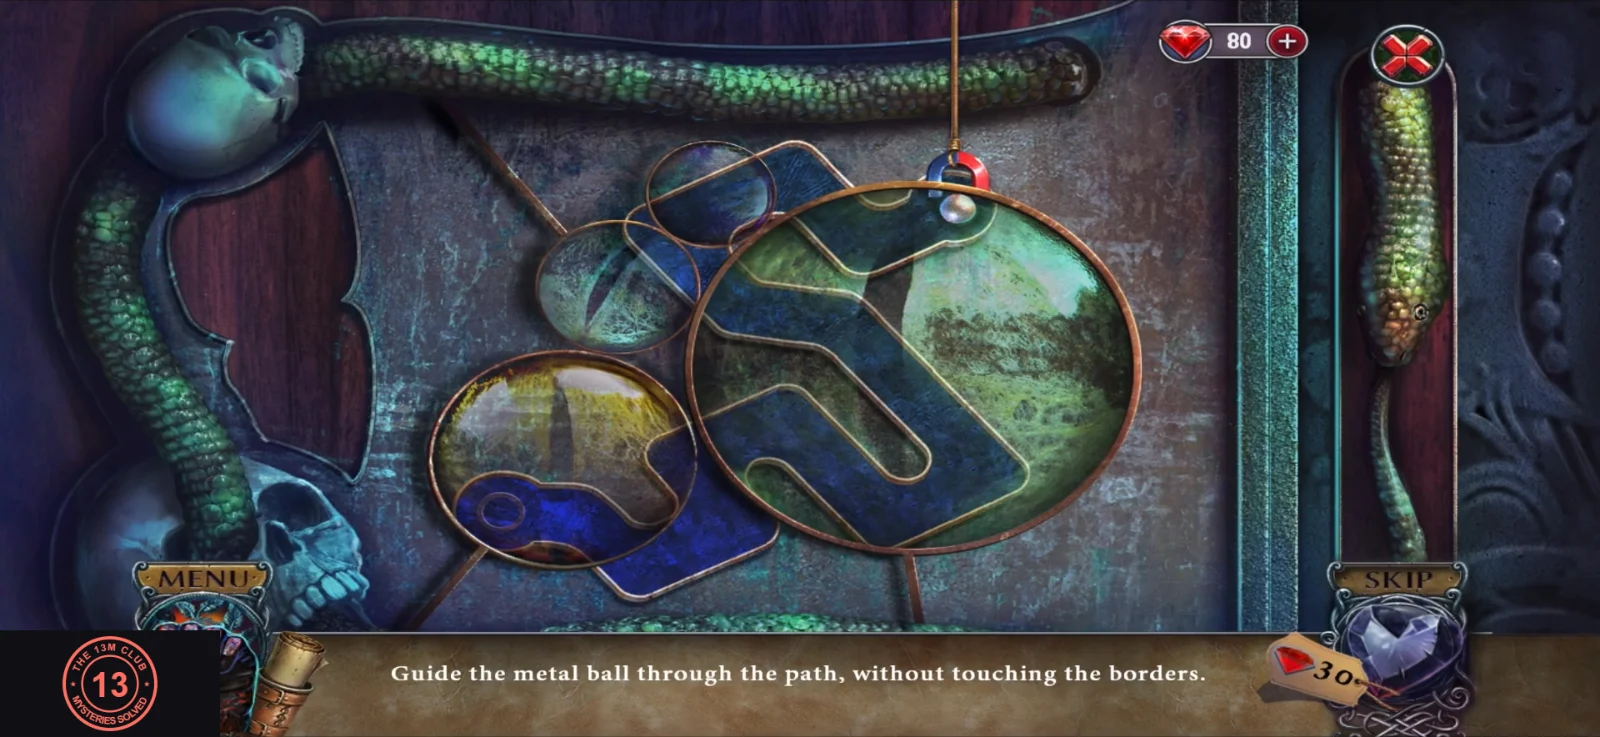
The snake lock on the study wall hides a metal ball at the end of a winding channel behind its lenses.
- Tie the MAGNET to the ROPE ("Have to tie this thing nicely."). Open the paper with the two heart crests (from the cave's star slot) in your inventory and add the MAGICIAN'S INSTRUCTION part from the mask-stand casket to complete the MAGICIAN'S INSTRUCTIONS. Lower the magnet on its cord into the snake lock: "Guide the metal ball through the path, without touching the borders." Drag slowly along the channel. When the ball is out, a passage opens to the ritual room.
The Ritual Room and the Shield
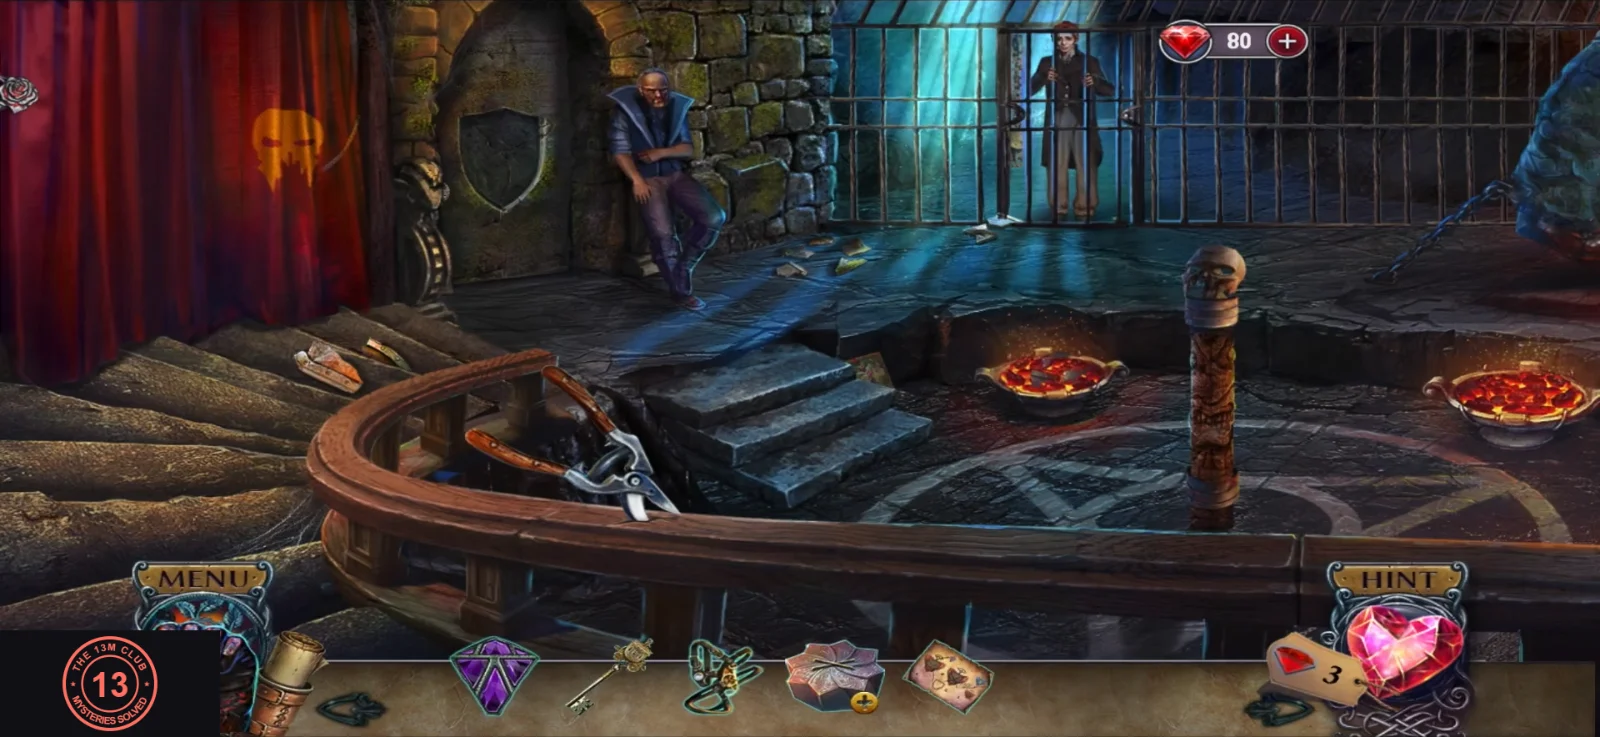
The magician's apprentice is locked in a cage, and a broken shield frame hangs on the wall. Collect twelve SHIELD PARTS (counter x/12). The portrait piece is on the middle stone steps that lead down into the ritual circle.
- Take the PRUNER from the stair railing and collect the portrait piece from the middle steps. Use the stone hand on the cracked floor slabs by the seated prisoner ("Maybe my hand will be... handy.") and collect the shield parts that fall out. Talk to the apprentice in the cage ("Here - I grabbed this while they were dragging me in here. It might be useful.") and take the triangular PENDANT.
- In the study, place the PENDANT in the book-shaped recess. The album opens: take the AWL from the photo frame. Cut the stalks of the potted plant with the PRUNER and take the TONGS hidden inside.
- Open the wardrobe for a two-round hidden-object scene. Round 1: 2 Symbols, 2 Snakes, 2 Lilies, 2 Spiders, 2 Masks, 2 Eyes. Round 2: Earrings, Money, Belt, Brooch, Silver, Jars. You get the BOTTLE OF RESIN.
- In the ritual room, pry the stuck shield part out of the stairs with the AWL ("It's stuck! How can I work it out?"). Then lift the remaining parts out of the hot brazier ("Too hot! Can't do it barehanded.") with the TONGS. The counter reaches 12/12.
The Broken Shield
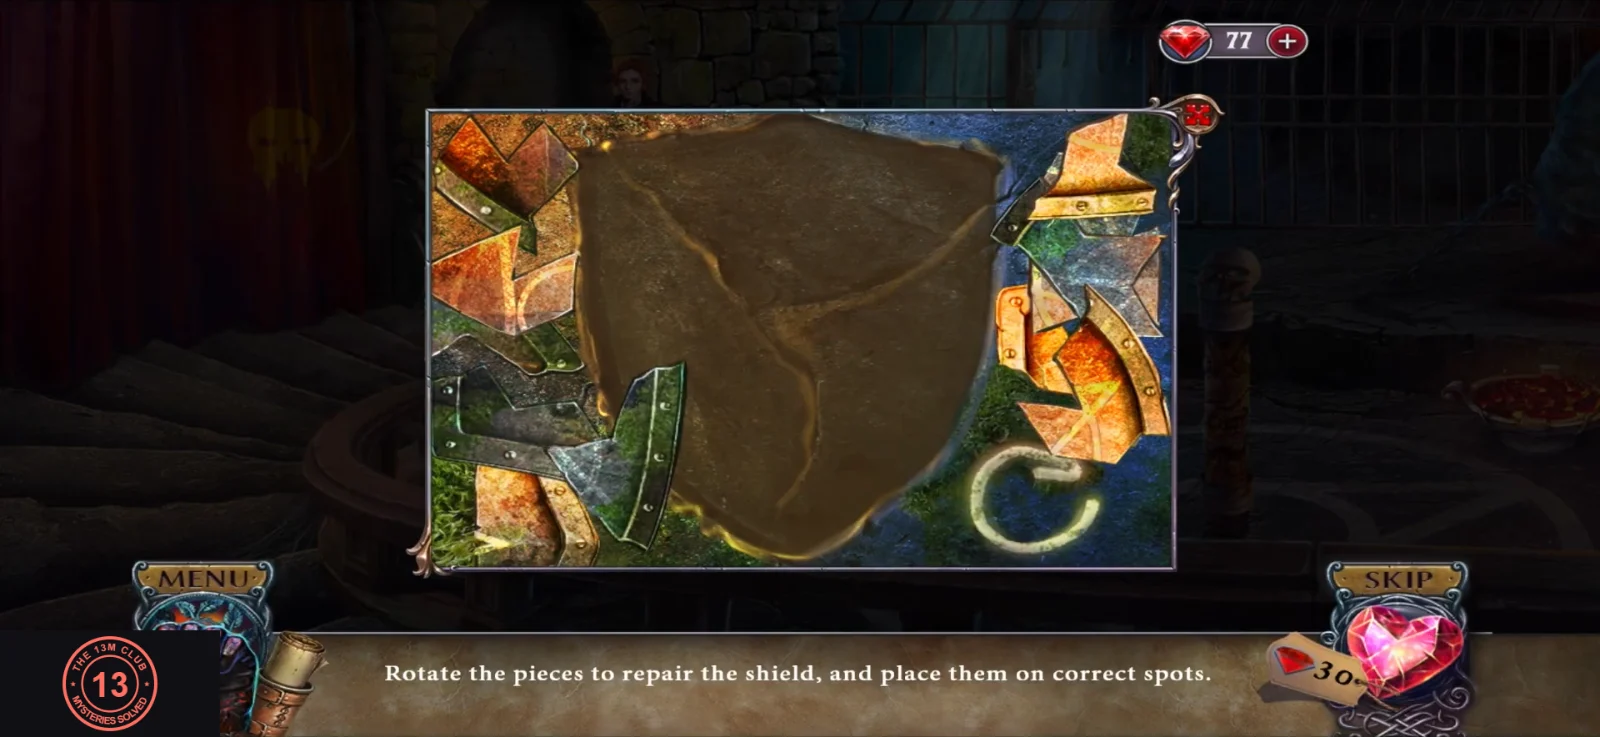
The twelve SHIELD PARTS go back onto the empty frame on the ritual-room wall.
- Place the shield parts on the frame. "Have to glue all this parts together." Spread the BOTTLE OF RESIN over it, then "Rotate the pieces to repair the shield, and place them on correct spots." Drag each piece into place and turn it with the rotate button until the shield is whole, with its triangle-and-circle crest. You leave through the stable yard.
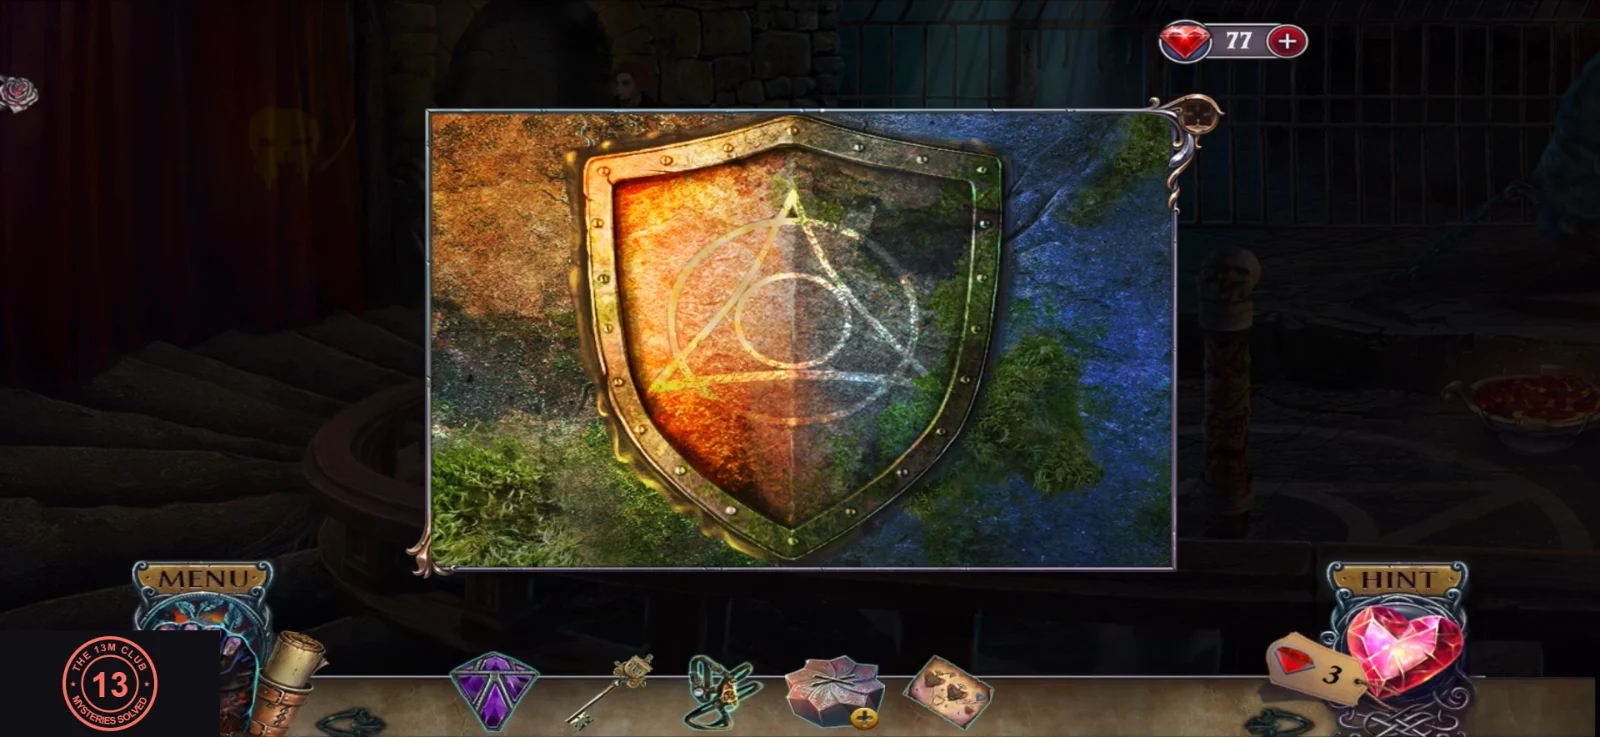
The finished shield.
The Stable Yard and the Carriage Shed
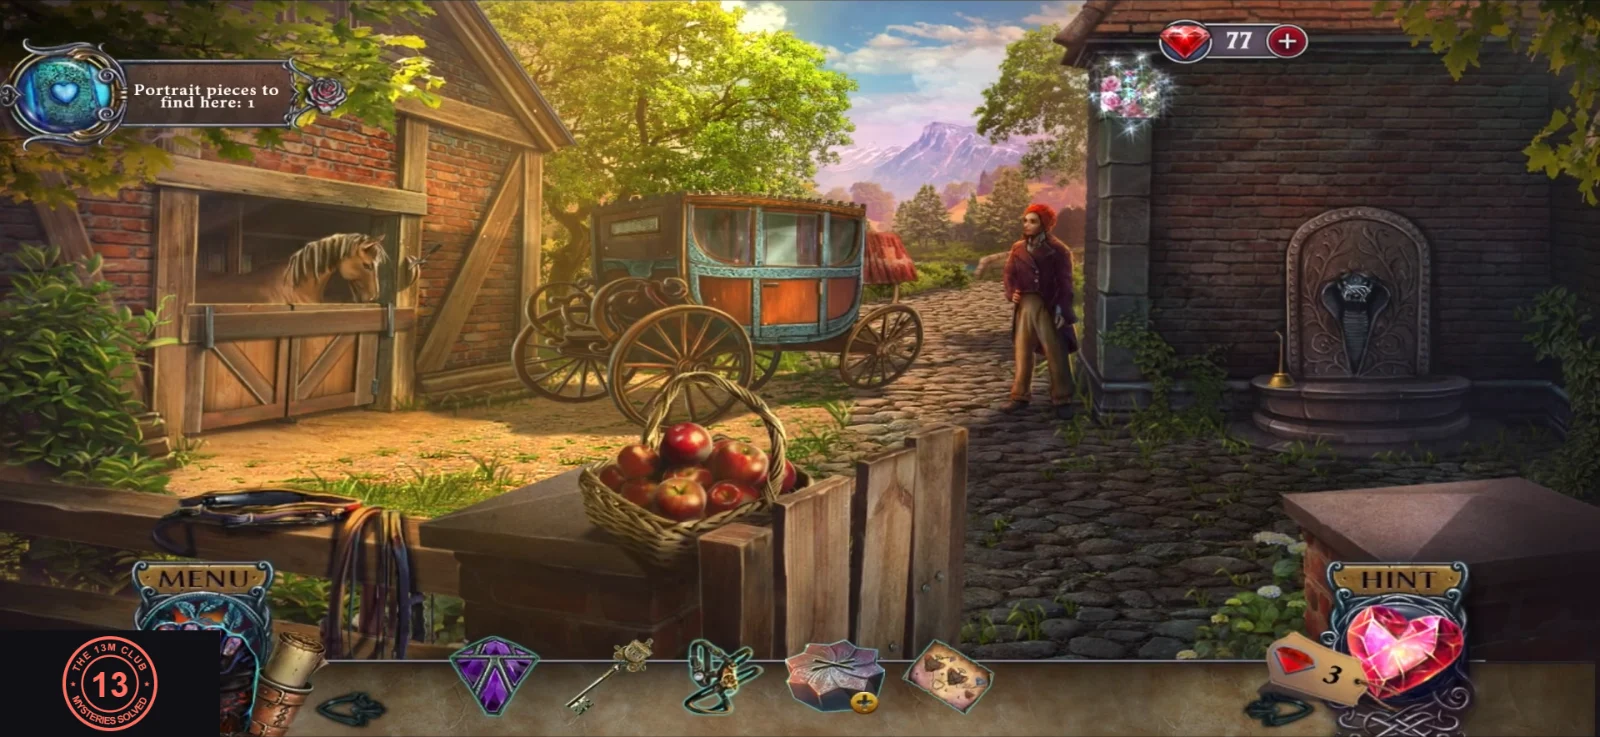
Prepare the carriage and escape. The stable yard and the carriage shed have one portrait piece each.
- Collect the portrait piece high on the right, at the top corner of the brick building's pillar. At the snake fountain, take the OILER from the rim and pull the WIRE out of the snake's mouth so water flows again. Take an APPLE from the basket.
- The stall latch is broken ("Darn! Guess I need to fix it too."). Fix it with the WIRE. Then win the horse over with the APPLE ("The easiest way to gain his trust is through his stomach.") and lead him to the carriage.
- "The horse must be harnessed." Take the HARNESS hanging to the left of the apple basket and put it on the horse. Oil the rusty rear wheel hub with the OILER ("It's completely rusted! And twisted."). Unlock the carriage door with the CARRIAGE KEY. The carriage takes you to the shed.
- In the shed, collect the portrait piece on the front of the carriage at the left, beside its big wheel, and take the BASIN by the crate. A fence is on fire, and the stream is too shallow to scoop from ("I can't use it when the water's this low."). Fill the BASIN at the stable-yard fountain and throw the water on the fire.
- Take the BOARD in the stable yard ("This board can be useful.") and lay boards across the stream in the shed. "There is our long-awaited exit. A stone's throw away." New objective: break the artifact. The apprentice calls: "Hurry! I can't hold him off for long! The artifact is making him strong ... break it!"
- Pick up the large TONGS lying in the grass at the bottom of the shed. Use them to pull the pins out of the star-shaped CONTAINER, which opens to reveal the ARTIFACT. In the artifact close-up, insert the purple RELIC ("Now it's time to use the Magician's gift."), then lay the MAGICIAN'S INSTRUCTIONS on it to start the final labyrinth.
Breaking the Artifact and the Bonus Ending
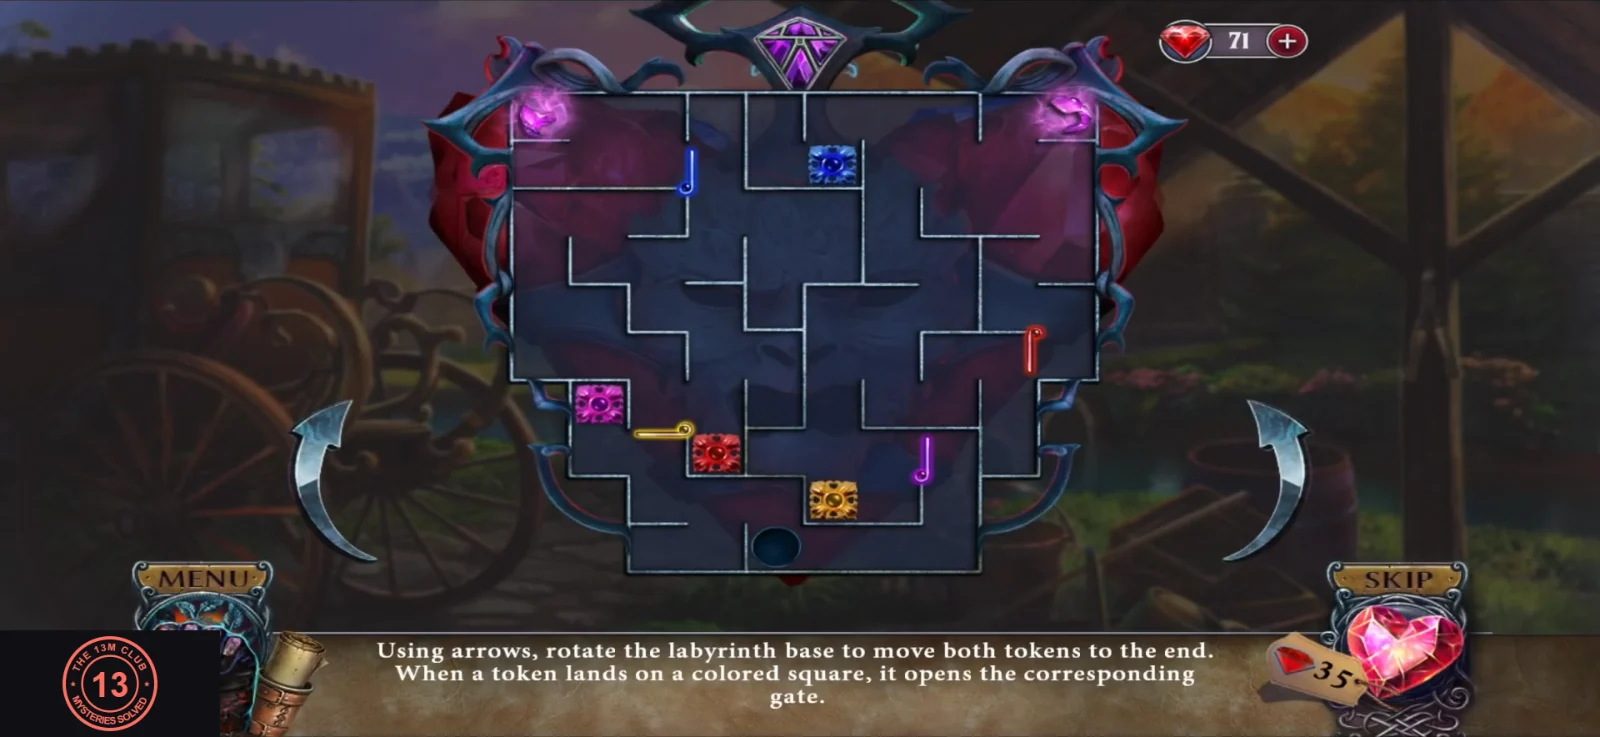
"Using arrows, rotate the labyrinth base to move both tokens to the end. When a token lands on a colored square, it opens the corresponding gate." Two purple tokens start in the top corners: a heart-shaped one at the top left and a curled one at the top right. The end is the dark hole at the bottom. Each arrow press turns the whole board a quarter turn, and both tokens roll as far as they can. The left arrow turns the board clockwise and the right arrow turns it anticlockwise. If your first press below (Right) turns the top of the board to the right instead of the left, swap the arrows throughout. A gate bar stays open only while a token rests on the square of its colour and closes as soon as that token rolls off. The heart token must go into the hole first. If the curled token gets there first, it is not taken and rolls out again later. The 61 presses below solve the board from its starting position, in twelve stages. Wait for both tokens to stop before each press, and check the described position after each stage. A SKIP button is also available.
- Stage 1: press Right, Left, Left, Left, Left, Right, Left, Left. The board is upright again. The curled token sits on the blue square at the top and the blue bar has opened. The heart token is back in the top-left corner.
- Stage 2: press Left, Right, Left, Right. The heart token rolls through the open blue bar and drops a short way down the left-middle of the board. The curled token stays on the blue square.
- Stage 3: press Right, Left, Left, Left, Right, Right. The curled token leaves the blue square and the blue bar closes. After the fourth press the board is upside down, and both tokens lie side by side against the board's top edge, which is now at the bottom of the screen. When you finish, the board is upright, the heart token is back where it was after stage 2 and the curled token is in the upper-right part of the board.
- Stage 4: press Left, Right, Right, Right, Left, Left. The board is upright. The heart token is on the left edge in the last row before the board narrows. The curled token is on the right side, just above the red bar.
- Stage 5: press Left, Right, Left, Right. The heart token rolls onto the red square low on the left, so the red bar on the right opens. The curled token waits on the right edge just outside the red bar.
- Stage 6: press Right, Left, Right, Right, Left, Left. The first press rolls the curled token through the open red bar. When you finish, the board is upright, the curled token sits on the yellow square at the bottom so the yellow bar is open, and the heart token is on the left side in the middle of the board.
- Stage 7: press Right, Right, Left, Right, Left, Left. The curled token leaves the yellow square and comes back to it. When you finish, the board is upright, the heart token is on the left edge in the last row before the board narrows, and the curled token is on the yellow square again with the yellow bar open.
- Stage 8: press Left, Right, Right, Left. After the second press the heart token rests on the closed yellow bar. The third press rolls the curled token back onto the yellow square to open the bar, and the fourth press drops the heart token through it into the small bottom-left section that leads to the hole.
- Stage 9: press Left, Left, Left, Right, Left. The board ends turned with its top on the left. The heart token is just below the magenta square, and the curled token is right beside the red square.
- Stage 10: press Right, Right. The first press rolls the heart token onto the magenta square and opens the magenta bar. The second press rolls the curled token through that bar to the right.
- Stage 11: press Right, Right, Left, Left, Right, Left, Right, Left, Right. On the second press the curled token rolls onto the hole but is not taken, because the heart token must go first. Two presses later it rolls back to the lower-right corner. The heart token then runs along the bottom-left section, and the seventh press drops it onto the hole. It stays there while it sinks, even when the eighth press turns the board. After the ninth press the heart token is gone and only the curled token is left, in the lower-right corner.
- Stage 12: press Right. The curled token rolls left along the bottom row into the hole, and the labyrinth is solved.
- Watch the ending. The apprentice: "Nice job! Now we can hide the parts so the Baroness can't find them. Watch out!" ... "No! Don't use that thing on me! I'd rather die than become one of those... things." ... "You have to finish what we started! Hide the artifact!" Conrad writes: "Dear Greg... You've always been like a father to me. I'd like to sell you that artifact...". This leads into the main story. The game then shows "Well done! You've completed the Bonus Chapter!"