The Child's Torn Drawings
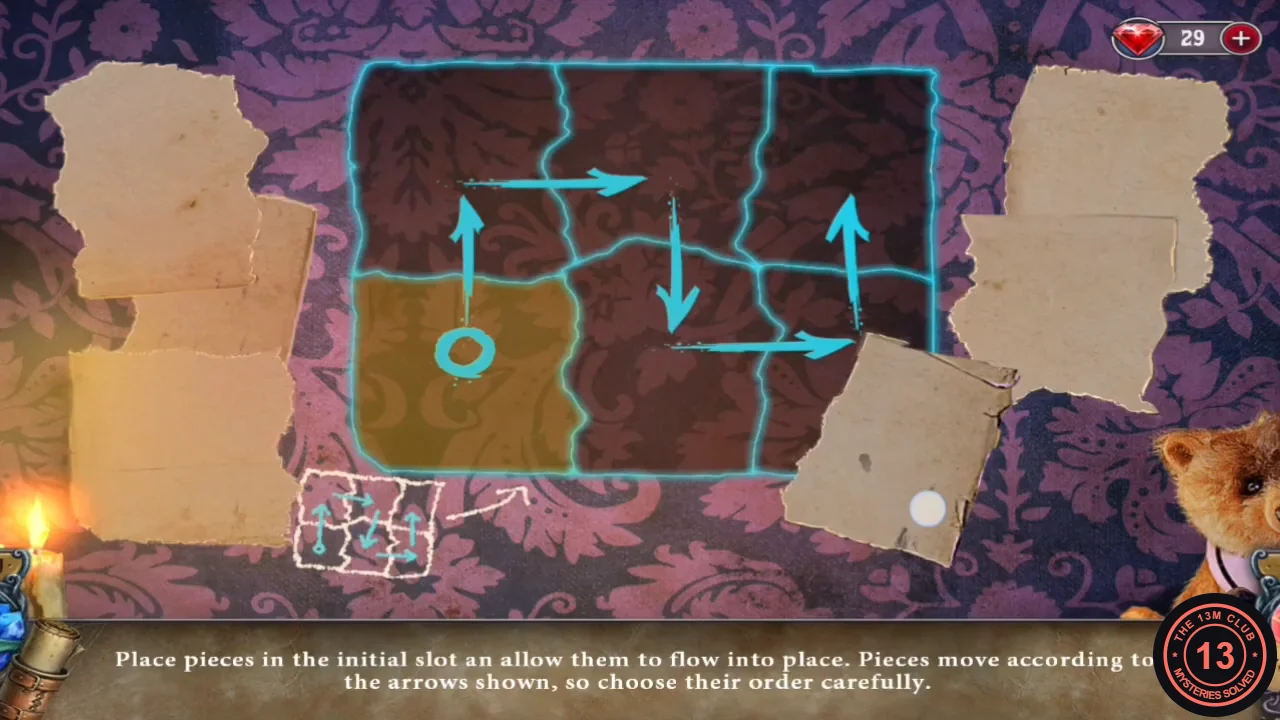
Put the four RED PENCILS in the pencil box on the bedroom desk. "Place pieces in the initial slot an allow them to flow into place. Pieces move according to the arrows shown, so choose their order carefully." Each drawing is torn into scraps, and every slot on the board has its own torn outline, so each scrap belongs in one particular slot. Compare the edges of the loose scraps with the slot outlines to work out where each one goes. When you drop a scrap on the highlighted start slot, it moves one slot along the arrows, and every scrap already on the board moves one slot further too. The last scrap stays in the start slot. So the first scrap you drop ends up in the last slot of the arrow path: drop the scraps in reverse path order, starting with the scrap for the end of the path and finishing with the scrap for the start slot. A dropped scrap can also go back to the side pile; if that happens, carry on with a different scrap.
- Place the four RED PENCILS in the pencil box to start.
- Drawing 1 (two rows of three, start slot bottom-left): the path runs bottom-left, top-left, top-middle, bottom-middle, bottom-right and ends top-right. Drop the six scraps in this order: top-right scrap, bottom-right, bottom-middle, top-middle, top-left, and finally the bottom-left scrap.
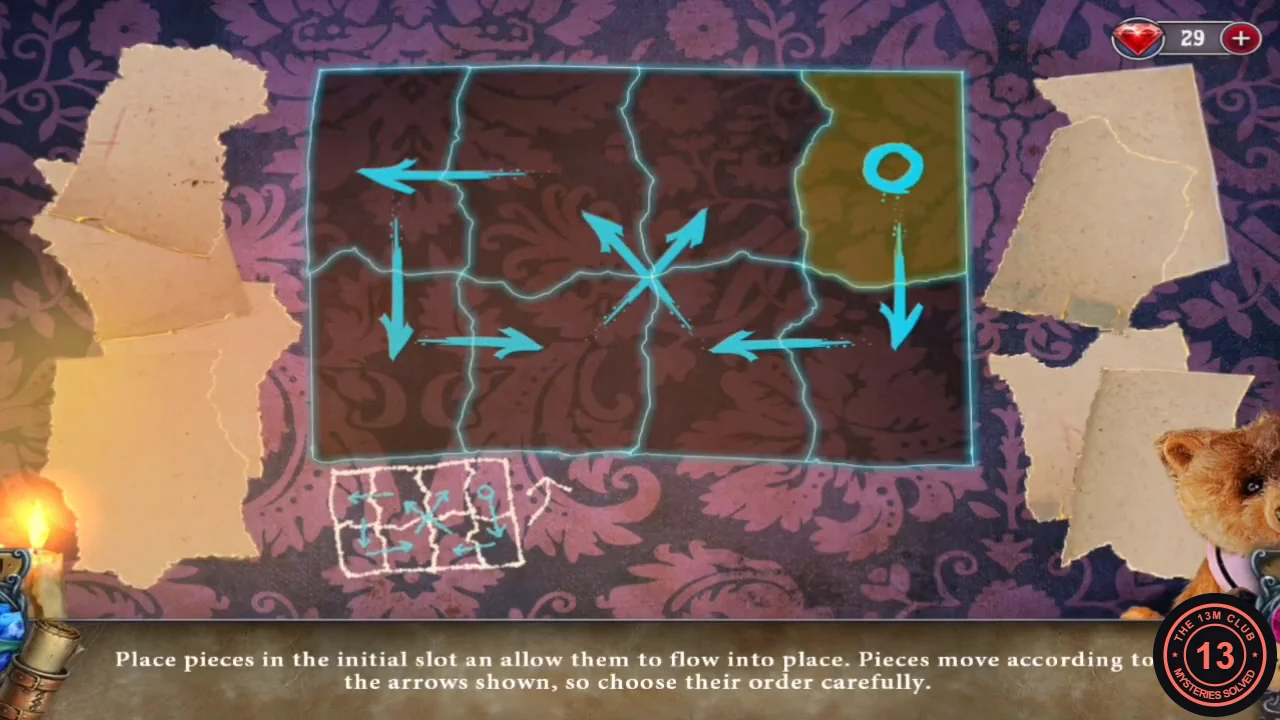
Drawing 2: start slot top right; follow the arrows, including the crossing diagonals. - Drawing 2 (two rows of four, start slot top-right): the path runs top-right, bottom-right, bottom third column, diagonally up to the top second column, top-left, bottom-left, bottom second column and diagonally up to end at the top third column. Drop the eight scraps in reverse path order: top third column, bottom second column, bottom-left, top-left, top second column, bottom third column, bottom-right, and finally the top-right scrap.
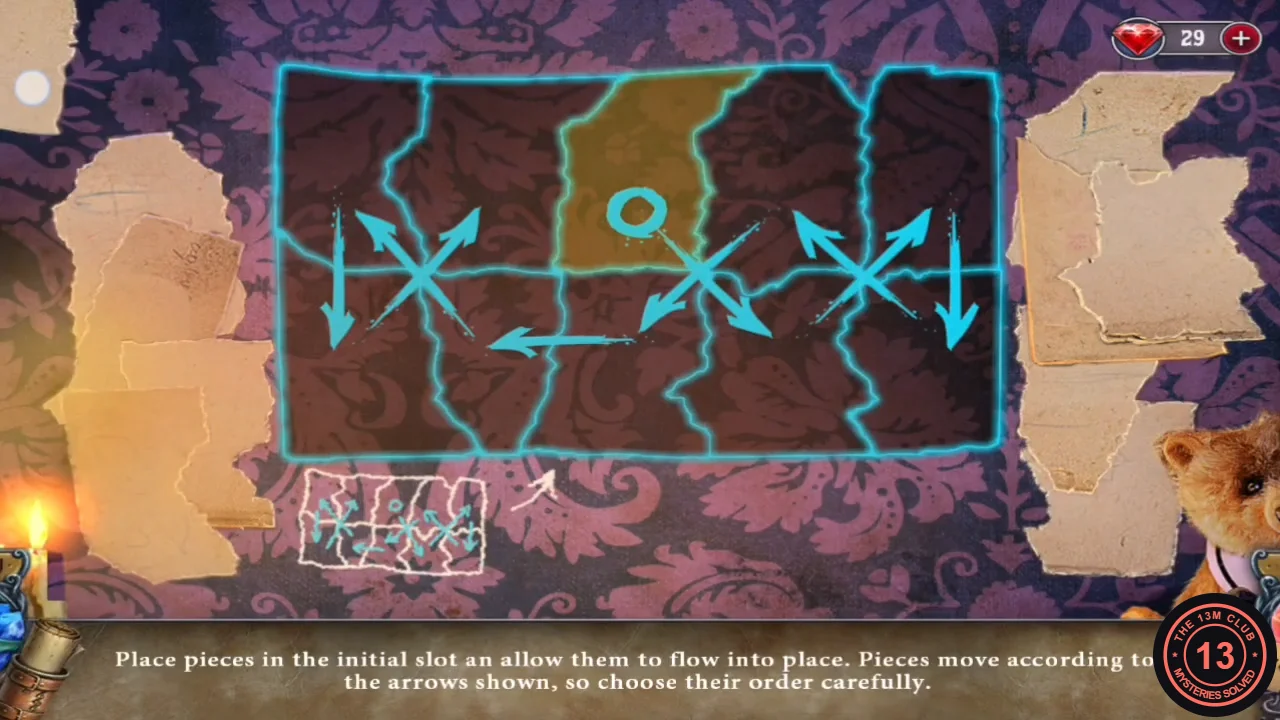
Drawing 3: start slot in the top middle. - Drawing 3 (two rows of five, start slot top middle): the path runs top 3, bottom 4, top 5, bottom 5, top 4, bottom 3, bottom 2, top 1, bottom 1 and ends at top 2 (columns numbered from the left). Drop the ten scraps in reverse path order: top 2, bottom 1, top 1, bottom 2, bottom 3, top 4, bottom 5, top 5, bottom 4, and finally top 3. The finished drawing reveals the PART OF A SLIDE.
The Ice Power and the Projector
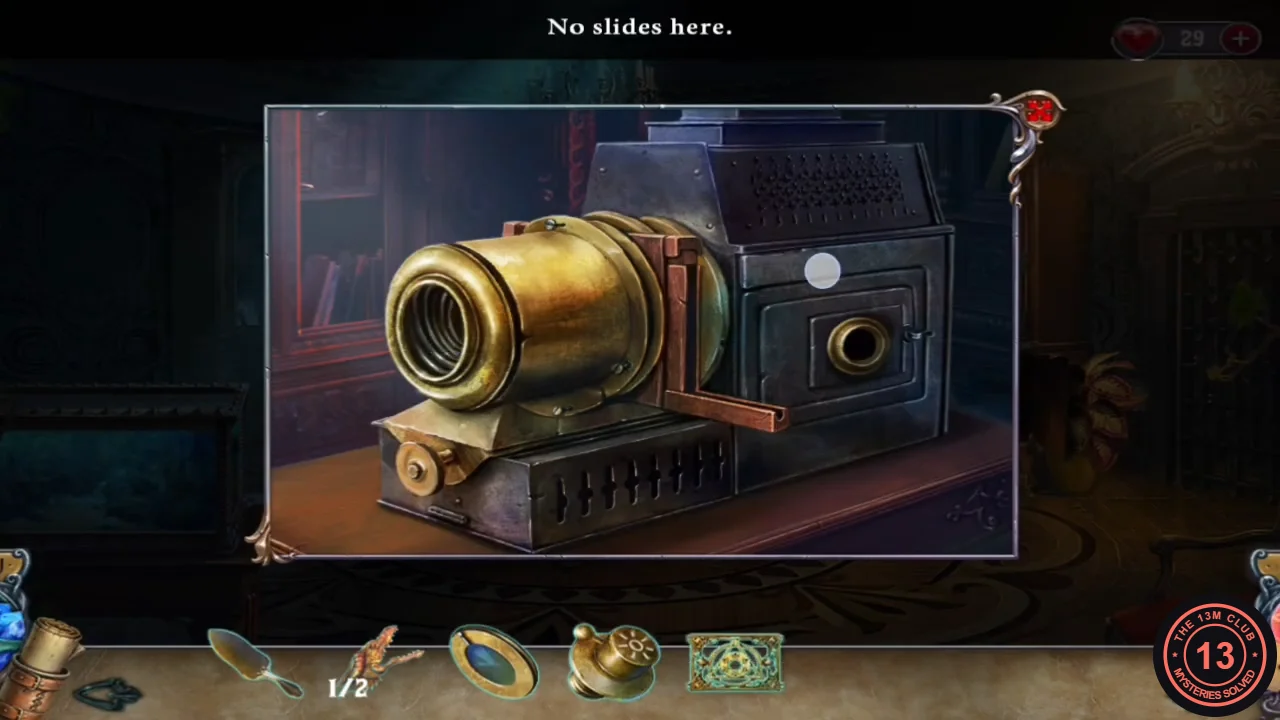
The remaining study clues need the projector parts and a way past the snake on the gallery nest.
- Put the DOLL HEAD on the headless bear in the bedroom wheelchair and take the PROJECTOR TUMBLER.
- Place both SNAKE STATUE PARTS on the snake pillars in the hall and take the SLIDE FRAME.
- Break the frozen statue on the stairs with the ICE PICK. A flashback shows who he was ("He was a cold-blooded killer, a ruthless cutthroat..."). The statue shatters, and Louisa can now use the freezing power from the hand icon.
- At the gallery nest, use the freezing power on the snake, then take the HAIRPIN.
- Pick the lock of the study desk drawer with the HAIRPIN. Read the notes ("She killed her own husband?"; one says the cave is in the old silver mine under this mountain) and take the second PART OF A SLIDE. New objective: find the secret mine the Baroness was looking for.
- Open the SLIDE FRAME in your inventory, add both PARTS OF A SLIDE and take the GOLDEN SLIDE.
- At the study projector, insert the PROJECTOR TUMBLER and turn it, attach the PROJECTOR LENS and insert the GOLDEN SLIDE. The projected sign opens a hidden passage ("This castle is full of secrets!").
The Secret Dungeon
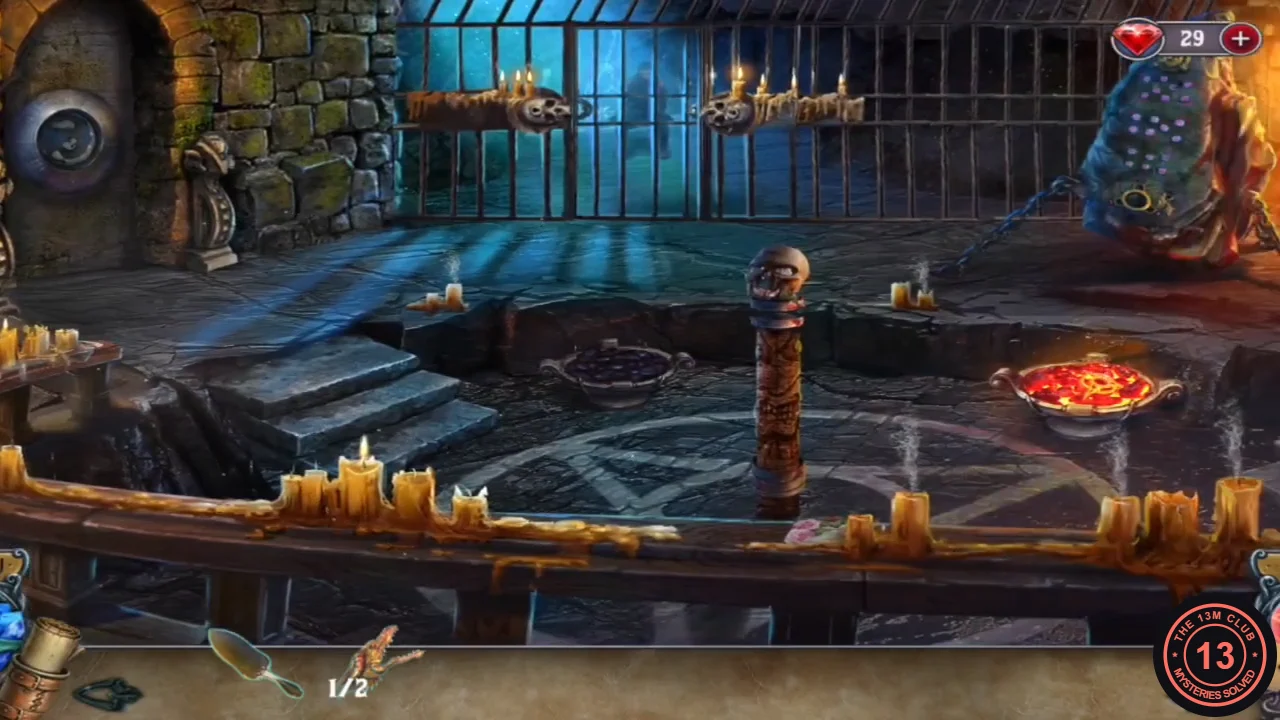
The passage leads to a dungeon with a brazier, a skull pillar, a soldier relief, a prisoner's cell and a bat-winged lock.
- Take the BROOM from the rim of the brazier and SKELETON KEY 1/2 from the round bat-winged mechanism.
- In the study, sweep the top corner of the painting behind the desk with the BROOM and take the CODE ON A PICTURE.
- Play the aquarium hidden-object scene again (two word lists) to receive SKELETON KEY 2/2.
- Put both SKELETON KEYS in the skull locks of the dungeon cell. The prisoner speaks ("Louisa, you have to believe me - I had no idea what they were up to when I joined them..."), hands you the CODE PAPER and fades away, leaving a skeleton. Take the OLD BONE from the cell.
- The emblem in the brazier is too hot to touch. Hook it out with the OLD BONE to get the ORDER EMBLEM.
- Place the ORDER EMBLEM on the glass dome in the study display cabinet and take the WOODEN RING and the PICTURE FRAME PARTS.
The Commode Symbol Safe
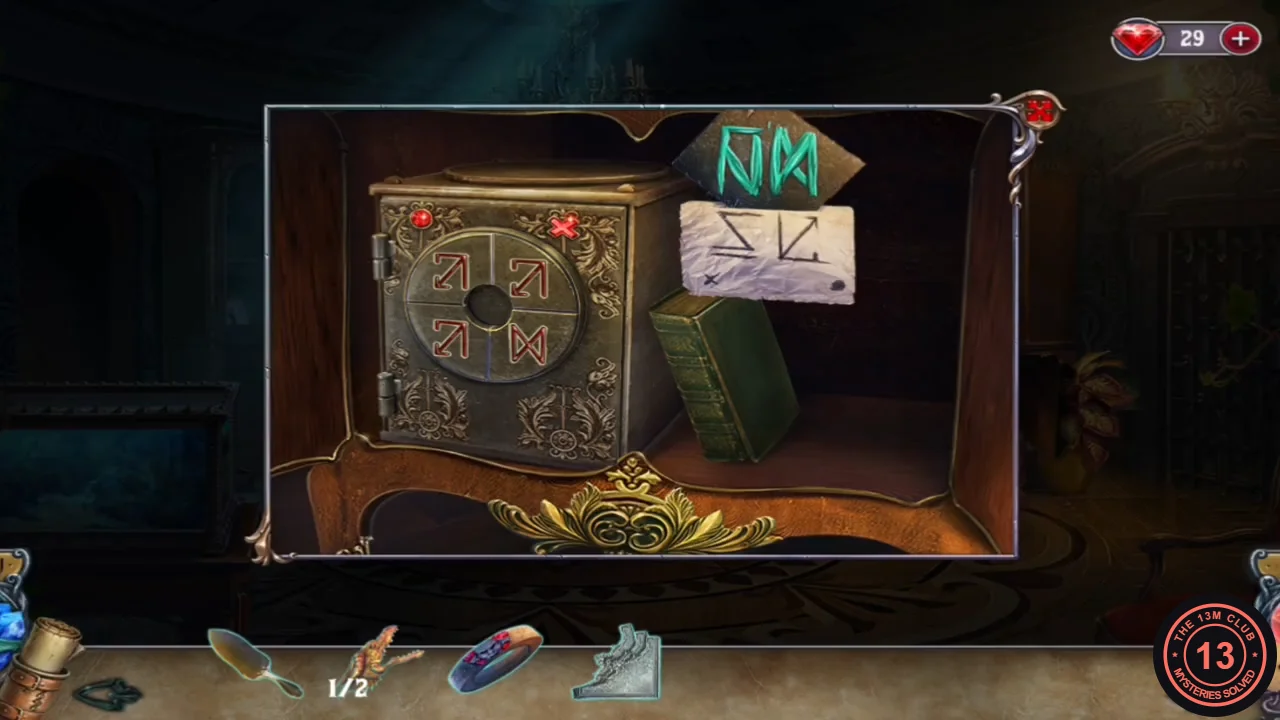
The safe inside the study commode has a dial of four quarters, each showing a symbol. The code is split between the CODE PAPER and the CODE ON A PICTURE.
- Open the CODE PAPER in your inventory and add the CODE ON A PICTURE ("I should find the other part of the code."). In the study, place the completed code beside the safe in the commode and select each quarter of the dial until it matches the code turned upside down: upper left a diagonal arrow with a hook, upper right the Z-shaped zigzag, lower left the bow-tie, lower right the hooked N. Take DRAGON HEAD 2/2.
The Baron's Portrait Runes
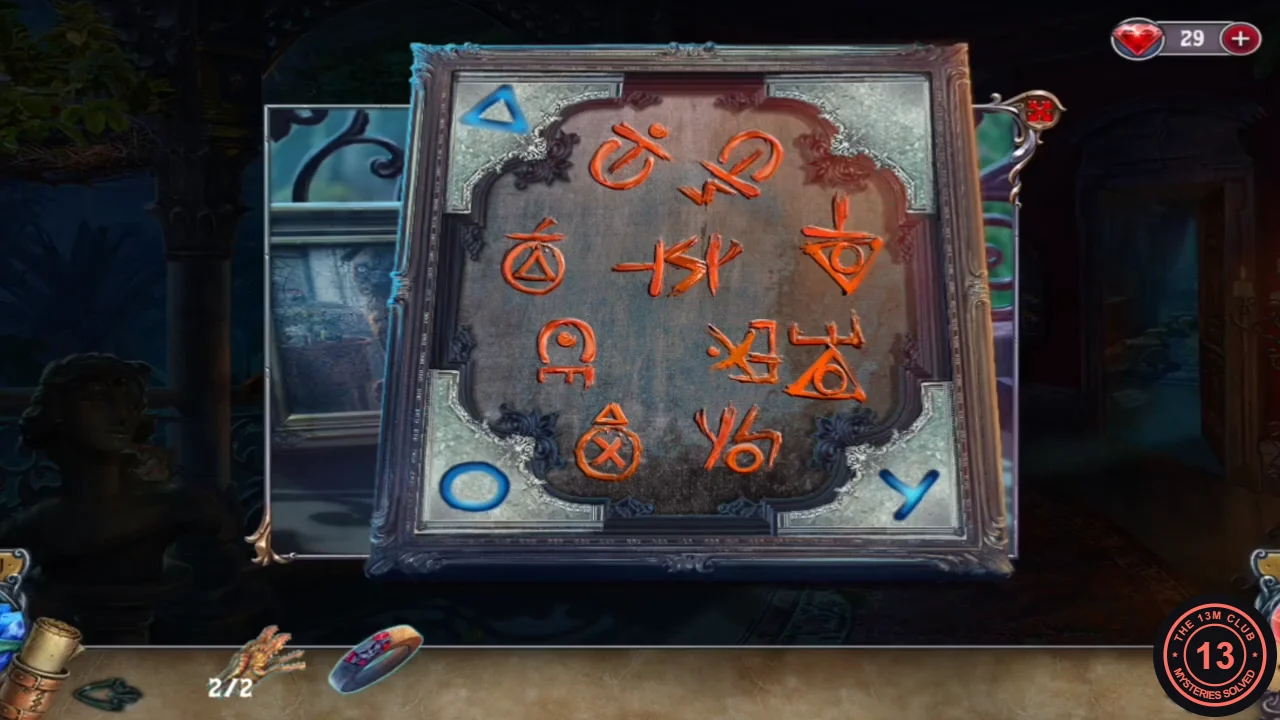
The Baroness's portrait on the gallery hides a picture of the Baron in a rune frame.
- On the gallery, scrape the smeared paint off the Baroness's portrait with the TROWEL to reveal the Baron ("There's more to this frame than meets the eye."). Add the PICTURE FRAME PARTS. In each of three rounds, blue symbols appear in the frame corners; select the red rune that combines them. Example rounds (if your corner symbols differ, use the same method): triangle, circle and Y - the circled triangle in the middle row on the left; circle, Y and S - the Y-S-o rune at the bottom; arch, Y and zigzag - the zigzag-with-loop rune at the top right. Take the STONE HEART.
The Skull Pillar Rings and the Soldier Relief
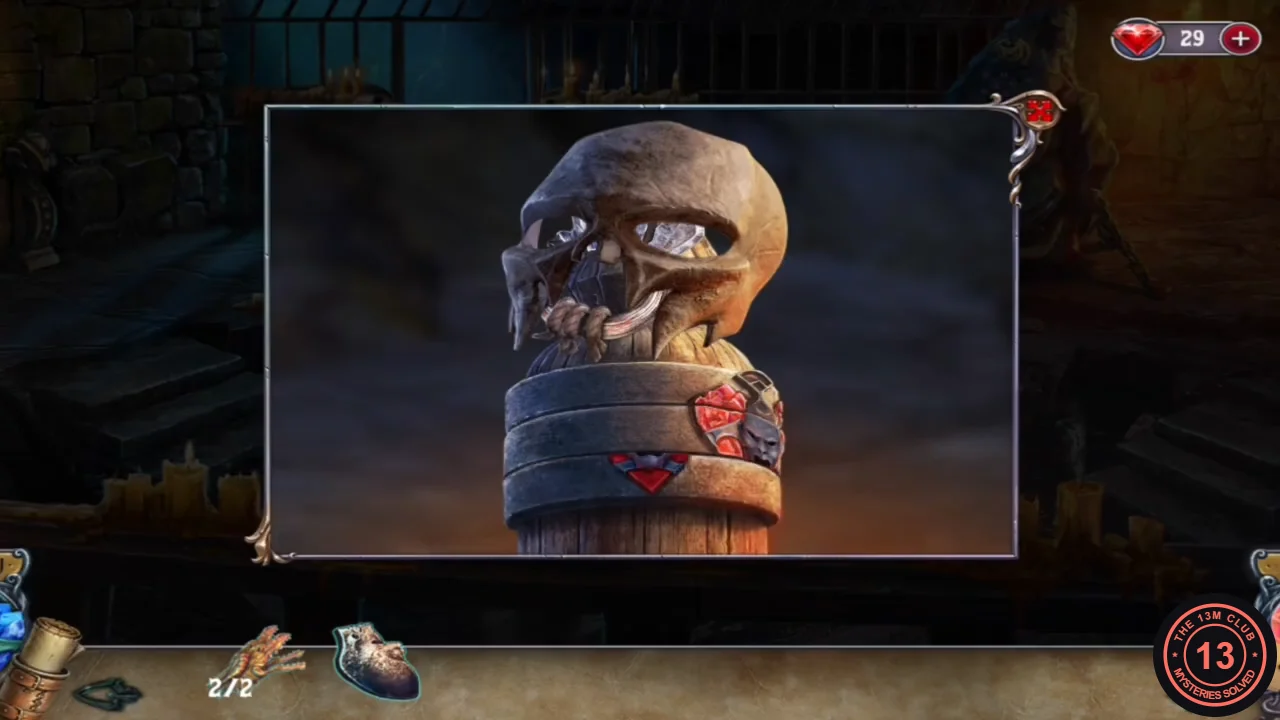
The skull pillar in the dungeon hides something behind its mask, and the soldier relief on the wall is missing its heart.
- In the dungeon, place the WOODEN RING on the skull pillar ("There's something behind the mask, but it won't move.") and turn the rings until the red winged heart faces front. Take the BLADE.
- Place the STONE HEART in the soldier relief on the dungeon wall ("How awful! What... what's in his jacket?"), cut his jacket open with the BLADE and take the CRYSTAL KEY.
The Dragon Lock Rune Stones
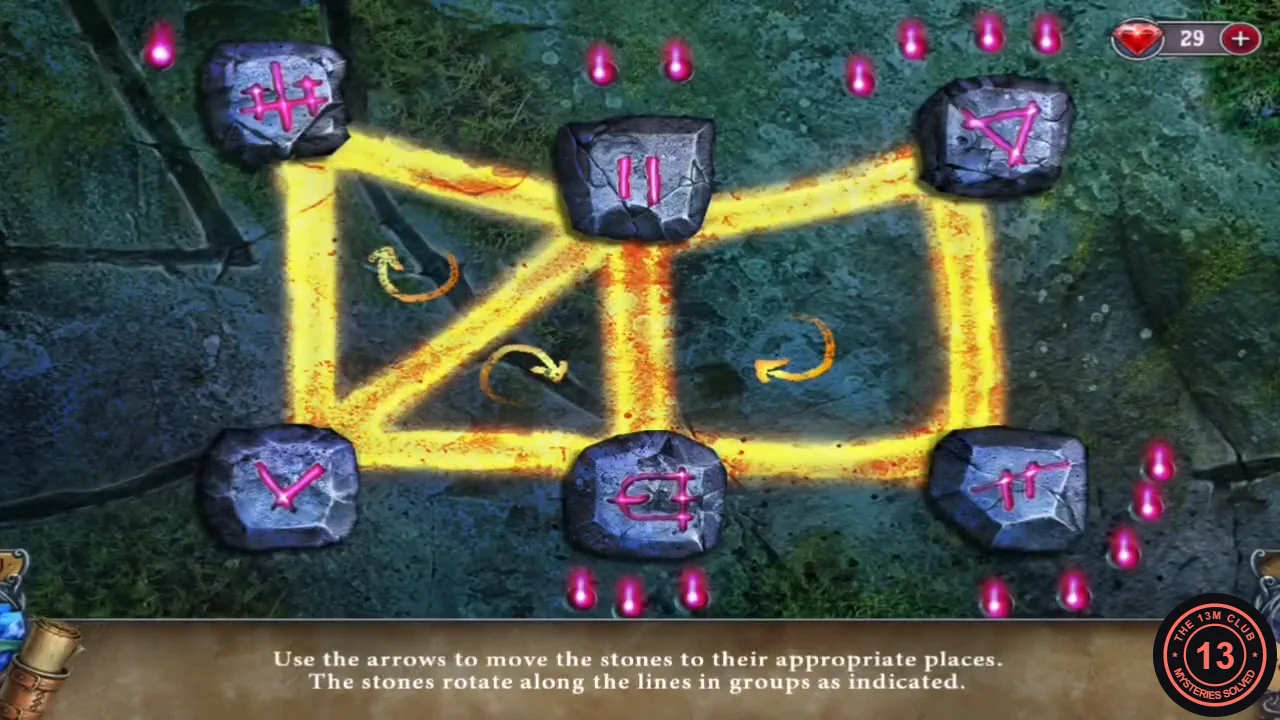
Place the CRYSTAL KEY and both DRAGON HEADS on the bat-winged mechanism ("Where did the Baroness find this? It's incomplete..."). "Use the arrows to move the stones to their appropriate places. The stones rotate along the lines in groups as indicated." Each stage has three loops; number them 1, 2 and 3 from left to right and select each loop's arrow the number of times shown. Each stage has a fixed starting layout, so these sequences solve it.
- Place the CRYSTAL KEY and the two DRAGON HEADS to start the puzzle.
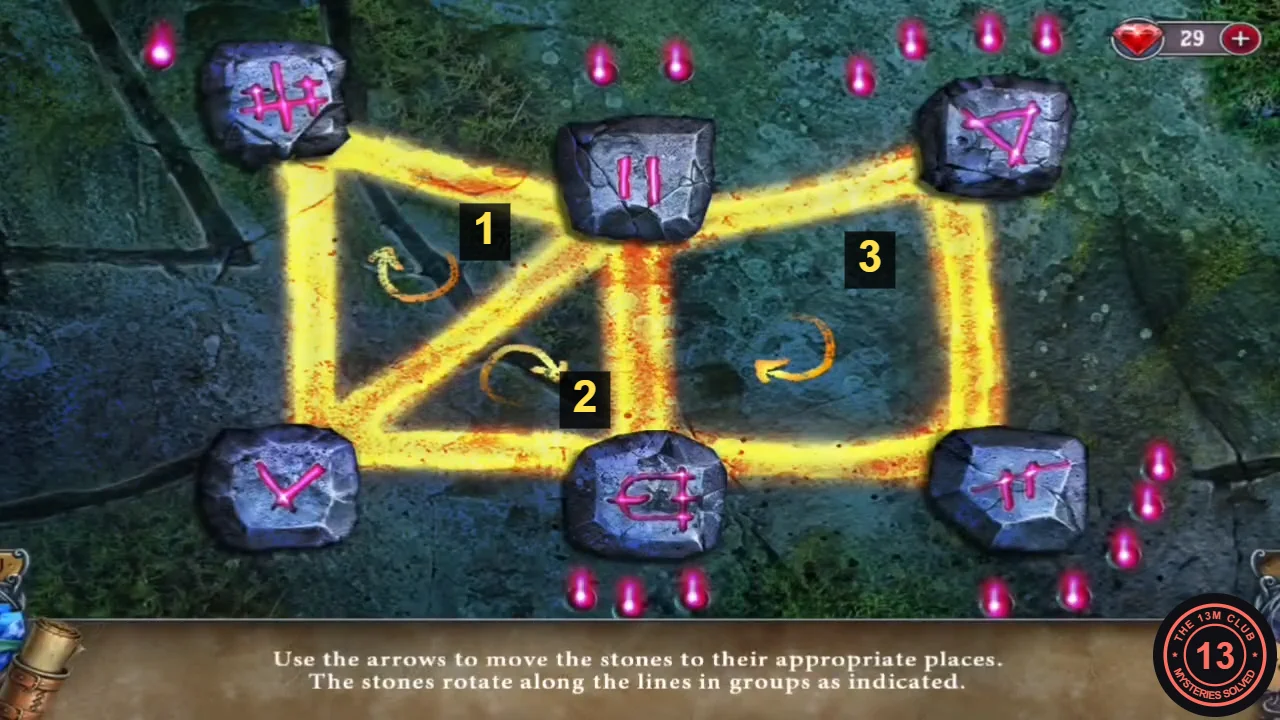
Stage 1 loop numbers: select the curved arrow inside each loop. - Stage 1 (loop 1 = upper-left triangle, loop 2 = lower-middle triangle, loop 3 = right square): 1, 1, 2, 3, 2, 3, 1, 1.CODE1-1-2-3-2-3-1-1
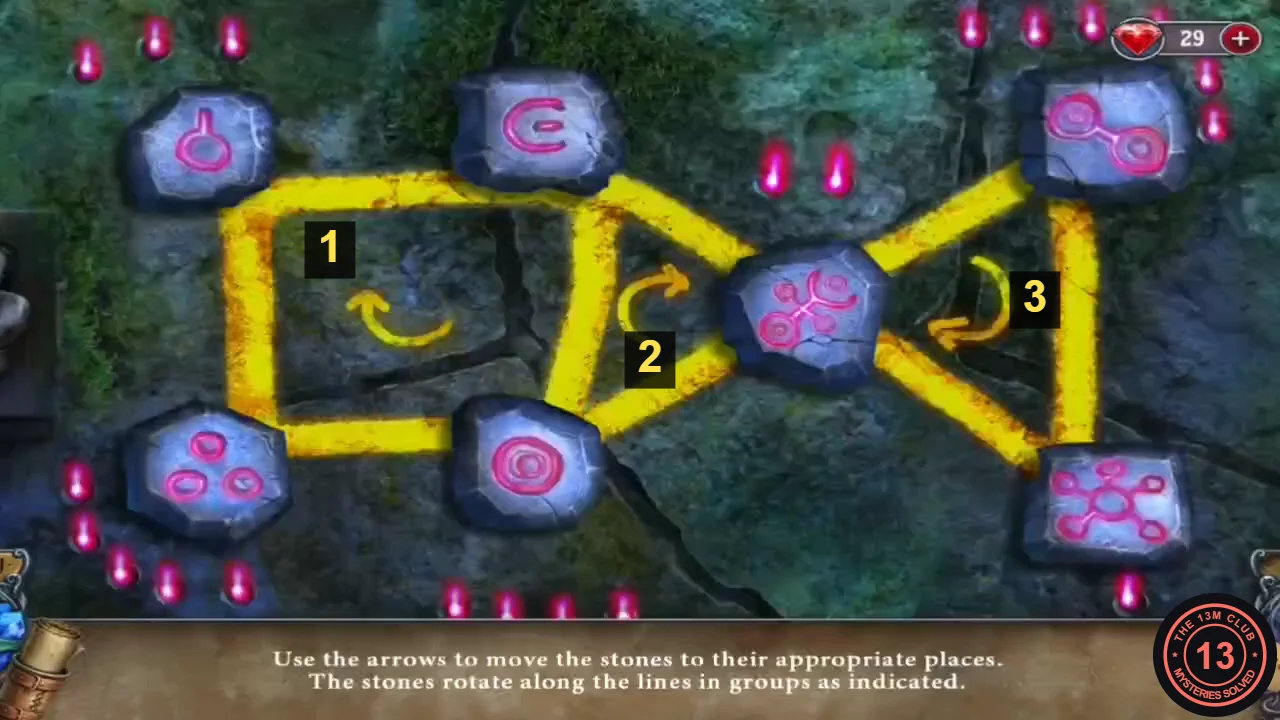
Stage 2 loop numbers. - Stage 2 (loop 1 = left square, loop 2 = middle triangle, loop 3 = right triangle): 2, 1, 2, 3, 3, 2.CODE2-1-2-3-3-2
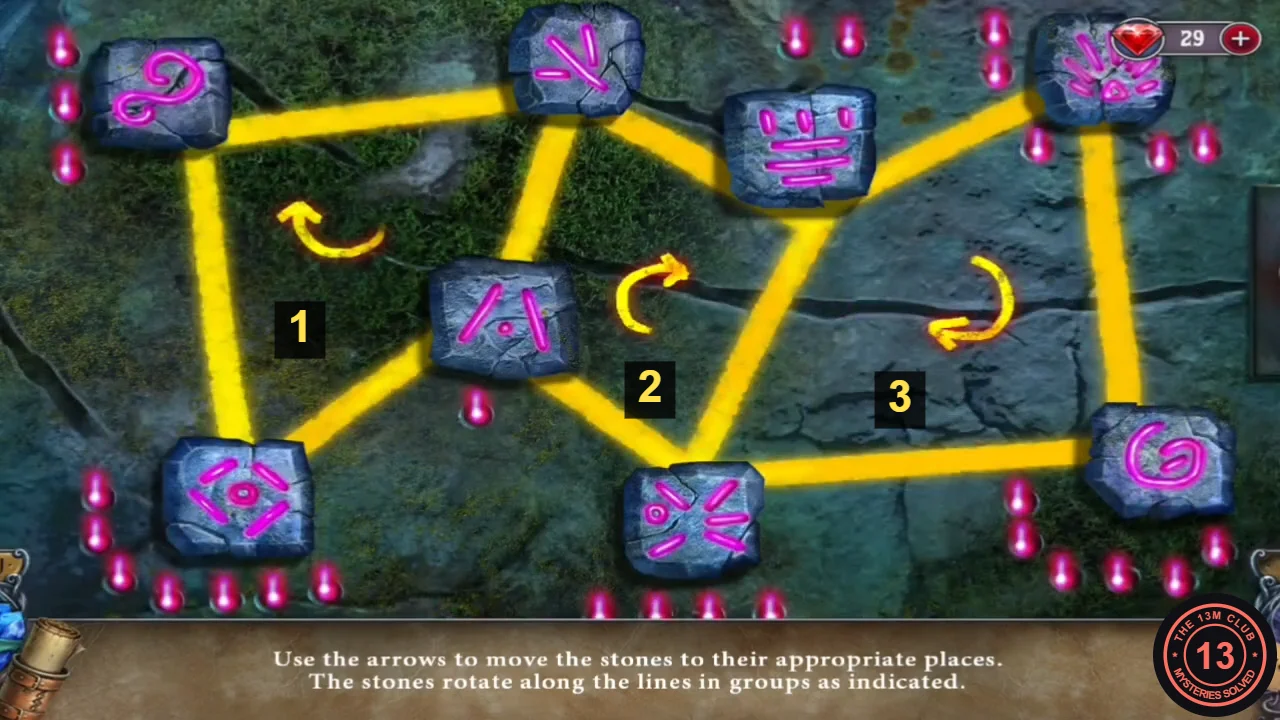
Stage 3 loop numbers. - Stage 3 (three linked four-sided loops): 3, 3, 1, 1, 2, 1, 2. Take the DRAGON EMBLEM.CODE3-3-1-1-2-1-2
- Conrad recognises the mountain ("I know that mountain! I'll show you the way. But we'll need horses..."). New objective: catch up with the Baroness and free your father.
The Labyrinth Under the Castle
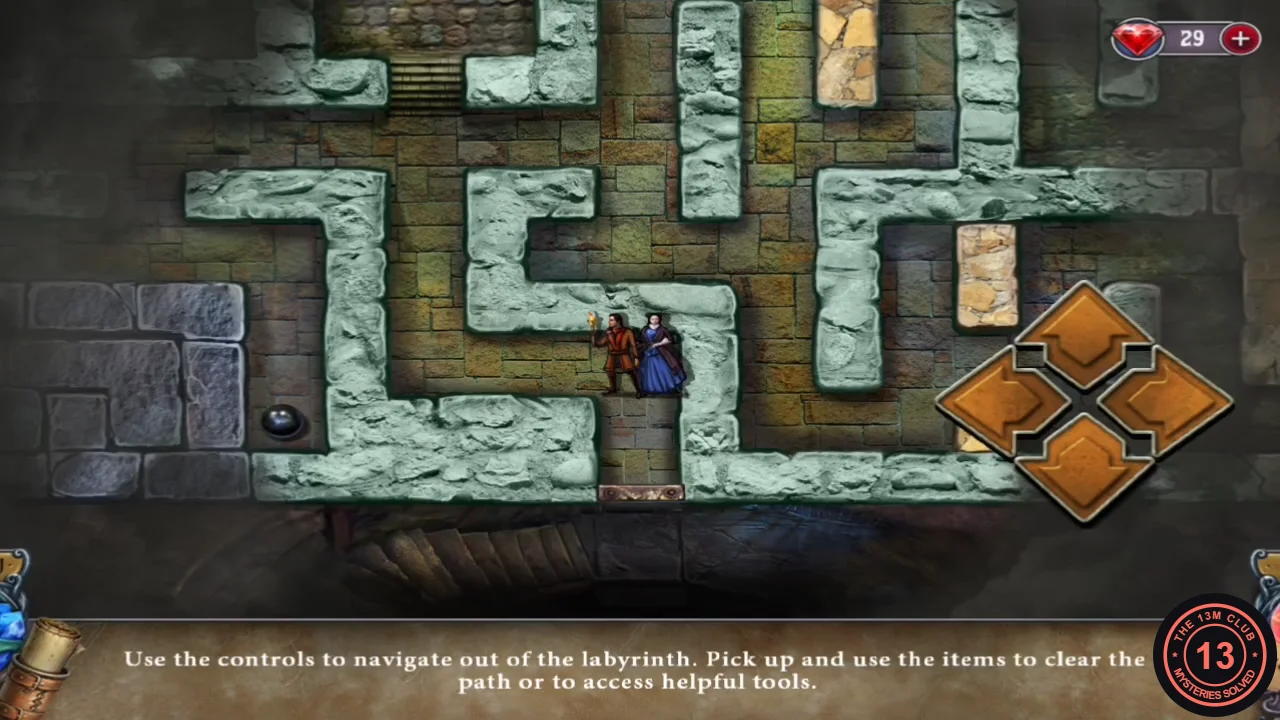
Place the DRAGON EMBLEM on the round door in the dungeon. "Use the controls to navigate out of the labyrinth. Pick up and use the items to clear the path or to access helpful tools." Move Louisa and Conrad with the arrow pad and walk over items to pick them up. The map scrolls as you move, so the full path cannot be shown in one screenshot. These steps list the obstacles in an order that works.
- Place the DRAGON EMBLEM on the round dungeon door to enter the labyrinth.
- Explore the first area. Pick up the lanterns on the walls (counter x/4), the BUCKET and the CANNONBALL. Roll the CANNONBALL into the spinning blade ("This thing will shred anything. Can I stop it?") to jam it, then use the BUCKET to put out the wall of fire.
- Pick up the HOOK and collect the last two lanterns (4/4). Bring them to the dark room with the hole in the floor; once the four lanterns are set around it, a plank path across appears.
- Pick up the CROWBAR and use it to move the stone slab into the mine-cart room, where you take the DYNAMITE. Place the DYNAMITE at the cracked wall ("This wall seems hiding something."), fetch the MATCHES and light it to blast the wall open. Pick up the ROPE behind it.
- Go back to the well ("There's something on the bottom but it's out of reach.") and use the HOOK with the ROPE to fish out the SHOVEL. Dig with the SHOVEL by the blue water pool and take the SKULL. Fit the SKULL into the skull slot on the wall to open the way into the sandy section.
- The last stretch of the labyrinth passes a wooden stall where the horses lie. Pick up the pale cloth mask (a pad with ties at both ends) from the corridor just left of the horses and the EMPTY JAR from the corridor above and to the right of the stall.
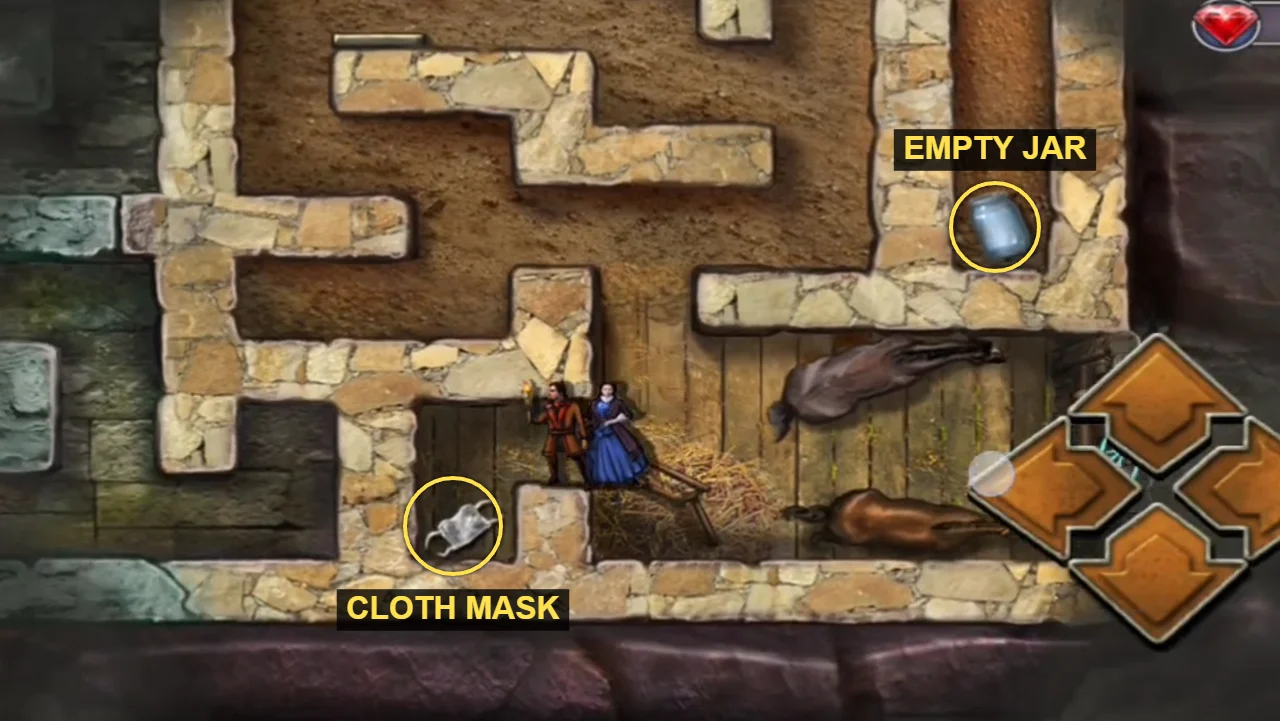
Near the horses' stall: the cloth mask lies to the left, the EMPTY JAR above and to the right. - Walk up to the small grassy room at the top right; green gas fills the corridor around it. Use the cloth mask where its outline glows at the edge of the gas, then walk through the gas into the room. Use the EMPTY JAR on the reddish nest in the lower-left corner of the room. The jar fills with insects from the nest.
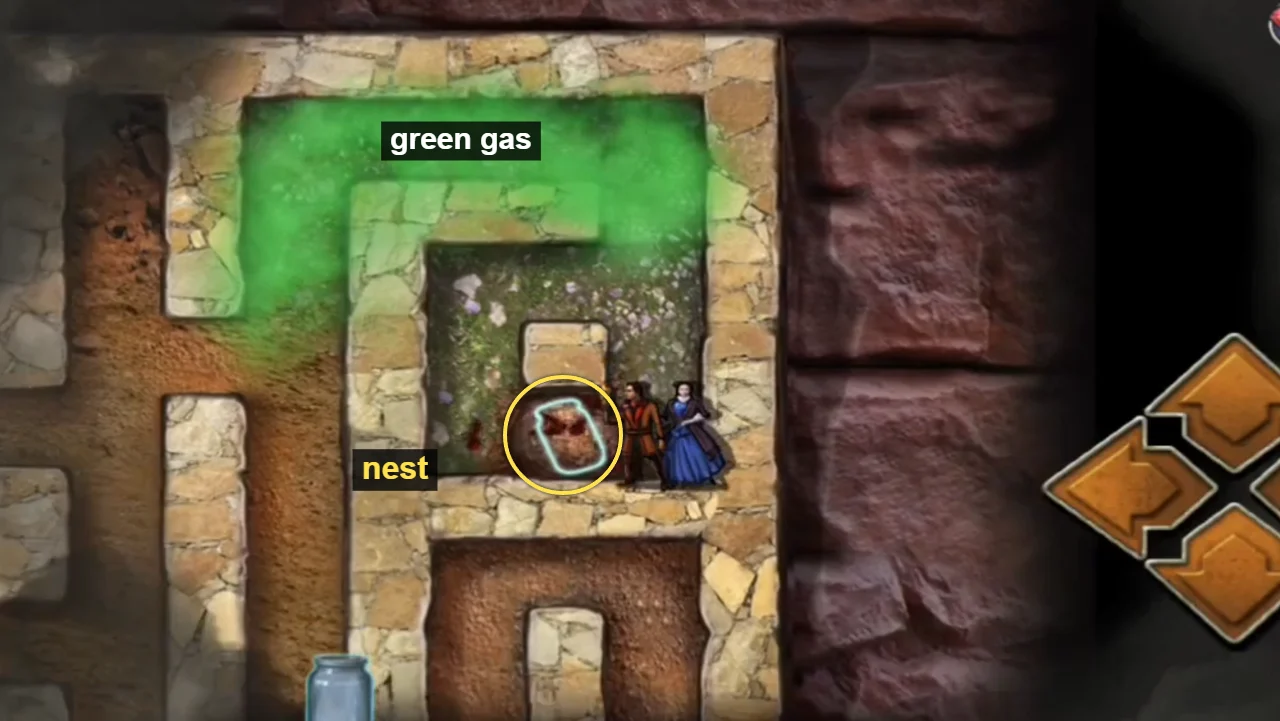
The grassy room in the green gas. Use the EMPTY JAR on the nest in its lower-left corner. - Go back down to the horses' stall. A bug-shaped symbol glows on the wooden door at the right end of the stall: use the full JAR there. The door opens and Louisa and Conrad leave the labyrinth.
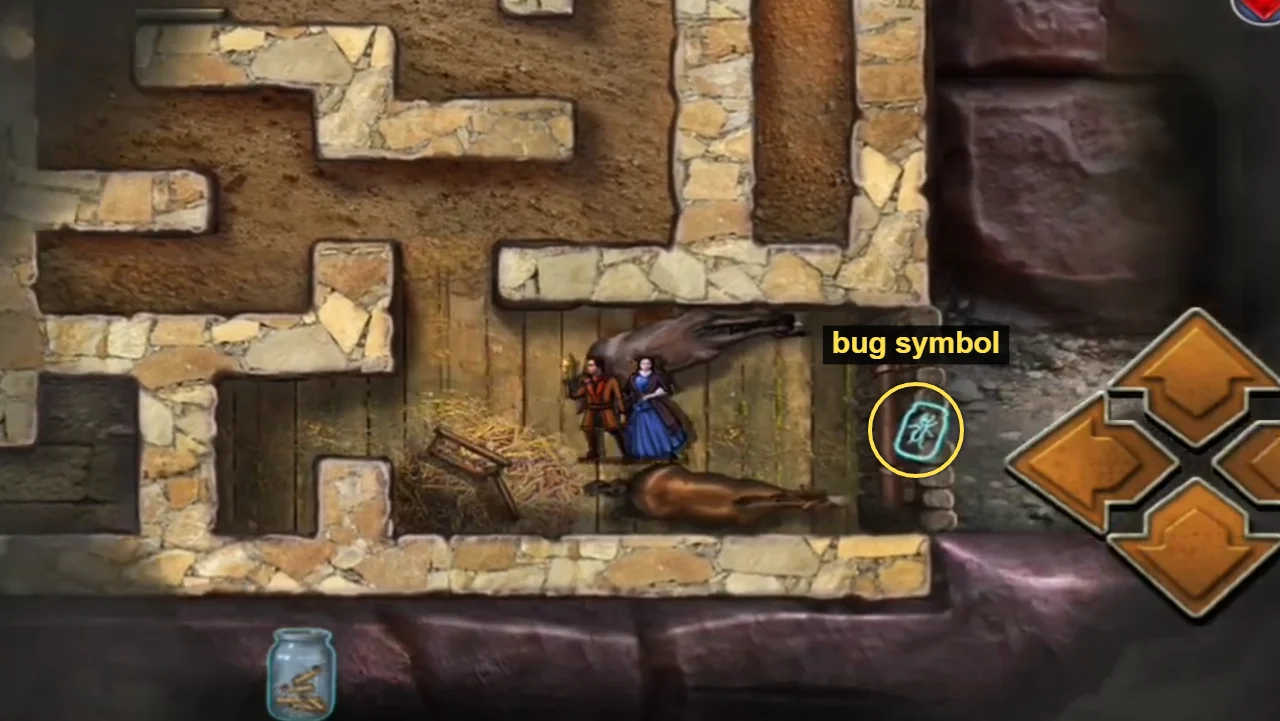
The bug symbol on the door at the right end of the stall. Use the full JAR here.